ULTRA FAST-FIX⢠Meniscal Repair System - Smith & Nephew
ULTRA FAST-FIX⢠Meniscal Repair System - Smith & Nephew
ULTRA FAST-FIX⢠Meniscal Repair System - Smith & Nephew

You also want an ePaper? Increase the reach of your titles
YUMPU automatically turns print PDFs into web optimized ePapers that Google loves.
Knee Series<br />
Technique Guide<br />
<strong>ULTRA</strong> <strong>FAST</strong>-FIX<br />
<strong>Meniscal</strong> <strong>Repair</strong> <strong>System</strong><br />
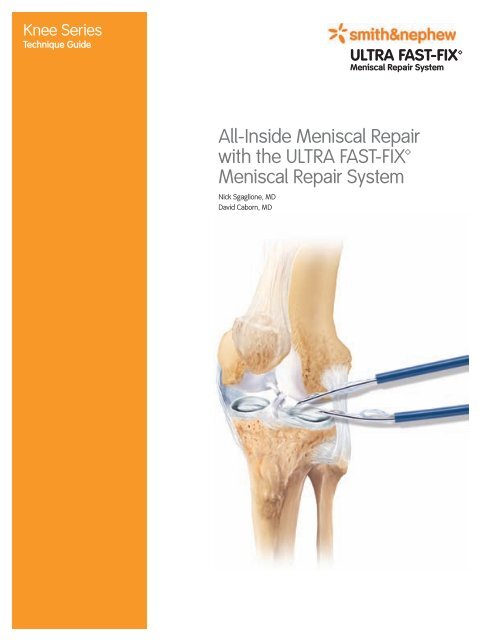
All-Inside <strong>Meniscal</strong> <strong>Repair</strong><br />
with the <strong>ULTRA</strong> <strong>FAST</strong>-FIX<br />
<strong>Meniscal</strong> <strong>Repair</strong> <strong>System</strong><br />
Nick Sgaglione, MD<br />
David Caborn, MD
Reviewed by:<br />
Nick Sgaglione, MD<br />
Associate Professor of Orthopedic Surgery<br />
Albert Einstein College of Medicine<br />
Great Neck, NY<br />
David Caborn, MD<br />
Director of Sports Medicine<br />
University of Louisville<br />
Louisville, KY<br />
2
All-Inside <strong>Meniscal</strong> <strong>Repair</strong><br />
with the <strong>ULTRA</strong> <strong>FAST</strong>-FIX<br />
<strong>Meniscal</strong> <strong>Repair</strong> <strong>System</strong><br />
Introduction<br />
<strong>Repair</strong> of peripheral and red/white meniscal tears<br />
has become the standard of care as evidence<br />
accumulates supporting meniscal preservation and<br />
its role in joint nutrition, lubrication, stability, load<br />
transmission, shock absorption, neuromuscular<br />
proprioception, and prevention of intra-articular<br />
chondrosis and arthrosis.<br />
Inside-Out and Outside-In procedures require<br />
additional incisions and dissection to avoid<br />
neurovascular complications and have the potential<br />
to cause capsular tethering, neuroma formation,<br />
and suboptimal repair tension secondary to knot<br />
tying over excess tissue. In addition, prolonged<br />
intraoperative and tourniquet time can cause<br />
increased pain and morbidity as well as increased<br />
anesthesia costs.<br />
The All-Inside arthroscopic approach has gained<br />
popularity because of its insertion ease and<br />
potential minimization of the aforementioned<br />
problems. However, many of the devices used<br />
in this approach have demonstrated inferior<br />
biomechanical properties and have been associated<br />
with breakage, loosening, distraction of the repair,<br />
neurological injury, subcutaneous prominence, and<br />
articular cartilage abrasion and damage. These<br />
complications have contributed to a recent trend<br />
back to the Inside-Out and Outside-In techniques,<br />
despite their inherent difficulties.<br />
3
Overview<br />
The <strong>ULTRA</strong> <strong>FAST</strong>-FIX <strong>Meniscal</strong> <strong>Repair</strong> <strong>System</strong> (Photo 1) provides a strong, reproducible, reliable, and time-efficient meniscal<br />
repair with equal biomechanical properties to the open vertical mattress suture technique 1 . This result is achieved without the<br />
associated comorbidities of Inside-Out or Outside-In meniscal repair and without the need for intra-articular knot tying.<br />
The <strong>ULTRA</strong> <strong>FAST</strong>-FIX <strong>Meniscal</strong> <strong>Repair</strong> <strong>System</strong> also gives the surgeon the versatility of placing horizontal or vertical mattress<br />
suture fixation, without risk to neurovascular structures. As with all arthroscopic procedures, good visualization of the<br />
meniscal tear and adequate arthroscopic distention are essential. To minimize the potential for damage to neurovascular<br />
structures, <strong>Smith</strong> & <strong>Nephew</strong> recommends the use of the curved delivery needle and the variable depth penetration limiter (as<br />
indicated by the meniscal tear position, especially if a vertical mattress suture is utilized).<br />
Diamond rasp, 45°<br />
Diamond rasp, 90°<br />
Curved knot pusher/suture cutter<br />
Straight knot pusher/suture cutter<br />
<strong>ULTRA</strong> <strong>FAST</strong>-FIX, Reverse Curved<br />
<strong>ULTRA</strong> <strong>FAST</strong>-FIX, Curved<br />
Blue split cannula<br />
<strong>ULTRA</strong> <strong>FAST</strong>-FIX AB, Curved<br />
Suture funnel<br />
Metal slotted cannula<br />
Adjustable depth penetration limiter<br />
Depth probe<br />
Photo 1. <strong>ULTRA</strong> <strong>FAST</strong>-FIX <strong>Meniscal</strong> <strong>Repair</strong> <strong>System</strong><br />
4
Setup<br />
Each <strong>ULTRA</strong> <strong>FAST</strong>-FIX device contains two 5 mm<br />
polymer integrated anchors (resorbable or bio-inert),<br />
with a pre-tied, self-sliding knot comprised of #0,<br />
non-absorbable, UHMW polyethelene <strong>ULTRA</strong>BRAID<br />
co-braid suture. The entire system is packaged in<br />
an easy-to-insert, integrated delivery needle. The<br />
anchors are placed into the meniscus sequentially,<br />
seated safely beyond the capsule, and are then<br />
tightened in a simple manner without the need for<br />
arthroscopic knot tying (Photos 2 and 3).<br />
The dark blue sheath comes preset to a depth of 25<br />
mm from the tip of the needle and 17 mm from the<br />
back of the implant, which has been shown to avoid<br />
neurovascular injury while allowing predictable<br />
meniscocapsular placement 2 .<br />
Peripheral, popliteal, hiatal, and mid-1/3 medial<br />
meniscus tears may require penetration less than<br />
the 17 mm allowed by the dark blue sheath. Use of<br />
the meniscal depth probe, in conjunction with the<br />
trimmable depth penetration limiter (white plastic<br />
sheath), allows controlled penetration (Figures 1a<br />
and 1b).<br />
If the trimmable depth penetration limiter is used<br />
with the split cannula, then the split cannula should<br />
be completely split before inserting it over the<br />
white depth penetration limiter, to allow for easier<br />
removal.<br />
Photo 2. Completed repair - horizontal<br />
Photo 3. Completed repair - vertical x 2<br />
Figure 1a. Trimmable depth penetration limiter and meniscal depth<br />
probe<br />
Figure 1b. Trimmable depth penetration limiter<br />
5
Photo 4. Holding needle like a dart<br />
Photo 5. Metal slotted cannula<br />
Figure 2. Portal placement<br />
Vertical Incision<br />
Mid-1/3 and Posterior-1/3 Tears<br />
The inferolateral/inferomedial portal<br />
should be 5 mm off the patella<br />
tendon, 1 cm above the joint line.<br />
Anterior-1/3 Tears<br />
The lateral portal should be in front<br />
of the illiotibial band, 1 cm above<br />
the joint line.<br />
The medial portal should be in front<br />
of the medial collateral ligament,<br />
5 mm above the joint line.<br />
The supralateral or supramedial<br />
portal can also be used to access<br />
the anterior horn.<br />
Procedure<br />
First, locate the portals using an 18 gauge spinal<br />
needle to precisely select the insertion direction/<br />
vector. For mid-1/3 and posterior-1/3 tears, make a<br />
vertical portal incision 5 mm off the patella tendon<br />
and 1 cm above the joint line. For anterior-1/3 tears,<br />
position the lateral portal in front of the illiotibial<br />
band, 1 cm above the joint line. The medial portal<br />
should be made in front of the medial collateral<br />
ligament, 5 mm above the joint line. The supralateral<br />
or supramedial portal can be used to access the<br />
anterior horn.<br />
To create the portals, use a knife to excise the tissue<br />
through to the joint and an obturator to dilate the<br />
portal. Use a meniscal depth probe to determine if<br />
an ipsilateral or contralateral portal is best.<br />
<strong>Meniscal</strong> tear site preparation is essential and<br />
advised. <strong>Meniscal</strong> rasps and/or arthroscopic<br />
shavers are used to stimulate the tear site and the<br />
peripheral vasculature.<br />
1. Insert the <strong>ULTRA</strong> <strong>FAST</strong>-FIX Delivery Needle into<br />
the appropriate arthroscopy portal, holding it like<br />
a dart (Photo 4). Insertion is facilitated through<br />
the use of either the metal slotted cannula<br />
(Photo 5) or the blue split cannula. Place the<br />
<strong>ULTRA</strong> <strong>FAST</strong>-FIX device either through the inferior<br />
(tibial) or superior (femoral) surface of the<br />
meniscus for optimal strength.<br />
Note: For the easiest knot sliding and avoidance<br />
of the neurovascular bundles, insert the needle<br />
perpendicular to the tear using a contralateral<br />
approach. Use portals placed adjacent to<br />
the patella tendon (Figure 2) to facilitate this<br />
procedure.<br />
The split sheath cannula obviates the need for a<br />
larger cannula incision and the need to pass the<br />
needle through a diaphragm. In addition, it can<br />
be partially or totally removed by retraction and<br />
peeling.<br />
6
Caution: The opening of the split cannula must<br />
be at 90° to the curved <strong>ULTRA</strong> <strong>FAST</strong>-FIX needle<br />
to prevent the needle from slipping out as it is<br />
introduced into the knee (Figure 3). If using the<br />
slotted cannula, make sure the curve of the<br />
needle faces down (Figure 3a).<br />
To minimize needle bending, grasp the cannula<br />
on the shaft and hold it like a dart or pencil when<br />
passing through the fat pad (Photo 4).<br />
Note: The pretied, self-sliding knot, included in<br />
the <strong>ULTRA</strong> <strong>FAST</strong>-FIX device, slides from the first<br />
implant (T1) to the second implant (T2). Therefore,<br />
placing T1 further away than T2 will facilitate<br />
sliding of the knot.<br />
Note: Maintaining the needle insertion tip within<br />
the arthroscopic view at all times avoids suture<br />
tangling.<br />
2. For a horizontal repair, place the first implant (T1)<br />
farthest away and advance the needle into the<br />
outer meniscal fragment until the implant pops<br />
through the meniscus.<br />
For a vertical repair, place the superior implant<br />
first and advance the needle into the outer<br />
meniscal fragment (bisecting the fragment) until<br />
the implant pops through the meniscus (Photo 6).<br />
Using the curved <strong>ULTRA</strong> <strong>FAST</strong>-FIX device may<br />
facilitate initial penetration.<br />
Using the slotted cannula minimizes needle<br />
skiving when accessing more anterior tears.<br />
Leave the cannula in to help steer the needle tip.<br />
3. Oscillate the needle approximately 5° and pull<br />
the needle out of the meniscus, releasing<br />
T1 behind the meniscus (Figure 4).<br />
To reduce the amount of suture in the field<br />
of view, slowly pull back on the needle after<br />
deploying implant 1. Use a forefinger for control<br />
upon withdrawal. Piercing the meniscus by<br />
2–3 mm prior to advancing T2 can also help with<br />
suture management.<br />
Figure 3. Blue split cannula positioned 90° to the curve of the<br />
delivery needle<br />
Figure 3a. Needle curve facing down<br />
Photo 6. Implant 1 placed superior to tear<br />
Figure 4. Placement of implant 1<br />
7
4. Using the tip (rather than the volar pad) of the<br />
thumb, slide the gold trigger forward to advance<br />
the second implant into the ready position<br />
(Photo 7 and Figure 5).<br />
Note: It is normal to encounter resistance prior<br />
to achieving the ready position. A snap or click<br />
is heard when the trigger is fully advanced,<br />
ensuring that the implant is fully seated at the<br />
end of the needle (Figures 6 and 7).<br />
Photo 7. Implant 2 fully advanced to the ready position<br />
Figure 5. Implant 2 fully advanced to the ready position<br />
Figure 6. Proper positioning of implant 2 Figure 7. Improper positioning of implant 2<br />
8
5. Insert the delivery needle to release implant 2.<br />
≠ For a horizontal repair, insert the needle<br />
between the entry point and the first implant,<br />
approximately 4–5 mm inferior from implant 1<br />
(Figure 8, Photo 8).<br />
≠ For a vertical repair, insert the needle<br />
approximately 4–5 mm inferior from implant 1<br />
(Figure 8, Photo 9).<br />
Figure 8. Implant 2 ready for release<br />
Photo 8. Horizontal mattress suture<br />
Photo 9. Vertical mattress suture<br />
9
Figure 9. Prior to tightening suture construct<br />
6. Remove the delivery needle from the knee,<br />
leaving the free end of the suture. Pull the free<br />
end of the suture to advance the sliding knot<br />
and reduce the meniscal tear (Figure 9, Photos<br />
10 and 11). It is normal to encounter considerable<br />
resistance as the knot is snugged down. It is<br />
important to pull the free end of the suture in a<br />
line directly perpendicular to the tear site.<br />
Avoid suture breakage by wrapping the suture<br />
around several fingers and using the tibia as<br />
a fulcrum to provide a tactile feel. Apply slow,<br />
increasing tension. In most cases, this steady<br />
pulling of the suture will cinch the knot down. As<br />
the knot is tightened, it may strangle the free leg<br />
of suture, creating a loop of suture. If controlled<br />
tightening does not eliminate the loop, place a<br />
probe under the tight leg of suture and use it as<br />
a pulley.<br />
7. To further snug down the suture construct,<br />
thread the free end of the suture through the<br />
<strong>ULTRA</strong> <strong>FAST</strong>-FIX Knot Pusher/Suture Cutter. Both<br />
curved and straight knot pushers/suture cutters<br />
are available. This threading can be facilitated<br />
with the use of the suture funnel.<br />
Photo 10. Hand-tightened suture construct - vertical mattress<br />
Photo 11. Hand-tightened suture construct - horizontal mattress<br />
10
8. While holding the suture taut, gently slide the<br />
knot pusher/suture cutter to the meniscus to<br />
achieve the desired tension (Figure 10). The knot<br />
pusher should engage the suture in a direct line<br />
and perpendicular to the repair. A manual suture<br />
“pull”/“push” maneuver is suggested.<br />
9. Rest the tip against the knot to allow for a<br />
2–3 mm suture tail. Cut the suture by sliding<br />
the gold trigger forward (Photos 12 and 13,<br />
Figure 11). Alternatively, trim the suture with<br />
arthroscopic scissors.<br />
To reduce puckering that may result from<br />
the femoral surface repair, the implants can<br />
subsequently be placed on the tibial side of the<br />
meniscus to help pull down the meniscal flap.<br />
The reverse curve <strong>ULTRA</strong> <strong>FAST</strong>-FIX device is<br />
recommended for tibial side tears.<br />
Postoperative Care<br />
Reestablish full extension and quadriceps activation<br />
early, along with joint kinematics and proprioception<br />
involving the entire kinetic chain progression to full<br />
weight bearing; limit flexion to 90° for three weeks<br />
and to torsion for six weeks. Running is indicated at<br />
8–12 weeks. Cutting activities are indicated at 10–12<br />
weeks. Return to full activity is indicated at 3–6<br />
months. Individualization is based on the stability of<br />
the tear, repair construct security, and associated<br />
pathology.<br />
Figure 10. Suture construct tensioning<br />
Figure 11. Suture cutting<br />
Photo 12. Suture cutting - horizontal mattress<br />
Photo 13. Suture cutting - vertical mattress<br />
11
Additional Instruction<br />
Prior to performing this technique, consult the<br />
Instruction for Use documentation provided with<br />
individual components – including indications,<br />
contraindications, warnings, cautions, and<br />
instructions.<br />
References<br />
1. Caborn, Borden, Nyland, Pienkowski:<br />
Biomechanical Comparison of the <strong>FAST</strong>-FIX<br />
<strong>Meniscal</strong> <strong>Repair</strong> Suture <strong>System</strong> with Vertical<br />
Mattress Sutures and Meniscus Arrows.<br />
The American Journal of Sports Medicine,<br />
Vol 31, No. 3, 2003.<br />
2. Coen, Caborn, Urban, et al: Arthroscopy 1998.<br />
Courtesy of <strong>Smith</strong> & <strong>Nephew</strong>, Inc.,<br />
Endoscopy Division<br />
Caution: U.S. Federal law restricts this device to sale<br />
by or on the order of a physician.<br />
Trademarks of <strong>Smith</strong> & <strong>Nephew</strong>, registered U.S. Patent & Trademark<br />
Office.<br />
Pearls<br />
≠ Prepare site and assess geometry of reduction.<br />
≠ Reduce tear center-to-center to avoid “dog ears”/<br />
gapping/ruffles.<br />
≠ Approach tear from contralateral portal/view from<br />
ipsilateral portal.<br />
≠ Use curve of needle to increase safety zone of<br />
vector and improve insertion positioning.<br />
≠ Hold delivery needle like a dart to stabilize.<br />
≠ Insert curved delivery needle within split cannula<br />
with convexity up.<br />
≠ Ease insertion using metal slotted cannula.<br />
≠ Vertical mattress suture: T1 goes posterior and<br />
superior; T2 goes anterior and inferior.<br />
≠ Insert T2 (implant 2) 4 mm to 5 mm from T1<br />
(implant 1).<br />
≠ Advance gold slide trigger and implant 2<br />
completely to tip until a click is heard (requires<br />
force). Use the tip of the thumb on slide trigger<br />
rather than volar pad of thumb.<br />
≠ If implant 1 does not deploy, it is most likely NOT<br />
inserted through the entire meniscal tissue:<br />
advance deeper.<br />
≠ If implant 2 does not deploy, it is most likely NOT<br />
advanced to the deployment position at the tip of<br />
the delivery needle.<br />
≠ Thread suture onto knot pusher/suture cutter<br />
with suture funnel.<br />
≠ If the knot does not cinch smoothly, it usually<br />
requires a more forceful steady pull which is<br />
facilitated by wrapping the suture around several<br />
fingers like a pulley and applying traction.<br />
≠ Cinch knot to obtain compression of the suture<br />
across the tear but avoid over-cinching or<br />
puckering the tissue.<br />
≠ Alternate divergent femoral side and tibial<br />
(tensile) side suture placement.<br />
≠ Consider reverse curved devices for tibial side<br />
fixation.<br />
Endoscopy<br />
<strong>Smith</strong> & <strong>Nephew</strong>, Inc.<br />
Andover, MA 01810<br />
USA<br />
www.smith-nephew.com<br />
+1 978 749 1000<br />
+1 978 749 1108 Fax<br />
+1 800 343 5717 U.S. Customer Service<br />
©2002, 2008 <strong>Smith</strong> & <strong>Nephew</strong>, Inc.<br />
All rights reserved.<br />
02/2008 1061031 Rev. C