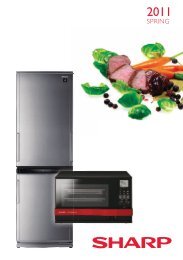
AL-2021/2041 Operation-Manual GB - Sharp
AL-2021/2041 Operation-Manual GB - Sharp
AL-2021/2041 Operation-Manual GB - Sharp

You also want an ePaper? Increase the reach of your titles
YUMPU automatically turns print PDFs into web optimized ePapers that Google loves.
CONFIGURING THE PRINTER DRIVER<br />
After installing the MFP driver, you must configure the printer driver settings<br />
appropriately for the size of paper loaded in each.<br />
1<br />
2<br />
3<br />
4<br />
5<br />
6<br />
Click the "Start" button, click "Control Panel", and then click<br />
"Printer".<br />
• In Windows 7, click the "start" button and then click "Devices and<br />
Printers".<br />
• In Windows XP, click the "start" button and click "Printers and Faxes".<br />
• In Windows 2000, click the "Start" button, select "Settings", and then click<br />
"Printers".<br />
In Windows XP, if "Printers and Faxes" does not appear in the "start"<br />
menu, select "Control Panel", select "Printers and Other Hardware", and<br />
then select "Printers and Faxes".<br />
Open the printer properties window.<br />
1<br />
2<br />
Right-click the printer driver icon of the machine.<br />
Select "Properties".<br />
In Windows 7, click the "Printer properties" menu.<br />
Click the "Configuration" tab.<br />
Click the "Set Tray Status" button and select the size of paper<br />
that is loaded in each tray.<br />
Select a tray in the "Paper Source" menu, and select the size of paper<br />
loaded in that tray from the "Set Paper Size" menu. Repeat for each tray.<br />
Click the "OK" button in the "Set Tray Status" window.<br />
Click the "OK" button in the printer properties window.<br />
3<br />
22