Create successful ePaper yourself
Turn your PDF publications into a flip-book with our unique Google optimized e-Paper software.
Replacing the Color Wheel<br />
The projector is equipped with a four-segment color wheel. You can replace it with a<br />
six-segment color wheel (sold separately). The replacement procedure described<br />
below also applies when you put the four-segment color wheel back in the place of<br />
the six-segment one.<br />
Warning!<br />
• Do not remove the color wheel from the<br />
projector right after use. The lamp and parts<br />
around the lamp will be very hot and may<br />
cause burns or injury.<br />
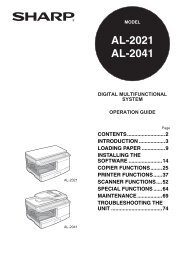
1<br />
Press STANDBY/ON on the<br />
projector or on the remote<br />
control to put the projector into<br />
Standby mode.<br />
STANDBY/ON button<br />
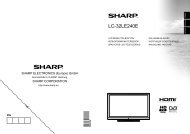
2<br />
Switch the MAIN POWER switch<br />
on the projector to “OFF” and<br />
then disconnect the power cord.<br />
• Unplug the power cord from the AC<br />
socket.<br />
• Leave the lamp until it has fully cooled<br />
down (about 1 hour).<br />
MAIN POWER switch<br />
AC socket<br />
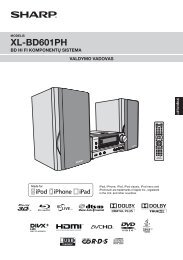
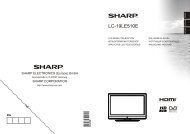
3<br />
Remove the lamp unit cover.<br />
• Loosen the user service screw (1) that<br />
secures the lamp unit cover. Remove the<br />
lamp unit cover (2).<br />
User service screw<br />
(for lamp unit cover)<br />
Appendix<br />
69