
You also want an ePaper? Increase the reach of your titles
YUMPU automatically turns print PDFs into web optimized ePapers that Google loves.
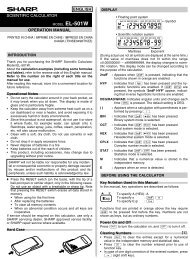
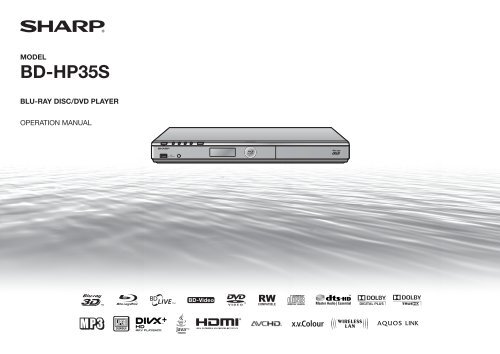
MODEL<br />
<strong>BD</strong>-<strong>HP35S</strong><br />
BLU-RAY DISC/DVD PLAYER<br />
OPERATION MANUAL
OPERATION MANUAL<br />
ENGLISH<br />
Introduction<br />
SAFETY / IMPORTANT INFORMATION<br />
WARNING:<br />
TO REDUCE THE RISK OF FIRE OR<br />
ELECTRIC SHOCK, DO NOT EXPOSE THIS<br />
EQUIPMENT TO RAIN OR MOISTURE.<br />
TO REDUCE THE RISK OF FIRE OR<br />
ELECTRIC SHOCK, AND ANNOYING<br />
INTERFERENCE, USE THE RECOMMENDED<br />
ACCESSORIES ONLY.<br />
CAUTION:<br />
USE OF CONTROLS OR ADJUSTMENTS OR<br />
PERFORMANCE OF PROCEDURES OTHER THAN<br />
THOSE SPECIFIED HEREIN MAY RESULT IN<br />
HAZARDOUS RADIATION EXPOSURE.<br />
AS THE LASER BEAM USED IN THIS PLAYER IS<br />
HARMFUL TO THE EYES, DO NOT ATTEMPT TO<br />
DISASSEMBLE THE CABINET.<br />
REFER SERVICING TO QUALIFIED PERSONNEL<br />
ONLY.<br />
• This Player is classified as a CLASS 1 LASER<br />
product.<br />
• The CLASS 1 LASER PRODUCT label is located<br />
on the rear cover.<br />
• This product contains a low power laser device. To<br />
ensure continued safety do not remove any cover<br />
or attempt to gain access to the inside of the<br />
product. Refer all servicing to qualified personnel.<br />
Note:<br />
This Player can be used only where the power<br />
supply is AC 100–240V, 50/60Hz. It cannot be<br />
used elsewhere.<br />
Power Cord Protection<br />
To avoid any malfunctions of the Player, and to<br />
protect against electric shock, fire or personal<br />
injury, please observe the following.<br />
• Hold the plug firmly when connecting or<br />
disconnecting the AC power cord.<br />
• Keep the AC power cord away from heating<br />
appliances.<br />
• Never put any heavy object on the AC power<br />
cord.<br />
• Do not attempt to repair or reconstruct the AC<br />
power cord in any way.<br />
1
SAFETY / IMPORTANT INFORMATION<br />
CE Statement:<br />
Hereby, SHARP Electronics (Europe) GmbH declares that the wireless LAN USB adapter (URCO-A002WJPZ) is in compliance with the essential requirements and<br />
other relevant provisions of Directive 1999/5/EC. The declaration of conformity may be consulted at: http://www.sharp.de/doc/URCO-A002WJPZ.pdf.<br />
NOTE<br />
The wireless LAN USB adapter is designed for indoor use only.<br />
IMPORTANT SAFETY INSTRUCTIONS<br />
Electricity is used to perform many useful functions, but it can also cause personal<br />
injuries and property damage if improperly handled. This product has been engineered<br />
and manufactured with the highest priority on safety. However, improper use can result<br />
in electric shock and/or fire. In order to prevent potential danger, please observe the<br />
following instructions when installing, operating and cleaning the product. To ensure<br />
your safety and prolong the service life of your Blu-ray Disc/DVD Player, please read the<br />
following precautions carefully before using the product.<br />
1) Read these instructions.<br />
2) Keep these instructions.<br />
3) Heed all warnings.<br />
4) Follow all instructions.<br />
5) Do not use this apparatus near water.<br />
6) Clean only with dry cloth.<br />
7) Do not block any ventilation openings. Install in accordance with the manufacturer’s<br />
instructions.<br />
8) Do not install near any heat sources such as radiators, heat registers, stoves, or<br />
other apparatus (including amplifiers) that produce heat.<br />
9) Protect the power cord from being walked on or pinched particularly at plugs,<br />
convenience receptacles, and the point where they exit from the apparatus.<br />
10) Only use attachments/accessories specified by the manufacturer.<br />
11) Use only with the cart, stand, tripod, bracket, or table specified by the<br />
manufacturer, or sold with the apparatus. When a cart is used, use caution when<br />
moving the cart/apparatus combination to avoid injury from tip-over.<br />
12) Unplug this apparatus during lightning storms or when unused for long periods of<br />
time.<br />
13) Refer all servicing to qualified service personnel. Servicing is required<br />
when the apparatus has been damaged in any way, such as powersupply<br />
cord or plug is damaged, liquid has been spilled or objects have<br />
fallen into the apparatus, the apparatus has been exposed to rain or<br />
moisture, does not operate normally, or has been dropped.<br />
Additional Safety Information<br />
14) Power Sources—This product should be operated only from the type of power<br />
source indicated on the marking label. If you are not sure of the type of power<br />
supply to your home, consult your product dealer or local power company. For<br />
products intended to operate from battery power, or other sources, refer to the<br />
operating instructions.<br />
15) Overloading—Do not overload wall outlets, extension cords, or integral convenience<br />
receptacles as this can result in a risk of fire or electric shock.<br />
16) Object and Liquid Entry—Never push objects of any kind into this product through<br />
openings as they may touch dangerous voltage points or short-out parts that could<br />
result in a fire or electric shock. Never spill liquid of any kind on the product.<br />
17) Damage Requiring Service—Unplug this product from the wall outlet and refer<br />
servicing to qualified service personnel under the following conditions:<br />
a) When the AC cord or plug is damaged,<br />
b) If liquid has been spilled, or objects have fallen into the product,<br />
c) If the product has been exposed to rain or water,<br />
d) If the product does not operate normally by following the operating<br />
instructions.<br />
Adjust only those controls that are covered by the operating instructions as<br />
an improper adjustment of other controls may result in damage and will often<br />
require extensive work by a qualified technician to restore the product to its<br />
normal operation,<br />
2
IMPORTANT SAFETY INSTRUCTIONS<br />
e) If the product has been dropped or damaged in any way, and<br />
f) When the product exhibits a distinct change in performance - this indicates a<br />
need for service.<br />
18) Replacement Parts—When replacement parts are required, be sure the service<br />
technician has used replacement parts specified by the manufacturer or have the<br />
same characteristics as the original part. Unauthorised substitutions may result in<br />
fire, electric shock, or other hazards.<br />
19) Safety Check—Upon completion of any service or repairs to this product, ask the<br />
service technician to perform safety checks to determine that the product is in<br />
proper operating condition.<br />
20) The main AC plug is used as disconnect device and shall always remain readily<br />
operable.<br />
• Water and Moisture—Do not use this product near<br />
water - for example, near a bath tub, wash bowl,<br />
kitchen sink, or laundry tub; in a wet basement; or<br />
near a swimming pool; and the like.<br />
• Stand—Do not place the product on an unstable<br />
cart, stand, tripod or table. Placing the product on an<br />
unstable base can cause the product to fall, resulting<br />
in serious personal injuries as well as damage to the<br />
product. Use only a cart, stand, tripod, bracket or<br />
table recommended by the manufacturer or sold with<br />
the product. When mounting the product on a wall,<br />
be sure to follow the manufacturer’s instructions. Use<br />
only the mounting hardware recommended by the<br />
manufacturer.<br />
• Selecting the location—Select a place with no direct<br />
sunlight and good ventilation.<br />
• Ventilation—The vents and other openings in the<br />
cabinet are designed for ventilation. Do not cover<br />
or block these vents and openings since insufficient<br />
ventilation can cause overheating and/or shorten the<br />
life of the product. Do not place the product on a bed,<br />
sofa, rug or other similar surface, since they can block<br />
ventilation openings. This product is not designed<br />
for built-in installation; do not place the product in an<br />
enclosed place such as a bookcase or rack, unless<br />
proper ventilation is provided or the manufacturer’s<br />
instructions are followed.<br />
• Heat—The product should be situated away from<br />
heat sources such as radiators, heat registers, stoves,<br />
or other products (including amplifiers) that produce<br />
heat.<br />
• Lightning—For added protection for this product<br />
during a lightning storm, or when it is left unattended<br />
and unused for long periods of time, unplug it from<br />
the wall outlet. This will prevent damage to the<br />
product due to lightning and power-line surges.<br />
• To prevent fire, never place any type of candle or<br />
flames on the top or near the product.<br />
• To prevent fire or shock hazard, do not expose this<br />
product to dripping or splashing.<br />
No objects filled with liquids, such as vases, should<br />
be placed on the product.<br />
• To prevent fire or shock hazard, do not place the AC<br />
cord under the product or other heavy items.<br />
Introduction<br />
3
PRECAUTIONS<br />
Precautions on viewing stereoscopic 3D images<br />
• Do not view stereoscopic 3D images if you have a history of photosensitivity, heart<br />
disease or poor health. This may cause the symptoms to worsen.<br />
• If you experience any health problems such as fatigue and discomfort while viewing<br />
stereoscopic 3D images, immediately discontinue viewing. Continuing viewing after<br />
symptoms appear may cause health risks. Take a break until the symptoms have<br />
completely disappeared.<br />
• Ages of 5–6 or over are recommended for viewing stereoscopic 3D images.<br />
Symptoms such as fatigue and discomfort are difficult to determine in young<br />
children, therefore they may suddenly become ill. When viewing 3D images with<br />
children, please watch for eye strain symptoms.<br />
• When viewing stereoscopic 3D images, take a moderate break after watching one<br />
title. Viewing for extended periods may cause visual strain.<br />
Precautions when cleaning this product<br />
• Turn off the main power and unplug the AC cord from the wall outlet before handling.<br />
• To clean the outer cabinet, periodically wipe it with a soft cloth (cotton, flannel, etc.).<br />
• For severe dirt, soak a soft cloth (cotton, flannel, etc.) in some neutral detergent<br />
diluted with water, wring the cloth out thoroughly, wipe off the dirt, then wipe again<br />
with a soft, dry cloth.<br />
• Do not use chemicals or a chemically treated cloth for cleaning. It may damage the<br />
cabinet finish.<br />
Notes on using Wireless LAN<br />
• When this player is connected to a wireless LAN network, transmissions between the<br />
wireless LAN adapter (supplied) and a wireless LAN compatible broadband router<br />
(commercially available) are carried out.<br />
Precautions on using Wireless LAN<br />
• The following devices, radio stations, etc. use the same frequency bands. Do not use<br />
wireless LAN near them.<br />
Manufacturing/scientific/diagnostic equipment such as pacemakers, etc.<br />
Specified low power radio stations (radio stations that do not require a license)<br />
If this player is used near these devices, there is a possibility that radio wave<br />
interference may occur. Therefore transmission may not be possible or speed may be<br />
reduced.<br />
• Mobile phones, radios, etc. use different radio frequency bands from wireless LAN,<br />
so there will not be any effect on the transmissions of these devices or wireless LAN<br />
if this player is used near them.<br />
However, if a wireless LAN product is placed near one of these devices, audio or<br />
video noise may occur due to the electromagnetic waves that emit from wireless LAN<br />
products.<br />
• Radio waves will pass through the wood, glass, etc. used in standard housing,<br />
however they will not pass through reinforcing bars, metal, concrete, etc. Radio<br />
waves will not pass through walls and floors if these materials are used.<br />
4
DEAR SHARP CUSTOMER<br />
Thank you for your purchase of the SHARP Blu-ray Disc/DVD Player. To ensure safety and many years of trouble-free operation of your product, please read<br />
the Important Safety Instructions carefully before using this product.<br />
Getting Started<br />
Step 1: Unpacking<br />
Make sure the following accessories are provided with the product.<br />
Remote control unit<br />
AC cord<br />
Step 2: Selecting equipment to connect<br />
Connection varies with the equipment used. Refer to Connection<br />
(Pages 16–19).<br />
Turn off the devices before connecting.<br />
Enjoying <strong>BD</strong>-LIVE and video on demand services (e-Contents)<br />
To enjoy <strong>BD</strong>-LIVE content or video on demand streaming content on your TV,<br />
after an Internet connection is made, communication setup is required. Refer<br />
to “Communication Setup” (Pages 46–49).<br />
Introduction<br />
Step 3: Playing back video/picture/music content<br />
Play back video, picture or music content from the desired media source<br />
such as Blu-ray and DVD discs, or via the Internet.<br />
Refer to Playback (Pages 20–39) and video on demand streaming content<br />
(Page 55).<br />
Pages 15 and 20<br />
Page 20<br />
Wireless LAN adapter<br />
Step 4: Adjust settings to suit your preference<br />
Adjust settings to enjoy various features and other functions for playing<br />
discs/content.<br />
Refer to Settings (Pages 40–54).<br />
“AA” size battery (g2)<br />
Page 20<br />
Page 19<br />
5
Contents<br />
Introduction<br />
SAFETY / IMPORTANT INFORMATION.............................................................. 1<br />
IMPORTANT SAFETY INSTRUCTIONS............................................................... 2<br />
PRECAUTIONS..................................................................................................... 4<br />
DEAR SHARP CUSTOMER.................................................................................. 5<br />
Getting Started..................................................................................................... 5<br />
Contents............................................................................................................... 6<br />
What would you like to do with this Player?...................................................... 8<br />
About Media Types.............................................................................................. 9<br />
Blu-ray Disc................................................................................................................... 9<br />
Types of Discs/Media Formats that Can Be Used with This Player.............................. 9<br />
Discs that Cannot Be Used with This Player.............................................................. 10<br />
About Disc Contents................................................................................................... 11<br />
<strong>BD</strong> Video................................................................................................................. 11<br />
Title, Chapter and Track......................................................................................... 12<br />
Icons Used on <strong>BD</strong>/DVD Video Disc Cases............................................................. 12<br />
The Icons Used in This <strong>Operation</strong> <strong>Manual</strong>.................................................................. 12<br />
Important Information....................................................................................... 13<br />
Disc Precautions......................................................................................................... 13<br />
License and Copyright................................................................................................ 13<br />
Major Components............................................................................................ 14<br />
Main Unit (Front).......................................................................................................... 14<br />
Main Unit (Rear)........................................................................................................... 14<br />
Remote Control Unit................................................................................................... 15<br />
Keylock function.......................................................................................................... 15<br />
Connection<br />
Connecting to a TV/projector........................................................................... 16<br />
Connecting to an amplifier/AV receiver........................................................... 17<br />
HDMI connection........................................................................................................ 17<br />
Digital audio connection............................................................................................. 17<br />
Broadband Internet Connection....................................................................... 18<br />
Wired connection (LAN cable)..................................................................................... 18<br />
Wireless connection (wireless LAN)............................................................................ 19<br />
Playback<br />
Before Starting Playback.................................................................................. 20<br />
Loading the Batteries in the Remote Control.............................................................. 20<br />
Approximate operating range of remote control.................................................... 20<br />
Connecting the Power Cord........................................................................................ 20<br />
Turning the Power On................................................................................................. 21<br />
Turning the power on.............................................................................................. 21<br />
Entering standby..................................................................................................... 21<br />
Indicators on the Player.......................................................................................... 21<br />
About the Home screen.......................................................................................... 21<br />
6<br />
Language Setting........................................................................................................ 22<br />
Changing the on-screen display language............................................................. 22<br />
Operating a SHARP TV Using the Remote Control.................................................... 22<br />
TV function control................................................................................................. 22<br />
Turning Off the LCD Backlight and Indications........................................................... 22<br />
Using AQUOS LINK.................................................................................................... 23<br />
Controlling the Blu-ray disc player using AQUOS LINK......................................... 23<br />
Using 3D...................................................................................................................... 23<br />
Control Panel............................................................................................................... 24<br />
Video/Picture/Music Playback.......................................................................... 25<br />
Loading a Disc............................................................................................................ 25<br />
<strong>BD</strong>/DVD Video Playback............................................................................................. 25<br />
Displaying the disc information.............................................................................. 26<br />
<strong>BD</strong>/DVD Menus........................................................................................................... 26<br />
Start playback by selecting a title from the top menu............................................ 26<br />
Using the disc menu............................................................................................... 26<br />
Using the pop-up menu.......................................................................................... 27<br />
Enjoying BONUSVIEW or <strong>BD</strong>-LIVE............................................................................. 27<br />
Use of Picture in Picture function (secondary audio/video playback).................... 28<br />
Virtual Package....................................................................................................... 28<br />
<strong>BD</strong>-LIVE.................................................................................................................. 28<br />
DVD-R/-RW (VR format) / <strong>BD</strong>-RE/-R (<strong>BD</strong>AV format) Playback................................... 29<br />
Playback by selecting a title................................................................................... 29<br />
Playback by selecting a chapter............................................................................. 30<br />
Sorting the titles...................................................................................................... 30<br />
Playback by selecting a Playlist............................................................................. 30<br />
Playback from the beginning or resume playback................................................. 30<br />
Audio CD Playback..................................................................................................... 31<br />
Playback from the beginning.................................................................................. 31<br />
Playback by selecting a track................................................................................. 31<br />
<strong>Operation</strong> procedure for the “Functions” menu..................................................... 31<br />
Audio Data (MP3 File) Playback.................................................................................. 32<br />
Displaying Still Images (JPEG files)............................................................................. 33<br />
Accessing DLNA servers............................................................................................. 34<br />
Playback by selecting a file list............................................................................... 34<br />
Playback Functions............................................................................................ 35<br />
Fast Forward/Reverse (Search)................................................................................... 35<br />
Skipping to the Next or the Start of the Current Chapter (Track/Title)........................ 35<br />
Pause/Frame Advance Playback................................................................................ 35<br />
Slow Playback (Forward/Reverse).............................................................................. 35<br />
Repeat Playback of a Title or Chapter (Repeat Playback).......................................... 36<br />
Partial Repeat Playback (Repeat Playback of a Specified Part)................................. 36<br />
Displaying the Audio Information................................................................................ 37<br />
Switching Subtitles..................................................................................................... 37<br />
Switching the Angle.................................................................................................... 37<br />
Displaying the Angle Mark.......................................................................................... 37<br />
Settings During Playback.................................................................................. 38<br />
Function Control.......................................................................................................... 38<br />
Function control operation procedure.................................................................... 38<br />
Functions which can be set.................................................................................... 39
Contents<br />
Settings<br />
SETTINGS........................................................................................................... 40<br />
Common operations................................................................................................... 40<br />
Basic <strong>Operation</strong> for Playback Setting......................................................................... 41<br />
Audio Video Settings................................................................................................... 42<br />
Smart Settings............................................................................................................ 43<br />
AQUOS LINK............................................................................................................... 43<br />
Playback Setting......................................................................................................... 44<br />
On Screen Language.................................................................................................. 45<br />
Version......................................................................................................................... 45<br />
System........................................................................................................................ 45<br />
Communication Setup................................................................................................ 46<br />
Sets whether “Cable” or “Wireless” is used for the network connection............... 46<br />
When selecting Cable............................................................................................. 46<br />
When selecting Wireless......................................................................................... 47<br />
The operation procedure for inputting characters manually.................................. 49<br />
USB Memory Management......................................................................................... 50<br />
Software Update Settings........................................................................................... 51<br />
Auto Update from Network..................................................................................... 51<br />
<strong>Manual</strong> Update from Network................................................................................ 52<br />
<strong>Manual</strong> Update from USB memory device............................................................. 52<br />
Streaming content<br />
Playing back video on demand streaming content........................................ 55<br />
Playing back YouTube content.................................................................................... 55<br />
Appendix<br />
PC control of the Player.................................................................................... 56<br />
IP Control Setup.......................................................................................................... 56<br />
Command list.............................................................................................................. 57<br />
Troubleshooting................................................................................................. 58<br />
To Reset this Player................................................................................................ 61<br />
On-screen Error Messages............................................................................... 62<br />
Specifications..................................................................................................... 63<br />
Glossary.............................................................................................................. 65<br />
Network Service Disclaimer.............................................................................. 68<br />
About Software License.................................................................................... 69<br />
End of Life Disposal........................................................................................... 70<br />
What to do first:<br />
Refer to “Getting Started” (p. 5) to prepare for using this<br />
player.<br />
Introduction (pp. 1–15)<br />
Explains the important operation information.<br />
Connection (pp. 16–19)<br />
Shows the connecting options provided by this Player.<br />
Playback (pp. 20–39)<br />
Shows simple playback and useful functions.<br />
Settings (pp. 40–54)<br />
Gives you more options to suit your circumstances.<br />
Streaming content (p. 55)<br />
Shows the Internet streaming services available with this<br />
player.<br />
Appendix (pp. 56–70)<br />
Provides troubleshooting tips and more information.<br />
The illustrations and on-screen displays in this operation manual<br />
are for explanation purposes and may vary slightly from the<br />
actual operations.<br />
7
What would you like to do with this Player?<br />
Watch high quality movies on Blu-ray discs<br />
This Player offers full high-definition Blu-ray disc playback.<br />
Video/Picture/Music Playback (p. 25)<br />
Enjoy stereoscopic and powerful 3D images<br />
This player can play 3D content from 3D compatible Blu-ray discs through<br />
an HDMI cable. To watch 3D images, connect a 3D compatible TV to this<br />
player using an HDMI cable and play the 3D content while wearing 3D<br />
glasses.<br />
Using 3D (p. 23)<br />
Enjoy different kinds of media sources<br />
Use this player to enjoy video, picture or music content from various types<br />
of media sources such as DVDs, USB memory devices and via the Internet.<br />
About Media Types (pp. 9–12)<br />
Video/Picture/Music Playback (p. 25)<br />
Simple connection and operation through HDMI<br />
This Player is equipped with an HDMI terminal. You can connect it to the TV<br />
using HDMI and no other cable will be needed to enjoy movies. If your TV is<br />
compatible with AQUOS LINK, you can control both the TV and this Player<br />
with simple operations.<br />
Connecting to a TV/projector (p. 16)<br />
Enjoy <strong>BD</strong>-LIVE functions through the Internet<br />
This Player is compatible with <strong>BD</strong>-LIVE. You can enjoy bonus content such<br />
as movie trailers through the Internet when playing back <strong>BD</strong>-Video discs<br />
compatible with <strong>BD</strong>-LIVE.<br />
Enjoying BONUSVIEW or <strong>BD</strong>-LIVE (pp. 27–28)<br />
Access to videos, pictures and music from home network<br />
servers<br />
This player can play back video, picture and music data stored on your<br />
home network servers such as a DLNA certified PC.<br />
Accessing DLNA servers (p. 34)<br />
Enjoy video on demand streaming content with higher<br />
image quality on your TV<br />
This player supports video on demand streaming services using the<br />
Internet. By connecting this player to the Internet, you can enjoy various<br />
content streamed on your TV. Also, with this player’s “Super Picture”<br />
function, you can enjoy video streaming images with higher image quality.<br />
Playing back video on demand streaming content (p. 55)<br />
SUPER PICTURE (p. 43)<br />
8
About Media Types<br />
Blu-ray Disc<br />
Blu-ray Disc is the ultimate next generation optical<br />
media format, offering the following key features:<br />
• Largest capacity (25 <strong>GB</strong> single layer – 50 <strong>GB</strong> dual layer)<br />
– with over 5 times the amount of content possible with<br />
current DVDs, particularly well suited for high definition<br />
feature films with extended levels of interactive features<br />
• Pristine picture quality with the capability for full high<br />
definition 1920 x 1080p resolution<br />
• Best audio possible with uncompressed surround sound<br />
(higher quality than even theatre audio)<br />
• Broadest industry support – ensuring more choice for<br />
consumers in the marketplace<br />
• Hardware products will be backward compatible with<br />
DVDs, allowing continued enjoyment of existing DVD<br />
libraries.<br />
• Disc Durability – new breakthroughs in hard coating<br />
technologies gives Blu-ray Discs the strongest<br />
resistance to scratches and finger prints.<br />
Types of Discs/Media Formats that<br />
Can Be Used with This Player<br />
• The following discs can be played back in this Player.<br />
Do not use an 8 cm to 12 cm adapter.<br />
• Use discs that conform to compatible standards as<br />
indicated by the presence of official logos on the disc<br />
label. Playback of discs not complying with these<br />
standards is not guaranteed. In addition, the image<br />
quality or sound quality is not guaranteed even if the<br />
discs can be played back.<br />
<strong>BD</strong><br />
Video<br />
Disc Type<br />
<strong>BD</strong>-RE DL<br />
<strong>BD</strong>-R DL<br />
DVD<br />
Video<br />
Region<br />
code B/ALL<br />
Region<br />
code<br />
2/ALL<br />
2 ALL<br />
DVD+RW/DVD+R<br />
DVD-RW/DVD-R<br />
DVD+R DL/DVD-R<br />
DL<br />
Audio CD I<br />
CD-RW/CD-R<br />
Recording<br />
Format<br />
Contents<br />
— Audio<br />
+ Video<br />
(Movie)<br />
<strong>BD</strong>MV/<strong>BD</strong>AV<br />
format<br />
Video format<br />
Video/VR/<br />
AVCHD<br />
format<br />
(finalised disc<br />
only)<br />
DivX+HD<br />
(H.264/MKV)<br />
JPEG J<br />
MP3 K<br />
Audio CD<br />
(CD-DA)<br />
Audio CD<br />
(CD-DA)<br />
JPEG J<br />
Audio<br />
+ Video<br />
(Movie)<br />
Audio<br />
+ Video<br />
(Movie)<br />
Still<br />
image<br />
(JPEG<br />
file)<br />
Audio<br />
Audio<br />
Audio<br />
Still<br />
image<br />
(JPEG<br />
file)<br />
Disc<br />
Size<br />
12 cm<br />
12 cm<br />
8 cm<br />
12 cm<br />
8 cm<br />
12 cm<br />
8 cm<br />
Media Format Recording Format Contents<br />
USB memory<br />
device<br />
DivX+HD<br />
(H.264/MKV)<br />
JPEG J<br />
MP3 K<br />
Audio + Video<br />
(Movie)<br />
Still image<br />
(JPEG file)<br />
Audio<br />
• <strong>BD</strong>/DVD video players and discs have region codes,<br />
which dictate the regions in which a disc can be played.<br />
This Player’s region code is B for <strong>BD</strong> and 2 for DVD.<br />
(Discs marked ALL will play in any player.)<br />
• <strong>BD</strong>/DVD video operations and functions may be<br />
different from the explanations in this manual and<br />
some operations may be prohibited due to disc<br />
manufacturer’s settings.<br />
• If a menu screen or operating instructions are displayed<br />
during playback of a disc, follow the operating<br />
procedure displayed.<br />
NOTE<br />
• Playback for some of the discs in the left side column<br />
tables may not be possible depending on the disc.<br />
• “Finalise” refers to a recorder processing a recorded<br />
disc so that it will play in other DVD players/recorders<br />
as well as this player. Only finalised DVD discs will play<br />
back in this player. (This player does not have a function<br />
to finalise discs.)<br />
• Regarding DVD+RW/+R/+R DL discs, only video format<br />
discs (finalised) can be played back. JPEG files, MP3<br />
files, DivX+HD files, etc. cannot be played back.<br />
• Some discs cannot be played back depending on the<br />
recording format.<br />
• DivX playback may not be available depending on the<br />
DivX content and file.<br />
Introduction<br />
MP3 K<br />
Audio<br />
9
About Media Types<br />
Discs that Cannot Be Used with<br />
This Player<br />
The following discs cannot be played back or will<br />
not play back properly on this Player. If such a<br />
disc is mistakenly played back, speaker damage<br />
may occur. Never attempt to play back these<br />
discs.<br />
CDG, Video CD, Photo CD, CD-ROM, CD-TEXT,<br />
SVCD, SACD, PD, CDV, CVD, DVD-RAM, DVD-<br />
Audio, <strong>BD</strong>-RE with the cartridge, CD-WMA<br />
Discs with unusual shapes cannot be played.<br />
• Discs with unusual shapes (heart-shaped or hexagonal<br />
discs, etc.) cannot be used. The use of such discs will<br />
cause malfunction.<br />
The following <strong>BD</strong> video discs cannot be played.<br />
• Discs not displaying “B” or “ALL” for the region code<br />
(discs sold outside the authorised marketing area).*<br />
• Discs produced illegally.<br />
• Discs recorded for commercial use.<br />
* The region code for this product is B.<br />
The following DVD video discs cannot be played.<br />
• Discs not displaying “2” or “ALL” for the region code<br />
(discs sold outside the authorised marketing area).*<br />
• Discs produced illegally.<br />
• Discs recorded for commercial use.<br />
* The region code for this product is 2.<br />
The following <strong>BD</strong>-RE/R, DVD-RW/R and<br />
DVD+RW/R discs cannot be played.<br />
• Discs on which data has not been recorded cannot be<br />
played back.<br />
• <strong>Sharp</strong> cannot guarantee playback compatibility for<br />
all self-recorded <strong>BD</strong>-discs because Blu-ray is a new<br />
and evolving format. The playback compatibility will<br />
be affected by your choice of <strong>BD</strong>-recorder, <strong>BD</strong>-disc<br />
and <strong>BD</strong>-burning software. Please always ensure you<br />
are using the latest software versions on all units and<br />
contact the individual manufacturers for further help if<br />
required.<br />
To avoid inconveniences, please check the playback<br />
compatibility of your self-recorded disc before you<br />
purchase this <strong>BD</strong>-player. For maximum playback<br />
compatibility of self-recorded <strong>BD</strong>-discs <strong>Sharp</strong><br />
recommends that the <strong>BD</strong>MV/<strong>BD</strong>AV standards are<br />
used. If a playback issue occurs after purchase, please<br />
download the latest software version for your <strong>BD</strong>-player<br />
from the <strong>Sharp</strong> internet page or ask your <strong>Sharp</strong>-Dealer.<br />
This <strong>BD</strong>-player uses the latest technology available at<br />
the time of development and cannot guarantee support<br />
for future enhancements or changes to the standard.<br />
The following Audio CD *1 discs cannot be played.<br />
• Discs containing a signal for the purpose of protecting<br />
copyrights (copy control signal) may not be played back<br />
with this Player.<br />
• This Player has been designed on the premise of<br />
playing back Audio CDs that comply with CD (Compact<br />
Disc) standards.<br />
The following CD-RW/R discs cannot be played.<br />
• Discs on which data has not been recorded cannot be<br />
played back.<br />
• Discs recorded in a format other than an Audio CD and<br />
JPEG/MP3 file format cannot be played back.<br />
• Discs may not be played back depending on their<br />
recording status or the status of the disc itself.<br />
• Discs may not be played back depending on their<br />
compatibility with this Player.<br />
*2<br />
About the JPEG file format<br />
JPEG is a type of file format for storing still-image<br />
files (photos, illustrations, etc.). The Player lets you<br />
play JPEG format still-image files.<br />
File formats that are not compatible.<br />
• Still images in formats other than JPEG (such as TIFF)<br />
cannot be played.<br />
• There may be some files that cannot be played even if<br />
they are in JPEG format.<br />
• Progressive JPEG files cannot be played.<br />
• Moving image files as well as Motion JPEG format files<br />
cannot be played, even though they are JPEG files.<br />
Other files that cannot be played back.<br />
• You may not be able to play some still images which<br />
you have created, touched up, copied or otherwise<br />
edited on your computer.<br />
• You may not be able to play some still images you have<br />
processed (rotated or saved by overwriting other images<br />
you have imported from the Internet or e-mail).<br />
You may experience one or more of the following<br />
symptoms when playing files.<br />
• It may take some time to play files depending on the<br />
number of folders, number of files and volume of data<br />
involved.<br />
• EXIF information will not be displayed. EXIF stands for<br />
Exchangeable Image File Format, and is a standard for<br />
storing interchange information in image files, especially<br />
those using JPEG compression. (Refer to http://exif.org<br />
for more information.)<br />
*3<br />
About the MP3 file format<br />
MP3 files are audio data compressed in the<br />
MPEG1/2 Audio layer-3 file format. “MP3 files” have<br />
“.mp3” as extensions. (Some files that have “.mp3”<br />
extensions or files that have not been recorded in<br />
MP3 format will produce noise or cannot be played.)<br />
Playing the MP3 file format<br />
• The MP3 files are not played in the order they were<br />
recorded.<br />
• It is recommended to record data at a lower speed as<br />
data recorded at a fast speed can produce noise and<br />
may not be able to be played.<br />
• The more folders there are, the longer the reading time.<br />
• Depending on the folder tree, reading MP3 files can take<br />
time.<br />
• The playing time may not be correctly displayed during<br />
MP3 file playback.<br />
The following files cannot be played on this<br />
player.<br />
• When both Audio CD [CD-DA] format and JPEG/<br />
MP3 file formats are recorded on a disc. (The disc is<br />
recognised to be an Audio CD [CD-DA] only tracks in<br />
Audio CD [CD-DA] format are played back.)<br />
• Multi-session discs cannot be played.<br />
10
About Media Types<br />
About the DivX+HD (H.264/MKV) file<br />
format<br />
• DivX playback may not be available depending on the<br />
DivX content and file.<br />
About files/folders for Still images (JPEG<br />
files) and audio data (MP3 files)<br />
You can play still images (JPEG files) /audio data<br />
(MP3 files) with this unit by making folder(s) on discs<br />
or USB memory devices as shown below.<br />
Example of a folder structure:<br />
Root<br />
001.jpg/001.mp3<br />
xxx.jpg/xxx.mp3<br />
01 Folder<br />
xxx Folder<br />
L<br />
Folder<br />
001.jpg/001.mp3<br />
255.jpg/255.mp3<br />
001.jpg/001.mp3<br />
L<br />
L<br />
001.jpg/001.mp3<br />
256.jpg/256.mp3<br />
File and folder requirements<br />
• The discs or USB memory devices which this player<br />
can play back (recognise) are limited to the following<br />
properties:<br />
Contains EXIF format files (only JPEG files)<br />
Picture resolution: Between 32 x 32 and 7680 x 4320<br />
pixels (only JPEG files)<br />
Maximum number of folders and files in each folder:<br />
256<br />
Maximum hierarchy level of folders: 5<br />
File size: 20 MB or less (JPEG files)<br />
200 MB or less (MP3 files)<br />
NOTE<br />
• File and folder names displayed on this player may differ<br />
from those displayed on PCs.<br />
ABOUT DivX VIDEO<br />
• DivX ® is a digital video format created by DivX, Inc. This<br />
is an official DivX Certified ® device that plays DivX video.<br />
Visit www.divx.com for more information and software<br />
tools to convert your files into DivX video.<br />
DivX Certified® to play DivX® and DivX Plus HD<br />
(H.264/MKV) video up to 1080p HD including premium<br />
content.<br />
About Disc Contents<br />
<strong>BD</strong> Video<br />
Enjoy <strong>BD</strong>-specific functions including BONUSVIEW<br />
(<strong>BD</strong>-ROM Profile 1 Version 1.1), such as picture-inpicture,<br />
and <strong>BD</strong>-LIVE (page 28).<br />
For the <strong>BD</strong> video discs compatible with<br />
BONUSVIEW/<strong>BD</strong>-LIVE, you can enjoy additional<br />
contents by copying the data from the discs or<br />
downloading it via the Internet. For instance, this<br />
function is capable of playing the original movie as<br />
the primary video while playing video commentary<br />
from the film director on a small screen as a<br />
secondary video.<br />
NOTE<br />
• The available functions differ depending on the disc.<br />
Introduction<br />
256.jpg/256.mp3<br />
L Including the root directory, the maximum number of folders<br />
and files in each folder is limited to 256 in total.<br />
L<br />
ABOUT DivX VIDEO-ON-DEMAND<br />
• This DivX Certified ® device must be registered in order<br />
to play purchased DivX Video-on-Demand (VOD)<br />
movies. To obtain the registration code, locate the DivX<br />
VOD section in your device setup menu. Go to vod.<br />
divx.com for more information on how to complete your<br />
registration.<br />
11
About Media Types<br />
Title, Chapter and Track<br />
• Blu-ray discs and DVDs are divided into “Titles”<br />
and “Chapters”. If the disc has more than one<br />
movie on it, each movie would be a separate<br />
“Title”. “Chapters”, on the other hand, are<br />
subdivisions of titles. (See Example 1.)<br />
• Audio CDs are divided into “Tracks”. You can think<br />
of a “Track” as one tune on an Audio CD. (See<br />
Example 2.)<br />
Example 1: Blu-ray disc or DVD<br />
Example 2: Audio CD<br />
Title 1 Title 2<br />
Chapter 1 Chapter 2 Chapter 3 Chapter 1<br />
Track 1 Track 2 Track 3 Track 4<br />
Icons Used on <strong>BD</strong>/DVD Video Disc<br />
Cases<br />
The back of the case of a <strong>BD</strong>/DVD that is<br />
commercially available usually contains various<br />
information about the contents of the disc.<br />
1 2<br />
1 Audio tracks and audio formats<br />
<strong>BD</strong> and DVD discs can contain up to 8 separate<br />
tracks with a different language on each. The first in<br />
the list is the original track.<br />
This section also details the audio format of each<br />
soundtrack — Dolby Digital, DTS, MPEG etc.<br />
Dolby Digital<br />
A sound system developed by Dolby Laboratories Inc.<br />
that gives movie theatre ambience to audio output<br />
when the Player is connected to a Dolby Digital<br />
processor or amplifier.<br />
DTS<br />
DTS is a digital sound system developed by DTS, Inc.<br />
for use in cinemas.<br />
Linear PCM<br />
Linear PCM is a signal recording format used for<br />
Audio CDs and on some DVD and Blu-ray discs. The<br />
sound on Audio CDs is recorded at 44.1 kHz with<br />
16 bits. (Sound is recorded between 48 kHz with 16<br />
bits and 96 kHz with 24 bits on DVD video discs and<br />
between 48 kHz with 16 bits and 192 kHz with 24 bits<br />
on <strong>BD</strong> video discs.)<br />
2 Subtitle languages<br />
This indicates the kind of subtitles.<br />
3 Screen aspect ratio<br />
Movies are shot in a variety of screen modes.<br />
4 Camera angle<br />
Recorded onto some <strong>BD</strong>/DVD discs are scenes<br />
which have been simultaneously shot from a number<br />
of different angles (the same scene is shot from the<br />
front, from the left side, from the right side, etc.).<br />
5 Region code<br />
This indicates the region code (playable region code).<br />
The Icons Used in This <strong>Operation</strong><br />
<strong>Manual</strong><br />
<strong>BD</strong> VIDEO .............. Indicates the functions that can be<br />
performed for <strong>BD</strong> Video discs.<br />
<strong>BD</strong>-RE .............. Indicates the functions that can be<br />
performed for <strong>BD</strong>-RE discs.<br />
<strong>BD</strong>-R .............. Indicates the functions that can be<br />
performed for <strong>BD</strong>-R discs.<br />
DVD VIDEO ...........Indicates the functions that can be<br />
performed for DVD Video discs.<br />
DVD-RW .............. Indicates the functions that can be<br />
performed for DVD-RW discs.<br />
DVD-R .............. Indicates the functions that can be<br />
performed for DVD-R discs.<br />
AUDIO CD .............. Indicates the functions that can be<br />
performed for Audio CDs.<br />
CD-R .............. Indicates the functions that can be<br />
performed for CD-R discs.<br />
CD-RW .............. Indicates the functions that can be<br />
performed for CD-RW discs.<br />
USB .............. Indicates the functions that can be<br />
performed for USB memory devices.<br />
1. English<br />
2 2<br />
2. Chinese<br />
1. English<br />
2. Chinese<br />
3 4 5<br />
16:9<br />
LB<br />
2<br />
1 2 3<br />
4 5 6<br />
DVD Video <strong>BD</strong> Video<br />
12
Important Information<br />
Disc Precautions<br />
Be Careful of Scratches and Dust<br />
• <strong>BD</strong>, DVD and CD discs are sensitive to dust, fingerprints<br />
and especially scratches. A scratched disc may not<br />
be able to be played back. Handle discs with care and<br />
store them in a safe place.<br />
Proper Disc Storage<br />
Place the disc in the centre<br />
of the disc case and store the<br />
case and disc upright.<br />
Avoid storing discs in locations<br />
subject to direct sunlight,<br />
close to heating appliances or<br />
in locations of high humidity.<br />
Do not drop discs or subject<br />
them to strong vibrations or<br />
impacts.<br />
Avoid storing discs in locations<br />
where there are large amounts<br />
of dust or moisture.<br />
Handling Precautions<br />
• If the surface is soiled, wipe gently with a soft, damp<br />
(water only) cloth. When wiping discs, always move the<br />
cloth from the centre hole toward the outer edge.<br />
• Do not use record cleaning sprays, benzene, thinner,<br />
static electricity prevention liquids or any other solvent.<br />
• Do not touch the surface.<br />
• Do not stick paper or adhesive labels to the disc.<br />
• If the playing surface of a disc is soiled or scratched,<br />
the Player may decide that the disc is incompatible<br />
and eject the disc tray, or it may fail to play the disc<br />
correctly. Wipe any dirt off the playing surface with a<br />
soft cloth.<br />
Cleaning the Pick Up Lens<br />
• Never use commercially available cleaning discs. The<br />
use of these discs can damage the lens.<br />
• Request the nearest service centre approved by SHARP<br />
to clean the lens.<br />
Warnings about dew formation<br />
• Condensation may form on pick up lens or disc in the<br />
following conditions:<br />
−−Immediately after a heater has been turned on.<br />
−−In a steamy or very humid room.<br />
−−When the Player is suddenly moved from a cold<br />
environment to a warm one.<br />
When condensation forms:<br />
• It becomes difficult for the Player to read the signals<br />
on the disc and prevents the Player from operating<br />
properly.<br />
To remove condensation:<br />
• Take out the disc and leave the Player with the<br />
power off until the condensation disappears. Using<br />
the Player when there is condensation may cause<br />
malfunction.<br />
License and Copyright<br />
Audio-visual material may consist of copyrighted<br />
works which must not be recorded without the<br />
authority of the owner of the copyright. Refer to<br />
relevant laws in your country.<br />
• “This item incorporates copy protection technology<br />
that is protected by U.S. patents and other intellectual<br />
property rights of Rovi Corporation. Reverse engineering<br />
and disassembly are prohibited.”<br />
• Manufactured under license from Dolby Laboratories.<br />
“Dolby” and the double-D symbol are trademarks of<br />
Dolby Laboratories.<br />
• Manufactured under license under U.S. Patent #’s:<br />
5,451,942; 5,956,674; 5,974,380; 5,978,762; 6,226,616;<br />
6,487,535; 7,392,195; 7,272,567; 7,333,929; 7,212,872<br />
& other U.S. and worldwide patents issued & pending.<br />
DTS and the Symbol are registered trademarks, &<br />
DTS-HD, DTS-HD Master Audio | Essential and the DTS<br />
logos are trademarks of DTS, Inc. Product includes<br />
software. ©DTS, Inc. All Rights Reserved.<br />
• is a trademark.<br />
• “<strong>BD</strong>-LIVE” logo is a trademark of Blu-ray Disc<br />
Association.<br />
• is a trademark of DVD Format/Logo Licensing<br />
Corporation.<br />
• “HDMI, the HDMI logo and High-Definition Multimedia<br />
Interface are trademarks or registered trademarks of<br />
HDMI Licensing LLC in the United States and other<br />
countries.”<br />
• “x.v.Colour” and “x.v.Colour” logo are trademarks of<br />
Sony Corporation.<br />
• Java and all Java-based trademarks and logos<br />
are trademarks or registered trademarks of Sun<br />
Microsystems, Inc. in the United States and/or other<br />
countries.<br />
• “BONUSVIEW” logo is a trademark of Blu-ray Disc<br />
Association.<br />
• “AVCHD” and the “AVCHD” logo are trademarks of<br />
Panasonic Corporation and Sony Corporation.<br />
• “Blu-ray 3D” and “Blu-ray 3D” logo are trademarks of<br />
Blu-ray Disc Association.<br />
• YouTube is a trademark of Google Inc.<br />
• DivX ® , DivX Certified ® , DivX Plus TM HD and associated<br />
logos are trademarks of DivX, Inc. and are used under<br />
license.<br />
• LC_LCFONT+ and LC logo<br />
mark are registered trademarks of SHARP Corporation.<br />
This product is embedded with LC Font technology,<br />
which was developed by SHARP Corporation for clearly<br />
displaying easy-to-read characters on an LCD screen.<br />
However, other non-LCD fonts are used for displaying<br />
some screen pages.<br />
Introduction<br />
13
Major Components<br />
Main Unit (Front)<br />
Main Unit (Rear)<br />
1<br />
3 4 5 6 7<br />
2<br />
2 13<br />
3 4 5<br />
8 9 10 11 12<br />
1<br />
1 B (Power) (p. 21)<br />
2 B (On/Standby) indicator (p. 21)<br />
3 d PLAY (p. 25)<br />
4 H STOP (p. 25)<br />
5 G REV (p. 35)<br />
6 J FWD (p. 35)<br />
7 OPEN/CLOSE (p. 25)<br />
8 USB2 terminal (p. 27, 32)<br />
9 Remote control sensor (p. 20)<br />
0 Front panel display (p. 21)<br />
• The elapsed time is displayed during<br />
playback.<br />
• When skipping is performed,<br />
the chapter (or track) number is<br />
displayed.<br />
Q <strong>BD</strong>/DVD/CD mode indicator (p. 21)<br />
W Door flap<br />
E Disc tray (p. 25)<br />
1 AC IN terminal (p. 20)<br />
2 ETHERNET terminal (p. 18)<br />
3 W-LAN*/USB1 terminal (p. 19, 27)<br />
4 HDMI OUT terminal (p. 16)<br />
5 DIGITAL AUDIO OUT OPTICAL terminal (p. 17)<br />
* The supplied wireless LAN adapter can be connected to this player.<br />
NOTE<br />
• When you insert or remove a USB memory device, be sure to turn the main power off.<br />
Also, be sure to set “Quick Start” to “No” (See page 43) before inserting or removing<br />
the device. If you insert or remove the device with the player or Quick Start on, the data<br />
may become damaged.<br />
14
Major Components<br />
Remote Control Unit<br />
1<br />
2<br />
3<br />
4<br />
5<br />
6<br />
7<br />
8<br />
9<br />
10<br />
11<br />
12<br />
13<br />
16<br />
17<br />
18<br />
19<br />
20<br />
21<br />
22<br />
23<br />
14 24<br />
15 25<br />
1 B (Power) (p. 21)<br />
2 m OPEN/CLOSE (p. 25)<br />
3 AUDIO (p. 37), SUBTITLE (p. 37)<br />
4 Number buttons (p. 39)<br />
5 REPEAT (p. 36)<br />
6 T SKIP/k (pp. 29, 35)<br />
7 U SKIP/l (pp. 29, 35)<br />
8 F PAUSE (pp. 31, 32, 33, 35)<br />
9 d PLAY (p. 25)<br />
0 TOP MENU/TITLE LIST (pp. 26, 29)<br />
Q Cursor buttons (a/b/c/d), ENTER (pp. 22, 40)<br />
W EXIT (pp. 31, 34, 40)<br />
E A (Red), B (Green), C (Yellow), D (Blue)<br />
(pp. 29, 30, 33, 49)<br />
R (Lock) (See below.)<br />
T 3D (p. 23)<br />
Y DISPLAY (pp. 26, 36)<br />
U TV control buttons (p. 22)<br />
I FUNCTION (pp. 37, 38)<br />
O V FWD (p. 35)<br />
PS REV (p. 35)<br />
A H STOP (p. 25)<br />
SPOP-UP MENU (p. 27)<br />
Dn RETURN (pp. 31, 33, 34, 36)<br />
FPinP (p. 28)<br />
GHOME (pp. 22, 31–34, 40)<br />
Keylock function<br />
You can set the keylock to prevent accidental operations.<br />
This function allows TVs compatible with AQUOS LINK to also perform a Key Lock on the player.<br />
Press and hold (Lock) for more than 2 seconds.<br />
• Each time you perform this operation, the function is activated or deactivated.<br />
• If you try to operate the Player while the keylock function is set, “Hold” blinks on the front display panel<br />
to indicate that the keylock function is set.<br />
Introduction<br />
15
Connection<br />
Connecting to a TV/projector<br />
You can enjoy high quality digital picture and sound using an HDMI cable. (Only<br />
TVs/projectors with an HDMI terminal can be connected to this player.)<br />
When you use AQUOS LINK, make sure to use a certified HDMI cable.<br />
1 Be sure to turn off this Player and the TV/projector before making any<br />
connections.<br />
2 Firmly connect an HDMI cable (commercially available) to the HDMI OUT<br />
terminal on the player (1) and the HDMI IN terminal of the TV/projector (2).<br />
NOTE<br />
• In this player, “HDMI Video Out” is set to “Auto” as a default (See page 42). (Normally<br />
set to “Auto”.) If you don’t get a stable image with “HDMI Video Out” set to “Auto”,<br />
select the output resolution which corresponds to the connected equipment.<br />
• To enjoy 3D images, connection to a 3D compatible TV is needed.<br />
• For connection to a TV/projector, refer to the TV/projector’s operation manual.<br />
E E After connecting<br />
• If desired, connect audio equipment. (Page 17)<br />
• If necessary, perform the Audio Video Settings. (Pages 42–43)<br />
• Refer to AQUOS LINK function. (Pages 23 and 43)<br />
• Prepare the desired disc or content and start playback. (Pages 25–34, 55)<br />
HDMI cable<br />
(commercially available)<br />
Projector<br />
TV<br />
16
Connecting to an amplifier/AV receiver<br />
You can connect this player to an amplifier/AV receiver to enjoy digital surround<br />
sound. With this player, the audio connection can be made using either one of<br />
the following methods depending on the capabilities of the amplifier/AV receiver<br />
you connect.<br />
• HDMI connection<br />
• Digital audio connection<br />
NOTE<br />
• Be sure to turn off this Player and the equipment before making any connections.<br />
• For details on output of audio formats, see page 54.<br />
HDMI connection<br />
NOTE<br />
• When using an HDMI output, 7.1 ch Digital Output is available.<br />
• Audio transmitted in DTS-HD High Resolution Audio and DTS-HD Master Audio<br />
formats is output from the HDMI terminal as Bitstream. Connect an amplifier with a<br />
built-in decoder to enjoy the fine sound quality.<br />
• When a connection to a 3D TV is made via an amplifier/AV receiver, it is necessary to<br />
connect to a 3D compatible amplifier/AV receiver.<br />
If the amplifier/AV receiver is not 3D compatible, connect the HDMI cable to the TV<br />
directly while connecting the player and the amplifier/AV receiver using an optical<br />
digital cable.<br />
Digital audio connection<br />
You can connect an amplifier/AV receiver using an optical digital audio cable<br />
(commercially available).<br />
Connection<br />
HDMI cable*<br />
Optical digital cable*<br />
TV HDMI cable* Amplifier/<br />
AV receiver<br />
* Commercially available<br />
Amplifier/AV receiver<br />
* Commercially available<br />
NOTE<br />
• When using OPTICAL DIGITAL AUDIO OUT, 5.1ch Digital Output is available. (7.1ch<br />
Digital Output is not available.)<br />
E E After connecting<br />
• If necessary, perform the Audio Video Settings. (Pages 42–43)<br />
• Prepare the desired disc or content and start playback. (Pages 25–34, 55)<br />
17
Broadband Internet Connection<br />
By connecting this player to the Internet, you can enjoy a variety of content<br />
on your TV using <strong>BD</strong>-LIVE functions, video on-demand services (e-Contents),<br />
home networks and also perform software updates. In this player, the Internet<br />
connection can be made using either one of the following methods.<br />
• Wired connection (LAN cable)<br />
• Wireless connection (wireless LAN) (See page 19.)<br />
NOTE<br />
• Be sure to turn off this Player and the equipment before making any connections.<br />
• When an Internet connection is made, wired and wireless connections cannot be used<br />
at the same time. Use only one of the connection types (See page 46).<br />
CAUTION<br />
• When using a broadband Internet connection, a contract with an Internet service<br />
provider is required. For more details, contact your nearest Internet service provider.<br />
• Refer to the operation manual of the equipment you have as the connected equipment<br />
and connection method may differ depending on your Internet environment.<br />
Wired connection (LAN cable)<br />
Connect a LAN cable (commercially available) to the ETHERNET terminal of this<br />
player (1) and the LAN port of the broadband router (2).<br />
LAN cable*<br />
PC<br />
LAN<br />
Internet Modem Broadband<br />
router<br />
* Commercially available<br />
NOTE<br />
• Use a LAN cable/router supporting 10BASE-T/100BASE-TX.<br />
• SHARP cannot guarantee that all brands’ broadband routers will operate with this<br />
player.<br />
18<br />
E E After connecting<br />
• Perform the communication settings. (Pages 46–49)<br />
• When enjoying <strong>BD</strong>-LIVE functions, see pages 28 and 44.<br />
• When enjoying video on-demand services (e-Contents), see page 55.<br />
• To play back files via the Home Network, see page 34.<br />
• To update the software via the Internet, perform Software Update Settings.<br />
(Pages 51–52)
Broadband Internet Connection<br />
Wireless connection (wireless LAN)<br />
Insert the wireless LAN adapter (supplied) into the W-LAN/USB1 terminal on the<br />
rear of the player.<br />
NOTE<br />
• When you insert or remove a wireless LAN adapter, be sure to turn the main power off<br />
and make sure that “Quick Start” is set to “No” (See page 43).<br />
• You must use a wireless router/access point that supports IEEE802.11 b/g/n. (n is<br />
recommended for stable operation of the wireless network.)<br />
• Wireless LAN, in its nature, may cause interference, depending on the usage conditions<br />
(access point performance, distance, obstacles, interference by other radio devices,<br />
etc.).<br />
• Set the wireless router/access point to Infrastructure mode. Ad-hoc mode is not<br />
supported.<br />
• SHARP cannot guarantee that wireless LAN adapters other than the supplied adapter<br />
will operate with this player.<br />
• SHARP cannot guarantee that all brands’ wireless routers will operate with this player.<br />
Wireless LAN adapter<br />
(Supplied)<br />
E E After connecting<br />
• Perform the communication settings. (Pages 46–49)<br />
• When enjoying <strong>BD</strong>-LIVE functions, see pages 28 and 44.<br />
• When enjoying video on-demand services (e-Contents), see page 55.<br />
• To play back files via the Home Network, see page 34.<br />
• To update the software via the Internet, perform Software Update Settings.<br />
(Pages 51–52)<br />
Connection<br />
PC<br />
Wireless<br />
router<br />
Modem<br />
Internet<br />
When a wireless connection is made, it is necessary to enter the MAC address<br />
shown on the wireless LAN adapter for the wireless router. We recommend writing<br />
down the MAC address in this operation manual. (See page 48.)<br />
19
Playback<br />
Before Starting Playback<br />
Loading the Batteries in the Remote<br />
Control<br />
1 Hold in the tab on the battery cover and pull the<br />
cover towards the direction of the arrow.<br />
NOTE<br />
• Do not subject the remote control unit to shock, water<br />
or excessive humidity.<br />
• The remote control unit may not function if the Player’s<br />
remote sensor is in direct sunlight or any other strong<br />
light.<br />
• Incorrect use of batteries may cause them to leak or<br />
burst. Read the battery warnings and use the batteries<br />
properly.<br />
• Do not mix old and new batteries, or mix different<br />
brands.<br />
• Remove the batteries if you will not use the remote<br />
control unit for an extended period of time.<br />
Connecting the Power Cord<br />
Plug the supplied AC cord into the AC IN terminal on<br />
the rear of the Player (1). Then plug into AC outlet<br />
(2).<br />
2 Load the two “AA” size batteries (R-06 size,<br />
UM/SUM-3). Place batteries with their terminals<br />
corresponding to the m and n indications in<br />
battery compartment.<br />
3 Insert the smaller tab of the battery cover into<br />
the opening 1, and press down on the cover<br />
until it clicks in place 2.<br />
Approximate operating range of<br />
remote control<br />
Remote control sensor<br />
15º<br />
30º 30º<br />
15º<br />
*Approx. 7m<br />
NOTE<br />
• Place the Player close to the AC outlet, and keep the<br />
power plug within reach.<br />
• TO PREVENT RISK OF ELECTRIC SHOCK, DO NOT<br />
TOUCH THE UN-INSULATED PARTS OF ANY CABLES<br />
WHILE THE AC CORD IS CONNECTED.<br />
• The B (On/Standby) indicator blinks while the Player is<br />
preparing for starting up. You cannot turn the Player on<br />
until the B (On/Standby) indicator stops blinking.<br />
• If you are not going to use this Player for a long period<br />
of time, be sure to remove the AC cord from the AC<br />
outlet.<br />
WARNING<br />
• Do not use or store batteries in direct sunlight or other<br />
excessively hot place, such as inside a car or near a<br />
heater.<br />
This can cause batteries to leak, overheat, explode or<br />
catch fire.<br />
It can also reduce the life or performance of batteries.<br />
Remote control unit<br />
20
Before Starting Playback<br />
Turning the Power On<br />
Turning the power on<br />
Indicators on the Player<br />
Press B on the remote control or on the Player to<br />
turn on the power of the Player.<br />
B (On/Standby) indicator<br />
Green on<br />
Power on<br />
Red on<br />
Standby<br />
2<br />
1<br />
3<br />
4<br />
NOTE<br />
• When you turn on this player for the first time after<br />
purchase or when you turn on this player after you<br />
perform “System Reset” (see page 45), the language<br />
setting screen will be displayed, so please perform the<br />
language setting (see step 3 of page 22).<br />
<strong>BD</strong>/DVD/CD mode indicator<br />
Blue on<br />
Blue blinks<br />
Playing back<br />
About the Home screen<br />
Loading a disc/updating<br />
Entering standby<br />
When turning on the player, the Home screen<br />
appears.<br />
11B (Power) button<br />
22B (On/Standby) indicator<br />
33Front panel display<br />
44<strong>BD</strong>/DVD/CD mode indicator<br />
Press B on the remote control or on the Player to<br />
enter standby.<br />
• If you press B again immediately after entering<br />
standby, the Player may not turn on. If this happens,<br />
wait for 10 seconds or more and then turn on the power<br />
again.<br />
Home screen<br />
1<br />
Video<br />
Music<br />
Picture<br />
e-Contents<br />
Settings<br />
<strong>BD</strong>-Video<br />
USB<br />
Home Network<br />
Select ENTER Enter Return EXIT Exit<br />
Playback<br />
NOTE<br />
• When the B (On/Standby) indicator is blinking (may<br />
take some time), the Player cannot be turned on.<br />
2 3 4<br />
5<br />
11Main menu<br />
22Icon for disc inserted<br />
33Icon for USB memory device connected<br />
44Icon for LAN connection<br />
55Button Guide<br />
21
Before Starting Playback<br />
Language Setting<br />
Changing the on-screen display<br />
language<br />
1 Press a/b to select “Settings”, then press d or<br />
ENTER.<br />
2 Press a/b to select “On Screen Language”,<br />
then press d or ENTER.<br />
HOME<br />
Video<br />
Music<br />
Picture<br />
e-Contents<br />
Settings<br />
Audio Video Settings<br />
Smart Settings<br />
AQUOS LINK<br />
Playback Setting<br />
On Screen Language<br />
Communication Setup<br />
Version<br />
USB Memory Management<br />
Software Update Settings<br />
System<br />
Select ENTER Enter Return EXIT Exit<br />
3 Press a/b to select the language you want to<br />
display on the screen, then press ENTER.<br />
English Nederlands Česky<br />
Deutsch Svenska Magyar<br />
Français Dansk Slovensky<br />
Italiano Norsk Slovenščina<br />
Español<br />
Português<br />
Suomi<br />
Polski<br />
NOTE<br />
• To select the DVD disc language, such as subtitle<br />
language, etc., see page 26.<br />
Operating a SHARP TV Using the<br />
Remote Control<br />
The Universal Remote Control may operate the<br />
basic functions of the SHARP TV.<br />
TV function control<br />
• TV Power: B<br />
• TV-AV Selector: b<br />
• TV Volume up/down: i e/f<br />
• TV Channel up/down: P r/s<br />
Turning Off the LCD Backlight and<br />
Indications<br />
If you feel that the indicators on the player’s front<br />
display are too bright when watching movies, you<br />
can turn them off except for the B (On/Standby)<br />
indicator.<br />
1 Press a/b to select “Settings”, then press d or<br />
ENTER.<br />
2 Press a/b to select “Smart Settings”, then<br />
press d or ENTER.<br />
3 Press a/b to select “Front Display/LED”, then<br />
press d or ENTER.<br />
4 Press a/b to select “On” or “Off”, then press<br />
ENTER.<br />
5 Press HOME or EXIT to exit.<br />
22
Before Starting Playback<br />
Using AQUOS LINK<br />
Controlling the Blu-ray disc player<br />
using AQUOS LINK<br />
What is AQUOS LINK?<br />
Using the HDMI CEC (Consumer Electronics<br />
Control), with AQUOS LINK you can interactively<br />
operate this player with your SHARP AQUOS TV.<br />
What you can do with AQUOS LINK<br />
When you connect this player to the LCD TV<br />
compatible with AQUOS LINK using an HDMI cable,<br />
you can perform the functions listed below. (See<br />
page 16 for connecting to the HDMI terminal).<br />
EEAutomatic input select function<br />
When you start playback of this player, the input<br />
selector of the LCD TV will automatically switch to<br />
the LCD TV input terminal connected to the player<br />
and the playback image will appear on the screen,<br />
even if you are watching a TV programme.<br />
EEAutomatic power off function<br />
If you turn off the LCD TV when this player is in stop<br />
mode, the power of this player will be turned off<br />
automatically. (However, when playing back a disc<br />
or other content using this player, the power does<br />
not turn off.)<br />
EEAutomatic power on function<br />
When you switch to the LCD TV input terminal<br />
connected to this player, the power of this player will<br />
be turned on automatically.<br />
EEAQUOS PURE MODE<br />
When you connect this player to an AQUOS LCD<br />
TV compatible with AQUOS LINK and set “AQUOS<br />
LINK” to “Yes” (page 43), images automatically<br />
adjusted to the most suitable image quality for the<br />
AQUOS TV are output from the HDMI OUT terminal<br />
of this player.<br />
NOTE<br />
• In order to make AQUOS LINK available, set “AQUOS<br />
LINK” to “Yes” (See page 43).<br />
Refer to the <strong>Operation</strong> <strong>Manual</strong> of the TV for details<br />
regarding setup.<br />
Using 3D<br />
This sets output of 3D images.<br />
To view 3D images, playback of 3D content (3D <strong>BD</strong><br />
video) is necessary with a 3D compatible TV and 3D<br />
glasses in addition to this player.<br />
Press 3D to change to the 3D mode.<br />
• Each time the button is pressed, the mode switches<br />
between “Auto(3D)” and “2D”.<br />
• The status of the selected mode will be displayed on the<br />
TV screen.<br />
Auto: Video signals are output as 3D when 3D content (3D<br />
<strong>BD</strong> video) is played or as 2D when 2D content is played.<br />
2D: Even if 3D content (3D <strong>BD</strong> video) is played, video<br />
signals are output as 2D at all times.<br />
• This setting (Auto(3D)/2D) can also be performed using<br />
the menu screen (See page 45).<br />
NOTE<br />
• The 3D mode can be switched only when playback is<br />
stopped.<br />
• Depending on the connected TV, the images during<br />
playback may switch to 2D images due to changes in<br />
the resolution, etc. Make sure the 3D image setting is<br />
performed on the TV.<br />
• The 3D images may not be output as set in “HDMI<br />
Video Out”.<br />
• When performing Fast Forward/Reverse, images are<br />
shown in 2D.<br />
CAUTION<br />
• When viewing 3D images, viewing for a long period<br />
of time or lying on your back may cause eye strain<br />
and discomfort. In addition, 3D images may affect the<br />
eyesight of young children/infants, so keep them from<br />
viewing the images.<br />
Playback<br />
23
Before Starting Playback<br />
Control Panel<br />
Control Panel<br />
Major functions of each button icon<br />
This function allows you to operate this player using<br />
the TV remote control by displaying the control<br />
panel on the TV screen.<br />
• To operate this function, connect this player to a TV<br />
compatible with HDMI CEC (Consumer Electronics<br />
Control) using an HDMI cable (See page 16). Make<br />
sure that “Control Panel” is set to “Yes” (See page 43).<br />
When the settings are completed, perform the following<br />
operations.<br />
POP-UP<br />
MENU<br />
TOP MENU<br />
TITLE LIST<br />
FUNC.<br />
POP-UP<br />
MENU<br />
TOP MENU<br />
TITLE LIST<br />
FUNC.<br />
• Display the pop-up menu screen for <strong>BD</strong><br />
video and the menu screen for DVD video.<br />
• Display the top menu screen for <strong>BD</strong> video<br />
and DVD video.<br />
• Display the Function Control screen for <strong>BD</strong><br />
video, DVD video, etc.<br />
NOTE<br />
• The control panel may not be displayed depending on<br />
the TV. Also, it may not be available depending on the<br />
content.<br />
• When operating using the remote control of the player,<br />
the control panel does not appear.<br />
• When playing video on demand streaming content<br />
available with this player, the control panel cannot be<br />
displayed.<br />
Select<br />
Enter<br />
PANEL<br />
OFF<br />
• Fast reverse (search).<br />
• Play.<br />
• Fast forward (search).<br />
1 Switch the TV input to the input source to which<br />
this player is connected (HDMI input).<br />
2 Press the PLAY button on the TV remote control.<br />
• The control panel appears on the TV screen.<br />
• When there is no operation for approximately<br />
10 seconds, the control panel disappears<br />
automatically.<br />
To display the control panel, press the PLAY button<br />
on the TV remote control.<br />
3 Press a/b/c/d on the TV remote control<br />
to select the desired button icon, then press<br />
ENTER.<br />
• The function of the selected button icon is available.<br />
• Skip to the beginning of a chapter.<br />
• Pause.<br />
• Skip to the next chapter.<br />
• Jump backward (approx. 10 seconds).<br />
(This function is used when you want to rewatch<br />
a scene that has just been shown.)<br />
• Stop.<br />
• Jump ahead (approx. 30 seconds).<br />
PANEL<br />
OFF<br />
• Turn off the control panel.<br />
24
Video/Picture/Music Playback<br />
Loading a Disc<br />
B (Power) OPEN/CLOSE<br />
1 Press B to turn on the power.<br />
2 Press OPEN/CLOSE to open the disc tray.<br />
3 Load a disc on the disc tray.<br />
• Insert the disc with the label face up.<br />
• In case of disc recorded on both sides, face down<br />
the side to play back.<br />
4 Press OPEN/CLOSE to close the disc tray.<br />
<strong>BD</strong>/DVD Video Playback<br />
<strong>BD</strong> VIDEO <strong>BD</strong>-RE <strong>BD</strong>-R<br />
DVD VIDEO DVD-R DVD-RW<br />
This section explains playback of commercially<br />
available <strong>BD</strong> Video and DVD Video discs (like<br />
movies) and recorded DVD-RW/R discs.<br />
• This player supports DVD upscaling during DVD<br />
playback.<br />
• For a description of other playback functions, refer to<br />
“Playback Functions” on pages 35–37.<br />
1 Load a disc.<br />
• Playback may begin automatically, depending on<br />
the disc.<br />
• Playback begins from the first title.<br />
• The menu may be displayed first, depending on the<br />
disc. Perform playback operation by following the<br />
directions on the screen.<br />
• When loading a disc containing 3D content (3D <strong>BD</strong><br />
video) with “Yes” selected in the “3D Notice” setting<br />
(page 45), playback will be stopped and the 3D<br />
notice will be displayed on the TV screen. In such<br />
cases, press ENTER for confirmation, and then<br />
playback will start.<br />
2 Press a if playback does not begin<br />
automatically or playback is stopped.<br />
NOTE<br />
• The disc load time may vary depending on the disc.<br />
Regarding playback of <strong>BD</strong> video discs<br />
• Some of the newly released <strong>BD</strong> video discs cannot be<br />
played back unless you update the player software<br />
to the latest version. Therefore, it may be required to<br />
update the software of the player.<br />
• Refer to pages 51–54 for more information regarding<br />
software updates for the player.<br />
To stop playback<br />
Press c.<br />
Resume playback function<br />
• If you press a next, playback will resume from<br />
the point where the Player was previously stopped. To<br />
playback from the beginning, cancel resume mode by<br />
pressing c, then press a. (This may not<br />
work depending on the type of disc. In this case, open<br />
the disc tray or enter standby.)<br />
NOTE<br />
• Resume playback may not function depending on the<br />
disc.<br />
• The resume playback function for discs will be cancelled<br />
if video on demand streaming content is viewed<br />
after disc playback. Disc playback will start from the<br />
beginning after viewing streaming content.<br />
Playback<br />
25
Video/Picture/Music Playback<br />
Displaying the disc information<br />
Press DISPLAY during playback.<br />
• Each time you press DISPLAY, the display switches<br />
as follows.<br />
1<br />
2<br />
3<br />
4<br />
4<br />
<strong>BD</strong>-VIDEO<br />
No Display<br />
1/1<br />
1/101<br />
00 :00 :12<br />
/ 03 :12 :28<br />
00 :00 :12<br />
/ 03 :12 :28<br />
Disc Information<br />
screen A<br />
Disc Information<br />
screen B<br />
11Type of disc<br />
22Title number being played / Total number of Titles<br />
33Chapter number being played / Total number of<br />
Chapters<br />
44Elapsed playback time / Total playback time for<br />
the Title<br />
NOTE<br />
• Disc Information Screen A disappears after about 1<br />
minute elapses without performing any operations.<br />
• For some commercially-released <strong>BD</strong> VIDEO discs, the<br />
total playback time display for the Chapter/Title may not<br />
appear.<br />
<strong>BD</strong>/DVD Menus<br />
• This section explains how to play back a <strong>BD</strong>/DVD<br />
video disc with a top menu, disc menu or pop-up<br />
menu.<br />
• The titles listed in the top menu and a disc guide<br />
(for options like subtitles and audio languages) are<br />
given in the disc menu.<br />
Start playback by selecting a title<br />
from the top menu<br />
<strong>BD</strong> VIDEO<br />
DVD VIDEO<br />
1 Press TOP MENU/TITLE LIST.<br />
• The top menu screen is displayed if present on the<br />
<strong>BD</strong>/DVD video disc.<br />
Example<br />
1 Jazz<br />
T O P M E N U<br />
2 Latin<br />
3 Classic 4 Rock<br />
2 Press a/b/c/d to select the title, then press<br />
ENTER.<br />
• The selected title is played back.<br />
NOTE<br />
• The procedure explained on this page is the basic<br />
operation procedure. Procedures vary depending on<br />
the <strong>BD</strong>/DVD video disc, so you may need to follow the<br />
instructions in the <strong>BD</strong>/DVD video disc manual or the<br />
instructions displayed on the screen.<br />
Top menu<br />
• With some <strong>BD</strong>/DVD discs, the top menu may be<br />
referred to as the “Title Menu”. Use TOP MENU/TITLE<br />
LIST on the remote control when the instructions refer<br />
to “Title Menu”.<br />
• If no top menu is available, the TOP MENU/TITLE LIST<br />
button will have no effect.<br />
Using the disc menu<br />
DVD VIDEO<br />
Example: Select “SUBTITLE LANGUAGE”.<br />
1 Press TOP MENU/TITLE LIST.<br />
• The disc menu screen is displayed if present on the<br />
DVD video disc.<br />
2 Press a/b to select “SUBTITLE LANGUAGE”,<br />
then press ENTER.<br />
• The screen for selecting the subtitle language is<br />
displayed.<br />
Example<br />
MENU<br />
1 AUDIO LANGUAGE<br />
2 SUBTITLE LANGUAGE<br />
3 AUDIO<br />
3 Press a/b to select the subtitle language, then<br />
press ENTER.<br />
4 Press TOP MENU/TITLE LIST to exit.<br />
26
Video/Picture/Music Playback<br />
Using the pop-up menu<br />
<strong>BD</strong> VIDEO<br />
1 Press POP-UP MENU during playback.<br />
• The pop up menu screen is displayed.<br />
• The menu contents displayed vary depending on<br />
the disc. For details on how to see and operate the<br />
pop-up menu, refer to the manual for the disc.<br />
Example<br />
Pop-up menu<br />
Previous page<br />
Next page<br />
2 Press a/b/c/d to select the desired item,<br />
then press ENTER.<br />
3 Press POP-UP MENU to exit.<br />
• The pop-up menu will automatically disappear for<br />
some discs.<br />
Enjoying BONUSVIEW or <strong>BD</strong>-LIVE<br />
<strong>BD</strong> VIDEO<br />
This Player is compatible with additional functions of<br />
<strong>BD</strong>-Video, BONUSVIEW (<strong>BD</strong>-ROM Profile 1 Version<br />
1.1) and <strong>BD</strong>-LIVE.<br />
For <strong>BD</strong>-Video discs compatible with BONUSVIEW,<br />
the functions of Picture in Picture and Virtual<br />
Package are available. For <strong>BD</strong>-LIVE compatible<br />
discs, you can enjoy a variety of functions via the<br />
Internet in addition to the BONUSVIEW functions.<br />
Virtual Package/<strong>BD</strong>-LIVE data is saved in Local<br />
Storage (USB memory device connected to this<br />
Player). To enjoy these functions, connect a USB<br />
memory device (2<strong>GB</strong> or greater) supporting USB<br />
2.0 High Speed (480Mbit/s) to the USB1 or USB2<br />
terminal on this player.<br />
When the wireless LAN adapter is not inserted into the<br />
USB1 terminal on the rear of the player, it is recommended<br />
that the USB memory device be connected to the USB1<br />
terminal. (When you insert or remove a USB memory<br />
device, be sure to turn the main power off and make sure<br />
that “Quick Start” is set to “No” (See page 43).)<br />
NOTE<br />
• A USB memory device can be used with either the<br />
USB1 or USB2 terminal. When two USB memory<br />
devices are connected to both terminals at the same<br />
time, in certain situations the USB1 terminal may give<br />
priority to Local Storage and the USB2 terminal cannot<br />
be used for Local Storage.<br />
Rear<br />
USB1 terminal<br />
USB memory device<br />
Front<br />
USB memory<br />
device<br />
USB2 terminal<br />
• If there is insufficient storage space, the data will not<br />
be copied/downloaded. Delete unneeded data or use a<br />
new USB memory device.<br />
• If a USB memory device containing other data<br />
(previously recorded) is used, the video and audio may<br />
not play back properly.<br />
• If the USB memory device is disconnected from this<br />
player during playback of Virtual Package/<strong>BD</strong>-LIVE data,<br />
playback of the disc will stop.<br />
• Some time may be required for the data to load (read/<br />
write).<br />
• Refer to “USB Memory Management” on page 50 for<br />
erasing the Virtual Package data and the <strong>BD</strong>-LIVE data<br />
in the USB memory device.<br />
NOTE<br />
• SHARP cannot guarantee that all brands’ USB memory<br />
devices will operate with this player.<br />
• Only USB memory devices formatted with FAT 32/16 are<br />
compatible.<br />
When formatting a USB memory device using a PC,<br />
perform the following settings.<br />
−−Format File System: FAT32<br />
−−Allocation Unit Size: Default Allocation Size<br />
• Do not use a USB extension cable when connecting a<br />
USB memory device to the USB terminal of the player.<br />
−−Using a USB extension cable may prevent the player<br />
from performing correctly.<br />
Playback<br />
27
Video/Picture/Music Playback<br />
Use of Picture in Picture function<br />
(secondary audio/video playback)<br />
<strong>BD</strong>-Video that includes secondary audio and<br />
video compatible with Picture in Picture can be<br />
played back with secondary audio and video<br />
simultaneously as a small video in the corner.<br />
1 Press PinP during playback to show the<br />
2-picture screen.<br />
Virtual Package<br />
For <strong>BD</strong>-Video discs compatible with Virtual<br />
Package, data is copied from the discs or Internet to<br />
local storage. It is automatically copied to the local<br />
storage prior to playback. You can enjoy a variety<br />
of additional functions including secondary video,<br />
secondary audio, subtitles, movie trailers, etc.<br />
• The playback methods vary depending on the disc. For<br />
details, refer to the disc manual.<br />
<strong>BD</strong>-LIVE<br />
In this Player, a variety of contents with interactive<br />
functions are available through <strong>BD</strong>-LIVE compatible<br />
Blu-ray discs by connecting to the Internet. You<br />
can enjoy the download of bonus features such as<br />
latest movie trailers to the USB memory device,<br />
communication compatible <strong>BD</strong>-J interactive games,<br />
etc.<br />
• The available functions differ depending on the disc.<br />
NOTE<br />
• Regarding playback method of <strong>BD</strong>-LIVE contents,<br />
etc., perform the operations in accordance with the<br />
instructions in the <strong>BD</strong> disc manual.<br />
• To enjoy <strong>BD</strong>-LIVE functions, perform the broadband<br />
Internet connection (pages 18–19) and communication<br />
settings (pages 46–49).<br />
• Before using this function, please read “Network Service<br />
Disclaimer” (page 68).<br />
• Refer to page 44 regarding the setup to restrict access<br />
to <strong>BD</strong>-LIVE contents.<br />
• If the <strong>BD</strong>-LIVE screen does not appear for a while after<br />
you select the <strong>BD</strong>-LIVE function in the <strong>BD</strong> disc menu,<br />
the USB memory device may not have enough free<br />
space. In such cases, eject the disc from the player, and<br />
then erase the data in the USB memory device in the<br />
“USB Memory Management” menu on page 50.<br />
Primary audio/<br />
video<br />
Secondary audio/<br />
video<br />
2 To remove the secondary video, press PinP<br />
again.<br />
NOTE<br />
• To listen to secondary audio, make sure that “Secondary<br />
Audio” is set to “On”. (See page 42.)<br />
• The secondary audio and video for Picture In Picture<br />
may automatically play back and be removed<br />
depending on the content. Also, playable areas may be<br />
restricted.<br />
28
Video/Picture/Music Playback<br />
DVD-R/-RW (VR format) / <strong>BD</strong>-RE/-R<br />
(<strong>BD</strong>AV format) Playback<br />
DVD-R DVD-RW <strong>BD</strong>-RE <strong>BD</strong>-R<br />
You can play back a recorded disc (DVD: VR format<br />
finalised disc only / <strong>BD</strong>: <strong>BD</strong>AV format disc only).<br />
• For a description of other playback functions, refer to<br />
”Playback Functions” on pages 35–37.<br />
Playback by selecting a title<br />
1 Load a recorded disc.<br />
• The Title List screen is displayed.<br />
Example: Thumbnail screen<br />
Program 1<br />
21/5 Fri 9:30 AM 110 Min.<br />
Program<br />
1<br />
Program<br />
2<br />
Program<br />
3<br />
About Title List<br />
• The Title List can be displayed in two types,<br />
Thumbnail and Title Name.<br />
• Each time you press A (Red), the screen changes<br />
between Thumbnail and Title Name.<br />
Thumbnail<br />
Program 1<br />
21/5 Fri 9:30 AM 110 Min.<br />
Program<br />
1<br />
Program<br />
2<br />
Program<br />
3<br />
1<br />
Program<br />
4<br />
Program<br />
5<br />
Program<br />
6<br />
Program<br />
4<br />
Program<br />
5<br />
Program<br />
6<br />
NOTE<br />
• “Finalise” refers to a recorder processing a recorded<br />
disc so that it will play in other DVD players/recorders<br />
as well as this player. Only finalised DVD discs will play<br />
back in this player. (This player does not have a function<br />
to finalise discs.)<br />
• Some discs cannot be played back depending on the<br />
audio format.<br />
• <strong>BD</strong>-RE/-R discs recorded from a <strong>BD</strong> recorder comply<br />
with AACS copyright protection technology. As this<br />
player is not intended to be compliant with AACS, such<br />
discs cannot be played back.<br />
(AACS: Advanced Access Content System)<br />
Select Enter Return EXIT Exit<br />
A Title Name B By Chapter C Playlist D Functions<br />
• If the Title List screen is not displayed, press TOP<br />
MENU/TITLE LIST.<br />
• When loading a <strong>BD</strong> disc with usage restrictions<br />
placed by a <strong>BD</strong> recorder, the password input screen<br />
appears. Then, input your password.<br />
If you input a wrong password three times, the disc<br />
tray will open. Close the disc tray, and then input a<br />
correct password.<br />
2 Press a/b/c/d to select the desired title, then<br />
press ENTER to start playback.<br />
• If you want to select additional titles, switch pages<br />
by pressing f or g.<br />
• You can playback by pressing a instead of<br />
pressing ENTER.<br />
3 Press c to stop playback.<br />
NOTE<br />
• The Title List screen also can be displayed by pressing<br />
TOP MENU/TITLE LIST when playback is stopped.<br />
Select Enter Return EXIT Exit<br />
A Title Name B By Chapter C Playlist D Functions<br />
Title Name<br />
Program 1<br />
21/5 Fri 9:30 AM 110 Min.<br />
1 Program 1 21/5 Fri 110 Min.<br />
Program 2 Program 2 15/6 Fri 110 Min.<br />
1<br />
3 Program 3 3/7 Mon 56 Min.<br />
4 Program 4 18/9 Thu 40 Min.<br />
5 Program 5 20/9 Sat 20 Min.<br />
6 Program 6 25/9 Thu 60 Min.<br />
1/All 8 Titles<br />
Select Enter Return EXIT Exit<br />
A Thumbnail B Sorting C Playlist D Functions<br />
11Information of selected title<br />
22Title Name<br />
Recording Date<br />
Recording Duration<br />
33Button Guide<br />
3<br />
1<br />
2<br />
3<br />
Playback<br />
29
Video/Picture/Music Playback<br />
Playback by selecting a chapter<br />
1 Press B (Green) while the Thumbnail screen is<br />
displayed.<br />
• The chapter screen is displayed.<br />
CHAPTER<br />
1<br />
CHAPTER<br />
4<br />
CHAPTER<br />
2<br />
CHAPTER<br />
5<br />
CHAPTER<br />
3<br />
CHAPTER<br />
6<br />
• If you want to select additional chapters,<br />
switch pages by pressing f or<br />
g.<br />
• To return to the Thumbnail screen, press B (Green).<br />
2 Press a/b/c/d to select the desired chapter,<br />
then press ENTER to start playback.<br />
• You can playback by pressing a instead of<br />
pressing ENTER.<br />
3 Press c to stop playback.<br />
Sorting the titles<br />
Each time you press B (Green) while the Title Name<br />
screen is displayed, the Title Name display changes<br />
between displaying the newest title first and the<br />
oldest title first.<br />
Playback by selecting a Playlist<br />
1 Press C (Yellow) while the Title List screen is<br />
displayed.<br />
• The Playlist screen is displayed.<br />
Example: Thumbnail screen<br />
Program 1<br />
21/5 Fri 9:30 AM 110 Min.<br />
Program<br />
1<br />
Program<br />
4<br />
Program<br />
2<br />
Program<br />
3<br />
Select Enter Return Exit<br />
A Title Name B By Chapter C Original D Functions<br />
2 Press a/b/c/d to select the desired title, then<br />
press ENTER to start playback.<br />
3 Press c to stop playback.<br />
Playback from the beginning or<br />
resume playback<br />
When you play back the title from the Title List after<br />
you stopped playback, you can select playback<br />
from the beginning or from the point where it was<br />
last stopped.<br />
1 Press D (Blue) when the desired title is selected<br />
while the Title List screen is displayed.<br />
2 Press a/b to select the type of Playback, then<br />
press ENTER to start playback.<br />
• The type of Playback may be selected from “From<br />
Beginning” or “From Continued”.<br />
3 Press c to stop playback.<br />
30
Video/Picture/Music Playback<br />
Audio CD Playback<br />
AUDIO CD<br />
This Player can play back audio CDs.<br />
• For a description of other playback functions, refer to<br />
“Playback Functions” on pages 35–36.<br />
Playback from the beginning<br />
1 Load an audio CD.<br />
• The CD screen is displayed.<br />
(The CD screen is displayed only when a compact<br />
disc recorded in the CD-DA format is inserted.)<br />
• Playback may begin automatically, depending on<br />
the disc.<br />
2 Press a if playback does not begin<br />
automatically or playback is stopped.<br />
3 To pause the playback at any time, press<br />
b.<br />
• Press b or a to return to playback.<br />
4 Press c to stop playback.<br />
5 To return to the HOME screen, press c<br />
again, and then press HOME or EXIT.<br />
Playback by selecting a track<br />
1 Press a/b to select the track, then press<br />
ENTER during playback or when playback is<br />
stopped.<br />
• Playback of the selected track will begin.<br />
Track 03<br />
0:00<br />
1 Track 01 5:16<br />
2 Track 02 5:10<br />
3 Track 03 5:23<br />
4 Track 04 5:03<br />
5 Track 05 4:44<br />
6 Track 06 5:08<br />
5:23<br />
2 Press c to stop playback.<br />
Functions<br />
3/12<br />
00:00:11<br />
3 L+R<br />
Off<br />
<strong>Operation</strong> procedure for the<br />
“Functions” menu<br />
1 Press D (Blue) (Functions) when the CD screen<br />
is displayed.<br />
• The “Functions” menu is activated.<br />
Track 03<br />
0:00<br />
1 Track 01 5:16<br />
2 Track 02 5:10<br />
3 Track 03 5:23<br />
4 Track 04 5:03<br />
5 Track 05 4:44<br />
6 Track 06 5:08<br />
5:23<br />
Functions<br />
3/12<br />
00:00 :11<br />
3 L+R<br />
Off<br />
2 Press a/b to select the desired setting, then<br />
press ENTER.<br />
• When playback is stopped, only “Track” can be<br />
selected.<br />
• For a description of each setting, see “Functions<br />
which can be set” (Page 39).<br />
3 Press a/b/c/d to set, then press ENTER.<br />
• <strong>Operation</strong>s vary depending on the setting. Follow<br />
the operation instructions on the screen.<br />
4 Press j or D (Blue) to exit the<br />
“Functions” menu.<br />
NOTE<br />
• The displayed items vary depending on the disc.<br />
Playback<br />
Track 01<br />
0:00<br />
1 Track 01 5:16<br />
2 Track 02 5:10<br />
3 Track 03 5:23<br />
4 Track 04 5:03<br />
5 Track 05 4:44<br />
6 Track 06 5:08<br />
5:16<br />
Functions<br />
1/12<br />
00 : 00 : 11<br />
3 L+R<br />
Off<br />
31
Video/Picture/Music Playback<br />
Audio Data (MP3 File) Playback<br />
CD-R CD-RW DVD-R DVD-RW USB<br />
This Player can play back audio data (MP3 files)<br />
recorded on CD-R/RW discs, DVD-R/RW discs and<br />
USB memory devices or via a home network.<br />
• For details on the audio data that you can play using<br />
this player, refer to page 11.<br />
• When data in the USB memory device is played back,<br />
playback from the USB memory device will stop when<br />
OPEN/CLOSE on the remote control or the player is<br />
pressed or when a disc is inserted into the player.<br />
1 Load a disc or a USB memory device*<br />
containing audio data (MP3 files).<br />
* When you insert or remove a USB memory device,<br />
be sure to turn the main power off and make sure<br />
that “Quick Start” is set to “No” (See page 43).<br />
• When the wireless LAN adapter is not inserted<br />
into the USB1 terminal on the rear of the player, it<br />
is recommended that the USB memory device be<br />
connected to the USB2 terminal.<br />
NOTE<br />
• A USB memory device can be used with either the<br />
USB1 or USB2 terminal. When two USB memory<br />
devices are connected to both terminals at the same<br />
time, in certain situations the USB1 terminal may give<br />
priority to Local Storage and MP3 files cannot be played<br />
back using this terminal.<br />
2 Press a/b to select “Music”, then press d or<br />
ENTER.<br />
3 Press a/b to select “DVD/CD*”, “USB Memory<br />
Device” or “Home Network”, then press d or<br />
ENTER.<br />
* Display name varies depending on the type of<br />
media inserted.<br />
• If only a “DVD/CD” or a USB memory device is<br />
inserted, the “DVD/CD” or “USB Memory Device”<br />
selection screen does not appear. In such cases,<br />
after step 2, proceed to step 4.<br />
4 Press a/b to select a folder or file.<br />
• When you select a folder, press ENTER to open it,<br />
and then press a/b to select a file in the folder.<br />
Folder 1<br />
CD<br />
1 Folder 1<br />
2 Folder 2<br />
3 Folder 3<br />
4 Folder 4<br />
5 Track 01.mp3<br />
6 Track 02.mp3<br />
1/All 14 files and folders<br />
5 Press ENTER to play back the selected file.<br />
• Playback of the selected file will begin.<br />
Track 01.mp3<br />
1/12<br />
00:00 :11<br />
1 MP3 Stereo<br />
0:00<br />
5:16<br />
–<br />
1 Track 01.mp3 5:16<br />
2 Track 02.mp3 5:10<br />
3 Track 03.mp3 5:23<br />
4 Track 04.mp3 5:03<br />
5 Track 05.mp3 4:44<br />
6 Track 06.mp3 5:08<br />
• When MP3 files are played, the “Functions” menu is<br />
not available.<br />
6 To return to the HOME screen, press c<br />
(press twice if during playback), and then press<br />
HOME or EXIT.<br />
List of available buttons during playback<br />
a/b<br />
ENTER<br />
Buttons<br />
b<br />
f<br />
g<br />
c<br />
Description<br />
Select a desired audio file.<br />
Play back audio file.<br />
Pause audio file playback.<br />
• Return to playback when<br />
paused.<br />
Skip backward.<br />
Skip forward.<br />
Stop playback.<br />
NOTE<br />
• The Fast Forward/Reverse function does not work.<br />
• The Repeat function does not work.<br />
32
Video/Picture/Music Playback<br />
Displaying Still Images (JPEG files)<br />
CD-R CD-RW DVD-R DVD-RW USB<br />
This Player can display still images (JPEG files)<br />
recorded on CD-R/RW discs, DVD-R/RW discs and<br />
USB memory devices or via a home network.<br />
• For details on the still images that you can display using<br />
this player, refer to page 11.<br />
• Still images are played one by one while during “Slide<br />
show”, they are automatically replaced one after<br />
another.<br />
• When data in the USB memory device is played back,<br />
playback from the USB memory device will stop when<br />
OPEN/CLOSE on the remote control or the player is<br />
pressed or when a disc is inserted into the player.<br />
1 Load a disc or a USB memory device*<br />
containing Still Images (JPEG files).<br />
* When you insert or remove a USB memory device,<br />
be sure to turn the main power off and make sure<br />
that “Quick Start” is set to “No” (See page 43).<br />
• When the wireless LAN adapter is not inserted<br />
into the USB1 terminal on the rear of the player, it<br />
is recommended that the USB memory device be<br />
connected to the USB2 terminal.<br />
NOTE<br />
• A USB memory device can be used with either the<br />
USB1 or USB2 terminal. When two USB memory<br />
devices are connected to both terminals at the same<br />
time, in certain situations the USB1 terminal may give<br />
priority to Local Storage and JPEG files cannot be<br />
played back using this terminal.<br />
2 Press a/b to select “Picture”, then press d or<br />
ENTER.<br />
3 Press a/b to select “DVD/CD*”, “USB Memory<br />
Device” or “Home Network”, then press d or<br />
ENTER.<br />
* Display name varies depending on the type of<br />
media inserted.<br />
• If only a “DVD/CD” or a USB memory device is<br />
inserted, the “DVD/CD” or “USB Memory Device”<br />
selection screen does not appear. In such cases,<br />
after step 2, proceed to step 4.<br />
4 Press a/b to select a folder or file.<br />
• When you select a folder, press ENTER to open it,<br />
and then press a/b to select a file in the folder.<br />
Folder 1<br />
CD<br />
1 Folder 1<br />
2 Folder 2<br />
3 Folder 3<br />
4 Folder 4<br />
5 Image 01.jpg<br />
6 Image 02.jpg<br />
1/All 14 files and folders<br />
• To set slide show speed/repeat playback, press D<br />
(Blue) (Slide Show Menu).<br />
Slide Show Menu<br />
Slide Show<br />
Speed<br />
Repeat Mode<br />
Setting<br />
Guide Display<br />
Setting<br />
Setting of slide show playback<br />
speed<br />
Setting of slide show repeat<br />
playback<br />
Guide display setting during still<br />
image display<br />
5 Press ENTER to display the selected file.<br />
• The selected still image appears on the screen.<br />
1/77<br />
6 To return to the HOME screen, press c,<br />
and then press HOME or EXIT.<br />
<strong>Operation</strong>al buttons during still image<br />
display<br />
Buttons<br />
f/<br />
g<br />
d/ e<br />
j<br />
C (Yellow)<br />
D (Blue)<br />
a<br />
b<br />
c<br />
A (Red)<br />
Description<br />
Go to the previous/next picture in<br />
the same directory.<br />
Return to the selection screen.<br />
Rotate the picture by 90 degrees<br />
to the left.<br />
Rotate the picture by 90 degrees<br />
to the right.<br />
Play back Slide Show.<br />
• Return to slide show playback<br />
when paused.<br />
Pause slide show playback.<br />
Stop still image display/slide show<br />
playback.<br />
Guide display on/off<br />
NOTE<br />
• Thumbnail data will be displayed when JPEG files from<br />
a digital camera contain thumbnail data.<br />
• An icon will be displayed for JPEG files which do not<br />
contain thumbnail data.<br />
Playback<br />
33
Video/Picture/Music Playback<br />
Accessing DLNA servers<br />
The player can browse and play movies, music and<br />
photos stored on your DLNA Certified media servers<br />
connected within your home network.<br />
About a home network<br />
This Player can display and play movies, photos<br />
and music content from your DLNA-compatible<br />
digital media servers (such as a PC and consumer<br />
electronics).<br />
Before accessing DLNA servers:<br />
• DLNA servers and this player must be connected to the<br />
same local area network. Specify the settings required<br />
for connecting this player to the local area network.<br />
• DLNA servers must be turned on.<br />
• When a PC running DLNA server software or other<br />
DLNA-compatible devices are connected to this player,<br />
some setting changes of software or other devices may<br />
be required.<br />
• Please refer to the operating instructions for the<br />
software or devices for more information.<br />
Types of playable files<br />
Video<br />
Music<br />
Picture<br />
DivX Plus HD (avi/divx/mkv)<br />
mp3<br />
jpg<br />
NOTE<br />
• Even if DLNA compatible, a connection may not be<br />
able to be made depending on the server, or playback<br />
may not be available even if a connection is made<br />
successfully.<br />
• Some files may not be playable depending on the file.<br />
For details, refer to pages 10–11.<br />
• To enjoy this function, make a broadband Internet<br />
connection to both your PC and this player (See pages<br />
18–19), and then set communication settings (See<br />
pages 46–49), then perform the following operation.<br />
• To use this function, we recommend setting “Auto<br />
Power Off” to “No”. (See page 43.)<br />
• Before using this function, please read “Network Service<br />
Disclaimer” (page 68).<br />
Playback by selecting a file list<br />
1 Press a/b to select Video/Music/Picture, then<br />
press d or ENTER.<br />
2 Press a/b to select “Home Network” in the sub<br />
window.<br />
Video<br />
Music<br />
Picture<br />
e-Contents<br />
Settings<br />
<strong>BD</strong>-Video<br />
USB<br />
Home Network<br />
Sub Window<br />
3 Press ENTER or d.<br />
• The player automatically scans and displays DLNA<br />
servers within your local network.<br />
Select server<br />
1. xxxxxxxxxxxxx<br />
2. yyyyyyyyyyyyy<br />
3. zzzzzzzzzzzzzz<br />
4. aaaaaaaaaaaa<br />
4 Press a/b to select a DLNA server which you<br />
want to access, then press ENTER or d.<br />
• The folder list or file list of the DLNA server which<br />
you accessed is displayed.<br />
• The previous screen appears when j<br />
is pressed.<br />
5 Press a/b to select the folder or file which you<br />
want to access, then press ENTER.<br />
• When you select a folder, the file list of the folder is<br />
displayed. Press a/b to select the file which you<br />
want to play, then press ENTER.<br />
• Playback starts.<br />
Root<br />
Folder1<br />
Folder2<br />
Video01.divx<br />
Video02.divx<br />
Video03.divx<br />
Video04.divx<br />
1/ALL 40 files and folders<br />
• For operation during playback, refer to pages<br />
35–36.<br />
6 Press c to stop playback.<br />
• The file list reappears.<br />
• The previous screen appears when j<br />
is pressed.<br />
7 Press EXIT or HOME to exit playback.<br />
• The HOME screen reappears.<br />
34
Playback Functions<br />
Fast Forward/Reverse (Search)<br />
<strong>BD</strong> VIDEO <strong>BD</strong>-R <strong>BD</strong>-RE<br />
DVD VIDEO DVD-R DVD-RW<br />
Pause/Frame Advance Playback<br />
<strong>BD</strong> VIDEO <strong>BD</strong>-R <strong>BD</strong>-RE<br />
DVD VIDEO DVD-R DVD-RW<br />
NOTE<br />
• Some operations in the following playback functions<br />
cannot be performed depending on the specifications of<br />
the disc.<br />
AUDIO CD<br />
The Fast Forward/Reverse function is enabled when<br />
d or e is pressed during playback.<br />
Example: When e is pressed<br />
• The search speed will change each time you press the<br />
button.<br />
When playing back a DVD<br />
• You cannot perform Fast Forward/Fast Reverse from<br />
one title and continue to another title (except when<br />
playing audio CDs). At the end or beginning of the title,<br />
Fast Forward/Fast Reverse will be cancelled and normal<br />
playback will automatically resume.<br />
NOTE<br />
• Subtitles are not played back with <strong>BD</strong>/DVD video discs<br />
during Fast Forward and Fast Reverse.<br />
Skipping to the Next or the Start of<br />
the Current Chapter (Track/Title)<br />
<strong>BD</strong> VIDEO <strong>BD</strong>-R <strong>BD</strong>-RE<br />
DVD VIDEO DVD-R DVD-RW<br />
AUDIO CD CD-R CD-RW USB<br />
The Skipping (to the beginning of a chapter, track<br />
or title) function is enabled when f or<br />
g is pressed during playback.<br />
The Pause function is enabled when b is<br />
pressed during playback. (If you are playing back<br />
an audio CD, audio data [MP3 files] or still images<br />
[JPEG files], these will also pause.)<br />
The Frame Advance Playback function is enabled<br />
when g is pressed during pause.<br />
• Frame Advance Playback may not function properly<br />
with discs other than DVD-RW/R (VR format).<br />
NOTE<br />
• Some <strong>BD</strong>/DVD Video discs are not compatible with<br />
Pause/Frame Advance Playback.<br />
• Frame Advance/Reverse Playback can be performed<br />
for DVD discs by pressing g or<br />
f during pause.<br />
• Frame Reverse Playback cannot be performed for DivX<br />
video.<br />
Slow Playback (Forward/Reverse)<br />
<strong>BD</strong> VIDEO <strong>BD</strong>-R <strong>BD</strong>-RE<br />
DVD VIDEO DVD-R DVD-RW<br />
The Slow Playback (Forward/Reverse) function is<br />
enabled when g or f is<br />
pressed for more than 2 seconds during pause.<br />
Press a to return to normal playback.<br />
NOTE<br />
• This doesn’t work for audio CDs.<br />
• You cannot perform Slow Playback between titles. At<br />
the end of the title, Slow Playback will be cancelled and<br />
normal playback will automatically resume.<br />
• Reverse Slow Playback cannot be performed for <strong>BD</strong><br />
video and DVD discs in AVCHD format.<br />
• Reverse Slow Playback cannot be performed for DivX<br />
video.<br />
Playback<br />
35
Playback Functions<br />
Repeat Playback of a Title or<br />
Chapter (Repeat Playback)<br />
<strong>BD</strong> VIDEO <strong>BD</strong>-R <strong>BD</strong>-RE<br />
DVD VIDEO DVD-R DVD-RW<br />
AUDIO CD<br />
1 Play back the title or chapter you want to repeat.<br />
2 Press REPEAT.<br />
3 Press a/b to select the type of Repeat<br />
Playback.<br />
• Playback Title: Repeats the title currently being<br />
played back.<br />
• Playback Chapter: Repeats the chapter currently<br />
being played back.<br />
• Scene Selection: Repeats the specified scene of<br />
title or chapter.<br />
Playback Title<br />
Playback Chapter<br />
Scene Selection<br />
NOTE<br />
• Press j to cancel without setting the type<br />
of Repeat Playback.<br />
• For Audio CD, you can select “Playing Disc”, “Playing<br />
Track” and “Specify The Part” as Repeat Playback<br />
options.<br />
• Repeat Playback cannot be performed for DivX video.<br />
4 Press ENTER.<br />
Example: Repeat playback of a title (TITLE)<br />
On Title Repeat<br />
<strong>BD</strong>-VIDEO<br />
1/3<br />
5/25<br />
00 :20 :30<br />
2 English<br />
1<br />
1 DTS<br />
On Title Repeat<br />
5 Press REPEAT to return to normal playback.<br />
NOTE<br />
• “Scene Selection” operation is not available for <strong>BD</strong><br />
video.<br />
Partial Repeat Playback (Repeat<br />
Playback of a Specified Part)<br />
DVD VIDEO DVD-R DVD-RW<br />
AUDIO CD<br />
1 Press REPEAT during playback.<br />
2 Press a/b to select “Scene Selection”, then<br />
press ENTER.<br />
• “Set Start Point” displays.<br />
Playback Title<br />
Playback Chapter<br />
3 Press ENTER at the scene where you want to<br />
set the start point.<br />
• “Set End Point” displays.<br />
4 Press ENTER at the scene where you want to<br />
set the end point.<br />
• You can press e to fast forward to the<br />
scene where you want to set the end point. When<br />
you reach the desired scene, simply press a<br />
and then ENTER to set the end point. To cancel<br />
Repeat Playback, press REPEAT.<br />
NOTE<br />
• Press g, the Repeat Playback is<br />
cancelled and the next chapter being play back.<br />
• Press f once, the Repeat Playback is<br />
cancelled and the player returns to the start of current<br />
chapter (track).<br />
• If you press f again (within about 5<br />
seconds) the player will skip to the beginning of the<br />
previous chapter (track).<br />
• For Partial Repeat Playback, set the start and end<br />
points within the same title.<br />
• Repeat Playback may be forbidden depending on the<br />
disc.<br />
• Partial Repeat Playback may not work in multi-angle<br />
scenes.<br />
• If you press DISPLAY, you can confirm the Repeat<br />
Playback status.<br />
Scene Selection<br />
Set Start Point<br />
36
Playback Functions<br />
Displaying the Audio Information<br />
You can display the audio information on the disc<br />
currently being played back by pressing AUDIO.<br />
The displayed contents vary depending on the disc.<br />
<strong>BD</strong> VIDEO<br />
DVD VIDEO<br />
The audio channel currently being played back will<br />
be displayed.<br />
If multiple audio channels are recorded, you can<br />
switch the audio channel by pressing AUDIO.<br />
DVD-RW<br />
DVD-R<br />
When a recorded broadcast with stereo or<br />
monaural audio is played back:<br />
“Stereo” is displayed. (Audio cannot be switched.)<br />
NOTE<br />
• When you play a programme recorded in stereo or<br />
monaural, and if you are listening to the Bitstream<br />
sound via the digital output jack, you cannot select the<br />
audio channel. Set “Audio Out” to “PCM” (page 42).<br />
• Settings for audio can also be changed in the Function<br />
Control screen (Page 38).<br />
• The operation of audio differs according to each disc.<br />
You may need to refer to the operation manual of the<br />
disc.<br />
• The display for audio information automatically<br />
disappears after 5 seconds.<br />
Switching Subtitles<br />
<strong>BD</strong> VIDEO<br />
DVD VIDEO<br />
If subtitles are provided in multiple languages, you<br />
can switch between them.<br />
Press SUBTITLE during playback.<br />
• The display indicates the subtitle number currently<br />
being played back, and the subtitles appear.<br />
Each time SUBTITLE is pressed, the subtitles change.<br />
• “–” is displayed if a disc has no subtitles.<br />
• You can also select “Off”.<br />
NOTE<br />
• Settings for subtitles can also be changed in the<br />
Function Control screen (Page 38).<br />
• The operation of subtitles differs according to each disc.<br />
You may need to refer to the operation manual of the<br />
disc.<br />
• The display for subtitle information automatically<br />
disappears after 5 seconds.<br />
Switching the Angle<br />
<strong>BD</strong> VIDEO<br />
DVD VIDEO<br />
If multiple angles are recorded, you can switch<br />
between them.<br />
1 Press FUNCTION during playback.<br />
• The Function Control screen is displayed on the TV.<br />
2 Press a/b to select the Angle Number column,<br />
then press ENTER.<br />
<strong>BD</strong>-VIDEO<br />
1/3<br />
5 / 25<br />
00: 20 : 30<br />
2 English<br />
1<br />
1 DTS<br />
Off<br />
3 Press a/b to select the desired Angle Number,<br />
then press ENTER.<br />
4 Press j or FUNCTION to close the<br />
Function Control screen.<br />
NOTE<br />
• The displayed items vary depending on the disc.<br />
• If you access the Function Control screen during<br />
playback of a <strong>BD</strong>/DVD video, it may be impossible to<br />
operate the <strong>BD</strong>/DVD video playback. In cases like this,<br />
close the Function Control screen.<br />
• The operation of angles differs according to each disc.<br />
You may need to refer to the operation manual of the<br />
disc.<br />
• The display for angle information automatically<br />
disappears after 5 seconds.<br />
Displaying the Angle Mark<br />
<strong>BD</strong> VIDEO<br />
DVD VIDEO<br />
You can change settings so that Angle Mark appears<br />
in the right bottom part of the screen when multiple<br />
angles are recorded. The settings can be changed<br />
in “Settings” – “Playback Setting” – “Angle Mark<br />
Display” (Page 44).<br />
Playback<br />
37
Settings During Playback<br />
Function Control<br />
<strong>BD</strong> VIDEO <strong>BD</strong>-R <strong>BD</strong>-RE<br />
DVD VIDEO DVD-R DVD-RW<br />
AUDIO CD<br />
This allows you to adjust various settings at once,<br />
like subtitles, angle settings and the title selection<br />
for Direct Playback. You can adjust the video and<br />
audio to suit your preferences. The operations are<br />
the same for <strong>BD</strong> and DVD.<br />
Function Control screen<br />
<strong>BD</strong>-VIDEO<br />
1 / 3<br />
5 / 25<br />
00 : 20 : 30<br />
2 English<br />
1<br />
1 DTS<br />
Off<br />
Select<br />
EXIT Exit<br />
ENTER<br />
3<br />
Enter<br />
Return<br />
1<br />
2<br />
11Playback status display<br />
Shows the operation status and the disc type.<br />
22Setting items<br />
Selects a title (or track) or chapter for playback, or<br />
performs video/audio settings.<br />
• Title/Track Number (Direct Title/Track Skip)<br />
• Chapter Number (Direct Chapter Skip)<br />
• Playback Elapsed Time (Direct Time Skip)<br />
• Subtitle Language<br />
• Angle Number<br />
• Audio<br />
• Repeat<br />
33<strong>Operation</strong> guide display<br />
Provides help on remote control button operations.<br />
Function control operation<br />
procedure<br />
1 Press FUNCTION during playback.<br />
• The Function Control screen is displayed on the TV.<br />
2 Press a/b to select the desired setting, then<br />
press ENTER.<br />
• For a description of each setting, see “Functions<br />
which can be set” (Page 39).<br />
<strong>BD</strong>-VIDEO<br />
1/3<br />
5 / 25<br />
00 : 20 : 30<br />
2 English<br />
1<br />
1 DTS<br />
Off<br />
3 Press a/b/c/d to set, then press ENTER.<br />
• <strong>Operation</strong>s vary depending on the setting. Follow<br />
the operation instructions on the screen.<br />
4 Press j or FUNCTION to close the<br />
Function Control screen.<br />
NOTE<br />
• If “– –” is displayed for an option like title number or<br />
subtitles, the disc has no titles or subtitles which can be<br />
selected.<br />
• The displayed items vary depending on the disc.<br />
• If you access the Function Control screen during<br />
playback of a <strong>BD</strong>/DVD video, it may be impossible to<br />
operate the <strong>BD</strong>/DVD video playback. In cases like this,<br />
close the Function Control screen.<br />
38
Settings During Playback<br />
Functions which can be set<br />
Title/Track Number (Direct Title/Track Skip)<br />
• Shows the title number being played back (or track<br />
number when playing back an audio CD). You can skip<br />
to the start of the title (or track).<br />
• To skip to the start of a selected title (or track), press<br />
the Number buttons to enter the title (or track) number<br />
when this option is highlighted.<br />
Chapter Number (Direct Chapter Skip)<br />
• Shows the chapter number being played back. You can<br />
skip to the start of the chapter.<br />
• To skip to the start of a selected chapter, press the<br />
Number buttons to enter the chapter number when this<br />
option is highlighted.<br />
Playback Elapsed Time (Direct Time Skip)<br />
• Shows the time elapsed from the beginning of the<br />
current disc title (or track). This lets you skip to a<br />
specific time.<br />
• Press c/d to select the Hour, Minute or Second, then<br />
press a/b or the Number buttons to set the time.<br />
Press ENTER to start playback at the set time.<br />
Subtitle Language<br />
• Shows the currently selected subtitle language. If<br />
subtitles are provided in other languages, you can<br />
switch to your preferred language.<br />
Angle Number<br />
• Shows the currently selected angle number. If the video<br />
is recorded with multiple angles, you can switch the<br />
angle.<br />
Audio<br />
• Shows the currently selected type of audio. You can<br />
select the desired type of audio.<br />
Repeat<br />
• The current Title (or Chapter) or partial segments can<br />
be repeatedly played back. Repeat Playback is also<br />
possible with the REPEAT button on the remote control.<br />
NOTE<br />
• These functions may not work with all discs.<br />
Playback<br />
39
Settings<br />
SETTINGS<br />
Common operations<br />
The “menu” enables various audio/visual settings<br />
and adjustments on the functions using the remote<br />
control unit. You need to call up the On Screen<br />
Display to perform settings for this player. The<br />
following is the explanation for the basic operations<br />
of the “menu”.<br />
Example: Setting “AQUOS LINK”<br />
HOME<br />
Video<br />
Music<br />
Picture<br />
e-Contents<br />
Settings<br />
Audio Video Settings<br />
Smart Settings<br />
AQUOS LINK<br />
Playback Setting<br />
On Screen Language<br />
Communication Setup<br />
Version<br />
USB Memory Management<br />
Software Update Settings<br />
System<br />
Home screen display<br />
Press a/b to select “Settings”, then press d or ENTER.<br />
Select ENTER Enter Return EXIT Exit<br />
Select a menu item<br />
HOME<br />
Video<br />
Music<br />
Picture<br />
e-Contents<br />
Settings<br />
Audio Video Settings<br />
Smart Settings<br />
AQUOS LINK<br />
Playback Setting<br />
On Screen Language<br />
Communication Setup<br />
Version<br />
USB Memory Management<br />
Software Update Settings<br />
System<br />
Press a/b to select “AQUOS LINK”, then press d or ENTER.<br />
Select ENTER Enter Return EXIT Exit<br />
Select the next item<br />
Press a/b to select the desired item, then press ENTER.<br />
Press j to return to the previous “menu” page.<br />
Press HOME or EXIT to exit.<br />
Exit the menu screen<br />
40
SETTINGS<br />
Basic <strong>Operation</strong> for Playback<br />
Setting<br />
Example: Setting “Parental Control” under “Playback<br />
Setting”<br />
1 Press a/b to select “Settings”, then press d or<br />
ENTER.<br />
2 Press a/b to select “Playback Setting”, then<br />
press d or ENTER.<br />
3 Press a/b to select “Parental Control”, then<br />
press d or ENTER.<br />
• When you operate this Player for the first time,<br />
the PIN code setting screen will be displayed. See<br />
“When setting the PIN code for the first time” below.<br />
4 Enter your 4-digit PIN code.<br />
• You cannot move to the next setting screen until<br />
you can input the correct PIN code.<br />
When setting the PIN code for the first time.<br />
11<br />
To set the PIN code for the first time, press a/b<br />
to select “Yes” to enter the PIN code setting<br />
menu, then press d or ENTER.<br />
22<br />
Enter a 4-digit number for the PIN code, then the<br />
same 4-digit number for confirmation.<br />
33<br />
Press ENTER to complete the PIN code setting<br />
procedure and move to the next setting screen.<br />
5 Press c/d to select the parental control level<br />
for DVD VIDEO, <strong>BD</strong>-ROM, and then select the<br />
country code. Press ENTER after making each<br />
selection.<br />
Parental Control<br />
Disc Language<br />
Angle Mark Display<br />
PIN Code Setting<br />
<strong>BD</strong> Internet Access<br />
3D Mode<br />
3D Notice<br />
6 Press HOME or EXIT to exit.<br />
Level 3<br />
0<br />
USA<br />
Settings<br />
41
SETTINGS<br />
Audio Video Settings<br />
HDMI Video Out<br />
This sets the resolution of the video output for the<br />
HDMI terminal of this player.<br />
Normally set to “Auto” (factory preset value).<br />
Item<br />
Auto, 1080p, 1080i, 720p, 576/480p<br />
NOTE<br />
• When the <strong>BD</strong> player is connected to a 1080p 24Hz<br />
compatible TV and the “HDMI Video Out” is set to<br />
“Auto”, 1080p 24Hz will automatically be displayed<br />
when compatible discs are played back.<br />
Secondary Audio<br />
This toggles the clicking sound on the menu and<br />
audio with secondary video in picture in picture<br />
mode for <strong>BD</strong>-Video.<br />
• Select “Off” when enjoying the high quality sounds of<br />
<strong>BD</strong>-Video.<br />
Item<br />
On, Off<br />
Audio Out<br />
You can set the audio output when connecting to<br />
SURROUND equipment.<br />
1 This sets the audio output connected to<br />
SURROUND equipment.<br />
Item<br />
HDMI Output: Select this when you connect using<br />
HDMI OUT terminal.<br />
Digital Output: Select this when you connect using<br />
DIGITAL AUDIO OUT terminal (OPTICAL).<br />
2 You can set the audio output mode for each<br />
output terminal.<br />
11<br />
This sets the audio output mode for HDMI OUT<br />
terminal when selecting “HDMI Output”.<br />
NOTE<br />
• When the secondary audio is set to “On”, PCM is<br />
automatically selected as the audio output mode.<br />
Item<br />
Bitstream:<br />
• Select this when connecting to HDMI equipment with<br />
a built-in decoder for DOLBY DIGITAL, etc.<br />
• Setting to Bitstream will output each audio signal by<br />
Bitstream.<br />
PCM (Surround):<br />
• Select this when connecting to multi-channel HDMI<br />
equipment.<br />
• Setting to PCM (Surround) will output by LINEAR<br />
PCM by decoding audio signals recorded in each<br />
audio output mode such as DOLBY DIGITAL, DTS.<br />
22<br />
This sets the audio output mode for DIGITAL<br />
AUDIO OUT (OPTICAL terminal) when selecting<br />
“Digital Output”.<br />
Item<br />
Bitstream:<br />
• Select this when connecting to SURROUND<br />
equipment with a built-in decoder for DOLBY<br />
DIGITAL, etc.<br />
• Setting to Bitstream will output each audio signal by<br />
Bitstream.<br />
PCM:<br />
• Select this when connecting to 2 channel stereo audio<br />
equipment.<br />
• Setting to PCM will output by converting each audio<br />
signal into PCM 2 channel audio signal.<br />
NOTE<br />
• See page 54 for information on output of audio formats.<br />
42
SETTINGS<br />
Dynamic Range Control<br />
This lets you adjust the range between the loudest<br />
and softest sounds (dynamic range) for playback<br />
at average volume. Use this when it is hard to hear<br />
dialogue.<br />
Item<br />
Normal: The same audio output range is played as the<br />
original recorded audio output range.<br />
Shift*: When Dolby Digital audio is played back, the<br />
dynamic range of the audio is adjusted so that the<br />
dialogue portion can be heard easily. (If the audio<br />
sounds abnormal, set to “Normal”.)<br />
Auto: When you play back audio in the Dolby TrueHD<br />
format, the dynamic range is automatically adjusted.<br />
* Lower the audio volume before setting. If you do not do<br />
so, the speakers may emit a loud sound or excessive<br />
output may be applied to the speakers.<br />
SUPER PICTURE<br />
This enhances the quality of video streaming images<br />
with pixel by pixel processing technology.<br />
Item<br />
On, Off<br />
Smart Settings<br />
Quick Start<br />
This turns the Quick Start function on and off.<br />
When the Quick Start function is on:<br />
• The startup time of the Player is reduced.<br />
• However, power consumption will increase.<br />
When the Quick Start function is off:<br />
• The player will enter the low power consumption mode<br />
when in standby condition.<br />
Item<br />
Yes, No<br />
NOTE<br />
• When “Quick Start” is set to “Yes”, the Player requires<br />
some time to turn off.<br />
Auto Power Off<br />
This sets the Player so that power is automatically<br />
shut off if playback is stopped and you do not<br />
perform any operations for about 10 minutes.<br />
Item<br />
Yes, No<br />
Control Panel<br />
This lets you set display of the control panel on the<br />
TV screen to on or off.<br />
Item<br />
Yes, No<br />
AQUOS LINK<br />
This lets you set the Player to receive the control<br />
signal from the AQUOS LINK remote control via the<br />
HDMI cable.<br />
Item<br />
Yes, No<br />
NOTE<br />
• For details, refer to the operation manual of TV.<br />
Front Display/LED<br />
If you feel that the indicators on the player’s front<br />
display are too bright when watching movies, you<br />
can turn them off except for the B (On/Standby)<br />
indicator.<br />
Settings<br />
Item<br />
On, Off<br />
43
SETTINGS<br />
Playback Setting<br />
Parental Control<br />
This lets you set the Parental Control depending<br />
on the disc content. The available Parental Control<br />
Levels are shown below.<br />
The 4-digit PIN code number needs to be entered<br />
before the Parental Control Levels and the Country<br />
Code are set. The Parental Control Levels and the<br />
Country Code cannot be set if a PIN code has not<br />
been created or the PIN code is not entered.<br />
• Select the rating level appropriate for the age of the<br />
user.<br />
Item (Parental control level for DVD-video)<br />
8 and Off: All DVD-video can be played.<br />
1–7: Prohibits play of DVD-video with corresponding<br />
ratings recorded on them.<br />
Item (Parental control level for <strong>BD</strong>-video)<br />
No Limit: All <strong>BD</strong>-video can be played.<br />
0–99 year(s): Prohibits play of <strong>BD</strong>-video with<br />
corresponding ratings recorded on them.<br />
Item (Country code)<br />
Select the country code.<br />
The ratings differ according to the country.<br />
NOTE<br />
• Refer to “Basic <strong>Operation</strong> for Playback Setting” on page<br />
41 for details.<br />
Disc Language (Disc Priority Language)<br />
This lets you select the language for subtitles, audio<br />
and menus displayed on the screen.<br />
Item (Subtitle)<br />
Select the subtitle language you want to display.<br />
Item (Audio)<br />
Select the audio language you want to hear.<br />
Item (Menu)<br />
Select the menu language you want to display.<br />
NOTE<br />
• When “Auto” is selected, the priority language of the<br />
disc will be played back.<br />
Angle Mark Display<br />
This lets you turn the Angle Mark Display on or off<br />
when <strong>BD</strong>/DVD video recorded with multiple angles<br />
is played back. (The Angle Mark is displayed in the<br />
lower right screen.)<br />
Item<br />
Yes, No<br />
PIN Code Setting<br />
This sets the PIN code for setting or changing the<br />
Parental Control Level.<br />
Item<br />
Yes: Enter the 4-digit number.<br />
No<br />
NOTE<br />
• When you forget the PIN code, you can reset the current<br />
PIN code using “System Reset” under “Settings”. (See<br />
page 45.)<br />
• You can also set the new PIN code if desired.<br />
<strong>BD</strong> Internet Access<br />
This allows you to set access restriction to <strong>BD</strong>-LIVE<br />
contents.<br />
Item<br />
Permit: Allows all <strong>BD</strong>-LIVE discs.<br />
Limit: Allows only discs with owner certification.<br />
Prohibit: Prohibits all <strong>BD</strong>-LIVE discs.<br />
NOTE<br />
• The available functions differ depending on the disc.<br />
• Regarding playback method of <strong>BD</strong>-LIVE contents,<br />
etc., perform the operations in accordance with the<br />
instructions in the <strong>BD</strong> disc manual.<br />
• To enjoy <strong>BD</strong>-LIVE functions, perform the broadband<br />
Internet connection (pages 18–19) and communication<br />
settings (pages 46–49).<br />
44
SETTINGS<br />
3D Mode<br />
This sets output of 3D images.<br />
To view 3D images, playback of 3D content (3D <strong>BD</strong><br />
video) is necessary with a 3D compatible TV and 3D<br />
glasses in addition to this player.<br />
Item<br />
Auto: Video signals are output as 3D when 3D content<br />
(3D <strong>BD</strong> video) is played or as 2D when 2D content is<br />
played.<br />
2D: Even if 3D content (3D <strong>BD</strong> video) is played, video<br />
signals are output as 2D at all times.<br />
CAUTION<br />
• When viewing 3D images, viewing for a long period<br />
of time or lying on your back may cause eye strain<br />
and discomfort. In addition, 3D images may affect the<br />
eyesight of young children/infants, so keep them from<br />
viewing the images.<br />
3D Notice<br />
This sets whether or not a notice is displayed (“Yes”<br />
or “No”) on the connected TV every time 3D content<br />
(3D <strong>BD</strong> video) is played.<br />
On Screen Language<br />
You can set the language you want to display on the<br />
screen.<br />
Item<br />
English, Deutsch, Français, Italiano, Español,<br />
Português, Nederlands, Svenska, Dansk, Norsk, Suomi,<br />
Polski, Česky, Magyar, Slovensky, Slovenščina<br />
Version<br />
When you select “Version”, the system software<br />
version is displayed.<br />
System<br />
System Reset<br />
You can reset all settings to the factory presets.<br />
Item<br />
Reset, Not Reset<br />
DivX(R) Registration<br />
DivX(R) Deregistration<br />
You can deactivate your DivX information on the<br />
player.<br />
Item<br />
Yes, No<br />
NOTE<br />
• To learn more, visit www.divx.com/vod.<br />
Item<br />
Yes, No<br />
The DivX registration code is displayed.<br />
Item<br />
Yes, No<br />
NOTE<br />
• To learn more, visit www.divx.com/vod.<br />
Settings<br />
45
SETTINGS<br />
Communication Setup<br />
This allows you to perform and/or change the<br />
communication settings and select the type of<br />
Internet connection from Cable or Wireless. This<br />
setting is required to use <strong>BD</strong>-LIVE functions, video<br />
on-demand services (e-Contents), home networks<br />
and software updates that connect to the Internet.<br />
NOTE<br />
• Make sure that the LAN cable or the wireless LAN<br />
adapter is connected to this player and make sure that<br />
the wireless router/access point is connected to the<br />
Internet if using the wireless LAN adapter. (See pages<br />
18–19.)<br />
• For manually performing the setting, the following<br />
information of the connected router or modem is<br />
required. Confirm the information prior to the setting.<br />
−−IP address, netmask, gateway, DNS address<br />
Sets whether “Cable” or “Wireless”<br />
is used for the network connection<br />
1 Press a/b to select “Settings”, then press d or<br />
ENTER.<br />
2 Press a/b to select “Communication Setup”,<br />
then press d or ENTER.<br />
3 Press a/b to select “Cable/Wireless Select”,<br />
then press d or ENTER.<br />
4 Press a/b to select “Cable” or “Wireless”, then<br />
press ENTER.<br />
• If selecting “Cable”, follow the [When selecting<br />
Cable] directions on this page, then go to step 3.<br />
• If selecting “Wireless”, follow the [When selecting<br />
Wireless] directions on the next page, then go to<br />
step 3.<br />
NOTE<br />
• When selecting “Wireless” when the wireless LAN<br />
adapter is not inserted, “Wireless LAN adapter is not<br />
inserted” appears on the screen.<br />
When selecting Cable<br />
1 Press a/b to select “Settings”, then press d or<br />
ENTER.<br />
2 Press a/b to select “Communication Setup”,<br />
then press d or ENTER.<br />
3 Press a/b to select “Ethernet Setup (Cable)”,<br />
then press d or ENTER.<br />
4 Press a/b to select “Change”, then press<br />
ENTER.<br />
Setting the info. of the Ethernet<br />
[Current Setup]<br />
IP Address : Auto Setup<br />
Netmask : Auto Setup<br />
Gateway : Auto Setup<br />
DNS : Auto Setup<br />
Change<br />
Initialize<br />
• For initializing the current setting, select “Initialize”,<br />
then press ENTER.<br />
5 For setting the IP address, press c/d to select<br />
“Yes” or “No”, then press ENTER.<br />
Do you obtain the IP address<br />
automatically?<br />
Yes<br />
IP Address<br />
Netmask<br />
Gateway<br />
Next<br />
• If selecting “Yes”: The IP address is automatically<br />
obtained.<br />
• If selecting “No”: The IP address, netmask and<br />
gateway are manually entered using the screen for<br />
inputting characters. (See page 49.)<br />
Regarding each of the setup values, confirm the<br />
specifications of your broadband router.<br />
No<br />
46
SETTINGS<br />
6 Select “Next”, then press ENTER.<br />
• If selecting “Yes” in the step 5, go to the step 8.<br />
7 Enter your DNS address.<br />
Enter your DNS address.<br />
Primary<br />
Secondary<br />
Next<br />
• The primary and secondary DNS addresses are<br />
entered using the screen for inputting characters.<br />
(See page 49.)<br />
Regarding each of the setup values, confirm the<br />
specifications of your broadband router.<br />
8 Select “Next”, then press ENTER.<br />
9 For testing the connection to the Internet, after<br />
confirming the settings, press a/b to select<br />
“Test”, then press ENTER.<br />
• “Test” is available only when setting to obtain the IP<br />
address automatically. “Test” cannot be selected if<br />
the IP address has not been obtained automatically.<br />
Confirm the current setting.<br />
IP Address : xxx xxx xxx xxx<br />
Netmask : xxx xxx xxx xxx<br />
Gateway : xxx xxx xxx xxx<br />
DNS Address : xxx xxx xxx xxx<br />
xxx xxx xxx xxx<br />
MAC Address : xx xx xx xx xx xx<br />
Test<br />
Complete<br />
• As a result of the test, if the Internet connection<br />
fails, enter the setup values manually.<br />
10 Press a/b to select “Complete”, then press<br />
ENTER.<br />
11 Press HOME or EXIT to return to the HOME<br />
screen.<br />
• To perform other settings, press j.<br />
When selecting Wireless<br />
CAUTION<br />
• We recommend writing down the MAC address of<br />
the connected wireless LAN adapter in this operation<br />
manual (page 48) and keeping it in a safe place. The<br />
MAC address is labeled on the adapter or displayed on<br />
the “Setting the info. of the Ethernet” screen (See step<br />
4 below).<br />
• When performing the wireless communication setup,<br />
security information for the wireless router/access<br />
point (WEP, WPA or WPA2 key) is required. Check your<br />
wireless router/access point’s information prior to setup.<br />
NOTE<br />
• Wireless communication setup cannot be performed<br />
when the wireless LAN adapter is not inserted.<br />
• Before this player can access the Internet wirelessly,<br />
setup of a wireless router/access point is required.<br />
1 Press a/b to select “Settings”, then press d or<br />
ENTER.<br />
2 Press a/b to select “Communication Setup”,<br />
then press d or ENTER.<br />
3 Press a/b to select “Ethernet Setup<br />
(Wireless)”, then press d or ENTER.<br />
4 Press a/b to select “Change”, then press<br />
ENTER.<br />
Setting the info. of the Ethernet<br />
MAC Address<br />
Access Point<br />
IP Address<br />
Netmask<br />
Gateway<br />
DNS<br />
: xx xx xx xx xx xx<br />
: Not Selected<br />
: Auto Setup<br />
: Auto Setup<br />
: Auto Setup<br />
: Auto Setup<br />
Change<br />
Initialize<br />
• For initializing the current setting, select “Initialize”,<br />
then press ENTER.<br />
5 The player scans all of the available access<br />
points and displays the points with the “Other<br />
Network” selection bar on the screen.<br />
• During searching access point(s), “Accessing...”<br />
appears on the screen.<br />
• Up to 6 items (5 access points and the “Other<br />
Network” selection bar) are displayed on the screen.<br />
• When there are six or more items retrieved, display<br />
the next screen by selecting “Next”, then pressing<br />
ENTER. (The “Other Network” selection bar is<br />
always displayed last.) When no available access<br />
points are retrieved, only the “Other Network”<br />
selection bar is displayed on the screen.<br />
6 Press a/b to select “desired access point” or<br />
“Other Network”, then press ENTER.<br />
• For access points which are set to hide the SSID<br />
using the wireless router, select “Other Network” to<br />
set the access point.<br />
Select the access point.<br />
XXXXXXXXXXXX<br />
YYYYYYYYYYYY<br />
Other Network<br />
• If selecting “desired access point”, go to step 9.<br />
• If selecting “Other Network”, go to the next step.<br />
Settings<br />
(Continued on the next page)<br />
47
SETTINGS<br />
7 Press ENTER, then enter the access point<br />
name.<br />
• The access point name is manually entered using<br />
the screen for inputting characters. (See page 49.)<br />
Access Point:<br />
Enter the access point name.<br />
Next<br />
8 Select “Next”, then press ENTER.<br />
9 Press a/b to select your appropriate security<br />
key, then press ENTER.<br />
• When selecting WPA/WPA2, selectable security<br />
keys are PSK/TKIP and PSK/AES.<br />
11 Select “Next”, then press ENTER.<br />
12 For testing after confirming the settings, select<br />
“Test”, then press ENTER.<br />
• If the test has failed, an error message appears.<br />
Retry to perform the settings after checking that the<br />
connection (page 19) is performed properly.<br />
Access Point:<br />
Security key:<br />
Confirm your setting.<br />
XXXXXXXXXXXX<br />
XXXXXXXXXXXX<br />
Test<br />
13 Follow steps 5–11 of “When selecting Cable”<br />
on page 46 to complete the network connection<br />
settings.<br />
Information on MAC addresses<br />
A MAC address is a unique ID number for<br />
network equipment. A MAC address is necessary<br />
for MAC address filtering on the wireless router/<br />
access point.<br />
Before the wireless communication setup is<br />
performed, we recommend writing down the MAC<br />
address of the connected wireless LAN adapter<br />
and keeping it in a safe place. The MAC address<br />
is labeled on the adapter. (The MAC address<br />
is displayed on the “Setting the info. of the<br />
Ethernet” screen when wireless communication is<br />
set (See step 4 of page 47).)<br />
MAC address<br />
Select the security key.<br />
OPEN<br />
WEP<br />
WPA-PSK(AES)<br />
WPA-PSK(TKIP)<br />
WPA2-PSK(AES)<br />
WPA2-PSK(TKIP)<br />
10 Press ENTER, then enter the security key code.<br />
• Enter the exact same security key which has been<br />
set in the wireless router.<br />
• The security key code is manually entered using the<br />
screen for inputting characters. (See page 49.)<br />
Enter the security key.<br />
Security key:<br />
Next<br />
48
SETTINGS<br />
The operation procedure for<br />
inputting characters manually<br />
NOTE<br />
• Numeric characters such as IP address can be entered<br />
on the input screen either by selecting each of the<br />
characters in the “Numeric” mode or using the Number<br />
buttons on the remote control.<br />
IP Address<br />
Netmask<br />
Gateway<br />
123<br />
1 Press ENTER at the boxes in which characters<br />
are to be entered, and the input screen will<br />
appear.<br />
Numeric<br />
Edit<br />
1 2 3 4 5 6 7 8 9 0<br />
NOTE<br />
• Press j (Del.Char.) to delete a number/<br />
character you have input.<br />
• To change a number/character you have input, press B<br />
(Green) (Left) or C (Yellow) (Right) to select the number/<br />
character you want to change, and press j<br />
(Del.Char.). Then, press c/d to select a new number/<br />
character you want to input, and press ENTER.<br />
Input character list<br />
1ABC (Alphabet/<br />
numeric character)<br />
5 Press D (Blue) (Complete) to fix the numbers<br />
which have been input.<br />
IP Address<br />
Netmask<br />
Gateway<br />
123<br />
6 Repeat step 1 to 5 to finish inputting all the<br />
required characters.<br />
Num. ABC DEF GHI JKL MNO PQRS TUV WXYZ Spc.<br />
Num. 1 2 3 4 5 6 7 8 9 0 ABC a b c A B C DEF d e f D E F<br />
GHI g h i G H I JKL j k l J K L MNO m n o M N O<br />
PQRS p q r s P Q R S TUV t u v T U V WXYZ w x y z W X Y Z<br />
Spc. (space)<br />
Selected by pressing<br />
a/b<br />
Selected by pressing<br />
c/d<br />
2 Press a/b to select the desired input mode.<br />
3 Press c/d to select a number/character, then<br />
press ENTER.<br />
4 Repeat the step 3 to display all of the desired<br />
characters/numbers in the input field.<br />
Numeric<br />
Sign<br />
1 2 3 4 5 6 7 8 9 0<br />
@ . , : ; _ - \ $ % ! ? & # + * = / | ˜ “ ‘ ˆ ` ( ) < > [ ]{ } Spc.<br />
@ . , : @ . , : ; _ - \ ; _ - \ $ % ! ? $ % ! ?<br />
& # + * & # + * = / | ˜ = / | ˜ “ ‘ ˆ ` “ ‘ ˆ `<br />
( ) < > ( ) < > [ ]{ } [ ] { } Spc. (space)<br />
Settings<br />
Example: The screen for inputting numeric characters<br />
Edit<br />
Cancel Left Right Complete Del.Char.<br />
Numeric 123<br />
Edit 1 2 3 4 5 6 7 8 9 0<br />
The same operation as the coloured buttons and j can be performed by<br />
selecting each of the items and pressing ENTER.<br />
“Del.Char.” stands for deleting characters.<br />
NOTE<br />
• When performing “Ethernet Setup (Cable)”, only “Numeric” and “Edit” are displayed.<br />
49
SETTINGS<br />
Before using the USB memory device<br />
CAUTION:<br />
• Do not remove the USB memory device or unplug<br />
the AC cord while the operations for “USB Memory<br />
Management” or “Software Update Settings (<strong>Manual</strong><br />
Update from USB memory device)” are being<br />
performed.<br />
• Do not use a USB extension cable when connecting<br />
a USB memory device to the USB1 or USB2 terminal<br />
on the player.<br />
−−Using a USB extension cable may prevent the<br />
player from performing correctly.<br />
NOTE:<br />
• SHARP cannot guarantee that all brands’ USB<br />
memory devices will operate with this player.<br />
• Only USB memory devices formatted with FAT 32/16<br />
are compatible.<br />
When formatting a USB memory device using a PC,<br />
perform the following settings.<br />
Format File System: FAT32<br />
Allocation Unit Size: Default Allocation Size<br />
USB Memory Management<br />
The following instructions explain how to delete data<br />
such as the Virtual Package data and the <strong>BD</strong>-LIVE<br />
data in a USB memory device.<br />
When you insert or remove a USB memory device,<br />
be sure to turn the main power off and make sure<br />
that “Quick Start” is set to “No” (See page 43).<br />
1 Insert the USB memory device into the USB<br />
terminal on this player.<br />
• When the wireless LAN adapter is not inserted<br />
into the USB1 terminal on the rear of the player, it<br />
is recommended that the USB memory device be<br />
connected to the USB1 terminal.<br />
NOTE<br />
• A USB memory device can be used with either the<br />
USB1 or USB2 terminal. When two USB memory<br />
devices are connected to both terminals at the same<br />
time, in certain situations the USB1 terminal may give<br />
priority to Local Storage and “Erase” and “Format” are<br />
not available for the USB memory device connected to<br />
the USB2 terminal.<br />
Rear<br />
USB1 terminal<br />
Front<br />
USB memory device<br />
5 Press a/b to select “Erase” or “Format”, then<br />
press ENTER.<br />
Erase: Deletes only <strong>BD</strong>-VIDEO data written on the<br />
USB memory device such as <strong>BD</strong>-LIVE data.<br />
Format: Be aware that all data including <strong>BD</strong>-VIDEO<br />
data and software update data will be deleted.<br />
• If you want to delete only the unneeded software<br />
update data after the software is updated, delete<br />
the data on the USB memory device using a PC.<br />
Erase<br />
Format<br />
Erases <strong>BD</strong>-VIDEO data on USB memory.<br />
Erase all contents on USB memory<br />
including protected contents.<br />
6 Press a/b to select “Yes”, then press ENTER.<br />
• A confirmation message is displayed. Check that<br />
the correct USB memory device is displayed, and<br />
then continue.<br />
7 Start the process.<br />
• The screen for the current operation will display.<br />
Complete<br />
OK<br />
50<br />
USB memory<br />
device<br />
USB2 terminal<br />
2 Press B to turn on the power.<br />
3 Press a/b to select “Settings”, then press d or<br />
ENTER.<br />
4 Press a/b to select “USB Memory<br />
Management”, then press d or ENTER.<br />
• The “USB Memory Management” screen is<br />
displayed.<br />
• “No USB Memory” appears when no USB memory<br />
is inserted.<br />
8 Press ENTER.<br />
9 Press HOME or EXIT to exit.<br />
NOTE<br />
• Data which has been saved to the player’s internal<br />
memory (game score, etc.) will also be deleted.
SETTINGS<br />
Software Update Settings<br />
In this player, the software version can be updated<br />
using either one of the following methods.<br />
• Auto Update from Network<br />
• <strong>Manual</strong> Update from Network<br />
• <strong>Manual</strong> Update from USB memory device<br />
Auto Update from Network<br />
This function allows you to perform the update by<br />
accessing an Internet connection automatically to<br />
check if there is a new firmware version every time<br />
the player is turned on.<br />
When using this function, it is required to perform<br />
the following settings in advance.<br />
NOTE<br />
• Make sure that the LAN cable or the wireless LAN<br />
adapter is connected to this player and make sure that<br />
the wireless router/access point is connected to the<br />
Internet if using the wireless LAN adapter. (See pages<br />
18–19.)<br />
• Make sure to perform the communication settings. (See<br />
pages 46–49.)<br />
• It may take time to access and download the update<br />
depending on the Internet connection and other factors.<br />
CAUTION<br />
• Do not remove the LAN cable or the wireless LAN<br />
adapter or unplug the AC cord while downloading or<br />
updating software.<br />
Setup<br />
1 Press a/b to select “Settings”, then press d or<br />
ENTER.<br />
2 Press a/b to select “Software Update<br />
Settings”, then press d or ENTER.<br />
3 Press a/b to select “Auto Update Setting”,<br />
then press d or ENTER.<br />
4 Press a/b to select “Yes”, then press ENTER.<br />
• After this, an Internet connection will be made<br />
automatically every time this player is turned on.<br />
Update process<br />
1 When this player is turned on, the Internet<br />
connection starts automatically.<br />
• “Accessing...” blinks on the screen.<br />
• The current version of this unit software and the<br />
latest version of the update file on the network are<br />
displayed when latest version of firmware has been<br />
found.<br />
To update this player software with update file,<br />
select “Yes”, and go to step 2.<br />
Latest version of firmware has been found.<br />
Firmware update is available.<br />
Proceed with update?<br />
Current Version : xxxxxxxxxx<br />
Latest Version : yyyyyyyyyy<br />
If “Yes” will be selected, version update will start.<br />
Yes<br />
No<br />
• If the latest firmware version has been already<br />
updated, nothing is displayed on the screen.<br />
2 Press ENTER to start updating.<br />
Downloading latest firmware…<br />
Version : yyyyyyyyyy<br />
30%<br />
Settings<br />
3 When the software is successfully updated, a<br />
screen is displayed indicating that the update<br />
process is completed.<br />
• If the update has failed, an error message appears.<br />
Retry the update after checking if the broadband<br />
Internet connection (pages 18–19) and<br />
communication settings (pages 46–49) are<br />
performed properly.<br />
4 Press B to turn off the player before using<br />
again.<br />
51
SETTINGS<br />
<strong>Manual</strong> Update from Network<br />
This function allows you to perform the update<br />
operation by accessing an Internet connection<br />
manually to check if there is a new firmware version.<br />
NOTE<br />
• Make sure that the LAN cable or the wireless LAN<br />
adapter is connected to this player and make sure that<br />
the wireless router/access point is connected to the<br />
Internet if using the wireless LAN adapter. (See pages<br />
18–19.)<br />
• Make sure to perform the communication settings. (See<br />
pages 46–49.)<br />
• It may take time to access and download the update<br />
depending on the Internet connection and other factors.<br />
CAUTION<br />
• Do not remove the LAN cable or the wireless LAN<br />
adapter or unplug the AC cord while downloading or<br />
updating software.<br />
1 Press a/b to select “Settings”, then press d or<br />
ENTER.<br />
2 Press a/b to select “Software Update<br />
Settings”, then press d or ENTER.<br />
3 Press a/b to select “<strong>Manual</strong> Update”, then<br />
press d or ENTER.<br />
4 Press a/b to select “Network”, then press<br />
ENTER.<br />
5 During access to the network and checking the<br />
latest version of firmware, “Accessing” blinks.<br />
• The current version of this unit software and the<br />
latest version of the update file on the network are<br />
displayed when latest version of firmware has been<br />
found.<br />
To update this player software with update file,<br />
select “Yes”, and go to step 6.<br />
Latest version of firmware has been found.<br />
Firmware update is available.<br />
Proceed with update?<br />
Current Version : xxxxxxxxxx<br />
Latest Version : yyyyyyyyyy<br />
If “Yes” will be selected, version update will start.<br />
Yes<br />
No<br />
• If the Internet connection has failed, an error<br />
message appears.<br />
Retry the update after checking if the broadband<br />
Internet connection (pages 18–19) and<br />
communication settings (pages 46–49) are<br />
performed properly.<br />
6 Press ENTER to start updating.<br />
Downloading latest firmware…<br />
Version : yyyyyyyyyy<br />
30%<br />
7 When the software is successfully updated, a<br />
screen is displayed indicating that the update<br />
process is completed.<br />
• If the update has failed, an error message appears.<br />
Retry the update after checking if the broadband<br />
Internet connection (pages 18–19) and<br />
communication settings (pages 46–49) are<br />
performed properly.<br />
8 Press B to turn off the player.<br />
<strong>Manual</strong> Update from USB memory<br />
device<br />
This function allows software updates by inserting<br />
a USB memory device with the update file into the<br />
USB1 or USB2 terminal on this player.<br />
• When a software update is performed, the software<br />
update data must be written onto the USB memory<br />
device in advance using a PC.<br />
• The USB memory device must be clear of all files<br />
except software update data to allow new software<br />
uploading.<br />
To check for the availability of a software update,<br />
visit www.sharp.co.uk/gb.<br />
• When software update data is released, copy the data<br />
onto a USB memory device after downloading it to a<br />
PC.<br />
• For methods such as downloading and copying to a<br />
USB memory device, carefully read the description<br />
shown on the website before performing the operation.<br />
52
SETTINGS<br />
NOTE<br />
• Only USB memory devices formatted with FAT 32/16 are<br />
compatible.<br />
When formatting a USB memory device using a PC,<br />
perform the following settings.<br />
Format File System: FAT32<br />
Allocation Unit Size: Default Allocation Size<br />
• Do not extract the firmware update file to any folders<br />
other than the root directory on the USB memory<br />
device. The firmware update file must be only one file<br />
directly in the root directory.<br />
When you insert or remove a USB memory device,<br />
be sure to turn the main power off and make sure<br />
that “Quick Start” is set to “No” (See page 43).<br />
1 Insert the USB memory device with the update<br />
file into the USB1 or USB2 terminal on this<br />
player.<br />
• It is recommended that the USB memory device be<br />
connected to the USB2 terminal on the front of the<br />
player.<br />
NOTE<br />
• A USB memory device can be used with either the<br />
USB1 or USB2 terminal. When two USB memory<br />
devices are connected to both terminals at the same<br />
time, in certain situations the USB1 terminal may give<br />
priority to Local Storage and the USB1 terminal cannot<br />
be used for Software Update.<br />
7 Enter the 4-digit number using 0–9.<br />
Enter 4-digit PIN code<br />
8 Press ENTER to start checking data in the USB<br />
memory device.<br />
Insert USB memory device containing<br />
the software update file.<br />
OK<br />
Front<br />
9 During the data checking, “Checking” blinks.<br />
Now checking the data in USB memory device.<br />
Checking<br />
CAUTION<br />
• Do not remove the USB memory device or unplug the<br />
AC cord while the software is being updated.<br />
USB memory device<br />
2 Press B to turn on the power.<br />
3 Press a/b to select “Settings”, then press d or<br />
ENTER.<br />
4 Press a/b to select “Software Update<br />
Settings”, then press d or ENTER.<br />
5 Press a/b to select “<strong>Manual</strong> Update”, then<br />
press d or ENTER.<br />
6 Press a/b to select “USB Memory”, then press<br />
ENTER.<br />
• If you have not yet set the PIN code, go to step 7.<br />
• The current version of this unit software and the<br />
version of the update file on the USB memory<br />
device are displayed. To update this player software<br />
with update file, select “Yes”, and press ENTER.<br />
Software update file is detected in the USB memory device.<br />
Start update?<br />
Current Ver. :<br />
Update Ver. :<br />
xxxxxxxxxx<br />
yyyyyyyyyy<br />
Yes<br />
No<br />
Settings<br />
(Continued on the next page)<br />
53
SETTINGS<br />
• If the USB memory device is not properly installed<br />
or the correct update file cannot be found on<br />
the USB memory device, an error message is<br />
displayed.<br />
Check the file on the USB memory device, and then<br />
reinsert the USB memory device correctly.<br />
Software update file is not detected in the USB memory device.<br />
Confirm that you have transferred the file<br />
to the USB memory device and retry software update.<br />
Confirm that you have inserted the USB memory device<br />
into the correct device.<br />
OK<br />
10 Press ENTER to start updating.<br />
• The screen becomes dark for a while until the<br />
update screen can be displayed. Please wait for<br />
the update screen to appear. Do not unplug the AC<br />
cord.<br />
The picture will temporarily go dark until<br />
the software update display appears.<br />
Wait several minutes and do not unplug the AC cord.<br />
OK<br />
11 When the software is successfully updated, a<br />
screen is displayed indicating that the update<br />
process is completed.<br />
• If the update has failed, check the file in the USB<br />
device and try Software Update again.<br />
12 Press B to turn off the player.<br />
• Delete unneeded software update data using a PC<br />
after the software update process is completed.<br />
13 Remove the USB memory device.<br />
There is more than one software file<br />
in the USB memory device.<br />
Confirm that only the software update file is<br />
in the USB memory device.<br />
OK<br />
Now updating<br />
* Do not unplug AC cord.<br />
Update Version<br />
yyyyyyyyyy<br />
30%<br />
About Output of Audio Formats<br />
Audio format<br />
Maximum number of<br />
channels<br />
HDMI<br />
DIGITAL OUT<br />
PCM Bitstream PCM Bitstream<br />
Dolby TrueHD 7.1ch (48kHz/96kHz) 7.1ch * 3 7.1ch * 4 2ch * 2 5.1ch * 1/ * 3<br />
5.1ch (192kHz) 5.1ch * 3 5.1ch * 4 2ch * 2 5.1ch * 1/ * 3<br />
Dolby Digital PLUS 7.1ch (48kHz) 7.1ch 7.1ch * 4 2ch * 2 5.1ch * 1/ * 3<br />
DTS-HD Master Audio 7.1ch (48kHz/96kHz) 7.1ch * 3 7.1ch * 4 2ch * 2 5.1ch * 1/ * 3<br />
5.1ch (192kHz) 5.1ch * 3/ * 5 5.1ch * 4 2ch * 2 5.1ch * 1/ * 3<br />
DTS-HD High Resolution Audio 7.1ch (48kHz/96kHz) 7.1ch * 3 7.1ch * 4 2ch * 2 5.1ch * 1/ * 3<br />
LPCM 7.1ch (48kHz/96kHz) 7.1ch * 3 — 2ch * 2 —<br />
I Core only<br />
J Down mixed<br />
K When “Secondary Audio” is set to “On”, the audio is output as 48kHz.<br />
L When “Secondary Audio” is set to “On”, the audio is output as PCM.<br />
M When 5.1ch (192kHz), the audio output is downsampled to 96kHz.<br />
M When 2ch, the audio is output as 192kHz.<br />
5.1ch (192kHz) 5.1ch * 3 — 2ch * 2 —<br />
54
Streaming content<br />
Playing back video on demand streaming content<br />
In this player, you can enjoy a variety of video on<br />
demand streaming content by connecting to the<br />
Internet.<br />
Video<br />
Music<br />
Picture<br />
e-Contents<br />
Settings<br />
VOD content<br />
VOD content<br />
YouTube<br />
• Playing back YouTube video content streaming<br />
NOTE<br />
• To enjoy this function, make a broadband Internet<br />
connection to both your PC and this player (See pages<br />
18–19), and then set communication settings (See<br />
pages 46–49), then perform the following operation.<br />
• To use this function, we recommend setting “Auto<br />
Power Off” to “No”. (See page 43.)<br />
• Before using this function, please read “Network Service<br />
Disclaimer” (page 68).<br />
Playing back YouTube content<br />
This player can play back YouTube video content<br />
streaming through the Internet.<br />
• For more information about YouTube, see the YouTube<br />
website using a PC (http://www.youtube.com).<br />
NOTE<br />
• Some video content may not be played back with this<br />
player.<br />
• The actual functions which can be operated may differ<br />
from the descriptions shown.<br />
• It may take time to access and download the update<br />
depending on the Internet connection and other factors.<br />
Playing back<br />
1 Press a/b to select “e-Contents”, then press<br />
d or ENTER.<br />
2 Press a/b to select “YouTube”, then press d<br />
or ENTER.<br />
• The YouTube screen is displayed.<br />
3 Follow the instruction on the screen.<br />
4 To exit the screen, press EXIT.<br />
<strong>Operation</strong>al buttons for playback control<br />
Item<br />
Progress bar<br />
Pause the video content. To resume<br />
playing paused content, press on<br />
the playback controls.<br />
Skip to the previous video content on<br />
the video list.<br />
Skip to the next video content on the<br />
video list.<br />
Play back all the video content on the<br />
video list repeatedly.<br />
Switch the video quality to high<br />
resolution.<br />
Toggle the playback screen between<br />
normal and full screen.<br />
Determine the point where you want to<br />
play back a video content by pressing<br />
c/d on the progress bar.<br />
NOTE<br />
• To turn the playback controls on during full screen<br />
display, press POP-UP MENU.<br />
• To return to the main page screen, press TOP MENU/<br />
TITLE LIST.<br />
Streaming content<br />
55
Appendix<br />
PC control of the Player<br />
• This player can be controlled from a PC using the<br />
IP.<br />
• Use an ETHERNET cable (commercially available)<br />
or wireless LAN USB adapter for the connections.<br />
IP Control Setup<br />
Command format<br />
Eight ASCII codes eCR<br />
C1 C2 C3 C4 P1 P2 P3<br />
P4<br />
NOTE<br />
• This operation system should be used by a person who<br />
is accustomed to using computers.<br />
Communication conditions for IP<br />
Connect to the player with the following settings<br />
made for IP on the PC.<br />
IP protocol:<br />
Host IP address:<br />
Service:<br />
TCP port#:<br />
TCP/IP<br />
Set the IP address on the player<br />
menu<br />
None (Do not select Telnet or<br />
SSH)<br />
Set a port number on the player<br />
menu<br />
When you set your ID and password on the player<br />
menu, you need to enter them as soon as you<br />
connect to the player.<br />
NOTE<br />
• The connection will be cut off when there has been no<br />
communication for 3 minutes.<br />
1 Press a/b to select “Settings”, then press d or<br />
ENTER.<br />
2 Press a/b to select “Communicatioin Setup”,<br />
then press ENTER.<br />
3 Press a/b to select “IP Control Setup”, then<br />
press ENTER.<br />
4 Press a/b to select “Change”, then press<br />
ENTER.<br />
5 To use IP Control, select “Enable”, then press<br />
ENTER.<br />
6 Set the device name.<br />
7 Set your login ID and password.<br />
8 Set the port to use with IP Control.<br />
9 Confirm the settings, then press “OK”.<br />
Communication procedure<br />
Send the control commands from the PC via the IP.<br />
This Player operates according to the received<br />
command and sends a response message to the<br />
PC.<br />
Do not send multiple commands at the same time.<br />
Wait until the PC receives the OK response before<br />
sending the next command.<br />
Make sure to send “A” with the carriage return and<br />
confirm that “ERR” returns before operating.<br />
Command<br />
4-digits<br />
Parameter<br />
4-digits<br />
Return code<br />
Command 4-digits: Command. The text of four<br />
characters.<br />
Parameter 4-digits: Parameter 0 – 9, blank<br />
Parameter<br />
Input the parameter values, aligning left, and fill with<br />
blank(s) for the remainder. (Be sure that four values<br />
are input for the parameter.)<br />
When the input parameter is not within an adjustable<br />
range, “ERR” returns. (Refer to “Response code<br />
format”.)<br />
Response code format<br />
Normal response<br />
O K<br />
Return code (0DH)<br />
Problem response (communication error or<br />
incorrect command)<br />
E R R<br />
Return code (0DH)<br />
56
PC control of the Player<br />
Command list<br />
CONTROL ITEM COMMAND PARAMETER<br />
POWER ON* P O W R 1 _ _ _<br />
POWER OFF P O W R 0 _ _ _<br />
PLAY D P L Y _ _ _ _<br />
STOP D S T P _ _ _ _<br />
FWD D F W D _ _ _ _<br />
REV D R E V _ _ _ _<br />
TOP MENU D T M N _ _ _ _<br />
UP a D U P K _ _ _ _<br />
DOWN b D D W N _ _ _ _<br />
LEFT c D L F T _ _ _ _<br />
RIGHT d D R G T _ _ _ _<br />
ENTER D E N T _ _ _ _<br />
RETURN D R E T _ _ _ _<br />
EXIT D E X T _ _ _ _<br />
HOME D S E T _ _ _ _<br />
POP-UP MENU D P M N _ _ _ _<br />
SKIP K D S K B _ _ _ _<br />
SKIP L D S K F _ _ _ _<br />
CONTROL ITEM COMMAND PARAMETER<br />
PAUSE D P U S _ _ _ _<br />
OPEN/CLOSE D E J T _ _ _ _<br />
FUNCTION D F N C _ _ _ _<br />
REPEAT D R E P _ _ _ _<br />
DEVICE NAME B D N M 1 _ _ _<br />
MODEL NAME M N R D 1 _ _ _<br />
SOFTWARE VERSION S W V N 1 _ _ _<br />
IP PROTOCOL VERSION I P P V 1 _ _ _<br />
* The POWER ON command is available with IP control only when the power is off and<br />
Quick start is ON.<br />
Appendix<br />
57
Troubleshooting<br />
The following problems do not always suggest a defect or malfunction of this Player.<br />
Refer to the problems and lists of possible solutions below before calling for service.<br />
Power<br />
Problem<br />
Possible causes and solutions<br />
The Player power cannot be turned on. • Is the power cord firmly plugged into the AC outlet? (Page 20)<br />
• When the power cord is plugged into an AC outlet, press and hold B on the Player until “<br />
panel display. Then, after the B (On/Standby) indicator is lit, turn on the power. (Page 61)<br />
• Press B after the B (On/Standby) indicator turns on. (Page 21)<br />
The Player power is turned off.<br />
Basic <strong>Operation</strong><br />
Problem<br />
” appears on the front<br />
• Is “Auto Power Off” set to “Yes”? When “Auto Power Off” is set to “Yes”, the power will be automatically turned off after<br />
10 continuous minutes of inactivity (no playback). (Page 43)<br />
Possible causes and solutions<br />
The remote control does not work. • Use the remote control within its operating range. (Page 20)<br />
• Replace the batteries. (Page 20)<br />
• Reset the remote control.<br />
−−Press and hold 1 (the number button) first and then ENTER on the remote control together for more than 5 seconds.<br />
Cannot operate the Player. • Are you operating the Player within the specified operating temperature range? (Page 63)<br />
Playback<br />
Problem<br />
Possible causes and solutions<br />
The Player cannot play a disc. • Take out the disc and clean it. (Page 13)<br />
• Make sure that the disc is loaded properly (aligned in disc tray and label-side up). (Page 25)<br />
• Make sure that region code on the disc matches that of this Player. (Page 9)<br />
• Allow any condensation in or near the Player to dry. (Page 13)<br />
• Check that the disc is recorded in the compatible TV system (PAL or NTSC).<br />
• The Player cannot play back video which was not recorded normally. (Page 10)<br />
• Proper playback may be impossible due to the state of the disc recording, a scratched, warped or dirty disc, the state of<br />
the pick-up, or compatibility issues between this Player and the disc being used. (Pages 10, 13)<br />
• When the recorded time of a disc is unusually short, playback may not be possible.<br />
• <strong>BD</strong>-RE/R discs recorded in a format other than <strong>BD</strong>MV/<strong>BD</strong>AV cannot be played back. (Page 9)<br />
The disc is automatically ejected after closing the disc<br />
tray.<br />
• Make sure that the disc is loaded properly (aligned in disc tray and label-side up). (Page 25)<br />
• Take out the disc and clean it. (Page 13)<br />
• Make sure that the disc is playable. (Page 9)<br />
58
Troubleshooting<br />
Playback (Continued)<br />
Video stops.<br />
Problem<br />
The Player makes a snapping sound when starting<br />
playback or loading a disc.<br />
Possible causes and solutions<br />
• Has the Player been subjected to shock or impact? Are you using it in an unstable location? The Player will stop if it<br />
senses shock or vibration.<br />
• The player may sometimes make a snapping sound when starting playback if it has not been operated in a while. These<br />
sounds are not malfunctions of the player but are normal operating conditions.<br />
Picture<br />
Problem<br />
Possible causes and solutions<br />
No picture. • Make sure that the cable is connected correctly. (Page 16)<br />
• Make sure that the connected TV or the AV receiver is set to the correct input. (Pages 16–17)<br />
• Take out the disc and clean it. (Page 13)<br />
• Make sure that region code on the disc matches that of this Player. (Page 9)<br />
• There is no picture from the HDMI output.<br />
− Are the settings performed correctly? Please check the settings. (Page 42)<br />
Screen freezes and operation buttons do not work. • Turn off the power and turn on the power again.<br />
• If the power is not turned off, perform a reset. (Page 61)<br />
• Is the disc damaged or dirty? Check the condition of the disc. (Page 13)<br />
Square noise (mosaic) appears on the screen.<br />
• Blocks in images may be visible in scenes with rapid movement due to the characteristics of digital image compression<br />
technology.<br />
Audio is not output, or images are not played back<br />
properly.<br />
3D images cannot be output to a TV.<br />
Noise appears on the screen.<br />
• The audio may not be output or the images may not be played back properly for some discs in which copyrightprotected<br />
contents are recorded. (Pages 10–11)<br />
• Is an HDMI cable used?<br />
• Are a 3D compatible TV and 3D glasses used?<br />
• Is a proper connection made between the HDMI OUT terminal of the player and the HDMI input terminal of the 3D<br />
compatible TV? (Page 16)<br />
• Are all devices (amplifier, AV receiver, etc.) between the TV and the player connected by HDMI and 3D compatible?<br />
(Pages 16-17)<br />
• Is the 3D setting on this player correct? (Pages 23, 45)<br />
• Is the 3D setting on the TV correct?<br />
• Is a 3D compatible <strong>BD</strong> disc being played back?<br />
• When you watch TV broadcasts with the power of this player turned on, noise may appear on the TV screen. In such<br />
cases, turn off the power to this player or keep this player away from the TV.<br />
Appendix<br />
(Continued on the next page)<br />
59
Troubleshooting<br />
Sound<br />
Problem<br />
No sound, or sound is distorted.<br />
Audio is not output, or images are not played back<br />
properly.<br />
Possible causes and solutions<br />
• If the volume of the TV or amplifier is set to minimum, turn the volume up.<br />
• There is no sound during still mode, slow motion playback, fast forward and fast reverse. (Page 35)<br />
• Check that the audio cable is connected correctly. (Page 17)<br />
• Check that the cable plugs are clean.<br />
• Take out the disc and clean it. (Page 13)<br />
• Audio may not be output depending on the audio recording status, such as when audio other than an audio signal or<br />
non-standard audio is recorded for the audio content of the disc. (Page 10)<br />
• The audio may not be output or the images may not be played back properly for some discs in which copyrightprotected<br />
contents are recorded.<br />
Network<br />
Problem<br />
Cannot connect to the Internet.<br />
Possible causes and solutions<br />
When the wired Internet connection is made<br />
• Is the LAN cable connected properly? (Page 18)<br />
• Is the wrong cable such as a modular cable used? Connect a LAN cable to the ETHERNET terminal. (Page 18)<br />
• Is the power for the connected equipment, such as a broadband router or modem turned on?<br />
• Is the broadband router and/or modem properly connected?<br />
• Is the proper value(s) set in the network setting? Check “Communication Setup”. (Pages 46–49)<br />
When the wireless Internet connection is made<br />
• Is the wireless LAN adapter connected properly? (Page 19)<br />
• Is the power for the connected equipment, such as a wireless router or access point turned on?<br />
• Is the wireless router or access point properly connected?<br />
• Are there any obstacles, such as physical structures (brick and concrete walls, etc.) and electronics (microwave, etc.)<br />
between the wireless router/access point and the player? As this may cause interference with the wireless signal, make<br />
sure to keep obstacles away.<br />
• Is the proper value(s) set in the network setting? Check “Communication Setup”. (Pages 46–49)<br />
Cannot download <strong>BD</strong>-LIVE contents. • Is the LAN cable or the wireless LAN adapter connected properly? (Page 18–19)<br />
• Is the USB memory device properly connected? Check that the USB memory device is connected to the USB1 or USB2<br />
terminal of this Player. (Page 27)<br />
• Check if the <strong>BD</strong> disc supports <strong>BD</strong>-LIVE.<br />
• Check the setting for “<strong>BD</strong> Internet Access”. (Page 44)<br />
60
Troubleshooting<br />
Other<br />
Problem<br />
The TV operates incorrectly.<br />
The Player heats up during use.<br />
B (On/Standby) indicator will remain lit.<br />
Possible causes and solutions<br />
• Some TVs with wireless remote control capability may operate incorrectly when using the remote control of this Player.<br />
Use such TVs away from this Player.<br />
• When using this Player, the console cabinet may heat up depending on the usage environment. This is not a malfunction.<br />
• When the AC cord is removed from the outlet, the B (On/Standby) indicator will remain lit for a short period. This is<br />
normal and is not a malfunction.<br />
To Reset this Player<br />
• If this Player receives strong interference from a source such as excessive static electricity, strong external noise, malfunction of power supply, or<br />
voltage caused by lightning during use or a wrong operation is sent to the Player, errors like the Player not accepting an operation may occur.<br />
B (Power)<br />
Press and hold B on the Player until “ ” appears on the front panel display when the Player does not operate properly even after the<br />
power has been turned off. Then, after the B (On/Standby) indicator is lit, turn on the power.<br />
• When a reset is performed while the power is on, the Player will turn off. Turn the power on again. At this point, it may take a few moments for the system processing to finish before<br />
the Player is ready for use. During the system processing, the <strong>BD</strong>/DVD/CD mode indicator on the front panel display of the player will blink. Once the system processing has finished,<br />
the indicator will finish blinking and then light up normally. You can operate the Player when the <strong>BD</strong>/DVD/CD mode indicator is lit.<br />
• Since all settings including the language setting stored in memory are also reset when a reset has been performed, they must be set again.<br />
• When the problem persists even after performing a reset, unplug the AC cord and plug it in again. If this does not solve the problem, contact the nearest service centre approved by<br />
SHARP.<br />
Appendix<br />
61
On-screen Error Messages<br />
The following messages appear on the TV screen in case of an error during operation.<br />
Error message Possible Error Suggested Solution<br />
Cannot play. • The disc cannot be played back with this Player. • Check the disc, and load it correctly.<br />
Incompatible disc.<br />
• If you load a disc which cannot be played with this<br />
Player (i.e. a scratched disc), or if you load a disc upside<br />
down, this message will appear, and the disc tray will<br />
automatically pop out.<br />
• Occurs if the loaded disc cannot be played because it is<br />
a non-standard disc or scratched, etc.<br />
• Remove the disc.<br />
Cannot operate. • Occurs if an operation is incorrect. —<br />
This USB memory is not formatted properly. Please format<br />
the memory in USB memory management.<br />
The Connected USB Memory cannot be used. It should be<br />
compliant with USB 2.0<br />
• Occurs if there is a formatting error.<br />
• Occurs if the USB memory is not formatted with FAT<br />
32/16.<br />
• Occurs if USB memory not compliant with USB 2.0 High<br />
Speed (480Mbit/s) is used (i.e. USB 1.0/USB 1.1).<br />
• Format the USB memory again.<br />
• Format the USB memory with your PC.<br />
• Connect USB 2.0 High Speed (480Mbit/s) compliant<br />
USB memory.<br />
62
Specifications<br />
Specifications are subject to change without notice.<br />
General<br />
Power supply<br />
Power consumption (Normal)<br />
Power consumption (Standby)<br />
AC 100–240 V, 50/60 Hz<br />
15 W (AC 230 V, 50 Hz)<br />
0.4 W (AC 230 V, 50 Hz) (When “Quick Start” is set to “No”)<br />
Dimensions Approx. 430 mm g 49 mm g 198 mm (W g H g D)<br />
Weight<br />
Approx. 1.7 kg<br />
Operating temperature 5°C to 35°C<br />
Storage temperature –20°C to 60°C<br />
Operating humidity<br />
TV systems<br />
10 % to 80 % (no condensation)<br />
PAL system/NTSC system<br />
(The system recorded on the disc is output.)<br />
Playback<br />
Playable discs/media formats<br />
Region code<br />
Input/Output<br />
HDMI<br />
Digital audio optical output<br />
USB input<br />
ETHERNET<br />
<strong>BD</strong>-ROM, <strong>BD</strong>-RE, <strong>BD</strong>-R,<br />
DVD Video, DVD+RW/+R/-RW/-R (Video/VR/AVCHD/JPEG file/MP3 file/DivX (H.264/MKV) format),<br />
Audio CD (CD-DA), CD-RW/R (CD-DA/JPEG file/MP3 file format)<br />
USB memoy device (JPEG file/MP3 file/DivX (H.264/MKV) format)<br />
B or ALL for <strong>BD</strong>, 2 or ALL for DVD<br />
HDMI 19-pin standard connector (1080p 24Hz output)<br />
HDMI ® (Deep Colour, x.v.Colour, Dolby TrueHD, DTS-HD Master Audio | Essential)<br />
Terminal: Square Optical terminal<br />
USB1/USB2<br />
USB 2.0 High Speed (480Mbit/s) correspondence (for Wireless LAN adapter and Local storage/Software update/JPEG,<br />
MP3 and DivX (H.264/MKV) playback)<br />
10BASE-T/100BASE-TX<br />
Appendix<br />
(Continued on the next page)<br />
63
Specifications<br />
Wireless LAN USB Adapter<br />
Product name<br />
Wireless LAN adapter (supplied)<br />
Standard<br />
IEEE 802.11b/g/n<br />
Host interface USB 2.0<br />
Frequency band<br />
Draft 802.11n Radio: 2.4GHz<br />
802.11g Radio: 2.4GHz<br />
802.11b Radio: 2.4GHz<br />
Europe-2.400 – 2.483GHz (channel 1–13)<br />
Modulation<br />
Security<br />
Power consumption<br />
DBPSK @ 1 Mbps<br />
DQPSK@ 2 Mbps<br />
CCK@ 5.5/11 Mbps<br />
BPSK@ 6/9 Mbps<br />
QPSK@ 12/18 Mbps<br />
16-QAM@ 24/36 Mbps<br />
64-QAM@ 48/54 Mbps<br />
AP (Infrastructure) mode supports<br />
- Static WEP that support both 64 and 128 bit keys.<br />
- WPA(TKIP) with PSK<br />
Ad-hoc mode supports<br />
- None (plaintext)<br />
- Static WEP that supports both 64 and 128 bit keys.<br />
TX: up to 310mA (5V)<br />
Dimensions Approx. 17 g 8.4 g 29.8 mm (W g H g D)<br />
Weight Approx. 3.9g<br />
Permit countries *1<br />
II<br />
Usage of this player’s wireless LAN is permitted for the countries listed.<br />
Belgium, Netherlands, Luxembourg, Germany, France, Italy, United Kingdom, Ireland, Denmark, Greece, Spain, Portugal,<br />
Austria, Finland, Sweden, Poland, Hungary, Czech Republic, Slovenia, Slovakia, Estonia, Latvia, Lithuania, Cyprus, Malta,<br />
Romania, Bulgaria, Iceland, Norway, Switzerland, Liechtenstein, Turkey<br />
64
Glossary<br />
Ad-hoc mode (pages 19, 64)<br />
Ad-hoc mode is a wireless LAN communication<br />
format. This performs direct communication<br />
between equipment without an access point. (Adhoc<br />
mode is not supported.)<br />
AVCHD (page 9)<br />
AVCHD (Advanced Video Codec High Definition)<br />
refers to a recording format (specification) for digital<br />
video cameras which can record to a disc such as<br />
8 cm DVD disc and play back digital high definition<br />
images.<br />
<strong>BD</strong>AV (page 9)<br />
<strong>BD</strong>AV (Blu-ray Disc Audio/Visual, <strong>BD</strong>-AV) refers to<br />
one of the application formats used for writable<br />
Blu-ray discs such as <strong>BD</strong>-R, <strong>BD</strong>-RE, etc. <strong>BD</strong>AV is a<br />
recording format equivalent to DVD-VR (VR mode) of<br />
the DVD specifications.<br />
<strong>BD</strong>-J application<br />
The <strong>BD</strong>-ROM format supports Java for interactive<br />
functions. “<strong>BD</strong>-J” offers content providers almost<br />
unlimited functionality when creating interactive <strong>BD</strong>-<br />
ROM titles.<br />
<strong>BD</strong>-LIVE (page 28)<br />
A variety of interactive content is available from <strong>BD</strong>-<br />
LIVE compatible Blu-ray discs via the Internet.<br />
<strong>BD</strong>MV (page 9)<br />
<strong>BD</strong>MV (Blu-ray Disc Movie, <strong>BD</strong>-MV) refers to one<br />
of the application formats used for <strong>BD</strong>-ROM which<br />
is one of the Blu-ray Disc specifications. <strong>BD</strong>MV is<br />
a recording format equivalent to DVD-video of the<br />
DVD specification.<br />
<strong>BD</strong>-R (pages 9, 25)<br />
A <strong>BD</strong>-R (Blu-ray Disc Recordable) is a recordable,<br />
write-once Blu-ray Disc. Since contents can be<br />
recorded and cannot be overwritten, a <strong>BD</strong>-R can be<br />
used to archive data or for storing and distributing<br />
video material.<br />
<strong>BD</strong>-RE (pages 9, 25)<br />
A <strong>BD</strong>-RE (Blu-ray Disc Rewritable) is a recordable<br />
and rewritable Blu-ray Disc.<br />
<strong>BD</strong>-ROM (pages 9, 25)<br />
<strong>BD</strong>-ROMs (Blu-ray Disc Read-Only Memory)<br />
are commercially produced discs. Other than<br />
conventional movie and video contents, these discs<br />
have enhanced features such as interactive content,<br />
menu operations using pop-up menus, selection of<br />
subtitle display, and slide shows. Although a <strong>BD</strong>-<br />
ROM may contain any form of data, most <strong>BD</strong>-ROM<br />
discs will contain movies in High Definition format<br />
for playback on Blu-ray Disc players.<br />
Blu-ray Disc (<strong>BD</strong>) (page 9)<br />
A disc format developed for recording/playing highdefinition<br />
(HD) video (for HDTV, etc.), and for storing<br />
large amounts of data. A single layer Blu-ray Disc<br />
holds up to 25 <strong>GB</strong>, and a dual-layer Blu-ray Disc<br />
holds up to 50 <strong>GB</strong> of data.<br />
Chapter number (pages 38, 39)<br />
Sections of a movie or a music feature that are<br />
smaller than titles. A title is composed of several<br />
chapters. Some discs may only be comprised of a<br />
single chapter.<br />
Control Panel (page 24)<br />
This function allows you to operate this player using<br />
the TV remote control by displaying the control<br />
panel on the TV screen.<br />
Copy guard<br />
This function prevents copying. You cannot copy<br />
discs marked by the copyright holder with a signal<br />
which prevents copying.<br />
Deep Colour<br />
Deep Colour can reproduce rich colours, increasing<br />
the number of bits describing colours.<br />
This Player is compatible with Deep Colour. You can<br />
enjoy this function by connecting to a Deep Colour<br />
compatible TV using an HDMI cable.<br />
Disc menu (page 26)<br />
This lets you select things like the subtitle language<br />
or audio format using a menu stored on the DVD<br />
video disc.<br />
Dolby Digital<br />
A sound system developed by Dolby Laboratories<br />
Inc. that gives movie theatre ambience to audio<br />
output when the product is connected to a Dolby<br />
Digital processor or amplifier.<br />
Dolby Digital Plus (page 54)<br />
A sound system developed as an extension to Dolby<br />
Digital. This audio coding technology supports 7.1<br />
multi-channel surround sound.<br />
Dolby TrueHD (page 54)<br />
Dolby TrueHD is a lossless coding technology that<br />
supports up to 8 channels of multi-channel surround<br />
sound for the next generation optical discs. The<br />
reproduced sound is true to the original source bitfor-bit.<br />
DTS<br />
This is a digital sound system developed by DTS,<br />
Inc. for use in cinemas.<br />
DTS-HD High Resolution Audio (page 54)<br />
DTS-HD High Resolution Audio is a new technology<br />
developed for the next generation high definition<br />
optical disc format.<br />
DTS-HD Master Audio (page 54)<br />
DTS-HD Master Audio is a lossless audio<br />
compression technology developed for the next<br />
generation high definition optical disc format.<br />
Appendix<br />
65
Glossary<br />
DTS-HD Master Audio | Essential<br />
DTS-HD Master Audio | Essential is a lossless audio<br />
compression technology developed for the next<br />
generation high definition optical disc format.<br />
DVD upscaling (page 25)<br />
Upscaling (upconverting) refers to a function of<br />
various players and devices that enlarge the image<br />
size to fit the size of the screen of video equipments<br />
such as a TV.<br />
DVD video (pages 9, 25)<br />
A disc format that contains up to eight hours of<br />
moving pictures on a disc the same diameter as<br />
a CD. A single-layer single sided DVD holds up to<br />
4.7 <strong>GB</strong>; a double layer single-sided DVD, 8.5 <strong>GB</strong>; a<br />
single layer double-sided DVD, 9.4 <strong>GB</strong>; double-layer<br />
double-sided DVD, 17 <strong>GB</strong>. The MPEG 2 format was<br />
adopted for efficient video data compression. It is<br />
a variable rate technology that encodes the data to<br />
according to the status of the video for reproducing<br />
high-quality images. Audio information is recorded<br />
in a multi-channel format such as Dolby Digital,<br />
allowing for a realistic audio presence.<br />
DVD+/-R (pages 9, 25)<br />
A DVD+/-R is a recordable, write-once DVD.<br />
Since contents can be recorded and cannot be<br />
overwritten, a DVD+/-R can be used to archive data<br />
or for storing and distributing video material. The<br />
DVD+/-R has two different formats: VR format and<br />
Video format. DVDs created in Video format have<br />
the same format as a DVD video, while discs created<br />
in VR (Video Recording) format allow the contents to<br />
be programmed or edited.<br />
DVD+/-RW (pages 9, 25)<br />
A DVD+/-RW is a recordable and rewritable DVD.<br />
The re-recordable feature makes editing possible.<br />
The DVD+/-RW has two different formats: VR format<br />
and Video format. DVDs created in Video format<br />
have the same format as a DVD video, while discs<br />
created in VR (Video Recording) format allow the<br />
contents to be programmed or edited.<br />
HDMI (page 16)<br />
HDMI (High-Definition Multimedia Interface) is an<br />
interface that supports both video and audio on<br />
a single digital connection. The HDMI connection<br />
carries standard to high definition video signals<br />
and multi-channel audio signals to AV components<br />
such as HDMI equipped TVs, in digital form without<br />
degradation.<br />
Infrastructure mode (page 19)<br />
Infrastructure mode is a wireless LAN<br />
communication format. This performs wireless<br />
communication through an access point.<br />
Interlace format<br />
Interlace format shows every other line of an image<br />
as a single “field” and is the standard method for<br />
displaying images on television. The even numbered<br />
field shows the even numbered lines of an image,<br />
and the odd numbered field shows the odd<br />
numbered lines of an image.<br />
JPEG (pages 9–11, 33, 34)<br />
JPEG (Joint Photographic Experts Group) is a still<br />
image data compression format and is used in most<br />
of digital cameras.<br />
Linear PCM Sound (pages 12, 42, 54)<br />
Linear PCM is a signal recording format used for<br />
Audio CDs and on some DVD and Blu-ray discs. The<br />
sound on Audio CDs is recorded at 44.1 kHz with<br />
16 bits. (Sound is recorded between 48 kHz with 16<br />
bits and 96 kHz with 24 bits on DVD video discs and<br />
between 48 kHz with 16 bits and 192 kHz with 24<br />
bits on <strong>BD</strong> video discs.)<br />
MP3 (pages 9–11, 32, 34)<br />
MP3 files are audio data compressed in the<br />
MPEG1/2 Audio layer-3 file format. “MP3 files” have<br />
“.mp3” as extensions.<br />
MPEG-2<br />
MPEG-2 (Moving Picture Experts Group phase 2) is<br />
one of the video data compression schemes, which<br />
is adopted for DVD videos and digital broadcasts<br />
worldwide. Some Blu-ray Discs also use high bitrate<br />
MPEG-2.<br />
Multi Angle (pages 37–39)<br />
This is a feature of DVD and <strong>BD</strong> video discs. In<br />
some discs, the same scene is shot from different<br />
angles, and these are stored in a single disc so you<br />
can enjoy playback from each angle. (This function<br />
can be enjoyed if the disc is recorded with multiple<br />
angles.)<br />
Multi Audio (pages 37–39)<br />
This is a feature of DVD and <strong>BD</strong> video discs. This<br />
function makes it possible to record different audio<br />
tracks for the same video, so you can enhance your<br />
enjoyment by switching the audio. (You can enjoy<br />
this function with discs recorded with multiple audio<br />
tracks.)<br />
66
Glossary<br />
Parental control (page 44)<br />
In some digital broadcasts and <strong>BD</strong>/DVD video discs,<br />
a control level for disc viewing is set depending on<br />
the age of the viewer. With this Player, you can set<br />
the control level for viewing such broadcasts and<br />
discs.<br />
Pop-up menu (page 27)<br />
An enhanced menu operation available on <strong>BD</strong> video<br />
discs. The pop-up menu appears when POP-UP<br />
MENU is pressed during playback, and can be<br />
operated while playback is in progress.<br />
Progressive format<br />
Compared to the Interlace format that alternately<br />
shows every other line of an image (field) to create<br />
one frame, the Progressive format shows the entire<br />
image at once as a single frame. This means that<br />
while the Interlace format can show 30 frames/60<br />
fields in one second, the Progressive format<br />
can show 60 frames in one second. The overall<br />
picture quality increases and still images, text, and<br />
horizontal lines appear sharper.<br />
Region code (page 9)<br />
Code identifying a geographic region of<br />
compatibility for a <strong>BD</strong>/DVD.<br />
Resume playback (page 25)<br />
If you stop playback while it is in progress, the<br />
Player stores the stop position in memory, and this<br />
function lets you playback from that point.<br />
Skip (pages 29, 30, 32, 33, 35)<br />
This returns to the start of the chapter (or track)<br />
being played, or skips to the next chapter (or track).<br />
Subtitles (pages 37–39)<br />
These are the lines of text appearing at the bottom<br />
of the screen which translate or transcribe the<br />
dialogue. They are recorded on many DVD and <strong>BD</strong><br />
video discs.<br />
Time number (pages 14, 39)<br />
This indicates the play time which has elapsed from<br />
the start of a disc or a title. It can be used to find a<br />
specific scene quickly. (It may not work with some<br />
discs.)<br />
Title number (pages 38, 39)<br />
These numbers are recorded on DVD and Blu-ray<br />
discs. When a disc contains two or more movies,<br />
these movies are numbered as title 1, title 2, etc.<br />
Top menu (page 26)<br />
In a <strong>BD</strong>/DVD video, this is the menu for selecting<br />
things like the chapter to be played back and the<br />
subtitle language. In some DVD videos, the top<br />
menu may be called the “Title Menu”.<br />
Track number (pages 38, 39)<br />
These numbers are assigned to the tracks which are<br />
recorded on audio CDs. They enable specific tracks<br />
to be located quickly.<br />
x.v.Colour<br />
x.v.Colour reproduces a greater range of colour than<br />
before, showing almost all of the colours that the<br />
human eye can detect. (Applicable for JPEG files<br />
only with this system)<br />
YouTube (page 55)<br />
YouTube is a website where users can upload and<br />
view video content, such as video clips and TV clips.<br />
You can watch the content streamed on your TV.<br />
Appendix<br />
67
Network Service Disclaimer<br />
This <strong>Sharp</strong> device facilitates the access to content and services provided by third parties. The content and services accessible via this device belong to and may be<br />
proprietary to third parties. Therefore, any use of such third party content and services must be in accordance with any authorisation or terms of use provided by<br />
such content or service provider. <strong>Sharp</strong> shall not be liable to you or any third party for your failure to abide by such authorisation or terms of use. Unless otherwise<br />
specifically authorised by the applicable content or service provider, all third party content and services provided are for personal and non-commercial use; you may<br />
not modify, copy, distribute, transmit, display, perform, reproduce, upload, publish, license, create derivative works from, transfer or sell in any manner or medium any<br />
content or services available via this device.<br />
<strong>Sharp</strong> is not responsible, nor liable, for customer service-related issues related to the third party content or services. Any questions, comments or service-related<br />
inquiries relating to the third party content or service should be made directly to the applicable content or service provider.<br />
You may not be able to access content or services from the device for a variety of reasons which may be unrelated to the device itself, including, but not limited to,<br />
power failure, other Internet connection, or failure to configure your device properly. <strong>Sharp</strong>, its directors, officers, employees, agents, contractors and affiliates shall<br />
not be liable to you or any third party with respect to such failures or maintenance outages, regardless of cause or whether or not it could have been avoided.<br />
ALL THIRD PARTY CONTENT OR SERVICES ACCESSIBLE VIA THIS DEVICE IS PROVIDED TO YOU ON AN “AS-IS” AND “AS AVAILABLE” BASIS AND SHARP AND<br />
ITS AFFILIATES MAKE NO WARRANTY OR REPRESENTATION OF ANY KIND TO YOU, EITHER EXPRESS OR IMPLIED, INCLUDING, WITHOUT LIMITATION, ANY<br />
WARRANTIES OF MERCHANTABILITY, NON-INFRINGEMENT, FITNESS FOR A PARTICULAR PURPOSE OR ANY WARRANTIES OF SUITABILITY, AVAILABILITY,<br />
ACCURACY, COMPLETENESS, SECURITY, TITLE, USEFULNESS, LACK OF NEGLIGENCE OR ERROR-FREE OR UNINTERRUPTED OPERATION OR USE OF THE<br />
CONTENT OR SERVICES PROVIDED TO YOU OR THAT THE CONTENT OR SERVICES WILL MEET YOUR REQUIREMENTS OR EXPECTATIONS.<br />
SHARP IS NOT AN AGENT OF AND ASSUMES NO RESPONSIBILITY FOR THE ACTS OR OMISSIONS OF THIRD PARTY CONTENT OR SERVICE PROVIDERS, NOR<br />
ANY ASPECT OF THE CONTENT OR SERVICE RELATED TO SUCH THIRD PARTY PROVIDERS.<br />
IN NO EVENT WILL SHARP AND/OR ITS AFFILIATES BE LIABLE TO YOU OR ANY THIRD PARTY FOR ANY DIRECT, INDIRECT, SPECIAL, INCIDENTAL, PUNITIVE,<br />
CONSEQUENTIAL OR OTHER DAMAGES, WHETHER THE THEORY OF LIABILITY IS BASED ON CONTRACT, TORT, NEGLIGENCE, BREACH OF WARRANTY,<br />
STRICT LIABILITY OR OTHERWISE AND WHETHER OR NOT SHARP AND/OR ITS AFFILIATES HAVE BEEN ADVISED OF THE POSSIBILITY OF SUCH DAMAGES.<br />
68
About Software License<br />
Information on the Software License for This Product<br />
Software composition<br />
The software included in this product is comprised of various software components whose individual copyrights are held by SHARP or by third parties.<br />
Software developed by SHARP and open source software<br />
The copyrights for the software components and various relevant documents included with this product that were developed or written by SHARP are owned<br />
by SHARP and are protected by the Copyright Act, international treaties, and other relevant laws. This product also makes use of freely distributed software and<br />
software components whose copyrights are held by third parties. These include software components covered by a GNU General Public License (hereafter GPL), a<br />
GNU Lesser General Public License (hereafter LGPL) or other license agreement.<br />
Obtaining source code<br />
Some of the open source software licensors require the distributor to provide the source code with the executable software components. GPL and LGPL include<br />
similar requirements. For information on obtaining the source code for the open source software and for obtaining the GPL, LGPL, and other license agreement<br />
information, visit the following website:<br />
http://www.sharp-eu.com/gpl<br />
We are unable to answer any questions about the source code for the open source software. The source code for the software components whose copyrights are<br />
held by SHARP is not distributed.<br />
Acknowledgements<br />
The following open source software components are included in this product:<br />
• cairo • Curl • DirectFB • Droid Sans font • Droid Sans Fallback font • Fltk • FreeType • Giflib • glib • Icu • Jpeg • Libpng • LibPThread<br />
• Librt • libsoup • Libstdc++ • libxml2 • OpenSSL • pango • swfdec • Webkit • zlib • linux kernel • uClibc • modutils • NanoXML<br />
• org.apache.oro.text.regex • libsysfs • mtd/jffs2 • ncurses • libiconv • libusb • busybox • bash • libmpeg2 • libjpeg • FontConfig<br />
Software License Notice<br />
Software License Notice Requirements<br />
The software components incorporated into this product include components whose copyright holders require license notices. The license notices for these software<br />
components are shown below.<br />
OpenSSL License<br />
This product includes software developed by the OpenSSL Project for use in the OpenSSL Toolkit. (http://www.openssl.org)<br />
Original SSLeay License<br />
This product includes cryptographic software written by Eric Young (eay@cryptsoft.com).<br />
BSD License<br />
This product includes software developed by the University of California, Berkeley and its contributors.<br />
Appendix<br />
69
End of Life Disposal<br />
A. Information on Disposal for Users (private households)<br />
1. In the European Union<br />
Attention: If you want to dispose of this equipment, please do not use the ordinary dust bin!<br />
Attention: Your player and the<br />
wireless LAN adapter (supplied) are<br />
marked with this symbol. It means<br />
that used electrical and electronic<br />
products should not be mixed with<br />
general household waste. There<br />
is a separate collection system for<br />
these products.<br />
Used electrical and electronic equipment must be treated separately and in accordance with legislation that requires proper treatment, recovery and recycling<br />
of used electrical and electronic equipment. Following the implementation by member states, private households within the EU states may return their used<br />
electrical and electronic equipment to designated collection facilities free of charge*. In some countries* your local retailer may also take back your old product<br />
free of charge if you purchase a similar new one.<br />
*) Please contact your local authority for further details.<br />
If your used electrical or electronic equipment has batteries or accumulators, please dispose of these separately beforehand according to local requirements.<br />
By disposing of this product correctly you will help ensure that the waste undergoes the necessary treatment, recovery and recycling and thus prevent potential<br />
negative effects on the environment and human health which could otherwise arise due to inappropriate waste handling.<br />
2. In other Countries outside the EU<br />
If you wish to discard this product or the adapter, please contact your local authorities and ask for the correct method of disposal.<br />
For Switzerland: Used electrical or electronic equipment can be returned free of charge to the dealer, even if you don’t purchase a new product. Further collection<br />
facilities are listed on the homepage of www.swico.ch or www.sens.ch.<br />
B. Information on Disposal for Business Users<br />
1. In the European Union<br />
If the product is used for business purposes and you want to discard it:<br />
Please contact your SHARP dealer who will inform you about the take-back of the product. You might be charged for the costs arising from take-back and<br />
recycling. Small products (and small amounts) might be taken back by your local collection facilities.<br />
For Spain: Please contact the established collection system or your local authority for take-back of your used products.<br />
2. In other Countries outside the EU<br />
If you wish to discard of this product or the adapter, please contact your local authorities and ask for the correct method of disposal.<br />
Information on Battery Disposal<br />
The battery supplied with this product contains traces of Lead.<br />
For EU: The crossed-out wheeled bin implies that used batteries should not be put to the general household waste! There is a separate collection system for used<br />
batteries, to allow proper treatment and recycling in accordance with legislation. Please contact your local authority for details on the collection and recycling<br />
schemes.<br />
For Switzerland: The used battery is to be returned to the selling point.<br />
For other non-EU countries: Please contact your local authority for correct method of disposal of the used battery.<br />
70
Memo<br />
Appendix<br />
71
SHARP CORPORATION<br />
SHARP ELECTRONICS (EUROPE) GmbH<br />
Sonninstraße 3, 20097 Hamburg, Germany<br />
11P02-CH-NG