Jet Convection Oven - Shark
Jet Convection Oven - Shark
Jet Convection Oven - Shark
Create successful ePaper yourself
Turn your PDF publications into a flip-book with our unique Google optimized e-Paper software.
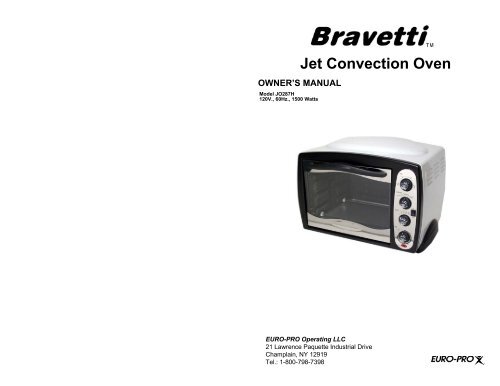
Model JO287H<br />
120V., 60Hz., 1500 Watts<br />
<strong>Jet</strong> <strong>Convection</strong> <strong>Oven</strong><br />
OWNER’S MANUAL<br />
EURO-PRO Operating LLC<br />
21 Lawrence Paquette Industrial Drive<br />
Champlain, NY 12919<br />
Tel.: 1-800-798-7398
Model JO287H<br />
ONE (1) YEAR LIMITED WARRANTY<br />
EURO-PRO Operating LLC warrants this product to be free from defects in material and<br />
workmanship for a period of one (1) year from the date of purchase when utilized for<br />
normal household use.<br />
If your appliance fails to operate properly while in use under normal household<br />
conditions within the warranty period, return the complete appliance and accessories,<br />
freight prepaid to EURO-PRO Operating LLC, 21 Lawrence Paquette Industrial Drive,<br />
Champlain, N.Y. 12919. If the appliance is found by EURO-PRO Operating LLC to be<br />
defective in material or workmanship, EURO-PRO Operating LLC will repair or replace<br />
it free of charge. Proof of purchase date and $18.95 to cover the cost of return shipping<br />
and handling must be included.*<br />
The liability of EURO-PRO Operating LLC is limited solely to the cost of the repair or<br />
replacement of the unit at our option. This warranty does not cover normal wear of parts<br />
and does not apply to any unit that has been tampered with or used for commercial<br />
purposes. This limited warranty does not cover damage caused by misuse, abuse,<br />
negligent handling or damage due to faulty packaging or mishandling in transit.<br />
This warranty is extended to the original purchaser of the unit and excludes all other<br />
legal and/or conventional warranties. The responsibility of EURO-PRO Operating LLC if<br />
any, is limited to the specific obligations expressly assumed by it under the terms of the<br />
limited warranty. In no event is EURO-PRO Operating LLC liable for incidental or<br />
consequential damages of any nature whatsoever. Some states do not permit the<br />
exclusion or limitation of incidental or consequential damages, so the above may not<br />
apply to you.<br />
This warranty gives you specific legal rights, and you may also have other rights which<br />
vary from state to state.<br />
*IMPORTANT: Carefully pack item to avoid damage in shipping. Be sure to include<br />
proof of purchase date and to attach tag to item before packing with your name,<br />
complete address and phone number with a note giving purchase information,<br />
model number and what you believe is the problem with item. We recommend you<br />
insure the package (as damage in shipping is not covered by your warranty). Mark<br />
the outside of your package “ATTENTION CUSTOMER SERVICE”. We are<br />
constantly trying to improve our products, therefore the specifications contained<br />
herein are subject to change without notice.<br />
••••••••••••••••••••••••••••••••••••••••••••••••••<br />
OWNERSHIP REGISTRATION CARD<br />
Please fill out and mail the product registration card within ten (10) days of purchase in<br />
order to validate the foregoing Limited Warranty. The registration will enable us to<br />
contact you in the unlikely event of a product safety notification. By returning this card<br />
you acknowledge to have read and understood the instructions for use, and warnings set<br />
forth in the accompanying instructions.<br />
RETURN TO EURO-PRO OPERATING LLC, 21 LAWRENCE PAQUETTE IND. DR., CHAMPLAIN, N.Y. 12919<br />
JO287H<br />
______________________________________________________________________<br />
Appliance model<br />
______________________________________________________________________<br />
Date purchased Name of store<br />
______________________________________________________________________<br />
Owner’s name<br />
______________________________________________________________________<br />
Address City State Zip Code<br />
Printed in China<br />
12
IMPORTANT SAFETY INSTRUCTIONS<br />
When using your Bravetti <strong>Jet</strong> <strong>Convection</strong> <strong>Oven</strong>, basic safety precautions<br />
should always be observed, including the following:<br />
1. Read all instructions before using your<br />
<strong>Jet</strong> <strong>Convection</strong> <strong>Oven</strong>.<br />
2. Do not touch hot surfaces. Always use<br />
handles or knobs.<br />
3. Close supervision is necessary when any<br />
appliance is used by or near children.<br />
4. To protect against electric shock, do not<br />
immerse cord, plug or any parts of the oven<br />
in water or any other liquids.<br />
5. Do not let cord hang over edge of table or<br />
counter, or touch hot surfaces.<br />
6. Do not operate appliance with damaged<br />
cord or plug or after the appliance<br />
malfunctions or has been damage in any<br />
manner. Return appliance to the nearest<br />
EURO-PRO Operating LLC for<br />
examination, repair or adjustment.<br />
7. The use of accessory attachments not<br />
recommended by the appliance<br />
manufacturer may cause hazard or injury.<br />
8. Do not place on or near a hot gas or<br />
electric burner.<br />
9. When operating the oven, keep at least four<br />
inches of free space on all sides of the<br />
oven to allow for adequate air circulation.<br />
10. Unplug from outlet when not in use and<br />
before cleaning. Allow to cool before<br />
putting on or taking off parts, and before<br />
cleaning.<br />
11. To disconnect, turn the time control button<br />
to OFF, then remove the plug. Always hold<br />
the plug, and never pull the cord.<br />
12. Extreme caution must be used when<br />
moving a drip pan containing hot oil or<br />
other hot liquids.<br />
13. Do not cover crumb tray or any part of the<br />
oven with metal foil. This may cause the<br />
oven to overheat.<br />
14. Use extreme caution when removing the<br />
tray, racks or disposing of hot grease or<br />
other hot liquids.<br />
15. Do not clean the inside of the oven with<br />
metal scouring pads. Pieces can break off<br />
the pad and touch electrical parts, creating<br />
a risk of electric shock.<br />
16. Oversized foods or metal utensils must not<br />
be inserted in a toaster oven as they may<br />
create a fire or risk of electric shock.<br />
17. A fire may occur if the oven is covered or<br />
touching flammable material, including<br />
curtains, draperies, walls and the like when<br />
in operation. Do not place any items on the<br />
oven during operation.<br />
18. Extreme caution should be exercised when<br />
using cooking or baking containers<br />
constructed of anything other than metal or<br />
ovenproof glass.<br />
19. Be sure that nothing touches the top or<br />
bottom elements of the oven.<br />
20. Do not place any of the following materials<br />
in the oven: cardboard, plastic, paper, or<br />
anything similar.<br />
21. Do not store any materials other than<br />
manufacturer’s recommended accessories<br />
in this oven when not in use.<br />
22. This appliance is OFF when the Timer<br />
Control button is in the “OFF” position.<br />
23. Always wear protective, insulated oven<br />
gloves when inserting or removing items<br />
from the hot oven.<br />
24. This appliance has a tempered, safety glass<br />
door. The glass is stronger than ordinary<br />
glass and more resistant to breakage.<br />
Tempered glass can still break around the<br />
edges. Avoid scratching door surface or<br />
nicking edges.<br />
25. Do not use outdoors.<br />
26. Do not use appliance for other than intended<br />
use.<br />
This unit has a short power supply cord to<br />
Reduce the risk resulting from becoming<br />
entangled in or tripping over a long cord. An<br />
extension cord may be used if you are careful in<br />
its use:<br />
1. The electrical rating of the extension<br />
cord should be at least as great as the<br />
electrical rating of the appliance.<br />
2. An extension cord with the power cord<br />
must be arranged so that it will not drape<br />
over the countertop or tabletop where they<br />
can be pulled on by children or tripped<br />
over accidentally.<br />
SAVE THESE INSTRUCTIONS<br />
For Household Use Only<br />
WARNING: To reduce the risk of electric shock, this appliance has a polarized plug<br />
(one blade is wider than the other). This plug will fit in a polarized outlet only one way.<br />
If the plug does not fit fully in the outlet, reverse the plug. If it still does not fit, contact a<br />
qualified electrician to install the proper outlet. Do not modify the plug in any way.<br />
1<br />
Rev. 07/03A
GETTING TO KNOW YOUR JET CONVECTION OVEN<br />
Control Panel<br />
Warning:<br />
Care & Cleaning<br />
Be sure to unplug the oven and allow it to<br />
cool before cleaning.<br />
Your oven features a continuous clean coating that automatically cleans<br />
itself during normal operation. Any spattering that occurs while cooking<br />
and comes into contact with the continuous coating is oxidized while the<br />
oven is in operation. If desired, wipe the walls with a damp sponge, cloth<br />
or nylon scouring pad and mild detergent. DO NOT USE STEEL WOOL<br />
SCOURING PADS, ABRASIVE CLEANERS OR SCRAPE THE WALLS<br />
WITH A METAL UTENSIL, AS ALL OF THESE METHODS MAY<br />
DAMAGE THE CONTINUOUS CLEAN COATING.<br />
All accessories should be washed in hot soapy water or can be cleaned in<br />
a dishwasher. The door can be wiped with a damp sponge and wiped dry<br />
with a paper or cloth towel. Clean the outside with a damp sponge. DO<br />
NOT USE AN ABRASIVE CLEANER AS IT MAY DAMAGE THE<br />
EXTERIOR FINISH.<br />
DO NOT USE AN ABRASIVE CLEANER OR STEEL WOOL SCOURING<br />
PAD ON THE BROILER PAN AS IT MAY DAMAGE THE PORCELAIN<br />
ENAMEL FINISH.<br />
LET ALL PARTS AND SURFACES DRY THOROUGHLY PRIOR TO<br />
PLUGGING OVEN IN AND USING.<br />
1. Housing<br />
2. Temperature Control Knob<br />
3. Function Control Knob<br />
4. <strong>Convection</strong> Control Knob<br />
5. Time Control/On-Off Knob<br />
6. Rotisserie On/Off Switch<br />
7. <strong>Convection</strong> Fan<br />
8. Glass Door<br />
9. Lower Heating Element<br />
10. Rotisserie Skewer Support<br />
Technical Specifications<br />
Voltage:<br />
Power:<br />
Capacity:<br />
120V., 60Hz.<br />
1500 Watts<br />
29 liters<br />
2<br />
11. Broiler Rack<br />
12. Broiler/Drip Pan<br />
13. Wire Rack (x2)<br />
14. Rotisserie Skewer<br />
15. Skewer Clamps (x2)<br />
16. Rotisserie Handle<br />
17. Rack Handle<br />
18. Cookie Sheets (x2)<br />
19. Crumb Tray<br />
20. Pizza Stone<br />
11
Grill<br />
Please note that the Grill function uses only the bottom heating elements. For<br />
best results, it is recommended that you preheat the oven for 15 minutes on<br />
450°.<br />
Operation<br />
• Set Temperature Control to 450°.<br />
• Turn Function Control to Grill.<br />
• Preheat the oven.<br />
• Place the Wire Rack on the lowest rack support guide.<br />
• Place the food on the Broiler Rack and place the Broiler Rack on a Cookie<br />
Sheet to catch all the drippings.<br />
• Food should be placed as close as possible to the Lower Heating Element<br />
without touching it.<br />
• Set temperature control to the appropriate temperature.<br />
• Brush food with sauces or oil, as desired.<br />
• Turn Time Control to position ‘Stay On’.<br />
• It is advisable to leave the door slightly ajar.<br />
• Turn food over midway through the prescribed cooking time.<br />
• When grilling is complete, turn the Time Control to ‘OFF’.<br />
Keep Warm<br />
Keep cooked food warm for up to 30 minutes. Longer periods of time are<br />
not recommended as food will become dry or will spoil.<br />
Operation<br />
• Set the Temperature Control to Keep Warm.<br />
• Turn the Function Control to Keep Warm.<br />
• Turn the Time Control to “Stay On” position.<br />
• Turn the Time Control to “Off” position when finished with Keep Warm.<br />
CAUTION:<br />
When sliding trays out of oven, always<br />
support the rack. Do not let go until you are<br />
sure the rack is securely supported by the<br />
tray handle.<br />
10<br />
Read all the sections of this booklet and follow all the instructions carefully.<br />
Before Using Your <strong>Jet</strong> <strong>Convection</strong> <strong>Oven</strong><br />
1. Read all of the instructions included in this manual.<br />
2. Make sure that the oven is unplugged and the Time Control is in the<br />
“OFF” position.<br />
3. Wash all the accessories in hot, soapy water or in the dishwasher.<br />
4. Thoroughly dry all accessories and re-assemble in oven. Plug oven into<br />
outlet and you are ready to use your new Toaster <strong>Oven</strong> with <strong>Jet</strong><br />
<strong>Convection</strong>.<br />
5. After re-assembling your oven, we recommend that you run it at the<br />
highest temperature (450° F.) on the Toast Function for approximately 15<br />
minutes to eliminate any packing residue that may remain after shipping.<br />
This will also remove all traces of odor initially present.<br />
Please Note:<br />
Initial start-up operation may result in minimal smell and<br />
smoke (about 15 minutes). This is normal and harmless.<br />
It is due to burning of the protective substance applied to<br />
the heating elements in the factory.<br />
<strong>Convection</strong> Cooking<br />
<strong>Convection</strong> cooking combines hot air movement by means of a fan with the<br />
<strong>Convection</strong>/Baking feature. <strong>Convection</strong> cooking provides faster cooking in many<br />
cases than regular radiant type toaster ovens. The fan gently sends air to every<br />
area of the food, quickly browning, crisping and sealing in moisture and flavor. It<br />
produces more even temperature all around the food by air movement, so that<br />
food cooks/bakes evenly versus the normal ovens hot and cold spots. The<br />
convection feature allows cooking/baking at lower temperatures, which saves<br />
energy and helps keep the kitchen cooler. With the <strong>Jet</strong> <strong>Convection</strong> <strong>Oven</strong> you<br />
will see about a 25 to 30% decrease in cooking temperature and a 20 to 25%<br />
decrease in cooking time when compared to a conventional oven. <strong>Convection</strong><br />
cooking is very consistent and even. The oven heats quickly, so pre-heating is<br />
not necessary or desirable. The fan circulates the hot air around the food<br />
making baked goods rise quickly and evenly.<br />
Using Your <strong>Jet</strong> <strong>Convection</strong> <strong>Oven</strong><br />
Please familiarize yourself with the following oven functions and accessories<br />
prior to first use:<br />
• Temperature Control - Choose the desired temperature from 180° (Keep<br />
Warm) to 450° F for baking, broiling, toasting or grilling.<br />
• Function Control - This oven is equipped with five positions for a variety of<br />
cooking needs:<br />
<strong>Convection</strong> Baking - Cakes, pies, cookies, poultry, beef, pork, etc.<br />
Toast/Pizza- Bread, muffins, frozen waffles, pizza, etc.<br />
Grill - For grilling fish, steak, sandwiches, bacon & eggs, etc.<br />
Broil - For broiling fish, steak, poultry, pork chops, etc.<br />
Keep Warm - To keep cooked food warm for up to 30 minutes.<br />
• Rotisserie On/Off Switch – Turns the rotisserie “On”. Can be used with any<br />
of the above functions.<br />
• Time Control - When you turn the control to the left, (counter-clockwise),<br />
the oven will “STAY ON” until it is manually shut “OFF”. To activate the timer<br />
segment of the control, turn to the right (clockwise) to toast or use as a timer.<br />
This function also has a bell that rings at the end of the programmed time.<br />
• <strong>Convection</strong> Control – You can choose from “LO” to “MAX” settings. Can<br />
ONLY be used with the <strong>Convection</strong> Baking function.<br />
3
Using Your <strong>Jet</strong> <strong>Convection</strong> <strong>Oven</strong><br />
• Power “On” Light - It is illuminated whenever the oven is turned on.<br />
• Broiler/Drip Pan - For use in broiling and roasting meat, poultry, fish and<br />
various other foods. Also to be used when using the Rotisserie to catch<br />
the drippings.<br />
• Tray Handle - Allows you to pick up the wire rack, and broiler pan when<br />
they are hot.<br />
WARNING: TO AVOID RISK OF INJURY<br />
OR BURNS, DO NOT<br />
TOUCH HOT SURFACES<br />
WHEN OVEN IS IN USE.<br />
ALWAYS USE OVEN MITTS.<br />
Caution: Always use extreme care when<br />
removing broiler pan, wire rack<br />
or any hot container from a hot<br />
oven. Always use the rack<br />
handle, or an oven mitt when<br />
removing hot items from the<br />
oven.<br />
Toasting<br />
Large capacity oven allows for toasting 4 to 6 slices of bread, 6 muffins,<br />
frozen waffles or frozen pancakes. When toasting only 1 or 2 items, place<br />
food on the wire rack in the center of the oven.<br />
Operation<br />
• Set the Temperature Control Knob to 450°.<br />
• Turn the Function Control Knob to Toast/Pizza.<br />
• Place food to be toasted on the Wire Rack.<br />
• Ensure Crumb Tray is in place.<br />
• Turn the Time Control Knob to desired darkness. (Light to Dark).<br />
• Bell will signal the end of the Toast cycle.<br />
Note: Wire Rack should be positioned in the middle of the oven with<br />
the indentations pointing down.<br />
Using the Pizza Stone<br />
Your Pizza Stone heats evenly, absorbs moisture and cooks without fats,<br />
making each dish a success.<br />
Operation<br />
• Preheat oven for 15 minutes on 450°.<br />
• Turn the Function Control Knob to Toast/Pizza.<br />
• Set Timer Control Knob to “ON” position.<br />
• Then lower temperature according to baking instructions.<br />
• Place pizza stone on the Wire Rack and begin baking.<br />
• Do not use oil or other fats on the pizza stone. You can add a light dusting of flour so<br />
that dough will not stick to pizza stone.<br />
• Pizza stone baking times and temperature may differ from those necessary when<br />
using other baking pans.<br />
• When pizza is ready, turn the Time Control Knob to “OFF” position.<br />
• For cleaning, residues can be eliminated from pizza stone using a spatula or a<br />
knife. For deeper cleaning, heat pizza stone in the oven, brush it with a scouring<br />
pad (do not use detergents) and rinse well with hot water.<br />
• With use, the pizza stone will darken but its characteristics will remain unchanged.<br />
Preparation & Cooking Time<br />
Frozen Pizzas -<br />
Pizza Mix -<br />
Cook for 5-8 minutes or as indicated on the package.<br />
It is advisable to remove the pizza from the freezer<br />
10 minutes before placing in the oven.<br />
Place pizza on pizza stone to bake.<br />
Follow the instructions on the box.<br />
Place pizza on pizza stone to bake.<br />
Cook for 18-25 minutes.<br />
Pizza From Scratch - Follow the recipe instructions.<br />
Place pizza on pizza stone to bake.<br />
4<br />
9
Roasting In Your <strong>Oven</strong><br />
Roast your favorite cut of meat to perfection. The oven can cook up to an 8-lb.<br />
chicken or turkey and up to a 6-lb. roast. A guide has been provided to assist<br />
you with roasting times. However, we suggest that you periodically check the<br />
cooking progress with a meat thermometer. For best results we recommend<br />
that you preheat the oven for 15 minutes on 450°. We do not recommend the<br />
use of oven roasting bags or glass containers in the oven. Never use plastic<br />
cardboard, paper or anything similar in the oven.<br />
Operation<br />
• Place the wire rack in the oven at the lowest position.<br />
• Place food to be cooked in any roasting pan. If you wish to use the Broil/Drip<br />
Pan, then you do not need to insert the wire rack because the Broil/Drip pan<br />
supports itself on the oven support guides.<br />
• Set the Temperature Control Knob to the desired temperature.<br />
• Turn the Function Control Knob to <strong>Convection</strong> Baking.<br />
• You have the option of roasting with or without the <strong>Convection</strong> Fan. If you<br />
wish to use the <strong>Convection</strong> Fan, then turn the <strong>Convection</strong> Control Knob to<br />
the desired fan speed setting.<br />
• Turn the Time Control Knob to the “STAY ON” position.<br />
• To check or remove roast, use the rack handle provided to help you slide<br />
the roast in and out.<br />
• When cooking is complete, turn the Time Control Knob and the <strong>Convection</strong><br />
Control Knob to the “OFF” position.<br />
Roasting Guide<br />
Cooking times may vary depending on whether you are using the convection<br />
fan feature and on what fan speed setting you have it on. Adjust these times<br />
to your individual requirements.<br />
MEAT OVEN TEMP<br />
BEEF ROAST 325<br />
PORK ROAST 325<br />
HAM 325<br />
CHICKEN 350<br />
TURKEY 350<br />
TIME PER LB.<br />
25-30 min.<br />
40-45 min.<br />
35-40 min.<br />
20-25 min.<br />
20-25 min.<br />
Note: All roasting times are based on meats at refrigerator<br />
temperature. Frozen meats may take considerably longer.<br />
Therefore, use of a meat thermometer is highly<br />
recommended.<br />
The top heating elements cycle on and off to maintain maximum<br />
temperature in the oven. For best results, the oven should be preheated<br />
for 20 minutes at 450° before adding the food to be broiled.<br />
Operation<br />
Broiling<br />
• Set Temperature Control to 450°.<br />
• Turn Function Control to Broil.<br />
• Preheat the oven.<br />
• Place the food on the Broil Rack which is on top of the Broil/Drip Pan.<br />
• Place the Broil/Drip Pan on the Top Rack Support Guide or Middle Rack<br />
Support Guide depending on the thickness of the food that you are cooking.<br />
• Food should be placed as close as possible to the Top Heating Element<br />
without touching it.<br />
• Set temperature control to the appropriate temperature.<br />
• Brush food with sauces or oil, as desired.<br />
• Turn Time Control to position “Stay On”.<br />
• It is advisable to leave the door slightly ajar.<br />
• When broiling is complete, turn the Time Control to “OFF”.<br />
Broiling Guide<br />
Cooking results may vary, adjust these times to your individual<br />
requirements. Also, check often during broiling to avoid overcooking.<br />
MEAT OVEN TEMP<br />
RIB STEAK 400<br />
T-BONE STEAK 400<br />
HAMBURGER 400<br />
PORK CHOPS 400<br />
LAMB CHOPS 400<br />
CHICKEN LEGS 400<br />
FISH FILETS 350<br />
SALMON STEAKS 350<br />
COOKING TIME<br />
25-30 min.<br />
25-30 min.<br />
25-28 min.<br />
40-45 min.<br />
30-40 min.<br />
30-35 min.<br />
20-25 min.<br />
20-25 min.<br />
Note: All broiling times are based on meats at refrigerator<br />
temperature. Frozen meats may take considerably longer.<br />
Therefore, use of a meat thermometer is highly<br />
recommended.<br />
8<br />
5
<strong>Convection</strong> Baking<br />
<strong>Convection</strong> baking is very consistent and even. The oven heats quickly, so<br />
preheating is not necessary or desirable. The fan circulates the hot air around<br />
the food making baked goods rise quickly and evenly. With this oven, you<br />
have the option of four (4) convection settings. We recommend using the “LO”<br />
to MED” settings for small roasts or baking cookies/cakes and the “HI” to<br />
“MAX” settings for larger roasts or for rotisserie cooking.<br />
Bake your favorite cookies, cakes, pies, brownies, etc. The bakeware that will<br />
fit in your oven are up to 10 inches in width. We do not recommend the use of<br />
oven roasting bags or glass containers in the oven. Never use plastic,<br />
cardboard, paper or anything similar in the oven.<br />
Operation<br />
• Place the wire rack in the lowest or middle Rack Support Guide depending<br />
on the height of the pan or according to the recipe.<br />
• Place pan with item(s) to be baked on the wire rack.<br />
• Turn the Function Control to <strong>Convection</strong> Baking.<br />
• Turn the Time Control to position “Stay On”.<br />
• You have the option of using the convection with this function. If you want to<br />
use the convection fan, turn the <strong>Convection</strong> Control Knob to “LO”, “MED”,<br />
“HI” or “MAX” setting. If you do not want the convection fan to work, set the<br />
<strong>Convection</strong> Control Knob to the “Off” position.<br />
• When baking is complete, turn the Time Control to “OFF” as well as the<br />
Convention Control Knob to the “Off” position if it was being used.<br />
Positioning of the Wire Racks<br />
Cookies - Use bottom and middle Support Guides.<br />
Layer Cakes - Use bottom Support Guide only (bake one at a time).<br />
Pies - Use bottom Support Guide.<br />
Baking on 2 Racks<br />
Two racks of cookies can be baked at the same time, however it is necessary<br />
to rotate them (i.e. move the top to the bottom and the bottom to the top)<br />
halfway to through the baking time if you are NOT using the convection fan. If<br />
you are using the convection fan feature, then you do NOT need to rotate.<br />
Baking Cookies<br />
For baking cookies, we suggest adjusting baking temperature and using a<br />
cookie sheet placed on the wire rack. Also, using parchment paper on a<br />
cookie sheet might prove helpful when baking certain types of cookies.<br />
1. Use parchment paper on cookie sheet so cookies will not stick.<br />
2. Cookie sheets, baking times and temperatures may differ from<br />
those necessary when using other baking materials.<br />
Note: <strong>Convection</strong> air is superheated and it circulates around the food, so it<br />
cooks food up to 25% faster. When baking your favorite recipes or packaged<br />
goods, follow recipe instructions remembering not to preheat. Check the<br />
baked goods a few minutes before the shortest recommended baking time.<br />
Baking Guide<br />
Follow the package or recipe instructions for baking times and temperature.<br />
6<br />
Rotisserie Cooking<br />
We recommend that you do not cook a roast larger than 4-5 lbs. on the<br />
Rotisserie Skewer. Chicken should be bound in string to prevent the chicken<br />
legs or wings from unraveling during roasting and so that rotisserie assembly<br />
will rotate smoothly. For best results we recommend that you preheat the oven<br />
for 15 minutes on 450°.<br />
Operation<br />
• Set temperature control to 450°F.<br />
• Turn Function Control Knob to <strong>Convection</strong> Baking.<br />
• Turn <strong>Convection</strong> Control Knob to desired fan speed (LO - MED – HI – MAX).<br />
• Insert the meat or poultry that you are going to cook onto the rotisserie skewer<br />
making sure that the meat or poultry is secured tightly onto the skewer with<br />
the skewer clamps and thumbscrews. Make sure that the meat or poultry is<br />
centered onto the skewer.<br />
• Insert the pointed end of the Rotisserie Skewer into the drive socket located<br />
on the right hand side of the oven wall. Make sure that the square end of the<br />
Rotisserie Skewer rests on the Rotisserie Skewer Support located on the left<br />
hand side of the oven wall.<br />
• Slide the Broil/Drip Pan onto the lowest position to catch the food drippings.<br />
• Turn the Time Control Knob to the “Stay On” position.<br />
• Push the Rotisserie On/Off Switch to the “On” position.<br />
• When the cooking is completed, turn the Time Control Knob to the “Off”<br />
position.<br />
• Remove the Rotisserie Skewer from the oven by placing the hooks of the<br />
Rotisserie Handle under the grooves on either side of the Rotisserie Skewer.<br />
Remove the left side of the Rotisserie Skewer first by lifting up and out. Then<br />
pull the Rotisserie Skewer out of the drive socket and carefully remove the<br />
roast from the oven.<br />
• Take the meat or poultry off the Rotisserie Skewer and place on a cutting<br />
board or platter.<br />
Rotisserie Guide<br />
Cooking times may vary depending on whether you are using the convection<br />
fan feature and on what fan speed setting you have it on. Adjust these times<br />
to your individual requirements.<br />
Note:<br />
MEAT OVEN TEMP<br />
BEEF ROAST 325<br />
PORK ROAST 325<br />
HAM 325<br />
CHICKEN 350<br />
TURKEY 350<br />
TIME PER LB.<br />
30-35 min.<br />
45-50 min.<br />
45-50 min.<br />
25-30 min.<br />
25-30 min.<br />
All roasting times are based on meats at refrigerator<br />
temperature. Frozen meats may take considerably longer.<br />
Therefore, use of a meat thermometer is highly recommended.<br />
7


