EURO-PRO 9106(GB).cdr - Shark
EURO-PRO 9106(GB).cdr - Shark
EURO-PRO 9106(GB).cdr - Shark

You also want an ePaper? Increase the reach of your titles
YUMPU automatically turns print PDFs into web optimized ePapers that Google loves.
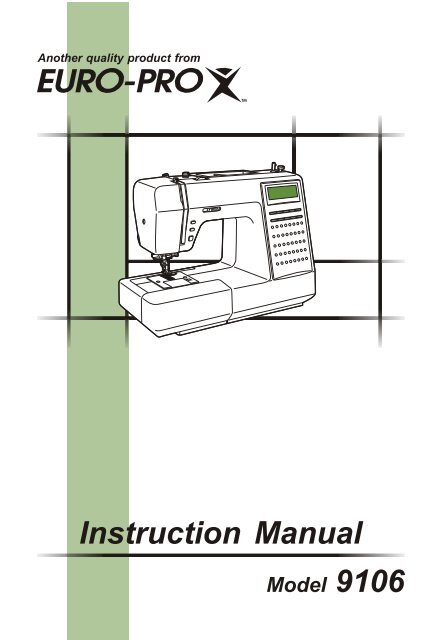
Another quality product from<br />
Instruction Manual<br />
Model <strong>9106</strong>
SYMBOL INSTRUCTIONS<br />
Raise needle Raise presser foot Lower presser foot
IMPORTANT SAFETY INSTRUCTIONS<br />
When using an electrical appliance, basic safety should always be followed, including<br />
the following:<br />
Read all instructions before using this sewing machine.<br />
DANGER -To reduce the risk of electric shock:<br />
1. An appliance should never be left unattended when plugged in.<br />
2. Always unplug this appliance from the electric outlet immediately after using and<br />
before cleaning.<br />
3. Always unplug before re-lamping. Replace bulb with same type rated 5 watts.<br />
WARNING -To reduce the risk of burns, fire, electric shock, or injury to persons:<br />
1. Do not allow to be used as a toy. Close attention is necessary when this appliance is<br />
used by or near children.<br />
2. Use this appliance only for its intended use as described in this manual. Use only the<br />
attachments recommended by the manufacturer as contained in this manual.<br />
3. Never operate this appliance if it has a damaged cord or plug, if it is not working<br />
properly, if it has been dropped or damaged, or dropped into water. Return the<br />
appliance to the nearest authorized dealer or service center for examination, repair,<br />
electrical or mechanical adjustment.<br />
4. Never operate the appliance with any air openings block. Keep ventilation openings<br />
of the sewing machine and foot controller free from accumulation of lint, dust, and<br />
loose cloth.<br />
5. Keep fingers away from all moving parts. Special care is required around the sewing<br />
machine needle.<br />
6. Always use the proper needle plate, a wrong needle plate can cause the needle to break.<br />
7. Do not use bent needles.<br />
8. Do not pull or push fabric while stitching. It may deflect the needle causing it to break.<br />
9. Switch the sewing machine off ("O") when making any adjustments in the needle area,<br />
such as threading needle, changing needle, threading bobbin, or changing presser<br />
foot, and the light.<br />
10.Always unplug sewing machine from the electrical outlet when removing covers,<br />
lubricating, or when making any other user servicing adjustments mentioned in the<br />
instruction manual.<br />
11.Never drop or insert any object into any opening.<br />
12.Do not use outdoors.<br />
13.Do not operate where aerosol spray products are being used or where oxygen is<br />
being administered.<br />
14.To disconnect, turn all controls to the off ("O") position, then remove plug from outlet.<br />
15.Do not unplug by pulling on cord. To unplug, grasp the plug, not the cord.<br />
SAVE THESE INSTRUCTIONS<br />
This sewing machine is intended for household use only.<br />
I
CONTENTS<br />
PRINCIPAL PARTS OF THE MACHINE .........................................................................................1-2<br />
ACCESSORIES .................................................................................................................................3<br />
CONNECTING THE MACHINE TO THE POWER SOURCE .........................................................4-5<br />
OPERATION BUTTONS AND FOOT CONTROLLER .......................................................................6<br />
CHANGING THE PRESSER FOOT...................................................................................................7<br />
REPLACING THE NEEDLE ...............................................................................................................7<br />
WINDING THE BOBBIN.....................................................................................................................8<br />
INSERTING THE BOBBIN .................................................................................................................9<br />
THREADING THE UPPER THREAD ...............................................................................................10<br />
USING THE NEEDLE THREADER ..................................................................................................11<br />
THREAD TENSION..........................................................................................................................12<br />
RAISING UP THE LOWER THREAD...............................................................................................13<br />
CUTTING THE THREAD..................................................................................................................13<br />
TWO-STEP PRESSER FOOT LIFTER............................................................................................14<br />
TO RAISE OR DROP THE FEED DOGS.........................................................................................14<br />
MATCHING NEEDLE/ FABRIC/ THREAD .......................................................................................15<br />
QUICK ADJUSTMENT REFERENCE CHART.................................................................................16<br />
TYPE OF PRESSER FOOT CHART................................................................................................17<br />
SELECTING A STITCH ....................................................................................................................18<br />
MIRROR...........................................................................................................................................18<br />
AUTO-STOP.....................................................................................................................................18<br />
ADJUSTING THE STITCH LENGTH ...............................................................................................19<br />
ADJUSTING THE STITCH WIDTH/ NEEDLE POSITION ...............................................................19<br />
MEMORY<br />
Program........................................................................................................................................20<br />
Sew Prog......................................................................................................................................21<br />
Sewing sample .............................................................................................................................21<br />
USEFUL SKILLS<br />
Sewing corners.............................................................................................................................22<br />
Reverse ........................................................................................................................................22<br />
Free arm.......................................................................................................................................22<br />
Sewing on the heavy fabric ..........................................................................................................23<br />
STRAIGHT STITCHES AND NEEDLE POSITION ..........................................................................24<br />
ZIGZAG STITCHES .........................................................................................................................24<br />
STRETCH STITCH ..........................................................................................................................25<br />
OVERCASTING STITCHES ............................................................................................................26<br />
BLIND HEM/LINGERIE STITCH ......................................................................................................27<br />
BUTTON SEWING ...........................................................................................................................28<br />
BUTTONHOLE STITCHING .......................................................................................................29-31<br />
DARNING.........................................................................................................................................32<br />
FAGOTING.......................................................................................................................................33<br />
PATCHWORK STITCH.....................................................................................................................33<br />
ZIPPER INSERTION...................................................................................................................34-35<br />
NARROW HEMMING.......................................................................................................................36<br />
CORDING ........................................................................................................................................37<br />
SATIN STITCH SEWING .................................................................................................................38<br />
QUILTING.........................................................................................................................................39<br />
GATHERING ....................................................................................................................................40<br />
SMOCKING......................................................................................................................................41<br />
FREE MOTION DARNING, EMBROIDERY AND MONOGRAMMING.......................................42-43<br />
SCALLOP STITCH...........................................................................................................................44<br />
TWIN NEEDLE (OPTIONAL) ...........................................................................................................45<br />
WALKING FOOT (OPTIONAL) ........................................................................................................46<br />
MAINTENANCE ..........................................................................................................................47-48<br />
REPLACING THE LIGHT BULB.......................................................................................................48<br />
TROUBLE SHOOTING GUIDE........................................................................................................49<br />
II
PRINCIPAL PARTS OF THE MACHINE<br />
1<br />
2<br />
3<br />
4<br />
5<br />
6<br />
7<br />
8<br />
9<br />
10<br />
11<br />
14<br />
15<br />
16 (A)<br />
17 (B)<br />
18 (C)<br />
12<br />
13<br />
1. Tension dial<br />
2. Bobbin thread guide<br />
3. Upper thread guide<br />
4. Thread take-up lever<br />
5. Face plate<br />
6. Needle up/down position<br />
button<br />
7. Auto-lock button<br />
8. Thread cutter<br />
9. Reverse button<br />
10. Buttonhole lever<br />
11. Auto needle threader<br />
12. Needle plate<br />
13. Sewing table and<br />
accessory box<br />
14. Speed limiting adjustment<br />
lever 19. Handwheel 24. Handle<br />
15. Bobbin winder 20. Main power switch 25. Horizontal spool pin<br />
16. LCD (Liquid crystal display) 21. Foot controller connector 26. Drop feed lever<br />
17. Function of buttons 22. Power cord 27. Presser foot lifter<br />
18. Stitch selection buttons 23. Hole for second spool pin<br />
19<br />
20<br />
21<br />
22<br />
23<br />
24<br />
25<br />
26<br />
27<br />
1
PRINCIPAL PARTS OF THE MACHINE<br />
A. LCD (Liquid crystal display)<br />
Needle up/ down position<br />
Auto-Stop Bobbin winding<br />
Reverse Mirror Buttonhole lever<br />
Normal sewing<br />
Program memory<br />
Sewing program<br />
Normal<br />
Program<br />
Sew Prog.<br />
Presser foot<br />
Needle position<br />
Pattern number Stitch length Stitch width<br />
B. Function of buttons<br />
Selected function<br />
Verify-MEM<br />
Mirror<br />
Stitch length adjustment<br />
Stitch width adjustment<br />
Clear-MEM<br />
Enter-MEM<br />
Auto-Stop<br />
Stitch length adjustment<br />
Stitch width adjustment<br />
C. Pattern chart<br />
The portion marked in green on the chart below shows the one unit of each pattern.<br />
1 2 3 4 5 6 7 8 9 10<br />
11 12 13 14 15 16 17 18 19 20<br />
21 22 23 24 25 26 27 28 29 30<br />
31 32 33 34 35 36 37 38 39 40<br />
2
ACCESSORIES<br />
Standard<br />
1. All purpose foot (T)<br />
2. Zipper foot (I)<br />
3. Buttonhole foot (D)<br />
4. Cording foot (M)<br />
5. Overcasting foot (E)<br />
6. Blind hem foot (F)<br />
7. Hemmer foot (K)<br />
8. Satin stitch foot (A)<br />
9. Quilting foot (P)<br />
10.Darning/ Embroidery foot<br />
11.Gathering foot<br />
12.Button sewing foot<br />
13.Brush/ Seam ripper<br />
14.Spool holder (Large)<br />
15.Spool holder (Small)<br />
16.Seam guide<br />
17.Bobbin(3x)<br />
18.Screwdriver (L & S)<br />
19.Pack of needle<br />
20.Spool pin felt<br />
21.Second spool pin<br />
Standard<br />
1 2 3 4<br />
T<br />
I D M<br />
006186008 006905008 006102008<br />
006813008<br />
5 6<br />
7<br />
E F K A<br />
006907008 006904008<br />
006900008<br />
006172008<br />
9 10<br />
11 12<br />
P<br />
006916008<br />
13 14<br />
006099008<br />
18<br />
006016008<br />
R12373210<br />
19<br />
15<br />
TA10943209<br />
006917008<br />
20<br />
16<br />
006008001<br />
8<br />
006914008<br />
21<br />
17<br />
006084009<br />
Optional<br />
006012008<br />
006014148<br />
006015009 R60033210<br />
22.Twin needle<br />
23.Walking foot<br />
Optional<br />
22<br />
23<br />
006020008<br />
006185008<br />
3
CONNECTING THE MACHINE TO THE POWER SOURCE<br />
OFF<br />
ON<br />
Connecting the machine<br />
Before connecting the power supply, make sure that the voltage and frequency shown on the<br />
machine is conforming with your electrical power.<br />
Place the machine on a stable table.<br />
1. Connect the power line cord to the machine by inserting the 2-hole plug into the terminal box.<br />
2. Connect the power line plug to the electric outlet.<br />
3. Turn on the power switch.<br />
4. The sewing lamp will light up when the switch is turned on.<br />
To disconnect, turn the power switch to the off position, then remove plug from outlet.<br />
Polarized plug information<br />
This appliance has a polarized plug (one blade wider than<br />
the other), to reduce the risk of electrical shock; this plug<br />
will fit in a polarized outlet only one way. If the plug does<br />
not fit fully in the outlet, reverse the plug. If it still does not<br />
fit, contact a qualified electrician. Do not modify the plug in<br />
any way.<br />
4
CONNECTING THE MACHINE TO THE POWER SOURCE<br />
Foot control<br />
With the sewing machine turned off, insert the foot control<br />
plug into its connector on the sewing machine. Turn on the<br />
sewing machine, and then slowly depress the foot control<br />
to start sewing. Release the foot control to stop the<br />
sewing machine.<br />
Note: The setting of the speed control<br />
maximum speed of the machine.<br />
lever will limit the<br />
Attention: Consult a qualified electrician if in doubt as how to connect the machine to the<br />
power source. Unplug the power cord when the machine is not in use.<br />
The appliance must be used with the foot controller 4C-337G manufactured by<br />
MATSUSHITA ELECTRIC (TAIWAN) CO., LTD.<br />
Message and beeping sound<br />
The computer will automatically adjust the needle upper position when the machine is switch on,<br />
and automatically adjust the needle lower position when you start sewing. Please note that it is a<br />
normal phenomenon if you hear a sound coming from the machine (machine adjusting sound)<br />
and feel that the sewing is being delayed. It's not dangerous to sew.<br />
- When operating correctly: 1 beep<br />
- When operating incorrectly: 3-short beeps<br />
- When the sewing machine is in trouble and can't sew: 6 seconds short beeps<br />
It means that the thread is twisted or jammed and the hand wheel axle can't move. Please look<br />
through the "Trouble shooting guide" on page 49 to find the solution. After the problem has<br />
been solved, the machine will continue to sew.<br />
Note: If the problem is still not solved, please contact your local dealer.<br />
Attention: During the sewing, if the thread get jammed inside the hook stopping the<br />
needle from moving and you continue pressing the foot control, the security switch will<br />
stop the machine completely. In order to restart the sewing machine, you will have to turn<br />
the on/off switch to the OFF position and the ON again.<br />
5
OPERATION BUTTONS AND FOOT CONTROLLER<br />
Speed limiting<br />
adjustment lever<br />
Needle up/down<br />
position button<br />
Auto-lock button<br />
Reverse button<br />
Slow<br />
Fast<br />
Speed limiting adjustment lever<br />
Slide the lever to change the maximum speed of the sewing<br />
machine.<br />
LCD<br />
Normal<br />
Upper thread<br />
Fabric<br />
Bobbin thread<br />
Start<br />
Stop<br />
Needle up/ down position button<br />
With the Needle up/ down position button, you decide whether the<br />
needle shall stop in the up position or in the material when you<br />
stop sewing. Press the button so that the arrow, on the LCD<br />
Screen, will point upward and the needle will stop in the up<br />
position. When you press the button so that the arrow points<br />
downward , the machine will stop with the needle in the material.<br />
When you turn on the machine, the needle is always in the<br />
highest position.<br />
Auto-Lock button<br />
At the end of a seam, the machine will immediately sew 3 locking<br />
stitches, when the Auto-Lock button is pressed, then<br />
automatically stop.<br />
It will sew 3 locking stitches automatically when one of the<br />
patterns 1~4 is being selected.<br />
LCD<br />
Normal<br />
Only for pattern 1-6<br />
Reverse button (Only for pattern 1-6)<br />
When pattern 1-6 are selected, the machine will sew in reverse<br />
while the reverse button is pressed. The machine sews forward<br />
when the button is released. For continuous reverse, press the<br />
button twice in a quick succession before starting to sew. To sew<br />
forward again, press the button once more.<br />
An arrow<br />
on the LCD display indicates reverse sewing.<br />
6
CHANGING THE PRESSER FOOT<br />
a<br />
a<br />
Attaching the presser foot holder (1)<br />
Raise the presser foot bar (a). Attach<br />
the presser foot holder (b) as illustrated.<br />
e<br />
b<br />
d<br />
c<br />
f<br />
Attaching the presser foot (2)<br />
Lower the presser foot holder (b) until<br />
the cut-out (c) is directly above the pin<br />
(d).<br />
Raise the lever (e).<br />
Lower the presser foot holder (b) and<br />
the presser foot (f) will engage<br />
automatically.<br />
b<br />
1 2<br />
Removing the presser foot (3)<br />
Raise the presser foot.<br />
Raise the lever (e) and the foot will<br />
disengages.<br />
e<br />
g<br />
Attaching the seam guide (4)<br />
Attach the seam guide (g) in the slot as<br />
illustrated. Adjust according to need for<br />
hems, pleats, etc.<br />
3<br />
4<br />
Attention: Turn power switch to off<br />
("O") when carrying out any of the<br />
above operations!<br />
REPLACING THE NEEDLE<br />
A<br />
B<br />
Change the needle regularly, especially if<br />
it is showing signs of wear and causing<br />
problems.<br />
Insert the needle following the illustrated<br />
instructions.<br />
A. Loosen the needle clamp screw and<br />
tighten again after inserting the new<br />
needle.<br />
The flat side of the shaft should be<br />
towards the back.<br />
B. Insert the needle as far up as it will go.<br />
Attention: Turn power switch to off<br />
("O").<br />
Needles must be in perfect condition.<br />
Problems can occur with:<br />
- Bent needles<br />
- Blunt needles<br />
- Damaged points<br />
7
WINDING THE BOBBIN<br />
2<br />
1<br />
3<br />
4~10<br />
1. Place the thread and spool holder onto<br />
the spool pin. For smaller spools of<br />
thread, place spool holder with the<br />
small side next to the spool or use the<br />
small spool holder.<br />
1 2<br />
2. Snap the thread into the thread guide.<br />
3. Wind the thread clockwise around the<br />
bobbin winder tension discs.<br />
4. Thread the bobbin as illustrated and it<br />
on the spindle.<br />
3 4<br />
5 6<br />
Normal<br />
5. Push the bobbin to the right.<br />
6. When the bobbin winder spindle is<br />
push to the right, "bobbin winding<br />
position", the symbol is shown on<br />
the LCD screen. It will disappear from<br />
the LCD screen when the bobbin<br />
winder spindle is push to the left,<br />
"sewing position".<br />
7. Hold the end of the thread.<br />
8. Press on the foot control to start the<br />
sewing machine.<br />
7 8<br />
9. After the bobbin has wind few turns<br />
stop the machine and cut the thread<br />
near the hole of the bobbin. Continue<br />
filling the bobbin until it is full. The<br />
bobbin winder will stop automatically<br />
when the bobbin is full.<br />
Stop the machine and cut the thread.<br />
9 10<br />
8<br />
10.Push the bobbin winder spindle to the<br />
left and remove the bobbin.<br />
Please Note: When the bobbin winder spindle is in "bobbin winding" position, the machine will<br />
not sew and the hand wheel will not turn. To start sewing, push the bobbin winder spindle to the<br />
left (sewing position).
INSERTING THE BOBBIN<br />
When inserting or removing the bobbin,<br />
the needle must be fully raised.<br />
1. Insert the bobbin in the bobbin case with<br />
the thread running in a counterclockwise<br />
direction (arrow).<br />
1<br />
2. Pull the thread through the slit (A).<br />
2<br />
A<br />
3. Pull the thread toward the left and along<br />
the inside of the spring until it slips into the<br />
notch (B) being sure that the thread does<br />
not slip out of the slit (A).<br />
3<br />
B<br />
B<br />
A<br />
4. Pull out about 15 cm (6 inches) of thread<br />
and attach the bobbin cover plate. (C)<br />
C<br />
4<br />
Attention: Turn power switch to off ("O")<br />
before inserting or removing the bobbin.<br />
9
THREADING THE UPPER THREAD<br />
3<br />
6<br />
4<br />
2<br />
1<br />
5<br />
8<br />
7<br />
1 2<br />
3 4<br />
5 6<br />
7 8<br />
It is important to carry out the threading<br />
correctly as by not doing so several sewing<br />
problems could result.<br />
Start by raising the needle to its highest point,<br />
and also raise the presser foot to release the<br />
tension discs.<br />
1. Lift up the spool pin. Place the spool of<br />
thread on the spool pin so that the thread<br />
comes from the front of the spool place the<br />
spool cap at the end of the spool pin.<br />
2. Draw the thread from the spool through the<br />
upper thread guide.<br />
3. Guide the thread around the thread guide<br />
pulling the thread through the pre-tension<br />
spring as illustrated.<br />
4. Thread the tension module by passing the<br />
thread between the silver discs.<br />
5. Then, down and around the check spring<br />
holder.<br />
6. At the top of this movement, pass the thread<br />
from right to the left through the slotted eye of<br />
the take-up lever and then downwards again.<br />
7. Pass the thread behind the flat, horizontal<br />
thread guide.<br />
8. Now take the thread behind the needle<br />
clamp guide and then down to the needle<br />
which should be threaded from the front to<br />
the back. Pull out about 10cm (4 inches) of<br />
thread to the rear beyond the needle eye.<br />
10
USING THE NEEDLE THREADER<br />
Raise the needle to its highest position.<br />
Lower the presser foot.<br />
1.<br />
Lower the needle threader lever slowly<br />
and draw the thread through the<br />
thread guide as illustrated and then to<br />
the right.<br />
1<br />
2. The needle threader automatically<br />
turns to the threading position and the<br />
hook pin passes through the needle<br />
eye.<br />
2<br />
3. Take the thread in front of the needle.<br />
3<br />
4.<br />
Hold the thread loosely and release<br />
the lever slowly. The hook will turn and<br />
pass the thread through the needle<br />
eye in forming a loop.<br />
Pull the thread through the needle eye.<br />
4<br />
Attention: Turn power switch to the<br />
off position ("O").<br />
11
THREAD TENSION<br />
Loose<br />
Tight<br />
1<br />
Reverse<br />
side<br />
Upper thread<br />
Bobbin thread<br />
Surface<br />
Surface<br />
- Basic thread tension setting: "4"<br />
- To increase the tension, turn the dial to<br />
the next number up. To reduce the<br />
tension, turn the dial to the next number<br />
down.<br />
- Proper setting of tension is important to<br />
good sewing.<br />
- There is no single tension setting<br />
appropriate for all stitch functions, thread<br />
on fabric.<br />
Reverse<br />
side<br />
- 90% of all sewing will be between "3"<br />
and "5" ("4" is basic setting).<br />
2<br />
3<br />
Upper thread<br />
Bobbin thread<br />
Reverse<br />
side<br />
Upper thread<br />
Bobbin thread<br />
Reverse<br />
side<br />
Surface<br />
Surface<br />
- For all decorative sewing you will always<br />
obtain a nicer stitch and less fabric<br />
puckering when the upper thread<br />
appears on the bottom side of your<br />
fabric.<br />
1. Normal thread tension for straight stitch<br />
sewing.<br />
2. Thread tension is too loose for straight<br />
stitch sewing. Turn dial to higher<br />
number.<br />
3. Thread tension is too tight for straight<br />
stitch sewing. Turn dial to lower number.<br />
4. Normal thread tension for zig zag and<br />
decorative sewing.<br />
Upper thread<br />
4<br />
Bobbin thread<br />
12
RAISING UP THE LOWER THREAD<br />
1. Hold the upper thread with the left<br />
hand. Turn the handwheel towards<br />
you (counterclockwise) lowering, then<br />
raising the needle.<br />
1<br />
2. Gently pull on the upper thread to<br />
bring the bobbin thread up through the<br />
needle plate hole. The bobbin thread<br />
will come up in a loop.<br />
2<br />
3. Pull both threads to the back under the<br />
presser foot.<br />
3<br />
CUTTING THE THREAD<br />
Raise the presser foot. Remove the<br />
fabric, draw the threads to the left side of<br />
the face cover and cut using the thread<br />
cutter.<br />
The threads are cut at the proper length<br />
for starting the next seam.<br />
13
TWO-STEP PRESSER FOOT LIFTER<br />
1. The presser foot lifter raises and<br />
lowers your presser foot.<br />
1<br />
2. When sewing several layers or thick<br />
fabrics, the presser foot can be raised<br />
a second stage for easy positioning of<br />
the work.<br />
2<br />
TO RAISE OR DROP THE FEED DOGS<br />
With the sewing table off the machine,<br />
the feed dog adjustment lever can be<br />
seen on the base in back of the sewing<br />
machine.<br />
Sliding the lever to the right (b) will lower<br />
the feed dog, for example during button<br />
sewing. If you wish to continue sewing<br />
normally, slide the lever to the left (a) in<br />
order to raise the feed dogs.<br />
a<br />
The feed dog will not rise up if you do<br />
not turn the handwhee, even if the lever<br />
is slid to the left. Make a complete turn<br />
to raise the feed dogs.<br />
a<br />
b<br />
b<br />
14
MATCHING NEEDLE/ FABRIC/ THREAD<br />
NEEDLE, FABRIC, THREAD SELECTION GUIDE<br />
NEEDLE SIZE FABRICS THREAD<br />
9-11 (70-80) Lightweight fabrics-thin cottons,<br />
voile, serge, silk, muslin, Qiana,<br />
interlocks, cotton knits, tricots,<br />
jerseys, crepes, woven polyester,<br />
shirt & blouse fabrics.<br />
Light-duty thread in cotton, nylon,<br />
polyester or cotton wrapped<br />
polyester.<br />
11-14 (80-90) Medium weight fabrics-cotton,<br />
satin, kettleclote, sailcloth, double<br />
knits, lightweight woollens.<br />
14 (90)<br />
Medium weight fabrics-cotton<br />
duck, woolen, heavier knits,<br />
terrycloth, denims.<br />
Most threads sold are medium<br />
size and suitable for these fabrics<br />
and needle sizes. Use polyester<br />
threads on synthetic materials<br />
and cotton on natural woven<br />
fabrics for best results. Always<br />
use the same thread on top and<br />
bottom.<br />
16 (100)<br />
Heavyweight fabrics-canvas,<br />
woolens, outdoor tent and quilted<br />
fabrics, denims, upholstery<br />
material (light to medium).<br />
18 (110)<br />
Heavy woollens, overcoat fabrics,<br />
upholstery fabrics, some leathers<br />
and vinyls.<br />
Heavy duty thread, carpet thread.<br />
IMPORTANT: Match needle size to thread size and weight of fabric<br />
Note twin needle:<br />
1. Twin needles, can be purchased for utility and decorative work.<br />
2. When sewing with twin needles, the stitch width dial should be set at less than "3.5".<br />
3. Replace needle often (approximately every other garment ) and/ or at first thread<br />
breakage or skipped stitches.<br />
15
QUICK ADJUSTMENT REFERENCE CHART<br />
STRAIGHT<br />
STITCH<br />
UTILITY<br />
STITCH<br />
BUTTONHOLE<br />
SEWING<br />
STITCH<br />
DARNING STITCH<br />
BLOCK<br />
STITCH<br />
PRACTICAL<br />
STITCH<br />
STITCH<br />
LENGTH (mm) WIDTH (mm) PRESSER FUNCTIONS<br />
FOOT REVERSE<br />
AUTO MANUAL AUTO MANUAL<br />
1 2.5 0.0~4.5 3.5 0.0~7.0 T(P/K/I)<br />
2 3.0 1.0~3.0 3.5 1.0~6.5 T(P)<br />
3 2.5 1.0~3.0 3.5 1.0~6.0 T<br />
4 2.5 1.0~3.0 3.5 0.5~6.5 T<br />
5 2.0 0.2~4.5 5.0 0.0~7.0 T(E)<br />
6 1.0 0.2~4.5 5.0 2.5~7.0 T(M)<br />
7 2.5 1.0~3.0 5.0 2.5~7.0 T(A)<br />
8 2.5 1.0~3.0 5.0 2.5~7.0 E<br />
9 2.5 1.0~3.0 5.0 2.5~7.0 T<br />
10 3.0 1.0~3.0 3.5 2.5~7.0 T<br />
11 2.0 0.5~4.5 3.5 2.5~7.0 F<br />
12 1.0 0.5~4.5 3.5 2.5~7.0 F<br />
13 3.0 1.0~3.0 5.0 2.5~7.0 T(A)<br />
14 0.4 0.2~1.0 5.0 2.5~7.0 D<br />
15 0.4 0.2~1.0 5.0 2.5~5.5 D<br />
16 0.4 0.2~1.0 7.0 5.5~7.0 D<br />
17 2.5 1.5~3.0 7.0 3.5~7.0 T<br />
18 0.4 0.2~1.0 7.0 2.5~7.0 A<br />
19 0.4 0.2~1.0 7.0 2.5~7.0 A<br />
20 0.4 0.2~1.0 7.0 2.5~7.0 A<br />
21 0.4 0.2~1.0 7.0 2.5~7.0 A<br />
22 0.4 0.2~1.0 7.0 2.5~7.0 A<br />
23 0.4 0.2~1.0 7.0 2.5~7.0 A<br />
24 0.4 0.2~1.0 7.0 2.5~7.0 A(M)<br />
25 3.0 1.0~3.0 7.0 2.5~7.0 A<br />
26 3.0 1.0~3.0 7.0 2.5~7.0 A(T)<br />
27 3.0 1.0~3.0 7.0 2.5~7.0 A(T)<br />
28 2.5 1.0~3.0 5.0 2.5~7.0 A<br />
29 3.0 1.0~3.0 7.0 2.5~7.0 A(T)<br />
30 3.0 1.0~3.0 7.0 2.5~7.0 A(T)<br />
31 2.5 1.0~3.0 7.0 2.5~7.0 A(T)<br />
32 2.5 1.0~3.0 7.0 2.5~7.0 A(T)<br />
33 2.5 1.0~3.0 7.0 2.5~7.0 T<br />
34 3.0 1.0~3.0 7.0 2.5~7.0 T(A)<br />
35 2.5 1.0~3.0 5.0 2.5~7.0 A<br />
36 2.0 1.0~3.0 7.0 2.5~7.0 A<br />
37 2.5 1.0~3.0 5.0 2.5~7.0 A<br />
38 2.5 1.0~3.0 7.0 2.5~7.0 T(A)<br />
39 2.5 1.0~3.0 7.0 2.5~7.0 A<br />
40 2.5 1.0~3.0 5.0 2.5~7.0 A(M)<br />
16<br />
AUTO<br />
STOP<br />
MIRROR MEMORY<br />
* * * *<br />
* * * *<br />
* * * *<br />
* * * *<br />
* * * *<br />
* * * *<br />
* * *<br />
* * *<br />
* * *<br />
* * *<br />
* * *<br />
* * *<br />
* * *<br />
* * *<br />
* * *<br />
* * *<br />
* * *<br />
* * *<br />
* * *<br />
* * *<br />
* * *<br />
* * *<br />
* * *<br />
* * *<br />
* * *<br />
* * *<br />
* * *<br />
* * *<br />
* * *<br />
* * *<br />
* * *<br />
* * *<br />
* * *<br />
* * *<br />
* * *<br />
* * *<br />
*: Adjustments can be made.
TYPE OF PRESSER FOOT CHART<br />
(double is being suggested for certain stitches for more creativity)<br />
PRESSER FOOT<br />
T<br />
All purpose foot (T)<br />
APPLICATION<br />
General sewing,<br />
Patchwork stitches,<br />
Decorative<br />
stitching,<br />
Smocking,<br />
Fagoting, etc.<br />
NEEDLE<br />
PRESSER FOOT<br />
A<br />
Satin stitch foot (A)<br />
APPLICATION<br />
Satin stitch<br />
NEEDLE<br />
Inserting zippers<br />
Quilting<br />
I<br />
P<br />
Zipper foot (I)<br />
Quilting foot (P)<br />
D<br />
Buttonhole<br />
Darning<br />
Free embroidery<br />
Monogramming<br />
Buttonhole foot<br />
(D)<br />
Darning/<br />
Embroidery foot<br />
Cording<br />
Gathering<br />
M<br />
Cording foot (M)<br />
Gathering foot<br />
Overcasting<br />
Button sewing<br />
E<br />
Overcasting foot<br />
(E)<br />
Button sewing foot<br />
F<br />
Blind hem foot (F)<br />
Blind hem<br />
Walking foot<br />
(Optional)<br />
This foot helps to<br />
prevent uneven<br />
feeding of very<br />
difficult fabrics<br />
Narrow hemming<br />
K<br />
Hemmer foot (K)<br />
Note: When sewing with twin needles, the stitch width dial should be set at less than "3.5".<br />
17
SELECTING A STITCH<br />
LCD<br />
Function of<br />
buttons<br />
Stitch<br />
selection<br />
buttons<br />
When you turn the machine "ON" it always selects<br />
the straight stitch and the number is displayed. You<br />
select a different stitch by pressing the corresponding<br />
stitch button. The LCD screen will display the<br />
selected stitch number and the suggested settings.<br />
Normal<br />
You can set the sewing functions according to the<br />
fabric and the sewing purpose. For example, you can<br />
use the function buttons to adjust the stitch length<br />
and stitch width, select the mirror function or autostop.<br />
The LCD screen also shows you the suitable<br />
presser foot for the stitch selected.<br />
MIRROR<br />
Normal<br />
Pressing the will sew a reflection pattern from your<br />
selected stitch. The LCD will display the mirror function<br />
and the machine will continue to sew the reflected pattern<br />
until the mirror function is pressed again to cancel the<br />
mirror function. When the mirror function disappears from<br />
the LCD screen, the machine will continue to sew the<br />
normal stitch.<br />
If you change the pattern setting, then the mirror function<br />
will be cancelled accordingly. If you need the reflection<br />
pattern, then press the mirror button again.<br />
Attention: The mirror function will not available for<br />
pattern 14~17.<br />
AUTO-STOP<br />
Normal<br />
Auto-Lock<br />
Using the Auto-Stop function will allow you to stop with<br />
complete pattern after sewing the same pattern<br />
continuously. When the is pressed, the machine will<br />
sew few locking stitches at the end of the current pattern<br />
and stop automatically. You can set the auto-stop function<br />
while sewing and the machine will stop after one unit of<br />
the pattern or press before starting to sew and the<br />
machine will sew 1 unit of the pattern only. When you<br />
press the auto-stop function, the LCD screen will display<br />
the figure . After the machine had stop, just press the<br />
foot control again to continue sewing.<br />
If you change your pattern selection, the Auto-Stop function<br />
will be cancelled accordingly. If you need the function for<br />
the current pattern, press the Auto-Stop button again.<br />
Attention: The Auto-Stop function will not available for pattern 14~17.<br />
18
ADJUSTING THE STITCH LENGTH<br />
Normal<br />
When you select a stitch the machine will<br />
automatically set the recommended stitch length<br />
which will be indicated by numbers on the LCD<br />
screen. The stitch length can be adjusted by pressing<br />
the stitch length adjustment buttons. To shorten the<br />
stitch length, press the button. For a longer stitch<br />
length, press the button. The stitch length can be<br />
adjusted between "0.0" ~ "4.5". Certain stitches have<br />
a limited length.<br />
Normal<br />
ADJUSTING THE STITCH WIDTH/ NEEDLE POSITION<br />
Normal<br />
When you select a stitch, the machine will<br />
automatically set the recommended stitch width,<br />
which will be indicated by numbers on the LCD<br />
screen. The stitch width can be regulated by pressing<br />
the stitch width adjustment buttons. For a narrower<br />
stitch, press the button. For a wider stitch, press<br />
the button. The stitch width can be adjusted<br />
between "0.0" ~ "7.0". Certain stitches have a limited<br />
stitch length.<br />
Normal<br />
Normal<br />
When the straight stitch patterns (patterns 1~4) has been<br />
selected, the needle position is regulated by the stitch<br />
width adjustment buttons. Pressing the button, will<br />
move the needle to the left and pressing the button,<br />
will move the needle to the right. On the LCD screen, the<br />
needle position will be shown as a point above the<br />
numbers. The numbers will be changed from left position<br />
"0.0" to extreme right position "7.0". The pre-set center<br />
needle position will be indicated as "3.5".<br />
19
MEMORY<br />
Normal<br />
Program<br />
Sew Prog.<br />
When you turn the machine "on", the LCD screen<br />
displays Normal . Touch the button to Program for<br />
programming. If you touch the function button again,<br />
Sew Prog. will be displayed to allow sewing your<br />
programmed stitches. After a third touch, Normal is<br />
displayed again.<br />
Program<br />
Note:<br />
-<br />
The machine has a program memory that can retain 30 units of stitches.<br />
- You can continue your programming even after having pressed Auto-Stop. Then, when sewing,<br />
the machine stops automatically and locks the thread in each position where you have.<br />
- Your machine will hold what you have programmed even when it is switched off.<br />
Program<br />
Program<br />
Programming<br />
1. Press for Program position.<br />
2. Select the first pattern you want to enter (You can<br />
change the stitch length, width, choose the Auto-Stop<br />
or mirror function if desired) then press the button<br />
to select next pattern.<br />
3. Use the button or button to check what you<br />
have programmed.<br />
Corrections<br />
If you wish to change a stitch to another one in your<br />
program, press button or button until the stitch<br />
number you have selected is displayed. Select the new<br />
stitch or change the stitch length, width, Auto-Stop or<br />
mirror if desire.<br />
Program<br />
Cancel<br />
If you wish to delete a certain stitch within the program,<br />
use the button or button until the actual stitch<br />
number is displayed and press . The stitch and<br />
following patterns will be deleted.<br />
If you wish to delete the whole program, press the<br />
button to return to Program . The machine will be positioned<br />
at the first programmed stitch. Press button.<br />
Note: If you mistake press button, simply press button again to bring back the balance<br />
of your program as long as you have not used another button.<br />
20
MEMORY<br />
Sew Prog.<br />
Sew Prog.<br />
1. Press for Sew Prog. position. The machine will be<br />
positioned at the first programmed stitch.<br />
2. Press foot controller. The machine will start to sew<br />
from first entered pattern. On the LCD screen,<br />
sewing stitch data is indicated.<br />
3. If you wish to check what is programmed or if you<br />
wish to start sewing a few stitches into the program,<br />
use the button or button<br />
4. You can use the Auto-Lock<br />
Attention: The Auto-Lock can not be set if one of the pattern 1~4 is being selected as the<br />
first programmed stitch.<br />
5. You can continue your programming even after having pressed . Then, when sewing, the<br />
machine stops automatically and fastens the thread in every position where you have<br />
programmed Auto-Stop. Just press the foot control again and the machine will sew the rest of<br />
what you have programmed.<br />
6. If you wish to repeat your stitch combination without having the machine stop press the<br />
button to cancel the Auto-Stop in Program position. The will disappear from the LCD screen.<br />
7. If you should forget to enter the Auto-Stop function in Program position it is also possible to use the<br />
Auto-Stop button in Sew Prog. position. But the Auto-Stop function will not be memorized in the program.<br />
Sewing sample<br />
function when the sewing machine is stopped.<br />
Press the button to Sew Prog. position. Press to empty the memory. Select any stitches you<br />
wish with the exception of pattern 14~17. This way you can combine different stitches according<br />
to your own taste and imagination. Press the button to the Sew Prog. position to sew your<br />
program. The machine will be positioned at the first programmed stitch. Press the foot control to<br />
begin sewing. You can try the memory program illustrated below.<br />
ex.1<br />
Program<br />
Sewing sample<br />
LCD screen<br />
Programming direction<br />
ex.2<br />
ex.3<br />
Sew Prog.<br />
Start to sewing<br />
21
USEFUL SKILLS<br />
Sewing corners<br />
1. Stop the sewing machine<br />
when you reach a corner.<br />
2<br />
3<br />
5<br />
2. Lower the needle into the<br />
fabric.<br />
3. Raise the presser foot.<br />
4. Use the needle as a pivot<br />
and turn the fabric.<br />
1<br />
4<br />
5. Lower the presser foot and<br />
resume sewing.<br />
Reverse<br />
Reverse stitching is used to<br />
secure the threads at the<br />
beginning and at the end of a<br />
seam.<br />
Press the reverse button and<br />
sew 4~5 stitches. The machine<br />
will sew forward when the<br />
button is released.<br />
Attention: The reverse<br />
button can only be used<br />
for patterns 1~6.<br />
Free arm<br />
Free-arm sewing is convenient for sewing tubular areas such as pant hems and cuffs.<br />
22
USEFUL SKILLS<br />
Sewing on the heavy fabric<br />
The black button on the right<br />
side of the presser foot will lock<br />
the presser foot in a horizontal<br />
position if you push it in before<br />
lowering the presser foot. This<br />
ensures even feeding at the<br />
beginning of a seam and helps<br />
when sewing multiple layers of<br />
fabric such as sewing over<br />
seams when hemming jeans.<br />
When you reach the point of an<br />
increased thickness, lower the<br />
needle and raise the presser<br />
foot. Press the toe of the foot<br />
and push in the black button,<br />
then lower the foot and<br />
continue sewing.<br />
Cardboard or<br />
thick fabric<br />
The black button releases<br />
automatically after sewing few<br />
stitches.<br />
You also can place another<br />
piece of fabric with the same<br />
thickness at the back of the<br />
seam. Or support the presser<br />
foot while feeding by hand and<br />
sewing toward the folded side.<br />
23
STRAIGHT STITCHES AND NEEDLE POSITION<br />
T<br />
Change the needle position<br />
These setting apply only to "straight" stitch patterns 1~4.<br />
The machine will sew 3 locking stitches automatically<br />
when you are starting any of the pattern1~4.<br />
The pre-set position is "3.5", center position. When you<br />
press , the needle position will move to the left.<br />
When you press , the needle position will move to<br />
the right. On the LCD screen, the point illustration and<br />
the number indicate the needle position.<br />
Changing the stitch length<br />
To shorten the stitch length, press the button. For<br />
a longer stitch length, press the button.<br />
If you are sewing on very fine (thin) fabric and you<br />
want to use a long stitch length. The stitch length will<br />
be set automatically to a maximum length of "4.0" even<br />
if you select "4.5".<br />
ZIGZAG STITCHES<br />
T<br />
A<br />
Adjusting the stitch width<br />
The maximum zigzag stitch width for zigzag stitching is<br />
"7"; however, the width can be reduced on any patterns.<br />
The width increases as you press the zigzag button<br />
from "0" - "7.0".<br />
Attention:<br />
For twin needle sewing, never set the width wider<br />
than "3.5".<br />
Adjusting the stitch length<br />
The density of zigzag stitches increase as the setting<br />
of stitch length dial approaches "0.2".<br />
Neat zigzag stitches are usually achieved at "1.0" -<br />
"2.5".<br />
Closed up zigzag stitches (close together) are referred<br />
to as a satin stitch.<br />
24
STRETCH STITCH<br />
T<br />
A<br />
Straight stretch stitch<br />
It assures you of a stitch that is strong and<br />
flexible and will give with the fabric without<br />
breaking. Good for easy to ravel and knit<br />
fabrics. It is good for joining durable fabric<br />
such as denims.<br />
These stitches can also be used as a<br />
decorative top stitch.<br />
Straight stitch<br />
Straight stretch stitch is used to add triple<br />
reinforcement to stretch and hardwearing<br />
seams.<br />
Triple zigzag stretch stitch is suitable for<br />
firm fabrics like denim, poplin, duck, etc.<br />
25
OVERCASTING STITCHES<br />
Using the overcasting foot<br />
1<br />
E<br />
2.0~3.0 5.0~7.0<br />
2 3<br />
1. Change presser foot to overcasting foot.<br />
2. Sew the fabric with the fabric edge against the guide of the overcasting foot.<br />
Attention: The overcasting foot should be used to sew with patterns 5 and 8 only and do not<br />
set the stitch width narrower than "5.0". It is possible that needle could hit the presser foot<br />
and break when sewing other patterns and width.<br />
Using the all purpose foot<br />
1<br />
T<br />
2.0~3.0 2.5~4.5<br />
2 3<br />
1. Change presser foot to all purpose foot.<br />
2. Sewing the overcasting along the edge of the fabric so that the needle drops over the edge of<br />
the fabric on the right side.<br />
26
BLIND HEM/ LINGERIE STITCH<br />
F<br />
1.0~2.0 2.5~4.0<br />
11: Blind hem/lingerie for firm fabrics<br />
12: Blind hem for stretch fabrics<br />
5mm<br />
5mm<br />
Note: It takes practice to sew blind hems.<br />
Always make a sewing test first.<br />
1. Fold the fabric as illustrated with the<br />
wrong side uppermost.<br />
1<br />
Reverse<br />
side<br />
Overcasting<br />
stitches<br />
Reverse<br />
side<br />
a<br />
2. Place the fabric under the foot. Turn the<br />
handwheel forwards by hand until the<br />
needle swings fully to the left. It should<br />
just pierce the fold of the fabric. If it does<br />
not, adjust the stitch width accordingly.<br />
3. Adjust the guide (b) by turning the knob (a)<br />
so that the guide just rests against the fold.<br />
2<br />
3<br />
b<br />
4. Sew slowly, guiding the fabric carefully<br />
along the edge of the guide.<br />
4<br />
5. Turn over the fabric.<br />
5<br />
27
BUTTON SEWING<br />
2.0~7.0<br />
Change presser foot to the button sewing foot.<br />
a<br />
1. Move the drop feed control to to lower<br />
the feed dogs. (Note: Stitch length cannot<br />
be controlled with stitch length adjustment.)<br />
1<br />
a<br />
b<br />
b<br />
2. Position the work under the foot. Place the<br />
button in the desired position, lower the<br />
foot.<br />
3<br />
2.0~7.0<br />
3. Select zig zag pattern. Adjust the stitch<br />
width to "2.0" ~ "7.0" according to the<br />
distance between the two holes of the<br />
button.<br />
2 4<br />
4. Turn the handwheel to check that the<br />
needle goes cleanly into the left and right<br />
holes of the button.<br />
5. Before sewing, press the Auto-lock button<br />
to sew reinforcement stitches automatically<br />
at the beginning and at the end of the stitch.<br />
If a shank is required, place a darning<br />
needle on top of the button and sew.<br />
5<br />
6 For buttons with 4 holes, sew through the<br />
front two holes first, push work forward and<br />
then sew through the back two holes.<br />
6<br />
28
BUTTONHOLE STITCHING<br />
0.3~0.7 3.0~7.0<br />
0.4~0.6 3.5~5.5<br />
D<br />
14: For thin or medium fabric<br />
15: For horizontal holes on<br />
blouses or shirts made<br />
from thin or medium fabric<br />
16: For suits or overcoats<br />
0.3~0.6 5.5~7.0<br />
Note: Before sewing a buttonhole on your<br />
project, practice on a scrap piece of the same<br />
type of fabric.<br />
1. Mark the positions of the buttonhole on the<br />
fabric.<br />
The maximum buttonhole length is 3cm.<br />
(Total of diameter + thickness of button.)<br />
1<br />
2<br />
2. Attach the buttonhole foot, then pull out the<br />
button holder plate and insert the button.<br />
The size of the buttonhole is determined by<br />
the button inserted in the button plate.<br />
Set the buttonhole stitch. Adjust stitch width<br />
and length to desired width.<br />
The thread should be passed through the<br />
hole in the presser foot, then be placed<br />
under the foot.<br />
3. Select the buttonhole stitch. Adjust the<br />
stitch width and the stitch length to the<br />
desired width and density.<br />
3<br />
Starting<br />
point<br />
29
BUTTONHOLE STITCHING<br />
4. Position the fabric under the presser foot<br />
so that the centerline's mark is aligning with<br />
the center of the buttonhole foot.<br />
Lower the buttonhole foot.<br />
Note: When you select any buttonhole<br />
pattern, LCD screen will be demonstrated<br />
the figure , it is to remind you to lower<br />
the buttonhole lever.<br />
4<br />
5. While lightly holding the end of upper<br />
thread and start sewing.<br />
Note: Gently feed the fabric by hand.<br />
Before stopping, the machine will<br />
automatically sew a reinforcement stitch<br />
after the buttonhole is sewn.<br />
6. Lightly holds the end of the upper thread<br />
and start sewing.<br />
5<br />
Note: If you have moved the fabric before<br />
completing the buttonhole, you must select<br />
another stitch and returned to the<br />
buttonhole setting after. The machine will<br />
return to the starting position of the<br />
buttonhole stitch. You can restart to sew.<br />
6<br />
30
BUTTONHOLE STITCHING<br />
7. Raise the presser foot and cut thread. To<br />
sew over same buttonhole, raise presser<br />
foot (will return to original position). After<br />
sewing the buttonhole stitch, raise the<br />
buttonhole lever until it stops.<br />
7<br />
8. Cut the center of the buttonhole being<br />
careful not to cut any stitches on either side.<br />
Use a pin as a stopper at the bartack so<br />
you do not cut too much.<br />
8<br />
Making a buttonhole on stretch fabrics<br />
When sewing buttonholes on stretch fabric,<br />
hook heavy thread or cord under the<br />
buttonhole foot.<br />
1<br />
1. Attach the buttonhole foot and hook the<br />
gimp thread onto the back of the presser<br />
foot. Bring the two gimp thread ends to the<br />
front of the foot and insert them into the<br />
grooves, then temporarily tie them there.<br />
Lower the presser foot and start sewing.<br />
Set the stitch width to match the diameter<br />
of the gimp thread.<br />
2. Once sewing is completed, pull the gimp<br />
thread gently to remove any slack, then<br />
trim off any excess.<br />
Note: It is suggested that you use interfacing<br />
on the backside of the fabric.<br />
2<br />
31
DARNING<br />
T<br />
1.5~3.0 3.5~7.0<br />
Normal<br />
1. Press pattern 17 to get the darning stitch.<br />
Chang the presser foot to the all-purpose<br />
foot.<br />
1<br />
2. Baste the upper fabric and the under fabric<br />
together. Select the needle position. Lower<br />
the presser foot over the center of the tear.<br />
2<br />
Start<br />
3. Sew until the stitch has reached the<br />
desired length. Touch the reverse button.<br />
The machine now completes the pattern<br />
after sewing 15 even lines.<br />
a The length of sewing.<br />
3<br />
Reverse<br />
a<br />
b<br />
Stop<br />
b The width of sewing.<br />
Notes: Normally, for the darning the needle<br />
position can be settled between "3.5" ~<br />
"7.0" by pressing the stitch width<br />
adjustment buttons. The width of the<br />
sewing is controlled by the position of the<br />
needle.<br />
4. If the sewing range is too big to sew, then<br />
we suggest you can sew several times (or<br />
cross sew) to get better sewing result.<br />
4<br />
32
FAGOTING<br />
T<br />
1. Separate the folded edges of the fabric<br />
pieces with a gap of 0.4cm (1/8") and baste<br />
them onto a piece of thin paper or watersoluble<br />
stabilizer sheet.<br />
1<br />
Thin paper<br />
Basting<br />
2. Align the center of the presser foot with the<br />
center of the two pieces of fabric and begin<br />
sewing.<br />
3. After sewing, remove the paper.<br />
2 3<br />
PATCHWORK STITCH<br />
T<br />
1. Place the two pieces of fabric with the right<br />
side together and sew with the straight<br />
stitch. Open the seam allowances and<br />
presses it flat.<br />
2. Place the center of the presser foot on the<br />
seam line of the joined pieces of fabric and<br />
sew over the seam.<br />
33
ZIPPER INSERTION<br />
I<br />
Centered application<br />
1.5~3.0 3.5<br />
Attention: Zipper foot should be used for<br />
sewing center needle position straight<br />
stitch only. It is possible that needle could<br />
hit the presser foot and break when<br />
sewing other patterns.<br />
1. Baste the zipper opening on the garment.<br />
5 mm<br />
2. Press open the seam allowance. Place the<br />
zipper face down on the seam allowance<br />
with the teeth against the seam line. Baste<br />
the zipper tape.<br />
1<br />
2<br />
3. Attach the zipper foot. Attach the right side<br />
of the presser foot pin to the holder when<br />
sewing the left side of the zipper.<br />
4. Attach the left side of the presser foot pin to<br />
the presser foot holder when sewing the<br />
right side of the zipper.<br />
3<br />
4<br />
5. Stitch left side of the zipper from top to<br />
bottom.<br />
6. Stitch across the lower end and right side<br />
of zipper. Remove the basting and press.<br />
5<br />
6<br />
34
ZIPPER INSERTION<br />
Side application<br />
1. Baste the zipper opening on the garment.<br />
5 mm<br />
2. Fold back to the left seam allowance. Turn<br />
under the right seam allowance to form<br />
3mm fold.<br />
1<br />
2<br />
3. Attach the zipper foot. Attach the right side<br />
of the presser foot pin to the holder when<br />
sewing the left side of the zipper. Attach the<br />
left side of the presser foot pin to the<br />
presser foot holder when sewing the right<br />
side of the zipper.<br />
3<br />
4<br />
4. Stitch the left side of zipper from bottom to<br />
top.<br />
5. Turn the fabric right side out, stitch across<br />
the lower end and right side of zipper.<br />
6. Stop about 5 cm from the top of zipper.<br />
Remove the basting and open the zipper.<br />
Stitch the remainder of the the seam.<br />
5<br />
6<br />
35
NARROW HEMMING<br />
K<br />
1.5~3.0 3.5<br />
1. Fold edge of fabric over about 3mm (1/8"),<br />
then fold it over again 3mm (1/8") for about<br />
5cm (2") along the edge of fabric.<br />
1<br />
2. Insert the needle into the fold by rotating<br />
the handwheel toward you, and lower the<br />
presser foot. Sew several stitches and<br />
raise the presser foot.<br />
Insert the fabric fold into the spiral opening<br />
of hemmer foot. Move fabric back and forth<br />
until the fold forms a sceolled shape.<br />
2<br />
3. Lower the presser foot and start sewing<br />
slowly guiding the raw edge of the fabric in<br />
front of the hemmer foot evenly into the<br />
scroll of the foot.<br />
3<br />
36
CORDING<br />
Sew over one strand of cording to create a pretty swirled design on a jacket or vest or sew over<br />
three strands of cording for border trims. Pearl cotton, knitting yarn, embroidery floss, lace thread,<br />
fine wool or lily yarn can be used for cording.<br />
Single cording<br />
M<br />
Mark the design on the fabric. Insert the cord<br />
in the center groove of the cording foot from<br />
the right side opening. Pull the cord about<br />
5cm (2") behind the foot.<br />
The grooves under the foot will hold the<br />
length of the cord in place while the stitches<br />
are being form over the cord.<br />
Select the stitch and adjust the stitch width so<br />
that the stitches are just covering the cord.<br />
Lower the foot and sew slowly, guiding the<br />
cord over the design.<br />
Triple cording<br />
M<br />
Push the sewing thread to the left and insert<br />
three cords into the grooves of the foot and<br />
pull about 5cm (2") of the cords behind the<br />
foot. Select the desired pattern and adjust the<br />
stitch width so that the stitches are just<br />
covering the cords. Lower the foot and sew<br />
slowly guiding the cords.<br />
37
SATIN STITCH SEWING<br />
A<br />
0.4~1.0 3.5~7.0<br />
Use the satin stitch foot for satin stitching and<br />
sewing decorative stitches. This foot has a full<br />
indentation on the underside to allowed easy<br />
sewing over the thickness of the stitches form<br />
by closely spaced zigzag stitches, and even<br />
feeding of the fabric.<br />
To tailor the satin or decorative stitch pattern,<br />
you may adjust the length and width of the<br />
pattern by pressing the stitch length and width<br />
adjustment buttons. Experiment with fabric<br />
scraps until you get the desired length and<br />
width.<br />
Sewing thin fabrics<br />
When sewing very thin fabrics, it is suggested<br />
that you use interfacing on the backside of the<br />
fabric.<br />
38
QUILTING<br />
P<br />
1.0~3.0 3.5<br />
Insert the quilting guide in the presser foot<br />
holder as illustrated and set the space as you<br />
desire.<br />
Sew the first row and move over the fabric to<br />
sew successive rows with the guide riding<br />
along the previous row of stitching.<br />
39
GATHERING<br />
4.5 3.5<br />
1. Remove the presser foot holder and attach<br />
the gathering foot.<br />
2. Sew a single row or multiple rows of<br />
straight stitches.<br />
3. If more gathering is required, loosen the<br />
upper thread tension to below 2 so that the<br />
bobbin thread lies on the underside of the<br />
material.<br />
4. Pull the bobbin threads to obtain the<br />
desired amount of gather, then tie the<br />
threads to secure them.<br />
5. Smooth the gathers by ironing them.<br />
Note: It can also use the all purpose foot and<br />
gather fabric by hand by lowering the tension<br />
setting to below 2 and pulling the lower thread<br />
to gather the material.<br />
40
SMOCKING<br />
T<br />
1. Use the gathering foot to sew straight lines<br />
1cm(3/8") apart, across the area to be<br />
smocked.<br />
* For gathering sewing instructions, see<br />
page 40.<br />
1<br />
2. Knot the threads along one edge. Pull the<br />
bobbin threads and distribute the gathers<br />
evenly. Secure the threads at the other end.<br />
2<br />
3. Reduce the tension and if necessary and<br />
sew decorative pattern stitches between<br />
the straight seams.<br />
3<br />
4. Pull out the gathering stitches.<br />
4<br />
41
FREE MOTION DARNING, EMBROIDERY AND MONOGRAMMING<br />
3.5~5.0<br />
Move the drop feed control to<br />
feed dogs.<br />
to lower the<br />
a<br />
a<br />
b<br />
b<br />
c<br />
a<br />
b<br />
Remove the presser foot holder, and attach<br />
the darning foot to the presser foot holder bar.<br />
The lever (a) should be behind the needle<br />
clamp screw (b). Press the darning foot on<br />
firmly from behind with your index finger and<br />
tighten the screw (c).<br />
Darning<br />
First sew around the edges of the hole (to<br />
secure the threads). Working from left to right,<br />
sew over the hole in a constant and<br />
continuous movement. Turn the work by 1/4<br />
and sew over the first stitching moving the<br />
work slower over the hole to separate the<br />
threads and not form big gaps between the<br />
threads.<br />
Note: Free motion darning is accomplished<br />
without the sewing machine internal feed<br />
system. Movement of the fabric is controlled<br />
by the operator. It is necessary to coordinate<br />
sewing speed and movement of fabric.<br />
42
FREE MOTION DARNING, EMBROIDERY AND MONOGRAMMING<br />
Embroidery<br />
Select zigzag stitch pattern and adjust the<br />
stitch width as desired. Stitch along the<br />
outline of the design by moving the<br />
embroidery hoop. Make sure to maintain a<br />
constant speed.<br />
Fill in the design working from the outline<br />
towards the inside. Keep the stitches close<br />
together.<br />
You will get longer stitches by moving the<br />
hoop faster and shorter stitches by moving<br />
the hoop more slowly.<br />
Secure with a reinforcement stitches at the<br />
end by press Auto-Lock button.<br />
Monogramming<br />
Select the zigzag stitch pattern and adjust the<br />
stitch width as desired. Sew at a constant<br />
speed, moving the hoop slowly along the<br />
lettering.<br />
When the letter is finished. Secure with a<br />
reinforcement stitches at the end by press<br />
Auto-Lock button.<br />
*Embroider hoop is not included with the machine.<br />
43
SCALLOP STITCH<br />
Scallop hem<br />
T<br />
1. Fold the fabric right side together in and<br />
sew along the edge.<br />
2. Cut the fabric along the seam leaving an<br />
allowance of 3mm (1/8") for seaming.<br />
Notch the allowance.<br />
Wrong side<br />
of fabric<br />
1 2<br />
3. Turn fabric over and push out the curved<br />
seam to the surface and iron it.<br />
3<br />
Scallop edging<br />
T<br />
A<br />
1. Sew on hem line.<br />
2. Trim the fabric close to the stitching taking<br />
care not to cut the thread.<br />
1 2<br />
44
TWIN NEEDLE (Optional)<br />
T<br />
1.0~3.5<br />
Please Note: When using twin needle on zig-zag stitch make sure<br />
the stitch width dial is set between "1" and "3.5". Do not use twin<br />
needle at setting above "3.5".<br />
When using twin needles, use the "T" presser<br />
foot regardless of what kind of sewing will be<br />
carried out.<br />
1. Insert the twin needle.<br />
*The twin needle is optional. It is not included<br />
with the accessories..<br />
1<br />
2. Follow the instructions for single-needle<br />
threading using the horizontal spool pin.<br />
3. Thread through the left needle.<br />
Note: Make sure that the two threads used<br />
to thread the twin needle are of the same<br />
weight. You can use one or two colors.<br />
2 3<br />
4. Set the second spool pin (included with the<br />
accessories) into the hole on the top of the<br />
machine. Follow the instructions for singleneedle<br />
threading.<br />
4 5<br />
5. Thread through remaining points, making<br />
certain to omit the thread guide above the<br />
needle and pass thread through the right<br />
needle. The thread of the right needle<br />
should pass in front of the needle clamp<br />
thread guide.<br />
Note:<br />
Before sewing, adjust the stitch width. Turn<br />
the handwheel to check the needle clearance,<br />
so that the needle does not hit the needle<br />
plate.<br />
When sewing with twin needle, always<br />
proceed slowly, and make sure to maintain a<br />
low speed to insure quality stitching.<br />
45
WALKING FOOT (Optional)<br />
*The walking foot accessory is optional. It is not included with this machine.<br />
Always try to sew first without the walking<br />
foot accessory which should be used only<br />
when necessary.<br />
1<br />
It is easier to guide the fabric and you have a<br />
better view of the seam when using the<br />
standard, regular foot on your machine. Your<br />
sewing machine offers excellent stitch quality<br />
on a wide range of fabrics from delicate<br />
chiffons to multiple layers of denim.<br />
The Walking Foot accessory equalizes the<br />
feeding of the upper and lower layers of fabric<br />
and improves the matching of plaids, stripes<br />
and patterns. It also helps to prevent uneven<br />
feeding of very difficult fabrics.<br />
1. Lift the presser foot lifter to raise the<br />
presser foot bar.<br />
2<br />
3<br />
c<br />
b<br />
a<br />
2. Remove the presser foot holder by<br />
unscrewing (counterclockwise) the presser<br />
bar attaching screw.<br />
3. Attach the Walking Foot to the machine as<br />
follows:<br />
- The arm (a) should fit into above the<br />
needle screw and clamp (b).<br />
- Slide the plastic attaching head (c) from<br />
your left to right so that it is fitted into the<br />
presser foot bar.<br />
- Lower the presser foot bar.<br />
- Replace and tighten (clockwise) the<br />
presser bar attaching screw.<br />
- Make sure both the needle screw and the<br />
presser bar attaching screw are tightly<br />
secured.<br />
4. Draw the bobbin thread up and place both<br />
the bobbin thread and the needle thread<br />
behind the walking foot attachment.<br />
4<br />
46
MAINTENANCE<br />
Attention: Disconnect the machine from the wall outlet before carrying out any maintenance.<br />
Cleaning the shuttle<br />
If lint and bits of thread accumulate in the hook, this will interfere with the smooth operation of the<br />
machine. Check regularly and clean the stitching mechanism when necessary.<br />
A-1<br />
A. Bobbin holder<br />
1. Remove the bobbin cover plate and bobbin.<br />
2. Clean the bobbin holder with a brush.<br />
A-2<br />
B-1<br />
B-2<br />
B-3<br />
47<br />
B-4<br />
B. Hook race and feed dog<br />
1. Remove the needle, presser foot and presser foot holder. Remove the bobbin cover plate and<br />
bobbin. Remove the screw holding the needle plate and remove the needle plate.<br />
2. Lift up bobbin case and remove it.<br />
3. Clean the hook race, feed dog and bobbin case with a brush. Also clean them, using a soft, dry<br />
cloth.<br />
4. Replace the bobbin case into the hook race so that the tip (a) fits to the stopper (b) as shown.<br />
a<br />
b
MAINTENANCE<br />
Attention: Disconnect the power cord from the wall socket before cleaning the screen and<br />
sewing machine surface, otherwise injury or electrical shock may result.<br />
Cleaning the screen<br />
If the front panel is dirty, wipe it gently with a<br />
soft, dry cloth.<br />
Do not use any organic solvents or detergents.<br />
Cleaning the sewing machine surface<br />
If the surface of the sewing machine is dirty, lightly soak a cloth in neutral detergent, squeeze it<br />
out firmly and then wipe the surface. After cleaning it once in this way, wipe the surface again<br />
with a dry cloth.<br />
REPLACING THE LIGHT BULB<br />
Attention: Turn the power switch off and wait<br />
until the lamp has cooled down before touching<br />
it.<br />
a<br />
b<br />
1. Loosen the screw (a) on the left side of the<br />
sewing head and remove the face plate (b).<br />
1<br />
2. Pull light bulb downward to remove.<br />
Replace the bulb with same type rated 5w.<br />
Set the face plate and tighten the screw.<br />
2<br />
48
TROUBLE SHOOTING GUIDE<br />
Before calling for service, check the following items. If the problem still persists, contact the place<br />
of purchase or your nearest authorized dealer.<br />
Problem Cause Correction<br />
Upper 1.The machine is not threaded correctly 1.Rethread the machine<br />
thread 2.The thread tension is too tight 2.Reduce the thread tension (lower number)<br />
breaks 3.The thread is too thick for the needle 3.Select a larger needle<br />
4.The needle is not inserted correctly 4.Remove and reinsert the needle (flat side<br />
5.The thread is wound around the spool towards the back)<br />
holder pin<br />
5.Remove the reel and wind thread onto reel<br />
6.The needle is damaged<br />
6.Replace the needle<br />
Lower 1.The bobbin case is not inserted 1.Remove and reinsert the bobbin case and<br />
thread correctly pull on the thread. The thread should pull<br />
breaks 2.The bobbin case is threaded wrong easily<br />
3.The lower thread tension is too tight 2.Check both bobbin and bobbin case<br />
3.Loosen lower thread tension as described<br />
Skipped 1.The needle is not inserted correctly 1.Remove and reinsert needle(flat side<br />
stitches 2.The needle is damaged towards the back)<br />
3.The wrong size needle has been used 2.Insert a new needle<br />
4.The foot is not attached correctly 3.Choose a needle to suit the thread and<br />
fabric<br />
4.Check and attach correctly<br />
Needle 1.The needle is damaged 1.Insert a new needle<br />
breaks 2.The needle is not correctly inserted 2.Ins ert the needl e corre ctly (flat side<br />
3.Wrong needle size for the fabric towards the back)<br />
4.The wrong foot is attached<br />
3.Choose a needle to suit the thread and<br />
fabric<br />
4.Select the correct foot<br />
Loose 1.The machine is not correctly threaded 1.Check the threading<br />
stitches 2.The bobbin case is not correctly 2.Thread the bobbin case as illustrated<br />
threaded<br />
3.The needle size must suit the fabric and<br />
3.Needle/fabric/thread combination is thread<br />
wrong<br />
4.Correct the thread tension<br />
4.Thread tension is wrong<br />
Seam gather 1.The needle is too thick for the fabric 1.Select a finer needle<br />
or pucker 2.The stitch length is adjusted wrong 2.Readjust the stitch length<br />
3.The thread tension is too tight 3.Loosen the thread tension<br />
Uneven 1.Poor quality thread 1.Select a better quality thread<br />
stitches, 2.The bobbin case is threaded wrong 2.Remove the bobbin case, the thread and<br />
uneven feed 3.Fabric has been pulled reinsert correctly<br />
3.Do not pull on the fabric while sewing, let it<br />
be taken up by the machine<br />
The 1.Fluff or oil have collected on the hook 1.Clean the hook and feed dog as described<br />
machine is or needle bar 2.Only use good quality sewing machine oil<br />
noisy 2.Poor quality oil has been used 3.Replace the needle<br />
3.The needle is damaged<br />
The Thread is caught in the hook Remove the upper thread and bobbin case,<br />
machine<br />
turn the handwheel backwards and forwards<br />
jams<br />
by hand and remove the thread remands.<br />
49
<strong>EURO</strong>-<strong>PRO</strong> <strong>9106</strong>(9300A3)( ) Jan/04