Remote Access (VPN) - Kaleida Health
Remote Access (VPN) - Kaleida Health
Remote Access (VPN) - Kaleida Health

Create successful ePaper yourself
Turn your PDF publications into a flip-book with our unique Google optimized e-Paper software.
<strong>Remote</strong> <strong>Access</strong> (<strong>VPN</strong>)<br />
User Instructions<br />
1 Printed: 10/10/11
2 Printed: 10/10/11
Contents:<br />
FIRST TIME REMOTE ACCESS (<strong>VPN</strong>) USERS ................................................................................................................................ 4<br />
KPASS AND REMOTE ACCESS (<strong>VPN</strong>) ............................................................................................................................................ 5<br />
USING AND INSTALLING REMOTE ACCESS (<strong>VPN</strong>) ...................................................................................................................... 6<br />
CISCO <strong>VPN</strong> CLIENT - USING ............................................................................................................................................................... 6<br />
CISCO <strong>VPN</strong> CLIENT - INSTALLING ........................................................................................................................................................ 8<br />
DRIVE MAPPING APPLICATIONS ........................................................................................................................................................ 10<br />
INSTALLING THE CITRIX ONLINE WEB PLUGIN AND ACCESSING THE CITRIX APPLICATION PORTAL ............................... 11<br />
INSTALLING THE CITRIX ONLINE PLUGIN (NON-KALEIDA PC) .................................................................................................................. 11<br />
ACCESSING THE KALEIDA CITRIX APPLICATION PORTAL ......................................................................................................................... 13<br />
INSTALLING THE SYNAPSE CARDIOVASCULAR CLIENT ........................................................................................................... 14<br />
COMPUTER REQUIREMENTS .............................................................................................................................................................. 14<br />
KALEIDA HEALTH CISCO SYSTEMS <strong>VPN</strong> CLIENT ................................................................................................................................... 14<br />
INSTALLING SYNAPSE CARDIOVASCULAR CLIENT .................................................................................................................................. 14<br />
3 Printed: 10/10/11
First Time <strong>Remote</strong> <strong>Access</strong> (<strong>VPN</strong>) Users<br />
You will receive your <strong>Remote</strong> <strong>Access</strong> user id and password from IS&T Security.<br />
You will be prompted to change your password after you log on for the first time. Your password must be at<br />
least 7 characters and contain at least three of the following – an uppercase letter, a lowercase letter, a<br />
number or a special character (& % / \ etc.).<br />
If you are a KPass user please be sure to review page 5 of this document.<br />
NOTE: This new account will prompt you to change your password every 90 days.<br />
NOTE: <strong>Kaleida</strong> <strong>Health</strong> managed laptops should already be configured with Cisco <strong>VPN</strong> Client. Please<br />
contact the Technology Assistance Center for problems with <strong>Kaleida</strong> <strong>Health</strong> managed laptops<br />
(716) 859-7777.<br />
4 Printed: 10/10/11
KPass and <strong>Remote</strong> <strong>Access</strong> (<strong>VPN</strong>)<br />
Registered users of KPass can reset their RA password via the KPass portal.<br />
Reminder: <strong>Remote</strong> <strong>Access</strong> (<strong>VPN</strong>) Accounts are also synchronized via TSync when you change your<br />
Network/AD account every 90 days.<br />
What is KPass?<br />
KPass Portal is a password reset application that allows you to reset passwords for many of the<br />
applications that you work with each day. After you have registered your profile, using KPass you can<br />
choose to reset one password or several passwords at once.<br />
What is TSync?<br />
Once you have registered your profile, whenever you change your Network ID password, Tsync will<br />
automatically change (synchronize) all of your accounts that are available in KPass to this new password<br />
making them the same.<br />
Which Passwords Can I Reset via KPass?<br />
The application (or system) must be available within KPass. At this time, the systems that are available for<br />
password resets and Tsync synchronization are:<br />
• Cerner Millennium (Appbar, FirstNet, PathNet, PharmNet, PowerChart, RadNet…)<br />
• Cerner Bridge Medical<br />
• Eclipsys Web<br />
• Eclipsys Text<br />
• <strong>Kaleida</strong>scope / Infoclique<br />
• Lawson Unix (LID)<br />
• Network Account<br />
Note: The following applications use Network Account Authentication.<br />
• EPSi Operating Budget Application<br />
• Kronos<br />
• Lawson Portal<br />
• Magellan Balanced Scorecard<br />
• Talent Management<br />
• <strong>Remote</strong> <strong>Access</strong> (<strong>VPN</strong>)<br />
Please contact the Technology Assistance Center at (716)859-7777 with any questions related to<br />
KPass.<br />
5 Printed: 10/10/11
Using and Installing <strong>Remote</strong> <strong>Access</strong> (<strong>VPN</strong>)<br />
Cisco <strong>VPN</strong> Client - Using<br />
1. Locate the <strong>Kaleida</strong> <strong>Health</strong> <strong>VPN</strong> Client icon on your desktop and double click on the icon. The Cisco <strong>VPN</strong><br />
Client is installed on every <strong>Kaleida</strong> issued Laptop. For install instructions on a personal PC go to page 8<br />
of this document.<br />
2. The <strong>VPN</strong> Client will then launch.<br />
3. Click on Connect to login into <strong>VPN</strong>. You will then be prompted with the <strong>VPN</strong> Client User Authentication<br />
screen. Enter your <strong>Remote</strong> <strong>Access</strong> (RA) user id and password. Click OK to continue.<br />
4. On a <strong>Kaleida</strong> Laptop you will see the Login Script Executer launch.<br />
5. Once authenticated you will receive the connection confirmation window. Click Continue.<br />
6 Printed: 10/10/11
6. On a <strong>Kaleida</strong> Laptop after clicking continue you will get the IST <strong>Access</strong> Request Security Agreement<br />
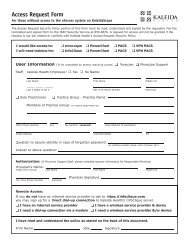
7. If this is a personal PC the <strong>Kaleida</strong> Drive Mapper window will then open. You will need to enter your<br />
network id and password. This will map your H, I and J network drives. If you don’t need access to these<br />
drives just click Cancel.<br />
7 Printed: 10/10/11
Cisco <strong>VPN</strong> Client - Installing<br />
Download and install the <strong>Kaleida</strong> Cisco <strong>VPN</strong> Client:<br />
1. From Internet Explorer access the <strong>Kaleida</strong> <strong>Health</strong> <strong>Remote</strong> <strong>Access</strong> Options site at the following address:<br />
http://www.kaleidahealth.org/access<br />
2. From this site click on Download for Windows under the Cisco <strong>VPN</strong> Client section.<br />
3. The Licensing Agreement screen will then appear. Click on I Agree to continue.<br />
4. You will then get a File Download window. Select Save to continue.<br />
8 Printed: 10/10/11
5. Save the file to a location you will be able to access. In this example I’m saving the <strong>Kaleida</strong><strong>VPN</strong>.exe file<br />
to the My Documents folder.<br />
6. Once you click save the file download will begin.<br />
7. Once the download completed click on Run to continue.<br />
8. You may get a security warning. If you do… Click Run to continue.<br />
9. The <strong>Kaleida</strong> <strong>Health</strong> <strong>VPN</strong> Client will then launch. Click Extract to continue.<br />
9 Printed: 10/10/11
10. The installation with then start…<br />
11. Once the installation completes Click OK. You will then need to reboot your computer.<br />
12. Note… If you already have the Cisco Systems <strong>VPN</strong> client loaded you will get the following message.<br />
Click Yes and it will load the <strong>Kaleida</strong><strong>Health</strong> Connection Entry/Profile.<br />
Drive Mapping Applications<br />
Drivemapper.hta (Non-<strong>Kaleida</strong> PC)<br />
To be used by NON-<strong>Kaleida</strong> imaged PC’s. This utility only maps drives after you have connected to <strong>Kaleida</strong><br />
with your <strong>Remote</strong> <strong>Access</strong> (<strong>VPN</strong>) account and have logged into the Helper Utility using a valid Network Login<br />
account.<br />
LoginScriptExecuter.vbs (<strong>Kaleida</strong> Imaged PC<br />
To be used by <strong>Kaleida</strong> imaged PC’s, This utility runs the full <strong>Kaleida</strong> <strong>Health</strong> Login Script and is automatically<br />
run after you connect to the <strong>Kaleida</strong> <strong>Health</strong>’s network.<br />
NOTE: To disable either of these two scripts from running uncheck the Enable button in the Application<br />
Launcher.<br />
10 Printed: 10/10/11
Installing the Citrix Online Web Plugin and <strong>Access</strong>ing the Citrix application Portal<br />
Installing the Citrix Online Plugin (Non-<strong>Kaleida</strong> PC)<br />
Download and install the Citrix Online Web Plugin:<br />
1. To download and install the Citrix Online Web Plug-in you will need to access the web site link listed<br />
below. To launch it from this document place you mouse pointer over the link and hit Ctrl and click to<br />
launch. If that does not work you can copy the entire line into the address line in Internet Explorer and<br />
hit enter.<br />
http://www.citrix.com/English/ss/downloads/details.asp?downloadId=2304987&productId=186&c1=sot2755<br />
Once the Citrix Online Plug-in 12.1 site is displayed you will need to click on the Download link for the<br />
Citrix Online plug-in – Web shown circled below.<br />
3. Once you click on the Download link you will be presented with the Citrix Download Manager window.<br />
To initiate the download click on the click here link shown circled below.<br />
11 Printed: 10/10/11
4. You will then see the File Download – Security Warning window. Click Run to continue.<br />
5. Once downloaded you will be prompted with the following security warning. Click Run to continue.<br />
6. You will then see the Installation Progress<br />
7. Once the install completed you will receive a message that the client has been installed successfully.<br />
Make sure that you close all Internet Explorer web browser windows prior to logging into the <strong>Kaleida</strong><br />
Citrix Application Portal for the first time.<br />
12 Printed: 10/10/11
<strong>Access</strong>ing the <strong>Kaleida</strong> Citrix Application Portal<br />
1. Connect to the <strong>Kaleida</strong> network using Cisco <strong>VPN</strong> Client.<br />
2. Launch Internet Explorer and type http://citrix on the address line and it will take you directly to the<br />
<strong>Kaleida</strong> Citrix Application Portal.<br />
3. The Citrix Application portal will then launch. Make sure that the Login Type is set to Explicit User. You<br />
will then need to enter your <strong>Kaleida</strong> network user id and password. Click Log On to continue.<br />
4. Once logged on you will see the Applications windows for Citrix.<br />
13 Printed: 10/10/11
Installing the Synapse Cardiovascular Client<br />
Computer Requirements<br />
• Processor - Intel Core 2 Duo 2.33 GHz<br />
• RAM - 2 GB (Windows XP) 3 GB (Windows 2008/7)<br />
• Internet Explorer 6 & 7 & 8<br />
• Hard Disk - 40 GB available, SATA 3.0<br />
• Video Display<br />
LCD color display set to one of the following native resolutions<br />
1280 x 1024 pixels, 1600 x 1200 pixels, or 1680 x 1050 pixels<br />
Only Landscape display orientation and Native resolution is supported<br />
Medical grade displays are highly recommended<br />
• Graphics System<br />
32-bit color and native video display resolution<br />
256 MB dedicated Video RAM for image viewing<br />
• High Speed Internet <strong>Access</strong> - Cable Modem or FiOS required<br />
<strong>Kaleida</strong> <strong>Health</strong> Cisco Systems <strong>VPN</strong> Client<br />
If you already use Cisco <strong>VPN</strong> client, skip this step and proceed to Installing Synapse Cardiovascular Client<br />
outlined in the section below.<br />
Installation instructions can be found on Page 8 of this document.<br />
Installing Synapse Cardiovascular Client<br />
NOTE: User must have logged in to Synapse CV system at <strong>Kaleida</strong> <strong>Health</strong> before installing remotely.<br />
1. Connect to the <strong>Kaleida</strong> network using Cisco <strong>VPN</strong> Client.<br />
2. Navigate to http://10.12.208.210/psinstall using Internet Explorer. You will be prompted with an<br />
authentication screen as shown below. Enter your username and password and click the Sign In button.<br />
14 Printed: 10/10/11
3. On the screen that appears, click the ProSolv Cardiovascular Client hyperlink and you will be prompted<br />
for a file download:<br />
4. Click Run in the File Download dialog and run again if a security warning is displayed. The files with<br />
extract and the setup wizard will start:<br />
5. Click Next twice in the setup wizard to accept the defaults and then click Install:<br />
15 Printed: 10/10/11
6. After the install completes, click finish and navigate to the desktop. DoubleClick on the ProSolv<br />
Cardiovascular Client 4.0.4 icon:<br />
7. Enter a username and password when presented with the login screen and click login:<br />
8. After you initially login, there may be updates available the need applied to the workstation (these are<br />
usually reports, etc). If you are prompted, click Yes to accept the updates:<br />
9. After the updates complete, you will be returned to the login screen and the system is ready for use.<br />
16 Printed: 10/10/11