IQ Quick Programming Guide V3.604 - Security Help Desk
IQ Quick Programming Guide V3.604 - Security Help Desk
IQ Quick Programming Guide V3.604 - Security Help Desk

You also want an ePaper? Increase the reach of your titles
YUMPU automatically turns print PDFs into web optimized ePapers that Google loves.
INNER RANGE <strong>IQ</strong> PLUS. <strong>Quick</strong> Programmer’s Manual.<br />
Version 3.604 (31/03/05) p9<br />
7. BASIC PROGRAMMING GUIDE.<br />
1 ZONE TO 16 ZONE BURGLARY ALARM SYSTEM.<br />
The <strong>Programming</strong> Sequence beginning on the following page takes the Installer through the steps required to program a typical Burglary Alarm System.<br />
<strong>Programming</strong> options for Multi-Area systems, Access Control and Off-site reporting are included.<br />
In many cases system programming can be completed by following these steps.<br />
Where more advanced programming is required, follow this Basic <strong>Programming</strong> <strong>Guide</strong> first, then refer to the programming procedures found in Section 8 of the<br />
Programmer’s Manual .<br />
IMPORTANT NOTES:<br />
1) It is highly recommended that the system is fully defaulted to the factory presets as described in Step 1 before the rest of the programming sequence is performed.<br />
2) In the database fields described, only the options relevant to basic system programming are shown.<br />
In many cases other options are available. Simply ignore any options not listed. These are not relevant to basic programming and are explained in the appropriate<br />
applications in Section 8 of the Programmer’s Manual<br />
3) Section 9 of the Programmer’s Manual can be referred to for extra details on any option when required.<br />
INSTALLATION NOTES:<br />
1) If Siren and Strobe are to be used, it is recommended that:<br />
• An 8 Ohm Siren Speaker is connected between “DET+” and “SPK” on connector T5 as shown in the Installation guide. (Aux 0)<br />
• A 12V Strobe is connected as follows: Strobe + to “DET+”, Strobe - to “OUT 1” on connector T5 as shown in the Installation guide. (Aux 1)<br />
If you prefer to progam the system by following the Address locations in numerical order, go to Section 9 of the Programmer’s Manual<br />
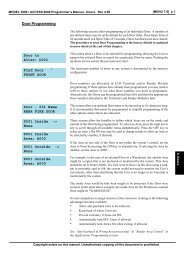
How to Enter Data. Select Address: Key in the Installer PIN Code; Press then enter the 3 digit Address (A1 to A3 Lamps will flash to prompt for each digit). The current Data will be displayed.<br />
Enter Data: Enter the new Data .. (1-16 digits) OR Option/s to Select/De-select , then . NOTE: clears the current field of all data or settings ready for new data.