USB / S / RE - Seattle Coffee Gear
USB / S / RE - Seattle Coffee Gear
USB / S / RE - Seattle Coffee Gear

You also want an ePaper? Increase the reach of your titles
YUMPU automatically turns print PDFs into web optimized ePapers that Google loves.
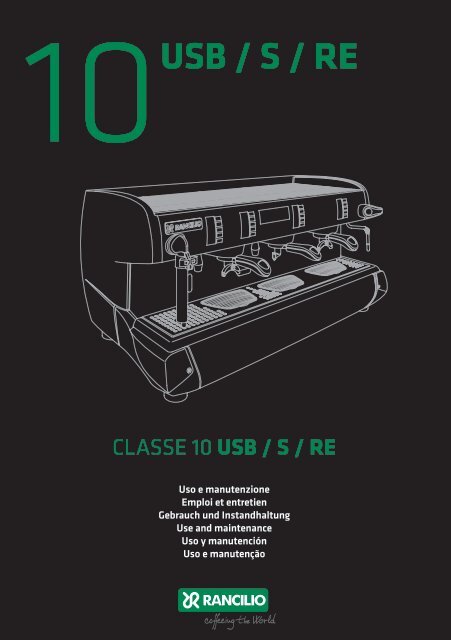
10<br />
<strong>USB</strong> / S / <strong>RE</strong><br />
CLASSE 10 <strong>USB</strong> / S / <strong>RE</strong><br />
Uso e manutenzione<br />
Emploi et entretien<br />
Gebrauch und Instandhaltung<br />
Use and maintenance<br />
Uso y manutención<br />
Uso e manutenção
IT<br />
Gentile cliente,<br />
grazie per averci accordato la Sua fiducia.<br />
Siamo sicuri che il prodotto che Lei ha acquistato risponderà in pieno alle Sue<br />
aspettative, come tutti gli altri articoli della produzione RANCILIO. Il prodotto che Lei si<br />
accinge ad usare è il risultato di approfonditi studi e meticolose sperimentazioni fatte<br />
dalla RANCILIO per offrirLe quanto di più funzionale, sicuro ed apprezzabile, anche sotto<br />
il profilo del design, si possa trovare sul mercato. Il libretto di istruzioni per il corretto<br />
uso e manutenzione della macchina La aiuterà a sfruttare al meglio le sue elevatissime<br />
possibilità e prestazioni.<br />
Con l’augurio di poterLa sempre annoverare tra i nostri clienti, Le auguriamo una buona<br />
lettura.<br />
GB<br />
Dear Customer,<br />
First of all, thank you for choosing RANCILIO.<br />
We are confident that the product you have purchased will meet all your expectations<br />
just as all our other products are designed to do. The product that you are about to use<br />
is the outcome of painstaking research and tests.<br />
Rancilio guarantees the equipment we have supplied to you, is the most functional,<br />
safe and satisfactory of its kind to be found on the market, in regards to both its design<br />
and its efficiency.<br />
This booklet of instructions, which outlines the correct use and maintenance will<br />
help you to get the best possible service out of your machine. We trust you will find<br />
our explanations clear and we may continue, in the future, to count you among our<br />
esteemed customers.<br />
FR<br />
Cher Client,<br />
Nous Vous remercions pour Votre confiance.<br />
Nous sommes certains que le produit que Vous avez acheté correspondra entièrement<br />
à Vos désirs, comme du reste tous les articles de la production RANCILIO. Le produit<br />
que Vous allez employer est le résultat d’études approfondies et de méticuleux essais<br />
effectués par RANCILIO afin de pouvoir Vous offrir le produit le plus fonctionnel, le plus<br />
sûr et le plus remarquable, également du point de vue design, que l’on puisse trouver<br />
sur le marché. Le petit livre d’instructions pour l’emploi correct et l’entretien de la<br />
machine Vous aidera à tirer le maximum de ses grandes possibilités et performances.<br />
Nous sommes certains que nos explications sont claires et espérons, cher client, mériter<br />
Votre fidélité.<br />
ES<br />
Muy estimado cliente:<br />
muchas gracias por habernos acordado Su confianza.<br />
Estamos seguros que el producto que Ud. ha adquirido responderà seguramente a Sus<br />
esperanzas, asi como és por todos los demás articulos RANCILIO fabrica. El producto que<br />
Ud. se apresta a utilzar és el resultado de particulares estudios y pruebas meticulosas<br />
hechas por la firma RANCILIO para ofrecerle un producto funcional, seguro y apreciable,<br />
tambien por lo que se refiere al design, seguramente<br />
uno de los mejores que Ud. pueda encontrar en comercio. El manual de instrucciones para<br />
utilizar correctamente y efectuar la manutención de la máquina, la ayudará a disfrutar<br />
a lo máximo las elevadas posibilidades y prestaciones de la misma. Mientras confiamos<br />
que Ud. siga siendo siempre Cliente nuetro, le deseamo una provechosa lectura.<br />
DE<br />
Sehr geehrte Kundin/sehr geehrter Kunde,<br />
Zuerst möchten wir Innen für das uns entgegengebrachte Vertrauen danken.<br />
Wir hoffen, dass das von Ihnen gekaufte Produkt Ihren Erwartungen in jeder Hinsicht<br />
entsprechen wird-wie übrigens auch all unsere anderen Erzeugnisse. Das Produkt<br />
das Sie in Gebrauch nehmen werden, ist das Resultat von sorgfältigen von RANCILIO<br />
Untersuchungen und Tests, um Ihnen in Bezug auf Funktionalität, Sicherheit,<br />
Leitungsfähigkeit sowie Design ein Produkt anbieten zu können, das das Beste auf<br />
Markt befindliche ist. Das Büchlein mit den Anwiesungen für eine korrekte Bedienung<br />
und Wartung der Maschine wird Ihnen behilflich sein, das Beste aus Ihnem Gerät zu<br />
machen. Wir hoffen, dass unsere Erklärungen verständlich sind und dass Sie auch in<br />
Zukunft zu unseren Kunden zählen dürfen.<br />
Mit freundlichen Grüssen.<br />
PT<br />
Prezado Cliente,<br />
Obrigado por nos ter dado a sua confiança.<br />
Temos certeza que o produto que Você comprou responderá totalmente as suas<br />
expectativas, como todos os outros artigos da produção RANCILIO. O produto que Você<br />
está para usar é o resultado de estudos profundos e experiências meticulosas feitas pela<br />
RANCILIO, para oferece-lhe quanto de mais funcional, seguro e considerável, também<br />
sob o perfil do disign, que se possa encontrar no mercado. O manual de instruções para<br />
o uso correto e manutenção da máquina lhe ajudará a desfrutar ao máximo as suas<br />
elevadíssimas possibilidades e desempenhos.<br />
Com o desejo de poder tê-lo sempre entre os nossos clientes, desejamo-lhe uma boa<br />
leitura.
Trattamento dei rifiuti delle apparecchiature elettriche ed elettroniche.<br />
Smaltire il prodotto seguendo le norme vigenti relative allo smaltimento<br />
differenziato presso centri di raccolta dedicati.<br />
Non trattare come semplice rifiuto urbano.<br />
Per qualsiasi informazione necessaria contattare il costruttore all’indirizzo indicato<br />
nel libretto istruzioni.<br />
Il prodotto risponde ai requisiti richiesti dalle nuove direttive introdotte a tutela<br />
dell’ambiente e che deve essere smaltito in modo appropriato al termine del<br />
suo ciclo di vita.<br />
Sähköisten ja elektronisten laitteiden jätteiden käsittely<br />
Hävitä tuote noudattaen seuraavia voimassa olevia lajitellun jätteiden käsittelyä<br />
koskevia määräyksiä asianmukaiseen jätteidenkäsittelylaitokseen.<br />
Älä käsittele sitä tavallisena kaupunkijätteenä.<br />
Mitä tahansa tietoja varten ota yhteyttä valmistajaan ohjekirjassa olevaan osoitteeseen.<br />
Tuote on uusien ympäristöä suojaavien direktiivien vaatimusten mukainen ja<br />
se tulee hävittää asianmukaisella tavalla sen käyttöiän päätyttyä.<br />
Treatment of waste from electric/electronic equipment<br />
Dispose of the product in accordance with current regulations concerning differentiated<br />
waste disposal in dedicated waste disposal areas.<br />
Do not treat as simple urban waste.<br />
For any information please contact the manufacturer at the address specified in the user<br />
manual.<br />
The product complies with the requirements of the new directives introduced for<br />
the environmental safeguard and must be disposed of appropriately at the end<br />
of its life cycle.<br />
Traitement des ordures des équipements électriques et électroniques<br />
Ecouler le produit conformément aux normes en vigueur concernant l’écoulement<br />
différencié auprès de centres de récolte dédiés.<br />
Ne pas traiter comme simples ordures urbaines. Pour toute information nécessaire<br />
contacter le constructeur à l’adresse indiquée dans le manuel d’emploi.<br />
Le produit est conforme aux caractéristiques requises par les nouvelles directives<br />
introduites pour la sauvegarde de l’environnement et doit être écoulé de<br />
façon appropriée à la fin de son cycle de vie.<br />
Entsorgung von elektrischen und elektronischen Geräten<br />
Das ist Produkt gemäß den geltenden Normen für die Mülltrennung bei den<br />
zuständigen Sammelzentren zu entsorgen.<br />
Nicht wie normalen Müll behandeln.<br />
Weitere Informationen sind beim Hersteller unter der in der Gebrauchsanleitung angegebenen<br />
Adresse zu erhalten.<br />
Das Produkt entspricht den Erfordernissen den neuen Richtlinien über den<br />
Umweltschutz, und muss an seinem Lebensende entsprechend entsorgt werden.<br />
Tratamiento de los desechos de los equipos eléctricos y electrónicos<br />
Eliminar el producto en los centros de recolección especializados, siguiendo<br />
las normas vigentes relativas a la eliminación diferenciada.<br />
No tratar como simple desecho urbano.<br />
Para cualquier información necesaria, contacten al fabricante en la dirección indicada<br />
en el manual de instrucciones.<br />
El producto responde a los requisitos demandados en las nuevas directivas<br />
introducidas para la protección del ambiente y debe ser eliminado de manera<br />
apropiada al final de su ciclo de vida.<br />
Tratamento do lixo dos aparelhos elétricos e eletrônicos<br />
Jogar o produtos seguindo as normas em vigor relativas à coleta diferenciada<br />
em centros de coleta apropriados.<br />
Não tratar como simples lixo urbano.<br />
Para qualquer informação necesssária contatar o construtor no endereço indicado<br />
no manual de instruções.<br />
O produto responde aos requisitos exigidos pelas novas diretrizes introduzidas<br />
para tutelar o ambiente e deve ser sucadato em modo apropriado ao<br />
final do seu ciclo de vida.<br />
Zaobchádzanie s odpadmi z elektrických / elektronických zariadení<br />
Výrobok likvidujte podľa súčasných predpisov o likvidácii triedeného odpadu<br />
na k tomu určených skládkach.<br />
Nezaobchádzajte s ním ako s bežným komunálnym odpadom.<br />
Ak potrebujete akékoľvek informácie, kontaktujte, prosím, výrobcu na adrese uvedenej<br />
v návode na použitie.<br />
Výrobok zodpovedá požiadavkám nových smerníc zavedených pre ochranu<br />
životného prostredia a zlikvidovať sa na konci svojej životnosti musí<br />
príslušným spôsobom.<br />
Az elektromos és elektronikai készülékek hulladékkezelése<br />
A terméket az erre a célra kijelölt gyűjtőhelyekre adja le követve a szelektív<br />
hulladékgyűjtéssel kapcsolatos jelenlegi jogszabályokat.<br />
Ne kezelje közönséges városi hulladékként.<br />
Bárminemű információért forduljon a gyártóhoz, melynek címét a használati útmutatóban<br />
találja.<br />
A termék megfelel a környezet védelme érdekében újonnan bevezetett<br />
irányelvek követelményeinek és ennek megfelelően kell kezelni az élettartamának<br />
végeztével.<br />
Zacházení s odpady z elektrických / elektronických zařízení<br />
Výrobek likvidujte podle současných předpisů o likvidaci tříděného odpadu<br />
na k tomu určených skládkách.<br />
Nezacházejte s ním jako s běžným obecním odpadem.<br />
Potřebujete-li jakékoli informace, kontaktujte prosím výrobce na adrese uvedené v<br />
návodu pro použití.<br />
Výrobek odpovídá požadavkům nových směrnic zavedených pro ochranu<br />
životního prostředí a zlikvidovat se na konci své životnosti musí příslušným<br />
způsobem.<br />
Elektri- ja elektronseadmete jäätmete töötlemine<br />
Tootest lahtisaamist peab läbi viima vastavalt käibivatele eeskirjadele, mis<br />
käsitlevad jäätmetest eristatud lahtisaamist selleks mõeldud jäätmetest<br />
lahtisaamise alades.<br />
Mitte töödelda nagu tavalisi majapidamisjäätmeid.<br />
Mistahes informatsiooni saamiseks pöörduge palun tootja poole aadressil, mis on<br />
märgitud kasutaja käsiraamatus.<br />
Toode vastab uuetele nõutele, mis on esitletud keskkonna kaitsmiseks ja sellest<br />
peab reeglipäraselt lahti saama selle elutsükli lõpus.<br />
Afvalbehandeling van de elektrische en elektronische apparatuur<br />
Verwerk het product volgens de geldende normen m.b.t. de gescheiden<br />
afval bij de voorbestemde vuilniscentrums.<br />
Behandel het product niet als eenvoudig stadsvuil.<br />
Neem contact op met de constructeur op het aangegeven adres in deze handleiding<br />
voor nadere informaties.<br />
Het product beantwoordt aan de door de nieuwe richtlijnen verlangde vereisten<br />
ingevoerd ter bescherming van het milieu en moet op passende wijze op<br />
het einde van zijn levenscyclus worden verwerkt.<br />
Behandling af affald fra elektrisk/elektronisk udstyr<br />
Bortskaf produktet i overensstemmelse med nuværende reguleringer vedr.<br />
forskellige affaldsprodukter på deponeringssteder dedikeret til affald.<br />
Må ikke behandles som alm. byaffald.<br />
Kontakt producenten på den specificerede adresse i brugerhåndbogen for yderligere<br />
oplysninger.<br />
Produktet er i overensstemmelse med de nye direktiver, introduceret for miljøforanstaltningen<br />
og skal bortskaffes på behørig vis ved slutningen af dets<br />
livscyklus.<br />
Avfallshantering av elektriska och elektroniska apparate<br />
Nedskrota produkten genom att följa gällande normer för differentierad sanering<br />
på seriösa uppsamlingsställen.<br />
Behandla det inte som vanligt tätortsavfall.<br />
Vid behov av ytterligare information, var vänlig ta kontakt med tillverkaren på den<br />
adress som anges i bruksanvisningen.<br />
Produkten motsvarar de krav som ställs i de nya miljödirektiven och den<br />
måste nedskrotas på ett lämpligt sätt i slutet av sin livscykel.<br />
Behandling av avfall fra elektrisk/elektronisk utstyr<br />
Produktet skal avhendes i samsvar med gjeldende forskrifter angående differensiert<br />
avfallsavhending på dediserte avfallsavhendingsområder.<br />
Det må ikke behandles som vanlig byavfall.<br />
For videre opplysninger vennligst kontakt fabrikanten på adressen som er angitt i<br />
bruksanvisningen.<br />
Produktet etterkommer kravene i de nye miljødirektivene og skal avhendes<br />
på en passende måte etter avsluttet bruk.<br />
Kur išmesti elektros \ elektroninės įrangos atliekas.<br />
Šalinkite įrangos atliekas atitinkamai esamų taisyklių, kurios liečia tokios<br />
rūšies atliekas apie specialias atliekų kaupimo vietas.<br />
Nemeskite atliekas į paprastus miesto šiukšlių konteinerius. Papildomos informacijos<br />
kreipkitės į gamintoją nurodytu vartotojo instrukcijoje adresu .<br />
Šis produktas atitinka įvestos ekologiniam saugumui naujos direktyvos<br />
reikalavimams ir turi būti sunaikintas pasibaigus jo atitikties terminui.<br />
Obdelava odpadkov električnih in elektronskih naprav<br />
Odlaganje izdelkov je potrebno vršiti v skladu z veljavnimi predpisi v zvezi z<br />
selektivnim odlaganjem odpadkov v centrih za zbiranje odpadkov ki so temu<br />
namenjeni. Ne odlagajte ga kot običajne smeti.<br />
Za kakršnokoli informacijo kontaktirajte proizvajalca na naslovu, ki je naveden v<br />
priročniku z navodili.<br />
Izdelek odgovarja zahtevam novih smernic, ki so uvedene zaradi zaščite<br />
življenske sredine in mora biti odložen na ustrezen način po koncu življenjske<br />
dobe.<br />
Postępowanie z odpadami pochodzącymi z urządzeń elektrycznych/<br />
elektronicznych<br />
Produkt musi zostać poddany utylizacji zgodnie z obowiązującymi przepisami<br />
dotyczącymi segregowania odpadów w specjalnie do tego wyznaczonych miejscach.<br />
Nie wyrzucać razem ze zwykłymi odpadami miejskimi.<br />
W celu uzyskania jakichkolwiek informacji proszę skontaktować się z producentem<br />
pod adresem podanym w instrukcji obsługi dla użytkownika.<br />
Ten produkt odpowiada wymogom zawartym w nowych dyrektywach<br />
wprowadzonych w celu ochrony środowiska i po zakończeniu cyklu eksploatacji<br />
musi zostać zutylizowany we właściwy sposób.<br />
Kā utilizēt elektrisko/elektronisko iekārtu atkritumus<br />
Iekārtu atkritumus nepieciešams utilizēt atbilstoši spēkā esošajiem noteikumiem,<br />
kuri reglamentē dažādu veidu atkritumu utilizēšanu tikai speciālajās atkritumu<br />
konteineros. Nemetiet šos atkritumus parastajos kopējos pilsētas atkritumu.<br />
Lai saņemtu jebkuru informāciju, griezieties pie ražotāja, kura adrese uzrādīta<br />
ekspluatācijas instrukcijā.<br />
Dotais produkts atbilst jaunās direktīvas prasībām, kura attiecās uz<br />
ekoloğisko drošību, un tas ir atbilstošā kārtībā utilizējams pēc tā, kad nobeigsies<br />
tā derīguma termiņš.
20010 Villastanza di Parabiago (MI)<br />
Viale della Repubblica 40<br />
DICHIARAZIONE DI CONFORMITA’ CE - DECLARATION DE CONFORMITE CE<br />
EG-KONFORMITÄTSERKLÄRUNG - EC DECLARATION OF CONFORMITY<br />
DECLARACIÓN DE CONFORMIDAD CE - DECLARAÇÃO DE CONFORMIDADE CE<br />
Noi RANCILIO Macchine per caffè S.p.A.<br />
Dichiariamo sotto la nostra responsabilità che il prodotto: Macchina per caffè per uso professionale<br />
Déclarons, sous notre responsabilité, que le produit : Machine à café d’utilisation professionnel<br />
Wir erklären auf unsere Verantwortung, daß das Produkt: Kaffeemaschine für Beruflichgebrauch<br />
Declare under our responsibility that the product: Espresso coffee makers for commercial use<br />
Declaramos bajo nuestra responsabilidad que el producto: Máquina para café de uso profesional<br />
Declaramos sob a nossa responsabilidade que o produto: Máquina para café para uso profissional<br />
al quale è riferita questa Dichiarazione, secondo quanto prescritto dalle direttive specifiche:<br />
à laquelle se réfère cette déclaration, selon les prescriptions des directives spécifiques.<br />
auf das sich diese Erklärung bezieht, Entsprechend der Vorschriften der spezifischen Richtlinien.<br />
to which this declaration relates is, according to the provisions of the specific directives:<br />
al cual se refiere esta Declaración, de acuerdo con lo prescrito por las específicas directivas:<br />
ao qual se refere esta Declaração, segundo quanto prescrito pelas específicas diretrizes:<br />
98/37/CE<br />
Direttiva macchina - Direttiva machine - Richtlinie Maschine - Makers directive - Directiva máquina - Diretriz da máquina:<br />
73/23/CEE, 93/68/CEE<br />
Direttiva Bassa Tensione - Direttiva Basse Tension - Niederspannungsrichtline - Low Voltage Directive - Directiva Baja Tensiòn - Diretriz Baixa Tensão:<br />
89/336/CEE, 93/68/CEE, 92/31/CEE<br />
Direttiva EMC - Direttiva EMC - Richtlinie EMC - EMC Directive - Directiva EMC - Diretriz EMC<br />
97/23/CE<br />
Direttiva attrezzatura a pressione (PED)-Directive sur les appareillages sous pression (PED)-Richtlinie für unter Druck stehende Geräte (PED) Pressure<br />
device directive (PED) - Directiva equipos de presión (PED) - Diretriz aparelhagem de pressão (PED)<br />
è conforme alle seguenti norme: - conforme aux normes suivantes :<br />
In Übereinstimmung mit den folgenden Normen: - it complies with the following norms:<br />
es conforme a las siguientes normas: - É conforme as seguintes normas:<br />
EN 60335-1, EN 60335-2-75, EN 55014-1, EN 55014-2, EN 61000-3, EN 61000-4, EN 50366<br />
Norme EN armonizzate - Normes EN harmonisées - Harmonisierte EN-Norme - Harmonized EN norms - Normas EN armonizadas - Normes EN Harmonia<br />
Il presidente - The president<br />
La presente dichiarazione perde la sua validità se la macchina viene modificata senza la nostra espressa autorizzazione.<br />
La présente déclaration perd sa validité dès lors que la machine est modifiée sans notre expresse autorisation.<br />
Die vorliegende Erklärung verliert ihre Gültigkeit, wenn die Maschine ohne unsere ausdrückliche Genehmigung verändert wird.<br />
The present declaration will become invalid should the machine be modified without our specific authorization.<br />
La presente declaración pierde su validez si la máquina es modificada sin nuestra expresa autorización.<br />
A presente declaração perde a validade se a máquina é modificada sem a nossa expressa autorização.<br />
MD-CER.01 rev.0.0 del 16/05/05
Descrizione attrezzatura a pressione-Description de l’appareillage sous pression-Beschreibung der unter Druck stehenden Geräte-<br />
Pressure device description-Descripción de los equipos de presión - Descrição dos equipamentos de pressão<br />
Pressione - Pression<br />
Druck - Pressure<br />
Presión - Pressão<br />
Temperatura - Température<br />
Temperatur - Temperature<br />
Temperatura - Temperatura<br />
Fluido - Fluide<br />
Flüssig - Fluid<br />
Fluido - Fluído<br />
Capacità lt-Capacité lt-Fähigkeit lt-<br />
Capacity lt-Potencia lt- Potência it<br />
Caldaia - Chaudière<br />
Kessel - Boiler<br />
Caldera - Caldeira<br />
0,18/1,8 Mpa/bar 131,2 C°<br />
Acqua/Vapore - Eau/Vapeur<br />
Wasser/Dampf - Water/Steam<br />
Agua/Vapor - Água/Vapor<br />
2 gr. 3 gr. 4 gr.<br />
11 16 22<br />
Pressione - Pression<br />
Druck - Pressure<br />
Presión - Pressão<br />
Temperatura - Température<br />
Temperatur - Temperature<br />
Temperatura - Temperatura<br />
Fluido - Fluide<br />
Flüssig - Fluid<br />
Fluido - Fluído<br />
Capacità-Capacité<br />
Fähigkeit -Capacity<br />
Potencia-Potência<br />
Numero scambiatore -Numéro de l’échangeur<br />
Nummer des Austauschers-<br />
Exehanger number-Número intercambiador<br />
Número Intercambiador<br />
Scambiatore -Echangeur<br />
Austauscher -Exchanger<br />
Intercambiador<br />
Intercambiador<br />
1.2/12 Mpa/bar 131,2 C°<br />
Acqua - Eau<br />
Wasser- Water<br />
Agua - Água<br />
0.35 l<br />
2 gr. 3 gr. 4 gr.<br />
2 3 4<br />
1<br />
2<br />
4<br />
3<br />
5<br />
6 7<br />
8<br />
9<br />
10<br />
11<br />
Fig. 1<br />
12<br />
13<br />
A<br />
Fig. 2<br />
7
MOD. S<br />
3 6<br />
MOD. <strong>USB</strong><br />
3 6 15<br />
3 18<br />
MOD. <strong>RE</strong><br />
1<br />
2<br />
5<br />
14<br />
21<br />
4<br />
8<br />
17<br />
19<br />
Fig. 3<br />
20<br />
8
L<br />
Lovato<br />
7<br />
9<br />
13<br />
10<br />
Fig. 4<br />
20 16<br />
H<br />
C<br />
D<br />
B<br />
A<br />
Fig. 5<br />
3<br />
1 (Ø 30 mm)<br />
4<br />
2 (3/8"G)<br />
Fig. 6 Fig. 7<br />
9
6.1<br />
4<br />
6.2<br />
6.3<br />
6.1<br />
3<br />
7.1<br />
7.2<br />
A<br />
B<br />
6.2<br />
7.3<br />
C<br />
5<br />
7.4<br />
D<br />
6.3<br />
7.5<br />
E<br />
6 (<strong>RE</strong>)<br />
7 (<strong>USB</strong>)<br />
3 (S)<br />
4 (<strong>RE</strong>)<br />
5 (<strong>USB</strong>)<br />
8<br />
14<br />
9<br />
VERS.<br />
ISTEAM<br />
10<br />
11<br />
7.6 7.7<br />
2<br />
1<br />
12<br />
Fig. 8<br />
10
Fig. 12<br />
Fig. 9<br />
Fig. 13<br />
Fig. 10<br />
1<br />
Fig. 14<br />
Fig. 11<br />
11
IT ITALIANO 12-30<br />
EN ENGLISH<br />
FR FRANCAIS 31-49<br />
DE DEUTSCH 50-68<br />
EN ENGLISH 69-87<br />
ES ESPAÑOL 88-106<br />
PT PORTUGUÊS 107-125<br />
SCHEMI ELETTRICI<br />
SCHEMAS ELECTRIQUES<br />
SCHALTPLANE<br />
WIRING DIAGRAMS 126-131<br />
ESQUEMAS ELECTRICOS<br />
ESQUEMAS ELÉTRICOS<br />
SCHEMI IDRAULICI<br />
SCHÉMAS HYDRAULIQUES<br />
HYDRAULIKPLÄNE<br />
HYDRAULIC DIAGRAMS 132-134<br />
ESQUEMAS HIDRÁULICOS<br />
ESQUEMAS HIDRÁULICOS<br />
The operations marked with this symbol<br />
are to be undertaken exclusively by an<br />
installation technician<br />
The operations marked with this symbol are<br />
to be undertaken by the user.<br />
CONTENTS<br />
Machine identification data ............................. 70<br />
1. General safety rules ...................................... 70<br />
2. Description .................................................... 71<br />
2.1. Specifications and composition ................ 71<br />
2.2. Machine equipment .................................. 71<br />
2.3. Mechanical protective devices ................. 72<br />
2.4. Electric safety devices ............................. 72<br />
2.5. Aerial noise .............................................. 72<br />
2.6. Vibrations ................................................. 72<br />
3. Technical data ............................................... 72<br />
3.1. Dimensions and weights .......................... 72<br />
4. Use ................................................................. 72<br />
4.1. Precautionary measures .......................... 73<br />
5. Transport ....................................................... 73<br />
5.1. Packaging ................................................ 73<br />
5.2. Inspection on receipt ................................ 73<br />
6. Installation ..................................................... 73<br />
6.1.Connections to be made by the user ........ 73<br />
6.1.1. Water and gas supply ........................... 73<br />
6.1.2. Electric supply ....................................... 74<br />
6.2. Preliminary operations ............................. 74<br />
6.3. Connections ............................................. 74<br />
7. Operation ....................................................... 75<br />
7.1. Controls .................................................... 75<br />
7.2. Control instruments .................................. 76<br />
7.3. Starting up ................................................ 76<br />
8. Use ................................................................. 77<br />
8.1. Preparing coffee ....................................... 77<br />
8.2. Preparing cappuccino .............................. 77<br />
8.3. Warming a beverage ................................ 78<br />
8.4. Preparing tea, camomile, etc................ ... 78<br />
8.5. Machines with iSteam automatic system .. 78<br />
8.5.1. Heating Milk or a Drink (iSteam) ........... 78<br />
8.5.2. Preparing Frothed Milk (iSteam) ........... 78<br />
9. Adjustments and settings of the dose ........ 78<br />
9.1. For models <strong>USB</strong> ....................................... 78<br />
9.1.1. Adjusting the dose ................................. 78<br />
9.2. Programming (Mod.<strong>USB</strong>) ......................... 79<br />
9.2.1. Selecting the display language ............. 79<br />
9.2.2. Softener regeneration ........................... 80<br />
9.2.3. Buzzer .................................................. 80<br />
9.2.4. Clock ..................................................... 80<br />
9.2.5. Set Timer ............................................... 81<br />
9.2.6. Selection counts .................................... 81<br />
9.2.7. Procedure for replacing the water inside<br />
the boiler with fresh water. .................... 82<br />
9.3. Displaying ................................................ 82<br />
9.3.1. Warming up phase ................................ 82<br />
9.3.2. Operating mode .................................... 82<br />
9.4. Operating safety devices ......................... 83<br />
9.5. The cup-warmer ....................................... 83<br />
9.6. List of malfunctions .................................. 83<br />
9.7. List of warning ......................................... 83<br />
10. Load & show .................................................. 84<br />
11. Maintenance .................................................. 85<br />
10.1. Daily ....................................................... 85<br />
10.2. Weekly ................................................... 85<br />
10.2.1. Washing of the coffee groups ............. 85<br />
10.2.2. Cleaning iSteam ................................ 86<br />
10.3. Periodical ............................................... 86<br />
10.3.1.Renewal of water in the boiler .............. 86<br />
12. Stopping the machine .................................. 86<br />
13. Troubleshooting ............................................ 86<br />
13.1.1 Safety thermostat – Manual resetting .. 86<br />
14. Machines with alternative gas heater<br />
version ........................................................... 87<br />
69
NAME:<br />
MODEL:<br />
VERSIONS:<br />
<strong>Coffee</strong> machine, CLASSE 10 series<br />
<strong>USB</strong> - S - <strong>RE</strong><br />
2 - 3 - 4 GROUPS<br />
The label illustrated on the EC Declaration of Conformity of this instruction manual corresponds to the identification<br />
label placed on the machine Fig. 2. (Pos. A).<br />
Label identification (Fig.1):<br />
1 Manufacturer<br />
2 Model and version<br />
3 Voltage<br />
4 EC conformity mark (if required)<br />
5 Serial number<br />
6 Boiler data<br />
7 Machine total absorption<br />
8 Protection level<br />
9 Motor power<br />
10 Heating element power<br />
11 Frequency<br />
12 Conformity marks<br />
13 Year of manufacture<br />
Symbols<br />
Warning signal. The instructions which refer to this signal must be followed with great care in order to<br />
avoid accidents or damage to the machine.<br />
This manual is an integral and essential part of the product and must be delivered to the user. The warnings<br />
contained in it must be read carefully, as they supply important indications relating to the safety of installation,<br />
use and maintenance. Keep this manual for future reference.<br />
1. GENERAL SAFETY RULES<br />
Don’t leave the packing elements (plastic bags,<br />
expanded polystyrene, nails, cardboard, etc.)<br />
within the reach of children, as these elements<br />
are potential sources or danger.<br />
Check that the data on the machine corresponds<br />
to that of the electrical supply network, before<br />
connecting the equipment.<br />
Adaptors, multiple sockets and /or extensions must<br />
not be used.<br />
In doubt, request an accurate control of the plant<br />
by qualified personnel. The electric plant must be<br />
provided with the following safety devices:<br />
- efficient earth connection;<br />
- section of conductors suitable for absorption<br />
capacity<br />
- efficient earth leakage protection circuit<br />
breaker.<br />
Install the machine on a water repellent surface<br />
(laminate, steel, ceramic, etc.) away from heat<br />
sources (oven, cooking stove, fireplace, etc.) and<br />
in conditions in which the temperature may not go<br />
below 5°C. KEEP WARM.<br />
Do not leave the machine exposed to atmospheric<br />
agents or place them in damp rooms such as<br />
bathrooms.<br />
Do not obstruct the suction or dispersion grilles<br />
and do not cover with cloths, etc.<br />
Keep the packed machine in a dry place, not<br />
exposed to atmospheric agents and in conditions<br />
in which the temperature does not go below 5°C.<br />
Do not stack more than three items of the same kind.<br />
Do not place heavy items on the packaging.<br />
In an emergency, such as the breaking out of a fire,<br />
unusual noise, overheating, etc., take immediate<br />
action, disconnecting the power and closing gas<br />
and water taps.<br />
Only use original spare parts in order to avoid<br />
compromising the safety and proper functioning<br />
of the machine.<br />
Erroneous installation can cause damage<br />
to people, animals and things for which the<br />
manufacturer cannot be considered responsible<br />
70
2. DESCRIPTION<br />
The machines in the CLASSE 10 series have been<br />
designed to prepare express coffee and hot beverages.<br />
A positive-displacement pump inside the machine<br />
powers the heater in which the water is heated. By<br />
pressing the appropriate buttons, water is supplied<br />
to the spouts in the form of hot water or steam, according<br />
to needs.<br />
The hot water used to make drinks comes from the<br />
boiler and is mixed directly with cold water from the<br />
water outlet.<br />
The machine is composed of a steel carrying structure<br />
on which the mechanical and electrical components<br />
are fitted. These are completely covered with<br />
panels made of aluminium.<br />
The beverages are dispensed at the front of the<br />
machine, where all the buttons, control devices and<br />
dispensers are to be found.<br />
There is a cup-warming plate on the top of the machine.<br />
2.1. Specifications and composition (Fig.3 - 4)<br />
A B C D E F<br />
<strong>USB</strong> - ok 2 - 3 - 4 2 2 ok<br />
S ok - 2 - 3 - 4 2 2 ok<br />
<strong>RE</strong> ok - 2 - 3 - 4 2 2 ok<br />
Legend:<br />
A Semiautomatic system; manual dispensing start<br />
and stop.<br />
B Automatic system; electronic control of coffee<br />
and hot water doses dispensed.<br />
C N. of coffee dispensing units.<br />
D N. of steam spouts.<br />
E N. of hot water spouts.<br />
F Operating with economizer.<br />
Gas heating, on request.<br />
1 Steam tap (C-LEVER)<br />
2 Steam spout<br />
3 Function/service button panel<br />
4 Hot water spout thermoregular<br />
5 <strong>Coffee</strong> dispensing unit<br />
6 <strong>Coffee</strong> dispensing button panel (mod.S - <strong>USB</strong>)<br />
7 Manual water supply tap<br />
8 Level indicator<br />
9 Gauge<br />
10 Power on-off switch and led<br />
11 Gas lighter (on specific models)<br />
12 Valved gas tap (on specific models)<br />
13 Switch and boiler resistance engagement light.<br />
14 Bottom unit door for access to controls<br />
15 Display (mod.UDB)<br />
16 Programming panel (mod. <strong>USB</strong>)<br />
17 Hot water spout<br />
18 Dispenser control lever (mod.<strong>RE</strong>)<br />
19 Unit door opening lever<br />
20 <strong>USB</strong> connection<br />
21 iSteam dispenser nozzle<br />
2.2. Machine equipment<br />
2 GROUP 3 GROUP 4 GROUP<br />
1 dose filter holder 1 1 1<br />
2 dose filter holder 2 3 4<br />
Filters 3 4 5<br />
1 mt. supply pipe 1 1 1<br />
1,5 mt. supply pipe 1 1 1<br />
1,5 mt. drainage pipe 1 1 1<br />
Pipe connections 1 1 1<br />
Blind disks for cleaning 2 3 4<br />
Doser and presser 1 1 1<br />
Instruction manual 1 1 1<br />
Brush 1 1 1<br />
Models equipped with gas connections (when applied).<br />
71
2.3. Mechanical protective devices<br />
The machine is equipped with the following protective<br />
devices:<br />
complete panelling protection of all the parts<br />
subject to heat and of the steam and hot water<br />
supplier;<br />
cup-warmer plate supplied with a tray to collect<br />
spilt liquids;<br />
work surface provided with grill and tray to collect<br />
spilt liquids;<br />
expansion valve in the hydraulic system and valve<br />
on the boiler to avoid overpressure;<br />
nonreturn valve on the hydraulic system to avoid<br />
flowing back to the main supply.<br />
2.4. Electric safety devices<br />
The safety devices provided are:<br />
12V low tension push buttons an the <strong>USB</strong> control<br />
key panel;<br />
thermal protection on the pump motor;<br />
gas failure thermocouple and thermocouple thermostat<br />
automatically closing gas tap;<br />
safe resistance thermal;<br />
Electronic safety devices.<br />
2.5. Aerial noise<br />
Noise level in the working place does not usually<br />
exceed 70dB(A).<br />
2.6. Vibrations<br />
The machine is supplied with rubber vibration damping<br />
feet. In normal working conditions, the machine<br />
does not produce vibrations harmful to the operator<br />
and the environment.<br />
3. TECHNICAL DATA<br />
3.1. Dimensions and weights (Fig.5)<br />
2 GROUP 3 GROUP 4 GROUP<br />
A mm 780 1020 1260<br />
B mm 700 940 1180<br />
C mm 540 540 540<br />
D mm 470 470 470<br />
H mm 530 530 530<br />
Boiler capacity in litr. 11 16 22<br />
Machine weight kg 76 94 112<br />
Water inlet 3/8” 3/8” 3/8”<br />
Ømm drainage 14 14 14<br />
Packaging<br />
Volume m 3 0,44 0,55 0,67<br />
Dimensions L x P x H mm 910x670x720 1150x670x720 1390x670x720<br />
Gross weight kg 91 111 134<br />
72<br />
You’ll find all the technical data on electric<br />
connection, on the machine identification<br />
label Fig. 1.<br />
Machines provided with gas heating have a standard<br />
connection kit to carry out the following connections<br />
with:<br />
- direct stiff pipe;<br />
- copper and double cone pipe;<br />
- rubber support.<br />
Gas connections must be made in compliance<br />
with the safety regulations in force in the<br />
relative country.<br />
4. USE<br />
The machine have been designed, manufactured and<br />
protected to be used to make express coffee and hot<br />
beverages (tea, cappuccino, etc.). Any other use is to<br />
be considered unsuitable and therefore dangerous.<br />
The manufacturer cannot be held responsible for<br />
any damage caused to people or things<br />
due to unsuitable, erroneous or irrational<br />
use of the machine.<br />
The operator must always follow the indications<br />
contained in this manual. In the case of a failure or if<br />
the machine is not working properly, switch it off and<br />
do not attempt any direct repair. Refer exclusively<br />
to a service centre.
The user must not:<br />
touch the hot surfaces and dispensing areas;<br />
place liquids containers on the machine;<br />
put his hands under the spouts during use;<br />
transport the machine or carry out maintenance<br />
operations when the plug is connected or when<br />
the machine is hot;<br />
wash the machine with water or steam jet;<br />
dip completely or partially the machine in water;<br />
use the machine if the cable is damaged;<br />
touch the machine when his hands or feet are wet<br />
or damp;<br />
use the machine when there are children in its<br />
proximity;<br />
allow the machine to be used by children or unfit<br />
people;<br />
obstruct the suction or dispersal grilles with cloth<br />
or any other thing;<br />
do not use the machine when wet or very damp.<br />
4.1. Precautionary measures<br />
This machine may only be used with foodstuffs. It<br />
cannot be used for heating liquids or grinding any other<br />
kind of product that could damage and pollute it.<br />
The manufacturer cannot be held responsible<br />
for damage to people or things caused by<br />
unsuitable, erroneous or irrational use.<br />
5. TRANSPORT<br />
5.1. Packaging<br />
The machine is delivered in a strong cardboard box<br />
with internal protection.<br />
The packaging bears symbols which must be observed<br />
during handling and stocking of the item.<br />
Always keep the package in a vertical position<br />
during transport. Do not turn it over or lay it<br />
on its side and avoid bumping and exposure<br />
to atmospheric agents.<br />
5.2. Inspection on receipt<br />
Check that the machine received corresponds to<br />
the one indicated on the delivery note, including any<br />
accessories.<br />
Check that it has not been damaged during transport<br />
and, if so, inform the forwarder and our customer<br />
service office immediately.<br />
The packing elements (plastic bags, expanded<br />
polystyrene, nails, cardboard, etc.) must<br />
not be left within reach of children as they are<br />
potential sources of danger. Do not dispose<br />
of the packing elements in the environment;<br />
consign them to firms authorized for their<br />
disposal.<br />
6. INSTALLATION<br />
The appliance is only to be installed in<br />
locations where use and maintenance is<br />
restricted to trained personnel.<br />
The machines are fitted with height adjustable feet.<br />
The support surface shall be levelled, dry, smooth,<br />
steady and stable and at such a height that the cupwarming<br />
surface is at over 150 cm from ground. Do not<br />
use water jets or install where water jets are used.<br />
In order to guarantee normal operation, the machine<br />
must be installed in areas that the environmental<br />
temperature is between +5°C ÷ +32°C end humidity<br />
of not over 70%.<br />
It does not need to be anchored to the surface and it<br />
does not require any technical operations to dampen<br />
vibrations in order to operate properly.<br />
It is recommended to leave the area around the machine<br />
free to facilitate its use and the performance<br />
of any maintenance operations.<br />
If the machine is wet or very damp, wait until it is<br />
completely dry before installing or using it. It is always<br />
necessary to request an accurate control to qualified<br />
service people in order to find any possible damage<br />
to the electric components.<br />
Reserve an area near the machine for the installation<br />
of the coffee grinding and dosage machine (see<br />
relevant documentation).<br />
The machine is usually equipped with a water softener,<br />
type DP2 or DP4, which must be connected<br />
by the user in compliance with the laws in force.<br />
Should a different softener be installed, refer to the<br />
documentation of the relevant product.<br />
A dreg drawer should be fitted by the installer.<br />
6.1. Connections to be made by the<br />
user<br />
Hook-up must be carried out by qualified<br />
personnel in full accordance with federal,<br />
state and local regulations.<br />
6.1.1. Water and gas supply (Fig.6)<br />
This equipment is to be installed to<br />
comply with the applicable federal, state<br />
or local plumbing codes.<br />
Connections must be installed close to the machine.<br />
Water drainage pipe 1, having a minimum internal<br />
diameter of 30 mm, equipped with a water-trap<br />
accessible for inspection.<br />
Water supply pipe 2, with a 3/8"G cut-off tap.<br />
Gas supply pipe 3, with a cutoff tap.<br />
Make sure that the maximum supply pressure<br />
does not exceed 6.5 bar; otherwise, install a<br />
pressure reducer.<br />
The machine with gas heating must be installed<br />
in compliance with current local laws.<br />
73
6.1.2. Electric supply<br />
The machine is supplied ready for connection<br />
according to the required electrical specifications.<br />
Before connecting the machine ensure that the plate<br />
details comply with those of the electric distribution<br />
network.<br />
The electrical connection cable must be directly<br />
connected to the connection provided according to<br />
current legislation. Ensure that the earthing system<br />
is efficient and in compliance with current legal requirements.<br />
The earthing system and the lightening protection<br />
system must be realized in accordance with the<br />
provisions of current legislation.<br />
For the supply network use a cable in compliance with<br />
standards with protective conductor (earthing wire).<br />
For three-phase power use a cable with 5 conductors<br />
( 3 phases + neutral + earth).<br />
For single phase power supply use a cable with 3<br />
conductors (phase + neutral + earth).<br />
In both cases it is necessary to provide an automatic<br />
differential switch (Fig. 6) at the start of the power<br />
cable, complete with magnetic release elements in<br />
accordance with the identification plate details (Fig.<br />
1). The contacts must have an opening of equal or<br />
over 3 mm and with dispersed current protection of<br />
30 mA.<br />
Remember that each machine must be fitted with its<br />
own safety elements.<br />
WARNING:<br />
Should the power supply cable be damaged<br />
it is to be replaced by the manufacturer or by<br />
its technical assistance service or by person<br />
with equivalent qualification, in order to prevent<br />
any risks.<br />
6.3. CONNECTIONS<br />
Place the machine on the horizontal surface previously<br />
prepared.<br />
Before connecting, thoroughly wash the mains water<br />
pipes:<br />
Leave the water supply taps running at full pressure<br />
for several minutes.<br />
Connect to the mains water supply.<br />
Connect the machine to the socket.<br />
Connect the gas pipe<br />
Thoroughly wash all the water pipes of the machine:<br />
Leave the water supply taps running at full pressure.<br />
Switch on main switch 1 (Fig.8): wait until the boiler<br />
fills up to the level set.<br />
Boiler resistance switch2 (Fig.8) to begin heating<br />
the water in the boiler.<br />
Operate each unit in order to allow the water to<br />
escape for about one minute; repeat the operation<br />
twice.<br />
Deliver steam from the steam jets for about one<br />
minute.<br />
Deliver hot water for about one minute; repeat the<br />
operation twice.<br />
Switch off switches 1 and 2.<br />
Empty the water from the boiler: see point 10.3.<br />
IMPORTANT<br />
Should the machine not deliver water for over<br />
24 hours, wash the internal components before<br />
beginning work, repeating the operations<br />
as described above.<br />
6.2. Preliminary operations (Fig.7)<br />
P O T E N T I A L - E Q U A L I Z I N G<br />
CONNECTION<br />
This connection, which is the one called for by several<br />
norms, avoids electrical potential differences, building<br />
up between any equipment that may be installed in<br />
the same room. There is a terminal clip on the under<br />
side of the base of the machine to which an external<br />
potential-equalizing wire should be connected.<br />
This connection is ABSOLUTELY NECESSARY and<br />
must be made right after the machine is installed.<br />
Use a wire whose cross-sectional area conforms to<br />
the existing norms.<br />
74
7. OPERATION<br />
7.1. Controls (Fig.8)<br />
1 Main switch<br />
Two-position switch with led.<br />
Turn on the switch (led on) the machine is turned<br />
(apart from the boiler) and the pump is turned on<br />
to fill the boiler;<br />
2 Boiler resistance switch<br />
Two-position switch with led.<br />
On activating the switch (the led comes on) and<br />
power is supplied to the resistance for the boiler<br />
water.<br />
3 <strong>Coffee</strong> dispensing switch (mod.S)<br />
Two-position switch:<br />
With switch ON, coffee is dispensed;<br />
With switch OFF, dispensing of coffee is interrupted.<br />
4 Dispenser control lever (mod.<strong>RE</strong>)<br />
Move the lever downward to start dispensing coffee.<br />
To stop dispensing, move the lever upward.<br />
5 <strong>Coffee</strong> Dispensing Electronic Panel (mod. <strong>USB</strong>)<br />
Five buttons with relative led:<br />
A Press the button for a second, led on, release<br />
button; a small coffee is dispensed.<br />
The led turns off and dispensing ceases.<br />
B Press the button for a second, led on, release<br />
the button; two small coffees ar dispensed from<br />
the same unit.<br />
The led turns off and dispensing ceases.<br />
C Press the button for a second, led on, release<br />
the button; a big cup of coffee is dispensed.<br />
The led turns off and dispensing ceases.<br />
D Press the button for a second, led on, release<br />
the button; two big cups of coffee are dispensed<br />
from the same unit.<br />
The led turns off and dispensing ceases.<br />
E Press the button for a second, led on, release<br />
the button; coffee is continuously dispensed.<br />
Press the button for a second, led off, release<br />
button; continuous dispensing of coffee ceases.<br />
To interrupt brewing once the operation has been<br />
activated with buttons A-B-C-D, press the same<br />
button again or press E.<br />
Each time a coffee is dispensed, the LED of the<br />
relative button lights up.<br />
If pressed for approx. 8 sec., the dose quantity<br />
programming function is accessed.<br />
During dose programming, the LED of the 5 th<br />
button flashes rapidly.<br />
If the dose is supplied irregularly or the volumetric<br />
counter is malfunctioning, the LED of the pressed<br />
button flashes dispensing the dose on a time basis.<br />
6 Hot Water and Cup-Warmer Panel (mod.S-<strong>RE</strong>)<br />
6.1 Cup-warmer switch with two positions:<br />
With switch ON, the LED flashes and the cup<br />
warmer resistance is energized.<br />
With switch OFF, the LED switches off and the<br />
resistance is de-energized.<br />
6.2 Two-position hot water switch (thermoregulated):<br />
With switch ON, the LED flashes and thermoregulated<br />
hot water is dispensed.<br />
With switch OFF, the LED switches off and dispensing<br />
stops.<br />
6.3 Hot water switch (picking up directly from the<br />
boiler) with two positions:<br />
With switch ON, the LED flashes and hot water is<br />
dispensed directly from the boiler.<br />
With switch OFF, the LED switches off and dispensing<br />
stops.<br />
7 Hot Water and Function Panel (mod.<strong>USB</strong>)<br />
This panel features 5 buttons and 5 LEDs consisting<br />
of the following:<br />
1 cup-warmer button (7.1)<br />
2 buttons for dispensing hot water (7.2 - 7.3)<br />
3 keys for dispensing hot water blended with the<br />
temperature control function (7.3 - 7.4 - 7.5)<br />
7.1 The Cup Warmer<br />
The function provides for 4 setting levels of resistance<br />
heating strength:<br />
off, minimum, medium, maximum (pls. consult par.<br />
9.5).<br />
7.2 Hot water<br />
When the button is pressed, hot water is dispensed<br />
directly from the boiler for the set time or until the<br />
button is pressed again.<br />
If the key is kept pressed in for 2 seconds, the<br />
dispensing flow becomes continuous and it will<br />
stop only if the key is pressed in again.<br />
The dispensing flow is anyway stopped automatically<br />
after 30 sec.<br />
7.3 – 7.4 – 7.5 Hot water blended with the temperature<br />
control function (4-TEA)<br />
Pressing on any one of the keys will start dispensing<br />
of the temperature-controlled water for the set<br />
amount of time, or until the key is pressed in again.<br />
During this dispensing cycle, the pump starts up.<br />
The default programming of the 3 keys provides<br />
for different water temperatures, ranging between<br />
85°C (7.3) and 60°C (7.5). The temperatures and<br />
the dispensing times can anyway be programmed.<br />
It is also possible to set a dispensing option<br />
providing cold water taken directly from the water<br />
mains line.<br />
If the key is kept pressed in for 2 seconds, the dispensing<br />
flow becomes continuous and it will stop<br />
only if the key is pressed in again. The dispensing<br />
flow is anyway stopped automatically after 30<br />
seconds.<br />
75
7.6 Foamed milk<br />
Press the button to excite the steam and emulsion<br />
delivery electromagnetic valves until the programmed<br />
temperature and froth level are reached or<br />
until the function is switched off.<br />
7.7 Steamed milk<br />
Pressing the key excites the steam distribution<br />
electro-valves until the programmed temperature<br />
is reached or until the same is pressed again.<br />
Safety Devices<br />
Dispensing cannot be carried out if the machine<br />
has not reached the operating pressure or temperature<br />
at least once, and each time that the boiler<br />
pressure drops too much.<br />
8 Steam supply handwheel “C-LEVER”:<br />
Rotating the turn-knob upwards will open the tap;<br />
the turn-knob will remain in open position to allow<br />
for a continuous steam supply. To close the tap,<br />
turn the turn-knob back into its horizontal position.<br />
Rotating the turn-knob downwards provides for<br />
instant steam supply. Once it is released, the turnknob<br />
will go back into its horizontal position and<br />
the steam supply is instantly stopped.<br />
9 Supplementary manual water filling tap positioned<br />
under the discharge basin.<br />
Press down to fill the boiler.<br />
10 Valved gas power tap (models with gas heating).<br />
Open: vertical position;<br />
Closed: turn 90° in clockwise direction.<br />
11 Piezoelectric button (models with gas heating).<br />
Firing button: press down firmly to give off the<br />
spark to light the gas for the burner.<br />
7.2. Control instruments (Fig.8)<br />
12 Gauge with mobile needle on a fixed dial with a<br />
double scale.<br />
Visual control of the pump (manometer on the lefthand<br />
side) and of the boiler pressure (manometer<br />
on the right-hand side)<br />
7.3. Starting up<br />
Turn on the water supply tap 2 Fig.6.<br />
Turn the main switch 1; the pump is activated, filling<br />
the boiler.<br />
When the water reaches the correct level, the pump<br />
stops.<br />
Turn the main switch 2 to begin heating the water<br />
in the boiler then turn each one until water begins<br />
to flow from them.<br />
Wait for the machine to reach its working pressure<br />
and to reach the correct thermal balance.<br />
Models with gas (Fig.8)<br />
Turn on the water supply tap 2 (Fig.6).<br />
Turn on the gas tap 3 (Fig.6).<br />
Turn the main switch 1; the pump is activated, filling<br />
the boiler.<br />
When the correct level is reached, the pump stops.<br />
Turn the switch 2.<br />
Turn the gas tap 10 to the vertical open position<br />
and hold down the incorporated button, at the same<br />
time repeatedly press hard on the piezelectric button<br />
11 until the spark lights the gas flame (carry out<br />
this operation looking through window 14). Hold<br />
the tap button 10 down for approx. 30 seconds to<br />
allow the safety system to keep the flame lighted.<br />
If the flame goes out, repeat the operation.<br />
Should the flame not light up, avoid insisting<br />
and close the gas tap by turning it 90° in a<br />
clockwise direction.<br />
Wait until the machine reaches its working pressure<br />
and until the correct thermal balance is achieved.<br />
13 Minimum and maximum water level indicator .<br />
Visual control of water level in boiler.<br />
14 Control window (models with gas heating).<br />
Visual control of lighting and functioning of the<br />
flame of the gas burner.<br />
76
8. USE<br />
The machine has a top shelf on which the cups are<br />
kept and heated, ready for use.<br />
This is very important to obtain good coffee as the<br />
pre-warmed cup stops the coffee from growing cold<br />
too quickly.<br />
8.1. Preparing coffee<br />
Unclamp the filter-holder from the dispensing unit<br />
and knock any grouts out into the drawer especially<br />
provided for this purpose, taking care not to<br />
damage the rim of the filter.<br />
Use the filter for 1 or 2 coffees, according to<br />
need.<br />
Fill the filter with the measure of coffee, level it off<br />
and press it down gently with the presser.<br />
Remove any ground coffee that has stuck to the<br />
rim of the filter while pressing.<br />
If ground coffee is left on the rim of the filter, a<br />
leaktight seal is not ensured, with consequent<br />
leaking of water and coffee grounds.<br />
Lock the filter-holder into the dispensing unit firmly<br />
to obtain a leaktight seal.<br />
Place the cups under the spouts and start pouring<br />
using control 3 - 4 or button panel 5 according to<br />
model (Fig.9).<br />
When the coffee has been poured, leave the filterholder<br />
attached to the dispensing unit until the next<br />
coffee is required.<br />
When pouring, beware of the hot parts of the<br />
machine, especially the coffee dispensing<br />
units, the steam and hot water spouts. Do not<br />
put your hands for any reason under the units<br />
and the spouts when they are operating.<br />
The grinding of the coffee beans is of fundamental<br />
importance to the making of good coffee, and the<br />
granular texture of the resulting grounds should<br />
be such that it takes 25-30 seconds to produce the<br />
beverage. If the coffee is ground too coardsely the<br />
coffee will be pale in colour and weak in flavour, with<br />
only a very small amount of white cream, and if the<br />
grounds are too fine, the coffee will be dark with no<br />
cream. Good coffee can only be made if the beans<br />
are freshly and uniformly ground (only possible when<br />
the blades of the coffee grinder are sharp) and are<br />
then measured out into the correct quantities (roughly<br />
6 grams per measure).<br />
The importance of freshly ground coffee beans is<br />
due to the fact that once ground, they rapidly lose<br />
their aromatic qualities, and fats present in the beans<br />
go rancid.<br />
8.2. Preparing cappuccino (Fig.9)<br />
Make cup of cappuccino with the express coffee.<br />
Use a high and narrow jug, half-filled with milk.<br />
Place the jug under the spout so that the nozzle<br />
touches the bottom.<br />
Turn on the steam tap and lower the jug so that<br />
the nozzle is almost at the surface of the milk.<br />
Now, raise and lower the vessel constantly so that<br />
the steam nozzle is immersed in and out of the<br />
milk to create the froth.<br />
Turn off the steam tap and pour the milk into the<br />
cup.<br />
Immediately after carrying out this operation,<br />
clean the spout with a sponge or a clean<br />
cloth so that the milk does not dry on it. Be<br />
careful as the spout is hot and may burn<br />
your hand.<br />
8.3. Heating a beverage<br />
Immerse the steam spout into the liquid to be<br />
heated.<br />
Gradually turn on the steam tap 8 Fig.8; the steam<br />
that bursts in the liquid heats it to the desired temperature.<br />
Turn off the steam tap when the desired temperature<br />
has been reached.<br />
Immediately after carrying out this operation,<br />
clean the spout with a sponge or clean cloth.<br />
Be careful as the spout is hot and may burn<br />
your hand<br />
8.4. Preparing tea, camomile, etc.<br />
Place the jug under the hot water spout and use<br />
the delivery control according to the model (Fig.8).<br />
When the desired quantity has been obtained, turn<br />
off the switch.<br />
Add the beverage desired.<br />
Models <strong>USB</strong>For these models, hot water is dispensed<br />
in specific measures (see paragraph 9, adjusting<br />
the dose of hot water).<br />
To dispense hot water in different quantities, proceed<br />
as follows:<br />
Hold down the delivery control 7.2 o 7.3 o 7.4 o 7.5<br />
(Fig.8) for at least four seconds then release the<br />
button; the machine continuously delivers water.<br />
When the desired measure has been obtained,<br />
press the button E again to interrupt delivery.<br />
When the dose of hot water is being delivered electronically,<br />
delivery can be interrupted by pressing the<br />
button 7.3.<br />
When purified water is used, these beverages often<br />
assume a darker colour.<br />
Should the user prefer a lighter coloured drink, draw<br />
fresh water from an ordinary tap and proceed with<br />
the heating phase as described in point 8.3.<br />
77
8.5. Machines with iSteam automatic system<br />
(Fig.8) (only Mod. <strong>USB</strong>)<br />
8.5.1 Heating Milk or a Drink (iStema)<br />
Immerse the wand in the drink<br />
Press button 7.7 on the keypad (Fig.8)<br />
The display will show the temperature of the drink<br />
Press button 7.7 again to stop heating at the desired<br />
temperature.<br />
Wait for dispensing at the programmed temperature<br />
to stop automatically, otherwise press key<br />
7.7 in again to stop the drink-heating function<br />
manually.<br />
Should heating the drink above the set temperature<br />
be required, hold key 7.7 pressed in.<br />
The steam dispenser nozzle will continue supplying<br />
steam until a maximum temperature of approx. 90°C<br />
is reached, or until the key is released again.<br />
8.5.2. Preparing Frothed Milk (iSteam)<br />
Immerse the wand in a container containing at<br />
least 250 cc of milk (the sensor must be at least 3<br />
cm below the water level).<br />
To obtain best results, use refrigerated milk (≤ 5°C)<br />
- (≤ 41°F)<br />
Press button 7.6 on the keypad (Fig.8)<br />
The display shows the temperature of the milk.<br />
Press button 7.6 again to stop the machine at the<br />
desired temperature and emulsion level.<br />
Wait for dispensing at programmed temperature and<br />
at programmed cream level to stop automatically,<br />
otherwise press key 7.6 in again to stop the drink<br />
emulsion function manually<br />
9. ADJUSTMENT AND SETTING OF THE<br />
DOSE<br />
9.1. Models <strong>USB</strong><br />
It is possible to adjust the dose of coffee and hot water<br />
dispensed by electronically controlled models. (If the<br />
function is enabled)<br />
9.1.1. Adjusting the dose<br />
The quantity of coffee and hot water dispensed can<br />
be adjusted using the button panel or the hot water<br />
controls.<br />
1 Press the button E on any button panel and hold<br />
it down for 8-10 seconds until water stops flowing<br />
from the dispensing unit and the led of the continuons<br />
button on the first button panel on the left<br />
begins flashing.<br />
The following page displaying the services selection<br />
keypad and the coffee selection will come up<br />
on screen.<br />
2 It is necessary to act as to make 1 or 2 cups in order<br />
to reach the correct coffee amount adjustment<br />
in the cup.<br />
3 Put the filter-holder (with ground coffee) on the left<br />
unit and the cup under the spout.<br />
4 Operate the selected button (i.e. button A for one<br />
small cup).<br />
5 One the required coffee amount in the cup has been<br />
reached, press the stop button A. Coffe will stop<br />
pouring and the microprocessor will store the dose.<br />
The screen will display the impulses relative to the<br />
completed dose and a data box will highlight that<br />
it has been stored into the system.<br />
6 Press the continuous button E again; the led will go<br />
out and the machine will store the new quantity.<br />
7 Make the coffee and check the cup amount in order<br />
to check that programming is correct.<br />
If some doses have to be changed (A-B-C-D), once<br />
at point 5 repeat the instructions in points 3-4-5 for<br />
each dose, remembering to use the filter-holder with<br />
relevant filter and freshly ground coffee.<br />
Then carry out point 6 and repeat point 7 to check<br />
all changed doses.<br />
If all units are to be programmed with the same doses,<br />
the selection of coffee doses is finished. If the dosage<br />
of another unit is to be changed (1-2-3-4 doses), proceed<br />
as indicated in the above-mentioned point 1-7,<br />
using only the button panel of the selected unit.<br />
9.1.2. Adjusting the quantity of hot water<br />
Proceed as follows:<br />
1 Press the continuous E button on any button panel<br />
and hold down for 8-10 seconds until water stops<br />
flowing from the dispensing unit and the led of the<br />
E button on the first button panel on the left starts<br />
flishing. The machine is ready to accept quantity<br />
variations.<br />
2 Put a cup or a jug to receive the water under the<br />
water spout 17 (Fig.3).<br />
3 Push the delivery button 7.2.<br />
4 Once the required amount is reached, press the<br />
button 7.2 again. Water will stop pouring and the<br />
microprocessor will store the dose.<br />
- To adjust the water dose for the dispensing beak 4<br />
(Fig. 3), carry out the same steps using either key<br />
7.3 or 7.4 or 7.5. Temperature-controlled water is<br />
not dispensed during this phase.<br />
5 Once adjusted, press the stop-continuous button<br />
E on any button panel; the led will go out and the<br />
machine will store the new quantity.<br />
6 Pour out doses of hot water to check that programming<br />
is correct.<br />
78
9.2. Programming (Mod.<strong>USB</strong>)<br />
Warning!<br />
The bottom hatch door (fig.3 – item14) will close<br />
itself automatically.<br />
Be careful with your hands when accessing the<br />
controls located in the machine’s bottom section.<br />
Programming Panel<br />
This panel features 4 buttons with the following functions:<br />
- Button with “+” sign<br />
to scroll through the menu items or to increase the sizes.<br />
- Button with “-” sign<br />
to scroll through the menu items or to increase the sizes.<br />
- Button with “enter” sign<br />
To enter the programming menu. Or to confirm entries<br />
- Button with “esc” sign<br />
To quit the menu or to quit programming mode.<br />
SELEZIONE<br />
LINGUA<br />
<strong>RE</strong>SET<br />
RIGENER.<br />
<strong>RE</strong>SINE<br />
BUZZER<br />
LANGUAGE<br />
SELECTION<br />
<strong>RE</strong>GENERAT<br />
ON <strong>RE</strong>SET<br />
When the “+” and “ – “buttons are pressed for approximately 2 seconds,<br />
the “bartender” programming menu is activated. This menu contains the<br />
following submenus:<br />
OROLOGIO<br />
SET TIMER<br />
BUZZER<br />
CLOCK<br />
To move from one submenu to another, press “+” or “-”. To enter in a<br />
submenu, press “enter”, while to quit, press “esc”.<br />
When a submenu is accessed, the editable value is displayed and changes<br />
can be made to it by pressing on the “+” or “-” keys.<br />
If you make changes, these must be confirmed by pressing “enter” until<br />
you quit the submenu. If you do not wish to save your changes, press<br />
“esc”.<br />
CONTATORI<br />
PARZIALI<br />
RINNOVO<br />
ACQUA<br />
CALDAIA<br />
SET TIMER<br />
SELECTIONS<br />
COUNTER<br />
<strong>RE</strong>NEW<br />
WATER BOILER<br />
LANGUAGE<br />
SELECTION<br />
SELEZIONE<br />
LINGUA<br />
<strong>RE</strong>GENERAT<br />
ON <strong>RE</strong>SET<br />
<strong>RE</strong>SET<br />
RIGENER.<br />
<strong>RE</strong>SINE<br />
BUZZER<br />
BUZZER<br />
CLOCK<br />
OROLOGIO<br />
ITALIANO<br />
ITALIANO<br />
ENGLISH<br />
ENGLISH<br />
ESPANOL<br />
ESPANOL<br />
FRANCAIS<br />
FRANCAIS<br />
DEUTSCH<br />
DEUTSCH<br />
PORTUGUES<br />
PORTUGUES<br />
9.2.1. Selecting the Display Language<br />
This menu allows you to select the language to be<br />
used to show and messages on the display. You can<br />
select among the following languages: Italian, English,<br />
Spanish, French, German and Portuguese.<br />
SET TIMER<br />
SET TIME<br />
79
9.2.2. Softener regeneration<br />
If the function is enabled,<br />
you can select “Reset” N<br />
(no) or Y (yes)- by pressing<br />
keys “+” or “-”. Press<br />
“enter” to confirm.<br />
LANGUAGE<br />
SELECTION<br />
<strong>RE</strong>GENERAT<br />
ON <strong>RE</strong>SET<br />
<strong>RE</strong>SET SOFTENER<br />
<strong>RE</strong>GENERATION? NO<br />
BUZZER<br />
YES<br />
CLOCK<br />
SET TIMER<br />
9.2.3. Buzzer<br />
If you enable this function, whenever you<br />
press a button you will hear a beep.<br />
LANGUAGE<br />
SELECTION<br />
SELECTIONS<br />
COUNTER<br />
<strong>RE</strong>NEW<br />
WATER BOILER<br />
<strong>RE</strong>GENERAT<br />
ON <strong>RE</strong>SET<br />
BUZZER<br />
NO<br />
LANGUAGE<br />
SELECTION<br />
CLOCK<br />
YES<br />
<strong>RE</strong>GENERAT<br />
ON <strong>RE</strong>SET<br />
9.2.4. Clock<br />
Sub-menu to set date, time and mode (24 hours ou<br />
12 hours for the time, dd/mm/yy or mm/dd/yy for the<br />
date).<br />
BUZZER<br />
SET TIMER<br />
SELECTIONS<br />
COUNTER<br />
CLOCK<br />
<strong>RE</strong>NEW<br />
CLOCK SETTING WATER BOILER DATE 20-02-08<br />
CLOCK 10.10<br />
SET TIMER<br />
DATE MODE<br />
gg-mm-aa<br />
SELECTIONS<br />
COUNTER<br />
mm-gg-aa<br />
<strong>RE</strong>NEW<br />
WATER BOILER<br />
CLOCK MODE<br />
24 h<br />
12 h<br />
80
LANGUAGE<br />
SELECTION<br />
.2.5. Set Timer<br />
This menu allows you to set the automatic switching ON and OFF times of the machine. It has the following<br />
submenus:<br />
<strong>RE</strong>GENERAT<br />
ON <strong>RE</strong>SET<br />
- Enable/disable function<br />
- Set the time the machine switches ON and the number of working hours for every day of the week.<br />
BUZZER<br />
When the timer function is selected, if the machine is OFF, press the “Esc” buttons on the programming keypad<br />
(for at least 3 second) to switch the machine ON; the machine remains ON until the next timed switching OFF<br />
or until you press the same controls again (for at least 3 seconds).<br />
CLOCK<br />
SET TIMER<br />
STAND-BY TIMER<br />
NO<br />
SELECTIONS<br />
COUNTER<br />
YES<br />
<strong>RE</strong>NEW<br />
WATER BOILER<br />
LANGUAGE<br />
SELECTION<br />
SUNDAY 00:00 24:00<br />
MONDAY 00:00 24:00<br />
When the timer function is selected, if the machine is ON, press the “Esc”<br />
<strong>RE</strong>GENERAT<br />
buttons on the programming keypad ON <strong>RE</strong>SET (for at least 3 second) to switch the<br />
machine OFF; the machine remains OFF until the next timed switching<br />
ON or until you press the same controls again (for at least 3 seconds).<br />
BUZZER<br />
9.2.6. Selection counts<br />
This displays the counts for each coffee group, the water group, the TSC<br />
group and the total of the counters. It also asks you whether you wish to<br />
reset the counters or not.<br />
CLOCK<br />
If enabled to the counting of output, the number of the coffees and water<br />
output is accounted for the and the 5 th key on the coffee keyboard operates<br />
as Stop dose only.<br />
TUESDAY 00:00 24:00<br />
WEDNESDAY00:00 24:00<br />
THURSDAY 00:00 24:00<br />
FRIDAY 00:00 24:00<br />
SET TIMER<br />
SELECTIONS<br />
COUNTER<br />
COFFEE GR. 1<br />
BUTTON 1<br />
<strong>RE</strong>NEW<br />
WATER BOILER<br />
COFFEE GR. 2<br />
COFFEE GR. 3<br />
BUTTON 2<br />
BUTTON 3<br />
COFFEE GR. 4<br />
BUTTON 4<br />
HOT WATER<br />
TEA<br />
4 - TEA (1)<br />
ISTEAM<br />
FOAMED MILK<br />
4 - TEA (2)<br />
TOTAL B<strong>RE</strong>WINGS<br />
STEAMED MILK<br />
4 - TEA (3)<br />
<strong>RE</strong>SET<br />
81
9.2.7. Procedure for replacing the water inside<br />
the boiler with fresh water.<br />
Hot water is emptied out from the nozzle spout<br />
Fig.3 – item 8, until the boiler is empty. When<br />
emptied, fresh water is filled in automatically until<br />
the set level is reached.<br />
During the final phase, the boiler is heated up until<br />
the set pressure is reached.<br />
During the boiler water emptying-out operations,<br />
the boiler level control and resistance functions<br />
are OFF.<br />
For water removal, we recommend the insertion of<br />
a tube leading from the nozzle spout directly into<br />
the discharge drain. This to avoid water squirts.<br />
ESC can be pressed at any time to interrupt the<br />
cycle.<br />
WARNING: Water may spill out during the<br />
automatic cycle. Beware of skin burning<br />
hazards!<br />
LANGUAGE<br />
SELECTION<br />
<strong>RE</strong>GENERAT<br />
ON <strong>RE</strong>SET<br />
BUZZER<br />
CLOCK<br />
SET TIMER<br />
SELECTIONS<br />
COUNTER<br />
9.3. Displaying<br />
9.3.1. Warming Up Phase<br />
During the warming up phase, the following message<br />
is displayed:<br />
“Machine not ready”<br />
Until the set pressure is reached.<br />
<strong>RE</strong>NEW<br />
WATER BOILER<br />
During dispensing, the following is displayed:<br />
NO<br />
YES<br />
The following messages are also displayed, concerning:<br />
“Please make the regenerate softener”, if the<br />
function is enabled and the set values have been<br />
reached (this message will be then repeated every<br />
hour until it is reset)<br />
“Please make the service time”, if the function is<br />
enabled and the set values have been reached (this<br />
message will be then repeated every hour until it is<br />
reset)<br />
9.3.2. Operating Mode<br />
Once the temperature/pressure is reached, the date,<br />
the current time and the pressure data will stay on<br />
display (for 20 sec.) and flash alternatively to the<br />
customisation logos.<br />
1 <strong>Coffee</strong> dispensing symbol<br />
2 Hot water dispensing symbol<br />
3 iSteam dispensing symbol<br />
4 Date and time<br />
5 Selected coffee dispensing group<br />
6 Hot water dispensing<br />
7 Type of hot water blending (4-TEA)<br />
8 Milk warm-up display<br />
9 Milk instant-temperature<br />
10 Boiler pressure<br />
11 Cup heater symbol<br />
12 Set-time symbol<br />
13 Water charge symbol<br />
14 Boiler resistance ON symbol<br />
82
If one of the two time/doses control functions are<br />
activated, the coffee symbol space will instead<br />
display:<br />
otherwise:<br />
9.5 .The Cup-Warmer<br />
“Brewing time ”<br />
For energy saving purposes, the display will reduce<br />
its luminosity after one hour of continuous inactivity<br />
without dispensing anything. After two hours of continuous<br />
inactivity without dispensing anything, it will<br />
switch itself off altogether.<br />
9.4. Operating Safety Devices<br />
When the coffee maker is switched ON, it checks<br />
whether there is enough water in the boiler.<br />
9.4.1. If the water level is inadequate, the machine<br />
tops up the level automatically. If this does not<br />
take place within a set period, the boiler filling<br />
operation is discontinued and a warning message<br />
is displayed:<br />
“G01 Water missing”<br />
9.4.2. If the water presence check result is positive,<br />
the boiler heating resistances are enabled.<br />
If the set pressure is not reached within a specific<br />
time, the power supply to the heating resistances<br />
is cut off and a warning message is shown on the<br />
display:<br />
“G02 Boiler Pressure low”<br />
9.4.3. If the safety device for slow dispensing intervenes,<br />
the LED of the dispensing button must flash<br />
until the end of dispensing.<br />
The boiler safety devices can be reset by switching<br />
the machine OFF and then back ON again<br />
By pressing the relative button, the display shows<br />
the following:<br />
Depending on the darkened segments it indicates the<br />
selected power status of the cup-warmer resistances<br />
(min – med – max – off).<br />
passing from one level to the next is performed by<br />
pressing on the cup-warmer key.<br />
9.6. List of malfunctions<br />
The system electronics are capable of diagnosing<br />
the following failures by displaying the relative error<br />
codes on screen:<br />
Because they are serious, these errors will stop and<br />
block machine operations.<br />
G00<br />
G01<br />
G02<br />
G03<br />
G04<br />
G05<br />
G06<br />
G07<br />
G08<br />
G09<br />
G10<br />
G11<br />
G12<br />
G13<br />
G14<br />
G15<br />
G16<br />
G17<br />
G18<br />
Check CPU<br />
Water missing<br />
Boiler Pressure low<br />
Boiler probe shorted<br />
Interrupted boiler probe<br />
Connection IDS<br />
Regen. softener<br />
Maintenance<br />
Cleaning interrupted<br />
24V Group 1 shorted<br />
24V Group 2 shorted<br />
24V Group 3 shorted<br />
24V Group 4 shorted<br />
24V Func. Group shorted<br />
12V Capacitive level shorted<br />
12V Transducer shorted<br />
2V Flowmeter shorted<br />
5V ext shorted<br />
12V sk power shorted<br />
Failures G06-7-8- will not block the machine functions<br />
and are displayed on the error codes log..<br />
9.7 List of warning<br />
The system electronics are capable of diagnosing the<br />
following failures by displaying the relative error code<br />
on screen (which will come flashing on alternatively<br />
to the customisation logos).<br />
Because they are not serious, these errors will allow<br />
the machine to keep running.<br />
We nevertheless recommend that you contact the<br />
Technical Service Department in order to settle the<br />
problem as quickly as possible.<br />
W01 Interr. flowmeter Group 1<br />
W02 Interr. flowmeter Group 2<br />
W03 Interr. flowmeter Group 3<br />
W04 Interr. flowmeter Group 4<br />
W05 iSteam probe shorted<br />
W06 Interr. iSteam probe<br />
W07 Check data<br />
W08 Maintenance<br />
W09 Water softener<br />
W10 Run the coffee cleaning cycle<br />
W11 Check the clock<br />
W12 EV Group 1 shorted<br />
W13 Interr. EV Group 1<br />
W14 EV Group 2 shorted<br />
W15 Interr. EV Group 2<br />
W16 EV Group 3 shorted<br />
W17 EV Group 4 shorted<br />
W18 EV Autofill shorted<br />
W19 Interr. EV Autofill<br />
W20 EV Hot water shorted<br />
W21 Interr. EV Hot water<br />
W22 EV cold 4-TEA shorted<br />
83
W23<br />
W24<br />
W25<br />
W26<br />
W27<br />
W30<br />
W31<br />
W32<br />
Interr. EV cold 4-TEA<br />
EV hot 4-TEA shorted<br />
Interr. EV hot 4-TEA<br />
EV steam iSteam shorted<br />
Interr. EV steam iSteam<br />
EV air iSteam shorted<br />
Interr. EV air iSteam<br />
Check the message file<br />
10. LOAD & SHOW<br />
Inserting a <strong>USB</strong> key into port 20 (fig. 3) will automatically upload the LOAD & SHOW interface, through which<br />
it is possible to perform the following operations:<br />
1. Machine software: software updating procedures.<br />
2. Graphics: uploading of any static or dynamic customisation logos**.<br />
3. Messages: updating of the machine messages (provides new language<br />
upload options).<br />
4. Parameters: enables uploading of another machine’s parameters or downloading<br />
parameters - currently in use on Class 10.<br />
Note:<br />
The files that need to be uploaded must be copied directly onto the <strong>USB</strong> key, without first putting them into<br />
a folder.<br />
Never switch the machine off during the upload procedure.<br />
SOFTWA<strong>RE</strong> MHX<br />
GRAPHICS<br />
LOGO 1<br />
LOGO1.BMP<br />
LOGO 2<br />
LOGO2.BMP<br />
LOGO 3<br />
LOGO3.BMP<br />
LOGO 4<br />
LOGO4.BMP<br />
MESSAGES<br />
MESSAGE.MSG<br />
SETTINGS<br />
<strong>RE</strong>AD<br />
SETTING.PAR<br />
WRITE<br />
SDE07 PAR<br />
** Features of the logos that can be<br />
uploaded<br />
Static logo<br />
Up to 4 static logos can be displayed on the Class<br />
10.<br />
In order to be uploaded into the machine system, the<br />
logos must have the following features:<br />
- bitmap image (.bmp)<br />
- 240x64 pixel resolution<br />
- 2-colour image (1 bit)<br />
84<br />
Dynamic logo<br />
One animated logo can be displayed on the Class<br />
10.<br />
In order to be uploaded into the machine system, said<br />
logo must have the following features:<br />
- bitmap image (.bmp)<br />
- Max. 1280x64 pixel resolution<br />
- 2-colour image (1 bit)
11.2. Weekly<br />
11. MAINTENANCE<br />
Maintenance operations have to be carried<br />
out when the machine is off and cold and<br />
the plug is disconnected. Some particular<br />
operations have to be effected when the<br />
machine is operating.<br />
Do not clean the machine by using metal or<br />
abrasive devices, such as steel wool, metal<br />
brushes, needles, etc. or general detergents<br />
(alcohol, solvents, etc.)<br />
When necessary, use special detergents<br />
for coffee machines that can be bought in<br />
specialized service centres.<br />
11.1. Daily (Fig.10)<br />
Use a clean cloth or sponge that does not leave hairs<br />
or fluff (preferably cotton or linen).<br />
Carefully clean the outside surface, following the<br />
grain of the satin finish on the parts in stainless<br />
steel.<br />
Clean the steam and hot water spouts and check<br />
that the nozzles are not encrusted (if they become<br />
encrusted, be careful not to deform or damage<br />
them).<br />
Clean the spray units and the seals under the casing<br />
of the delivery units using the special brush<br />
supplied.<br />
Remove the filter-holders and remove the filter<br />
and the clamp which secures the filter, use a brush<br />
to remove any coffee deposits and rinse with hot<br />
water in order to dissolve any grease deposits.<br />
Operations to be carried out with the machine<br />
operative and under pressure.<br />
Place the supplied blind filter in the filter-holder,<br />
put in a spoonful of detergent in powder for coffee<br />
machines and fit the filter-holder in the unit to be<br />
cleaned.<br />
Press the coffee dispensing button and draw water<br />
for approx. 30 seconds.<br />
Stop and start dispensing several times until clean<br />
water comes out of the discharge unit tube.<br />
Remove the filter-holder, take out the blind filter<br />
and insert a normal one.Replace the filter-holder<br />
on the unit and rinse by drawing water several<br />
times.<br />
Make a coffee to eliminate any unpleasant taste.<br />
Cleaning the filters and delivery heads (Fig.11)<br />
Operation to be carried out when the machine is off<br />
and cold.<br />
Prepare a solution of 4 sachets of detergent<br />
powder Code 69000124 dissolved in a litre of<br />
boiling water in a stainless steel, plastic or glass<br />
recipient (NOT ALUMINIUM OR IRON).<br />
Remove the filters and immerse them with the filter<br />
holders in the prepared solution, leaving them for<br />
at least 10/20 minutes (all night is better).<br />
Remove them from the container and rinse them<br />
thoroughly in running water.<br />
Remove the cup rack 1 (Fig.12), slide out the drip<br />
tray and clean them both.<br />
Check and clean the drainage sump 4 (Fig.14),<br />
removing any sludge with the help of a spoon.<br />
11.2.1 Washing of the coffee groups<br />
At the fixed time, if the automatic washing (par.2.6)<br />
mode is enabled, a message on the display requests<br />
to wash the coffee groups.<br />
Keep “ENTER” button pressed to start washing until<br />
the display shows:<br />
<strong>Coffee</strong> Cleaning Cycle<br />
Start cleaning cycle<br />
Group?<br />
press <br />
If you press “enter” within 10 seconds, the following<br />
cycle starts (if you do not leave this menu automatically):<br />
- The display shows:<br />
<strong>Coffee</strong> Cleaning Cycle<br />
Insert the blind<br />
filters then<br />
press <br />
- When you press “enter”, the cleaning cycle starts<br />
and the display shows:<br />
<strong>Coffee</strong> Cleaning Cycle<br />
CLEANING RUNNING<br />
The machine carries out n. 10 cycles as follows:<br />
- Starts dispensing from the groups for 10 sec.<br />
- Pauses for 10 sec.<br />
At the end of the 10 cycles, the display reads:<br />
<strong>Coffee</strong> Cleaning Cycle<br />
Remove the<br />
filterholders<br />
press <br />
If you press “enter” the display shows:<br />
RINSE RUNNING<br />
The machine carries out n. 2 cycles as follows:<br />
- Starts dispensing from the groups for 30 sec.<br />
- Pauses for 30 sec.<br />
Keeping ‘’esc’’ pressed for 2 seconds, during the<br />
cycle the current washing phase will stop and the<br />
next phase will take place.<br />
It is advisable to always complete the rinsing cycle<br />
to remove any detergent residues.<br />
N.B. In the washing and rinsing phases the groups<br />
are operated alternatively.<br />
In any case the washing of the coffee groups can<br />
be enabled whenever necessary according to the<br />
previously described procedure.<br />
85
11.2.2. Cleaning iSteam<br />
Clean the iSteam nozzle frequently with a sponge<br />
or damp cloth. Make sure to clean the lower parts.<br />
Check to make sure that the sprayer is not clogged<br />
or partially clogged with crusts and residues (if<br />
a crust removal operation is necessary, be very<br />
careful not to deform or damage the sprayer)<br />
11.3. Periodical maintenance<br />
Have been fitted with economizers which do not<br />
draw water from the boiler to make hot water, the<br />
water in the boiler need only to be renewed from<br />
time to time.<br />
11.3.1. Renewal of water in the boiler<br />
(Fig.12)<br />
To be carried out only by qualified personnel.<br />
Turn off the machine and wait for the pressure in<br />
the boiler to diminish (gauge needl on “0”).<br />
Insert a rubber hose into the hose-end fitting (3)<br />
(Fig.12)<br />
Use the wrench (1) to immobilize the fitting (2) and<br />
loosen the hose-end fitting (3).<br />
Allow the water to flow out completely; then, close<br />
the fitting (3) and remove the rubber hose.<br />
Refill the boiler (paragraph 7.3.).<br />
12. STOPPING THE MACHINE<br />
A - Temporary stop<br />
Carry out cleaning and maintenance operations.<br />
Wind up the cable and fasten it to the machine<br />
with sticky tape.<br />
Cover the machine and place it in a dry room. Do<br />
not leave it exposed to atmospheric agents and<br />
do not allow it to be touched by children or unift<br />
persons.<br />
To disconnect from the main power supply, consult<br />
qualified personnel.<br />
B - Definitive stop<br />
Besides carrying out the operations necessary for<br />
a temporary stop, cut off the cable, pack the machine<br />
in cardboard, polystyrene or other packing<br />
material and consign it to firms authorized for its<br />
disposal or to second-hand goods dealers.<br />
13. PROBLEMS AND <strong>RE</strong>MEDIES<br />
Check operations to be carried out by the<br />
user with the plug disconnected.<br />
For any type of problem or inconvenience not<br />
specifically indicated, disconnect the plug and<br />
contact our service centre without attempting<br />
any direct repairs.<br />
A) The machine does not start:<br />
- check that the plug is connected;<br />
- In case of power failure wait for the power to return<br />
and check if the earth leakage protection circuit<br />
breaker or the main switch is on;<br />
- check the condition of the plug and the supply<br />
cable; if damaged have them replaced by qualified<br />
personnel.<br />
B) There is water under the machine:<br />
- check that the drainage tray is not obstructed.<br />
C) Slow dispensing:<br />
- check that the filters and delivery heads are clean;<br />
- check that the coffee is not too finely ground.<br />
D) Irregular steam delivery:<br />
- check that the nozzles are not obstructed.<br />
13.1. Safety thermostat – Manual<br />
resetting<br />
Warning! The operation described hereunder<br />
must strictly be performed solely by an<br />
installation and service technician that has<br />
been duly authorised by the manufacturer<br />
to doing so.<br />
Subsequent to a failure during machine use, the<br />
safety thermostat might kick in to prevent even more<br />
severe damages occurring to the boiler.<br />
In order to reset the standard machine functions, it<br />
is first necessary to remove the failure that originally<br />
caused the safety thermostat to kick in and then to<br />
reset the standard machine conditions by pressing<br />
on the red (<strong>RE</strong>SET) pushbutton, as illustrated in<br />
figure 13.<br />
86
14. MACHINES WITH ALTERNATIVE GAS<br />
HEATER VERSION (Fig.14)<br />
N.B. Installation of the machine and any<br />
adjustment or adaptation to the type of gas<br />
should be done by a technically qualified<br />
person.<br />
The machine leaves the factory all set for use with<br />
liquid gas (GPL).<br />
The gas regulator (1) is therefore fitted with the appropriate<br />
injector shown in the table below:<br />
Model<br />
2 Gr.<br />
3-4 Gr<br />
Nominal<br />
thermic<br />
capacity<br />
2,5 KW<br />
(2150 Kcal/h.)<br />
3,3 KW<br />
(2850 Kcal/h.)<br />
The primary air intake regulator (2) is set with the<br />
reference notch showing “GPL” corresponding te the<br />
secuting screw (3).<br />
The flame is regulated (minimum and maximum) to<br />
suit this type of gas.<br />
If the machine is to be used with a different type<br />
of gas, it will be necessary to replace the injector<br />
in accordance with the above table and to rotate<br />
the primary air regulator (2), which, in the case of<br />
natural gas, will have to be set with the reference<br />
notch showing “N” corresponding to the securing<br />
screw (3).<br />
To do this, it will of course be necessary to loosen<br />
the securing screw (3) and to tighten it again after<br />
rotating the primary air intake regulator (2).<br />
Connections to mains gas, from the gas tap available<br />
in the room to the valve fitted on the machine, must<br />
be carried out in accordance with the regulations in<br />
force, using a flexible pipe or a rigid pipe in annealed<br />
copper.<br />
In the latter case, the special rubber-pipe fitting in<br />
connected tightly to the valve by means of the biconical<br />
nozzle and securing nut supplied.<br />
The flexible pipe is fitted over the end of the mains<br />
outlet and secured with the metal strip supplied.<br />
Alternatively, the annealed copper pipe can be connected<br />
up, again using the special biconical nozzle<br />
and the appropriate nuts, directly to the valve.<br />
Once the machine has been connected up to the<br />
gas main, and after filling the boiler up with water in<br />
accordance with the instructions in the booklet (“IN-<br />
STRUCTIONS FOR USE AND MAINTENANCE”),<br />
the burner can be lit in the following manner:<br />
Open the main gas tap.<br />
GPL<br />
G30 - 29 mbar<br />
(cent of milimeter)<br />
Natural gas<br />
G20 - 20 mbar<br />
(cent of milimeter)<br />
75 102<br />
90 135<br />
Press on the gas valve knob, on the machine rotate<br />
it 90° anti-clockwise, and keep it pressed in. At<br />
the same time, press the piezoelectric lighter one<br />
or more times – the lighter knob bears a symbol<br />
resembling a spark – until the burner lights up.<br />
Wair about 20 seconds, then release the valve<br />
knob and the burner should stay lit – the flame is<br />
vidible through the special hole in the panel behind<br />
the dispenser units.<br />
N.B.<br />
Should the burner not light up, do not persist, but<br />
release the valve knob, and then check that lighter<br />
spark on the burner is in order and about 5 mm<br />
long.<br />
Should the flame go out when te valve knob is released,<br />
check the position of thermocouple and the<br />
circuit connected to it.<br />
The flame should be bright blue; if not, slightly regulate<br />
the primary air intake (2) until the desired effect<br />
is achieved.<br />
Wait until the machine has the correct pressure,<br />
according to instructions. Otherwise, adjust the gas<br />
pressure regulator, which has two regulating screws.<br />
The one that protrudes more (4) serves to regulate<br />
the boiler’s operating pressure, while the other (5)<br />
serves to set the flame at the minimum.<br />
When the machine is pressurized, check to see<br />
that the minimum flame is correct by adjusting the<br />
screw (4) if necessary; after loosening the lockingnut,<br />
unscrew the screw until it feels loose (the main<br />
gas-pipe is closed), and check whether, under these<br />
conditions, the low flame remains lit, thus acting as<br />
a pilot.<br />
If the flame is too high, it will be necessary to regulate<br />
screw (5), turning it slightly clockwise, of course after<br />
having loosened the locking-nut. If, on the contrary,<br />
the flame tends to go out, then regulate screw (5) by<br />
turning it anti-clockwise, until a very low, but constant<br />
flame is obtained. Having achieved this correct adjustment<br />
of the minimum flame, hold the screw still and<br />
lock it with the locking-nut.<br />
Then rotate the screw (4) clockwise until there is a<br />
there is a high flame, and wait for the boiler to reach<br />
the desired operating pressure: if the flame dies<br />
down before reaching the required pressure, tighten<br />
screw (4) further; if the flame dies down at a higher<br />
pressure, then unscrew the screw.<br />
Check once or twice by opening the steam tap to<br />
release the pressure in the boiler, then hold screw<br />
(4) still and lock it with the locking-nut.<br />
87
SCHEMI ELETTRICI<br />
SCHEMAS ELECTRIQUES<br />
SCHALTPLANE<br />
WIRING DIAGRAMS<br />
ESQUEMAS ELECTRICOS<br />
ESQUEMA ELÉTRICO<br />
IT FR DE EN ES PT<br />
CA = Centralina autolivello Controle de niveau Wasserniveaukont Water level control Transd. autonivel Central auto nível<br />
de l’eau<br />
rolle<br />
CPU = Scheda CPU Fiche CPU Karte CPU CPU Board Tarjeta CPU Placa CPU<br />
CV = Contatore volumetrico Compteur volumetrique Volumenzaehler Flow Meter Contador volum. Contador volumétrico<br />
EA = Elettrovalvola acqua Electrovanne eau Wasserelektroventil Water electrovelve Electrovalvula agua Válvula Elétrica da água<br />
EAR = Elettrovalvola aria Electrovanne air Luftelektroventil Air electrovalve Electrovalvula aire Válvula Elétrica do ar<br />
EC = Elettrovalvola carico Electr. de chargement Speisungselektroventil Feeding electrovalve Electrovalv. carga Válvula Elétrica abast.<br />
EE = Elettr. Economizzatore Electr. economizeur Ekonomiserelektroventil Economizer electr. Electr. Economizador V.Eletr. Economizador<br />
EG = Elettrovalvola gruppo Electr. du groupe Gruppeelektroventil Group Electrovalve Electrovalvula grupo Válvula Elétrica grupo<br />
EV = Elettrovalvola vapore Electrovanne vapeur Dampfelektroventil Steam valve Electrovalvula vapor Válvula Elétrica vapor<br />
F = Fusibile Fusible Sicherung Fuse Fusible Fusível<br />
IG = Interruttore generale Interrupteur general Hauptschalter Main switch Interruptor general Interruptor geral<br />
IG1-4 = Interruttori gruppo Interrupteurs groupe Gruppenschalter Group switches Interruptores grupo Interruptores do grupo<br />
IA = Interruttori acqua Interrupteurs eau Wasserschalter Water switches Interruptores agua Interruptores da água<br />
IR = Interruttore Resistenza Interrupteur resistance Heizungsschalter Resistance Switch Interruptor resist. Interruptor da Resist.<br />
IS = Interruttore scaldatazze Interrupteur chauffe Schalter Tassenwärmer Cup heating switch Interruptor calienta Interruptor aquec.<br />
tasses tazas xícaras<br />
LC = Lampada livello Lampe niveau Lampe für Wasserstand Level lamp Lámpara de nivel Lâmpada nível<br />
M = Morsettiera allacciam. Boit a bornes pour Anschhlussklemmleiste Mains Power Bloque de terminales Conj. bornes ligação<br />
branchement<br />
Connection<br />
MP = Motore pompa Moteur pompe Pumpen motor Motor Pump Motor bomba Motor da bomba<br />
M<strong>RE</strong> = Micro Relé pompa Micro Relé pompe Micro Relé pumpen Pump micro Comtactor Micro Relé bomba Micro Relé bomba<br />
MT = Morsetto di terra Borne du sol Erdklammer Earth connection Conexion de tierra Borne do terra<br />
P = Pressostato Pressostat mecanique Mech. druckwaechter Mechanic pressure Presostato mecanico Interrup. Mec. Pressão<br />
switch<br />
RC = Resistenza caldaia Resistance chaudiere Kesselheizung Boiler Heating Resist. Resist. Caldera Resistência da caldeira<br />
RP = Relé pompa Relé pompe Relé pumpen Pump contactor Relé bomba Relé bomba<br />
RR = Relè macanza acqua Relé manque d’eau Relé Kein Wasser Water shortage relè Relé falte de agua Relé falta de água<br />
RS = Resistenza scaldatazze Resistance chauffe Tassen warmerheizung Cups Heating Resist. Calienta tazas Resistência aquec.<br />
tasse Resistance xícaras<br />
SA = Scheda autolivello Carte autoniveau Wasserstandkarte Autolevel board Ficha de autonivel Placa auto nível<br />
SL = Sonda Livello Sonde niveau Standfühler Level feeler Sonda nivel Sonda nível<br />
SP = Sensore di pressione Capteur de pression Drucksensor Autolevel board Detector de presión Sensor de pressão<br />
ST = Sonda temperatura Sonde Temperature Temperatur Sonde Temperature Probe Sonda de temp. Sonda temperatura<br />
STS = Sonda temp.TS/TSC Sonde Temperature Temperatur Sonde Temperature Probe Sonda de temp. Sonda temperatura<br />
TS/TSC TS/TSC TS/TSC TS/TSC TS/TSC<br />
TA = Tasto acqua Touche eau Wassertaste Key water Tecla agua Tecla água<br />
TF = Tastiera funzioni/servizi Clavier function/service Funktion/Dienst druck Function/service Botonera/Funciòn/ Teclado funções/<br />
keyboard servicio serviços<br />
TG = Tastiera gruppo Clavier groupe Gruppedruckknoepfe Group Keyboard Botonera grupo Teclado grupo<br />
TM = Trasformatore transformateur Transformator Transformer Transformador Trasformador<br />
TP = Tastiera programmazione Clavier de programmation Programmiertastatur Program Keyboard Botonera programación Teclado programação<br />
TR(SR) =Teleruttore Télérupteur Fernschalter Transformer Telerruptor Contador<br />
TS = Termostato di sicurezza Thermostat de sécurité Sicherheitsdruckwächter Safety thermostat Termóstato de seguridad Termostato de segurança<br />
TTSC = Tastiera TSC Clavier TSC Tastatur TSC TSC keyboard Botonera TSC Teclado TSC<br />
VP = Pompa a vibrazione Pompe à vibration Vibrationspumpe Vibration pump Bomba de vibración Bomba com vibração<br />
Ar = Arancio Orange Orange-farbig Orange Naranja Laranja<br />
B = Blu Bleu Blau Blue Azul Azul<br />
Bi = Bianco Blanc Weiss White Blanco Branco<br />
BiB = Bianco-Blu Blanc-Bleu Weiss-Blau White-Blue Blanco-Azul Branco-Azul<br />
BiN = Bianco-Nero Blanc-Noir Weiss- Braun White-Black Blanco-Negro Branco-Preto<br />
G = Giallo Jaune Gelb Yellow Amarillo Amarelo<br />
GV = Giallo-Verde Jaune-vert Gelb-gruen Yellow-green Amarillo-verde Amarelo-Verde<br />
Gr = Grigio Gris Grau Grey Gris Cinza<br />
M = Marrone Marron Braun Brown Marron Marrom<br />
N = Nero Noir Schwarz Black Negro Preto<br />
R = Rosso Rouge Rot Red Rojo Vermelho<br />
Ro = Rosa Rose Rosa Rose Rosado Rosa<br />
V = Verde Vert Gruen Green Verde Verde<br />
Vi = Viola Violette Violett Violet Morado Roxo<br />
126
MT<br />
L3<br />
L2<br />
L1<br />
N<br />
M1<br />
TR<br />
P<br />
M<br />
N<br />
N<br />
x<br />
M<br />
N<br />
M<br />
N<br />
x<br />
R<br />
R<br />
R<br />
x<br />
B<br />
B<br />
B<br />
M<strong>RE</strong>1<br />
M<strong>RE</strong>2<br />
TF<br />
5 2<br />
RS<br />
IG<br />
4<br />
1<br />
5 2<br />
IR<br />
4<br />
1<br />
EA EE<br />
EE<br />
TS<br />
TR<br />
<strong>RE</strong>V. DESCRIZIONE DATA FIRMA N° CTI<br />
Viale della Repubblica 40<br />
20010 Villastanza di Parabiago-Mi-Italia<br />
Tel +39 0331 408200<br />
Fax +39 0331 551437<br />
www.rancilio.com info@rancilio.it<br />
RC<br />
GV<br />
M<strong>RE</strong>3<br />
M<strong>RE</strong>4<br />
MC<br />
MC<br />
M<br />
GV<br />
MP<br />
LC<br />
EC<br />
PROGETTO:<br />
CLASSE 10<br />
SCHEMA<br />
ELETTRICO<br />
DENOMINAZIONE:<br />
VERS. <strong>RE</strong> 346V+415V/3N~ 200V+240V<br />
VERS. 2007<br />
CODICE:<br />
SE_1339<br />
SL<br />
N<br />
B<br />
F<br />
N<br />
1<br />
2<br />
GV<br />
SR<br />
4<br />
RO<br />
N<br />
R<br />
AR<br />
SL<br />
C<br />
N.O.<br />
N.O.<br />
6<br />
7<br />
8<br />
9<br />
CA<br />
Diffusione e riproduzione<br />
vietata a termini di legge<br />
senza nostra autorizzazione.<br />
Data:<br />
07/11/07<br />
Firma:<br />
Formato:<br />
U.T.<br />
A4<br />
127
MT<br />
L3<br />
L2<br />
L1<br />
N<br />
M1<br />
M<br />
N<br />
N<br />
x<br />
M<br />
N<br />
TR<br />
P<br />
RC<br />
M<br />
GV<br />
N<br />
x<br />
R<br />
R<br />
R<br />
x<br />
B<br />
B<br />
B<br />
TG1<br />
TG2<br />
TG3<br />
TG4<br />
TF<br />
MC<br />
EG1 EG2 EG3 EG4<br />
MC<br />
IG<br />
5 2<br />
4 1<br />
5 2<br />
RS<br />
M<br />
MP<br />
GV<br />
IR<br />
4 1<br />
LC<br />
EA EE EE<br />
EC<br />
TS<br />
TR<br />
PROGETTO:<br />
CLASSE 10<br />
SCHEMA<br />
ELETTRICO<br />
<strong>RE</strong>V. DESCRIZIONE DATA FIRMA N° CTI<br />
Viale della Repubblica 40<br />
20010 Villastanza di Parabiago-Mi-Italia<br />
Tel +39 0331 408200<br />
Fax +39 0331 551437<br />
www.rancilio.com info@rancilio.it<br />
DENOMINAZIONE:<br />
VERS. S 346V+415V/3N~ 200V+240V<br />
VERS. 2007<br />
CODICE:<br />
SE_1340<br />
SL<br />
N<br />
B<br />
F<br />
N<br />
1<br />
2<br />
GV<br />
SR<br />
4<br />
RO<br />
N<br />
R<br />
AR<br />
SL<br />
C<br />
N.O.<br />
N.O.<br />
6<br />
7<br />
8<br />
9<br />
CA<br />
Diffusione e riproduzione<br />
vietata a termini di legge<br />
senza nostra autorizzazione.<br />
Data:<br />
07/11/07<br />
Firma:<br />
Formato:<br />
U.T.<br />
A4<br />
128
L3<br />
L2<br />
L1<br />
N<br />
MT<br />
M1<br />
TR<br />
M M<br />
N<br />
N<br />
R<br />
N<br />
R<br />
B<br />
J8<br />
J4<br />
J5<br />
B<br />
B<br />
GV<br />
B<br />
N<br />
J9<br />
F2<br />
J7<br />
J6<br />
PE2<br />
PE1<br />
F3<br />
F5 F4<br />
POWER<br />
J1<br />
J10<br />
TM<br />
5 2<br />
4<br />
1<br />
B N<br />
IG IR<br />
5<br />
2<br />
4 1<br />
TS<br />
TR<br />
EAR EV EG1 EG2 EG3<br />
EG4<br />
CV1 CV2 CV3 CV4<br />
TF<br />
J4<br />
J8<br />
J9<br />
J1<br />
J2<br />
J5<br />
J6<br />
J3<br />
TG1<br />
J4<br />
J8<br />
J9<br />
J1<br />
J2<br />
J5<br />
J6<br />
J3<br />
TG2<br />
J4<br />
J8<br />
J9<br />
J1<br />
J2<br />
J5<br />
J6<br />
J3<br />
TG3<br />
J4<br />
J8<br />
J9<br />
J1<br />
J2<br />
J5<br />
J6<br />
J3<br />
TG4<br />
J4<br />
J8<br />
J9<br />
J1<br />
J2<br />
J5<br />
J6<br />
J3<br />
J5<br />
J4<br />
DISPLAY<br />
VE<br />
Viale della Repubblica 40<br />
20010 Villastanza di Parabiago-Mi-Italia<br />
Tel +39 0331 408200<br />
Fax +39 0331 551437<br />
www.rancilio.com info@rancilio.it<br />
RC<br />
RS<br />
MP<br />
M<br />
J14<br />
<strong>USB</strong><br />
J15<br />
J13<br />
EA<br />
EF<br />
CPU<br />
J3<br />
J2<br />
J1<br />
J5<br />
J7<br />
J6<br />
J8<br />
J12<br />
J4<br />
J9<br />
EH<br />
J11<br />
EC<br />
PROGETTO:<br />
CLASSE 10<br />
SCHEMA<br />
ELETTRICO<br />
DENOMINAZIONE:<br />
VERS. <strong>USB</strong> 346V+415V/3N~ 200V+240V<br />
CODICE:<br />
SE_1341<br />
TiS<br />
SP<br />
STS<br />
LEV_DIFF 1.0<br />
SA<br />
J1<br />
TP<br />
Diffusione e riproduzione<br />
vietata a termini di legge<br />
senza nostra autorizzazione.<br />
Data:<br />
07/11/07<br />
Firma:<br />
Formato:<br />
U.T.<br />
A4<br />
-<br />
+<br />
-<br />
+<br />
-<br />
+<br />
-<br />
+<br />
I<br />
D<br />
S<br />
129
COLLEGAMENTO ELETTRICO<br />
BRANCHEMENT ELECTRIQUE<br />
STROMANSCHLUSS<br />
ELECTRONIC CONNECTION<br />
CONEXION ELECTRICA<br />
LIGAÇÃO ELÉTRICA<br />
R S T N<br />
L3 L2 L1 N<br />
M N GR B<br />
GV<br />
400 V / 3N~<br />
COLLEGAMENTO TRIFASE A STELLA CON NEUTRO<br />
BRANCHEMENT TRIPHASE EN ETOILE AVEC NEUT<strong>RE</strong><br />
D<strong>RE</strong>IPHASIGER STERN ANSCHLUSS MIT MITTELEITER<br />
TH<strong>RE</strong>E-PHASE STAR CONNECTION WITH NEUTRAL<br />
CONEXION TRIFASICA A EST<strong>RE</strong>LLA CON NEUTRO<br />
LIGAÇÃO TRIFÁSICA EM FORMA DE EST<strong>RE</strong>LA, COM NEUTRA<br />
2 GR. H07RN-F 5x2,5 mm2<br />
3 / 4 GR. H07RN-F 5x4 mm2<br />
L<br />
N<br />
L3 L2 L1 N<br />
M<br />
B<br />
GV<br />
230 V~<br />
COLLEGAMENTO MONOFASE<br />
BRANCHEMENT MONOPHASE<br />
EINPHASINGER ANSCHLUSS<br />
SINGLE-PHASE CONNECTION<br />
CONEXION MONOFASICA<br />
LIGAÇÃO MONOFÁSICA<br />
2 GR. H07RN-F 3x2,5 mm2<br />
3 / 4 GR. H07RN-F 3x4 mm2<br />
L<br />
N<br />
L3 L2 L1 N<br />
N<br />
BI<br />
V-GV<br />
2 GR. 120V~ 1 / 2 / 3 / 4 GR. 220V~<br />
PONTICELLI FORNITI IN DOTAZIONE<br />
JUMPERS A<strong>RE</strong> WITH THE SUPPLIED<br />
ZUSATZBRUCKEN SIND IN AUSSTATTUNG<br />
PONTETS INSE<strong>RE</strong>S DANS LA DOTATION<br />
PUENTES ESTAN INCLUIDOS EN EL MATERIAL DE DOTACION<br />
PONTINHAS FORNECIDAS<br />
IL CONDUTTO<strong>RE</strong> DI TERRA (GV) DEVE ESSE<strong>RE</strong> PIU' LUNGO DI 9 cm RISPETTO AI RIMANENTI<br />
THE EARTH CONDUCTOR (GV) MUST BE LONGER THAN THE OTHERS OF 9 cm<br />
DER ERD STROMLEITER MUSS LAENGER ALS 9 cm IN BEZUG AUF DEN <strong>RE</strong>STLICHEN STROMLEITER SEIN<br />
LE CONDUCTEUR DE TER<strong>RE</strong> DOIT ET<strong>RE</strong> PLUS LONG DE 9 cm PAR RAPPORT A LES AUT<strong>RE</strong>S<br />
LA LONGITUD DE LA TOMA DE TIERRA TIEN ESSER SUPERIOR A 9 cm <strong>RE</strong>SPECTO AL <strong>RE</strong>STO<br />
O FIO TERRA (GV) DEVE SER 9 cm MAIS COMPRIDO DO QUE OS <strong>RE</strong>STANTES<br />
M = MARRONE MARRON BRAUN BROWN MARRON MARROM<br />
N = NERO NOIR SCHWARZ BLACK NEGRO P<strong>RE</strong>TO<br />
B = BLU BLEU BLAU BLUE AZUL AZUL<br />
BI = BIANCO BLANC WEISS WHITE BLANCO BRANCO<br />
V = VERDE VERT GRUEN G<strong>RE</strong>EN VERDE VERDE<br />
GV = GIALLO-VERDE JAUNE-VERT GELB-GRUEN YELLOW-G<strong>RE</strong>EN AMARILLO-VERDE AMA<strong>RE</strong>LO-VERDE<br />
BIN = BIANCO-NERO BLANC-NOIR WEISS-SCHWARZ WHITE-BLACK BLANCO-NEGRO BRANCO-P<strong>RE</strong>TO<br />
BIB = BIANCO-BLU BLANC-BLEU WEISS-BLAU WHITE-BLUE BLANCO-AZUL BRANCO-AZUL<br />
VI = VIOLA VIOLET VIOLET VIOLETT VIOLETA ROXO<br />
R = ROSSO ROUGE ROT <strong>RE</strong>D ROJO VERMELHO<br />
130
200-240 3V~ mod. <strong>USB</strong><br />
COLLEGAMENTO-RACCORDEMENT-VERBINDUNG-CONNECTION-CONEXIÓN-LIGAÇÃO<br />
1) Das Versorgungskabel anbringen, wie es auf der<br />
Abbildung angegeben ist.<br />
2) Die Verbindung der Widerstände von Verbinder<br />
3VN~ auf Verbinder 3V~ auf der Leistungskarte<br />
umstecken.<br />
1) Collegare il cavo alimentazione come indicato in<br />
figura.<br />
2) Spostare il collegamento delle resistenze dal connettore<br />
siglato 3VN~ in quello 3V~ sulla scheda di<br />
potenza<br />
1) Raccorder le câble d’alimentation comme indiqué<br />
dans la figure.<br />
2) Déplacer le raccordement des résistances du<br />
connecteur avec sigle 3VN~ dans celui 3V~ sur la<br />
carte de puissance<br />
1)Connect cable as shown in the picture.<br />
2) On the power board, move resistance connection<br />
from connector marked 3VN~ to connector marked<br />
3V~<br />
1) Conectar el cable de alimentación como se ilustra<br />
en la figura.<br />
2) Cambiar la conexión de las resistencias del conector<br />
con la sigla 3VN~ a 3V~ en la tarjeta de potencia.<br />
1) Ligar o fio de alimentação como indicado na figura.<br />
2) Transferir a ligação das resistências do conector<br />
siglado 3VN~ para àquele 3V~ na placa de potência.<br />
200-240 3V~ mod. S<br />
COLLEGAMENTO-RACCORDEMENT-VERBINDUNG-CONNECTION-CONEXIÓN-LIGAÇÃO<br />
1) Raccorder le câble d’alimentation comme indiqué<br />
dans la figure.<br />
2) Débrancher les câbles bleus (neutres) de la résistance<br />
électrique et les isoler.<br />
3) Raccorder la résistance électrique de la chaudière<br />
selon le schéma reporté ci-dessus.<br />
1) Collegare il cavo alimentazione come indicato in<br />
figura.<br />
2) Scollegare i cavi azzurri (neutri) dalla resistenza<br />
elettrica ed isolarli.<br />
1) Das Versorgungskabel anbringen, wie es auf der<br />
Abbildung angegeben ist.<br />
2) Die blauen Kabel (Nullleiter) vom elektrischen<br />
Widerstand abtrennen und isolieren.<br />
3)Den elektrischen Widerstand des Kessels anschließen,<br />
wie es weiter oben abgebildet ist.<br />
1)Connect cable as shown in the picture.<br />
2) Disconnect the light blue cables (neutral) from<br />
electric resistance and insulate them.<br />
3) Connect boiler electric resistance according to the<br />
diagram below.<br />
1) Conectar el cable de alimentación como se ilustra<br />
en la figura.<br />
2) Desconectar los cables azules (neutros) de la resistencia<br />
eléctrica e aislarlos.<br />
3) Conectar la resistencia eléctrica de la caldera según<br />
el esquema que se ilustra arriba.<br />
3) Collegare la resistenza elettrica della caldaia secondo<br />
lo schema sopra riportato.<br />
1) Ligar o fio de alimentação como indicado na figura<br />
2) Desligar os fios azuis (neutros) da resistência<br />
elétrica e isolá-los<br />
3) Ligar a resistência elétrica da caldeira, segundo o<br />
esquema acima.<br />
131
SCHEMI IDRAULICI<br />
SCHÉMAS HYDRAULIQUES<br />
HYDRAULIKPLÄNE<br />
HYDRAULIC DIAGRAMS<br />
ESQUEMAS HIDRÁULICOS<br />
ESQUEMA HIDRÁULICO<br />
IT FR DE EN ES PT<br />
AD = Addolcitore Adoucisseur Wasserenthärter Softener Eliminador de caliza Descalcificador<br />
CA = Centralina autolivello Controle de niveau Wasserniveaukontrolle Water level control Transd. autonivel Central auto nível<br />
de l’eau<br />
CL = Caldaia Chaudière Kessel Boiler Caldera Caldeira<br />
CV = Contatore volumetrico Compteur volumetrique Volumenzaehler Flow Meter Contador volum. Contador volumétrico<br />
EA = Elettrovalvola acqua Electrovanne eau Wasserelektroventil Water electrovelve Electrovalvula agua Válvula Elétrica da água<br />
EAR = Elettrovalvola aria Electrovanne air Luftelektroventil Air electrovalve Electrovalvula aire Válvula Elétrica do ar<br />
EC = Elettrovalvola carico Electr. de chargement Speisungselektroventil Feeding electrovalve Electrovalv. carga V á l v u l a E l é t r i c a<br />
abast.<br />
EE = Miscelatore Mélangeur Mixer Mixer Mezclador Misturador<br />
EG = Elettrovalvola gruppo Electr. du groupe Gruppeelektroventil Group Electrovalve Electrovalvula grupo Válvula Elétrica grupo<br />
ES = Valvola di espansione valve d’expansion Expansionsventil exspansion valve Válvula de expansión Válvula de expansão<br />
EV = Elettrovalvola vapore Electrovanne vapeur Dampfelektroventil Steam valve Electrovalvula vapor Válvula Elétrica vapor<br />
GR = Gruppo erogatore Groupe de distribution Brühgruppe Group Grupo erogador Grupo distribuidor<br />
IL = Indicatore livello Indicateur de niveau Pegelanzeiger Level indicator Indicador de nivel Indicador do nível<br />
LC = Lampada livello Lampe niveau Lampe für Wasserstand Level lamp Lámpara de nivel Lâmpada do nível<br />
MA = Manometro Manomètre Manometer Manometer Manómetro Manômetro<br />
MA1 = Manometro Pompa Manomètre pompe Manometer Pumpe Manometer pump Manómetro bomba Manômetro Bomba<br />
MA2 = Manometro Caldaia Manomètre chaudière Manometer Kessel Manometer boiler Manómetro caldera Manômetro Caldeira<br />
P = Pressostato Pressostat mecanique Mech. druckwaechter Mechanic pressure Presostato mecanico Interrup. Mec. Pressão<br />
switch<br />
PV = Pompa volumetrica pompe volumétrique Volumetrische Pumpe Volumetric pump Bomba volumétrica Bomba volumétrica<br />
RA = Rubinetto Acqua Robinet eau Wasserhahn Water tap Grifo de agua Torneira Água<br />
RL = Rubinetto Carico Robinet d’arrivée Auffüllhahn Inlet water tap Grifo de carga Torneira Abastecimento<br />
RV = Rubinetto Vapore Robinet vapeur Dampfhahn Steam tap Grifo de vapor Torneira Vapor<br />
S = Serbatoio Réservoir Behälter Tank Depósito Reservatório<br />
SA = Scheda autolivello Fiche autoniveau Wasserstandkarte Autolevel board Ficha de autonivel Placa auto nível<br />
SC = Scambiatore di calore Échangeur de chaleur Wärmaustauscher Heat-exchanger Intercambiador de calor Intercambiador de calor<br />
SL = Sonda Livello Sonde niveau Standfühler Level feeler Sonda nivel Placa Nível<br />
SP = Sensore di pressione Capteur de pression Drucksensor Pressure sensor Detector de presión Sensor de pressão<br />
ST = Sonda temperatura Sonde Temperature Temperatur Sonde Temperature Probe Sonda de temp. Sonda temperatura<br />
VA = Valvola antidepressione Vanne antidépression Unterdruckventil Antivacuum valve Válvula antidepresión Válvula anti depressão<br />
VB = Valvola bypass Vanne bypass Bypass ventil Bypass valve Válvula bypass Válvula bypass<br />
VP = Pompa a vibrazione Pompe à vibration Vibrationspumpe Vibration pump Bomba de vibración Bomba com vibração<br />
VR = Valvola di ritegno Valve de retenue Rückschlagventil Check-valve Válvula de retención Válvula de retenção<br />
VS = Valvola di sicurezza Clapet de sûreté Sicherheitsventil Safety valve Válvula de seguridad Válvula de segurança<br />
132
EA<br />
RV<br />
RV<br />
IL<br />
EH EF<br />
VS<br />
SL<br />
SC<br />
CL<br />
SC<br />
GR GR<br />
PV<br />
Viale della Repubblica 40<br />
20010 Villastanza di Parabiago-Mi-Italia<br />
Tel +39 0331 408200<br />
Fax +39 0331 551437<br />
www.rancilio.com info@rancilio.it<br />
VA<br />
MA1<br />
MA2<br />
VR<br />
ES<br />
PROGETTO:<br />
CLASSE 10<br />
DENOMINAZIONE:<br />
VERS. S/<strong>RE</strong> 2 GR.<br />
CODICE:<br />
SI_C10_S/<strong>RE</strong><br />
P<br />
PA<br />
SCHEMA<br />
IDRAULICO<br />
EC<br />
Diffusione e riproduzione<br />
vietata a termini di legge<br />
senza nostra autorizzazione.<br />
Data:<br />
13/11/07<br />
Firma:<br />
Formato:<br />
U.T.<br />
A4<br />
133
EA<br />
RV<br />
iSTEAM<br />
EV<br />
RV<br />
BV<br />
IL<br />
SA<br />
IL<br />
EAR<br />
SA<br />
EH EF<br />
VS<br />
SC SC<br />
CL<br />
CV<br />
GR GR<br />
PV<br />
Viale della Repubblica 40<br />
20010 Villastanza di Parabiago-Mi-Italia<br />
Tel +39 0331 408200<br />
Fax +39 0331 551437<br />
www.rancilio.com info@rancilio.it<br />
SP<br />
VA<br />
MA1<br />
MA2<br />
CV<br />
VR<br />
ES<br />
PA<br />
PROGETTO:<br />
CLASSE 10<br />
SCHEMA<br />
IDRAULICO<br />
DENOMINAZIONE:<br />
VERS. <strong>USB</strong> - iSTEAM 2 GR.<br />
CODICE:<br />
SI_C10_<strong>USB</strong>_iSTEAM<br />
EC<br />
Diffusione e riproduzione<br />
vietata a termini di legge<br />
senza nostra autorizzazione.<br />
Data:<br />
13/11/07<br />
Firma:<br />
Formato:<br />
U.T.<br />
A4<br />
134
ITALY<br />
Rancilio Macchine per caffè S.p.A.<br />
Viale della Repubblica 40<br />
20010 Villastanza di Parabiago<br />
Milano Italy<br />
Tel +39 0331 408200<br />
Fax +39 0331 551437<br />
www.rancilio.it<br />
info@rancilio.it<br />
SPAIN<br />
Rancilio Espana, s.a.<br />
Gran Vía de Carlos III, 84 3ª<br />
Edificio Trade<br />
08028 Barcelona Spain<br />
Tel. +34 902 884 275<br />
Tel. +34 934 923 414<br />
Fax +34 93 496 57 01<br />
www.rancilio.com<br />
info@rancilio.es<br />
USA<br />
Rancilio North America Inc.<br />
8102 S.Lemont Rd. #1200<br />
Woodridge, IL 60517 USA<br />
Tel +1 630 427 1703<br />
Fax +1 630 427 1713<br />
www.rancilio.com<br />
info@rancilio-na.com<br />
ASIA<br />
Asian Market Access HK Ltd<br />
601 Tak Woo House<br />
17-19 D’aguilar Street Central<br />
Hong Kong<br />
Tel +852 2521 7839<br />
Fax +852 2521 5787<br />
www.rancilio.com
www.rancilio.com<br />
Cod. 46900146 <strong>RE</strong>V. -- 03/2008