Maxtor Shared Storage II User's Guide, English - Seagate
Maxtor Shared Storage II User's Guide, English - Seagate
Maxtor Shared Storage II User's Guide, English - Seagate

Create successful ePaper yourself
Turn your PDF publications into a flip-book with our unique Google optimized e-Paper software.
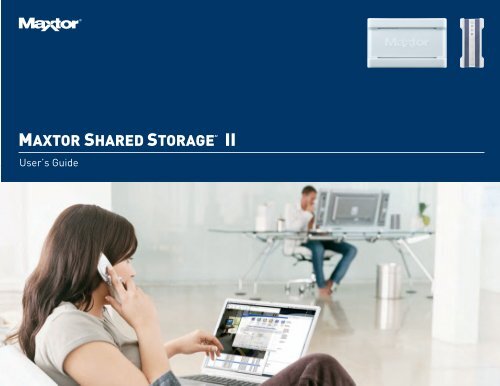
MAXTOR SHARED STORAGE “ <strong>II</strong><br />
User’s <strong>Guide</strong>
MAXTOR SHARED STORAGE <strong>II</strong> USER’S GUIDE<br />
Contents<br />
Windows Installation<br />
Introduction . . . . . . . . . . . . . . . . . . . . . . . . 1<br />
About this <strong>Guide</strong>. . . . . . . . . . . . . . . . . . . . 1<br />
Components. . . . . . . . . . . . . . . . . . . . . . . 1<br />
Included in Package . . . . . . . . . . . . . . . . 2<br />
System Requirements. . . . . . . . . . . . . . . 2<br />
Handling Precautions . . . . . . . . . . . . . . . 2<br />
<strong>Maxtor</strong> Product Support . . . . . . . . . . . . . 2<br />
Installing the <strong>Shared</strong> <strong>Storage</strong> <strong>II</strong> . . . 3<br />
Step 1 - Connect the Drive . . . . . . . . . . . .3<br />
Step 2 - Power up the Drive . . . . . . . . . . .4<br />
Step 3 - Setup the Drive . . . . . . . . . . . . . .5<br />
Using the <strong>Shared</strong> <strong>Storage</strong> <strong>II</strong> . . . . . . . .6<br />
Using EasyManage . . . . . . . . . . . . . . . . . 6<br />
SimpleView . . . . . . . . . . . . . . . . . . . . . . 6<br />
Create User Account . . . . . . . . . . . . . . . . 7<br />
Settings. . . . . . . . . . . . . . . . . . . . . . . . . . 10<br />
Backup . . . . . . . . . . . . . . . . . . . . . . . . . . 12<br />
Backup File Management . . . . . . . . . . . 12<br />
Restore . . . . . . . . . . . . . . . . . . . . . . . . . . 14<br />
OneTouch Status Icons . . . . . . . . . . . . . .15<br />
Using Media Server . . . . . . . . . . . . . . . . .16<br />
Storing Audio . . . . . . . . . . . . . . . . . . . . . 17<br />
Shutting Down Your <strong>Shared</strong> <strong>Storage</strong> <strong>II</strong> 17<br />
Resetting Your <strong>Shared</strong> <strong>Storage</strong> <strong>II</strong> . . . . 17<br />
Security Lock . . . . . . . . . . . . . . . . . . . . . 18<br />
Media Serving . . . . . . . . . . . . . . . . . . . . .18<br />
Macintosh Installation<br />
Introduction. . . . . . . . . . . . . . . . . . . . . . . . 20<br />
About this <strong>Guide</strong> . . . . . . . . . . . . . . . . . . . 20<br />
Components . . . . . . . . . . . . . . . . . . . . . . 20<br />
Included in Package . . . . . . . . . . . . . . . . 21<br />
System Requirements . . . . . . . . . . . . . . 21<br />
Handling Precautions. . . . . . . . . . . . . . . 21<br />
<strong>Maxtor</strong> Product Support . . . . . . . . . . . . 21<br />
Installing the <strong>Shared</strong> <strong>Storage</strong> <strong>II</strong>. . . 22<br />
Step 1 - Connect the Drive. . . . . . . . . . . 22<br />
Step 2 - Power up the Drive. . . . . . . . . . 23<br />
Step 3 - Setup the Drive. . . . . . . . . . . . . 24<br />
Using the <strong>Shared</strong> <strong>Storage</strong> <strong>II</strong> . . . . . . 25<br />
Using EasyManage . . . . . . . . . . . . . . . . . 25<br />
Create and Use <strong>Shared</strong> Folders . . . . . . 25<br />
Creating <strong>Shared</strong> Folders . . . . . . . . . . . . 25<br />
Drag and Sort . . . . . . . . . . . . . . . . . . . 28<br />
Backup Settings . . . . . . . . . . . . . . . . . . . 29<br />
Editing Backup Settings. . . . . . . . . . . . . 30<br />
Advanced Settings . . . . . . . . . . . . . . . . . 30<br />
SimpleView <strong>Storage</strong> and Backup. . . . 33<br />
Using Media Server . . . . . . . . . . . . . . . . 33<br />
Storing Audio . . . . . . . . . . . . . . . . . . . . . 34<br />
Shutting Down Your <strong>Shared</strong> <strong>Storage</strong> <strong>II</strong> . 34<br />
Resetting Your <strong>Shared</strong> <strong>Storage</strong> <strong>II</strong> . . . . . 34<br />
Security Lock . . . . . . . . . . . . . . . . . . . . . 35<br />
Media Serving . . . . . . . . . . . . . . . . . . . . . 35<br />
Web User Interface<br />
Accessing the Web UI . . . . . . . . . . . . . . 37<br />
Run Set-up Wizard . . . . . . . . . . . . . . . . 38<br />
Accounts Management . . . . . . . . . . . . . 39<br />
<strong>Shared</strong> Folders Management. . . . . . . . 41<br />
Manage Digital Photos, Music, Video. . 43<br />
<strong>Shared</strong> Folder Backup . . . . . . . . . . . . . 43<br />
Advanced Settings . . . . . . . . . . . . . . . . . . 45<br />
Network Settings. . . . . . . . . . . . . . . . . . . 46<br />
System Maintenance. . . . . . . . . . . . . . . . 47<br />
Configure Your USB Devices . . . . . . . . 48<br />
System Status . . . . . . . . . . . . . . . . . . . . 49<br />
Using External USB Drives. . . . . . . . . . 50<br />
Using USB Printers . . . . . . . . . . . . . . . . 50<br />
© 2006 <strong>Maxtor</strong> Corporation. All rights reserved. Changes are periodically made to the information herein which will be incorporated in revised editions of this publication. <strong>Maxtor</strong> may make changes or improvements to the product(s)<br />
described in this publication at any time and without notice. <strong>Maxtor</strong> is a registered trademark of <strong>Maxtor</strong> Corporation. All other brands or products are trademarks or registered trademarks of their respective holders. <strong>Maxtor</strong><br />
Corporation, 500 McCarthy Blvd., Milpitas, California 95035 USA
MAXTOR SHARED STORAGE <strong>II</strong> WINDOWS INSTALLATION<br />
Introduction<br />
Thank you for selecting the <strong>Maxtor</strong> <strong>Shared</strong> <strong>Storage</strong> <strong>II</strong> Drive.<br />
Connecting this storage solution to your network in a home or<br />
small office is a simple and economical way for users to<br />
share and backup files. Your new <strong>Maxtor</strong> <strong>Shared</strong> <strong>Storage</strong> <strong>II</strong><br />
drive offers a winning combination of capacity, simplicity of<br />
use and helpful software features that automate configuration,<br />
privacy and more. The simple installation allows you to<br />
start using your drive as quickly as possible. You can also<br />
change settings on your drive at any time, and manage user<br />
access through web browsers.<br />
<strong>Shared</strong> <strong>Storage</strong> <strong>II</strong> Features<br />
Instantly add storage to your network, back up files across<br />
every compatible computer on your network, and stream<br />
music, videos and photos from your drive to your home<br />
entertainment system.<br />
About this <strong>Guide</strong><br />
The following symbols and conventions are used in this guide:<br />
Bold<br />
Italics<br />
Used for menu, command, and keyboard selections you make and<br />
screens you will see.<br />
Used for emphasis and to identify new terms.<br />
Components<br />
Before installing, review the solution features in Figure 1.<br />
FIGURE 1 SOLUTION FEATURES<br />
1. Status Lights<br />
2. Power Switch<br />
3. Power Connector<br />
4. USB 2.0 Ports<br />
5. Ethernet Port<br />
6. Security Lock<br />
Simple Installation and Setup<br />
– Automatically configure the drive to your network<br />
– Manage the drive using our simple user interface<br />
– Connect and share additional hard drives using the<br />
drive’s 2 USB ports<br />
– Easily store and share access to files, photos, music<br />
and videos<br />
–Organize files automatically using Drag and Sort<br />
– Give users full access to public folders, while keeping<br />
others private<br />
– Get backup and storage status for all users with<br />
SimpleView<br />
– Back up user files/folders to an external USB drive<br />
–Protect data on all of your networked PCs using<br />
<strong>Maxtor</strong> ® Backup<br />
– Playback of Videos, Music and Photos<br />
– Use our media streaming feature to play digital photos,<br />
music and video on a networked home entertainment<br />
system - even without turning on your computer<br />
– Connect automatically through a UPnP AV<br />
compatible digital media adapter<br />
PAGE 1
Logiciel d’installation, Installationssoftware,<br />
Software di installazione, Installationsprogram,<br />
Software de instalación, Installatiesoftware,<br />
Asennusohjelma, Software de Instalação,<br />
Includes:<br />
– <strong>Maxtor</strong> EasyManage <br />
Software<br />
– <strong>Maxtor</strong> Backup Software<br />
– <strong>Maxtor</strong> <strong>Shared</strong> <strong>Storage</strong> <strong>II</strong><br />
User <strong>Guide</strong> (<strong>English</strong>)<br />
WINDOWS MACINTOSH<br />
<strong>English</strong> <strong>English</strong><br />
Français Français<br />
Deutsch Deutsch<br />
Español<br />
Italiano<br />
© 2006 <strong>Maxtor</strong> Corporation and its Licensors. <strong>Maxtor</strong> and the stylized<br />
<strong>Maxtor</strong> logo are registered trademarks,and <strong>Maxtor</strong> <strong>Shared</strong> <strong>Storage</strong>,<br />
<strong>Maxtor</strong> EasyManage, and <strong>Maxtor</strong> Backup are trademarks of<br />
<strong>Maxtor</strong> Corporation. U.S. patents 5,150,473 and 5,966,730.<br />
Other patents pending. Other trademarks are the property<br />
of their respective holders. All rights reserved.<br />
06/06 PN: 20337500<br />
MAXTOR SHARED STORAGE <strong>II</strong> WINDOWS INSTALLATION<br />
FIGURE 2 INCLUDED IN PACKAGE<br />
1. Backup Solution<br />
2. Power Adapter<br />
3. Ethernet Cable<br />
4. EasyManage CD<br />
Handling Precautions<br />
Please handle your new <strong>Maxtor</strong> <strong>Shared</strong> <strong>Storage</strong> <strong>II</strong> with care!<br />
Follow the precautions listed here or you could damage your<br />
drive and void the product warranty. Review the <strong>Maxtor</strong> Limited<br />
Warranty for more information.<br />
Follow these precautions to prevent data loss<br />
– Do not bump, move or drop the drive while in operation.<br />
Installation Software<br />
<strong>Maxtor</strong> <strong>Shared</strong> <strong>Storage</strong> <strong>II</strong><br />
– Do not remove the interface cable or power cord<br />
without first disconnecting the drive properly through<br />
the operating system.<br />
– Do not set any liquids or drinks on or near the drive.<br />
Liquids will damage the internal electronics.<br />
– Do not open the drive enclosure. This can cause loss of<br />
data and will void the product warranty.<br />
System Requirements<br />
– Wired or wireless router with an available<br />
10/100/1000 Ethernet port<br />
–Pentium <strong>II</strong>I, 500 Mhz equivalent processor or higher<br />
– Windows ® 2000 Professional, XP Professional, or<br />
Media Center<br />
– 256MB RAM (512MB recommended) or more as<br />
required by operating system<br />
– Internet connection (for system updates)<br />
– Internet Explorer 6.0 or higher<br />
(for management interface of <strong>Shared</strong> <strong>Storage</strong> <strong>II</strong>)<br />
– UPnP certified Digital Media Adapter<br />
(if using Media Serving)<br />
– CD-ROM/DVD-ROM drive<br />
<strong>Maxtor</strong> Product Support<br />
<strong>Maxtor</strong> Corporation provides a comprehensive product<br />
support section on its web site, including the latest software<br />
drivers, product specifications, a complete troubleshooting<br />
section, and the <strong>Maxtor</strong> Knowledge Base.<br />
<strong>Maxtor</strong> USA Support<br />
Visit www.maxtorkb.com for the following information:<br />
– Search the Hard Drive Knowledge Base<br />
We store all resolved problems and FAQ’s in our<br />
knowledge base. Search by product, category,<br />
keywords, or phrases.<br />
– My Stuff<br />
Login to modify or view your FAQ update<br />
notifications or update your personal profile.<br />
– Most Popular Help Topics<br />
Top five most frequently asked questions.<br />
– Software Download<br />
Download installation and diagnostic programs<br />
for your hard drive or external storage device.<br />
<strong>Maxtor</strong> Worldwide Support<br />
Visit www.maxtor.com and click worldwide support or<br />
contact us for product support outside of the USA.<br />
PAGE 2
MAXTOR SHARED STORAGE <strong>II</strong> WINDOWS INSTALLATION<br />
Installing the <strong>Shared</strong> <strong>Storage</strong> <strong>II</strong><br />
Step 1 – Connect the Drive<br />
The <strong>Maxtor</strong> <strong>Shared</strong> <strong>Storage</strong> <strong>II</strong> connects to your computer with<br />
a Cat5 Ethernet cable.<br />
Connecting the Ethernet Cable<br />
1. Plug one end of the Ethernet cable into your network,<br />
router or switch.<br />
2. Plug the other end of the Ethernet cable into the Ethernet<br />
port on your <strong>Shared</strong> <strong>Storage</strong> <strong>II</strong> drive.<br />
Connecting the Power<br />
1. Plug the round female connector from the power adapter<br />
into the drive’s power connector.<br />
2. Plug the female connector on the power cord into the<br />
power adapter.<br />
3. Plug the standard electrical plug from the power adapter<br />
into your power source.<br />
FIGURE 4 CONNECTING THE POWER<br />
3. Once connected, the Ethernet status LED(s) located on<br />
either side of the Ethernet port will illuminate:<br />
– If connected through a 10/100 cable/router – the Green<br />
LED on the left side of the connector will show activity<br />
when the <strong>Shared</strong> <strong>Storage</strong> Drive is powered on. This LED<br />
will also illuminate when connected to a Gigabit cable/<br />
router too.<br />
– If connected through a Gigabit cable/router – the<br />
Amber LED on the right side of the connector will show<br />
activity when the <strong>Shared</strong> <strong>Storage</strong> Drive is powered on.<br />
FIGURE 3 CONNECTING THE ETHERNET CABLE<br />
PAGE 3
MAXTOR SHARED STORAGE <strong>II</strong> WINDOWS INSTALLATION<br />
Step 2 – Power up the Drive<br />
1. Press the round black button on the back panel of your<br />
<strong>Maxtor</strong> <strong>Shared</strong> <strong>Storage</strong> Drive. The green LED (light) with<br />
illuminate in the center of the power button.<br />
Power Button<br />
Activity LED<br />
Ethernet LED<br />
Front Panel LEDs<br />
LED Definition Status<br />
Top Power Activity Illuminated – Power On<br />
Blinking – Drive is either powering up or<br />
shutting down<br />
Not Illuminated – Power Off<br />
Center Hard Disk Activity Illuminated – Power On<br />
Blinking – Data is being transferred to/from the<br />
drive<br />
Not Illuminated – Power Off<br />
Bottom Network Activity Illuminated – Power On<br />
Blinking – Network communication is occurring<br />
Not Illuminated – Power Off<br />
2. Your drive will now start. The startup process can take up<br />
to one minute to complete.<br />
<strong>Shared</strong> <strong>Storage</strong> Drive Power/Status LED Definitions<br />
Various LED activity will appear on your <strong>Shared</strong> <strong>Storage</strong> <strong>II</strong><br />
Drive when power is applied. The following tables define the<br />
meaning/status of each LED on the back and front panels:<br />
Power Activity<br />
Hard Disk Activity<br />
Network Activity<br />
Back Panel LEDs<br />
LED Definition Status<br />
Power LED<br />
(located in<br />
center of the<br />
power button)<br />
Power switch<br />
Illuminated – Power On<br />
Not Illuminated – Power Off<br />
Ethernet LED<br />
(located on<br />
bottom side of<br />
Ethernet<br />
connector)<br />
Shows if the drive is<br />
connected through a 10/100 or<br />
a 1 Gb Ethernet connection.<br />
Left Green – 10/100 Mbps<br />
Ethernet connectivity<br />
Illuminated – Power On<br />
Blinking – Network<br />
communication is occurring<br />
Not Illuminated – Power Off<br />
Activity LED<br />
(located on top<br />
side of Ethernet<br />
connector)<br />
Left Amber – 1 Gbps Ethernet<br />
connectivity<br />
A flashing Activity LED<br />
indicates that the network<br />
connection is functional and<br />
that packets are being<br />
transmitted or received.<br />
PAGE 4
MAXTOR SHARED STORAGE <strong>II</strong> WINDOWS INSTALLATION<br />
Step 3 – Set up the Drive<br />
1. Insert the <strong>Maxtor</strong> <strong>Shared</strong> <strong>Storage</strong> <strong>II</strong> Installation Software<br />
into your CD-ROM drive. The Select Language window will<br />
display.<br />
Note: In the event that the CD does not autorun, click<br />
Start ➔ Run. Browse to the drive letter associated with<br />
the EasyManage CD. Click on Setup, click Open, and then<br />
click OK.<br />
2. The Select Language window opens. Choose your<br />
language (e.g., <strong>English</strong>).<br />
3. From the main menu, click Install Software.<br />
4. You will be asked if you wish to install the software.<br />
Click OK.<br />
5. The License Agreement screen will appear. Click Yes.<br />
6. The Choose Destination Location screen will appear. If<br />
you wish to change the location of the installation, you<br />
may do so by clicking the Browse button and selecting a<br />
new location. Click Next.<br />
7. The Setup Status screen will appear as the software is<br />
installed, followed by the InstallShield Wizard Complete<br />
screen when the installation is complete. Click Finish to<br />
restart your system.<br />
8. After system restart, EasyManage will discover <strong>Shared</strong><br />
<strong>Storage</strong> Drive(s) on you network segment.<br />
Note: In the event that No <strong>Shared</strong> <strong>Storage</strong> Drives were<br />
found, please refer to the Help File for available<br />
troubleshooting tips.<br />
This simply means that you can use EasyManage in<br />
conjunction with these products provided one of the following<br />
software packages is installed:<br />
– <strong>Maxtor</strong> OneTouch <strong>II</strong>I USB 2.0<br />
– <strong>Maxtor</strong> OneTouch <strong>II</strong>I FireWire 400/USB 2.0<br />
– <strong>Maxtor</strong> OneTouch <strong>II</strong>I FireWire 800/FireWire 400/USB 2.0<br />
– <strong>Maxtor</strong> OneTouch <strong>II</strong>I Turbo Edition<br />
– <strong>Maxtor</strong> OneTouch <strong>II</strong>I Mini Edition<br />
Granted, you can use these software packages completely<br />
separate from EasyManage. However, it is suggested that you<br />
use the EasyManage application with all of these products.<br />
Note: Please refer to <strong>Maxtor</strong>’s Knowledge Base for<br />
examples and more information.<br />
9. Once detected, a window displays informing you that your<br />
<strong>Shared</strong> <strong>Storage</strong> drive has no security password set for the<br />
administrative function.<br />
To set a password for the drive, click Manage. This will<br />
launch the Web User Interface (Web UI). Follow the<br />
onscreen prompts in you browser to configure your<br />
<strong>Shared</strong> <strong>Storage</strong> Drive.<br />
Note: See “The Web UI” later in this guide for details on<br />
using the <strong>Maxtor</strong> <strong>Shared</strong> <strong>Storage</strong> Web UI. Run Set-up<br />
Wizard for more information on configuring these<br />
settings.<br />
10. When finished, close your browser to return to the<br />
<strong>Storage</strong> Manager’s Settings screen, and then click the<br />
Home button.<br />
A Note About EasyManage<br />
EasyManage is an all encompassing application that will,<br />
under specific conditions, allow you to manage both <strong>Maxtor</strong><br />
OneTouch <strong>II</strong>I and <strong>Shared</strong> <strong>Storage</strong> Drive products through one<br />
single interface.<br />
PAGE 5
MAXTOR SHARED STORAGE <strong>II</strong> WINDOWS INSTALLATION<br />
Using the <strong>Shared</strong> <strong>Storage</strong> <strong>II</strong><br />
Using EasyManage<br />
If you select a <strong>Shared</strong> <strong>Storage</strong> <strong>II</strong> Drive, EasyManage will display<br />
this image:<br />
Home<br />
The EasyManage Home window provides access to<br />
the following:<br />
Search for <strong>Shared</strong> <strong>Storage</strong> Drives<br />
When selecting this option, EasyManage discovers <strong>Shared</strong><br />
<strong>Storage</strong> Drives located on your network segment. When<br />
detected, the following information is displayed:<br />
– Hostname (e.g., MSS-000155)<br />
– IP Address<br />
–MAC Address<br />
– Mounted Share<br />
– Drive (letter assigned to the Mounted Share – e.g. Z:)<br />
Note: Mounted Share and Drive entries will be blank<br />
unless a user account is connected.<br />
Detection of <strong>Shared</strong> <strong>Storage</strong> Products<br />
Note: In the event that no <strong>Shared</strong> <strong>Storage</strong> Drives were<br />
found, please refer to the Help File for available<br />
troubleshooting tips.<br />
SimpleView<br />
When selected, SimpleView provides the following<br />
information:<br />
– Space Used - Total size of all user's files<br />
– Last Backup - Date of user's last backup<br />
– Backup Status - Success of user's last backup. This<br />
information is displayed via backup status indicators<br />
(icons) in the Backup Status column.<br />
Backup Status Indicators Definitions<br />
Color Status Meaning<br />
EasyManage can detect all <strong>Maxtor</strong> <strong>Shared</strong> <strong>Storage</strong> Drive<br />
products located on your network segment. If you select a<br />
<strong>Shared</strong> <strong>Storage</strong> or <strong>Shared</strong> <strong>Storage</strong> Plus Drive, EasyManage<br />
will display this image:<br />
Complete<br />
Incomplete<br />
All files successfully backed up<br />
Some files backed up<br />
Failed<br />
No files backed up<br />
PAGE 6
MAXTOR SHARED STORAGE <strong>II</strong> WINDOWS INSTALLATION<br />
Backup Log File<br />
You can see the details of a backup by reading the log file.<br />
To view the log file, click the colored status indicator in the<br />
Backup Status column.<br />
Home and Business Folders<br />
You can choose a set of folders appropriate for Home or<br />
Business use. The folders created are listed below.<br />
Home Folders<br />
Depending on your operating system, you will be prompted<br />
with Open File window. If so, click the Open button.<br />
This will launch your system’s text editor (e.g., Notepad) and<br />
show you information regarding the backup in question.<br />
Below is an excerpt from a log file:<br />
*******************************************<br />
Friday, June 02, 2006, at 09:15<br />
\\MSS-000155\<strong>Maxtor</strong>\My Backup Destination is not accessible<br />
\\MSS-000155\<strong>Maxtor</strong>\My Backup Destination is not accessible<br />
\\MSS-000155\<strong>Maxtor</strong>\My Backup Destination is not accessible<br />
Create User Account<br />
This feature gives the admin the capability to create user<br />
accounts on the <strong>Shared</strong> <strong>Storage</strong> drive. The admin can create<br />
Public or Private user accounts and further customize these<br />
accounts for either Home or Business use.<br />
Account Types<br />
Public<br />
With a public account, all of your files are accessible to anyone<br />
who has an account on the <strong>Shared</strong> <strong>Storage</strong> Drive.<br />
Private<br />
With a private account, all of your files are password-protected<br />
except for those that you place in your “public” folder to share<br />
with others.<br />
Folder<br />
My Backup<br />
My Documents<br />
My Library<br />
My Movies<br />
My Music<br />
My Photos<br />
My Sites<br />
My Software<br />
Public<br />
Business Folders<br />
Folder<br />
My Backup<br />
My Documents<br />
My Multimedia<br />
My Photos<br />
My Presentations<br />
My Projects<br />
My Sites<br />
My Spreadsheets<br />
My Software<br />
Public<br />
Appropriate for<br />
Backed-up files<br />
Word processing files<br />
Electronic books<br />
Home videos<br />
Digital music collection<br />
Digital photos and artwork<br />
Web pages<br />
Software storage<br />
Sharing files with others<br />
Appropriate for<br />
Backed-up files<br />
Word processing files<br />
Audio and video files<br />
Digital photos and artwork<br />
Presentation files<br />
Project files<br />
Web pages<br />
Spreadsheet files<br />
Software storage<br />
Sharing files with others<br />
PAGE 7
MAXTOR SHARED STORAGE <strong>II</strong> WINDOWS INSTALLATION<br />
Naming Conventions<br />
–A User Name may contain 1 - 20 characters<br />
– Users with a Private user account can have a Password<br />
that contains 1 - 32 characters<br />
– Both the User Name and Password may contain<br />
letters, numbers, and underscores “_”, but no spaces<br />
or symbols can be used<br />
To Create a Public Home User Account<br />
1. From the EasyManage home page, click the Create a user<br />
account button.<br />
2. The Create a user account screen opens. Click on the<br />
Public and Home buttons.<br />
3. In the Name field, type the name for the user.<br />
4. Click the Create button.<br />
5. At this point, the user is created. A status bar shows the<br />
creation of the account. This process may take awhile.<br />
6. When finished, you will be notified that a folder has been<br />
created for the user. A shortcut icon (by default, this<br />
shortcut maps to Drive Z: - or the next available drive<br />
letter) will appear on the system’s desktop for the user.<br />
To Create a Public Business User Account<br />
1. From the EasyManage home page, click the Create a user<br />
account button.<br />
2. The Create a user account screen opens. Click on the<br />
Public and Business buttons.<br />
3. In the Name field, type the name for the user.<br />
4. Click the Create button.<br />
5. At this point, the user is created. A status bar shows the<br />
creation of the account. This process may take awhile.<br />
6. When finished, you will be notified that a folder has been<br />
created for the user. A shortcut icon (by default, this<br />
shortcut maps to Drive Z: - or the next available drive<br />
letter) will appear on the system’s desktop for the user.<br />
7. Click Open to use the folder right away.<br />
8. Click Done to return to the EasyManage Home Window.<br />
Note: The Mounted Share and Drive fields, located in the<br />
EasyManage Home window, are now populated with the<br />
user account’s information.<br />
7. Click Open to use the folder right away.<br />
8. Click Done to return to the EasyManage Home Window.<br />
Note: The Mounted Share and Drive fields, located in the<br />
EasyManage Home window, are now populated with the<br />
user account’s information.<br />
PAGE 8
MAXTOR SHARED STORAGE <strong>II</strong> WINDOWS INSTALLATION<br />
To Create a Private Home User Account<br />
1. From the EasyManage home page, click the Create a user<br />
account button.<br />
To Create a Private Business User Account<br />
1. From the EasyManage home page, click the Create a user<br />
account button.<br />
2. The Create a user account screen opens. Click on the<br />
Private and Home buttons.<br />
3. In the Name field, type the name for the user.<br />
4. In the fields provided, enter a password and confirm the<br />
password.<br />
5. Click the Create button.<br />
6. At this point, the user is created. A status bar shows the<br />
creation of the account. This process may take awhile.<br />
7. When finished, you will be notified that a folder has been<br />
created for the user. A shortcut icon (by default, this<br />
shortcut maps to Drive Z: - or the next available drive<br />
letter) will appear on the system’s desktop for the user.<br />
2. The Create a user account screen opens. Click on the<br />
Private and Business buttons.<br />
3. In the Name field, type the name for the user.<br />
4. In the fields provided, enter a password and confirm the<br />
password.<br />
5. Click the Create button.<br />
6. At this point, the user is created. A status bar shows the<br />
creation of the account. This process may take awhile.<br />
7. When finished, you will be notified that a folder has been<br />
created for the user. A shortcut icon (by default, this<br />
shortcut maps to Drive Z: - or the next available drive<br />
letter) will appear on the system’s desktop for the user.<br />
8. Click Open to use the folder right away.<br />
9. Click Done to return to the EasyManage Home Window.<br />
Note: The Mounted Share and Drive fields, located in the<br />
EasyManage Home window, are now populated with the<br />
user account’s information.<br />
8. Click Open to use the folder right away.<br />
9. Click Done to return to the EasyManage Home Window.<br />
Note: The Mounted Share and Drive fields, located in the<br />
EasyManage Home window, are now populated with the<br />
user account’s information.<br />
PAGE 9
MAXTOR SHARED STORAGE <strong>II</strong> WINDOWS INSTALLATION<br />
Connect to a User Account<br />
This feature of EasyManage allows you to select the user<br />
account’s share that you wish to use on your PC.<br />
1. Click the Connect to a user account button.<br />
2. The Connect to a user account window is displayed. At<br />
this point, EasyManage identifies all user accounts on the<br />
<strong>Shared</strong> <strong>Storage</strong> drive and lists them in the Name field.<br />
3. Click on the triangle to the right of the Name field and<br />
select a name from the drop-down menu.<br />
4. If you are selecting a Private Account, type the password<br />
for the user in the Password field.<br />
5. Click the Mount button.<br />
6. When finished, you will be notified that you can access the<br />
folder for the selected user. A shortcut icon (by default,<br />
this shortcut maps to Drive Z: - or the next available drive<br />
letter) will appear on the system’s desktop for the user.<br />
Settings<br />
Drag and Sort<br />
The Drag and Sort feature automatically sorts files into a set<br />
of folders inside your personal folder or the public folder.<br />
Every time you drag files to your <strong>Shared</strong> <strong>Storage</strong> Drive, each<br />
file is sorted into the appropriate folder based on its file type.<br />
By default, the Drag and Sort feature is turned On and files<br />
will sort into the My Personal folder.<br />
To Disable Drag and Sort Settings<br />
1. Open EasyManage and click on the Settings button.<br />
2. From the Settings screen, click Drag and Sort.<br />
3. Click the Off button and click Apply.<br />
4. At this point, the Drag and Sort feature is turned Off and<br />
you are returned to the Settings window.<br />
To Enable Drag and Sort Settings<br />
1. Open EasyManage and click on the Settings button.<br />
7. Click Open to use the folder right away.<br />
8. Click Done to return to the EasyManage Home Window.<br />
Note: The Mounted Share and Drive fields, located in the<br />
EasyManage Home window, are now populated with the<br />
user account’s information.<br />
2. From the Settings screen, click Drag and Sort.<br />
3. Click the On button and click Apply.<br />
4. At this point, the Drag and Sort feature is turned On and<br />
you are returned to the Settings window.<br />
What’s New?<br />
Click on this button to go to www.maxtorsolutions.com. There<br />
you can find more information on <strong>Shared</strong> <strong>Storage</strong> <strong>II</strong> Drive.<br />
<strong>Maxtor</strong> Support<br />
Click on this button and your browser will launch to the home<br />
page for <strong>Maxtor</strong>’s Knowledge Base. There you can find comprehensive<br />
articles related to troubleshooting, FAQs and<br />
other information for the <strong>Shared</strong> <strong>Storage</strong> drive and other<br />
<strong>Maxtor</strong> products.<br />
PAGE 10
MAXTOR SHARED STORAGE <strong>II</strong> WINDOWS INSTALLATION<br />
To Sort Files into Our Public Folder<br />
1. Open EasyManage and click on the Settings button.<br />
2. From the Settings screen, click Drag and Sort.<br />
3. Click the Sort files into “Our” public folder button and<br />
click Apply. At this point, the Drag and Sort feature is<br />
configured to copy files to “Our” public folder and you are<br />
returned to the Drive Management window.<br />
Sorted File Types<br />
A complete list of default, sorted file types can be found via<br />
the Help menu. Click the “Which file types work and how are<br />
they sorted?” link for more information. The Sorted File<br />
Types list can be configured to meet your needs.<br />
Advanced Web Page<br />
The Advanced Web Page feature launches the <strong>Shared</strong> <strong>Storage</strong><br />
Drive’s Web User Interface (aka Web UI).<br />
Note: You must login as the admin user to use the Web UI.<br />
To access this feature:<br />
1. Open EasyManage and click on the Settings button.<br />
2. From the Settings screen, click Advanced Web Page. This<br />
will launch the Web UI. If prompted, type the User name<br />
and Password to authenticate.<br />
Folder Tags<br />
By default, this feature adds a special icon to each folder on<br />
your computer that is set to be backed up to the <strong>Shared</strong><br />
<strong>Storage</strong> Drive.<br />
Example of a Folder Tag denoted by the blue circle with a check.<br />
To Disable Folder Tags<br />
1. Open EasyManage and click on the Settings button.<br />
2. Click on Folder Tags.<br />
3. From the Settings: Folder Tags window, click the Off<br />
button.<br />
4. Click Apply to Disable Folder Tags.<br />
To Re-enable Folder Tags (when it has been shut off)<br />
1. Open EasyManage and click on the Settings button.<br />
2. Click on Folder Tags.<br />
3. From the Settings: Folder Tags window, click the<br />
On button.<br />
4. Click Apply to Enable Folder Tags.<br />
The admin user can select this option to configure the <strong>Shared</strong><br />
<strong>Storage</strong> Drive’s:<br />
– Language<br />
– Network Time Protocol<br />
– Date/Time Format<br />
– Date<br />
– Time<br />
– Computer Name<br />
–Workgroup Name<br />
–Password<br />
Note: See “The Web UI” later in this guide for details on using<br />
the <strong>Maxtor</strong> <strong>Shared</strong> <strong>Storage</strong> Web UI. Run Set-up Wizard for<br />
more information on configuring these settings.<br />
PAGE 11
MAXTOR SHARED STORAGE <strong>II</strong> WINDOWS INSTALLATION<br />
<strong>Shared</strong> Folder Backup<br />
This option will launch your browser and open the <strong>Shared</strong><br />
Folder Backup portion of the Web UI. From this, you can:<br />
–Format an external USB drive for use as a backup for<br />
<strong>Shared</strong> Folders located on the <strong>Shared</strong> <strong>Storage</strong> Drive<br />
– Backup and Restore data<br />
Note: See “The Web UI” later in this guide for details on using<br />
the <strong>Maxtor</strong> <strong>Shared</strong> <strong>Storage</strong> Web UI - <strong>Shared</strong> Folder Backup<br />
for more information on configuring these settings.<br />
Backup<br />
From this screen, you can:<br />
– Set a backup so that local files from your PC will<br />
backup to the <strong>Shared</strong> <strong>Storage</strong> Drive<br />
– Begin an immediate backup of your selected files/<br />
folders from your PC to the <strong>Shared</strong> <strong>Storage</strong> Drive<br />
–Perform file maintenance tasks that delete historical<br />
file versions from the <strong>Shared</strong> <strong>Storage</strong> Drive and remove<br />
files from the shared <strong>Storage</strong> Drive if they are no<br />
longer on your PC<br />
To Setup a Backup<br />
1. Open EasyManage and click the Backup button.<br />
2. The Backup: Settings Part 1 of 2 – Select Folders window<br />
opens. Check the boxes associated with the files and or<br />
folders you want to back up and click Next.<br />
3. The Backup: Settings Part 2 of 2 – Schedule Days/Time<br />
window opens. By default, your selected files and/or<br />
folders will be backed up daily at 10:00 pm. Click Finish to<br />
continue.<br />
Edit My Backup Settings<br />
1. Open EasyManage and click on the Backup button.<br />
2. The Backup: Settings window opens. Check the boxes<br />
associated with the files and or folders you want to back<br />
up and click Next.<br />
3. A second Backup: Settings window opens. By default,<br />
your selected files and/or folders will be backed up daily<br />
at 10:00 pm. Check the days/time that you wish to run<br />
your edited backup and click Finish.<br />
4. The Backup Files to My <strong>Shared</strong> <strong>Storage</strong> Device window<br />
opens. To launch your first backup, click Back Up Now.<br />
The backup will launch copying selected files/folders<br />
from your PC to your User Account’s My Backup folder on<br />
the <strong>Shared</strong> <strong>Storage</strong> Drive. Backup times may vary pending<br />
on how much data has to be copied.<br />
Backup File Management<br />
Edit Historical Versions<br />
This option allows you to change the number of Historical File<br />
Versions you wish to store on your <strong>Shared</strong> <strong>Storage</strong> Drive. You<br />
can select between 1 – 10 Historical Versions to save. By<br />
default, 5 historical versions of each file are stored.<br />
1. Open EasyManage and click on the Backup button.<br />
2. The Backup Files to My <strong>Shared</strong> <strong>Storage</strong> Device window<br />
opens. Click Backup File Management.<br />
3. Click Edit to open the Advanced Settings window.<br />
4. Click on the down arrow of the Historical Versions dropdown<br />
menu.<br />
5. Choose the number of Historical Versions you wish to<br />
backup (between 1 – 10) and click Save to return to the<br />
Backup File Management window.<br />
4. The Backup Files to My <strong>Shared</strong> <strong>Storage</strong> Device Window<br />
opens. To launch your first backup, click Back Up Now.<br />
The backup will launch copying selected files/folders<br />
from your PC to your User Account’s My Backup folder on<br />
the <strong>Shared</strong> <strong>Storage</strong> Drive. Backup times may vary pending<br />
on how much data has to be copied.<br />
PAGE 12
MAXTOR SHARED STORAGE <strong>II</strong> WINDOWS INSTALLATION<br />
Delete Historical Versions<br />
This option will delete all but the most recent Historical File<br />
Versions from your user account’s My Backup folder.<br />
1. Open EasyManage and click on the Backup button.<br />
2. The Backup Files to My <strong>Shared</strong> <strong>Storage</strong> Device window<br />
opens. Click Backup File Management.<br />
3. Click Delete.<br />
4. A confirmation window opens asking you to confirm the<br />
deletion.<br />
Note: All Historical File Versions will be deleted except for<br />
the most recent if you continue.<br />
Click Yes to delete the Historical File Versions.<br />
5. Click OK to return to the Backup File Management<br />
window.<br />
Clean Up Deleted Files<br />
This option will remove all files from your user account’s My<br />
Backup folder if they have been deleted from your PC.<br />
1. Open EasyManage and click on the Backup button.<br />
2. The Backup Files to My <strong>Shared</strong> <strong>Storage</strong> Device window<br />
opens. Click Backup File Management.<br />
3. Click Clean Up.<br />
4. A confirmation window opens asking you to confirm the<br />
deletion.<br />
Note: All files will be deleted from the user account’s My<br />
Backup folder if you continue.<br />
Click Yes to delete these files.<br />
5. Click OK to return to the Backup File Management<br />
window.<br />
Automatic Backups On/Off<br />
You can turn Off/On Automatic Backups on your <strong>Shared</strong><br />
<strong>Storage</strong> Drive. Automatic Backups are beneficial because you<br />
don’t have to remember to backup your data regularly.<br />
However, some users like the flexibility of managing their<br />
backups manually.<br />
To Turn Automatic Backups Off<br />
1. Open EasyManage and click on the Backup button.<br />
2. The Backup Files to My <strong>Shared</strong> <strong>Storage</strong> Device window<br />
opens. In the upper-right corner of the window you will<br />
see that, by default, Automatic Backups is turned On.<br />
Click Off to continue. At this point, the Automatic Backup<br />
feature is disabled.<br />
Note: When the Automatic Backup feature is turned Off, all<br />
backup functionality must be done manually. To manually<br />
launch a backup:<br />
or<br />
– Open EasyManage, click on the Backup button.<br />
– The Backup Files to My <strong>Shared</strong> <strong>Storage</strong> Device window<br />
opens. To manually launch a backup, click Back Up<br />
Now.<br />
– Click on the OneTouch Status icon in the System Tray<br />
and select Back Up Now from the menu<br />
To Turn Automatic Backups On<br />
1. Open EasyManage and click on the Backup button.<br />
2. The Backup Files to My <strong>Shared</strong> <strong>Storage</strong> Device window<br />
opens. In the upper-right corner of the window you will<br />
see that Automatic Backups are turned Off. Click On to<br />
continue. At this point, the Automatic Backup feature is<br />
enabled and you can schedule backups.<br />
PAGE 13
MAXTOR SHARED STORAGE <strong>II</strong> WINDOWS INSTALLATION<br />
Restore<br />
Differences Between Restore Methods<br />
Restore Historical Versions of Individual Backed-up Files<br />
Choosing this option allows you to restore an individual historical<br />
version of a file, based on the date it was backed up.<br />
The number of historical versions available is based on the<br />
number selected in the Backup File Management option<br />
under Edit Historical Versions. You can select between 1 – 10<br />
Historical Versions to save. By default, 5 historical versions of<br />
each file are stored.<br />
Restore Most Recent Files and Folders<br />
Choosing this option will open the “My Backup” folder inside<br />
the folder for your user account on the <strong>Shared</strong> <strong>Storage</strong> drive.<br />
You can then restore multiple files and folders by clicking and<br />
dragging them to wherever you want to put them.<br />
Restore Historical Versions of Individual Backed-up Files<br />
1. Open EasyManage and click the Restore button.<br />
2. From the Restore a Backup from my <strong>Storage</strong> Device<br />
window, click Restore historical versions of individual<br />
backed-up files.<br />
Select a File<br />
– Click the plus “+” sign next to your <strong>Shared</strong> <strong>Storage</strong><br />
Drive to reveal the folders stored inside the folder for<br />
your account.<br />
– Click the plus “+” sign next to the My Backup folder<br />
and select the file you would like to restore by clicking<br />
its checkbox.<br />
Select a Version<br />
Restore to Folder<br />
Original<br />
Temporary<br />
Note: “YourUserName” is your account Name.<br />
3. Click Restore to restore files to your computer.<br />
Restore Most Recent Files and Folders<br />
1. Open EasyManage and click on the Restore button.<br />
2. From the Restore a Backup from my <strong>Storage</strong> Device<br />
window, click the Restore most recent files and folders<br />
button.<br />
3. This will launch a window showing the root directory<br />
structure of the My Backup folder for the user connected<br />
to the <strong>Shared</strong> <strong>Storage</strong> Drive. To restore files, simply<br />
browse to the file(s) location and drag and drop (copy and<br />
paste) files/folders from the <strong>Shared</strong> <strong>Storage</strong> Drive to your<br />
computer.<br />
Media Server<br />
Restores files to its original folder on<br />
your computer<br />
Restores file to the following folder:<br />
C:\MyDocuments\YourUserName\MSS<br />
Restore<br />
This option will launch your browser and open the Manage<br />
Digital Photos, Music, and Video portion of the Web UI.<br />
Note: See “The Web UI” later in this guide for details on using<br />
the <strong>Maxtor</strong> <strong>Shared</strong> <strong>Storage</strong> Web UI - Manage Digital Photos,<br />
Music, and Video for more information on configuring these<br />
settings.<br />
Click the checkbox next to the version you would like to<br />
restore. Versions are listed by date.<br />
PAGE 14
MAXTOR SHARED STORAGE <strong>II</strong> WINDOWS INSTALLATION<br />
OneTouch Status Icons<br />
The OneTouch Status Icon can:<br />
– Report the connectivity of your <strong>Shared</strong> <strong>Storage</strong> Drive<br />
and or the status of the last backup<br />
– Can be used for accessing certain EasyManage<br />
software features<br />
Color Definitions<br />
Icon<br />
Gray<br />
Green<br />
Yellow<br />
Red<br />
Blue<br />
Meaning<br />
No <strong>Shared</strong> <strong>Storage</strong> Drive is connected.<br />
Last backup completed successfully.<br />
Last backup completed with errors.<br />
Last backup failed.<br />
Backup needs to be configured.<br />
Features<br />
Access to User <strong>Shared</strong> Folder<br />
This feature will open up the connected user share in an<br />
explorer window.<br />
1. Click on the OneTouch Status icon.<br />
2. Select the share displayed (e.g., Public) at the top of the<br />
menu. An explorer window opens showing you the<br />
contents of the share’s files and folders.<br />
Backup Now<br />
This feature will launch an immediate backup of selected files<br />
and folders to the connected user account’s My Backup folder<br />
Change Account<br />
This feature will launch the EasyManage’s Connect to a user<br />
account window.<br />
Note: See “Connect to a User Account” on page 10 for<br />
more information regarding the use of these options.<br />
Backup Settings<br />
This feature opens EasyManage’s Backup My Files to My<br />
<strong>Shared</strong> <strong>Storage</strong> Device window. From which you can Edit<br />
Backup Settings, perform Backup file Management tasks<br />
(e.g., Edit Historical Versions, Delete Historical Versions,<br />
Clean Up files), launch immediate backups and/or Turn On/<br />
Off Automatic Backups.<br />
Note: See “Edit My Backup Settings” on page 12 for more<br />
information regarding the use of these options.<br />
Restore<br />
This feature opens EasyManage’s Restore window. From<br />
which you can Restore Historical Versions of Individual<br />
backed Up Files or Restore Most Recent Files and Folders<br />
Note: See “Restore” on page 14 for more information<br />
regarding the use of these options.<br />
MSS Settings<br />
This feature opens EasyManage’s Settings window. From<br />
which you can configure Drag and Sort, launch the Web UI,<br />
configure Folder Tags, review backup status and disk usage<br />
with SimpleView, and launch the Web UI’s <strong>Shared</strong> Folder<br />
Backup options.<br />
Note: See “Settings” on page 10 for more information<br />
regarding the use of these options.<br />
1. Click on the OneTouch Status icon.<br />
2. Click on Back Up Now. An immediate backup will be<br />
performed. You will notice that the OneTouch Status Icon<br />
will turn yellow (denoting backup activity) during the<br />
backup process.<br />
PAGE 15
MAXTOR SHARED STORAGE <strong>II</strong> WINDOWS INSTALLATION<br />
Exit<br />
This feature exits (closes and removes) the OneTouch Status<br />
icon from your System Tray. To exit OneTouch Status:<br />
1. Click on the OneTouch Status icon and select Exit from<br />
the menu.<br />
2. A window appears asking you to confirm this task. Click<br />
Yes to continue. This closes the OneTouch Status<br />
application. In the event that the OneTouch Status Icon<br />
still appears in the System Tray, simply move your mouse<br />
over it to remove it.<br />
To Re-open the OneTouch Status Application<br />
1. Click Start ➔ Programs (all Programs with Windows XP)<br />
➔ <strong>Maxtor</strong> ➔ OneTouch Status. The OneTouch Status<br />
application will load the icon back into the System Tray.<br />
Using Media Server<br />
Use Media Server to Manage your Digital Photo, Music and<br />
Video Collection<br />
If you have a networked home entertainment system, you can<br />
use Media Server to manage your digital photo, music and<br />
video collection on your <strong>Shared</strong> <strong>Storage</strong> Drive and use it with<br />
your entertainment system. Media Server can even search<br />
your iTunes Music folder for music and video files.<br />
Media Server recognizes files in the following folders on your<br />
<strong>Shared</strong> <strong>Storage</strong> Drive: Our Photos, Our Music, Our Movies, My<br />
Photos, My Music, My Movies or My Multimedia. By placing<br />
your files in these folders, they will automatically be available<br />
for use with your entertainment system. In order to use Media<br />
Server, your entertainment system will need to be compatible<br />
with UPnP (Universal Plug and Play).<br />
To enable Media Server on your <strong>Shared</strong> <strong>Storage</strong> Drive, click<br />
the Media Server button in the main EasyManage screen.<br />
To Enable Media Server<br />
1. From the EasyManage main menu, click the Media Server<br />
button.<br />
2. This will launch your browser. When prompted, type the<br />
User Name and Password to authenticate.<br />
3. Click Login.<br />
This will launch your browser directly to the Manage<br />
Digital Photos, Music, and Video page.<br />
Note: See “The Web UI” later in this guide for details on using<br />
the <strong>Maxtor</strong> <strong>Shared</strong> <strong>Storage</strong> Web UI - Manage Digital Photos,<br />
Music, and Video for more information on configuring these<br />
settings.<br />
PAGE 16
MAXTOR SHARED STORAGE <strong>II</strong> WINDOWS INSTALLATION<br />
Storing Audio<br />
Using your computer as an audio jukebox is a very popular<br />
application. This allows you to store and play thousands of<br />
your favorite songs. You can also create and manage an audio<br />
library from your <strong>Maxtor</strong> <strong>Shared</strong> <strong>Storage</strong> <strong>II</strong>.<br />
Shutting Down Your <strong>Shared</strong> <strong>Storage</strong> <strong>II</strong> Drive<br />
To Shut Down Your Drive<br />
Resetting Your <strong>Shared</strong> <strong>Storage</strong> <strong>II</strong> Drive<br />
If you can not access your drive after moving it to another network,<br />
turning it on after it has been off for a period of time, or<br />
if you have forgotten/lost the admin password it may need to<br />
be reset.<br />
To Reset Your Drive<br />
1. With the drive turned on, use the tip of a pen or paperclip,<br />
then press and hold the reset button on the back of your<br />
drive. After a few seconds, the drive will reboot.<br />
Power Button<br />
Reset Button<br />
1. Press the round black button on the back panel of your<br />
<strong>Maxtor</strong> <strong>Shared</strong> <strong>Storage</strong> Drive. Upon doing so, the power<br />
status button on the front panel of the <strong>Shared</strong> <strong>Storage</strong><br />
Drive will blink rapidly.<br />
2. The power status LED will return to a blink state of about<br />
1 second between blinks. The reset is complete and your<br />
drive is ready for use.<br />
Power Status Light<br />
Power Status Light<br />
The power down sequence will take 1 – 10 seconds to<br />
complete. When properly shutdown, all LEDs on the front<br />
and back will no longer be illuminated.<br />
After Resetting Your Drive<br />
– The admin password will be removed<br />
– The computer name will reset back to its default name<br />
(Example: MSS-000155)<br />
– The workgroup name will be reset to MSHOME<br />
PAGE 17
MAXTOR SHARED STORAGE <strong>II</strong> WINDOWS INSTALLATION<br />
Security Lock<br />
Your new <strong>Maxtor</strong> <strong>Shared</strong> <strong>Storage</strong> <strong>II</strong> includes a security locking<br />
slot on the back of the drive. The slot is compatible with most<br />
security locking cables.<br />
Media Serving<br />
With the <strong>Shared</strong> <strong>Storage</strong> Drive’s Media Serving capabilities,<br />
you can view videos or photos and listen to music on your<br />
home entertainment center without ever turning on your<br />
computer. The Media Server feature is disabled by default on<br />
the <strong>Shared</strong> <strong>Storage</strong> Drive.<br />
Security Lock<br />
Once your <strong>Shared</strong> <strong>Storage</strong> Drive is properly connected to your<br />
network, you can copy music, movies, or videos directly to it.<br />
Next, connect an UPnP AV compatible digital media adapter<br />
(DMA) through your router, and your home network becomes<br />
a home entertainment center.<br />
PAGE 18
MAXTOR SHARED STORAGE <strong>II</strong> WINDOWS INSTALLATION<br />
Considerations for Home Media Networks<br />
– Some data may not be available for access for up to two<br />
(2) hours after being copied to the <strong>Shared</strong> <strong>Storage</strong><br />
Drive. To obtain immediate access to these media files,<br />
click the Refresh button located in Web UI.<br />
–Take a survey and note all of the wireless devices in<br />
your household (e.g., radio’s, stereo’s, speakers,<br />
phones, cell phones, microwave ovens, alarms, etc.).<br />
– Use of a hand held WiFi detector will help determine<br />
strength and weakness of WiFi signals in your home.<br />
– Be suspicious of any wireless devices in the same<br />
general area and remove them from the WiFi paths of<br />
your routers and media players.<br />
– In some cases, firewalls may need to be disabled and<br />
re-enabled.<br />
– Most wireless devices broadcast a wireless frequency<br />
by default. Check the documentation of your wireless<br />
media players for configuration (WEP) settings.<br />
– Check that your wireless router (WEP) security settings<br />
will allow detection and connection of new devices.<br />
–Try moving your media player within a couple of feet of<br />
your wireless router for configuration and connection.<br />
– When configuring and detecting wireless devices, keep<br />
an Ethernet cable handy to hard wire the devices<br />
together for diagnosis.<br />
– If you continue to have problems with your WiFi<br />
connection dropping off line, consider hardwiring the<br />
devices with Cat5e Ethernet cabling.<br />
– If you’re still having detection issues, reset all network<br />
devices by physically unplugging them from power.<br />
Power on all routers, switches, the <strong>Maxtor</strong> <strong>Shared</strong><br />
<strong>Storage</strong> Drive, computers, and finally media players.<br />
PAGE 19
MAXTOR SHARED STORAGE <strong>II</strong> MACINTOSH INSTALLATION<br />
Introduction<br />
Thank you for selecting the <strong>Maxtor</strong> <strong>Shared</strong> <strong>Storage</strong> <strong>II</strong> Drive.<br />
Connecting this storage solution to your network in a home or<br />
small office is a simple and economical way for users to<br />
share and backup files. Your new <strong>Maxtor</strong> <strong>Shared</strong> <strong>Storage</strong> <strong>II</strong><br />
drive offers a winning combination of capacity, simplicity of<br />
use and helpful software features that automate configuration,<br />
privacy and more. The simple installation allows you to<br />
start using your drive as quickly as possible. You can also<br />
change settings on your drive at any time, and manage user<br />
access through Safari or other web browsers.<br />
<strong>Shared</strong> <strong>Storage</strong> <strong>II</strong> Features<br />
Instantly add storage to your network, back up files across<br />
every compatible Macintosh on your network, and stream<br />
music, videos and photos from your drive to your home<br />
entertainment system.<br />
About this <strong>Guide</strong><br />
The following symbols and conventions are used in this guide:<br />
Bold<br />
Italics<br />
Used for menu, command, and keyboard selections you make and<br />
screens you will see.<br />
Used for emphasis and to identify new terms.<br />
Components<br />
Before installing, review the solution features in Figure 1.<br />
FIGURE 1 SOLUTION FEATURES<br />
1. Status Lights<br />
2. Power Switch<br />
3. Power Connector<br />
4. USB 2.0 Ports<br />
5. Ethernet Port<br />
6. Security Lock<br />
Simple Installation and Setup<br />
– Automatically configure the drive to your network<br />
– Manage the drive using our simple user interface<br />
– Connect and share additional hard drives using the<br />
drive’s 2 USB ports<br />
– Easily store and share access to files, photos, music<br />
and videos<br />
–Organize files automatically using Drag and Sort<br />
– Give users full access to public folders, while keeping<br />
others private<br />
– Get backup and storage status for all users with<br />
SimpleView<br />
– Back up user files/folders to an external USB drive<br />
–Protect data on all of your networked Macs using<br />
<strong>Maxtor</strong> ® Backup<br />
– Playback of Videos, Music and Photos<br />
– Use our media streaming feature to play digital photos,<br />
music and video on a networked home entertainment<br />
system - even without turning on your Macintosh<br />
– Connect automatically through a UPnP AV<br />
compatible digital media adapter<br />
PAGE 20
Logiciel d’installation, Installationssoftware,<br />
Software di installazione, Installationsprogram,<br />
Software de instalación, Installatiesoftware,<br />
Asennusohjelma, Software de Instalação,<br />
Includes:<br />
– <strong>Maxtor</strong> EasyManage <br />
Software<br />
– <strong>Maxtor</strong> Backup Software<br />
– <strong>Maxtor</strong> <strong>Shared</strong> <strong>Storage</strong> <strong>II</strong><br />
User <strong>Guide</strong> (<strong>English</strong>)<br />
WINDOWS MACINTOSH<br />
<strong>English</strong> <strong>English</strong><br />
Français Français<br />
Deutsch Deutsch<br />
Español<br />
Italiano<br />
© 2006 <strong>Maxtor</strong> Corporation and its Licensors. <strong>Maxtor</strong> and the stylized<br />
<strong>Maxtor</strong> logo are registered trademarks,and <strong>Maxtor</strong> <strong>Shared</strong> <strong>Storage</strong>,<br />
<strong>Maxtor</strong> EasyManage, and <strong>Maxtor</strong> Backup are trademarks of<br />
<strong>Maxtor</strong> Corporation. U.S. patents 5,150,473 and 5,966,730.<br />
Other patents pending. Other trademarks are the property<br />
of their respective holders. All rights reserved.<br />
06/06 PN: 20337500<br />
MAXTOR SHARED STORAGE <strong>II</strong> MACINTOSH INSTALLATION<br />
FIGURE 2 INCLUDED IN PACKAGE<br />
1. Backup Solution<br />
2. Power Adapter<br />
3. Cat5 Ethernet Cable<br />
4. EasyManage CD<br />
Handling Precautions<br />
Please handle your new <strong>Maxtor</strong> <strong>Shared</strong> <strong>Storage</strong> <strong>II</strong> with care!<br />
Follow the precautions listed here or you could damage your<br />
drive and void the product warranty. Review the <strong>Maxtor</strong> Limited<br />
Warranty for more information.<br />
Follow these precautions to prevent data loss<br />
– Do not bump, move or drop the drive while in operation.<br />
Installation Software<br />
<strong>Maxtor</strong> <strong>Shared</strong> <strong>Storage</strong> <strong>II</strong><br />
– Do not remove the interface cable or power cord<br />
without first disconnecting the drive properly through<br />
the operating system.<br />
– Do not set any liquids or drinks on or near the drive.<br />
Liquids will damage the internal electronics.<br />
– Do not open the drive enclosure. This can cause loss of<br />
data and will void the product warranty.<br />
System Requirements<br />
– Wired or wireless router with an available<br />
10/100/1000 Ethernet port<br />
– Apple G4 processor or greater<br />
– Mac OS X (10.3.9 or later)<br />
– 256MB RAM (512MB recommended) or more as<br />
required by operating system<br />
– Internet Explorer 6.0 or higher<br />
(for management interface of the <strong>Shared</strong> <strong>Storage</strong> <strong>II</strong> drive)<br />
– Internet connection (for system updates)<br />
– UPnP certified Digital Media Adapter<br />
(if using Media Serving)<br />
– CD-ROM/DVD-ROM drive<br />
<strong>Maxtor</strong> Product Support<br />
<strong>Maxtor</strong> Corporation provides a comprehensive product<br />
support section on its web site, including the latest software<br />
drivers, product specifications, a complete troubleshooting<br />
section, and the <strong>Maxtor</strong> Knowledge Base.<br />
<strong>Maxtor</strong> USA Support<br />
Visit www.maxtorkb.com for the following information:<br />
– Search the Hard Drive Knowledge Base<br />
We store all resolved problems and FAQ’s in our<br />
knowledge base. Search by product, category,<br />
keywords, or phrases.<br />
– My Stuff<br />
Login to modify or view your FAQ update<br />
notifications or update your personal profile.<br />
– Most Popular Help Topics<br />
Top five most frequently asked questions.<br />
– Software Download<br />
Download installation and diagnostic programs<br />
for your hard drive or external storage device.<br />
<strong>Maxtor</strong> Worldwide Support<br />
Visit www.maxtor.com and click worldwide support or<br />
contact us for product support outside of the USA.<br />
PAGE 21
MAXTOR SHARED STORAGE <strong>II</strong> MACINTOSH INSTALLATION<br />
Installing the <strong>Shared</strong> <strong>Storage</strong> <strong>II</strong><br />
Step 1 – Connect the Drive<br />
The <strong>Maxtor</strong> <strong>Shared</strong> <strong>Storage</strong> <strong>II</strong> connects to your computer with<br />
a Cat5 Ethernet cable.<br />
Connecting the Ethernet Cable<br />
1. Plug one end of the Ethernet cable into your network,<br />
router or switch.<br />
2. Plug the other end of the Ethernet cable into the Ethernet<br />
port on your <strong>Shared</strong> <strong>Storage</strong> <strong>II</strong> drive.<br />
Connecting the Power<br />
1. Plug the round female connector from the power adapter<br />
into the drive’s power connector.<br />
2. Plug the female connector on the power cord into the<br />
power adapter.<br />
3. Plug the standard electrical plug from the power adapter<br />
into your power source.<br />
FIGURE 4 CONNECTING THE POWER<br />
3. Once connected, the Ethernet status LED(s) located on<br />
either side of the Ethernet port will illuminate:<br />
– If connected through a 10/100 cable/router – the Green<br />
LED on the left side of the connector will show activity<br />
when the <strong>Shared</strong> <strong>Storage</strong> Drive is powered on. This LED<br />
will also illuminate when connected to a Gigabit cable/<br />
router too.<br />
4. If connected through a Gigabit cable/router – the Amber<br />
LED on the right side of the connector will show activity<br />
when the <strong>Shared</strong> <strong>Storage</strong> Drive is powered on.<br />
FIGURE 3 CONNECTING THE ETHERNET CABLE<br />
PAGE 22
MAXTOR SHARED STORAGE <strong>II</strong> MACINTOSH INSTALLATION<br />
Step 2 – Power up the Drive<br />
1. Press the round black button on the back panel of your<br />
<strong>Maxtor</strong> <strong>Shared</strong> <strong>Storage</strong> Drive. The green LED (light) with<br />
illuminate in the center of the power button.<br />
Power Button<br />
Activity LED<br />
Ethernet LED<br />
Front Panel LEDs<br />
LED Definition Status<br />
Top Power Activity Illuminated – Power On<br />
Blinking – Drive is either powering up or<br />
shutting down<br />
Not Illuminated – Power Off<br />
Center Hard Disk Activity Illuminated – Power On<br />
Blinking – Data is being transferred to/from the<br />
drive<br />
Not Illuminated – Power Off<br />
Bottom Network Activity Illuminated – Power On<br />
Blinking – Network communication is occurring<br />
Not Illuminated – Power Off<br />
2. Your drive will now start. The startup process can take up<br />
to one minute to complete.<br />
<strong>Shared</strong> <strong>Storage</strong> Drive Power/Status LED Definitions<br />
Various LED activity will appear on your <strong>Shared</strong> <strong>Storage</strong> <strong>II</strong><br />
Drive when power is applied. The following tables define the<br />
meaning/status of each LED on the back and front panels:<br />
Power Activity<br />
Hard Disk Activity<br />
Network Activity<br />
Back Panel LEDs<br />
LED Definition Status<br />
Power LED<br />
(located in<br />
center of the<br />
power button)<br />
Power switch<br />
Illuminated – Power On<br />
Not Illuminated – Power Off<br />
Ethernet LED<br />
(located on<br />
bottom side of<br />
Ethernet<br />
connector)<br />
Shows if the drive is<br />
connected through a 10/100 or<br />
a 1 Gb Ethernet connection.<br />
Left Green – 10/100 Mbps<br />
Ethernet connectivity<br />
Illuminated – Power On<br />
Blinking – Network<br />
communication is occurring<br />
Not Illuminated – Power Off<br />
Activity LED<br />
(located on top<br />
side of Ethernet<br />
connector)<br />
Left Amber – 1 Gbps Ethernet<br />
connectivity<br />
A flashing Activity LED<br />
indicates that the network<br />
connection is functional and<br />
that packets are being<br />
transmitted or received.<br />
PAGE 23
MAXTOR SHARED STORAGE <strong>II</strong> MACINTOSH INSTALLATION<br />
Step 3 - Setup the Drive<br />
1. Insert the <strong>Maxtor</strong> <strong>Shared</strong> <strong>Storage</strong> <strong>II</strong> Installation Software<br />
into your CD-ROM drive and double-click the Install CD<br />
icon.<br />
2. Then double-click the <strong>Maxtor</strong> EasyManage.pkg icon to<br />
launch the program.<br />
3. From the Welcome screen, click Continue.<br />
4. Review the License Agreement and click Continue.<br />
5. To accept the terms of the License Agreement, click<br />
Agree.<br />
6. Select a destination to install the EasyManage software<br />
and click Continue.<br />
7. To start the installation, click Install.<br />
8. When prompted, type your Name and Password of the<br />
user to authenticate.<br />
Click OK to proceed.<br />
13. The EasyManage software will begin locating <strong>Shared</strong><br />
<strong>Storage</strong> Drives detected on the network.<br />
14. When found, you will see the Network ID number and<br />
IP address for the located drive(s). For example:<br />
MSS-0170CA (192.169.1.108).<br />
15. The EasyManage - <strong>Shared</strong> <strong>Storage</strong> Administrator<br />
Password window will appear for all new drives, allowing<br />
you to set administrative security on the <strong>Shared</strong> <strong>Storage</strong><br />
drive.<br />
16. Click Yes to launch the Web User Interface and set an<br />
administrative password.<br />
Note: See “The Web UI” later in this guide for details on<br />
using the <strong>Maxtor</strong> <strong>Shared</strong> <strong>Storage</strong> Web UI - <strong>Shared</strong> Folder<br />
Backup for more information on configuring these<br />
settings.<br />
9. A restart is required to complete the installation. Click<br />
Continue Installation to proceed.<br />
10. The EasyManage software will install on your computer.<br />
11. When finished, click Restart.<br />
12. When the computer is ready, double-click the<br />
EasyManage icon.<br />
PAGE 24
MAXTOR SHARED STORAGE <strong>II</strong> MACINTOSH INSTALLATION<br />
Using the <strong>Shared</strong> <strong>Storage</strong> <strong>II</strong><br />
Using EasyManage<br />
Once installed, you can use your new <strong>Maxtor</strong> <strong>Shared</strong> <strong>Storage</strong><br />
<strong>II</strong> in the same way you use the other drives on your computer.<br />
Some of the basic ways you can use your new drive are:<br />
Select Your Drive<br />
Make sure your <strong>Shared</strong> <strong>Storage</strong> Drive is connected to your<br />
network and turned on. Its name and IP address will appear<br />
in the “Select a <strong>Maxtor</strong> <strong>Shared</strong> <strong>Storage</strong> Drive” list.<br />
1. Double-click the <strong>Maxtor</strong> EasyManage icon located on your<br />
Desktop.<br />
2. Click the name of your <strong>Shared</strong> <strong>Storage</strong> Drive in the list.<br />
3. Select a user account.<br />
4. Click Select Drive.<br />
5. If it is a private account, enter the password and click OK.<br />
A shortcut to the shared folder for this user account will<br />
appear on the desktop of your Macintosh.<br />
Note: If you are already connected to an account and want to<br />
connect to another account on your <strong>Shared</strong> <strong>Storage</strong> Drive, you<br />
do not need to select the drive (step 3, above). If you are setting<br />
up your <strong>Shared</strong> <strong>Storage</strong> Drive for the first time, you will<br />
need to create a user account.<br />
<strong>Maxtor</strong> EasyManage Help<br />
Help can be accessed from:<br />
– The Help Button located on the EasyManage main<br />
menu.<br />
– The Help Menu located at the top of the desktop.<br />
When selecting one of these options, the Help Menu is<br />
displayed.<br />
Create and Use <strong>Shared</strong> Folders<br />
User Account Types<br />
Public – With a public account, all of your files are accessible<br />
to anyone who has an account on your <strong>Shared</strong> <strong>Storage</strong> Drive.<br />
Private – With a private account, all of your files are password-protected<br />
except for those which you place in your<br />
“Public” folder to share with others.<br />
Name and Password<br />
Length – Name may be up to 20 characters in length. Password<br />
may be up to 32 characters in length.<br />
Characters – Both may contain letters, numbers, and underscores<br />
(_), but no spaces or symbols.<br />
Creating <strong>Shared</strong> Folders<br />
<strong>Shared</strong> Folder Types<br />
While creating a user account you can select a shared folder<br />
type to associate with the user. You can choose between three<br />
shared folder types:<br />
Home – With this folder type, a series of sub-folders are created<br />
that help with organizing files/folders commonly used in<br />
the Home environment (My Music, My Documents, etc.). A<br />
shortcut to the Public folder is provided as well.<br />
Business - With this folder type, a series of sub-folders are<br />
created that help with organizing files/folder commonly used<br />
in a business environment (My Documents, My Spreadsheets,<br />
My Presentations, etc.). A shortcut to the Public folder is provided<br />
as well.<br />
None - With this folder type, no sub-folders are created; however,<br />
there is a shortcut to the Public folder.<br />
Note: The Public account, for all users, contains a set of<br />
folders identical to the Home folders shown above, but<br />
using the name “Our.” For example: “Our Music.”<br />
PAGE 25
MAXTOR SHARED STORAGE <strong>II</strong> MACINTOSH INSTALLATION<br />
Creating a Public/Home User Account<br />
1. From the main EasyManage screen, click the Create a<br />
User Account button.<br />
Creating a Public/None User Account<br />
1. From the main EasyManage screen, click the Create a<br />
User Account button.<br />
2. Select the Public User Account type.<br />
3. Select the Home Folder type.<br />
4. Type a Name for your shared folder.<br />
5. Click Create. At this point, the account is created (this<br />
may take a few minutes to complete).<br />
6. When created, the word “Success” will appear near the<br />
help button and a shortcut to the shared folder for this<br />
user account will appear on the desktop.<br />
2. Select the Public User Account type.<br />
3. Select the None Folder type.<br />
4. Type a Name for your shared folder.<br />
5. Click Create. At this point, the account is created (this<br />
may take a few minutes to complete).<br />
6. When created, the word “Success” will appear near the<br />
help button and a shortcut to the shared folder for this<br />
user account will appear on the desktop.<br />
7. Double-click the shortcut to view its contents.<br />
Creating a Public/Business User Account<br />
1. From the main EasyManage screen, click the Create a<br />
User Account button.<br />
7. Double-click the shortcut to view its contents.<br />
Creating a Private/Home User Account<br />
1. From the main EasyManage screen, click the Create a<br />
User Account button.<br />
2. Select the Public User Account type.<br />
3. Select the Business Folder type.<br />
4. Type a Name for your shared folder.<br />
5. Click Create. At this point, the account is created (this<br />
may take a few minutes to complete).<br />
6. When created, the word “Success” will appear near the<br />
help button and a shortcut to the shared folder for this<br />
user account will appear on the desktop.<br />
2. Select the Private User Account type.<br />
3. Select the Home Folder type.<br />
4. Type a Name for your shared folder.<br />
5. Type and re-type a Password.<br />
6. Click Create. At this point, the account is created (this<br />
may take a few minutes to complete).<br />
7. When created, the word “Success” will appear near the<br />
help button and a shortcut to the shared folder for this<br />
user account will appear on the desktop.<br />
7. Double-click the shortcut to view its contents.<br />
PAGE 26<br />
8. Double-click the shortcut to view its contents.
MAXTOR SHARED STORAGE <strong>II</strong> MACINTOSH INSTALLATION<br />
Creating a Private/Business User Account<br />
1. From the main EasyManage screen, click the Create a<br />
User Account button.<br />
7. When created, the word “Success” will appear near the<br />
help button and a shortcut to the shared folder for this<br />
user account will appear on the desktop.<br />
2. Select the Private User Account type.<br />
3. Select the Business Folder type.<br />
4. Type a Name for your shared folder.<br />
5. Type and re-type a Password.<br />
6. Click Create. At this point, the account is created (this<br />
may take a few minutes to complete).<br />
7. When created, the word “Success” will appear near the<br />
help button and a shortcut to the shared folder for this<br />
user account will appear on the desktop.<br />
8. Double-click the shortcut to view its contents.<br />
Using <strong>Shared</strong> Folders to Connect to User Accounts<br />
There are two (2) methods for connecting to User Accounts.<br />
This section provides you with the steps for connecting a<br />
Public or Private User:<br />
Method 1 – Connect a Public User Account<br />
1. From the main EasyManage screen, click the Connect to a<br />
User Account button.<br />
The Connect to User Account window is displayed.<br />
8. Double-click the shortcut to view its contents.<br />
Creating a Private/None User Account<br />
1. From the main EasyManage screen, click the Create a<br />
User Account button.<br />
2. Select the Public User Account that you wish to connect.<br />
3. Click Connect. At this point the EasyManage software<br />
connects to the user account.<br />
4. When connected the word “Success” will appear near the<br />
help button and a shortcut to the shared folder for this<br />
user account will appear on the desktop.<br />
2. Select the Private User Account type.<br />
3. Select the None Folder type.<br />
4. Type a Name for your shared folder.<br />
5. Type and re-type a Password.<br />
6. Click Create. At this point, the account is created (this<br />
may take a few minutes to complete).<br />
PAGE 27
MAXTOR SHARED STORAGE <strong>II</strong> MACINTOSH INSTALLATION<br />
Method 2 – Connect a Private User Account<br />
1. From the main EasyManage screen, click the Connect to a<br />
User Account button.<br />
The Connect to User Account window is displayed.<br />
2. Select the Private User Account that you wish to connect.<br />
3. Type the Password.<br />
4. Click Connect. At this point, the EasyManage software<br />
connects to the user account.<br />
5. When connected the word “Success” will appear near the<br />
help button and a shortcut to the shared folder for this user<br />
account will appear on the desktop of your Macintosh.<br />
Drag and Sort<br />
Drag and sort is an easy and powerful way to sort files on<br />
your <strong>Shared</strong> <strong>Storage</strong> Drive. When you drag a group of files to<br />
the <strong>Shared</strong> <strong>Storage</strong> Drive icon, each file is automatically<br />
sorted into a specific folder, based on its file type.<br />
Enable Drag and Sort<br />
This turns Drag and Sort on or off. It is turned on by default<br />
when you install the <strong>Shared</strong> <strong>Storage</strong> Drive software. You may<br />
also control this setting using the Drag and Sort button in the<br />
main EasyManage screen.<br />
Note: Drag and Sort can also be enabled and/or disabled<br />
from the Settings – Drag and Sort menu.<br />
Folders and their Sorted File Types<br />
Two types of folder sets exist on your <strong>Shared</strong> <strong>Storage</strong> Drive:<br />
– “My” folders - a set of folders unique to each user.<br />
– “Our” folders - a set of folders for all users.<br />
Files dragged to a user-specific shared folder are sorted into<br />
the “My” Personal Folders. Files dragged to the Public shared<br />
folder are sorted into the “Our” Public Folders.<br />
“My” Personal Folders and their Sorted File Types<br />
* Business user account folders.<br />
“Our” Public Folders and their Sorted File Types<br />
PAGE 28
MAXTOR SHARED STORAGE <strong>II</strong> MACINTOSH INSTALLATION<br />
Adding Drag and Sort Folders<br />
To add a new folder:<br />
1. Click the plus sign (+) at the bottom of the column. A<br />
sheet will drop down where you can enter the new folder<br />
name.<br />
2. After clicking OK, the new folder will appear in the list in<br />
alphabetical order.<br />
Adding Drag and Sort File Types<br />
To Add a New File Type:<br />
1. Select the folder in which you want to store the new file<br />
type.<br />
2. Click the plus sign (+) at the bottom of the File Types<br />
column. A sheet will drop down where you can enter a<br />
new file type.<br />
3. After clicking OK, the new file type will appear in the list in<br />
alphabetical order.<br />
Note: To add a file type, you need to know its extension.<br />
For example: .DOC for a text file.<br />
Backup Settings<br />
To Launch Your First Backup<br />
1. From the EasyManage menu, click Settings.<br />
2. This will launch the EasyManage Settings menu. By<br />
default, Backup is selected. If necessary, click the Backup<br />
tab. You will see the following:<br />
Select Folders to Back Up<br />
1. Click the plus sign (+).<br />
2. From the Finder window, select a folder and click Open.<br />
Repeat steps 1 and 2 to add additional folders or select<br />
multiple folders in a list by holding down the command<br />
key while clicking each folder.<br />
3. To launch an immediate backup, click Back Up Now.<br />
4. At this point, the backup will prepare. Files will start<br />
backing up to the <strong>Shared</strong> <strong>Storage</strong> Drive.<br />
5. When finished, a message will be displayed notifying you<br />
that the backup has completed.<br />
PAGE 29
MAXTOR SHARED STORAGE <strong>II</strong> MACINTOSH INSTALLATION<br />
Editing Backup Settings<br />
Set Day and Time<br />
Choose a time for your backup by clicking the arrow buttons<br />
or typing. Then choose day(s) by clicking them.<br />
Enable Scheduled Backups<br />
This turns scheduled backups on or off.<br />
You may also control this setting using the Scheduled Backup<br />
button in the main EasyManage screen.<br />
Back Up Now<br />
After you've selected the folders to back up, the day and the<br />
time, you can back up your folders immediately by clicking<br />
Back Up Now.<br />
Historical Versions<br />
When you back up your files, you have the option to store previous,<br />
or “historical,” versions of each file. You can then<br />
restore any historical version based on the date when it was<br />
backed up.<br />
1. Click the drop menu.<br />
2. Choose the number of historical versions from the menu.<br />
By default, 5 historical versions of each file are stored.<br />
Delete History<br />
This deletes all but the most current historical version of<br />
each backed-up file, creating extra space on your <strong>Shared</strong><br />
<strong>Storage</strong> Drive.<br />
1. Click Delete History. The deletion begins.<br />
2. When finished, the message “Delete history” will display.<br />
Delete Unused<br />
This deletes all backed-up files from your <strong>Shared</strong> <strong>Storage</strong><br />
Drive that no longer exist on your Macintosh, creating extra<br />
space on your <strong>Shared</strong> <strong>Storage</strong> drive.<br />
1. Click Delete Unused. The deletion begins.<br />
2. When finished, the message “Delete Unused has<br />
completed” will be displayed.<br />
Advanced Settings<br />
To open, click Tab Advanced. The following options are<br />
displayed:<br />
Wake My Macintosh if it is Asleep<br />
Select this option to automatically wake up your Macintosh,<br />
so the backup can take place. If you do not select this option,<br />
you will need to manually wake up your Macintosh before<br />
backup can start. This option is enabled by default.<br />
Start My Macintosh if it is Not Running<br />
Select this option to automatically start your Macintosh, so<br />
that backup can take place.<br />
This requires that the “automatically log in…” option is<br />
selected for your Mac OS X user account.<br />
If you currently log in manually and would like to switch to<br />
automatic login:<br />
1. Go to the Apple Menu and choose System Preferences.<br />
2. Click Accounts.<br />
3. Click the lock at the bottom of the window.<br />
4. Type your password and click OK.<br />
5. Select your user account.<br />
6. Click Login Options.<br />
7. Click Automatically log in as.<br />
8. Choose your user name from the drop-down list.<br />
9. Type your password and click OK.<br />
10. Click Login.<br />
11. The browser then launches to the <strong>Maxtor</strong> <strong>Shared</strong> <strong>Storage</strong><br />
Drive – home page.<br />
Shut Down My Macintosh when Backup is Finished<br />
This option is only available if the Start My Macintosh if it is<br />
Not Running is checked. When selected, your Macintosh will<br />
shutdown after a scheduled backup has completed.<br />
PAGE 30
MAXTOR SHARED STORAGE <strong>II</strong> MACINTOSH INSTALLATION<br />
<strong>Shared</strong> <strong>Storage</strong> Administration<br />
The button launches the <strong>Shared</strong> <strong>Storage</strong> Drive’s Web User<br />
Interface (Web UI).<br />
Note: You must login as the admin user to use the Web UI.<br />
To Access this Feature<br />
1. Open EasyManage and click on the Settings button.<br />
2. From the Settings screen, click Advanced Web Page. This<br />
will launch the Web UI. If prompted, type the User name<br />
and Password to authenticate.<br />
The admin user can select this option to configure the <strong>Shared</strong><br />
<strong>Storage</strong> Drive’s:<br />
– Language<br />
– Network Time Protocol<br />
– Date/Time Format<br />
– Date<br />
– Time<br />
– Computer Name<br />
–Workgroup Name<br />
–Password<br />
Note: See “The Web UI” later in this guide for details on using<br />
the <strong>Maxtor</strong> <strong>Shared</strong> <strong>Storage</strong> Web UI. Run Set-up Wizard for<br />
more information on configuring these settings.<br />
Backup<br />
Connect to My Selected User Account at Login<br />
Select this option if you want to connect to the selected User<br />
Account when you login to your Mac computer.<br />
If configured through settings, you can launch a backup from<br />
EasyManage.<br />
1. Click the Back Up button. The backup prepares to launch.<br />
then starts to backup the files to your <strong>Shared</strong> <strong>Storage</strong><br />
Drive.<br />
2. When finished, a screen notifies you that the Backup<br />
completed.<br />
3. Click the red button to close the screen.<br />
Drag and Sort<br />
Drag and Sort is an easy and powerful way to sort files on<br />
your <strong>Shared</strong> <strong>Storage</strong> <strong>II</strong> Drive. When you drag a group of files<br />
to the <strong>Shared</strong> <strong>Storage</strong> Drive icon, each file is automatically<br />
sorted into a specific folder, based on its file type.<br />
Note: See “Drag and Sort” on page 31 for more information<br />
regarding the use of this feature.<br />
PAGE 31
MAXTOR SHARED STORAGE <strong>II</strong> MACINTOSH INSTALLATION<br />
Restore<br />
Restore Recent Files and Folders<br />
You can restore the most recent version of backed-up files<br />
and folders.<br />
Select a File or Folder<br />
1. From the EasyManage main menu, click the Restore<br />
button.<br />
2. Click the arrow next to the hard drive where the current<br />
files are stored to reveal the folders from which files or<br />
folders were backed up.<br />
3. Click the arrow next to each folder to reveal its contents<br />
until you find the specific files and/or folders you wish to<br />
restore.<br />
4. Click the checkbox next to the files and/or folders you<br />
wish to restore.<br />
Select a Restore Location<br />
Original: Restores file(s) to their original location, replacing<br />
the existing version.<br />
Temporary: Restores files to the temporary location in the<br />
Documents folder of the current user. For example: /Users/<br />
John/Documents/<strong>Maxtor</strong> Restore.<br />
Restore the files and folders<br />
After you've selected the file(s) and the restore location, click<br />
Restore.<br />
Historical Versions<br />
When you back up your files, you have the option to store previous,<br />
or “historical,” versions of each file. You can then<br />
restore any historical version based on the date when it was<br />
backed up.<br />
You can choose the number of historical versions from the<br />
Historical Versions pop-up menu in the Backup Settings window.<br />
By default, 5 historical versions of each file are stored.<br />
or<br />
To restore a historic version of a file, click the latest drop<br />
down menu and select the Historic file version that you<br />
wish to restore.<br />
PAGE 32
MAXTOR SHARED STORAGE <strong>II</strong> MACINTOSH INSTALLATION<br />
SimpleView <strong>Storage</strong> and Backup Status<br />
This screen provides you with an overview of each user's<br />
storage and backup information:<br />
Using Media Server<br />
Click SimpleView.<br />
Last Backup<br />
Space Used<br />
Backup Status<br />
Date of the user's latest backup<br />
Total size of all user's files<br />
Success of user's last backup<br />
Use Media Server to Manage Your Digital Photo, Music and<br />
Video Collection<br />
If you have a networked home entertainment system, you can<br />
use Media Server to manage your digital photo, music and<br />
video collection on your <strong>Shared</strong> <strong>Storage</strong> Drive and use it with<br />
your entertainment system. Media Server can even search<br />
your iTunes Music folder for music and video files.<br />
The following displays:<br />
Backup Status Indicators<br />
Icon Status Meaning<br />
Complete<br />
Incomplete<br />
Failed<br />
Backup Log File<br />
You can see the details of a user's backup by reading the log<br />
file. To view the log file, double-click the icon in the Status<br />
column.<br />
The log files launches in a Console window.<br />
All files successfully backed up<br />
Some files backed up<br />
No files backed up<br />
Media Server recognizes files in the following folders on your<br />
<strong>Shared</strong> <strong>Storage</strong> Drive: Our Photos, Our Music, Our Movies, My<br />
Photos, My Music, My Movies or My Multimedia. By placing<br />
your files in these folders, they will automatically be available<br />
for use with your entertainment system. In order to use Media<br />
Server, your entertainment system will need to be compatible<br />
with UPnP (Universal Plug and Play).<br />
To enable Media Server on your <strong>Shared</strong> <strong>Storage</strong> Drive, click<br />
the Media Server button in the main EasyManage screen.<br />
To enable Media Server:<br />
1. From the EasyManage menu, click the Media Server button.<br />
2. This will launch your browser. When prompted, type the<br />
User Name and Password to authenticate.<br />
3. Click Login.<br />
This will launch your browser directly to the Manage<br />
Digital Photos, Music, and Video page.<br />
Note: See “The Web UI” later in this guide for details on<br />
using the <strong>Maxtor</strong> <strong>Shared</strong> <strong>Storage</strong> Web UI - Manage Digital<br />
Photos, Music, and Video for more information on<br />
configuring these settings.<br />
PAGE 33
MAXTOR SHARED STORAGE <strong>II</strong> MACINTOSH INSTALLATION<br />
Storing Audio<br />
Using your computer as an audio jukebox is a very popular<br />
application. This allows you to store and play thousands of<br />
your favorite songs. You can also create and manage an audio<br />
library from your <strong>Maxtor</strong> <strong>Shared</strong> <strong>Storage</strong> <strong>II</strong>.<br />
Shutting Down Your <strong>Shared</strong> <strong>Storage</strong> <strong>II</strong> Drive<br />
To Shut Down Your Drive<br />
Resetting Your <strong>Shared</strong> <strong>Storage</strong> <strong>II</strong> Drive<br />
If you can not access your drive after moving it to another network,<br />
turning it on after it has been off for a period of time, or<br />
if you have forgotten/lost the admin password it may need to<br />
be reset.<br />
To Reset Your Drive<br />
1. With the drive turned on, use the tip of a pen or paperclip,<br />
then press and hold the reset button on the back of your<br />
drive. After a few seconds, the drive will reboot.<br />
Power Button<br />
Reset Button<br />
1. Press the round black button on the back panel of your<br />
<strong>Maxtor</strong> <strong>Shared</strong> <strong>Storage</strong> Drive. Upon doing so, the power<br />
status button on the front panel of the <strong>Shared</strong> <strong>Storage</strong><br />
Drive will blink rapidly.<br />
2. The power status LED will return to a blink state of about<br />
1 second between blinks. The reset is complete and your<br />
drive is ready for use.<br />
Power Status Light<br />
Power Status Light<br />
The power down sequence will take 1 – 10 seconds to<br />
complete. When properly shutdown, all LEDs on the front<br />
and back will no longer be illuminated.<br />
After Resetting Your Drive<br />
– The admin password will be removed<br />
– The computer name will reset back to its default name<br />
(Example: MSS-000155)<br />
– The workgroup name will be reset to MSHOME<br />
PAGE 34
MAXTOR SHARED STORAGE <strong>II</strong> MACINTOSH INSTALLATION<br />
Note: See “The Web UI” later in this guide for details on using<br />
the <strong>Maxtor</strong> <strong>Shared</strong> <strong>Storage</strong> Web UI. Run Set-up Wizard for<br />
more information on re-configuring these settings.<br />
Security Lock<br />
Your new <strong>Maxtor</strong> <strong>Shared</strong> <strong>Storage</strong> <strong>II</strong> includes a security locking<br />
slot on the back of the drive. The slot is compatible with most<br />
security locking cables.<br />
Media Serving<br />
With the <strong>Shared</strong> <strong>Storage</strong> Drive’s Media Serving capabilities,<br />
you can view videos or photos and listen to music on your<br />
home entertainment center without ever turning on your<br />
computer. The Media Server feature is disabled by default on<br />
the <strong>Shared</strong> <strong>Storage</strong> Drive.<br />
Security Lock<br />
Once your <strong>Shared</strong> <strong>Storage</strong> Drive is properly connected to your<br />
network, you can copy music, movies, or videos directly to it.<br />
Next, connect an UPnP AV compatible digital media adapter<br />
(DMA) through your router, and your home network becomes<br />
a home entertainment center.<br />
PAGE 35
MAXTOR SHARED STORAGE <strong>II</strong> MACINTOSH INSTALLATION<br />
Considerations for Home Media Networks<br />
– Some data may not be available for access for up to two<br />
(2) hours after being copied to the <strong>Shared</strong> <strong>Storage</strong><br />
Drive. To obtain immediate access to these media files,<br />
click the Refresh button located in Web UI.<br />
–Take a survey and note all of the wireless devices in<br />
your household (e.g., radio’s, stereo’s, speakers,<br />
phones, cell phones, microwave ovens, alarms, etc.).<br />
– Use of a hand held WiFi detector will help determine<br />
strength and weakness of WiFi signals in your home.<br />
– Be suspicious of any wireless devices in the same<br />
general area and remove them from the WiFi paths of<br />
your routers and media players.<br />
– In some cases, firewalls may need to be disabled and<br />
re-enabled.<br />
– Most wireless devices broadcast a wireless frequency<br />
by default. Check the documentation of your wireless<br />
media players for configuration (WEP) settings.<br />
– Check that your wireless router (WEP) security settings<br />
will allow detection and connection of new devices.<br />
–Try moving your media player within a couple of feet of<br />
your wireless router for configuration and connection.<br />
– When configuring and detecting wireless devices, keep<br />
an Ethernet cable handy to hard wire the devices<br />
together for diagnosis.<br />
– If you continue to have problems with your WiFi<br />
connection dropping off line, consider hardwiring the<br />
devices with Cat5e Ethernet cabling.<br />
– If you’re still having detection issues, reset all network<br />
devices by physically unplugging them from power.<br />
Power on all routers, switches, the <strong>Maxtor</strong> <strong>Shared</strong><br />
<strong>Storage</strong> Drive, computers, and finally media players.<br />
PAGE 36
MAXTOR SHARED STORAGE <strong>II</strong> WEB USER INTERFACE<br />
Web User Interface<br />
The Web User Interface (Web UI) is used for the following<br />
actions:<br />
– Setup the <strong>Shared</strong> <strong>Storage</strong> Drive (Language, Date/Time<br />
Settings, Administrative Password, etc.)<br />
–Create/Manage User Accounts<br />
–Create/Manage <strong>Shared</strong> Folders<br />
– Advanced Settings - configure network settings, adjust<br />
power settings, perform diagnostics, setup USB<br />
devices (external drives, printers)<br />
– View Drive Status<br />
Accessing the Web UI<br />
To Open or Start the Web UI<br />
1. Through your browser application:<br />
– By Network ID – Each <strong>Shared</strong> <strong>Storage</strong> Drive has its<br />
own Network ID. The Network ID is located on the label<br />
located on the back panel of the <strong>Shared</strong> <strong>Storage</strong> Drive.<br />
Locate the label on the back panel and find the text,<br />
MSS Network ID: mss-xxxxxx; “mss-“are the first four<br />
characters found at the beginning of each Network ID<br />
and the “x” are denoted by numeric characters – for<br />
example, 123456); then to access the Web UI:<br />
– Launch your computer’s web browser (e.g., Microsoft<br />
Internet Explorer) and type the following in the address<br />
field: http://mss-xxxxxx/<br />
For example, if the <strong>Shared</strong> <strong>Storage</strong> Drive’s Network ID<br />
is 123456, you would type: http://mss-123456/<br />
– By IP Address – Each <strong>Shared</strong> <strong>Storage</strong> Drive has its own<br />
IP Address, whether it is Static, assigned from a DHCP<br />
Server, or by default via Automatic Private IP Addressing<br />
(APIPA). To launch the Web UI via its IP Address if the<br />
<strong>Shared</strong> <strong>Storage</strong> Drive’s address is 169.254.26.69, you<br />
would type: http://169.254.26.69<br />
2. Through the <strong>Maxtor</strong> EasyManage software, you can<br />
launch the Web UI. To do so:<br />
–Start <strong>Maxtor</strong> EasyManage software.<br />
–For Windows: Click Settings ➔ Advanced Web Page.<br />
–For Macintosh: Click Settings ➔ Advanced ➔ <strong>Shared</strong><br />
<strong>Storage</strong> Administration.<br />
– At this point, your web browser launches. Type in your<br />
administrative username and password for<br />
authentication and click OK.<br />
The <strong>Shared</strong> <strong>Storage</strong> <strong>II</strong> Drive – Home Page opens in your<br />
browser. The Web UI is used to administrate the <strong>Shared</strong><br />
<strong>Storage</strong> Drive via a simple, but thorough web interface.<br />
In the following pages, you will learn how to use all features<br />
of the Web UI.<br />
PAGE 37
MAXTOR SHARED STORAGE <strong>II</strong> WEB USER INTERFACE<br />
Run Set-up Wizard<br />
The Run Set-up Wizard will aid in the initial configuration of<br />
your <strong>Shared</strong> <strong>Storage</strong> Drive. From the Wizard, you can:<br />
– Change the language used by the Web UI<br />
– Manually set Date/Time or enable/configure a Network<br />
Time Server<br />
– Name your <strong>Shared</strong> <strong>Storage</strong> Drive and assign it to a<br />
workgroup<br />
–Create the administrative password to secure the<br />
administrative functionality of the <strong>Shared</strong> <strong>Storage</strong><br />
Drive<br />
1. From the <strong>Maxtor</strong> <strong>Shared</strong> <strong>Storage</strong> Drive – Home Page,<br />
click Run Set-up Wizard.<br />
3. Select your Time Zone.<br />
4. To disable the Network Time Protocol feature, click<br />
Disable and then click Next.<br />
To Set the Date<br />
Note: Skip this step if Network Time Protocol was<br />
configured.<br />
1. Type in the Date using the (mm/dd/yyyy) format.<br />
To Set the Time<br />
Note: Skip this step if Network Time Protocol was<br />
configured.<br />
1. Type in the current time using the (hh:mm:ss) format,<br />
make sure to indicate AM or PM.<br />
2. Click Next.<br />
The following page is displayed:<br />
Step 1 of 2<br />
Use this page to enter your language preference, today’s<br />
date, and the current time. To change the date and time later,<br />
use the Advanced, Language, Date and Time settings page.<br />
To Select the Language<br />
1. Use the pull down menu and select your language.<br />
Network Time Protocol<br />
This option allows the <strong>Shared</strong> <strong>Storage</strong> Drive to maintain time<br />
via an Internet time server. By default, this feature is disabled.<br />
Note: This feature can only be used if the <strong>Shared</strong> <strong>Storage</strong><br />
Drive is connected to the Internet.<br />
1. To enable the Network Time Protocol, click Enable.<br />
2. Choose a continent (Asia or Europe), country (USA) or a<br />
user defined NTP server name as the default NTP server.<br />
If you choose to use a user defined NTP server name,<br />
enter the name in the field provided.<br />
Step 2 of 2<br />
Use this page to assign the <strong>Shared</strong> <strong>Storage</strong> Drive a network<br />
name, identify the workgroup (Domain) to which it belongs,<br />
and to add/change the Admin password for your <strong>Shared</strong><br />
<strong>Storage</strong> Drive.<br />
To Set the Name of Your <strong>Shared</strong> <strong>Storage</strong> Drive<br />
1. Enter the name of your choice in the Name field.<br />
To Set the Workgroup (Domain) that you would like your<br />
<strong>Shared</strong> <strong>Storage</strong> Drive to be in<br />
1. Enter the Workgroup (Domain) name of your choice in the<br />
Workgroup field.<br />
To Set an Administrator Password<br />
1. Select the Yes button to indicate that you want to have a<br />
password on the Administrator account.<br />
2. Type in the new password and then verify the password by<br />
retyping it.<br />
3. Click Next.<br />
PAGE 38
MAXTOR SHARED STORAGE <strong>II</strong> WEB USER INTERFACE<br />
Note: If you do not want an Administrator password on<br />
your <strong>Shared</strong> <strong>Storage</strong> Drive, select the NO button<br />
indicating that you do not want to assign an Administrator<br />
password and then click Next.<br />
You will be prompted to authenticate using the<br />
Administrator’s name (admin) and type the newly created<br />
administrator password. Click OK.<br />
Configuration Complete<br />
After completing the Set-up wizard, you should see a<br />
Congratulations message followed by an overview of all of<br />
the settings that were made. Please take a minute to either<br />
print or write down the information for future reference.<br />
To print the summary of your <strong>Shared</strong> <strong>Storage</strong> Drive<br />
1. Click the print icon below the information.<br />
2. When finished printing or writing down the information,<br />
click OK to return to the <strong>Shared</strong> <strong>Storage</strong> home page.<br />
Accounts Management<br />
Overview<br />
Use the Accounts Management link to manage the way<br />
people access and store information on your <strong>Shared</strong> <strong>Storage</strong><br />
Drive.<br />
The Accounts Management page is where you can:<br />
–Create a New User Account<br />
– Modify Account settings and Sharing Privileges<br />
– Delete User Accounts<br />
Using the Accounts Management Pages<br />
– Select what action you would like to do<br />
– If you want to redisplay a page (to change something<br />
you entered on it, for example), click Back<br />
– After making a change, click Next<br />
– Go back and forth between pages until you are satisfied<br />
that the information is correct<br />
–To stop and lose your changes, click Cancel. You can<br />
stop at any time<br />
Creating a New User Account<br />
Add a user to your <strong>Shared</strong> <strong>Storage</strong> Drive and you want someone<br />
to have a particular level of access to information in a<br />
share. You can then define the appropriate level of access for<br />
that user to that information.<br />
When <strong>Shared</strong> <strong>Storage</strong> Drive is installed, it includes an Admin<br />
user by default. Admin is the user name you or whoever else<br />
administers <strong>Shared</strong> <strong>Storage</strong> Drive use to log in to exercise<br />
administrative privileges.<br />
Note: This is the only account that will allow you to login to<br />
the Web Administration portion of the <strong>Shared</strong> <strong>Storage</strong> Drive.<br />
To Add a User<br />
1. Click Create A New User Account.<br />
2. Type the user name in the name field. (Note: The name<br />
must have alpha numeric characters and can be a<br />
maximum length of 32 characters.)<br />
3. Type a password in the Password field. You must enter a<br />
password for the user in order to continue.<br />
4. Click Next.<br />
5. Set the permissions for the user account by selecting the<br />
appropriate buttons for the folders that you want the user to<br />
have access to. Note: By default, the user has permissions to<br />
all <strong>Shared</strong> folders on the <strong>Shared</strong> <strong>Storage</strong> Drive.<br />
6. Click Next.<br />
7. A screen will appear showing that the user was created.<br />
Click OK to return to the Accounts Management page.<br />
PAGE 39
MAXTOR SHARED STORAGE <strong>II</strong> WEB USER INTERFACE<br />
The user is added and should immediately have access to<br />
the <strong>Shared</strong> <strong>Storage</strong> Drive.<br />
Modify Account Settings and <strong>Shared</strong> Privileges<br />
Use this page to change a password as well as modify what<br />
shared folders a user has access to on pre-existing accounts.<br />
Note: The Admin account always has access to every folder<br />
on the <strong>Shared</strong> <strong>Storage</strong> Drive.<br />
To Change Folder Permissions<br />
1. Click Modify Account Settings and <strong>Shared</strong> Privileges.<br />
2. Find the user to modify the permissions for and click<br />
Modify.<br />
3. Set the permissions for the user account by selecting the<br />
appropriate buttons for the folders that you want the user<br />
to have access to.<br />
4. Click Next.<br />
5. A screen will appear notifying you that access privileges<br />
have been successfully modified. Click OK to return to the<br />
Accounts Management page.<br />
To Change the Password on a User Account<br />
1. Click Modify Account Settings and <strong>Shared</strong> Privileges.<br />
2. Find the user to modify the permissions for and click<br />
Change.<br />
3. Enter the new password for the user.<br />
4. Confirm the password by re-entering it.<br />
Note: If the passwords do not match, an error message<br />
will appear.<br />
5. Click Next.<br />
6. A screen will appear notifying you that the password has<br />
been successfully changed.<br />
7. Click OK to return to the Accounts Management page.<br />
Delete User Accounts<br />
To Delete a User Account<br />
1. Click Delete User Accounts.<br />
2. Find the user that you would like to remove and click<br />
Delete.<br />
3. Confirm that you selected the correct user account to<br />
delete and click Yes.<br />
4. A screen will appear notifying you that the user was<br />
successfully deleted. Click OK to return to the Accounts<br />
Management page.<br />
Note: A User Folder will still remain on the <strong>Shared</strong><br />
<strong>Storage</strong> Drive when the User Account has been deleted.<br />
Refer to <strong>Shared</strong> Folders Management for the procedure<br />
used to delete a shared folder.<br />
PAGE 40
MAXTOR SHARED STORAGE <strong>II</strong> WEB USER INTERFACE<br />
<strong>Shared</strong> Folders Management<br />
Overview<br />
Use the <strong>Shared</strong> Folders Management page to manage the<br />
way people access and store information on your <strong>Shared</strong><br />
<strong>Storage</strong> Drive.<br />
The <strong>Shared</strong> Folders Management page is where you can:<br />
–Create a New <strong>Shared</strong> Folder<br />
– Modify <strong>Shared</strong> Folder Access Privileges.<br />
– Delete, Suspend or Re-Activate <strong>Shared</strong> Folders.<br />
– Manage Digital Photos, Music and Video for UPnP<br />
Audio/Video players connected to you home/office<br />
network<br />
Using the <strong>Shared</strong> Folders Management Page<br />
– Select what action you would like to do.<br />
– If you want to redisplay a page (to change something<br />
you entered on it, for example), click Back.<br />
– After making a change, click Next.<br />
– Go back and forth between pages until you are satisfied<br />
that the information is correct.<br />
–To stop and lose your changes, click Cancel. You can<br />
stop at any time.<br />
Create a New <strong>Shared</strong> Folder<br />
To Create a New Public <strong>Shared</strong> Folder<br />
If you create a share that has Public access, this means that<br />
all users will be able to access the folder as well as read and<br />
write to the folder.<br />
1. Click Create a New <strong>Shared</strong> Folder.<br />
2. Type in the desired name for the new shared folder. Note:<br />
the Name can be no longer than 32 characters.<br />
3. Set the Access Privileges at:<br />
– Public shared folder if you would like everyone to have<br />
access.<br />
4. Click Next.<br />
5. You will see confirmation that the share was successfully<br />
created. Click OK to go back to the <strong>Shared</strong> Folders<br />
Management page.<br />
6. Click New if you want to create another Share on your<br />
<strong>Shared</strong> <strong>Storage</strong> Drive.<br />
To Create a New Defined Access <strong>Shared</strong> Folder<br />
If you Define the shared folder access you will be able to limit<br />
the users that can access the <strong>Shared</strong> Folder.<br />
1. Click Create a New <strong>Shared</strong> Folder.<br />
2. Type in the desired name for the new shared folder. Note:<br />
the Name can be no longer than 32 characters.<br />
3. Set the Access Privileges at:<br />
– Define shared folder access privileges if you would like<br />
to limit user access to this share.<br />
4. Click Next.<br />
5. Set User Access for the share by selecting the appropriate<br />
buttons for the users that you want to have access to the<br />
folder.<br />
– Full Access - This will allow the selected user to Read,<br />
Write, and Create new files in the selected <strong>Shared</strong> Folder<br />
– Read Only Access - This will allow the selected user to<br />
only read the files in the selected shared folder<br />
– No Access - This will allow no access to the selected<br />
shared folder.<br />
6. Click Next.<br />
7. You will see a confirmation that the share was created. Click<br />
OK to return to the <strong>Shared</strong> Folders Management page.<br />
Click New if you want to create another Share on your<br />
<strong>Shared</strong> <strong>Storage</strong> Drive.<br />
PAGE 41
MAXTOR SHARED STORAGE <strong>II</strong> WEB USER INTERFACE<br />
Modify <strong>Shared</strong> Folder Access Privileges<br />
To Change Folder Permissions<br />
1. Click Modify <strong>Shared</strong> Folder Access Privileges.<br />
2. Find the Share to modify the permissions for and click<br />
Modify.<br />
3. Set the permissions for the share by selecting the<br />
appropriate buttons for the users that you want to have<br />
access to the folder.<br />
– Full Access - This will allow the selected user to Read,<br />
Write, and Create new files in the selected <strong>Shared</strong><br />
Folder<br />
– Read Only Access - This will allow the selected user to<br />
only read the files in the selected shared folder<br />
– No Access - No access will allowed to the selected<br />
shared folder.<br />
4. Click Next.<br />
To Suspend a <strong>Shared</strong> Folder<br />
1. Click Delete, Suspend or Re-Activate <strong>Shared</strong> Folders.<br />
2. Find the <strong>Shared</strong> Folder to Suspend and click Suspend.<br />
3. It will confirm that the selected <strong>Shared</strong> Folder has been<br />
suspended. Click OK to return to the <strong>Shared</strong> Folders<br />
Management page.<br />
To Re-Activate a User Account<br />
1. Click Delete, Suspend or Re-Activate <strong>Shared</strong> Folders.<br />
2. Find the shared folder to Reactivate and click Reactivate.<br />
3. It will confirm that the selected <strong>Shared</strong> folder has been<br />
re-activated. Click OK to return to the <strong>Shared</strong> Folders<br />
Management page.<br />
5. You will see a confirmation that the share permissions<br />
were successfully set on the selected folder. Click OK.<br />
Delete, Suspend or Re-Activate <strong>Shared</strong> Folders<br />
To Delete a <strong>Shared</strong> Folder<br />
1. Click Delete, Suspend or Re-Activate <strong>Shared</strong> Folders.<br />
2. Find the Share that you would like to remove and click<br />
Delete.<br />
3. Confirm that you selected the correct <strong>Shared</strong> Folder and<br />
click Yes.<br />
4. It will confirm that the selected <strong>Shared</strong> Folder has been<br />
deleted. Click OK to return back to the <strong>Shared</strong> Folders<br />
Management Page.<br />
PAGE 42
MAXTOR SHARED STORAGE <strong>II</strong> WEB USER INTERFACE<br />
Manage Digital Photos, Music, Video<br />
Media server technology enables digital photo, music, and<br />
video playback to networked home entertainment systems.<br />
By default, the Media Server is disabled.<br />
To Manage Digital Photos, Music and Videos<br />
1. Click Manage Digital Photos, Music and Videos.<br />
2. Click Enable Media Server.<br />
3. Click Next.<br />
To Disable Media Server<br />
1. Click Manage Digital Photos, Music and Videos.<br />
2. Click Disable Media Server.<br />
3. Click Next.<br />
4. Click Done to return to the <strong>Shared</strong> Folders Management<br />
page.<br />
<strong>Shared</strong> Folder Backup<br />
4. Select the shared folders that will be searched for music,<br />
videos and/or pictures and click Next.<br />
Note: You can only check one (1) iTunes folder at any given<br />
time.<br />
5. Click Done to return to the <strong>Shared</strong> Folders Management<br />
page.<br />
To Refresh Media Server<br />
This option is only available if Media Server is enabled. By<br />
default, the Media Server automatically searches for new<br />
media files every two (2) hours. To perform an immediate<br />
update to the Media Server database, you must refresh it.<br />
1. Click Manage Digital Photos, Music and Videos.<br />
2. Click Refresh. The Media Server will refresh<br />
automatically in the background.<br />
3. Click Done to return to the <strong>Shared</strong> Folders Management<br />
page.<br />
To Clean Up Media Server<br />
This option is only available if Media Server is disabled. This<br />
feature allows you to prevent potential database corruption<br />
when the <strong>Shared</strong> <strong>Storage</strong> Drive’s Media Serving feature is<br />
disabled.<br />
1. Click Manage Digital Photos, Music and Videos.<br />
2. Click Clean Up. The Media Server’s database will be<br />
cleaned in the background.<br />
3. Click Done to return back to the <strong>Shared</strong> Folders<br />
Management Page.<br />
To use this feature, an external USB drive must be connected<br />
to the <strong>Shared</strong> <strong>Storage</strong> Drive. After connecting, the External<br />
<strong>Storage</strong> unit will require a re-format from the <strong>Shared</strong> <strong>Storage</strong>’s<br />
browser interface.<br />
For connection information, refer to the <strong>Shared</strong> <strong>Storage</strong> <strong>II</strong><br />
User manual regarding the use of external USB drives.<br />
Formatting the External USB drive<br />
This procedure must be followed in order to use the <strong>Shared</strong><br />
Folder Backup features of the <strong>Shared</strong> <strong>Storage</strong> Drive.<br />
1. Connect the external USB drive to your <strong>Shared</strong> <strong>Storage</strong><br />
Drive.<br />
2. From the Web User Interface (Web UI), select <strong>Shared</strong><br />
Folder Backup.<br />
3. A page displays notifying you that, “Your backup drive is<br />
not formatted properly. Do you wish to format it now?”<br />
Select Yes to continue.<br />
4. A page will display prompting you to select a USB drive to<br />
format. Select the drive from the drop-down menu and<br />
choose Next.<br />
5. A warning will display, notifying you that formatting will<br />
erase all data currently on the USB drive. Choose Yes.<br />
6. A page appears showing format status of the USB drive.<br />
When finished, a page appears notifying you that the drive<br />
is formatted and ready for use. Choose Done and return to<br />
the <strong>Shared</strong> Folder Backup page.<br />
PAGE 43
MAXTOR SHARED STORAGE <strong>II</strong> WEB USER INTERFACE<br />
Create Backup Set<br />
This option allows you to create a backup of shared files and<br />
folders that reside on your <strong>Shared</strong> <strong>Storage</strong> Drive.<br />
1. Select <strong>Shared</strong> Folder Backup.<br />
2. From the <strong>Shared</strong> Folder Backup Home Page, select<br />
Create Backup Set.<br />
3. From the Create Backup Set page, select the shared<br />
folders you wish to add to the Backup Set or you can<br />
maintain the default, All <strong>Shared</strong> Folders option.<br />
4. Enter a Name for your backup set and choose Next.<br />
5. You will be prompted to select an external drive to backup<br />
to. Select the external USB drive from the drop-down<br />
menu and choose Next.<br />
6. You will then be prompted to create a Backup Schedule.<br />
By default, your selected shared folders will backup daily<br />
at 10:00 pm; the backup set will also maintain three<br />
months of the files located in the backup set.<br />
Delete Backup Set<br />
This feature allows you to delete a backup set stored on the<br />
External USB drive connected to the <strong>Shared</strong> <strong>Storage</strong> Drive.<br />
1. From the <strong>Shared</strong> Folder Backup Home Page, select<br />
Delete Backup Set.<br />
2. A page opens listing the Backup Sets located on the<br />
<strong>Shared</strong> <strong>Storage</strong> Drive. Select the backup set you want to<br />
delete and choose Delete.<br />
NOTE: Deleting a Backup Set does not remove files/<br />
folders from the external USB drive.<br />
3. You will be asked to confirm that you wish to delete the<br />
Backup Set. Choose Delete.<br />
4. A page opens showing the progress of the backup set<br />
removal. When complete, choose Done and return to the<br />
<strong>Shared</strong> Folder Backup page.<br />
Make your selections to the backup schedule and choose<br />
Next.<br />
7. A page opens showing that the Backup Set has been<br />
created, and displays the Backup Name, Backup Source,<br />
Destination, and Schedule. Choose Done and return to the<br />
<strong>Shared</strong> Folder Backup page, or choose Back Up Now to<br />
launch your first backup.<br />
8. If you select Back Up Now, a page launches showing you<br />
the status of the backup. When finished, a page opens<br />
showing when the backup is complete.<br />
9. Choose Done and return to the <strong>Shared</strong> Folder Backup<br />
page.<br />
PAGE 44
MAXTOR SHARED STORAGE <strong>II</strong> WEB USER INTERFACE<br />
Back Up<br />
This option allows you to perform an immediate backup of all,<br />
or selected Backup Sets.<br />
1. From the <strong>Shared</strong> Folder Backup Home Page, select<br />
Back Up.<br />
2. A page opens prompting you to select which backup sets<br />
you wish to immediately backup. Select the backup sets<br />
and choose Back Up Now.<br />
3. A page opens showing you the status of the backup. When<br />
finished, choose Done and return to the <strong>Shared</strong> Folder<br />
Backup page.<br />
Restore<br />
This option will restore data located in a backup set on the<br />
External USB drive to the <strong>Shared</strong> <strong>Storage</strong> Drive.<br />
1. From the <strong>Shared</strong> Folder Backup Home Page, select<br />
Restore.<br />
2. A page opens prompting you to select which backup sets<br />
you wish to restore to the <strong>Shared</strong> <strong>Storage</strong> Drive. Select the<br />
backup set you wish to restore and choose Next.<br />
3. Select the Year, Month, Date and Time that you wish to<br />
restore from.<br />
Select the location where to restore your data:<br />
– Public<br />
– Original location<br />
4. Choose Restore.<br />
5. If you selected to restore to the original location of the<br />
data, a page opens warning you that, “…files in the<br />
original location will be overwritten with the<br />
corresponding backup version you have just selected.”<br />
Advanced Settings<br />
Overview<br />
Use the Advanced Settings page to manage the Language,<br />
Date, Time, and Network Settings. As well as, run Diagnostics,<br />
set power management options, update the <strong>Shared</strong> <strong>Storage</strong><br />
Drive software and manage any USB peripherals that you<br />
have attached to the <strong>Shared</strong> <strong>Storage</strong> Drive.<br />
From the Advanced Settings You Can<br />
– Set the Language, Date, and Network Time Protocol<br />
– Adjust Network Settings<br />
– Run Diagnostics, set power management and update<br />
the software<br />
– Manage any USB peripherals attached to the <strong>Shared</strong><br />
<strong>Storage</strong> Drive<br />
Using the Advanced Settings Pages<br />
– Select what action you would like to do.<br />
– If you want to redisplay a page (to change something<br />
you entered on it, for example), click Back.<br />
– After making a change, click Next.<br />
Go back and forth between pages until you are satisfied<br />
that the information is correct.<br />
–To stop and lose your changes, click Cancel. You can<br />
stop at any time.<br />
6. To continue, choose Restore.<br />
7. A page opens showing the status of the restore. When<br />
finished, choose Done and return to the <strong>Shared</strong> Folder<br />
Backup page.<br />
PAGE 45
MAXTOR SHARED STORAGE <strong>II</strong> WEB USER INTERFACE<br />
Language, Date and Time<br />
Enter your language preference, date, and Network Time<br />
To select the Language<br />
1. Use the pull down menu and select the your language.<br />
Network Time Protocol<br />
This option allows the <strong>Shared</strong> <strong>Storage</strong> Drive to maintain time<br />
via an Internet time Server. By default, this feature is disabled.<br />
Note: This feature can only be used if the <strong>Shared</strong> <strong>Storage</strong><br />
Drive is connected to the Internet.<br />
1. To enable the Network Time Protocol, click Enable.<br />
2. Choose a continent (Asia or Europe), country (USA) or a<br />
User defined NTP Server name as the Default NTP<br />
server.<br />
If you choose to use a User defined NTP Server Name,<br />
enter the name in the field provided.<br />
3. Select your Time Zone.<br />
4. To disable the Network Time Protocol feature, click<br />
Disable and then click Next.<br />
To Set the Date<br />
Note: Skip this step if Network Time Protocol was configured.<br />
1. Type in the Date using the (mm/dd/yyyy) format.<br />
To Set the Time<br />
Note: Skip this step if Network Time Protocol was configured.<br />
1. Type in the current time using the (hh:mm:ss) format,<br />
make sure to indicate AM or PM.<br />
2. Click Next.<br />
3. Click Done to return to the Advanced Settings page.<br />
Network Settings<br />
Use this page to assign the file server a name, identify the<br />
workgroup to which it belongs, and to set the IP configuration<br />
of the <strong>Shared</strong> <strong>Storage</strong> Drive.<br />
To Set the Name of Your <strong>Shared</strong> <strong>Storage</strong> Drive<br />
1. Click Network Settings.<br />
2. Enter a name for the <strong>Shared</strong> <strong>Storage</strong> Drive in the name field.<br />
To set the Workgroup that you would like Your <strong>Shared</strong><br />
<strong>Storage</strong> Drive to be in<br />
1. Enter the Workgroup name of your choice in the<br />
workgroup field.<br />
2. Click Next.<br />
To set the IP address on the <strong>Shared</strong> <strong>Storage</strong> Drive using a<br />
DHCP server (default)<br />
1. Select the button indicating that you would like to obtain<br />
an IP address from a DHCP server.<br />
2. Click Next.<br />
3. A message will appear indicating that the network settings<br />
have been submitted to the <strong>Shared</strong> <strong>Storage</strong> Drive.<br />
4. Click Done to return to the Advanced Settings page.<br />
To set the IP address on the <strong>Shared</strong> <strong>Storage</strong> Drive using a<br />
STATIC IP address (advanced users only)<br />
1. Select Network Settings.<br />
2. Select the button indicating that you would like to use<br />
manual TCP/IP settings.<br />
3. Enter the IP Address, Subnet Mask, and Default Gateway.<br />
4. Click Next. You will see a status and a message asking<br />
you to, “…stand by.”<br />
5. Once the network settings have been applied, click Done<br />
to return to the Advanced Settings page.<br />
PAGE 46
MAXTOR SHARED STORAGE <strong>II</strong> WEB USER INTERFACE<br />
System Maintenance<br />
Use these pages to run disk utilities and perform diagnostics;<br />
modify power management settings, and to update your<br />
<strong>Shared</strong> <strong>Storage</strong> Drive software.<br />
To Change Power Management Settings<br />
1. Click Power Management.<br />
2. Select the Drive that you would like to apply power<br />
management settings to.<br />
3. Use the pull down menu to select the time which you<br />
would like the drive to sit idle before “Going to sleep.”<br />
Note: By default, the drive inactivity period is set to<br />
1 hour.<br />
4. Click Next.<br />
5. It will confirm the amount of time that you set.<br />
6. Click Done to return to the System Maintenance page.<br />
To Run Diagnostics<br />
1. Click Diagnostics Scan and Repair.<br />
2. A warning will appear notifying you that the drive will be<br />
inaccessible to users while running. Click Next.<br />
3. The diagnostic feature inspects your hard drive for defects.<br />
– Click Proceed to start the diagnostic process.<br />
– Click Cancel if you would like to back up your data first.<br />
Selecting Cancel will require a re-test.<br />
4. A status bar will appear showing the status of the scan.<br />
The Diagnostic process takes between 2 - 5 minutes.<br />
5. Upon successful completion, a window will appear<br />
notifying you that your <strong>Shared</strong> <strong>Storage</strong> Drive is functioning<br />
within normal operating parameters.<br />
6. Click on Done to return to the System Maintenance<br />
Options page. If there are errors that are not repairable, a<br />
screen will prompt you with a diagnostics code. Record<br />
this error code and contact <strong>Maxtor</strong> Technical Assistance.<br />
System Update<br />
1. Click System Update.<br />
2. A warning will appear notifying you that the drive will be<br />
inaccessible to users while running. Click Next.<br />
3. Follow the on screen instructions. This process does<br />
require a firmware download from the <strong>Maxtor</strong> website.<br />
4. After the file is downloaded, click the Browse button and<br />
search for the firmware update.<br />
5. Once the file is selected, click Update.<br />
6. A progress bar will show the status of the update. The<br />
drive does reboot during this process. You will have a<br />
countdown. Once the countdown is finished, close your<br />
browser and then reopen it to the <strong>Shared</strong> <strong>Storage</strong> Drive<br />
home page.<br />
7. Click Done to return to the System Maintenance page.<br />
PAGE 47
MAXTOR SHARED STORAGE <strong>II</strong> WEB USER INTERFACE<br />
Configure Your USB Devices<br />
Use these pages to configure USB drives and to manage<br />
USB printers plugged into the <strong>Shared</strong> <strong>Storage</strong> Drive.<br />
Format USB Drive<br />
1. Click Format USB Drive.<br />
2. Select the button indicating if you would like to:<br />
– Re-format the drive and create a single partition<br />
– Re-format a specific existing partition<br />
3. If necessary, select the partition you wish to format and<br />
click Next.<br />
4. Enter a Volume name and click Next.<br />
5. A warning will appear stating that if you continue, you will<br />
lose all of your data. Click Next.<br />
6. You will then see a status page with an elapsed time on it.<br />
When the drive has finished formatting, you will see a<br />
message that the USB drive has been successfully<br />
formatted. Click Done to return to the Configure Your<br />
USB Devices page.<br />
Printer Support Management<br />
1. Click Printer Support Management.<br />
2. You will see the current status of your printer support. It<br />
will be Enabled or Disabled. Depending on the state, the<br />
button on the screen will read to opposite. If the printer<br />
support is disabled and you want to enable it, click Enable.<br />
3. You will see a message stating that the Printer Support is<br />
enabled. Click Done to return to the Configure Your USB<br />
Devices page.<br />
4. If Printer Support is enabled and you want to disable it,<br />
click Disable. You will see a message stating that the<br />
Printer Support is disabled.<br />
5. Click Done to return to the Configure Your USB Devices<br />
page.<br />
Unplug USB Devices from the <strong>Shared</strong> <strong>Storage</strong> Drive<br />
1. Click Unplug USB devices from the <strong>Shared</strong> <strong>Storage</strong><br />
Drive. It will list all of the USB devices currently plugged<br />
into the drive.<br />
2. Click the Safely Remove button next to the device that you<br />
would like to unplug.<br />
3. A message will appear stating that you can remove the<br />
selected device. Click Done to return to the Configure<br />
Your USB Devices page.<br />
PAGE 48
MAXTOR SHARED STORAGE <strong>II</strong> WEB USER INTERFACE<br />
System Status<br />
Online Help<br />
Your <strong>Shared</strong> <strong>Storage</strong> Drive has advanced help features. To<br />
access these files, click on the Online Help link at the bottom<br />
of the drive file screen.<br />
Overview<br />
Use the System Status page to get a summary of your <strong>Maxtor</strong><br />
<strong>Shared</strong> <strong>Storage</strong> Drive, including IP address, Users and<br />
Shares, USB Devices and Printers attached to the unit.<br />
The System Status page is where you can see your current:<br />
– User Accounts and Shares<br />
– Network Settings<br />
– USB devices attached<br />
– Printers<br />
User Accounts<br />
This section will tell you the user accounts that are currently<br />
created on your <strong>Shared</strong> <strong>Storage</strong> Drive.<br />
Network Settings<br />
This section will tell you the Current Network configuration<br />
that is on your <strong>Shared</strong> <strong>Storage</strong> Drive, including IP Address,<br />
subnet Mask, and default Gateway.<br />
Accounts & Share Status<br />
Click on this link to show a summary of the current accounts<br />
and what shares those accounts have permissions to.<br />
USB Devices<br />
This section will tell you what type of devices are attached to<br />
the USB ports on the back of the unit. Supported devices are<br />
external USB drives and USB flash drives.<br />
Printing Devices<br />
This section will tell you the current status of any printer that<br />
is attached to the unit including Manufacturer, Model and<br />
Serial Numbers.<br />
PAGE 49
MAXTOR SHARED STORAGE <strong>II</strong> WEB USER INTERFACE<br />
Using External USB Drives with Your<br />
<strong>Shared</strong> <strong>Storage</strong> <strong>II</strong><br />
There are 2 USB ports on the back of your drive which allow<br />
you to connect USB hard drives, such as the <strong>Maxtor</strong><br />
OneTouch TM and <strong>Maxtor</strong> Personal <strong>Storage</strong> 5000 drives.<br />
Note: The <strong>Maxtor</strong> <strong>Shared</strong> <strong>Storage</strong> Drive is only compatible with<br />
USB drives that are formatted with the FAT32 file system. With<br />
the FAT32 file system, the size of a single file is limited to 4 GB.<br />
Connecting a USB Drive<br />
You may connect a USB drive while your <strong>Shared</strong> <strong>Storage</strong> Drive<br />
is on. It will automatically recognize the drive.<br />
You may also connect a USB drive while your <strong>Shared</strong> <strong>Storage</strong><br />
Drive is off. It will be recognized the next time you turn your<br />
<strong>Shared</strong> <strong>Storage</strong> Drive on.<br />
Accessing the external USB Drive<br />
Using USB Printers with Your <strong>Shared</strong> <strong>Storage</strong> <strong>II</strong><br />
You may connect a USB printer to your <strong>Shared</strong> <strong>Storage</strong> <strong>II</strong><br />
Drive and share it with anyone on your network.<br />
Connecting a USB Printer<br />
– Connect the USB printer while your <strong>Shared</strong> <strong>Storage</strong> <strong>II</strong><br />
Drive is on.<br />
– The printer will appear in the list of shares displayed in<br />
the Printers and Faxes folder on your <strong>Shared</strong> <strong>Storage</strong> <strong>II</strong><br />
Drive.<br />
Configuring Network Printing<br />
Configuring a networked USB Printer varies depending on<br />
your operating system and/or platform (Windows and/or<br />
Macintosh). Please refer to <strong>Maxtor</strong>'s Knowledge Base for<br />
more information regarding network printer setup and<br />
configurations.<br />
1. Open your <strong>Shared</strong> <strong>Storage</strong> Drive by double-clicking its<br />
desktop icon.<br />
2. Your external USB drive will appear as a folder on the<br />
<strong>Shared</strong> <strong>Storage</strong> Drive.<br />
The name of this folder will correspond to the volume<br />
name of your external USB drive.<br />
Disconnecting a USB Drive<br />
To disconnect a USB drive from your <strong>Shared</strong> <strong>Storage</strong> Drive:<br />
1. Go to the <strong>Maxtor</strong> <strong>Shared</strong> <strong>Storage</strong> Drive home page.<br />
2. Click the Advanced Settings button.<br />
3. Click Configure Your USB Devices.<br />
4. Click Unplug USB devices from the <strong>Shared</strong> <strong>Storage</strong> Drive.<br />
5. Click the Safely Remove button, next to the USB drive you<br />
want to disconnect. A message will appear informing you<br />
that your drive can be safely removed. Then click Done.<br />
6. Disconnect your USB drive from your <strong>Shared</strong> <strong>Storage</strong> Drive.<br />
PAGE 50
20344100