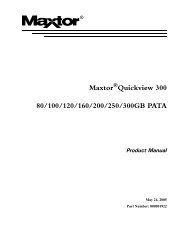
Hard Disk Drive Specifications Models: 546106, 53073H4 ... - Seagate
Hard Disk Drive Specifications Models: 546106, 53073H4 ... - Seagate
Hard Disk Drive Specifications Models: 546106, 53073H4 ... - Seagate

You also want an ePaper? Increase the reach of your titles
YUMPU automatically turns print PDFs into web optimized ePapers that Google loves.
<strong>Hard</strong> <strong>Disk</strong> <strong>Drive</strong> <strong>Specifications</strong><br />
<strong>Models</strong>: <strong>546106</strong>, <strong>53073H4</strong>,<br />
52049H3, 51536H2<br />
P/N:1493/A<br />
This publication could include technical inaccuracies or typographical<br />
errors. Changes are periodically made to the information herein – which<br />
will be incorporated in revised editions of the publication. Maxtor may<br />
make changes or improvements in the product(s) described in this<br />
publication at any time and without notice.<br />
Copyright © 2000 Maxtor Corporation. All rights reserved. Maxtor ® ,<br />
MaxFax ® and No Quibble Service ® are registered trademarks of Maxtor<br />
Corporation. Other brands or products are trademarks or registered<br />
trademarks of their respective holders.<br />
Corporate Headquarters<br />
510 Cottonwood <strong>Drive</strong><br />
Milpitas, California 95035<br />
Tel: 408-432-1700<br />
Fax: 408-432-4510<br />
Research and Development Center<br />
2190 Miller <strong>Drive</strong><br />
Longmont, Colorado 80501<br />
Tel: 303-651-6000<br />
Fax: 303-678-2165
Revisions Manual No. 1493<br />
REV EC NO. SECTION DESCRIPTION DATE<br />
A 80345 All Initial release. 7/19/2000
Before You Begin<br />
Thank you for your interest in Maxtor hard disk drives. This manual provides technical information for OEM<br />
engineers and systems integrators regarding the installation and use of Maxtor hard drives. <strong>Drive</strong> repair should be<br />
performed only at an authorized repair center. For repair information, contact the Maxtor Customer Service Center<br />
at 800-2MAXTOR or 408-922-2085.<br />
Before unpacking the hard drive, please review Sections 1 through 4.<br />
CAUTION<br />
Maxtor hard drives are precision products. Failure to follow these precautions<br />
and guidelines outlined here may lead to product failure, damage<br />
and invalidation of all warranties.<br />
1 BEFORE unpacking or handling a drive, take all proper electro-static discharge (ESD)<br />
precautions, including personnel and equipment grounding. Stand-alone drives are<br />
sensitive to ESD damage.<br />
2 BEFORE removing drives from their packing material, allow them to reach room<br />
temperature.<br />
3 During handling, NEVER drop, jar, or bump a drive.<br />
4 Once a drive is removed from the Maxtor shipping container, IMMEDIATELY secure<br />
the drive through its mounting holes within a chassis. Otherwise, store the drive on a<br />
padded, grounded, antistatic surface.<br />
5 NEVER switch DC power onto the drive by plugging an electrically live DC source cable<br />
into the drive's connector. NEVER connect a live bus to the drive's interface connector.<br />
6 ELECTRICAL GROUNDING - For proper operation, the drive must be securely fastened<br />
to a device bay that provides a suitable electrical ground to the drive baseplate.<br />
Please do not remove or cover up Maxtor factory-installed drive labels.<br />
They contain information required should the drive ever need repair.
Contents<br />
Section 1 — Introduction<br />
Maxtor Corporation 1 - 1<br />
Products 1 - 1<br />
Support 1 - 1<br />
Manual Organization 1 - 1<br />
Abbreviations 1 - 1<br />
Conventions 1 - 2<br />
Key Words 1 - 2<br />
Numbering 1 - 2<br />
Signal Conventions 1 - 2<br />
Section 2 — Product Description<br />
Product Features 2 - 2<br />
Functional/Interface 2 - 2<br />
Zone Density Recording 2 - 2<br />
Read/Write Multiple Mode 2 - 2<br />
Ultra ATA - Mode 5 2 - 2<br />
Multi-word DMA (EISA Type B) - Mode 2 2 - 2<br />
Sector Address Translation 2 - 2<br />
Logical Block Addressing 2 - 3<br />
Defect Management Zone 2 - 3<br />
On-the-Fly <strong>Hard</strong>ware Error Correction Code (ECC) 2 - 3<br />
Software ECC Correction 2 - 3<br />
Automatic Head Park and Lock Operation 2 - 3<br />
Cache Management 2 - 4<br />
Buffer Segmentation 2 - 4<br />
Read-Ahead Mode 2 - 4<br />
Automatic Write Reallocation (AWR) 2 - 4<br />
Write Cache Stacking 2 - 4<br />
Major HDA Components 2 - 5<br />
<strong>Drive</strong> Mechanism 2 - 5<br />
Rotary Actuator 2 - 5<br />
Read/Write Electronics 2 - 5<br />
Read/Write Heads and Media 2 - 5<br />
Air Filtration System 2 - 5<br />
Microprocessor 2 - 5<br />
Subsystem Configuration 2 - 6<br />
Dual <strong>Drive</strong> Support 2 - 6<br />
Cable Select Option 2 - 6<br />
Jumper Location/Configuration 2 - 6<br />
Cylinder Limitation 2 - 6<br />
i
Section 3 — Product <strong>Specifications</strong><br />
<strong>Models</strong> and Capacities 3 - 1<br />
<strong>Drive</strong> Configuration 3 - 1<br />
Performance <strong>Specifications</strong> 3 - 1<br />
Physical Dimensions 3 - 2<br />
Power Requirements 3 - 3<br />
Power Mode Definitions 3 - 3<br />
Spin-up 3 - 3<br />
Seek 3 - 3<br />
Read/Write 3 - 3<br />
Idle 3 - 3<br />
Standby 3 - 3<br />
Sleep 3 - 3<br />
EPA Energy Star Compliance 3 - 3<br />
Environmental Limits 3 - 3<br />
Shock and Vibration 3 - 4<br />
Reliability <strong>Specifications</strong> 3 - 4<br />
Annual Return Rate 3 - 4<br />
Quality Acceptance Rate 3 - 4<br />
Start/Stop Cycles 3 - 4<br />
Data Reliability 3 - 4<br />
Component Design Life 3 - 4<br />
EMC/EMI 3 - 5<br />
EMC Compliance 3 - 5<br />
Canadian Emissions Statement 3 - 5<br />
Safety Regulatory Compliance 3 - 5<br />
Section 4 — Handling and Installation<br />
<strong>Hard</strong> <strong>Drive</strong> Handling Precautions 4 - 1<br />
Electro-Static Discharge (ESD) 4 - 1<br />
Unpacking and Inspection 4 - 2<br />
Repacking 4 - 3<br />
Physical Installation 4 - 3<br />
Before You Begin 4 - 4<br />
Please Read 4 - 4<br />
Back up. Protect Your Existing Data 4 - 4<br />
Tools for Installation 4 - 4<br />
System Requirements 4 - 4<br />
Operating System Requirements 4 - 4<br />
Hook up 4 - 4<br />
Boot the System with MaxBlast Plus <strong>Disk</strong>ette 4 - 4<br />
Configure the <strong>Drive</strong> Jumpers 4 - 4<br />
Installaing 5.25-inch Mounting Brackets 4 - 4<br />
Install <strong>Hard</strong> <strong>Drive</strong> in Device Bay 4 - 5<br />
Attach Interface and Power Cables 4 - 5<br />
Start up 4 - 5<br />
Set up 4 - 5<br />
ii
Section 5 — AT Interface Description<br />
Interface Connector 5 - 1<br />
Pin Description Summary 5 - 1<br />
Pin Description Table 5 - 2<br />
PIO Timing 5 - 3<br />
DMA Timing 5 - 4<br />
Ultra DMA Timing Parameters 5 - 5<br />
Section 6 — Host Software Interface<br />
Task File Registers 6 - 1<br />
Data Register 6 - 1<br />
Error Register 6 - 1<br />
Features Register 6 - 1<br />
Sector Count Register 6 - 2<br />
Sector Number Register 6 - 2<br />
Cylinder Number Registers 6 - 2<br />
Device/Head Register 6 - 2<br />
Status Register 6 - 2<br />
Command Register 6 - 3<br />
Read Commands 6 - 3<br />
Write Commands 6 - 3<br />
Mode Set/Check Commands 6 - 3<br />
Power Mode Commands 6 - 3<br />
Initialization Commands 6 - 3<br />
Seek, Format, and Diagnostic Commands 6 - 3<br />
S.M.A.R.T. Commands 6 - 3<br />
Summary 6 - 4<br />
Control Diagnostic Registers 6 - 5<br />
Alternate Status Register 6 - 5<br />
Device Control Register 6 - 5<br />
Digital Input Register 6 - 5<br />
Reset and Interrupt Handling 6 - 6<br />
Section 7 — Interface Commands<br />
Command Summary 7 - 1<br />
Read Commands 7 - 2<br />
Read Sector(s) 7 - 2<br />
Read Verify Sector(s) 7 - 2<br />
Read Sector Buffer 7 - 2<br />
Read DMA 7 - 3<br />
Read Multiple 7 - 3<br />
Set Multiple 7 - 3<br />
Write Commands 7 - 4<br />
Write Sector(s) 7 - 4<br />
iii
Write Verify Sector(s) 7 - 4<br />
Write Sector Buffer 7 - 4<br />
Write DMA 7 - 5<br />
Write Multiple 7 - 5<br />
Mode Set/Check Commands 7 - 6<br />
Set Features Mode 7 - 6<br />
Read Native Max Address 7 - 7<br />
Set Max 7 - 7<br />
Set Max Password 7 - 7<br />
Set Max Lock 7 - 7<br />
Set Max Unlock 7 - 7<br />
Set Max Freeze Lock 7 - 7<br />
Power Mode Commands 7 - 8<br />
Standby Immediate 7 - 8<br />
Idle Immediate 7 - 8<br />
Standby 7 - 8<br />
Idle 7 - 8<br />
Check Power Mode 7 - 8<br />
Set Sleep Mode 7 - 8<br />
Default Power-on Condition 7 - 9<br />
Initialization Commands 7 - 10<br />
Identify <strong>Drive</strong> 7 - 10<br />
Initialize <strong>Drive</strong> Parameters 7 - 13<br />
Seek, Format, and Diagnostic Commands 7 - 14<br />
S.M.A.R.T. Command Set 7 - 15<br />
Section 8 — Service and Support<br />
Service Policy 8 - 1<br />
No Quibble Service 8 - 1<br />
Support 8 - 1<br />
Glossary<br />
iv
Figures<br />
Figure Title Page<br />
2 - 1 PCBA Jumper Location and Configuration 2 - 6<br />
3 - 1 Outline and Mounting Dimensions 3 - 2<br />
4 - 1 Multi-pack Shipping Container 4 - 2<br />
4 - 2 Single-pack Shipping Container (Option A) 4 - 3<br />
4 - 3 Single-pack Shipping Container (Option B) 4 - 3<br />
4 - 4 IDE Interface and Power Cabling Detail 4 - 5<br />
5 - 1 Data Connector 5 - 1<br />
5 - 2 PIO Data Transfer to/from Device 5 - 3<br />
5 - 3 Multi-word DMA Data Transfer 5 - 4<br />
5 - 4 Initiating an Ultra DMA Data In Burst 5 - 5<br />
5 - 5 Sustained Ultra DMA Data In Burst 5 - 6<br />
5 - 6 Host Pausing an Ultra DMA Data In Burst 5 - 6<br />
5 - 7 Device Terminating an Ultra DMA Data In Burst 5 - 7<br />
5 - 8 Host Terminating an Ultra DMA Data In Burst 5 - 7<br />
5 - 9 Initiating an Ultra DMA Data Out Burst 5 - 8<br />
5 - 10 Sustained Ultra DMA Data Out Burst 5 - 8<br />
5 - 11 Device Pausing an Ultra DMA Data Out Burst 5 - 9<br />
5 - 12 Host Terminating an Ultra DMA Data Out Burst 5 - 9<br />
5 - 13 Device Terminating an Ultra DMA Data Out Burst 5 - 10<br />
v
INTRODUCTION<br />
Introduction<br />
SECTION 1<br />
Maxtor Corporation<br />
Maxtor Corporation has been providing high-quality computer storage products since 1982. Along the way,<br />
we’ve seen many changes in data storage needs. Not long ago, only a handful of specific users needed more than<br />
a couple hundred megabytes of storage. Today, downloading from the Internet and CD-ROMs, multimedia,<br />
networking and advanced office applications are driving storage needs even higher. Even home PC applications<br />
need capacities measured in gigabytes, not megabytes.<br />
Products<br />
Maxtor’s products meet the demanding data storage capacity requirements of today and tomorrow. They are<br />
available in 5400- and 7200- RPM configurations with capacity offerings from 10 to 80 GB and beyond.<br />
Support<br />
No matter which capacity, all Maxtor hard drives are supported by our commitment to total customer<br />
satisfaction and our No Quibble Service ® guarantee. One call – or a visit to our home page on the Internet<br />
(www.maxtor.com) – puts you in touch with either technical support or customer service. We’ll provide<br />
you the information you need quickly, accurately and in the form you prefer – a fax, a downloaded file or<br />
a conversation with a representative.<br />
Manual Organization<br />
This hard disk drive reference manual is organized in the following method:<br />
Section 1 – Introduction<br />
Section 2 – Product Description<br />
Section 3 – Product <strong>Specifications</strong><br />
Section 4 – Handling and Installation<br />
Section 5 – AT Interface Description<br />
Section 6 – Host Software Interface<br />
Section 7 – Interface Commands<br />
Section 8 – Service and Support<br />
Appendix – Glossary<br />
Abbreviations<br />
ABBRV DESCRIPTION ABBRV DESCRIPTION<br />
ATA AT attachment MB megabyte<br />
bpi bits per inch Mbits/sec megabits per second<br />
CHS cylinder - head - sector MB/sec megabytes per second<br />
db decibels M Hz megahertz<br />
dBA dec ibels, A weighted ms millis econd<br />
DMA direct memory access MSB most significant bit<br />
ECC error correction code mV millivolts<br />
fci flux changes per inch ns nanoseconds<br />
G ac celeration PIO programmed input/output<br />
GB gigabyte RPM revolutions per minute<br />
Hz hertz tpi tracks per inch<br />
KB kilobyte UDMA ultra direct memory access<br />
LBA logical block address(ing) µsec microsecond<br />
LSB least significant bit V volts<br />
mA milliamperes W watts<br />
1 – 1
INTRODUCTION<br />
Conventions<br />
If there is a conflict between text and tables, the table shall be accepted as being correct.<br />
Key Words<br />
The names of abbreviations, commands, fields and acronyms used as signal names are in all uppercase type<br />
(e.g., IDENTIFY DRIVE). Fields containing only one bit are usually referred to as the “name” bit instead of<br />
the “name” field.<br />
Names of drive registers begin with a capital letter (e.g., Cylinder High register).<br />
Numbering<br />
Numbers that are not followed by a lowercase “b” or “h” are decimal values. Numbers that are followed by<br />
a lowercase “b” (e.g., 01b) are binary values. Numbers that are followed by a lowercase “h” (e.g., 3Ah) are<br />
hexadecimal values.<br />
Signal Conventions<br />
Signal names are shown in all uppercase type.<br />
All signals are either high active or low active signals. A dash character (-) at the end of a signal name<br />
indicates that the signal is low active. A low active signal is true when it is below ViL and is false when it is<br />
above ViH. A signal without a dash at the end indicates that the signal is high active. A high active signal is<br />
true when it is above ViH and is false when it is below ViL.<br />
When a signal is asserted, it means the signal is driven by an active circuit to its true state.<br />
When a signal is negated, it means the signal is driven by an active circuit to its false state.<br />
When a signal is released, it means the signal is not actively driven to any state. Some signals have bias<br />
circuitry that pull the signal to either a true or false state when no signal driver is actively asserting or negating<br />
the signal. These instances are noted under the description of the signal.<br />
1 – 2
PRODUCT DESCRIPTION<br />
Product Description<br />
SECTION 2<br />
Maxtor hard disk drives are 1-inch high, 3.5-inch diameter random access storage devices which incorporate an<br />
on-board Ultra ATA/100 controller. High capacity is achieved by a balanced combination of high areal recording<br />
density and the latest data encoding and servo techniques.<br />
Maxtor's latest advancements in electronic packaging and integration methods have lowered the drive's power<br />
consumption and increased its reliability. Advanced giant magneto-resistive read/write heads and a state-of-the-art<br />
head/disk assembly - using an integrated motor/spindle design - allow up to four disks in a 3.5-inch package.<br />
Exceptionally high data transfer rates, 7200 RPM spin speed and < 8.7 ms access times make these performance<br />
series disk drives especially well-suited to high-end desktop and server applications.<br />
Key Features<br />
ANSI ATA-5 compliant PIO Mode 5 interface (Enhanced IDE)<br />
Supports Ultra DMA Mode 5 for up to 100 MBytes/sec data transfers<br />
2 MB buffer with multi-adaptive cache manager<br />
7200 RPM spin speed<br />
< 8.7 ms seek time<br />
Zone density and I.D.-less recording<br />
Outstanding shock resistance at 300 Gs<br />
High durability with 50K contact start/stop cycles<br />
Advanced multi-burst on-the-fly Error Correction Code (ECC)<br />
Extended data integrity with ECC protected data and fault tolerant servo synchronization fields<br />
Supports EPA Energy Star Standards (Green PC Friendly) with ATA powering savings commands<br />
Auto park and lock actuator mechanism<br />
Low power consumption<br />
S.M.A.R.T. Capability<br />
Note: Maxtor defines one megabyte as 10E6 or one million bytes and one gigabyte as 10E9 or one billion bytes.<br />
2 – 1
PRODUCT DESCRIPTION<br />
Product Features<br />
Functional / Interface<br />
Maxtor hard drives contain all necessary mechanical and electronic parts to interpret control signals and<br />
commands from an AT-compatible host computer. See Section 3 Product <strong>Specifications</strong>, for complete drive<br />
specifications.<br />
Zone Density Recording<br />
The disk capacity is increased with bit density management – common with Zone Density Recording. Each<br />
disk surface is divided into 16 circumferential zones. All tracks within a given zone contain a constant<br />
number of data sectors. The number of data sectors per track varies in different zones; the outermost zone<br />
contains the largest number of data sectors and the innermost contains the fewest.<br />
Read / Write Multiple Mode<br />
This mode is implemented per ANSI ATA/ATAPI-5 specification. Read/Write Multiple allows the host to<br />
transfer a set number of sectors without an interrupt request between them, reducing transfer process<br />
overhead and improving host performance.<br />
UltraDMA - Mode 5<br />
Maxtor hard drives fully comply with the new ANSI Ultra DMA protocol, which greatly improves overall<br />
AT interface performance by significantly improving burst and sustained data throughput.<br />
Multi-word DMA (EISA Type B) - Mode 2<br />
Supports multi-word Direct Memory Access (DMA) EISA Type B mode transfers.<br />
Sector Address Translation<br />
All Maxtor hard drives feature a universal translate mode. In an AT/EISA-class system, the drive may be<br />
configured to any specified combination of cylinders, heads and sectors (within the range of the drive's<br />
formatted capacity). Maxtor hard drives power-up in a translate mode:<br />
MODELS CYL HD SP T MAX LBA CAPACITY<br />
54610H6 89 331 16 63 90 045 648 46.1 GB<br />
<strong>53073H4</strong> 59 554 16 63 60 030 432 30.7 GB<br />
52049H3 39 704 16 63 40 021 632 20.4 GB<br />
51536H2 29 777 16 63 30 015 216 15.3 GB<br />
Logical Block Addressing<br />
The Logical Block Address (LBA) mode can only be utilized in systems that support this form of translation. The<br />
cylinder, head and sector geometry of the drive, as presented to the host, differs from the actual physical<br />
geometry. The host AT computer may access a drive of set parameters: number of cylinders, heads and sectors<br />
per track, plus cylinder, head and sector addresses. However, the drive can’t use these host parameters directly<br />
because of zoned recording techniques. The drive translates the host parameters to a set of logical internal<br />
addresses for data access.<br />
The host drive geometry parameters are mapped into an LBA based on this formula:<br />
LBA = (HSCA - 1) + HHDA x HSPT + HNHD x HSPT x HCYA (1)<br />
= (HSCA - 1) + HSPT x (HHDA + HNHD x HCYA) (2)<br />
where<br />
HSCA = Host Sector Address, HHDA = Host Head Address<br />
HCYA = Host Cylinder Address, HNHD = Host Number of Heads<br />
HSPT = Host Sectors per Track<br />
The LBA is checked for violating the drive capacity. If it does not, the LBA is converted to physical drive<br />
cylinder, head and sector values. The physical address is then used to access or store the data on the disk and<br />
for other drive related operations.<br />
2 – 2
PRODUCT DESCRIPTION<br />
Defect Management Zone (DMZ)<br />
Each drive model has a fixed number of spare sectors per drive, all of which are located at the end of the<br />
drive. Upon detection of a bad sector that has been reassigned, the next sequential sector is used.<br />
For example, if sector 3 is flagged, data that would have been stored there is “pushed down” and recorded<br />
in sector 4. Sector 4 then effectively becomes sector 3, as sequential sectors are “pushed down” across the<br />
entire drive. The first spare sector makes up for the loss of sector 3, and so maintains the sequential order of<br />
data. This push down method assures maximum performance.<br />
On-the-Fly <strong>Hard</strong>ware Error Correction Code (ECC)<br />
16 symbols, single burst, guaranteed.<br />
Software ECC Correction<br />
24 symbols, single burst, guaranteed.<br />
Automatic Park and Lock Operation<br />
Immediately following power down, dynamic braking of the spinning disks delays momentarily allowing the<br />
read/write heads to move to an inner mechanical stop. A small fixed magnet holds the rotary actuator in<br />
place as the disk spins down. The rotary actuator is released only when power is again applied.<br />
Cache Management<br />
Buffer Segmentation<br />
The data buffer is organized into two segments: the data buffer and the micro controller scratch pad.<br />
The data buffer is dynamically allocated for read and write data depending on the commands received.<br />
A variable number of read and write buffers may exist at the same time.<br />
Read-Ahead Mode<br />
Normally, this mode is active. Following a read request, disk read-ahead begins on the first sector and<br />
continues sequentially until the allocated buffer is full. If a read request is received during the read-ahead<br />
operation, the buffer is examined to determine if the request is in the cache. If a cache hit occurs, readahead<br />
mode continues without interruption and the host transfer begins immediately.<br />
Automatic Write Reallocation (AWR)<br />
This feature is part of the write cache and reduces the risk of data loss during deferred write operations. If a<br />
disk error occurs during the disk write process, the disk task stops and the suspect sector is reallocated to a<br />
pool of alternate sectors located at the end of the drive. Following reallocation, the disk write task continues<br />
until it is complete.<br />
Write Cache Stacking<br />
Normally, this mode is active. Write cache mode accepts the host write data into the buffer until the buffer<br />
is full or the host transfer is complete. A command complete interrupt is generated at the end of the transfer.<br />
A disk write task begins to store the host data to disk. Host write commands continue to be accepted and<br />
data transferred to the buffer until either the write command stack is full or the data buffer is full. The drive<br />
may reorder write commands to optimize drive throughput.<br />
2 – 3
PRODUCT DESCRIPTION<br />
Major HDA Components<br />
<strong>Drive</strong> Mechanism<br />
A brush-less DC direct drive motor rotates the spindle at 7200 RPM (±0.1%). The dynamically balanced<br />
motor/spindle assembly ensures minimal mechanical run-out to the disks. A dynamic brake provides a fast<br />
stop to the spindle motor upon power removal. The speed tolerance includes motor performance and motor<br />
circuit tolerances.<br />
Rotary Actuator<br />
All Maxtor hard drives employ a rotary voice coil actuator which consists of a moving coil, an actuator arm<br />
assembly and stationary magnets. The actuator moves on a low-mass, low-friction center shaft. The low<br />
friction contributes to fast access times and low power consumption.<br />
Read/Write Electronics<br />
An integrated circuit mounted within the sealed head disk assembly (near the read/write heads) provides up<br />
to eight head selection (depending on the model), read pre-amplification and write drive circuitry.<br />
Read/Write Heads and Media<br />
Low mass, low force giant magneto-resistive read/write heads record data on 3.5-inch diameter disks. Maxtor<br />
uses a sputtered thin film medium on all disks for all Maxtor hard drives.<br />
Air Filtration System<br />
All Maxtor hard drives are assembled in a Class 100 controlled environment. Over the life of the drive, a 0.1<br />
micron filter and breather filter located within the sealed head disk assembly (HDA) maintain a clean<br />
environment to the heads and disks. All DiamondMax drives are designed to operate in a typical office<br />
environment with minimum environmental control.<br />
Microprocessor<br />
The microprocessor controls the following functions for the drive electronics:<br />
Command execution<br />
Cache management<br />
Data correction and error recovery<br />
Diagnostic execution<br />
Data sequencing<br />
Head positioning (including error recovery)<br />
Host interface<br />
Index detection<br />
Spin speed control<br />
Seeks<br />
Servo<br />
S.M.A.R.T.<br />
2 – 4
PRODUCT DESCRIPTION<br />
Subsystem Configuration<br />
Dual <strong>Drive</strong> Support<br />
Two drives may be accessed via a common interface cable, using the same range of I/O addresses. The drives<br />
are jumpered as device 0 or 1 (Master/Slave), and are selected by the drive select bit in the<br />
Device/Head register of the task file.<br />
All Task File registers are written in parallel to both drives. The interface processor on each drive decides<br />
whether a command written to it should be executed; this depends on the type of command and which<br />
drive is selected. Only the drive selected executes the command and activates the data bus in response to<br />
host I/O reads; the drive not selected remains inactive.<br />
A master/slave relationship exists between the two drives: device 0 is the master and device 1 the slave.<br />
When J50 is closed (factory default, figure 2-1), the drive assumes the role of master; when open, the drive<br />
acts as a slave. In single drive configurations, J50 must be closed.<br />
Cable Select Option<br />
CSEL (cable select) is an optional feature per ANSI ATA specification. <strong>Drive</strong>s configured in a multiple drive<br />
system are identified by CSEL’s value:<br />
– If CSEL is grounded, then the drive address is 0.<br />
– If CSEL is open, then the drive address is 1.<br />
Jumper Location / Configuration<br />
Darkened jumper pins indicate factory-installed (default) shunts.<br />
JUMPER CONFIGURATION J50 J48 J46 J44 J42<br />
Master/Slave<br />
Only drive in sing le d r ive s ys tem*<br />
M aster drive in dual drive sys tem*<br />
Slave drive in dual drive sys tem<br />
Cable Select<br />
Disabled*<br />
Ena bled<br />
C y linder Lim itation<br />
Disabled*<br />
Ena bled<br />
Fac tory Reserved<br />
Fac tory Reserved<br />
O<br />
Key * = Default C = Closed (jumper installed) O = O pen (no jumper installed)<br />
C<br />
C<br />
O<br />
O<br />
C<br />
O<br />
C<br />
O<br />
Figure 2-1<br />
PCBA Jumper Location and Configuration<br />
Cylinder Limitation Jumper Description<br />
On some older BIOS', primarily those that auto-configure the disk drive, a hang may occur. The Cylinder<br />
Limitation jumper reduces the capacity in the Identify <strong>Drive</strong> allowing large capacity drives to work with older<br />
BIOS'. The capacity reported when J46 is closed will be as follows: drives less than or equal to 32GB will<br />
report 2.1GB. <strong>Drive</strong>s greater than 32GB will report 32GB.<br />
2 – 5
PRODUCT SPECIFICATIONS<br />
Product <strong>Specifications</strong><br />
SECTION 3<br />
<strong>Models</strong> and Capacities<br />
MODELS 54610H6 <strong>53073H4</strong> 52049H3 51536H2<br />
Formatted Capacity (GB LBA Mode) 46.1 GB 30.7 GB 20.4 GB 15.3 GB<br />
Maxtor defines one megabyte as 10E6 or one million bytes and one gigabyte as<br />
10E9 or one billion bytes.<br />
<strong>Drive</strong> Configuration<br />
MODELS 54610H6 <strong>53073H4</strong> 52049H3 51536H2<br />
Integrated Interface<br />
ATA-5 / Ultra ATA<br />
Encoding Method E 2 PR4 RLL 16/17<br />
Interleave 1:1<br />
Servo System<br />
Buffer Size / Type<br />
Embedded<br />
2 MB SDRAM<br />
Data Zones per Surface 16<br />
Data Surfaces / Heads 6 4 3 2<br />
Number of <strong>Disk</strong>s 3 2 2 1<br />
Areal Density<br />
Track Density<br />
Recording Density<br />
Flux Density<br />
11.02 Gbits / in 2 max<br />
28,400 tpi<br />
300 to 404 kbpi<br />
312 to 421 kfci<br />
Bytes per Sector / Block 512<br />
Sectors per Track 360 to 624<br />
Sectors per <strong>Drive</strong> 90 045 648 60 030 432 40 021 632 30 015 216<br />
Performance <strong>Specifications</strong><br />
MODELS 54610H6 <strong>53073H4</strong> 52049H3 51536H2<br />
Seek Times (typical read)<br />
Track-to-Trac k<br />
Average (perform ance)<br />
Full Stroke<br />
Average Latency<br />
Rotational Speed (±0.01%)<br />
Controller Overhead<br />
Data Transfer Rate<br />
To/From Interface<br />
(UltraDMA - M5)<br />
To/From Interface<br />
(PIO 4/Multi-word DMA M5)<br />
To/From Media<br />
Start Time (0 to <strong>Drive</strong> Ready)<br />
1.0 m s<br />
< 8.7 ms<br />
< 20.0 ms<br />
4.17 ms<br />
7200 RPM<br />
< 0.3 ms<br />
up to 100 MBytes/sec<br />
up to 16.7 MBytes/sec<br />
up to 49.5 MBytes/sec<br />
8.5 sec typical<br />
3 – 1
PRODUCT SPECIFICATIONS<br />
Physical Dimensions (maximum)<br />
PARAMETER STANDARD METRIC<br />
Height 1.028 inches 26.1 millimeters<br />
Length 5.787 inches 147 millimeters<br />
Width 4.02 inches 102.1 millimeters<br />
Weight 1.3 pounds 0.59 kilograms<br />
Figure 3 - 1<br />
Outline and Mounting Dimensions<br />
3 – 2
PRODUCT SPECIFICATIONS<br />
Power Requirements<br />
MODE 12V ± 10% 5V ± 5% POWER<br />
Spin-up (peak) 2500 mA 620 mA<br />
Seek (avg) 800 mA 510 mA 12.9 W<br />
Read/Write (avg) 525 mA 515 mA 9.0 W<br />
Id l e (avg) 350 mA 490 mA 6.6 W<br />
Standby (avg) 30 mA 270 mA 1.75 W<br />
Sleep (avg) 30 mA 170 mA 1.25 W<br />
Power Mode Definitions<br />
Spin-up<br />
The drive is spinning up following initial application of power and has not yet reached full speed.<br />
Seek<br />
A random access operation by the disk drive.<br />
Read/Write<br />
Data is being read from or written to the drive.<br />
Idle<br />
The drive is spinning, the actuator is parked and powered off and all other circuitry is powered on.<br />
The drive is capable of responding to read commands within 40 ms.<br />
Standby<br />
The spin motor is not spinning. The drive will leave this mode upon receipt of a command that requires<br />
disk access. The time-out value for this mode is programmable. The buffer is active to accept write data.<br />
Sleep<br />
This is the lowest power state – with the interface set to inactive. A software or hardware reset is required<br />
to return the drive to the Standby state.<br />
EPA Energy Star Compliance<br />
Maxtor Corporation supports the goals of the U.S. Environmental Protection Agency’s Energy Star program<br />
to reduce the electrical power consumption of computer equipment.<br />
Environmental Limits<br />
PARAMETER OPERATING NON-OPERATING/STORAGE<br />
Temperature 5° C to 55° C low temperature (-40° C)<br />
Thermal Gradient<br />
Relative Humidity<br />
Wet Bulb<br />
high temperature (71° C) per MIL-STD-810E, method<br />
501.3, climatic category; hot-induced conditions.<br />
25° C per hour (maximum)<br />
5% to 95% (non-condensing)<br />
30° C (max im um)<br />
Altitude -200 to 10,000 feet -200 to 40,000 feet<br />
Acoustic Noise - Idle Mode<br />
(per ISO 7779, 10 microphone, average<br />
sound power)<br />
3.3 bel, measured at 5k ft.<br />
3 – 3
PRODUCT SPECIFICATIONS<br />
Shock and Vibration<br />
PARAMETER OPERATING NON-OPERATING<br />
Mechanical Shock 30 Gs, 2.0 ms, no errors 300 Gs, 2.0 ms, no damage<br />
Rotational Shock<br />
20,000 Rad/sec,0.5 - 1.0 ms, no damage<br />
Random Vibration 10 - 45 Hz at 0.004 G 2 /Hz<br />
48 - 62 Hz at 0.008 G 2 /Hz<br />
65 - 300 Hz at 0.004 G 2 /Hz<br />
301 - 500 Hz at 0.0006 G 2 /Hz<br />
no errors<br />
PSD:<br />
10 Hz at .05 G 2 /Hz<br />
20 Hz at .055 G 2 /Hz,<br />
300 Hz at .05 G 2 /Hz<br />
301 Hz at .0014 G 2 /Hz<br />
500 Hz at .001 G 2 /Hz<br />
760 Hz at .001 G 2 /Hz<br />
877 Hz at .003 G 2 /Hz<br />
1000 Hz at .001 G 2 /Hz<br />
1570 Hz at .001 G 2 /Hz<br />
2000 Hz at .0001 G 2 /Hz<br />
Swept Sine Vibration<br />
10 - 300 Hz 1 G (0 - peak) amplitude, 1 octave per minute<br />
Reliability <strong>Specifications</strong><br />
Annual Return Rate<br />
< 1.0% Annual Return Rate (ARR) indicates the average against products shipped.<br />
ARR includes all reasons for returns (failures, handling damage, NDF), but<br />
does not include inventory credit returns.<br />
Quality Acceptance Rate<br />
< 1,000 DPPM The quality acceptance rate indicates the percentage of Maxtor products<br />
successfully installed by our customers, and/or the number of defective parts<br />
per million (DPPM) encountered during the entire installation process.<br />
Start/Stop Cycles<br />
50,000 This indicates the average minimum cycles for reliable start/stop function.<br />
Data Reliability<br />
< 10 per 10E15 bits read Data errors (non-recoverable). Average data error rate allowed with all error<br />
recovery features activated.<br />
Component Design Life<br />
5 years (minimum) Component design life is defined as a.) the time period before identified<br />
wear-out mechanisms impact the failure rate, or b.) the time period up to the<br />
wear-out point when useful component life expires.<br />
3 – 4
PRODUCT SPECIFICATIONS<br />
EMC/EMI<br />
Radiated Electromagnetic Field Emissions - EMC Compliance<br />
The hard disk drive mechanism is designed as a subassembly for installation into a suitable enclosure and is<br />
therefore not subject to Subpart J of Part 15 of FCC Rules (47CFR15) or the Canadian Department of<br />
Communications Radio Interference Regulations. Although not required, the disk mechanism has been<br />
tested within a suitable end-use product and found to comply with Class B limits of the FCC Rules and<br />
Regulations of the Canadian Department of Communications.<br />
The CE Marking indicates conformity with the European Union Low Voltage Directive (73/23/EEC) when<br />
the disk mechanism is installed in a typical personal computer. Maxtor recommends that testing and analysis<br />
for EMC compliance be performed with the disk mechanism installed within the user's end-use application.<br />
Canadian Emissions Statement<br />
This digital apparatus does not exceed the Class B limits for radio noise emissions from digital apparatus as set<br />
out in the radio interference regulations of the Canadian department of communications.<br />
Le present appareil numerique n'emet pas de bruit radioelectriques depassant les limites applicables aux<br />
appareils numeriques de Class B prescrites dans le reglement sur le brouillage radioelectrique edicte par le<br />
ministere des communications du Canada.<br />
Safety Regulatory Compliance<br />
All Maxtor hard drives comply with relevant product safety standards such as CE, CUL, TUV and UL rules and<br />
regulations. As delivered, Maxtor hard drives are designed for system integration before they are used.<br />
3 – 5
INSTALLATION<br />
Handling and Installation<br />
SECTION 4<br />
<strong>Hard</strong> <strong>Drive</strong> Handling Precautions<br />
◆ If the handling precautions are not followed, damage to the hard drive may result - which may void the warranty.<br />
◆ During handling, NEVER drop, jar, or bump a drive. Handle the drive by its sides and avoid touching the printed circuit board<br />
assembly (PCBA).<br />
◆ <strong>Hard</strong> drives are sensitive to electrostatic discharge (ESD) damage. Use proper ESD practices by grounding yourself and the<br />
computer system the hard drive will be installed in.<br />
◆ Allow the hard drive to reach room temperature BEFORE installing it in your computer system.<br />
◆ NEVER switch DC power onto the drive by plugging an electrically live DC source cable into the drive's connector. NEVER<br />
connect a live connector to the hard drive's IDE interface connector.<br />
◆ ELECTRICAL GROUNDING - For proper operation, the drive must be securely fastened to a device bay<br />
that provides a suitable electrical ground to the drive baseplate.<br />
Electro-Static Discharge (ESD)<br />
To avoid some of the problems associated with ESD, Maxtor advises that anyone handling a disk drive use a<br />
wrist strap with an attached wire connected to an earth ground. Failure to observe these precautions voids the<br />
product warranty.<br />
Manufacturers frequently experience “unsolved” component/hardware malfunctions often caused by ESD. To<br />
reduce the incidence of ESD-related problems, Maxtor recommends that any electronics manufacturing plans<br />
include a comprehensive ESD program, the basic elements and functions of which are outlined here:<br />
ESD Program Element<br />
Management<br />
Chief coordinator<br />
Multi-department committee<br />
Employee training<br />
ESD Program Function<br />
Institute and maintain<br />
Organize and enforce<br />
Evaluate and improve<br />
Educate and inform<br />
ESD program supplies typically include: wrist- and foot-worn grounding straps; counter-top and floor antistatic<br />
matting; wrist strap testers; ESD video and training materials. Sources for such supplies include:<br />
Static Control Systems – 3M<br />
Charleswater<br />
225-4S, 3M Center<br />
93 Border St.<br />
St. Paul, MN 55144 West Newton, MA 02165-9990<br />
Maxtor also offers a complete video training package, “Care and Handling of Maxtor <strong>Disk</strong> <strong>Drive</strong>s.”<br />
Contact your Maxtor representative for details.<br />
4 – 1
INSTALLATION<br />
Unpacking and Inspection<br />
Retain any packing material for reuse. Inspect the shipping container for evidence of damage in transit. Notify<br />
the carrier immediately in case of damage to the shipping container.<br />
As they are removed, inspect drives for evidence of shipping damage or loose hardware. If a drive is damaged<br />
(and no container damage is evident), notify Maxtor immediately for drive disposition.<br />
Figure 4 - 1<br />
Multi-pack Shipping Container<br />
4 – 2
INSTALLATION<br />
Figure 4 - 2<br />
Single Pack Shipping Container (Option A)<br />
Figure 4 - 3<br />
Single Pack Shipping Container (Option B)<br />
Repacking<br />
If a Maxtor drive requires return, repack it using Maxtor packing materials, including the antistatic bag.<br />
Physical Installation<br />
Recommended Mounting Configuration<br />
The Maxtor hard drive design allows greater shock tolerance than that afforded by larger, heavier drives. The<br />
drive may be mounted in any attitude using four size 6-32 screws with 1/8-inch maximum penetration and a<br />
maximum torque of 5-inch pounds. See Figure 3-1 for mounting dimensions. Allow adequate ventilation to<br />
the drive to ensure reliable operation. See the following pages for specific installation steps.<br />
4 – 3
INSTALLATION<br />
Before You Begin<br />
Important – Please Read<br />
Please read this installation section completely before installing the Maxtor hard drive. It gives general<br />
information for installing a Maxtor hard drive in a typical computer system. If you don’t understand the<br />
installation steps, have a qualified computer technician install the hard drive.<br />
Back up. Protect your Existing Data<br />
Periodic backup of important data is always a good idea. Whenever your computer is on, there is the<br />
potential for losing data on your hard drive. This is especially true when running disk utilities or any software<br />
that directly manipulates your files. Maxtor recommends that you make a backup copy of the files on any<br />
existing hard drives prior to installing the new drive. If required, this data may then be copied to the Maxtor<br />
hard drive after it has been installed in the computer. Refer to your computer user’s manual for detailed data<br />
backup instructions.<br />
Tools for Installation<br />
The following tools are needed to install your new Maxtor hard drive:<br />
• A small (#2) Phillips head screw driver<br />
• Small needle-nose pliers or tweezers<br />
• Your computer user’s manuals<br />
• Operating system software<br />
System Requirements<br />
• IDE/AT interface<br />
Maxtor recommends:<br />
• <strong>Drive</strong>s less than or equal to 8.4 GB – 486 DX 66 MHz<br />
• <strong>Drive</strong>s larger than 8.4 GB – Pentium-class processor<br />
Operating System Requirements<br />
• <strong>Drive</strong>s less than or equal to 8.4 GB:<br />
- DOS 5.0 or higher<br />
• <strong>Drive</strong>s larger than 8.4 GB:<br />
- Installing as boot drive (Primary Master) requires full installation set of Windows 95/98 – not an update<br />
from DOS or Windows 3.x.<br />
- Installing as non-boot drive (Primary Slave, Secondary Master or Slave) requires Windows 95/98 on the<br />
boot drive.<br />
Hook up<br />
Maxtor recommends that you use the MaxBlast Plus software to create a customized installation guide for your<br />
system before physically installing your new hard drive. The information created by MaxBlast Plus relates to the<br />
following illustrations.<br />
Boot the System with the MaxBlast Plus <strong>Disk</strong>ette<br />
Before physically installing the Maxtor hard drive, boot your system with the MaxBlast Plus diskette. It will<br />
assist you with the instructions in this section for a successful installation.<br />
Configure the <strong>Drive</strong> Jumpers<br />
The jumper configurations have three valid jumper settings – Master, Slave and Cable Select. Maxtor hard<br />
drives are always shipped with the Master jumper setting enabled.<br />
Install the 5.25-inch Mounting Brackets<br />
If the Maxtor hard drive will be mounted in a 5.25-inch device bay, you will need to attach 5.25-inch<br />
brackets to the hard drive. These brackets are not required if the drive is mounted in a 3.5-inch device bay.<br />
4 – 4
INSTALLATION<br />
Install the <strong>Hard</strong> <strong>Drive</strong> in a Device Bay<br />
Refer to your computer user’s manual for specific mounting information. Be sure to secure the drive to the<br />
device bay with all four screws.<br />
Attach the Interface and Power Cables<br />
Do not force or rock the connectors into their sockets on the hard drive. Push them in straight until they<br />
are seated.<br />
Note: Maxtor <strong>Hard</strong> <strong>Drive</strong> Kits that carry an “H” in the kit number are Ultra ATA/100 compatible hard<br />
drives. A standard IDE cable can be used for drive installation; however, an Ultra ATA cable is required to<br />
achieve Ultra ATA/100 data transfers in Ultra ATA/100 compatible systems. Follow the illustration below for<br />
proper cable connections to the system and hard drive(s) when using this cable.<br />
Attach an IDE interface connector to J1 on the Maxtor drive. Attach a power connector to J2 on the<br />
Maxtor drive. This connector is keyed and will only fit one way. Check all other cable connections before<br />
you power up. Striped/colored edge is pin 1<br />
After attaching the IDE interface cable and the<br />
power cable to the Maxtor hard drive, verify that<br />
all other cables connected to other devices, the<br />
mother board or interface card(s) are correctly<br />
seated.<br />
Striped/colored edge is pin<br />
Figure 4 - 4<br />
IDE Interface and Power Cabling Detail<br />
Start up<br />
Turn your system ON. During the system start up sequence, run the SETUP (BIOS) program. Newer systems<br />
usually display a message like “press DEL to enter Setup,” showing how to access the SETUP (BIOS) program.<br />
Choose the device position where the Maxtor hard drive will be installed (Primary Master, Primary Slave,<br />
Secondary Master, Secondary Slave or their equivalents) and select the “Auto Detect” option. Save and exit the<br />
BIOS. The system will now boot. Boot to the MaxBlast Plus diskette.<br />
Set up<br />
MaxBlast Plus will guide you through the steps to prepare (partition and format) your new Maxtor hard drive.<br />
Once you have completed this step, your new Maxtor hard drive will be ready to use.<br />
Note: Do not discard the MaxBlast Plus diskette once the installation is complete. The diskette contains Maxdiag,<br />
a diagnostic utility that is a separate program from the MaxBlast Plus installation software.<br />
4 – 5
AT INTERFACE DESCRIPTION<br />
AT Interface Description<br />
SECTION 5<br />
Interface Connector<br />
All Maxtor hard drives have a 40-pin ATA interface connector mounted on the PCBA. The drive may connect<br />
directly to the host; or it can also accommodate a cable connection (maximum cable<br />
length: 18 inches).<br />
Figure 5-1<br />
Data Connector<br />
Pin Description Summary<br />
PIN SIGNAL PIN SIGNAL<br />
01 Reset - 02 Ground<br />
03 D D7 04 D D8<br />
05 D D6 06 D D9<br />
07 D D5 08 DD 10<br />
09 D D4 10 D D11<br />
11 D D3 12 DD 12<br />
13 D D2 14 DD 13<br />
15 D D1 16 DD 14<br />
17 D D0 18 DD 15<br />
19 Ground 20 (k eypin)<br />
21 D MARQ 22 Ground<br />
23 DIOW -:STOP 24 Ground<br />
25 DIOR -:HD MARDY:HSTROBE 26 Ground<br />
27 IORDY:DDMARDY:DSTROBE 28 CSEL<br />
29 D MACK - 30 Ground<br />
31 INTRQ 32<br />
IOCS16<br />
Obsolete<br />
33 DA1 34 PD IAG -<br />
35 DA0 36 DA2<br />
37 C S0 - 38 C S1 -<br />
39 DASP - 40 Ground<br />
5 – 1
AT INTERFACE DESCRIPTION<br />
Pin Description Table<br />
PIN NAME PIN I/O SIGNAL NAME SIGNAL DESCRIPTION<br />
RESET - 01 I Host Reset Reset signal from the host system. Active during power up and inactive after.<br />
DD0 17 I/O Host Data Bus 16 bit bi-directional data bus between host and drive. Lower 8 bits used for<br />
register and ECC byte transfers. All 16 bits used for data transfers.<br />
DD1 15 I/O<br />
DD2 13 I/O<br />
DD3 11 I/O<br />
DD4 09 I/O<br />
DD5 07 I/O<br />
DD6 05 I/O<br />
DD7 03 I/O<br />
DD8 04 I/O<br />
DD9 06 I/O<br />
DD 10 08 I/O<br />
D D11 10 I/O<br />
DD 12 12 I/O<br />
DD 13 14 I/O<br />
DD 14 16 I/O<br />
DD 15 18 I/O<br />
DMARQ 21 O DMA Request This signal is used with DMACK for DMA transfers. By asserting this signal, the<br />
drive indicates that data is ready to be transfered to and from the host.<br />
DIOW -<br />
STOP<br />
DIOR -<br />
HDMARDY<br />
-<br />
HSTROBE<br />
IORDY<br />
DDMARDY<br />
-<br />
DSTROBE<br />
23 I Host I/O Write Rising edge of Write strobe clocks data from the host data bus to a register on<br />
the drive.<br />
25 I Host I/O Read Read strobe enables data from a register on the drive onto the host data bus.<br />
DMA ready during UltraDMA data in bursts.<br />
Data strobe during UltraDMA data out bursts.<br />
27 O I/O Channel Ready This signal may be driven low by the drive to insert wait states into host I/O<br />
cycles.<br />
DMA ready during UltraDMA data out bursts.<br />
Data strobe during UltraDMA data in bursts.<br />
CSEL 28 Cable Select Used for Master/Slave selection via cable. Requires special cabling on host<br />
system and installation of Cable Select jumper.<br />
DMACK - 29 I DMA Acknowledge This signal is used with DMARQ for DMA transfers. By asserting this signal, the<br />
host is acknowledging the receipt of data or is indicating that data is available.<br />
INTRQ 31 O Hos t Interrupt Interrupt to the host asserted when the drive requires attention from the host.<br />
Request<br />
IOCS16 32 Device 16 bit I/O Obsolete<br />
PDIAG - 34 I/O Passed Diagnostic Output by drive when in Slave mode; Input to drive when in Master mode.<br />
DA0 35 I Host Address Bus 3 bit binary address from the host to select a register in the drive.<br />
DA1 33 I<br />
DA2 36 I<br />
CS0 - 37 I Host Chip Select 0 Chip select from the host used to access the Command Block registers in the<br />
drive. This signal is a decode of I/O addres ses 1F0 - 1F 7 hex.<br />
CS1 - 38 I Host Chip Select 1 Chip select from the host used to access the Control registers in the drive. This<br />
signal is a decode of I/O addresses 3F6 - 3F7 hex.<br />
DASP - 39 I/O <strong>Drive</strong> Active/<strong>Drive</strong><br />
1 Present<br />
GND 02 N/A Ground Signal ground.<br />
19<br />
22<br />
24<br />
26<br />
30<br />
40<br />
Time-multiplexed, open collector output which indicates that a drive is active, or<br />
that<br />
device 1 is present.<br />
KEY 20 N/A Key Pin used for keying the interface connector.<br />
5 – 2
AT INTERFACE DESCRIPTION<br />
PIO Timing<br />
TIMING PARAMETERS MODE 0 MODE 1 MODE 2 MODE 3 MODE 4<br />
t0 Cycle Time (min) 600 ns 383 ns 240 ns 180 ns 120 ns<br />
t1 Address valid to DIOR-/DIOW- setup (min) 70 ns 50 ns 30 ns 30 ns 25 ns<br />
t2 D IOR-/DIOW- 16-bit (min) 165 ns 125 ns 100 ns 80 ns 70 ns<br />
t2i DIOR-/DIOW- recovery time (min) 70 ns 25 ns<br />
t3 DIOW- data setup (min) 60 ns 45 ns 30 ns 30 ns 20 ns<br />
t4 DIOW- data hold (min) 30 ns 20 ns 15 ns 10 ns 10 ns<br />
t5 DIOR- data setup (min) 50 ns 35 ns 20 ns 20 ns 20 ns<br />
t6 DIOW- data hold (min) 5 ns 5 ns 5 ns 5 ns 5 ns<br />
t6Z DIOR- data tristate (max) 30 ns 30 ns 30 ns 30 ns 30 ns<br />
t9 DIOR-/DIOW- to address valid hold (min) 20 ns 15 ns 10 ns 10 ns 10 ns<br />
tRd Read Data Valid to IORDY active (min) 0 0 0 0 0<br />
tA IORDY Setup Time 35 ns 35 ns 35 ns 35 ns 35 ns<br />
tB IORDY Pulse Width (max) 1250 ns 1250 ns 1250 ns 1250 ns 1250 ns<br />
Figure 5 - 2<br />
PIO Data Transfer To/From Device<br />
5 – 3
AT INTERFACE DESCRIPTION<br />
DMA Timing<br />
TIMING PARAMETERS MODE 0 MODE 1 MODE 2<br />
t0 Cycle Time (min) 480 ns 150 ns 120 ns<br />
tC DMACK to DMARQ delay<br />
tD DIOR-/DIOW- (min) 215 ns 80 ns 70 ns<br />
tE DIOR- data access (min) 150 ns 60 ns<br />
tF DIOR- data hold (min) 5 ns 5 ns 5 ns<br />
tG DIOR-/DIOW- data setup (min) 100 ns 30 ns 20 ns<br />
tH DIOW- data hold (min) 20 ns 15 ns 10 ns<br />
tI DMACK to DIOR-/DIOW- setup (min) 0 0 0<br />
tJ DIOR-/DIOW- to DMAC K hold (min) 20 ns 5 ns 5 ns<br />
tKr DIOR- negated puls e width (min) 50 ns 50 ns 25 ns<br />
tKw DIOW- negated pulse width (min) 215 ns 50 ns 25 ns<br />
tLr DIOR- to D MARQ delay (max) 120 ns 40 ns 35 ns<br />
tLw DIOW- to D MARQ delay (max) 40 ns 40 ns 35 ns<br />
tZ DMAC K- to tristate (max) 20 ns 25 ns 25 ns<br />
Figure 5 - 3<br />
Multi-word DMA Data Transfer<br />
5 – 4
AT INTERFACE DESCRIPTION<br />
Ultra DMA Timing<br />
DMARQ<br />
(device)<br />
TIMING PARAMETERS (all times in nanoseconds) MODE 0 MODE 1 MODE 2 MODE 3 MODE 4 MODE 5<br />
MIN MAX MIN MAX MIN MAX MIN MAX MIN MAX MIN MAX<br />
t CYC<br />
Cycle Time (from STROBE edge to STROBE edge) 112 73 54 39 25 16.8<br />
t2 CYC<br />
Two cycle time (from ris ing edge to next rising edge or<br />
from falling edge to next falling edge of STROBE)<br />
230 153 115 86 57 38<br />
t DS<br />
Data setup time (at recipient) 15 10 7 7 5 4<br />
t DH<br />
Data hold time (at recipient) 5 5 5 5 5 4.6<br />
t DVS<br />
Data valid setup time at sender (time from data bus being<br />
valid until STROBE edge)<br />
70 48 31 20 6.7 4.8<br />
t DVH<br />
Data valid hold time at sender (time from STROBE edge<br />
until data may go invalid)<br />
6.2 6.2 6.2 6.2 6.2 4.8<br />
t FS<br />
Firs t STROBE (time for device to send first STROBE) 0 230 0 200 0 170 0 130 0 120 0 90<br />
t LI<br />
Limited interlock time (time allowed between an action by<br />
one agent, either host or device, and the following action 0 150 0 150 0 150 0 100 0 100 0 75<br />
by the other agent)<br />
t ML I<br />
Interlock time with minimum 20 20 20 20 20 20<br />
t UI<br />
Unlimited interlock time 0 0 0 0 0 0<br />
t AZ<br />
Maximum time allowed for outputs to release 10 10 10 10 10 10<br />
t ZAH Minimum delay time required for output drivers turning on 20 20 20 20 20 20<br />
t ZAD<br />
(from releas ed state)<br />
0 0 0 0 0 0<br />
t ENV<br />
Envelope time (all control signal transitions are within the<br />
DMACK envelope by this much time)<br />
20 70 20 70 20 70 20 55 20 55 20 50<br />
t SR<br />
STROBE to DMARDY (response time to ensure the<br />
synchronous pause case when the recipient is pausing)<br />
50 30 20 NA NA NA<br />
t RF S<br />
Ready-to-final-STROBE time (no more STROBE edges<br />
may be sent this long after receiving DMARDY- negation)<br />
75 70 60 60 60 50<br />
t RP<br />
Ready-to-pause time (time until a recipient may assume<br />
that the sender has paused after negation of DMARDY-)<br />
160 125 100 100 100 85<br />
t IORDYZ<br />
Pull-up time before allowing IORD Y to be releas ed 20 20 20 20 20 20<br />
t ZIORDY<br />
Minimum time device shall wait before driving IORDY 0 0 0 0 0 0<br />
t ACK<br />
Setup and hold times before assertion and negation of<br />
DMACK-<br />
20 20 20 20 20 20<br />
t SS<br />
Time from STROBE edge to STOP assertion when the<br />
sender is stopping<br />
50 50 50 50 50 50<br />
DMACK-<br />
(host)<br />
t UI<br />
t ACK<br />
t ENV<br />
t FS<br />
STOP<br />
(host)<br />
t ZAD<br />
HDMARDY-<br />
(host)<br />
t ACK<br />
t ENV<br />
t ZAD<br />
t FS<br />
t ZIORDY<br />
DSTROBE<br />
(device)<br />
t AZ<br />
t VDS<br />
t DVH<br />
DD(15:0)<br />
t ACK<br />
Figure 5 - 4<br />
Initiating an Ultra DMA Data In Burst<br />
DA0, DA1, DA2,<br />
CS0-, CS1-<br />
5 – 5
AT INTERFACE DESCRIPTION<br />
t 2CYC<br />
t CYC<br />
t CYC<br />
DSTROBE<br />
at device<br />
t 2CYC<br />
t DVH<br />
t DVS<br />
t DVH<br />
t DVS<br />
t DVH<br />
DD(15:0)<br />
at device<br />
DSTROBE<br />
at host<br />
DD(15:0)<br />
at host<br />
t DH t DS t DH t DS<br />
t DH<br />
Figure 5 - 5<br />
Sustained Ultra DMA Data In Burst<br />
DMARQ<br />
(device)<br />
DMACK-<br />
(host)<br />
STOP<br />
(host)<br />
HDMARDY-<br />
(host)<br />
t SR<br />
t RFS<br />
t RP<br />
DSTROBE<br />
(device)<br />
DD(15:0)<br />
(device)<br />
Figure 5 - 6<br />
Host Pausing an Ultra DMA Data In Burst<br />
5 – 6
AT INTERFACE DESCRIPTION<br />
DMARQ<br />
(device)<br />
DMACK-<br />
(host)<br />
t LI<br />
t MLI<br />
t ACK<br />
STOP<br />
(host)<br />
HDMARDY-<br />
(host)<br />
t LI<br />
t ACK<br />
DSTROBE<br />
(device)<br />
t LI<br />
t SS<br />
t ZAH<br />
Figure 5 - 7<br />
t IORDYZ<br />
t AZ<br />
t DVS<br />
t DVH<br />
DD(15:0)<br />
CRC<br />
t ACK<br />
Device Terminating an Ultra DMA Data In Burst<br />
DMARQ<br />
(device)<br />
t LI<br />
t LI<br />
t MLI<br />
DA0, DA1, DA2,<br />
CS0-, CS1-<br />
DMACK-<br />
(host)<br />
t ZAH<br />
STOP<br />
(host)<br />
t AZ<br />
t ACK<br />
HDMARDY-<br />
(host)<br />
t ACK<br />
t RFS<br />
t RP<br />
Figure 5 - 8<br />
DSTROBE<br />
(device)<br />
t MLI<br />
t IORDYZ<br />
t DVS<br />
t DVH<br />
DD(15:0)<br />
CRC<br />
DA0, DA1, DA2,<br />
CS0-, CS1-<br />
t ACK<br />
Host Terminating an Ultra DMA Data In Burst<br />
5 – 7
AT INTERFACE DESCRIPTION<br />
DMARQ<br />
(device)<br />
t UI<br />
DMACK-<br />
(host)<br />
STOP<br />
(host)<br />
t ACK<br />
t ENV<br />
t ZIORDY t LI<br />
t DVS t DVH<br />
DDMARDY-<br />
(device)<br />
t UI<br />
t ACK<br />
HSTROBE<br />
(host)<br />
DD(15:0)<br />
(host)<br />
t ACK<br />
DA0, DA1, DA2,<br />
CS0-, CS1-<br />
Figure 5 - 9<br />
Initiating an Ultra DMA Data Out Burst<br />
t 2CYC<br />
t CYC<br />
t CYC<br />
HSTROBE<br />
at host<br />
t 2CYC<br />
t DVH<br />
t DVS<br />
t DVH<br />
t DVS<br />
t DVH<br />
DD(15:0)<br />
at host<br />
HSTROBE<br />
at device<br />
t DH<br />
t DS<br />
t DH<br />
t DS<br />
t DH<br />
DD(15:0)<br />
at device<br />
Figure 5 - 10<br />
Sustained Ultra DMA Data Out Burst<br />
5 – 8
AT INTERFACE DESCRIPTION<br />
DMARQ<br />
(device)<br />
DMACK-<br />
(host)<br />
STOP<br />
(host)<br />
DDMARDY-<br />
(device)<br />
t SR<br />
t RFS<br />
t RP<br />
HSTROBE<br />
(host)<br />
DD(15:0)<br />
(host)<br />
Figure 5 - 11<br />
Device Pausing an Ultra DMA Data Out Burst<br />
DMARQ<br />
(device)<br />
t LI<br />
t MLI<br />
DMACK-<br />
(host)<br />
t SS<br />
Figure 5 - 12<br />
t LI<br />
t ACK<br />
STOP<br />
(host)<br />
DDMARDY-<br />
(device)<br />
t LI<br />
t IORDYZ<br />
HSTROBE<br />
(host)<br />
t ACK<br />
DD(15:0)<br />
(host)<br />
DA0, DA1, DA2,<br />
CS0-, CS1-<br />
t DVS<br />
CRC<br />
t ACK<br />
t DVH<br />
Host Terminating an Ultra DMA Data Out Burst<br />
5 – 9
AT INTERFACE DESCRIPTION<br />
DMARQ<br />
(device)<br />
DMACK-<br />
(host)<br />
STOP<br />
(host)<br />
t LI<br />
t MLI<br />
t ACK<br />
DDMARDY-<br />
(device)<br />
t RP<br />
t IORDYZ<br />
t RFS<br />
Figure 5 - 13<br />
t LI<br />
t MLI<br />
t ACK<br />
HSTROBE<br />
(host)<br />
t DVS<br />
t DVH<br />
DD(15:0)<br />
(host)<br />
CRC<br />
DA0, DA1, DA2,<br />
CS0-, CS1-<br />
t ACK<br />
Device Terminating an Ultra DMA Data Out Burst<br />
5 – 10
HOST SOFTWARE INTERFACE<br />
Host Software Interface<br />
SECTION 6<br />
The host communicates with the drive through a set of controller registers accessed via the host’s I/O ports.<br />
These registers divide into two groups: the Task File, used for passing commands and command parameters and<br />
the Control/Diagnostic registers.<br />
Task File Registers<br />
The Task File consists of eight registers used to control fixed disk operations. The host accesses each register<br />
by the I/O port address shown in this Task File register map:<br />
I/O PORT READ WRITE<br />
1F0h Data Register Data Register<br />
1F1h Error Register Features Register<br />
1F2h Sector Count Sector Count<br />
1F3h Sector Number Sector Number<br />
1F4h Cylinder Low Cylinder Low<br />
1F5h Cylinder High Cylinder High<br />
1F6h <strong>Drive</strong>/Head (SDH) <strong>Drive</strong>/Head (SDH)<br />
1F7h Status Register Command Register<br />
Data Register<br />
Provides access to the drive’s sector buffer for read and write operations. With the exception of ECC byte<br />
transfers (which, during Read long and Write long commands, are 8 bits wide), data transfers through the<br />
Data register are all 16 bits wide.<br />
Error Register<br />
A read-only register containing specific information regarding the previous command. Data interpretation<br />
differs depending on whether the controller is in operational or diagnostic mode. A power up, reset,<br />
software reset, or receipt of a diagnostic command sets the controller into diagnostic mode. This mode<br />
invalidates contents of the Status register. The contents of the Error register reflect a completion code.<br />
Issuing any command (apart from a Diagnostic command) places the controller into operational mode.<br />
In operational mode, the Error register is valid only when the Error bit in the Status register is set. The bit<br />
definitions for operational mode follow:<br />
7 6 5 4 3 2 1 0<br />
0 ECC 0 IDNF 0 ABRT TK0 AMNF<br />
In te rface<br />
CRC<br />
Data<br />
ECC Error<br />
No t<br />
Us ed<br />
ID<br />
Not Found<br />
No t<br />
Us ed<br />
Aborted<br />
Command<br />
Track 0<br />
Error<br />
Address<br />
Mark Not<br />
Found<br />
Interface CRC – An interface CRC error occurred during an Ultra DMA transfer.<br />
Data ECC Error – An non-correctable ECC error occurred during a Read Sector command.<br />
Firmware Problem – Indicates a firmware problem was detected, (e.g., invalid interrupt, divide overflow).<br />
ID Not Found – Either a matching ID field not found, or a CRC error occurred.<br />
Aborted Command – Invalid commands, write fault, no seek complete, or drive not ready.<br />
Track 0 Error – Track 0 was not found during execution of a Restore command.<br />
Address Mark Not Found – The Address Mark could not be found after an ID match.<br />
Features Register<br />
Enables or disables features through the Set Features command.<br />
6 – 1
HOST SOFTWARE INTERFACE<br />
Sector Count Register<br />
Holds the number of sectors to be sent during a Read or Write command, and the number of sectors per<br />
track during a Format command. A value of zero in this register implies a transfer of 256 sectors. A multisector<br />
operation decrements the Sector Count register. If an error occurs during such an operation, this<br />
register contains the remaining number of sectors to be transferred.<br />
Sector Number Register<br />
Holds the starting sector number for any disk operation. The register is updated as each sector is processed in<br />
a multi-sector operation.<br />
Cylinder Number Registers<br />
Two 8-bit Cylinder Number registers (Low and High) specify the starting cylinder for disk operation.<br />
Device/Head Register<br />
Used to specify the drive and head number to be operated on during any disk operations. Within the<br />
context of a Set Parameters command, this register specifies the maximum number of heads on the drive.<br />
Bit definitions follow:<br />
7 6 5 4 3 2 1 0<br />
1 LBA 1 DRV HS3 HS2 HS1 HS0<br />
LBA<br />
Mode<br />
<strong>Drive</strong><br />
Select<br />
Head<br />
Select<br />
Head<br />
Select<br />
Head<br />
Select<br />
Head<br />
Select<br />
Select LBA Mode – Enabling this bit for commands not supported by LBA mode will abort the selected command. When set,<br />
the Task File register contents are defined as follows for the Read/Write and translate command:<br />
CONTENTS<br />
LBA BITS<br />
Sector Number 0 - 7<br />
Cylinder Low 8 - 15<br />
Cylinder High 16 - 23<br />
D rive/Head 24 - 27<br />
<strong>Drive</strong> Select – Set to 0 to select the master drive; set to 1 to select the slave drive.<br />
Head Select – Specifies the binary coded address of the head to be selected.<br />
Status Register<br />
Contains results of the last command executed, and the drive’s status. The other seven Task File registers may<br />
be read only when bit 7 (BUSY) of the Status register is low. Reading any of the Task File registers when<br />
BUSY is high returns the value of the Status register. Reading the Status register also clears any interrupt<br />
request to the host. Bit definitions follow:<br />
7 6 5 4 3 2 1 0<br />
BUSY DRDY DF DSC DRQ 0 0 ERR<br />
C ontroller<br />
Busy<br />
Device<br />
Ready<br />
Device<br />
Fault<br />
Device<br />
Seek<br />
Complete<br />
Data<br />
Request<br />
Error<br />
Controller Busy – Goes active when a command is written to the Command register, indicating controller<br />
task execution. After a command, this bit resets.<br />
Device Ready – Indicates that the drive is ready for commands. If drive ready is not present, all commands abort.<br />
Device Fault – Indicates the drive’s detection of a write fault condition, causing all commands to abort.<br />
Device Seek Complete – Signifies a seek completion, and that the drive is on track.<br />
Data Request – Indicates that the drive’s sector buffer is ready for data transfer.<br />
Error – The Error bit sets when the previous command has completed with a non-recoverable error.<br />
6 – 2
HOST SOFTWARE INTERFACE<br />
Command Register<br />
Contains code for the command to be performed. Additional command information should be written to the<br />
task file before the Command register is loaded. When this register is written, the BUSY bit in the Status<br />
register sets, and interrupt request to the host clears; invalid commands abort. (Detailed information on interface<br />
commands is given in Section 7.) Hex values for valid command formats follow:<br />
Read Commands<br />
Read Sector(s) 20h Normal reads; retries enabled<br />
21h Normal reads; retries disabled<br />
22h Read Long; retries enabled<br />
23h Read Long; retries disabled<br />
Read Verify Sector(s) 40h Retries enabled<br />
41h Retries disabled<br />
Read Sector Buffer E4h<br />
Read Multiple<br />
C4h<br />
Read DMA<br />
C8h<br />
C9h No retries<br />
Write Commands<br />
Write Sector(s) 30h Normal writes; retries enabled<br />
31h Normal writes; retries disabled<br />
32h Write Long; retries enabled<br />
33h Write Long; retries disabled<br />
Write Verify Sector(s) 3Ch<br />
Write Sector Buffer E8h<br />
Write Multiple<br />
C5h<br />
Write DMA<br />
CAh<br />
CBh No retries<br />
Mode Set/Check Commands<br />
Set Features<br />
Set Multiple Mode<br />
Read Native Max Address<br />
Set Max Mode<br />
Power Mode Commands<br />
Standby Immediate<br />
Idle Immediate<br />
Standby<br />
Idle<br />
Check Power Mode<br />
Set Sleep Mode<br />
Initialization Commands<br />
Identify <strong>Drive</strong><br />
Initialize <strong>Drive</strong> Parameters<br />
Re-calibrate<br />
EFh<br />
C6h<br />
F8h<br />
F9h<br />
94/E0h Stops drive spindle; do not change time-out value<br />
95/E1h Starts spindle; do not change time-out value<br />
96/E2h Stops spindle; change time-out value<br />
97/E3h Starts spindle; change time-out value<br />
98/E5h<br />
99/E6h<br />
ECh<br />
91h<br />
1xh<br />
Seek, Format, and Diagnostic Commands<br />
Seek<br />
7xh<br />
Format Track<br />
50h<br />
Execute <strong>Drive</strong> Diagnostic 90h<br />
S.M.A.R.T. Commands<br />
Execute S.M.A.R.T.<br />
B0h<br />
6 – 3
HOST SOFTWARE INTERFACE<br />
Summary<br />
CO MMAND N AME CO MMAND C OD E PARAMETER S U SED<br />
b7 b6 b5 b4 b3 b2 b1 b0 F SC SN C SD H<br />
Re calibrate 0 0 0 1 x x x x N N N N D<br />
Read Sector(s) 0 0 1 0 0 0 L x N Y Y Y Y<br />
Read D MA 1 1 0 0 1 0 0 x N Y Y Y Y<br />
Write Sector(s) 0 0 1 1 0 0 L x N Y Y Y Y<br />
Write D MA 1 1 0 0 1 0 1 x N Y Y Y Y<br />
Write Verify Se ctor(s ) 0 0 1 1 1 1 0 0 N Y Y Y Y<br />
Read Verify Se ctor(s ) 0 1 0 0 0 0 0 x N Y Y Y Y<br />
Fo rmat Track 0 1 0 1 0 0 0 0 N N N Y Y<br />
Seek 0 1 1 1 x x x x N N Y Y Y<br />
Execute Diag no stic 1 0 0 1 0 0 0 0 N N N N D<br />
Initialize Parameters 1 0 0 1 0 0 0 1 N Y N N Y<br />
Rea d S ector Buffer 1 1 1 0 0 1 0 0 N N N N D<br />
Write S ector Buffer 1 1 1 0 1 0 0 0 N N N N D<br />
Id e nt if y <strong>Drive</strong> 1 1 1 0 1 1 0 0 N N N N D<br />
S et Fea tures 1 1 1 0 1 1 1 1 Y N N N D<br />
Read Multiple 1 1 0 0 0 1 0 0 N Y Y Y Y<br />
Write Multiple 1 1 0 0 0 1 0 1 N Y Y Y Y<br />
Set Multiple Mode 1 1 0 0 0 1 1 0 N Y N N D<br />
Read Native M ax Address 1 1 1 1 1 0 0 0 N N N N Y<br />
S et Max 1 1 1 1 1 0 0 1 N Y Y Y Y<br />
6 – 4
HOST SOFTWARE INTERFACE<br />
Control Diagnostic Registers<br />
These I/O port addresses reference three Control/Diagnostic registers:<br />
I/O PORT READ WRITE<br />
3F6h Alternate Status Fixed <strong>Disk</strong> Control<br />
3F7h Digital Input Not used<br />
Alternate Status Register<br />
Contains the same information as the Status register in the Task File. However, this register may be read at<br />
any time without clearing a pending interrupt.<br />
Device Control Register<br />
Contains the software Reset and Enable bit to enable interrupt requests to the host. Bit definitions follow:<br />
7 6 5 4 3 2 1 0<br />
0 0 0 0 0 SRST IEN 0<br />
Reset IRQ Enable<br />
Reset – Setting the software Reset bit holds the drive in the reset state. Clearing the bit re-enables the drive.<br />
The software Reset bit must be held active for a minimum of 5 µsec.<br />
IRQ Enable – Setting the Interrupt Request Enable to 0 enables the IRQ 14 signal to the host. When this<br />
bit is set to 1, IRQ14 is tri-stated, and interrupts to the host are disabled. Any pending interrupt occurs when<br />
the bit is set to 0. The default state of this bit after power up is 0 (interrupt enabled).<br />
Digital Input Register<br />
Contains information about the state of the drive. Bit definitions follow:<br />
7 6 5 4 3 2 1 0<br />
x -WG -HS3 -HS2 -HS1 -HS0 -DS1 DS0<br />
Reserved Write<br />
Gate<br />
Head<br />
Select 3<br />
Head<br />
Select 2<br />
Head<br />
Select 1<br />
Head<br />
Select 0<br />
<strong>Drive</strong><br />
Select 1<br />
<strong>Drive</strong><br />
Select 0<br />
Bit 7 of the host data bus is not driven when this register is read.<br />
-Write Gate – Reflects the state of the active low write gate signal on the drive.<br />
-Head Select 3 through -Head Select 0 – Represents the ones complement of the currently selected head number.<br />
-<strong>Drive</strong> Select 1 – Is 0 if drive 1 selected; 1 otherwise.<br />
-<strong>Drive</strong> Select 0 – Is 0 if drive 0 selected; 1 otherwise.<br />
6 – 5
HOST SOFTWARE INTERFACE<br />
Reset and Interrupt Handling<br />
Reset Handling<br />
One of three different conditions may cause a reset: power on, hardware reset or software reset. All three<br />
cause the interface processor to initialize itself and the Task File registers of the interface. A reset also causes a<br />
set of the Busy bit in the Status register. The Busy bit does not clear until the reset clears and the drive<br />
completes initialization. Completion of a reset operation does not generate a host interrupt.<br />
Task File registers are initialized as follows:<br />
Error 1<br />
Sector Count 1<br />
Sector Number 1<br />
Cylinder Low 0<br />
Cylinder High 0<br />
<strong>Drive</strong>/Head 0<br />
Interrupt Handling<br />
The drive requests data transfers to and from the host by asserting its IRQ 14 signal. This signal interrupts the<br />
host if enabled by bit 1 (IRQ enable) of the Fixed <strong>Disk</strong> Control register.<br />
Clear this interrupt by reading the Status register, writing the Command register, or by executing a host<br />
hardware or software reset.<br />
6 – 6
INTERFACE COMMANDS<br />
Interface Commands<br />
SECTION 7<br />
The following section describes the commands (and any parameters necessary to execute them),<br />
as well as Status and Error register bits affected.<br />
Read Commands<br />
Read Sector(s)<br />
Read Verify Sector(s)<br />
Read Sector Buffer<br />
Read DMA<br />
Multi-word DMA<br />
Ultra DMA<br />
Read Multiple<br />
Set Multiple<br />
Write Commands<br />
Write Sector(s)<br />
Write Verify Sector(s)<br />
Write Sector Buffer<br />
Write DMA<br />
Multi-word DMA<br />
Ultra DMA<br />
Write Multiple<br />
Mode Set/Check Commands<br />
Set Features Mode<br />
Set Multiple Mode<br />
Set Max Mode<br />
Read Native Max Address<br />
Power Mode Commands<br />
Standby Immediate<br />
Idle Immediate<br />
Standby<br />
Idle<br />
Check Power Mode<br />
Set Sleep Mode<br />
Initialization Commands<br />
Identify <strong>Drive</strong><br />
Initialize <strong>Drive</strong> Parameters<br />
S.M.A.R.T.<br />
7 – 1
INTERFACE COMMANDS<br />
Read Commands<br />
Read Sector(s)<br />
Reads from 1 to 256 sectors, as specified in the Command Block, beginning at the specified sector. (A sector<br />
count of 0 requests 256 sectors.) Immediately after the Command register is written, the drive sets the BSY<br />
bit and begins execution of the command. If the drive is not already on the desired track, an implied seek is<br />
performed.<br />
Once at the desired track, the drive searches for the data address mark of the requested sector. The data<br />
address mark must be recognized within a specified number of bytes, or the Data Address Mark Not Found<br />
error will be reported. Assuming the data address mark is found:<br />
1. The data field is read into the sector buffer.<br />
2. Error bits are set (if an error was encountered).<br />
3. The DRQ bit is set.<br />
4. An interrupt is generated.<br />
The DRQ bit is always set, regardless of the presence or absence of an error condition after the sector.<br />
Upon command completion, the Command Block registers contain the numbers of the cylinder, head and<br />
sector of the last sector read. Back-to-back sector read commands set DRQ and generate an interrupt when<br />
the sector buffer is filled at the completion of each sector. The drive is then ready for the data to be read by<br />
the host. DRQ is reset and BSY is set immediately when the host empties the sector buffer.<br />
If an error occurs during Read Sector commands, the read terminates at the sector where the error occurred.<br />
The host may then read the Command Block to determine the nature of that error, and the sector where it<br />
happened. If the error type is a correctable or an non-correctable data error, the flawed data is loaded into<br />
the sector buffer.<br />
A Read Long command sets the Long bit in the command code and returns the data and the ECC bytes in<br />
the data field of the specified sector. During a Read Long, the drive does not check the ECC bytes to<br />
determine if there has been a data error. The Read Long command is limited to single sector requests.<br />
Read Verify Sector(s)<br />
Identical to the Read Sector(s) command, except that:<br />
1. DRQ is never set,<br />
2. No data is transferred back to the host and<br />
3. The long bit is not valid.<br />
7 – 2
INTERFACE COMMANDS<br />
Read DMA<br />
Multi-word DMA<br />
Identical to the Read Sector(s) command, except that<br />
1. The host initializes a slave-DMA channel prior to issuing the command,<br />
2. Data transfers are qualified by DMARQ and are performed by the slave-DMA channel<br />
and<br />
3. The drive issues only one interrupt per command to indicate that data transfer has<br />
terminated and status is available.<br />
Ultra DMA<br />
With the Ultra DMA Read protocol, the control signal (DSTROBE) that latches data from DD(15:0) is<br />
generated by the devices which drives the data onto the bus. Ownership of DD(15:0) and this data strobe<br />
signal are given DSTROBE to the drive during an Ultra DMA data in burst.<br />
During an Ultra DMA Read burst, the drive always moves data onto the bus, and, after a sufficient time to<br />
allow for propagation delay, cable settling, and setup time, the sender shall generate a DSTROBE edge to<br />
latch the data. Both edges of DSTROBE are used for data transfers.<br />
Any unrecoverable error encountered during execution of a Read DMA command terminates data transfer<br />
after the transfer of all sectors prior to the sector where the error was detected. The sector in error is not<br />
transferred. The drive generates an interrupt to indicate that data transfer has terminated and status is<br />
available. The error posting is identical to the Read Sector(s) command.<br />
Read Multiple<br />
Performs similarly to the Read Sector(s) command, except that for each READ MULTIPLE command data<br />
transfers are multiple sector blocks and the Long bit is not valid.<br />
Execution is also similar to that of the READ SECTOR(S) command, except that:<br />
1. Several sectors are transferred to the host as a block, without intervening interrupts.<br />
2. DRQ qualification of the transfer is required only at the start of each block, not of each sector.<br />
The block count consists of the number of sectors to be transferred as a block. (The block count is<br />
programmed by the Set Multiple Mode command, which must be executed prior to the Read Multiple<br />
command.) READ LONG command is limited to single sector requests.<br />
When the Read Multiple command is issued, the Sector Count register contains the number of sectors<br />
requested — not the number of blocks or the block count. If the number of sectors is not evenly divisible<br />
by the block count, as many full blocks as possible are transferred, followed by a final, partial block transfer.<br />
This final, partial block transfer is for N sectors, where N = (sector count) modulo (block count)<br />
The Read Multiple operation will be rejected with an Aborted Command error if attempted:<br />
1. Before the Set Multiple Mode command has been executed, or<br />
2. When Read Multiple commands are disabled.<br />
The controller reports disk errors encountered during Read Multiple commands at the start of the block or<br />
partial block transfer. However, DRQ still sets, and the transfer occurs normally, along with the transfer of<br />
any corrupt data. Remaining block data from the following the sector in error is not valid.<br />
If the Sector Count register contains 0 when the Set Multiple Mode command is issued, Read Multiple and<br />
Write Multiple commands are disabled; no error is returned. Once the appropriate action has been taken, the<br />
controller resets BSY and generates an interrupt. At power up, or after a hardware or software reset, Read<br />
Multiple and Write Multiple commands are disabled by default.<br />
7 – 3
INTERFACE COMMANDS<br />
Set Multiple Mode<br />
Enables the controller to perform Read and Write Multiple operations, and establishes the block count for<br />
these commands. Before issuing this command, the Sector Count register should be loaded with the number<br />
of sectors per block. The drives support block sizes of 2, 4, 8 and 16 sectors.<br />
When this command is received, the controller sets BSY and examines the Sector Count register contents. If<br />
they contain a valid and supported block count value, that value is loaded for all subsequent Read and Write<br />
Multiple commands, and execution of those commands is enabled. An invalid and unsupported block count<br />
in the register results in an Aborted Command error and disallows Read Multiple and Write Multiple<br />
commands.<br />
Write Commands<br />
Write Sector(s)<br />
Writes from 1 to 256 sectors, beginning at a sector specified in the Command Block. (A sector count of 0<br />
requests 256 sectors.)<br />
When the Command register is written, the drive sets the DRQ bit and waits for the host to fill the sector<br />
buffer with the data to be written. An interrupt is not generated to start the first buffer fill operation.<br />
Once the buffer is full, the drive resets DRQ, sets BSY, and begins command execution. If the drive is not<br />
already on the desired track, an implied seek is performed.<br />
The data loaded in the buffer is written to the data field of the sector, followed by the ECC bytes. Upon<br />
command completion, the Command Block registers contain the cylinder, head and sector number of the<br />
last sector written. The next time the buffer is ready to be filled during back-to-back Write Sector<br />
commands, DRQ is set and an interrupt is generated.<br />
After the host fills the buffer, DRQ is reset and BSY is set. If an error occurs, Write Sector operations<br />
terminate at the sector containing the error.<br />
The Command Block registers then contain the numbers of the cylinder, head and sector where the error<br />
occurred. The host may read the Command Block to determine the nature of that error, and on which<br />
sector it happened. A Write Long may be executed by setting the Long bit in the command code. The<br />
Write Long command writes the data and the ECC bytes directly from the sector buffer; the drive itself does<br />
not generate the ECC bytes. Restrict Write Long commands to PIO Mode 0.<br />
Write Verify Sector(s)<br />
Identical to the Write Sector(s) command, except that the requested sectors are verified immediately after<br />
being written. The verify operation reads (without transferring), and checks for data errors. Any errors<br />
encountered during this operation are reported.<br />
Write Sector Buffer<br />
Allows the host to overwrite the contents of the drive’s sector buffer with a selected data pattern. When this<br />
command is received, the drive:<br />
1. Sets BSY,<br />
2. Sets up the sector buffer for a write operation,<br />
3. Sets DRQ,<br />
4. Resets BSY and<br />
5. Generates an interrupt.<br />
The host may then write up to 256 words of data to the buffer. A disk write task begins to store the host<br />
data to disk. Host write commands continue to be accepted and data transferred to the buffer until either<br />
the write command stack is full or the data buffer is full. The drive may reorder write commands to optimize<br />
drive throughput.<br />
7 – 4
INTERFACE COMMANDS<br />
Write Multiple<br />
Performs similarly to the Write Sector(s) command, except that:<br />
1. The controller sets BSY immediately upon receipt of the command,<br />
2. Data transfers are multiple sector blocks and<br />
3. The Long bit and Retry bit is not valid.<br />
Command execution differs from Write Sector(s) because:<br />
1. Several sectors transfer to the host as a block without intervening interrupts.<br />
2. DRQ qualification of the transfer is required at the start of the block, not on each sector.<br />
The block count consists of the number of sectors to be transferred as a block and is programmed by the Set<br />
Multiple Mode command, which must be executed prior to the Write Multiple command. When the Write<br />
Multiple command is issued, the Sector Count register contains the number of sectors requested — not the<br />
number of blocks or the block count.<br />
If the number of sectors is not evenly divisible by the block count, as many full blocks as possible are<br />
transferred, followed by a final, partial block transfer. This final, partial block transfer is for N sectors, where<br />
N = (sector count) modulo (block count)<br />
The Write Multiple operation will be rejected with an Aborted Command error if attempted:<br />
1. Before the Set Multiple Mode command has been executed, or<br />
2. When Write Multiple commands are disabled.<br />
All disk errors encountered during Write Multiple commands report after the attempted disk write of the<br />
block or partial block in which the error occurred.<br />
The write operation ends with the sector in error, even if it was in the middle of a block. When an error<br />
occurs, subsequent blocks are not transferred. When DRQ is set at the beginning of each full and partial<br />
block, interrupts are generated.<br />
Write DMA<br />
Multi-word DMA<br />
Identical to the Write Sector(s) command, except that:<br />
1. The host initializes a slave-DMA channel prior to issuing the command,<br />
2. Data transfers are qualified by DMARQ and are performed by the slave-DMA channel and<br />
3. The drive issues only one interrupt per command to indicate that data transfer has terminated<br />
at status is available.<br />
Ultra DMA<br />
With the Ultra DMA Write protocol, the control signal (HSTROBE) that latches data from DD(15:0) is<br />
generated by the devices which drives the data onto the bus. Ownership of DD(15:0) and this data<br />
strobe signal are given to the host for an Ultra DMA data out burst.<br />
During an Ultra DMA Write burst, the host always moves data onto the bus, and, after a sufficient time to<br />
allow for propagation delay, cable settling, and setup time, the sender shall generate a HSTROBE edge to<br />
latch the data. Both edges of HSTROBE are used for data transfers.<br />
Any error encountered during Write DMA execution results in the termination of data transfer. The drive<br />
issues an interrupt to indicate that data transfer has terminated and status is available in the error register.<br />
The error posting is the same as that of the Write Sector(s) command.<br />
7 – 5
INTERFACE COMMANDS<br />
Mode Set/Check Commands<br />
Set Features Mode<br />
Enables or disables features supported by the drive. When the drive receives this command it:<br />
1. Sets BSY,<br />
2. Checks the contents of the Features register,<br />
3. Clears BSY and<br />
4. Generates an interrupt.<br />
If the value of the register is not a feature supported by the drive, the command is aborted.<br />
The acceptable values in the Features register are defined as follows:<br />
VAL UE<br />
02h<br />
03h<br />
05h<br />
42h<br />
44h<br />
55h<br />
66h<br />
82h<br />
85h<br />
AAh<br />
BBh<br />
C2h<br />
CC h<br />
DESC RIPTION<br />
Enabled Write Cache<br />
Set Transfer Mode based on value in Sector Count register<br />
Enable Advanced Power Management<br />
Enable Automatic Acoustic Management. The sector count register c ontains the<br />
Automatic Ac ous tic Management level.<br />
SECTOR LEVEL<br />
FFh Maxtor specific<br />
FEh Maximum performance<br />
81h-FDh Intermediate acoustic management levels<br />
80h Minimum acoustic emanation level<br />
00h-7Fh reserved<br />
Length of data appended on Read Long/Write Long commands specified in the<br />
Identify Device information<br />
Disable Read Look-ahead feature<br />
Disable reverting to Power-on defaults<br />
Disable Write Cache<br />
Disable Advanced Power Management<br />
Enable Read Look-ahead feature<br />
4 bytes of Maxtor specific data appended on Read Long/Write Long commands<br />
Disable Automatic Acoustic Management<br />
Enable reverting to Power-on defaults<br />
7 – 6
INTERFACE COMMANDS<br />
Read Native Max Address<br />
This command returns the native maximum address. The native maximum address is the highest address<br />
accepted by the drive in the factory default condition. The native maximum address is the maximum address<br />
that is valid when using the SET MAX ADDRESS command.<br />
Set Max<br />
Individual SET MAX commands are identified by the value placed in the Features register. After successful<br />
command completion, all read and write access attempts to addresses greater than specified by the successful<br />
SET MAX ADDRESS command are rejected with an IDNF error. IDENTIFY DEVICE response words 1,<br />
54, 57, 60 and 71 will reflect the maximum address set with this command.<br />
VALUE<br />
00h<br />
01h<br />
02h<br />
03h<br />
04h<br />
05h-F Fh<br />
COMMAND<br />
obsolete<br />
Set Max Set Password<br />
Set Max Lock<br />
Set Max Unlock<br />
Set Max Freeze Lock<br />
reserved<br />
Set Max Password<br />
This sub-command requests a transfer of a single sector of data from the host. The password is retained by<br />
the drive until the next power cycle.<br />
Set Max Lock<br />
After this sub-command is completed any other SET MAX commands except SET MAX UNLOCK and<br />
SET MAX FREEZE LOCK are rejected. The drive remains in this state until a power cycle or the<br />
acceptance of a SET MAX UNLOCK or SET MAX FREEZE LOCK command.<br />
Set Max Unlock<br />
This sub-command requests a transfer of a single sector of data from the host. The password supplied in the<br />
sector of data transferred will be compared with the stored SET MAX password.<br />
If the password compare fails, then the drive returns command aborted and decrements the unlock counter.<br />
On the acceptance of the SET MAX LOCK command, this counter is set to a value of five and will be<br />
decremented for each password mismatch when SET MAX UNLOCK is issued and the drive is locked.<br />
When this counter reaches zero, then the SET MAX UNLOCK command will return command aborted<br />
until a power cycle.<br />
If the password compare matches, then the drive will make a transition to the Set_Max_Unlocked state and<br />
all SET MAX commands will be accepted.<br />
Set Max Freeze Lock<br />
After sub-command completion any subsequent SET MAX commands are rejected. Commands disabled by<br />
SET MAX FREEZE LOCK are:<br />
Set Max Address<br />
Set Max Set Password<br />
Set Max Lock<br />
Set Max Unlock<br />
7 – 7
INTERFACE COMMANDS<br />
Power Mode Commands<br />
Standby Immediate – 94h/E0h<br />
Spin down and do not change time out value. This command will spin the drive down and cause the drive<br />
to enter the STANDBY MODE immediately. If the drive is already spun down, the spin down sequence is<br />
not executed.<br />
Idle Immediate – 95h/E1h<br />
Spin up and do not change time out value. This command will spin up the spin motor if the drive is spun<br />
down, and cause the drive to enter the IDLE MODE immediately. If the drive is already spinning, the spin<br />
up sequence is not executed. The actuator is parked and some circuits are powered off.<br />
Standby – 96h/E2h<br />
Spin down and change time out value. This command will spin the drive down and cause the drive to enter<br />
the STANDBY MODE immediately. If the drive is already spun down, the spin down sequence is not<br />
executed. A non-zero value placed in the sector count register will enable the Automatic Power Down<br />
sequence. The timer will begin counting down when the drive returns to the IDLE MODE. A value of zero<br />
placed in the sector count register will disable the Automatic Power Down sequence.<br />
Idle – 97h/E3h<br />
Spin up and change time out value. This command will spin-up the spin motor if the drive is spun-down.<br />
If the drive is already spinning, the spin up sequence is not executed. A non-zero value placed in the Sector<br />
Count register will enable the Automatic Power Down sequence and their timer will begin counting down<br />
immediately. A value of zero placed in the Sector Count register will disable the Automatic Power Down<br />
sequence. The actuator is parked and some circuits are powered off.<br />
TIMER VALUE TIME-OUT PERIOD<br />
0 Time-out disabled<br />
1 - 240 (value * 5) seconds<br />
241 - 251 ((value - 240) * 30) minutes<br />
252 21 minutes<br />
253 Vendor unique period = 10 hours<br />
254 Reserved<br />
255 21 minutes, 15 seconds<br />
Check Power Mode – 98h/E5h<br />
This command returns a code in the Sector Count register that determines the current Power Mode status of<br />
the drive. If the drive is in, going to, or recovering from the STANDBY MODE the drive sets the Sector<br />
Count register to OOh. If the drive is in the IDLE MODE or ACTIVE MODE, the drive sets the Sector<br />
Count register to FFh.<br />
Set Sleep Mode – 99h/E6h<br />
This command will spin the drive down and cause the drive to enter the SLEEP MODE immediately. If the<br />
drive is already spun down, the spin down sequence is not executed.<br />
Note: The only way to recover from SLEEP MODE is with a software reset or a hardware reset.<br />
7 – 8
INTERFACE COMMANDS<br />
Default Power-on Condition<br />
The drive’s default power on condition is the ACTIVE MODE.<br />
Upon receiving a Power Mode command, except the SLEEP MODE command, the drive sets BSY and<br />
performs the requested power operation. Once the requested Power Mode change has begun, the drive<br />
resets BSY and generates an interrupt - without waiting for the drive to spin up or spin down. Upon<br />
receiving a SLEEP MODE command the drive is spun down, and when it is stopped, the drive resets BSY<br />
and generates an interrupt.<br />
When enabling the Automatic Power Down sequence, the value placed in the Sector Count register is<br />
multiplied by five seconds to obtain the Time-out Interval value. If no drive commands are received from<br />
the host within the Time-out Interval, the drive automatically enters the STANDBY mode. The minimum<br />
value is 5 seconds.<br />
While the drive is in STANDBY MODE, any commands received from the host are accepted and executed<br />
as they would in normal operation, except that the spin motor is started if required to execute a disk<br />
command. Under these conditions, the drive will set BSY when command processing would normally begin<br />
and will leave BSY set until the drive comes up to speed and the disk command can be executed. <strong>Disk</strong><br />
commands issued while the drive is in STANDBY MODE, restarts the Time-out Interval after completing<br />
the command. A reset must be issued before attempting to issue any commands while the drive in<br />
SLEEP MODE.<br />
7 – 9
INTERFACE COMMANDS<br />
Initialization Commands<br />
Identify <strong>Drive</strong><br />
Allows the host to receive parameter information from the drive.<br />
When the command is received, the drive:<br />
1. Sets BSY,<br />
2. Stores the required parameter information in the sector buffer,<br />
3. Sets the DRQ bit and<br />
4. Generates an interrupt.<br />
The host may then read the information out of the sector buffer. Parameter words in the buffer follow.<br />
Note that all reserved bits or words should be zeroes.<br />
WORD CONTENT DESCRIPTION<br />
0 General configuration<br />
15 = device (0 = ATA device, 1 = ATAPI)<br />
14-8 = retired<br />
7, 1 = removable media device<br />
6, 1 = not removable controller and/or device<br />
5-3 = retired<br />
2 = response incomplete<br />
1 = retired<br />
0 = reserved<br />
1 Number of logical cylinders<br />
2 Reserved<br />
3 Number of logical heads<br />
4-5 Retired<br />
6 Number of logical sectors per logical track<br />
7-8 Reserved<br />
9 Retired<br />
10 - 19 <strong>Drive</strong> serial number (20 ASCII characters)<br />
20 - 21 Retired<br />
22 Obsolete<br />
23 - 26 F irmware revision (8 ASCII characters )<br />
27 - 46 Model number (40 ASCII characters)<br />
47 Maximum number of sectors that c an be transferred per interrupt on read and write multiple commands<br />
48 Reserved<br />
49 Capabilities<br />
15 - 14 = reserved<br />
13 = standby timer (1 = values as specified in this standard are supported, 0 = values are Maxtor specific)<br />
12 = reserved (advanced PIO mode support)<br />
11, 1 = IORD Y supported, 0 = IORDY may be supported<br />
10, 1 = IORDY can be disabled<br />
9-8 = shall be set to one. Used by Identify Packet Device command.<br />
7-0 = not us ed<br />
7 – 10
INTERFACE COMMANDS<br />
-WORD CONTENT DESCRIPTION<br />
50 Reserved<br />
51 - 52 Obsolete<br />
53 15 -3 = reserved<br />
2, 1 = the fields supported in words 88 are valid, 0 = the fields supported in words 88 are not valid<br />
1, 1 = the fields reports in words 64-70 are valid, 0 = the fields reports in words 64-70 are not valid<br />
0, 1 = the fields reports in words 54-58 are valid, 0 = the fields reports in words 54-58 are not valid<br />
54 Number of current logical cylinders<br />
55 Number of current logical heads<br />
56 Number of logical sectors per track<br />
57 - 58 C urrent capacity in sectors<br />
59 15-9 = reserved<br />
8, 1 = multiple sector setting is valid<br />
7-0 xxh = current setting for number of sectors that canbe transferred per interrupt on Read/Write Multiple<br />
command<br />
60 - 61 Total number of user addressable sectors (LBA mode only)<br />
62 obsolete<br />
63 15-11 = reserved<br />
10, 1 = Multi-word D MA mode 2 is selec ted, 0 = Multi-word D MA mode 2 is not selected<br />
9, 1 = Multi-word D MA mode 1 is selec ted, 0 = Multi-word D MA mode 1 is not selected<br />
8, 1 = Multi-word D MA mode 0 is selec ted, 0 = Multi-word D MA mode 0 is not selected<br />
7-3, = reserved<br />
2, 1 = Multi-word DMA mode 2 and below are supported<br />
1, 1 = Multi-word DMA mode 1 and below are supported<br />
0, 1 = Multi-word DMA mode 0 is supported<br />
7-0 = Multi=word DMA transfer modes supported<br />
64 15-8 = reserved, 7-0 = advanced PIO transfer modes supported<br />
65 Minimum multi-word DMA transfer cycle time per word (15-0 = cycle time in nanoseconds)<br />
66 Manufacturer's recommeded multi-word DMA transfer cycle time (15-0 = cycle time in nanoseconds)<br />
67 Minimum PIO transfer cycle time without flow control (15-0 = cycle time in nanoseconds)<br />
68 Minimum PIO transfer cycle time with IORDY flow control (15-0 = cycle time in nanoseconds )<br />
69-74 reserved<br />
75 Queue depth, 15 -3 = reserved, 4-0, maximum queue depth - 1<br />
76-79 reserved<br />
80 Major version number<br />
15, reserved, 14-6 = reserved for ATA/ATAPI-14 to ATA/ATAPI-6 respectively<br />
5, 1 = supports ATA/ATAPI-5<br />
4, 1 = supports ATA/ATAPI-4<br />
3, 1 = supports ATA-3<br />
2, 1 = supports ATA-2<br />
1, obsolete<br />
0, reserved<br />
81 Minor version number<br />
82 Command set supported. If words 82 and 83 = 0000h or FFFFh command set notification not supported.<br />
15, obsolete<br />
14, 1 = supports the NOP command<br />
13, 1 = supports the Read Buffer command<br />
12, 1 = supports theWrite Buffer command<br />
11, obsolete<br />
10, 1 = supports Host-Protected Area feature set<br />
9, 1 = supports the Device Reset command<br />
8, 1 = supports Service Interupt<br />
7, 1 = supports Release Interupt<br />
6, 1 = supports Look Ahead<br />
5, 1 = s upports Write Cache<br />
4, shall be cleared to zero<br />
3, 1 = supports the Power Management feature command<br />
2, 1 = s upports the Removable Media feature command<br />
1, 1 = supports the SecurityMode feature command<br />
0, 1 = supports the SMART feature set<br />
7 – 11
INTERFACE COMMANDS<br />
WORD CONTENT DESCRIPTION<br />
83 Command sets s upported. If words 82 and 83 = 0000h or F FF Fh command set notification not supported.<br />
15-10, as currently defined<br />
9, 1 = Automatic Acoustic Management feature set supported<br />
8-0, as currently defined<br />
84 Command set extensions supported. If words 84, 85 and 86 = 0000h or FFF Fh com mand set notification not<br />
supported.<br />
15 = shall be cleared to zero<br />
14 = shall be set to one<br />
13-0 = reserved<br />
85 Command set enabled. If words 84, 85 and 86 = 0000h or FFFFh command set notification not supported.<br />
15, obsolete<br />
14, 1 = NOP command enabled<br />
13, 1 = Read Buffer command enabled<br />
12, 1 = Write Buffer command enabled<br />
11, obsolete<br />
10, 1 = Host Protected Area feature set enabled<br />
9, 1 = Device Reset command enabled<br />
8, 1 = Service Interrupt enabled<br />
7, 1 = Release Interrupt enabled<br />
6, 1 = Look Ahead enabled<br />
5, 1 = Write Cache enabled<br />
4, 1 = Packet command feature set enabled<br />
3, 1 = Power Mangement feature set enabled<br />
2, 1 = Removable Media feature set enabled<br />
1, 1 = Security Mode feature set enabled<br />
0, 1 = SMART feature set enabled<br />
86 Command sets s upported. If words 82 and 83 = 0000h or F FF Fh command set notification not supported.<br />
15-10, as currently defined<br />
9, 1 = Automatic Acoustic Management feature set supported<br />
8-0, as currently defined<br />
88 Ultra D MA<br />
15-12 reserved<br />
13 1 = Ultra DMA mode 5 is selected<br />
0 = Ultra D MA mode 5 is not selected<br />
12 1 = Ultra DMA mode 4 is selected<br />
0 = Ultra D MA mode 4 is not selected<br />
11 1 = Ultra D MA mode 3 is selected<br />
0 = Ultra D MA mode 3 is not selected<br />
10 1 = Ultra DMA mode 2 is selected<br />
0 = Ultra D MA mode 2 is not selected<br />
9 1 = Ultra D MA mode 1 is selected<br />
0 = Ultra D MA mode 1 is not selected<br />
8 1 = Ultra D MA mode 0 is selected<br />
0 = Ultra D MA mode 0 is not selected<br />
7-5 reserved<br />
5 1 = Ultra DMA mode 5 and below are supported<br />
4 1 = Ultra DMA mode 4 and below are supported<br />
3 1 = Ultra DMA mode 3 and below are supported<br />
2 1 = Ultra DMA mode 2 and below are supported<br />
1 1 = Ultra DMA mode 1 and below are supported<br />
0 1 = Ultra D MA mode 0 is supported<br />
127 reserved<br />
128 Security Status<br />
15-9 reserved<br />
8 Security Level 0 = High, 1 = Maximum<br />
7-5 reserved<br />
4 1 = Security count expired<br />
3 1 = Security frozen<br />
2 1 = Security locked<br />
1 1 = Security enabled<br />
0 1 = Security supported<br />
129-130 reserved<br />
131 Spin at power-up, but 0 is asserted when no spin at power-up is enabled.<br />
132-159 Maxtor-specific (not used)<br />
160-255 reserved<br />
7 – 12
INTERFACE COMMANDS<br />
Initialize <strong>Drive</strong> Parameters<br />
Enables the drive to operate as any logical drive type. The drive will always be in the translate mode because<br />
of Zone Density Recording, which varies the number of sectors per track depending on the zone.<br />
Through setting the Sector Count Register and <strong>Drive</strong> Head Register, this command lets the host alter the<br />
drive's logical configuration. As a result, the drive can operate as any equal to or less than capacity drive type.<br />
Do not exceed the total number of sectors available on the drive:<br />
When this command is executed, the drive reads the Sector Counter Register and the <strong>Drive</strong> Head Register<br />
(and so determines the number of the logical sectors per track and maximum logical head number per<br />
cylinder and will calculate the number of logical cylinders.)<br />
Upon receipt of the command, the drive:<br />
1. Sets BSY,<br />
2. Saves the parameters,<br />
3. Resets BSY and<br />
4. Generates an interrupt.<br />
To specify maximum heads, write 1 less than the maximum (e.g. write 4 for a 5 head drive). To specify<br />
maximum sectors, specify the actual number of sectors (e.g. 17 for a maximum of 17 sectors/track).<br />
The sector count and head values are not checked for validity by this command. If they are invalid, no error<br />
will be posted until an illegal access is made by some other command.<br />
Moves the read/write heads from anywhere on the disk to cylinder 0.<br />
When this command is received, the drive:<br />
1. Sets BSY and<br />
2. Issues a seek to cylinder zero.<br />
The drive waits for the seek to complete, then the drive:<br />
1. Updates status,<br />
2. Resets BSY and<br />
3. Generates an interrupt.<br />
If the drive cannot reach cylinder 0, the Error bit is set in the Status register, and the Track 0 bit is set in the<br />
Error register.<br />
NOTE: If a maximum head and sector number is selected – such that the number of cylinders will exceed 65,535 – then<br />
the maximum cylinder value will be reduced to 65, 535.<br />
7 – 13
INTERFACE COMMANDS<br />
Seek, Format and Diagnostic Commands<br />
Seek<br />
Initiates a seek to the track, and selects the head specified in the Command block.<br />
1. Sets BSY in the Status register,<br />
2. Initiates the Seek,<br />
3. Resets BSY and<br />
4. Generates an interrupt.<br />
The drive does not wait for the seek to complete before returning the interrupt. If a new command is issued<br />
to a drive during the execution of a Seek command, the drive will wait (with BSY active) for the Seek to<br />
complete before executing the new command.<br />
Format Track<br />
Formats the track specified in the Command Block. Shortly after the Command register is written, the drive<br />
sets the bit, and waits for the host to fill the sector buffer with the interleave table. When the buffer is full,<br />
the drive resets DRQ, sets BSY and begins command execution. If the drive is not already on the desired<br />
track, an implied seek is performed. Once at the desired track the data fields are written with all zeroes.<br />
Execute <strong>Drive</strong> Diagnostic<br />
Commands the drive to implement the internal diagnostic tests. (These tests are executed only upon<br />
command receipt; they do not run automatically at power up or after a reset.)<br />
The drive sets BSY immediately upon receiving this command. The following table presents the codes and<br />
their descriptions. Note that the value in the Error register should be viewed as a unique 8 bit Code.<br />
ERROR CODE DESCRIPTION<br />
01 No error detected<br />
00 Master drive failed<br />
80, 82 Master and slave drives failed<br />
81 Slave drive failed<br />
Note: If a slave drive fails diagnostics, the master drive OR’s 80h with its own status, and loads that code<br />
into the Error register. If a slave drive passes diagnostics (or a slave is absent), the master drive OR’s 00<br />
with its own status and loads that code into the Error register.<br />
7 – 14
INTERFACE COMMANDS<br />
S.M.A.R.T. Command Set<br />
Execute S.M.A.R.T.<br />
The Self-Monitoring Analysis and Reporting Technology (S.M.A.R.T.) command has been implemented to<br />
improve the data integrity and data availability of hard disk drives. In some cases, a S.M.A.R.T. capable device<br />
will predict an impending failure with sufficient time to allow users to backup their data and replace the<br />
drive before data loss or loss of service. In addition to S.M.A.R.T., DiamondMax drives support DST and all<br />
of its options.<br />
The S.M.A.R.T. sub-commands (listed below) comprise the ATA S.M.A.R.T. feature set that provide access<br />
to S.M.A.R.T. attribute values, attribute thresholds and other logging and reporting information. Prior to<br />
writing a S.M.A.R.T. command to the device’s command register, key values must be written by the host<br />
into the device’s Cylinder Low and Cylinder High registers, or the command will be aborted. For any<br />
S.M.A.R.T. sub-command, if a device register is not specified as being written with a value by the host, then<br />
the value in that register is undefined and will be ignored by the device.<br />
The key values are:<br />
Key<br />
4Fh<br />
C2h<br />
Register<br />
Cylinder Low (1F4h)<br />
Cylinder High (1F5h)<br />
The S.M.A.R.T. sub-commands use a single command code (B0h) and are differentiated from one another<br />
by the value placed in the Features register. In order to issue a command, the host must write the subcommand-specific<br />
code to the device’s Features register before writing the command code to the command<br />
register. The sub-commands and their respective codes are:<br />
D0h<br />
D1h<br />
D2h<br />
D3h<br />
D4h<br />
D5h<br />
D6h<br />
D8h<br />
D9h<br />
DAh<br />
DBh<br />
S.M.A.R.T. Read Attribute Value<br />
This feature returns 512 bytes of attribute information to the host.<br />
S.M.A.R.T. Read Attribute Thresholds<br />
This feature returns 512 bytes of warranty failure thresholds to the host.<br />
Enable/Disable Autosave<br />
To enable this feature, set the sector count register to F1h (enable) or 0 (disable). Attribute values<br />
are automatically saved to non-volatile storage on the device after five minutes of idle time and<br />
before entering idle, sleep or standby modes. This feature is defaulted to “enabled” when<br />
S.M.A.R.T. is enabled via the S.M.A.R.T. Enable Operations commands. The autosave feature<br />
will not impact host system performance and does not need to be disabled.<br />
S.M.A.R.T. Save Attribute Value<br />
This feature saves the current attribute values to non-volatile storage.<br />
Perform Off-Line Data Collection/DST<br />
Data is collected from random seeks, timed pattern seek times and head margin tests. Supports<br />
captive long and short; and non-captive long and short.<br />
S.M.A.R.T. Read Log Sector<br />
Allows the host to read S.M.A.R.T. error log and host vendor-specific sectors.<br />
S.M.A.R.T. Write Log Sector<br />
Allows the host to write S.M.A.R.T. error log and host vendor-specific sectors.<br />
Enable S.M.A.R.T.<br />
Disable S.M.A.R.T.<br />
S.M.A.R.T. Return Status<br />
This feature allows the host to assess the status of a S.M.A.R.T. capable device by comparing all<br />
saved attribute values with their corresponding warranty failure thresholds. If no thresholds are<br />
exceeded, the drive is declared to have a positive health status. If any warranty failure threshold is<br />
exceeded, the drive is declared to have a negative health status. Executing this sub-command<br />
results in all attribute values being saved to non-volatile storage on the device.<br />
Enable/Disable Automatic Off-Line<br />
To enable this feature, set the Sector Count register to F1h or 0 to disable.<br />
7 – 15
SERVICE AND SUPPORT<br />
Service and Support<br />
SECTION 8<br />
Service Policy<br />
If a customer discovers a defect in a Maxtor hard drive, Maxtor will, at its option, repair or replace the disk<br />
drive at no charge to the customer, provided it is returned during the warranty period. <strong>Drive</strong>s must be properly<br />
packaged in Maxtor packaging or Maxtor-approved packaging to obtain warranty service. Any unauthorized<br />
repairs or adjustments to the drive void the warranty.<br />
To consistently provide our customers with the best possible products and services, Maxtor developed the<br />
Total Customer Satisfaction (TCS) program. Through the ongoing TCS process, Maxtor employees take<br />
direct responsibility for every customer’s level of satisfaction – with Maxtor technology, price, quality,<br />
delivery, service and support.<br />
No Quibble Service ®<br />
Another TCS feature is Maxtor’s No Quibble Service ® policy. By minimizing paperwork and processing,<br />
No Quibble Service dramatically cuts the turnaround time normally required for repairs and returns.<br />
Here’s how it works:<br />
1. Customer calls 1-800-2MAXTOR for a Return Material Authorization (RMA) number<br />
and provides a credit card number,<br />
2. Maxtor ships a replacement drive within 2 business days, and<br />
3. Customer returns the original drive and credit card draft is destroyed.<br />
Support<br />
Technical Assistance<br />
Highly-trained technicians are available 6 a.m. to 6 p.m. (Mountain Standard Time) Monday through Friday<br />
to provide detailed technical support.<br />
U.S. and Canada<br />
Language support: English, Spanish<br />
Voice 800-2MAXTOR (800-262-9867), press 1<br />
E-mail<br />
Technical_Assistance@maxtor.com<br />
Outside U.S. and Canada 303-678-2015<br />
Europe<br />
Language support: English, French, German<br />
Voice + 353 1 204 11 11<br />
E-mail<br />
Eurotech_Assistance@maxtor.com<br />
Fax + 353 1 286 45 77<br />
Asia/Pacific<br />
Voice<br />
E-mail<br />
Contact your local Maxtor Sales Office for assistance<br />
Apactech_Assistance@maxtor.com<br />
Language support: English<br />
MaxInfo Service<br />
Use a touch-tone phone to listen to technical information about Maxtor products and the top Q&A’s<br />
from our 24-hour automated voice system.<br />
U.S. and Canada 800-2MAXTOR (800-262-9867)<br />
Press 1, wait for announcement, listen for option<br />
Outside U.S. and Canada 303-678-2015, listen for option<br />
8 – 1
SERVICE AND SUPPORT<br />
MaxFax ® Service<br />
Use a touch-tone phone to order Technical Reference Sheets, <strong>Drive</strong> <strong>Specifications</strong>, Installation Guides<br />
and other documents from our 24-hour automated fax retrieval system. Requested items are sent directly to<br />
your fax machine.<br />
U.S. and Canada<br />
Language support: English<br />
Phone<br />
800-2MAXTOR (800-262-9867), listen for option<br />
Outside U.S. and Canada 303-678-2618<br />
Europe<br />
Language support: English, French, German<br />
Phone + 353 1 204 11 22<br />
Asia/Pacific<br />
Language support: English<br />
Phone + 61 2 9369 4733<br />
Internet<br />
Browse the Maxtor home page on Internet, download files from our FTP site.<br />
Home Page<br />
http://www.maxtor.com<br />
Customer Service<br />
All Maxtor products are backed by No Quibble Service ® , the benchmark for service and support in the industry.<br />
Customer Service is available 5 a.m. to 5 p.m. (Pacific Standard Time) Monday through Friday.<br />
U.S. and Canada<br />
Language support: English, Spanish<br />
Voice 800-2MAXTOR (800-262-9867), press 2<br />
E-mail<br />
RMA@maxtor.com<br />
Europe<br />
Language support: English, French, German<br />
Voice + 353 1 204 11 11<br />
E-mail<br />
Eurotech_Assistance@maxtor.com<br />
Fax + 353 1 286 14 19<br />
Asia/Pacific<br />
Call Singapore Customer Service from the countries listed below.<br />
Customer Service is available 8 a.m. to 5:30 p.m. (Singapore time is GMT +8).<br />
From<br />
Dial<br />
Australia 1-800-124-328<br />
Hong Kong +800-96-3387<br />
Indonesia +001-803-65-6500<br />
Japan +0031-65-3616<br />
South Korea +0078-65-800-6500<br />
Malaysia 1-800-1126<br />
New Zealand +0800-44-6542<br />
Singapore 1-800-481-6788<br />
Taiwan +0080-65-1062<br />
Thailand +001-800-65-6500<br />
8 – 2
GLOSSARY<br />
Glossary<br />
GLOSSARY<br />
ACCESS<br />
To obtain data from, or place data into, RAM, a register, or data<br />
storage device.<br />
ACCESS TIME<br />
The interval between the issuing of an access command and the<br />
instant that the target data may be read or written. Access time<br />
includes seek time, latency and controller overhead time.<br />
A<br />
ADDRESS<br />
A number, generally binary, distinguishing a specific member of an<br />
ordered set of locations. In disk engineering, the address may<br />
consist of drives (unit address), radial positions (cylinder address),<br />
or circumferential position (sector address).<br />
ALLOCATION<br />
A process of assigning designated areas of the disk to particular<br />
files.<br />
ALTERNATE TRACK<br />
A spare track used in the event that a normal track becomes<br />
damaged or is unusable.<br />
ANALOG<br />
A signal or system that does not use digital states to convey<br />
information. A signal may have any number of significant states<br />
(values), contrasted to digital signals which can only have two<br />
states.<br />
ANSI<br />
American National Standards Institute.<br />
APPLICATION PROGRAM<br />
A sequence of programmed instructions that tell the computer how<br />
to perform some end-user task, such as accounting or word<br />
processing.<br />
AREAL DENSITY<br />
Bit density (bits per inch) multiplied by track density (tracks per inch)<br />
or bits per square inch.<br />
ASYMMETRY<br />
A distortion of the readback signal which is shown in different<br />
intervals between the positive and negative voltage peaks.<br />
AUXILIARY MEMORY<br />
Memory other than main memory; generally a mass-storage<br />
subsystem containing disk drives and backup tape drives,<br />
controller(s) and buffer memory (also called peripheral memory).<br />
AVERAGE ACCESS TIME<br />
The average time to make all possible length accesses (seeks).<br />
AVERAGE SEEK TIME<br />
The average time to make all possible length seeks. A typical<br />
measure of performance.<br />
BADBLOCK<br />
A block that cannot store data because of a media flaw.<br />
B<br />
BIT<br />
An abbreviation for binary digit, of which there are two (0 and 1). A<br />
bit is the basic data unit of most digital computers. A bit is usually<br />
part of a data byte or word, but bits may be used singly to control or<br />
read logic “on-off” functions. The fundamental unit information,<br />
often used loosely to refer to a circuit or magnetization state at a<br />
particular instant in time.<br />
BIOS<br />
Acronym for Basic Input/Output System. The firmware area of a CPU<br />
that controls operations through the system bus and to the<br />
attached cards and peripheral devices.<br />
BPI<br />
Acronym for bits per inch. See bit density.<br />
BLOCK<br />
A group of bytes handled, stored, and accessed as a logical data<br />
unit, such as an individual file record.<br />
BUFFER<br />
A temporary data storage area that compensates for a difference in<br />
data transfer rates and/or data processing rates between sender<br />
and receiver.<br />
BUS<br />
A collection of functionally parallel conductors that forms an<br />
interconnection between functional blocks in a digital device. A<br />
length of parallel conductors that forms a major interconnection<br />
route between the computer system CPU (central processing unit)<br />
and its peripheral subsystems. Depending on its design, a bus may<br />
carry data, addresses, power, and more.<br />
BYTE<br />
An ordered collection of bits treated as a unit. Most often, a byte is<br />
understood to consist of eight bits. One byte is necessary to define<br />
an alphanumeric character.<br />
CACHE<br />
Random access memory (RAM) used as a buffer between the CPU<br />
and the disk drive.<br />
C<br />
CAPACITY<br />
The amount of data, usually expressed in bytes, which can be stored<br />
in a given device or portion of same.<br />
CENTRAL PROCESSING UNIT (CPU)<br />
The heart of the computer system that executes programmed<br />
instructions. It includes the arithmetic logic unit (ALU) for performing<br />
all math and logic operations, a control section for interpreting and<br />
executing instructions, internal memory for temporary storage of<br />
program variables and other functions.<br />
CHANNEL<br />
A collection of electronic circuits used in the process of writing and<br />
reading information to and from magnetic media.<br />
CHARACTER<br />
An ordered collection of bits representing one of a set of<br />
predefined symbols. Often the term is used interchangeably with<br />
byte, but this is inexact.<br />
CLOSED LOOP<br />
A control technique that enables the positioning system to correct<br />
off-track errors in real time. The actual head position is monitored<br />
and compared to the ideal track position to determine any position<br />
error that might be occurring. This information is then used to<br />
produce a correction signal (feedback) that goes to the positioner<br />
to correct the error. (See also track following servo).<br />
CLOSED LOOP SERVO<br />
A servo control technique that uses position feedback to correct<br />
off-track errors. See Track Following Servo.<br />
CLUSTER<br />
The smallest allocatable unit of disk storage allowed by MS-DOS;<br />
each FAT entry represents one cluster.<br />
CONTROLLER<br />
An electronic device for connecting one or more mass storage<br />
peripherals (rigid disk drives, tape drives, and optical disk drives) to<br />
the input/output circuits of a host computer. Controllers vary in<br />
complexity, with more sophisticated units able to buffer and<br />
schedule commands, correct data errors, and bypass media defects<br />
without host intervention.<br />
GL – 1
GLOSSARY<br />
CONTROLLER<br />
A miniature CPU dedicated to controlling a peripheral device, such<br />
as a disk drive, tape drive, video display terminal, or printer. The<br />
controller executes commands from the central processing unit and<br />
reissues commands to the peripheral device.<br />
CORRECTABLE ERROR<br />
An error that can be overcome by the use of Error Detection and<br />
Correction.<br />
CYLINDER<br />
On several disk surfaces sharing a common rotational axis, the<br />
aggregate of tracks at a given radial position. A set of disk tracks<br />
that are simultaneously under the set of read/write heads. This<br />
three-dimensional storage volume can be accessed after a single<br />
seek.<br />
CYLINDER ZERO<br />
The outermost cylinder in a drive that can be used for data storage.<br />
DATA<br />
An ordered collection of information. In a specific case, it is the<br />
information processed by a computer.<br />
D<br />
DATA SEPARATOR<br />
An electronic circuit which decodes playback data and produces<br />
separate clock and data bits. Sometimes incorrectly used to denote<br />
data synchronizer.<br />
DATA SYNCHRONIZER<br />
An electronic circuit producing a clock signal that is synchronous<br />
with the incoming data stream. This clock signal is then used to<br />
decode the recording code being used into user data.<br />
DATA TRANSFER RATE<br />
In a disk or tape drive, the rate at which data is transferred to or<br />
from the storage media. It is usually given in thousands of bits per<br />
second (Kbit/second) or millions of bits per second (Mbit/second).<br />
DEDICATED LANDING ZONE<br />
A designated radial zone on the disk where contact starting and<br />
stopping occur by design.<br />
DEDICATED SERVO<br />
A servo scheme in which a prerecorded pattern on an otherwise<br />
unused disk surface provides position information to the servo<br />
circuitry by means of a head reading that surface.<br />
DEFECT<br />
A magnetic imperfection in a recording surface.<br />
DEFECT MANAGEMENT<br />
A general methodology of avoiding data errors on a recording<br />
surface by avoiding the use of known bad areas of media. Usually<br />
defective sectors or tracks are retired and data are written in<br />
alternate locations. Several algorithms are possible such as “sector<br />
slipping,” or “spare sector per track.”<br />
DEFECT MAP<br />
A list of defects that fall within a pass/fail criteria of a user. This list<br />
is usually used by an operating system or a disk drive controller for<br />
defect management.<br />
DEFECT SKIPPING<br />
A defect management scheme for avoiding surface defects. It has<br />
data written before and after the defect, instead of using alternate<br />
tracks or sectors to avoid use of the defective area.<br />
DENSITY<br />
Generally, recording density. See areal, bit, and storage density.<br />
DC ERASE<br />
The method of erasing a track using a DC write/erase current<br />
through either a Read/Write or Erase head.<br />
DIGITAL<br />
Any system that processes digital binary signals (having only values<br />
of a 1 or 0; usually in bits and bytes) rather than analog signals<br />
(signals that can have many values)<br />
DIGITAL MAGNETIC RECORDING<br />
See magnetic recording.<br />
DIRECT ACCESS<br />
Access directly to memory location. (See random access).<br />
DIRECT MEMORY ACCESS<br />
A mean of data transfer between the device and host memory<br />
without processor intervention.<br />
DIRECTORY<br />
A listing of files maintained by the disk operation system (DOS) or a<br />
data base management system to enable a user to quickly access<br />
data files.<br />
DISK<br />
A flat, circular piece of metal (usually aluminum) or plastic (usually<br />
mylar) with a magnetic coating upon which information can be<br />
recorded. (See, for example, floppy disk or Winchester disk)<br />
DISK DRIVE OR DISK MEMORY DEVICE<br />
The total electromechanical storage device containing disks and<br />
read/write heads, head positioning mechanism, drive motor, and<br />
electronics.<br />
DISK PACK<br />
A number of metal disks packaged in a canister for removal from the<br />
disk drive (predecessor of Winchester technology).<br />
DISK OPERATING SYSTEM (DOS)<br />
The master computer system program that schedules tasks,<br />
allocates the computer system resources, controls accesses to<br />
mass storage devices, manages files, and so forth. Typical disk<br />
operating systems include CP/M, MS-DOS, and UNIX.<br />
DISK STORAGE<br />
Auxiliary memory system containing disk drives.<br />
DISK TRANSFER RATE<br />
The rate that digital data is transferred from one point to another.<br />
Expressed in either bits/second or bytes/second.<br />
DOUBLE FREQUENCY ENCODING<br />
Another name for FM encoding. This is because all possible data<br />
combinations will result in only two possible temporal displacements<br />
of adjacent data bits, specifically “1F” and 2F.”<br />
EARLY WINDOW<br />
A data window that has been intentionally shifted in time in an early<br />
direction.<br />
E<br />
EMBEDDED SERVO<br />
A servo technique used for track following. Position information is<br />
prerecorded between data areas in a track so that a data head, and<br />
proper additional circuitry, can determine the data head location<br />
with respect to the center position of the track (or cylinder) in<br />
question.<br />
ERASE<br />
A process by which a signal recorded on a medium is removed and<br />
the medium made ready for rerecording.<br />
ERROR CORRECTION CODE (ECC)<br />
A mathematical algorithm that can detect and correct errors in a<br />
data field. This is accomplished with the aid of Check Bits added to<br />
the raw data.<br />
ERROR FREE<br />
A recording surface that has no defects.<br />
ERROR RATE<br />
The number of errors (type must be specified) that occur in a<br />
specified number of bits read.<br />
ERROR RECOVERY PROCEDURE<br />
The process that occurs in response to a data error. In a drive<br />
without ECC, this would include re-calibration and re-seeking to the<br />
specified track and rereading the specified data.<br />
GL – 2
GLOSSARY<br />
EXTRA PULSE<br />
Term used in surface certification. It is when a flux field<br />
discontinuity remains after the recording surface is erased, thereby<br />
producing an electrical output of a read head passing over the area<br />
with the discontinuity. An extra pulse occurs when the electrical<br />
output is larger than a specified threshold.<br />
FEEDBACK<br />
In a closed-loop system, the output signal (from the servo head) is<br />
used to modify the input signal (to the positioner).<br />
FETCH<br />
A read operation and its related data transfer operations.<br />
FILE ALLOCATION TABLE (FAT)<br />
Allocates space on the disk for files, one cluster at a time; locks out<br />
unusable clusters; identifies unused (free) area; and lists a file’s<br />
location. With two FAT’s present, the second copy ensures<br />
consistency and protects against loss of data if one of the sectors<br />
on the first FAT is damaged.<br />
F<br />
FLUX CHANGES PER INCH<br />
Synonymous with frpi (flux reversals per inch). Only in MFM recording<br />
does 1 fci equal 1 bpi (bit per inch). In run-length-limited encoding<br />
schemes, generally 1 fci equals 1.5 bpi.<br />
FORMAT<br />
In a disk drive, the arrangement of data on a storage media. A<br />
standard 5.25-inch disk format consists of 17, 26, or 36 sectors per<br />
track, and 512 bytes of data per sector, plus identification, error<br />
correction, and other bytes necessary for accessing and<br />
synchronizing data.<br />
FORMATTED CAPACITY<br />
The actual capacity available to store data in a mass storage<br />
device. The formatted capacity is the gross capacity, less the<br />
capacity taken up by the overhead data used in formatting the<br />
sectors.<br />
FREQUENCY MODULATION<br />
A recording code. A flux reversal at the beginning of a cell time<br />
represents clock bit; a “1” bit is a flux reversal at the center of the<br />
cell time, and a “0” bit is an absence of a flux reversal.<br />
FREQUENCY RESPONSE<br />
A measure of how effectively a circuit or device transmits the<br />
different frequencies applied to it. In disk and tape drives this refers<br />
to the read/write channel. In disk drives, it can also refer to the<br />
dynamic mechanical characteristics of a positioning system.<br />
GIGABYTE (GB)<br />
One billion bytes (one thousand megabytes) or 10 9 .<br />
HARD ERROR<br />
An error that is not able to be overcome by repeated readings and<br />
repositioning means.<br />
HARD SECTORED<br />
A technique where a digital signal indicates the beginning of a<br />
sector on a track. This is contrasted to soft sectoring, where the<br />
controller determines the beginning of a sector by the reading of<br />
format information from the disk.<br />
G<br />
H<br />
HEAD<br />
The electromagnetic device that write (records), reads (plays back),<br />
and erases data on a magnetic media. It contains a read core(s)<br />
and/or a write core(s) and/or erase core(s) which is/are used to<br />
produce or receive magnetic flux. Sometimes the term is all inclusive<br />
to mean the carriage assembly which includes the slider and flexure.<br />
HEAD CRASH<br />
The inadvertent touching of a disk by a head flying over the disk<br />
(may destroy a portion of the media and/or the head).<br />
HEAD DISK ASSEMBLY (HDA)<br />
The mechanical portion of a rigid, fixed disk drive. It usually includes<br />
disks, heads, spindle motor, and actuator.<br />
HEAD LOADING ZONE<br />
The non-data area on the disk set aside for the controlled takeoff<br />
and landing of the Winchester heads when the drive is turned on<br />
and off. Dedicated annulus on each disk surface in which heads are<br />
loaded, unloaded, or flying height is established. Head-disk contact<br />
may occur in some instances; no data is recorded in this area.<br />
HEAD POSITIONER<br />
Also known as actuator, a mechanism that moves the arms that carry<br />
read/write heads to the cylinder being accessed.<br />
INDEX<br />
Similar to a directory, but used to establish a physical to logical<br />
cross reference. Used to update the physical disk address (tracks<br />
and sectors) of files and to expedite accesses.<br />
INSIDE DIAMETER<br />
The smallest radial position used for the recording and playback of<br />
flux reversals on a magnetic disk surface.<br />
INITIALIZATION<br />
Applying input patterns or instructions to a device so that all<br />
operational parameters are at a known value.<br />
INPUT<br />
Data entering the computer to be processed; also user commands.<br />
INPUT/OUTPUT (I/O)<br />
The process of entering data into or removing data from a computer<br />
system or a peripheral device.<br />
INTELLIGENT PERIPHERAL<br />
A peripheral device that contains a processor or microprocessor to<br />
enable it to interpret and execute commands.<br />
INTERFACE<br />
The data transmitters, data receivers, logic, and wiring that link one<br />
piece of computer equipment to another, such as a disk drive to a<br />
controller or a controller to a system bus.<br />
I<br />
INTERFACE STANDARD<br />
The interface specifications agreed to by various manufacturers to<br />
promote industry-wide interchangeability of products such as a disk<br />
drive. Interface standards generally reduce product costs, allows<br />
buyers to purchase from more than one source, and allow faster<br />
market acceptance of new products.<br />
INTERLEAVE<br />
An ordering of physical sectors to be skipped between logical<br />
sectors on your hard disk.<br />
I/O PROCESSOR<br />
Intelligent processor or controller that handles the input/output<br />
operations of a computer.<br />
INTERRUPT<br />
A signal, usually from a subsystem to a central processing unit, to<br />
signify that an operation has been completed or cannot be<br />
completed.<br />
JUMPER<br />
A small piece of plastic that slides over pairs of pins that protrude<br />
from the circuit board on the hard drive to make an electrical<br />
connection and activate a specific option.<br />
J<br />
K<br />
KILOBYTE (KB)<br />
A unit of measure of approximately 1,000 bytes. (However, because<br />
computer memory is partitioned into sizes that are a power of two, a<br />
kilobyte is really 1,024 bytes.)<br />
GL – 3
GLOSSARY<br />
L<br />
LANDING ZONE OR LZONE<br />
The cylinder number to where ParkHeads move the read/write heads.<br />
LATE BIT<br />
A bit that is in the late half of the data window.<br />
LATE WINDOW<br />
A data window that has been shifted in a late direction to facilitate<br />
data recovery.<br />
LATENCY<br />
A delay encountered in a computer when waiting for a specific<br />
response. In a disk drive there is both seek latency and rotational<br />
latency. The time required for the addressed sector to arrive under<br />
the head after the head is positioned over the correct track. It is a<br />
result of the disk’s rotational speed and must be considered in<br />
determining the disk drive’s total access time.<br />
LOGIC<br />
Electronic circuitry that switches on and off (“1” and “0”) to perform<br />
functions.<br />
LOGICAL ADDRESS<br />
A storage location address that may not relate directly to a physical<br />
location. Usually used to request information from a controller,<br />
which performs a logical to physical address conversion, and in turn,<br />
retrieves the data from a physical location in the mass storage<br />
peripheral.<br />
LOGICAL BLOCK ADDRESSING<br />
Defines the addressing of the device by the linear mapping of<br />
sectors.<br />
LOGICAL SECTOR<br />
The lowest unit of space that DOS can access through a device<br />
driver; one or more physical sectors.<br />
LOW FREQUENCY<br />
The lowest recording frequency used in a particular magnetic<br />
recording device. With FM or MFM channel codes, this frequency is<br />
also called “IF.”<br />
M<br />
MAIN MEMORY<br />
Random-access memory (RAM) used by the central processing unit<br />
(CPU) for storing program instructions and data currently being<br />
processed by those instructions. (See also random access memory.)<br />
MASS STORAGE<br />
Auxiliary memory used in conjunctions with main memory; generally<br />
having a large, on-line storage capacity.<br />
MEGABYTE (MB)<br />
A unit of measure approximately one million bytes (actually 1,048,576<br />
bytes) or 10 6 .<br />
MEMORY<br />
Any device or storage system capable of storing and retrieving<br />
information. (See also storage definitions.)<br />
MICROCOMPUTER<br />
A computer whose central processing unit is a microprocessor. It is<br />
usually, but not necessarily, desktop size.<br />
MICROPROCESSOR<br />
A central processing unit (CPU) manufactured as a chip or a small<br />
number of chips.<br />
MISSING PULSE<br />
A term used in surface certification. It is when a prerecorded signal<br />
is reduced in amplitude by a certain specified percentage.<br />
MODIFIED FREQUENCY MODULATION (MFM)<br />
A method of encoding digital data signals for recording on magnetic<br />
media. Also called “three frequency recording.” Recording code<br />
that only uses synchronizing clock pulse if data bits are not present.<br />
Doubles the lineal bit density without increasing the lineal flux<br />
reversal density, compared to Frequency Modulation.<br />
MODIFIED MODIFIED FREQUENCY MODULATION (MMFM)<br />
A recording code similar to MFM that has a longer run length limited<br />
distance.<br />
MODULATION<br />
1. Readback voltage fluctuation usually related to the rotational<br />
period of a disk. 2. A recording code, such as FM, MFM, or RLL, to<br />
translate between flux reversals and bits or bytes.<br />
N<br />
NON-RETURN TO ZERO<br />
A form of data encoding that is not self-clocking, in other words, it<br />
needs to be provided with an external bit cell clock signal. Generally<br />
used in higher-performance disk drives.<br />
OFF-LINE<br />
processing or peripheral operations performed while disconnected<br />
from the system CPU via the system bus.<br />
ON-LINE<br />
processing or peripheral operations performed while disconnected<br />
from the system CPU via the system bus.<br />
OPEN LOOP SERVO<br />
A head positioning system that does not use positional information<br />
to verify and correct the radial location of the head relative to the<br />
track. This is usually achieved by use of a stepper motor which has<br />
predetermined stopping point that corresponds to track locations.<br />
OPERATING SYSTEM<br />
A software program that organizes the actions of the parts of the<br />
computer and its peripheral devices. (See disk operating system.)<br />
OUTSIDE DIAMETER<br />
The largest radius recording track on a disk.<br />
OVERWRITE<br />
A test that measures the residual 1F recorded frequency on a track<br />
after being overwritten by a 2F signal. Variations of the test exist.<br />
O<br />
P<br />
PARALLELISM<br />
1. The condition of two planes or lines being parallel. Important in<br />
disk drives because a lack of it in mechanical assemblies can result<br />
in positioning inaccuracy. More precisely: planes-coplanar; linescolinear.<br />
2. Is the local variation in disk thickness measured<br />
independently of thickness itself. 3. The ability of a multiprocessor<br />
computer to allocate more than one processor (CPU) to a computing<br />
problem, where each CPU works on a separate problem or separate<br />
segment of that problem. Also referred to as parallel processing.<br />
PARITY<br />
A simple method of data error detections that always makes numbers<br />
either odd or even, using an extra bit in which the total number of<br />
binary 1s (or 0s) in a byte is always odd or always even; thus, in an<br />
odd parity scheme, every byte has eight bits of data and one parity<br />
bit. If using odd parity and the number of 1 bits comprising the byte<br />
of data is not odd, the ninth or parity bit is set to 1 to create the odd<br />
parity. In this way, a byte of data can be checked for accurate<br />
transmission by simply counting the bits for an odd parity indication.<br />
If the count is ever even, an error is indicated.<br />
PARTITION<br />
A logical section of a disk drive, each of which becomes a logical<br />
device with a drive letter.<br />
PEAK SHIFT<br />
The shifting in time of the zero-slope portion of a readback voltage<br />
from the values contained in the write current waveform. Sometimes<br />
incorrectly used to describe bit jitter.<br />
PERIPHERAL EQUIPMENT<br />
Auxiliary memory, displays, printers, and other equipment usually<br />
attached to a computer system’s CPU by controllers and cables.<br />
(They are often packaged together in a desktop computer.)<br />
PHASE LOCKED LOOP (PLL)<br />
A circuit whose output locks onto and tracks the frequency of an<br />
input signal. Sometimes incorrectly called a data separator.<br />
GL – 4
GLOSSARY<br />
PHASE MARGIN<br />
Measure in degrees of the amount of difference between<br />
excursions from the window center where flux reversals can occur<br />
and the edge of the data window. Similar to window margin.<br />
PHYSICAL SECTOR<br />
The smallest grouping of data on the hard disk; always 512 bytes.<br />
PIO<br />
Programmable Input Output. A means of accessing device registers.<br />
Also describes one form of data transfers. PIO data transfers are<br />
performed by the host processor using PIO register accesses to the<br />
data register.<br />
PLATED THIN FILM MEDIA<br />
Magnetic disk memory media having its surface plated with a thin<br />
coating of a metallic alloy instead of being coated with oxide.<br />
PROCESSING<br />
The process of the computer handling, manipulating and modifying<br />
data such as arithmetic calculation, file lookup and updating, and<br />
word pressing.<br />
PULSE CROWDING<br />
Modification of playback amplitude due to super-positioning of<br />
adjacent flux reversal fields being sensed by the read/write gap.<br />
PULSE DETECT<br />
A digital pulse train in which each leading edge or each edge<br />
corresponds to a magnetic transition read from the disk. If transition<br />
qualification circuitry exists in the drive, this signal is the output of<br />
same. Also known as transition detect.<br />
RANDOM ACCESS MEMORY (RAM)<br />
Memory designed so that any storage location can be accessed<br />
randomly, directly and individually. This is contrasted to sequential<br />
access devices such as tape drives.<br />
R<br />
READ<br />
To access a storage location and obtain previously recorded data.<br />
To sense the presence of flux reversals on magnetic media. Usually<br />
implemented such that a dynamic flux amplitude will cause a<br />
proportional electrical output from the transducer.<br />
READ GATE SIGNAL<br />
A digital input signal which causes the drive circuitry to recover<br />
data.<br />
READ ONLY MEMORY (ROM)<br />
A form of memory which cannot be changed in formal operational<br />
modes. Many different types are available. RAM is used for<br />
permanent information storage. Computer control programs are<br />
often stored in ROM applications.<br />
READ/WRITE HEAD<br />
The recording element which writes data to the magnetic media and<br />
reads recorded data from the media.<br />
RE-CALIBRATE<br />
The action of moving the head of a disk drive to cylinder zero.<br />
RECOVERABLE ERROR<br />
A read error, transient or otherwise, falling within the capability of<br />
an ECC mechanism to correct, or able to overcome by rereading the<br />
data in question.<br />
ROTATIONAL LATENCY<br />
The amount of delay in obtaining information from a disk drive<br />
attributable to the rotation of the disk.<br />
RUN-LENGTH LIMITED<br />
An encoding process that repositions data bits and limits the length<br />
of zero bits in order to compress information being stored on disks.<br />
RUN-LENGTH LIMITED ENCODING<br />
A recording code. Sometimes meant to denote “2.7 RLL” which can<br />
signify 1.5 times the bits as MFM, given the same number of flux<br />
reversals in a given lineal distance.<br />
SECTOR<br />
A logical segment of information on a particular track. The smallest<br />
addressable unit of storage on a disk. Tracks are made of sectors.<br />
SECTOR PULSE SIGNAL<br />
A digital signal pulse present in hard sectored drives which<br />
indicates the beginning of a sector. Embedded servo pattern or<br />
other prerecorded information may be present on the disk when<br />
sector is active.<br />
S<br />
SEEK<br />
A random access operation by the disk drive. The act of moving a set<br />
of read/write heads so that one of them is over the desired cylinder.<br />
The actuator or positioner moves the heads to the cylinder<br />
containing the desired track and sector.<br />
SEEK COMPLETE SIGNAL<br />
A digital signal level which indicates that the positioner is not<br />
moving and is located over a cylinder or offset position.<br />
SEEK TIME<br />
The amount of time between when a step pulse or seek command is<br />
issued until the head settles onto the desired cylinder. Sometimes is<br />
measured without settling times.<br />
SEQUENTIAL ACCESS<br />
The writing or reading of data in a sequential order such as reading<br />
data blocks stored one after the other on magnetic tape. This is<br />
contrasted to random access of information.<br />
SERVO BURST<br />
A momentary servo pattern used in embedded servo control systems<br />
usually positioned between sectors or at the end of a track.<br />
SERVO CONTROL<br />
A technique by which the speed or position of a moving device is<br />
forced into conformity with a desired or standard speed or position.<br />
SERVO HEAD<br />
A magnetic head designed specifically for accurately reading servo<br />
data.<br />
SERVO PATTERN<br />
A readback signal that indicates the position of a head relative to a<br />
track.<br />
SERVO SURFACE<br />
A recording surface in a multi-surface disk drive that only contains<br />
control information which provides timing, head position, and trackfollowing<br />
information for the data surfaces.<br />
SERVO SYSTEM<br />
An automatic system for maintaining the read/write head on track;<br />
can be either “open loop,” “quasi-closed loop,” or “closed loop.”<br />
SERVO TRACK<br />
A track on a servo surface. The prerecorded reference track on the<br />
dedicated servo surface of a disk drive. All data track positions are<br />
compared to their corresponding servo track to determine “off<br />
track”/”on track” position.<br />
SETTLING TIME<br />
The time it takes a head to stop vibrating, within specified limits,<br />
after it reaches the desired cylinder.<br />
SILICON<br />
Semiconductor material generally used to manufacture<br />
microprocessors and other integrated circuit chips.<br />
SMALL COMPUTER SYSTEM INTERFACE (SCSI)<br />
An intelligent interface that incorporates controller functions<br />
directly into the drive.<br />
S.M.A.R.T. CAPABILITY<br />
Self-Monitoring Analysis and Reporting Technology. Prediction of<br />
device degradation and/or faults.<br />
GL – 5
GLOSSARY<br />
SOFT ERROR<br />
A data error which can be overcome by rereading the data or<br />
repositioning the head.<br />
SOFT SECTORED<br />
A technique where the controller determines the beginning of a<br />
sector by the reading of format information from the disk. This is<br />
contrasted to hard sectoring where a digital signal indicates the<br />
beginning of a sector on a track.<br />
SOFTWARE<br />
Applications programs, operating systems, and other programs (as<br />
opposed to hardware).<br />
SPINDLE<br />
The rotating hub structure to which the disks are attached.<br />
SPINDLE MOTOR<br />
The motor that rotates the spindle and therefore the disks.<br />
SPUTTERED MEDIA<br />
Magnetic disk or tape that has the magnetic layer deposited by<br />
sputtering means.<br />
STEPPER MOTOR<br />
A motor that has known detent positions where the rotor will stop<br />
with the proper control in some cases. The digitally controlled motor<br />
moves the head positioner from track to track in small, step-like<br />
motions.<br />
STORAGE CAPACITY<br />
The amount of data that can be stored in a memory location, usually<br />
specified in kilobytes for main memory and floppy drives and<br />
megabytes for mass storage devices.<br />
STORAGE DENSITY<br />
Usually refers to recording density (BPI, TPI, or a combination of the<br />
two.)<br />
STORAGE LOCATION<br />
A memory location, identified by an address where information may<br />
be read or written.<br />
STROBE OFFSET SIGNAL<br />
A group of digital input signal levels which cause the read PLL and/<br />
or data decoder to shift the decoding windows by fractional<br />
amounts. Often early/late are modified when two signals are used.<br />
T<br />
THIN-FILM HEAD<br />
A magnetic transducer manufactured by deposition of magnetic and<br />
electrical materials on a base material contrasted with prior art<br />
mechanical methods. Read/write heads whose read/write element is<br />
deposited using integrated circuit techniques rather than being<br />
manually wound.<br />
THIN-FILM MEDIA<br />
See plated thin film media.<br />
TRACK<br />
One surface of a cylinder. A path which contains reproducible<br />
information left on a magnetic medium by recording means<br />
energized from a single channel.<br />
TRACK-FOLLOWING SERVO<br />
A closed-loop positioner control system that continuously corrects<br />
the position of the disk drive’s heads by utilizing a reference track<br />
and a feedback loop in the head positioning system. (See also<br />
closed loop.)<br />
TRACKS PER INCH (TPI)<br />
A measurement of radial density. Tracks per inch of disk radius.<br />
UN-CORRECTABLE ERROR<br />
An error that is not able to be overcome with Error Detection and<br />
Correction.<br />
UNFORMATTED CAPACITY<br />
Storage capacity of disk drive prior to formatting; also called the<br />
gross capacity. (See format.) The raw capacity of a drive not taking<br />
into account the capacity loss due to storage of the format control<br />
information on the disk surfaces.<br />
UNRECOVERABLE ERROR<br />
A read error falling outside the capability of an ECC mechanism to<br />
correct, or not able to be overcome by rereading the data in<br />
question, with or without repositioning the head.<br />
VOICE COIL MOTOR<br />
A positioning motor that uses the same principle as a voice coil in a<br />
loudspeaker. The motor has no detent positions. The mechanical<br />
motion output of it can be either rotary or linear.<br />
V<br />
W<br />
WHITNEY HEAD<br />
A successor to the original Winchester read/write head design. The<br />
primary change was to make the flexure smaller and more rigid. First<br />
used in IBM 3370/3380.<br />
WHITNEY TECHNOLOGY<br />
A method of constructing a read/write head in a rigid disk drive<br />
using a Whitney head. In all other details it is the same as<br />
Winchester technology.<br />
WINCHESTER HEAD<br />
The read/write head used in Winchester technology, non-removable<br />
media disk drives. May be either a monolithic or composite type. It is<br />
aerodynamically designed to fly within microinches of the disk<br />
surface.<br />
WINCHESTER TECHNOLOGY<br />
A method of constructing a rigid disk drive using concepts<br />
introduced in the IBM model 3340 disk drive. The primary changes<br />
from prior technology was to lower the mass of the slider, use of a<br />
monolithic slider, radically changing the design of the flexure and<br />
having the slider come to rest on a lubricated disk surface when disk<br />
rotation ceases. In addition to the above, a totally sealed chamber<br />
containing the read/write heads and disks was used to protect<br />
against contamination.<br />
WINDOW MARGIN<br />
The amount of tolerance a read/write system has for transition jitter<br />
at a specified error rate level.<br />
WORD<br />
A number of bits, typically a multiple of eight, processed in parallel<br />
(in a single operation). Standard word lengths are 8, 16, 32 and 64<br />
bits (1, 2, 4, or 8 bytes).<br />
WRITE<br />
The recording of flux reversals on a magnetic media.<br />
WRITE PRE-COMPENSATION<br />
The intentional time shifting of write data to offset the effects of bit<br />
shift in magnetic recording.<br />
WRITE GATE SIGNAL<br />
A digital input signal level which causes the drive circuitry to record<br />
(write) data.<br />
TRACK POSITIONING<br />
The method, both mechanical and electrical, used to position the<br />
heads over the correct cylinder in a disk drive system.<br />
U<br />
GL – 6