CRYSTALSIX - Schoonover, Inc.
CRYSTALSIX - Schoonover, Inc.
CRYSTALSIX - Schoonover, Inc.

You also want an ePaper? Increase the reach of your titles
YUMPU automatically turns print PDFs into web optimized ePapers that Google loves.
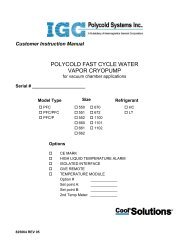
CrystalSix Sensor Operating Manual<br />
5 Rotate the stop ratchet (Item #38) CW (clockwise) until it contacts the stem<br />
of the pawl and actuator stem assembly (Item #24) as shown in Figure 4-3<br />
on page 4-14.<br />
6 Rest the detent spacing tool on the top of the alignment pin as shown in<br />
Figure 4-4 on page 4-15. Position the detent spacing tool (of the 750-254-G1<br />
assembly) between the detent (Item #41) and ratchet (Item #22) as shown<br />
in Figure 4-4. Pull the detent against the detent spacing tool and<br />
subsequently against the tooth of the ratchet. Tighten the #2 fastener (Item<br />
#42) to secure the detent to the bellow assembly.<br />
7 Remove the detent spacing tool.<br />
8 Release air pressure from the bellows assembly (item #19).<br />
9 Remove the 0.125 diameter alignment pin of the 750-254-G1 alignment tool<br />
assembly from the hole.<br />
10 Prior to installation of the crystal holder assembly, check the continuity<br />
between the center contact of the connector and the electrical contacts<br />
associated with the carousel assembly (item #5). Install the crystal holder<br />
assembly when electrical continuity is verified. If electrical continuity is not<br />
verified, the unit should be disassembled (see section 4.4.2 on page 4-6).<br />
The electric contact associated with the carousel will have to be adjusted to<br />
ensure electrical contact when assembled.<br />
11 Press the crystal switch button on the hand-held controller or the instrument<br />
front panel. The sensor will advance to the next crystal position. Each<br />
crystal should be centered in the aperture. Repeat step #10 for each crystal<br />
position. Make certain the detent drops in to engage each tooth of the<br />
ratchet (item #22) on each pulse.<br />
12 Secure the actuator cover (item #15) to the top plate (item #10) using two<br />
#4-40 x 0.187" long socket head cap screws (items #16 and #17).<br />
IPN 074-155G<br />
13 Install the heat shield (item #8) by first orienting the slot in the heat shield<br />
to accommodate the water lines, then secure the heat shield by applying<br />
pressure near the center of the shield. The shield should snap in place.<br />
14 Regulate the air supply to 80-90 psi (550-618 KPa) for operation.<br />
Unit is now ready for operation.<br />
4 - 5