5. Commands and Functions - Sanyo Denki America, Inc.
5. Commands and Functions - Sanyo Denki America, Inc.
5. Commands and Functions - Sanyo Denki America, Inc.

Create successful ePaper yourself
Turn your PDF publications into a flip-book with our unique Google optimized e-Paper software.
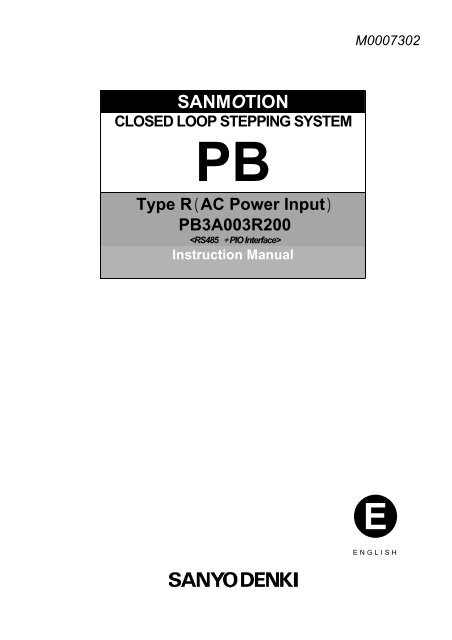
M0007302<br />
SANMOTION<br />
CLOSED LOOP STEPPING SYSTEM<br />
PB<br />
Type RAC Power Input<br />
PB3A003R200<br />
<br />
Instruction Manual<br />
E<br />
ENGLISH
Preface<br />
Shipping the product<br />
This product in this instruction manual corresponds with the shipping regulations given in the<br />
Export Trade Control Ordinance (Table 1, item 16). When these products are exported by<br />
customers, it is recommended to fulfill the requirements of export procedure with the relevant<br />
authorities, as well as “Information Requirements” <strong>and</strong> “Objective Requirements” according to the<br />
Catch-all regurations.<br />
Feature outline<br />
This manual outlines the functions, wiring, installation, operations, maintenance, specifications,<br />
etc. of the closed loop stepping system “PB” Series TypeR.<br />
<br />
PBwas born as a new, intelligent, <strong>and</strong> easy to h<strong>and</strong>le closed loop stepping system which the<br />
technology of design <strong>and</strong> production in précised compact motor with high performance is in harmony<br />
with up-to-date control technology.<br />
This is a Software Servo System which controls according to the comm<strong>and</strong> of upper controller.<br />
Specially in minor stroke <strong>and</strong> high-hitrate operation, this has higher response of<br />
acceleration/deceleration than the servo system in the same size.<br />
Since this has its unique stopping holding torque, slight vibration is not caused as usual servos<br />
has.<br />
Position comm<strong>and</strong> stored beforeh<strong>and</strong> through SIO or program can be started by Point or<br />
program no. designation <strong>and</strong> startup trigger signal. As this can be controlled by general PIO,<br />
hardware cost can be cut down.<br />
Push operation, teaching, modulo function<strong>and</strong> various returning-to-origin are equipped.<br />
Addition comm<strong>and</strong> is also enabled.<br />
Precautions related to this Instruction Manual<br />
In order to fully underst<strong>and</strong> the functions of closed loop stepping system “PB” Series TypeR,<br />
please read this instruction manual thoroughly before use.<br />
After reading this manual thoroughly, please keep it h<strong>and</strong>y for reference.<br />
Please contact the dealre or sales representative if there are defects such as nonconsecutive<br />
pages, missing pages or if the manual is lost or damaged.<br />
Carefully <strong>and</strong> completely follow the safety instructions outlined in this manual. Please note<br />
that safety is not guaranteed for usage methods other than those specified in this manual or<br />
usage methods intended for the original product.<br />
The contents of this manual may be modified without prior notice, as revisions or additions are<br />
made in the usage method of this product. Modifications are performed per the revisions of<br />
this manual.<br />
Permission is granted to reproduce or omit part of the attached figures (as abstracts) for use.<br />
Although the manufacturer has taken all possible measures to ensure the veracity of the<br />
contents of this manual, if you should notice any error or ommission, please notify the dealer<br />
or sales office of the finding.<br />
Related instructions manual<br />
Refer to for the specification of the PC I/F software.
1. 1 Introduction 11<br />
1. 2 Location of warning labels on the product 11<br />
1. 3 Explanation about Indications 12<br />
1. 4 Caution when Using 13<br />
<br />
<br />
<br />
2. 1 Verifying Package Contents 21<br />
2. 2 Model number Nomenclature 21<br />
2. 3 Motor Model Combination Table 23<br />
<br />
<br />
<br />
3. 1 External wiring diagram 31<br />
3. 2 Part Names <strong>and</strong> <strong>Functions</strong> 32<br />
3. 3 Installation 33<br />
3. 4 Wiring 35<br />
3.4.1 Wiring Precautions 35<br />
3.4.2 External Installation Wiring Diagram 35<br />
3.4.3 Connector Model Numbers <strong>and</strong> Appropriate Electric Wires 36<br />
3.4.4 Connector Pin Assignment 37<br />
3.4.5 Grounding 38<br />
3.4.6 Short-circuit Breaker 38<br />
3.4.7 Motor <strong>and</strong> Encoder Wiring 38<br />
3.4.8 Power Wiring 38<br />
Control Input / Output Signal Wiring 39<br />
Communication 311<br />
<br />
<br />
<br />
4. 1 Input / Output Control Signal <strong>Functions</strong> 41<br />
4. 2 Switch Settings 48<br />
4. 3 Display 48<br />
4. 4 ALM Detection Function 49<br />
4. 5 Amplifier Status Change Diagram 413<br />
4. 6 Adjustment 414<br />
<br />
<br />
<br />
<strong>5.</strong> 1 Comm<strong>and</strong> structure 51<br />
<strong>5.</strong>2 Comm<strong>and</strong> List 52<br />
<strong>5.</strong>3 System Comm<strong>and</strong> 58<br />
<strong>5.</strong>4 Direct Comm<strong>and</strong> 515<br />
<strong>5.</strong>5 Point <strong>and</strong> Program Comm<strong>and</strong> 533<br />
<strong>5.</strong>6 RD Comm<strong>and</strong> 541<br />
<br />
<br />
<br />
6. 1 Communication Specifications 61<br />
6.2 Data Format 63<br />
6.3 Communication MethodTiming chart65<br />
6.4 St<strong>and</strong>ard Response Time 67<br />
6.5 Communication Example 68<br />
<br />
<br />
<br />
7. 1 Amplifier Basic Specifications 71<br />
7. 2 Motor St<strong>and</strong>ard Specifications 72<br />
7. 3 Motor Option Specifications 73<br />
7. 4 Velocity – Torque, power consumption characteristics 75<br />
7. 5 Outline Drawings 77
8. 1 Optional Cables 81<br />
8. 2 Optional Connectors 83<br />
8. 3 Optional Communication Equipment 84<br />
<br />
<br />
<br />
9. 1 International St<strong>and</strong>ards Conformity 91<br />
9. 2 Low voltage comm<strong>and</strong> 91<br />
9. 3 EMC Directive 92
Preface<br />
Shipping the product<br />
This product in this instruction manual corresponds with the shipping regulations given in the<br />
Export Trade Control Ordinance (Table 1, item 16). When these products are exported by<br />
customers, it is recommended to fulfill the requirements of export procedure with the relevant<br />
authorities, as well as “Information Requirements” <strong>and</strong> “Objective Requirements” according to the<br />
Catch-all regurations.<br />
Feature outline<br />
This manual outlines the functions, wiring, installation, operations, maintenance, specifications,<br />
etc. of the closed loop stepping system “PB” Series TypeR.<br />
<br />
PBwas born as a new, intelligent, <strong>and</strong> easy to h<strong>and</strong>le closed loop stepping system which the<br />
technology of design <strong>and</strong> production in précised compact motor with high performance is in harmony<br />
with up-to-date control technology.<br />
This is a Software Servo System which controls according to the comm<strong>and</strong> of upper controller.<br />
Specially in minor stroke <strong>and</strong> high-hitrate operation, this has higher response of<br />
acceleration/deceleration than the servo system in the same size.<br />
Since this has its unique stopping holding torque, slight vibration is not caused as usual servos<br />
has.<br />
Position comm<strong>and</strong> stored beforeh<strong>and</strong> through SIO or program can be started by Point or<br />
program no. designation <strong>and</strong> startup trigger signal. As this can be controlled by general PIO,<br />
hardware cost can be cut down.<br />
Push operation, teaching, modulo function<strong>and</strong> various returning-to-origin are equipped.<br />
Addition comm<strong>and</strong> is also enabled.<br />
Precautions related to this Instruction Manual<br />
In order to fully underst<strong>and</strong> the functions of closed loop stepping system “PB” Series TypeR,<br />
please read this instruction manual thoroughly before use.<br />
After reading this manual thoroughly, please keep it h<strong>and</strong>y for reference.<br />
Please contact the dealre or sales representative if there are defects such as nonconsecutive<br />
pages, missing pages or if the manual is lost or damaged.<br />
Carefully <strong>and</strong> completely follow the safety instructions outlined in this manual. Please note<br />
that safety is not guaranteed for usage methods other than those specified in this manual or<br />
usage methods intended for the original product.<br />
The contents of this manual may be modified without prior notice, as revisions or additions are<br />
made in the usage method of this product. Modifications are performed per the revisions of<br />
this manual.<br />
Permission is granted to reproduce or omit part of the attached figures (as abstracts) for use.<br />
Although the manufacturer has taken all possible measures to ensure the veracity of the<br />
contents of this manual, if you should notice any error or ommission, please notify the dealer<br />
or sales office of the finding.<br />
Related instructions manual<br />
Refer to for the specification of the PC I/F software.
1. 1 Introduction 11<br />
1. 2 Location of warning labels on the product 11<br />
1. 3 Explanation about Indications 12<br />
1. 4 Caution when Using 13<br />
<br />
<br />
<br />
2. 1 Verifying Package Contents 21<br />
2. 2 Model number Nomenclature 21<br />
2. 3 Motor Model Combination Table 23<br />
<br />
<br />
<br />
3. 1 External wiring diagram 31<br />
3. 2 Part Names <strong>and</strong> <strong>Functions</strong> 32<br />
3. 3 Installation 33<br />
3. 4 Wiring 35<br />
3.4.1 Wiring Precautions 3-5<br />
3.4.2 External Installation Wiring Diagram 3-5<br />
3.4.3 Connector Model Numbers <strong>and</strong> Appropriate Electric Wires 3-6<br />
3.4.4 Connector Pin Assignment 3-7<br />
3.4.5 Grounding 3-8<br />
3.4.6 Short-circuit Breaker 3-8<br />
3.4.7 Motor <strong>and</strong> Encoder Wiring 3-8<br />
3.4.8 Power Wiring 3-8<br />
Control Input / Output Signal Wiring 3-9<br />
Communication 3-11<br />
<br />
<br />
<br />
4. 1 Input / Output Control Signal <strong>Functions</strong> 41<br />
4. 2 Switch Settings 49<br />
4. 3 Display 49<br />
4. 4 ALM Detection Function 410<br />
4. 5 Amplifier Status Change Diagram 414<br />
4. 6 Adjustment 415<br />
<br />
<br />
<br />
<strong>5.</strong> 1 Comm<strong>and</strong> structure51<br />
<strong>5.</strong>2 Comm<strong>and</strong> List 52<br />
<strong>5.</strong>3 System Comm<strong>and</strong> 58<br />
<strong>5.</strong>4 Direct Comm<strong>and</strong> 515<br />
<strong>5.</strong>5 Point <strong>and</strong> Program Comm<strong>and</strong> 533<br />
<strong>5.</strong>6 RD Comm<strong>and</strong> 541<br />
<br />
<br />
<br />
6. 1 Communication Specifications 61<br />
6.2 Data Format 63<br />
6.3 Communication MethodTiming chart65<br />
6.4 St<strong>and</strong>ard Response Time 67<br />
6.5 Communication Example 68<br />
<br />
<br />
<br />
7. 1 Amplifier Basic Specifications 71<br />
7. 2 Motor St<strong>and</strong>ard Specifications 72<br />
7. 3 Motor Option Specifications 73<br />
7. 4 Velocity – Torque, power consumption characteristics 75<br />
7. 5 Outline Drawings 77
8. 1 Optional Cables 81<br />
8. 2 Optional Connectors 83<br />
8. 3 Optional Communication Equipment 84<br />
<br />
<br />
<br />
9. 1 International St<strong>and</strong>ards Conformity 91<br />
9. 2 Low voltage comm<strong>and</strong> 91<br />
9. 3 EMC Directive 92
7<br />
6<br />
9 A B C D E F 08<br />
2<br />
1<br />
1. Safety Precautions <br />
<br />
1.1 Introduction<br />
The PB system is designed for use in general manufacturing equipment.<br />
Please observe the following instructions:<br />
Read this User Manual carefully before any installation or assembly, to ensure proper use.<br />
Do not perform any retrofitting or modification of the product.<br />
Consult with a sales representative or a qualified technician regarding installation <strong>and</strong> maintenance.<br />
Special considerations, such as redundant services or an emergency generator are required when operating,<br />
maintaining <strong>and</strong>/or controlling devices in the following applications. Contact our office if:<br />
The device is used in medical instruments used for life support.<br />
The device is used in trains or elevators, the failure of which could cause bodily injury.<br />
The device is used in computer systems of social or public importance.<br />
The device is used in any equipment related to human safety or public infrastructure.<br />
Please contact our office if the device is to be used in an environment where vibration is present, such as<br />
in-vehicle or transport applications.<br />
Before installing, operating, performing maintenance or inspecting this device, read this entire manual<br />
carefully to ensure proper use. Use this device only after learning about the device, its safety information<br />
<strong>and</strong> the precautions related to its use.<br />
After reading this User Manual, keep it in a place where it is always visible to the user. <br />
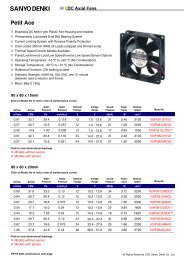
1.2 Location of warning labels on the product<br />
Warning labels are located on the front panel of the servo amplifier.<br />
<br />
<br />
M<br />
TION<br />
PB<br />
5<br />
4<br />
3<br />
SW1<br />
CN3<br />
C<br />
N<br />
7<br />
C<br />
N<br />
2<br />
S<br />
W<br />
2<br />
CN4<br />
C<br />
N<br />
1<br />
C<br />
N<br />
5<br />
C<br />
N<br />
6<br />
11
1. Safety Precautions <br />
<br />
This chapter provides cautions for ensuring safe use of the PB amplifier. Read before use.<br />
<br />
<br />
In the following description, each indication is completed as shown in the figure below.<br />
<br />
<br />
DANGER<br />
<br />
XXXXX XX X<br />
<br />
Safety precaution item ranking<br />
<br />
<br />
1.3.2 Safety Precaution Item Ranking<br />
<br />
<br />
<br />
<br />
<br />
<br />
<br />
<br />
<br />
<br />
<br />
Items described in CAUTION may lead to a very serious result depending on the<br />
<br />
<br />
<br />
<br />
<br />
<br />
<br />
<br />
<br />
<br />
<br />
<br />
The following eight visual cues are used in this manual:<br />
Kind of symbol<br />
Visual cue of danger<br />
Visual cue for caution<br />
Example of symbol<br />
DangerInjury Electric shock<br />
Caution Fire Burn<br />
Visual cue for<br />
restriction<br />
Visual cue for<br />
requirement<br />
Restriction<br />
Requirement<br />
Disassembly not allowed<br />
12
1. Safety Precautions <br />
<br />
<br />
<br />
<br />
<br />
<br />
(General)<br />
1. Do not use the system in an explosive atmosphere.<br />
Doing otherwise may result in injury or fire.<br />
2. Do not touch the working amplifier under any circumstances.<br />
Touching inside the amplifier may result in electric shock.<br />
3. Do not conduct work while power is being supplied. Be sure to wait at least<br />
one minute after turning off the power supply before doing an electrical<br />
wiring or inspection work.<br />
Touching inside the amplifier may result in electric shock.<br />
4. Only properly rained staff should take charge of transportation, installation,<br />
piping, wiring, operation, manipulation, maintenance, <strong>and</strong> inspection work.<br />
Doing otherwise may result in electric shock, injury, or fire.<br />
()<br />
<strong>5.</strong> To avoid getting an electric shock, be sure to ground the earth terminal of<br />
the driver or motor.<br />
6. Avoid damaging cables, applying excessive stress to them, putting a heavy<br />
objects on them, or nipping them.<br />
Doing otherwise may result in electric shock.<br />
7. Make a connections with the power cable according to the connection<br />
diagram or the Operation’s Manual.<br />
Failure to do so may result in electric shock or fire.<br />
(Operation)<br />
8. Before starting the motor, take necessary safety measures such as covering the rotary<br />
parts. Never touch a rotating part of the motor.<br />
Doing so may result in injury.<br />
9. Never approach or touch terminals when the power is on.<br />
Removing the terminal base cover may result in electric shock.<br />
13
1. Safety Precautions <br />
<br />
<br />
<br />
<br />
<br />
<br />
<br />
<br />
<br />
<br />
<br />
<br />
(General)<br />
1. Before starting installation, operation, maintenance, or inspection, be sure to read the<br />
Operator’s Manual carefully <strong>and</strong> observe the instructions in it.<br />
Failure to observe the instructions may result in electric shock, injury, or fire.<br />
2. Do not use the system out of the specifications of the amplifier.<br />
Doing so may result in electric shock, injury, or damage.<br />
3. Do not use a damaged amplifier.<br />
Doing so may result in injury or fire.<br />
4. Do not remove the nameplate.<br />
<strong>5.</strong> Use an amplifier <strong>and</strong> a driver in the specified combinati<br />
Doing so may result in a fire or failure.<br />
6. Note that the amplifier/motor <strong>and</strong> peripheral units will become hot enough to cause a<br />
burn.<br />
7. This amplifier is an open-flame type. Do not touch the printed circuit boards.<br />
Doing so may result in damage. <br />
(Unpacking)<br />
8. Check if the product is the ordered one.<br />
Installing an incorrect wrong product may result in injury or damage.<br />
9. Avoid applying static electricity to the encoder terminals on the motor.<br />
Doing so may result in functional failures.<br />
<br />
14
1. Safety Precautions <br />
<br />
<br />
<br />
<br />
<br />
(Wiring)<br />
10. Do not measure the insulation resistance <strong>and</strong> dielectric strength.<br />
Doing so may result in damage. Call us if you need such testing.<br />
11. Perform wiring in accordance with the Technical St<strong>and</strong>ards for Electric Equipment<br />
<strong>and</strong> instructions in 4. Wiring.<br />
Failure to do so may result in a burn or fire.<br />
12. The amplifier is not equipped with an overcurrent protection function. Consequently,<br />
make wirings properly <strong>and</strong> accurately paying attention not to cause shorting of power<br />
circuits.<br />
Failure to do so may result in breakage of the amplifier <strong>and</strong> the motor.<br />
13. Be careful not to apply static electricity, high voltage to the sensor terminals of the<br />
motor or printed circuit boards of the amplifier.<br />
Doing so may result in functional failures.<br />
(Installation)<br />
14. Do not let foreign matter fall onto the printed circuit boards of the amplifier.<br />
Doing so may result in damage or a fire.<br />
1<strong>5.</strong> Give a clearance as specified in the Instruction Manual between the amplifier <strong>and</strong><br />
inside of the control panel or other devices.<br />
Doing so may result in damage.<br />
16. Never apply a strong shock to the system. Doing so may result in damage.<br />
17. At installation, take extreme care so as to prevent the unit from dropping or turning<br />
over.<br />
18. Never install the unit in a place where water may splash, in an inflammable gas<br />
atmosphere, or near combustible materials.<br />
Doing so may result in a fire or failure.<br />
19. Always install to a noncombustible structure like a metal structure. Otherwise, fire<br />
accident may occur.<br />
15
1. Safety Precautions <br />
<br />
<br />
<br />
<br />
<br />
<br />
<br />
<br />
(Operation)<br />
20. The motor is not equipped with protection means. Install an earth leakage breaker, an<br />
excessive temperature rise prevention means <strong>and</strong> an emergency stop unit as necessary<br />
protection measures.<br />
Failure to do so may result in an injury or a fire accident.<br />
21. Never touch the heat sink of the amplifier, regenerative resistor, motor, or other part<br />
while the power is on or for awhile after the power has been turned off.<br />
These parts may become very hot, causing a burn on contact.<br />
22. In the event of any abnormality, stop operating the system at once.<br />
Failure to do so may result in electric shock, injury, or fire.<br />
23. Never make an extreme adjustment change that will cause the system operation to<br />
become unstable. Doing so may result in injury.<br />
24. At trial operation, fix the motor <strong>and</strong> check the operation separate from the mechanical<br />
system, then install the system on the machine. Failure to do so may result in an<br />
injury.<br />
2<strong>5.</strong> The holding brake is not a stop unit to secure the safety of the machine. Install a stop<br />
unit to secure the safety on the machine side.<br />
Failure to do so may result in an injury.<br />
26. When an alarm occurs, remove the cause of the alarm <strong>and</strong> secure safety. After that,<br />
reset the alarm, then result the system operation. Failure to follow this procedure may<br />
result in an injury.<br />
27. After a recovery from an instantaneous power interruption, the operation may be<br />
restarted suddenly. Do not approach the machine. (Design the machine so that safety<br />
for personnel may be secured even if the system operation is restarted.)<br />
Approaching the machine when it restarts may result in an injury.<br />
28. Make sure the supply voltage is within the specified range. If the supply voltage is out<br />
of specification, functional failures may occur<br />
16
1. Safety Precautions <br />
<br />
<br />
<br />
<br />
<br />
<br />
<br />
<br />
<br />
<br />
<br />
<br />
(Maintenance)<br />
29. The amplifier frame becomes very hot. Take care to avoid burns when doing<br />
maintenance <strong>and</strong> inspection.<br />
30. The electrolytic capacitors of the amplifier will deteriorate with age. As preventive<br />
measures, we recommend you to replace them in about 5 years (when ambient<br />
temperature is 40°C). Also, replacement of the fuses in about 10 years is<br />
recommended. When replacing them, contact us.<br />
31. Do not let dust accumulate on the printed circuit boards in the amplifier.<br />
Doing so may result in damage.<br />
32. When repair is required, please contact us.<br />
Disassembly of the system by the user may render it inoperable.<br />
(Transportation)<br />
33. Take extreme care not to drop or turn over turn system, because it is very dangerous.<br />
34. Do not hold the unit by the cables or the motor shaft.<br />
Doing so may result in injury or equipment failure.<br />
3<strong>5.</strong> Do not touch the connector pins of the amplifier when conveying the equipment.<br />
Doing so may result in damage.<br />
(Scrapping)<br />
36. When discarding the amplifier <strong>and</strong> the motor, dispose of it as a general industrial<br />
waste.<br />
17
1. Safety Precautions <br />
<br />
<br />
<br />
<br />
<br />
<br />
<br />
<br />
<br />
(Storage)<br />
37. Do not store the system in a place exposed to rain or moisture or in a place where<br />
noxious gas or liquid exists. Doing so may result in functional failures.<br />
(Operation)<br />
38. The brake built in the motor is used for holding. Do not use it for ordinary braking<br />
Using this brake for braking will damage it.<br />
(Maintenance)<br />
39. Do not disassembly or repair the system.<br />
Doing so may result in fire or electric shock.<br />
<br />
(Storage)<br />
40. Store the system in a place which is not exposed to direct sunlight <strong>and</strong> in the<br />
determined temperature/humidity range (−20°C to +65°C, 90% RH or less without<br />
condensation).<br />
41. When the system is to be stored for a long time (more than 3 years as a reference<br />
period), consult us.<br />
Long-time storage will lower the capacity of the electrolytic capacitor.<br />
(Operation)<br />
42. Install an emergency stop circuit out side so that the system operation may be stopped<br />
immediately to shut off the power supply.<br />
43. Be sure to use in places free from direct sunlight under the specified temperature <strong>and</strong><br />
humidity conditions (amplifier: 0°C to 55°C <strong>and</strong> 20% to 90% RH without<br />
condensation; <strong>and</strong> motors; 0°C to +40°C <strong>and</strong> 20% to 90% RH without condensation).<br />
(Transportation)<br />
44. Loadage exceeding the specified loading capacity will cause a load collapse. Observe<br />
the indication.<br />
18
2. Model Number Nomenclature<br />
2. 1 Verifying Package Contents<br />
Verify the following items when the product arrives. If any discrepancies are noticed, contact our office.<br />
Verify that the model number is the same as ordered (model number is located on the main name plate).<br />
Verify that there are no defects, such as damage to the exterior of the device.<br />
2.2 Model number Nomenclature<br />
2.2.1 Set Number Specification<br />
The PB system has a set number based on the combination of amplifier <strong>and</strong> motor.<br />
PB A R - <br />
Motor Option III<br />
B: With holding brake<br />
No symbol: Without holding brake<br />
Motor Option II<br />
■: Gear Ratio (for geared models)<br />
No symbol: Gear not included<br />
Motor Option I<br />
●: Gear (for geared models)<br />
No symbol: No gear<br />
Motor Length<br />
Motor Mounting Surface Edge Dimension (mm)<br />
Amplifier I/F Specification: RS-485+PIO input<br />
Power Specification: AC input (wide-range)<br />
System Series Name: PB System<br />
2.2.2 Set Product Packing List<br />
Product Quantity Model Number Drawing Reference<br />
(page number)<br />
Amplifier 1 PB3A003R200 7-7<br />
Motor 1 PBM∆∆□F**20 7-8<br />
Power cable 1 PBC7P0020A (2m) 8-2<br />
I/O cable 1 PBC1S0010A (1m) 8-2<br />
The communication cable is not included; refer to Chapter 8 to determine the appropriate<br />
communication cable <strong>and</strong> converter unit for the specific application.<br />
21
2. Model Number Nomenclature<br />
2.2.3 Amplifier Number Specification<br />
3 3 2 00<br />
Specification identification 00st<strong>and</strong>ard equipment<br />
Sensor type INC500 <br />
I/F Specification +<br />
Output current Phase<br />
Power supply voltage Power supplyWide range<br />
Series Name: PB System<br />
2.2.4 Motor Number Specification<br />
-<br />
International st<strong>and</strong>ards Authorization product<br />
No symbol: st<strong>and</strong>ard equipment<br />
Specification identification 20st<strong>and</strong>ard equipment<br />
Sensor type INC3ch500PR<br />
Option No option<br />
With holding brake<br />
With gear<br />
With harmonic gear<br />
Voltage specification AC Input<br />
Motor Length<br />
Motor Mounting Surface Edge Dimension (mm)<br />
Series Name: PB motor<br />
22
2. Model Number Nomenclature<br />
<br />
2.3 Motor Model Combination Table<br />
Set Number PBAR423 PBAR603 PBAR604<br />
Motor size 42 60 60<br />
Amplifier Number<br />
PB3A003R200<br />
Motor Number PBM423FE2 PBM603FE2 PBM604FE2<br />
Set Number PBAR861 PBAR862<br />
Motor size 86 86<br />
Amplifier Number<br />
PB3A003R200<br />
Motor Number PBM861FXE2 PBM862FXE2<br />
Gear Type<br />
Gear<br />
SET Number<br />
Motor Model<br />
Compatibility<br />
Ratio<br />
()<br />
(Symbol □)<br />
○: Optional setting<br />
Holding Brake<br />
Holding Brake<br />
×: No optional setting<br />
No Yes No Yes PBM423 PBM603 PBM604 PBM861 PBM862<br />
No gear B X B ○ ○ ○ × ×<br />
Low-backlash gear<br />
Harmonic gear<br />
1/3.6 C3.6 C3.6B GA CG ○ ○ × × ×<br />
1/7.2 C7.2 C7.2B GB CG ○ ○ × × ×<br />
1/10 C10 C10B GE CG ○ ○ × × ×<br />
1/20 C20 C20B GG CG ○ ○ × × ×<br />
1/30 C30 C30B GJ CG ○ ○ × × ×<br />
1/50 H50 H50B HL CH ○ ○ × × ×<br />
1/100 H100 H100B HM CH ○ ○ × × ×<br />
Refer to Section 7.3 for gear <strong>and</strong> holding brake specifications.<br />
23
3. Installation, Wiring <strong>and</strong> Operation<br />
3.1 External wiring diagram<br />
*1) CN7 is a measurement connector reserved for the manufacturer; it is not intended for customer use.<br />
(CN7 is a high-voltage terminal. Do not touch the amplifier when it is powered up.)<br />
*2) The regenerative control function is built into the amplifier; normally there is no need for wiring.<br />
*3) The functions of IN1 to IN5 <strong>and</strong> OUT1 to OUT5 are allocated by comm<strong>and</strong> 16h. Refer to Section 4.1 <strong>and</strong> Section 5 for more<br />
information.<br />
3-1
7<br />
9 A B C D E F 08<br />
1<br />
3. Installation, Wiring <strong>and</strong> Operation<br />
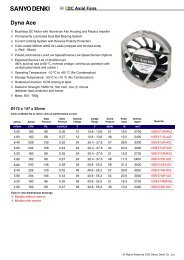
3.2 Part Names <strong>and</strong> <strong>Functions</strong><br />
ALM indicator LED (P4-9)<br />
M<br />
TION<br />
PB<br />
Power indicator LED (P4-9)<br />
SW1: Transmission rate setting<br />
6<br />
5<br />
4<br />
3<br />
2<br />
Node address setting switch (P4-9)<br />
(P4-9)<br />
SW1<br />
CN3: Motor connector (P3-8)<br />
CN3<br />
C<br />
N<br />
7<br />
C<br />
N<br />
2<br />
CN2: Sensor connector (P3-8)<br />
S<br />
W<br />
2<br />
SW2: Terminating resistor setting (P4-9)<br />
CN4: Power connector (P3-8)<br />
CN4<br />
C<br />
N<br />
1<br />
CN1: Control I/O signal connector<br />
(P3-9, P4-1)<br />
Protective ground terminal<br />
(P3-8)<br />
C<br />
N<br />
5<br />
C<br />
N<br />
6<br />
CN5, 6: Communication connector<br />
(P3-11)<br />
Amplifier front panel<br />
* CN7 is not intended for customer use.<br />
3-2
3. Installation, Wiring <strong>and</strong> Operation<br />
3.3 Installation<br />
3.3.1 Amplifier Installation Precautions<br />
The amplifier must be installed in an enclosure. Carefully consider the size of the case, the cooling<br />
method, <strong>and</strong> the location so that the ambient temperature around the amplifier does not exceed 55°C.For<br />
longevity <strong>and</strong> high reliability, it is recommended to keep the temperature around the amplifier below 40°C.<br />
The amplifier has an internal overheating detection function. Consider the cooling method to be used if an<br />
amplifier overheating error is detected.<br />
If there is a vibration source nearby, use a shock absorber between the amplifier <strong>and</strong> the installation base<br />
to prevent the vibration from directly affecting the amplifier.<br />
Long-term use in the presence of corrosive gas may cause contact failure on the connectors <strong>and</strong> on<br />
connecting parts. Never use the device where it may be subjected to corrosive gas.<br />
Do not use the device where explosive or combustible gas is present, as this could cause fire or an<br />
explosion.<br />
Do not use the device where dust or oil mist is present. If dust or oil mist attaches to <strong>and</strong> accumulates on<br />
the device, it can cause insulation deterioration or leakage between the conductive parts, <strong>and</strong> damage the<br />
amplifier.<br />
A large noise source may cause inductive noise to enter the input signals or the power circuit, <strong>and</strong> can<br />
cause a malfunction. If there is a possibility of noise, insert a noise filter, inspect the line wiring <strong>and</strong> take<br />
appropriate noise prevention measures.<br />
3.3.2 Amplifier Installation Method<br />
1) Installation dimensions<br />
The amplifier must be installed using two M4 screws on its rear panel. Refer to the amplifier outline<br />
drawing (Section 7.<strong>5.</strong>1) for the installation dimensions.<br />
2) Installation direction<br />
The amplifier uses natural convection cooling. The installation direction must be vertical. Do not install<br />
the unit upside down.<br />
3) Installing multiple amplifiers in a row<br />
Leave at least 50mm of space above <strong>and</strong> below the amplifiers to ensure unobstructed airflow from the<br />
radiator. If heat gets trapped above the amplifier, use a fan to create airflow. Leave at least 10mm of<br />
space between the amplifiers.<br />
<br />
3-3
3. Installation, Wiring <strong>and</strong> Operation<br />
3.3.3 Motor Installation Precautions<br />
If the motor is enclosed in an enclosure, consider its size, the use of a heat sink, <strong>and</strong> ensure the<br />
temperature inside the case is between 0 <strong>and</strong> 40°C.<br />
Consider a radiation method to ensure that the surface temperature of the motor (end cap surface<br />
temperature) does not exceed 85°C. (If the motor overheating prevention function is working, an ALM will<br />
be detected.)<br />
When installing a pulley or a gear to the motor, avoid methods such as press fitting that apply force in the<br />
torque direction. Ensure accurate shaft centering when integrating the rotating shaft of the motor with the<br />
target machinery. <strong>Inc</strong>orrect centering can damage the shaft <strong>and</strong> the bearings.<br />
Avoid installation in places where the unit may be subjected to water, cutting fluid, rain or conductive<br />
particles such as dust <strong>and</strong> iron filings.<br />
Never install the unit where it could be subjected to corrosive (acid, alkali, etc.), flammable, explosive liquids or<br />
fumes.<br />
Avoid installing the motor on moving parts. Since the wires <strong>and</strong> cables used for this device are electric<br />
connection wires, disconnection could occur. Contact the manufacturer for assistance for use on moving parts.<br />
If a belt-drive is used, verify that the gear reduction value of the belt tension does not exceed the thrust<br />
load tolerance. Refer to 7.2 <strong>and</strong> 7.3.)<br />
3.3.4 Motor Installation Method<br />
Use the tap hole or mounting hole on the installation surface <strong>and</strong> the mounting rabbet for installation. Refer<br />
to the outline drawing (Section 7.<strong>5.</strong>2) for the tap hole pitch measurements <strong>and</strong> the mounting rabbet<br />
diameter.<br />
Installation Angle Motor Model Screws to Use Recommended Tightening Torque<br />
42 angles PBM423 M3 x4<br />
-<br />
60 angles PBM60* M4 x4<br />
0.6 Nm<br />
86 angles PBM86* M4 x4<br />
1.4 Nm<br />
3-4
7<br />
9 A B C D E F 08<br />
1<br />
3. Installation, Wiring <strong>and</strong> Operation<br />
3.4 Wiring<br />
3.4.1 Wiring Precautions<br />
1) Noise protection<br />
Follow the instructions below to prevent malfunctions due to noise.<br />
The noise filter, amplifier <strong>and</strong> the host controller should be placed at the minimum distance.<br />
Apply a surge absorber circuit to coils such as relays, electromagnetic contacts, induction<br />
motors <strong>and</strong> brake solenoids, etc.<br />
Do not enclose the power lines, the motor lines, <strong>and</strong> the signal lines in the same wire<br />
conduit; they are not intended to be bundled together.<br />
If there are large noise sources such as electric welding machines or electric discharge<br />
machines nearby, apply a noise filter for the power line <strong>and</strong> the input circuit.<br />
Do not bundle the primary <strong>and</strong> secondary wiring of the noise filter together.<br />
2) Wiring<br />
Perform wiring only when power is cut off. Carefully verify that wiring is correct, as faulty wiring<br />
can cause damage to the device.<br />
3) Cables for wiring<br />
Use the correct size of cables as specified for wiring. (Refer to Section 3.4.3)<br />
4) Emergency stop circuit<br />
Be sure to install an external emergency stop circuit that can stop the device <strong>and</strong> cut off the power<br />
instantaneously.<br />
3.4.2 External Installation Wiring Diagram<br />
M<br />
TION<br />
PB<br />
6<br />
5<br />
4<br />
3<br />
2<br />
SW1<br />
3B<br />
CN3<br />
C<br />
N<br />
7<br />
2B<br />
C<br />
N<br />
2<br />
3C<br />
2C<br />
S<br />
W<br />
2<br />
3D<br />
2D<br />
4B<br />
CN4<br />
C<br />
N<br />
1<br />
1B<br />
C<br />
N<br />
5<br />
C<br />
N<br />
6<br />
5,6B PC/Slabe<br />
3-5
3. Installation, Wiring <strong>and</strong> Operation<br />
3.4.3 Connector Model Numbers <strong>and</strong> Appropriate Electric Wires<br />
Refer to Section 3.4.2 (External installation wiring diagram) for more information on the symbols.<br />
Appropriate Electric Maximum<br />
Application Symbol Name Model<br />
Manufacturer<br />
Wire Extension Length<br />
1A Plug 8830E-020-170LD AWG28 (7/0.127) 3m<br />
I/O<br />
KEL<br />
1B Receptacle 8822E-020-171D<br />
2A Tab header 1376020-1<br />
AWG24, 26 20m<br />
Receptacle<br />
Twisted pair wire<br />
1-1318118-6<br />
2B housing<br />
with external<br />
Encoder 2D Receptacle 1318108-1(bulk) shield<br />
AMP<br />
contact 1318106-1(chain)<br />
Tab housing 1-1318115-6<br />
2C<br />
1318112-1(bulk)<br />
Tab contact<br />
1318110-1(chain)<br />
3A Tab header 1376136-1<br />
AWG18 to 22 20m<br />
Receptacle<br />
Discrete wire<br />
1-1318119-3<br />
3B housing<br />
Motor<br />
3D Receptacle 1318107-1(bulk)<br />
Power<br />
AMP<br />
contact 1318105-1(chain)<br />
Tab housing 1-1318115-3<br />
3C<br />
1318111-1(bulk)<br />
Tab contact<br />
1318109-1(chain)<br />
4A Tab header 1-178295-5 AWG16 to 20 3m<br />
Electric<br />
Power 4B<br />
5A<br />
Communication<br />
5B<br />
Receptacle<br />
Discrete wire<br />
1-178288-5<br />
housing<br />
AMP<br />
Receptacle 1-175218-5(bulk)<br />
contact 1-175196-5(chain)<br />
Post with S10B-PADSS-1GW AWG28 to 24 100m<br />
base<br />
Twisted pair wire<br />
Housing PADP-10V-1-S with external<br />
JST<br />
Contact SPH-002T-P0.5L shield<br />
* These are necessary for extending the relay cables between the motor power <strong>and</strong> the sensor in excess of<br />
50cm.<br />
* Optional cables <strong>and</strong> connector sets are available. Refer to Options (Section 8) for more information.<br />
3-6
3. Installation, Wiring <strong>and</strong> Operation<br />
3.4.4 Connector Pin Assignment (pin side)<br />
CN No Pin Number / Signal name Pin Layout<br />
(amplifier front panel view)<br />
CN1<br />
I/O signal<br />
1<br />
2<br />
3<br />
4<br />
5<br />
6<br />
7<br />
8<br />
9<br />
10<br />
+COM(+5V to 24V)<br />
-COM<br />
EXE<br />
Point1<br />
Point2<br />
Point3/IN1<br />
Point4/IN2<br />
Point5/IN3<br />
Point6/SDN/IN4<br />
STOP<br />
11<br />
12<br />
13<br />
14<br />
15<br />
16<br />
17<br />
18<br />
19<br />
20<br />
ALM CLR<br />
Point7/IN5<br />
Ack output<br />
In-Position output<br />
ALM output<br />
ZONE/OUT1<br />
END/OUT2<br />
SON MON/OUT3<br />
OUT4<br />
OUT5<br />
CN2 1 A<br />
7 VCC(+5V)<br />
Sensor 2 A<br />
8 GND<br />
3 B<br />
9 <br />
4 B<br />
10 Overheat<br />
5 C<br />
11 FG<br />
6 C<br />
12 N.C<br />
<br />
<br />
<br />
<br />
<br />
CN3<br />
1<br />
A<br />
Motor<br />
Power<br />
2<br />
3<br />
A<br />
B<br />
<br />
<br />
4<br />
5<br />
6<br />
B<br />
BRK+ (for motors with holding brake)<br />
BRK- (for motors with holding brake)<br />
<br />
<br />
CN4<br />
Electric<br />
1<br />
2<br />
AC1<br />
AC2<br />
<br />
Power<br />
3<br />
N.C (VBUS+: terminal for external regeneration)<br />
<br />
4<br />
N.C (VBUS-: terminal for external regeneration)<br />
5<br />
FG<br />
<br />
CN 5, 6<br />
Communication<br />
1<br />
2<br />
A<br />
B<br />
6<br />
7<br />
-<br />
-<br />
<br />
<br />
3<br />
Y<br />
8<br />
-<br />
4<br />
5<br />
Z<br />
GND<br />
9<br />
10<br />
-<br />
FG <br />
1 The functions of IN1 to IN5 <strong>and</strong> OUT1 to OUT5 are allocated by comm<strong>and</strong> 16h.<br />
2 Of pin No shows maker mosquito naming.<br />
3-7
3. Installation, Wiring <strong>and</strong> Operation<br />
3.4.5 Grounding<br />
Amplifier grounding: Ground the amplifier using the grounding wire from the ground connector<br />
(M4) of the amplifier case. Use single point grounding with a minimum of AWG 16 wire<br />
(1.25mm 2 ).<br />
Motor frame grounding: If the motor is grounded through the frame, then Cf x dv/dt current<br />
flows from the PMW power part of the servo amplifier through the motor floating capacitance<br />
(Cf). To prevent the effects of this current, use single point grounding for the motor frame <strong>and</strong><br />
the servo amplifier ground. Use at least AWG18 wire (0.75mm 2 ) for grounding the motor.<br />
Grounding the wiring: If the motor is wired to a metal conduit or metal box, the metal must be<br />
grounded. Use single-point grounding.<br />
<br />
3.4.6 Short-circuit Breaker<br />
Due to the noise filter of the power input unit <strong>and</strong> the high-frequency switching noise of the PWM<br />
control, a high frequency leakage current may occur at the servo amplifier. If a short-circuit breaker is<br />
used to prevent malfunctions, use a high frequency leakage breaker.<br />
3.4.7 Motor <strong>and</strong> Encoder Wiring (CN 2,3)<br />
Connect the connectors of the encoder / motor cables (including the holding brake connections) to<br />
CN2, CN3 of the amplifier. The st<strong>and</strong>ard length of the motor / encoder cable is 0.5m. Use a relay cable to<br />
extend the wiring length, if necessary.<br />
* The encoder connector cable contains a motor overheating detection line. If an extension cable is<br />
used, this line must also be connected.<br />
* The holding brake is polarized. If an extension cable is used, verify the pin assignment (Section<br />
3.4.4) for correct polarization. The holding brake control function is built into the amplifier.<br />
3.4.8 Power Wiring<br />
Connect the AC power to Pin 1, 2 of CN4.<br />
The following table shows the power specifications:<br />
<br />
Motor Model PBM423 PBM603 PBM604 PBM861 PBM862<br />
Power voltage specification AC100V - 230V –15% to +10% 50/60Hz<br />
Current capacity (A rms) See Section 7.4<br />
* Pins 3 <strong>and</strong> 4 of CN4 are for connecting the regeneration unit, required if a regeneration error ALM<br />
occurs due to reasons such as moving a negative load. Normally, regenerative control is<br />
performed internally by the amplifier, so there is no need to connect an external unit.<br />
* Pins 4 <strong>and</strong> 5 of CN4 are the FG terminals. Use them when connecting to the motor case.<br />
(Use the M4 screw that was installed on the case as the amplifier ground terminal.)<br />
3-8
3. Installation, Wiring <strong>and</strong> Operation<br />
3.4.9 Control Input / Output Signal Wiring (CN1)<br />
Connect the user-selected control device. Refer to Section 4.1 for more information on this function.<br />
1) CN1 Input / Output Signal List<br />
Pin Signal Signal name<br />
Function summary<br />
Circuit<br />
No.<br />
(default value)<br />
1 Electric +COM External power (DC5V-24V) for the input signal -<br />
2 power -COM Output port common ground<br />
3 Input EXE Point/PRG execution number<br />
1<br />
4 Point1 Point/PRG No. selection signal 1<br />
5 Point2 Point/PRG No. selection signal 2<br />
6 (Point3)/IN1 Point/PRG No. selection signal 3/generic input 1<br />
7 (Point4)/IN2 Point/PRG No. selection signal 4/generic input 2<br />
8 (Point5)/IN3 Point/PRG No. selection signal 5/generic input 3<br />
9 (Point6)/SDN/IN4 Point/PRG No. selection signal 6/generic input 4<br />
10 STOP Emergency stop input (SOFF input)<br />
11 ALM CLR ALM cancel signal<br />
12<br />
(Point7)/IN5 Point/PRG No. selection signal 7/generic input 5<br />
13 Output Ack Response to the EXE signal<br />
2<br />
14 In-Position In-Position signal<br />
15 ALM ALM output<br />
16 (ZONE)/OUT1 ZONE/generic output 1<br />
17 (END)/OUT2 END/generic output 2<br />
18 (SON MON)/OUT3 SON MON/generic output 3<br />
19 OUT4 ZONE/generic output 4<br />
20<br />
OUT5 ZONE/generic output 5<br />
* The logic of the input/output signals can be selected remotely. Refer to Chapter 5 (comm<strong>and</strong><br />
16h) for more information about modifying the logic.<br />
* These functions can be selected remotely for IN1 - IN5, OUT1 - OUT<strong>5.</strong> Refer to Chapter 5<br />
(Comm<strong>and</strong> 16h) <strong>and</strong> Section 4.1 for more information.<br />
IN1 to IN5 functions<br />
OUT1 to OUT5 functions<br />
Point No. Zone Out 0 Zone Out 1 to 15<br />
Zero-return start END signal Zone No Bit 0<br />
Pause P.Busy Zone No Bit 1<br />
Interlock Zero-return completion monitor Zone No Bit 2<br />
SELECT SON monitor Zone No Bit 3<br />
Positive direction H. Limit Input pin monitor<br />
Negative direction H. Limit Generic output<br />
Generic input<br />
Motor stop<br />
3-9
3. Installation, Wiring <strong>and</strong> Operation<br />
Circuit<br />
Type<br />
1<br />
(Input)<br />
Circuit Structure<br />
DC Input Specifications<br />
DC 5V~24V ± 10%<br />
2<br />
(Output)<br />
DC 30V, maximum 30 mA<br />
3-10
3. Installation, Wiring <strong>and</strong> Operation<br />
3.4.10 Communications<br />
Amplifier side<br />
1<br />
2<br />
3<br />
4<br />
A<br />
B<br />
Y<br />
Z<br />
GND<br />
5<br />
10<br />
5G<br />
FG<br />
Note 1) If multiple amplifiers are daisy-chained, do not connect Pin 6 (VCC) of the communication<br />
cable between amplifiers.<br />
Note 2) If multiple amplifiers are daisy-chained, verify that the IP addresses that are set using the<br />
switches on the front panel of the amplifier are not overlapping.<br />
Note 3) If the VCC from Pin 6 of the communication connector is used for an external device, make<br />
sure that the total current drawn does not exceed 0.4 Arms.<br />
Note 4) Turn ON the terminating resistor after the amplifier that is the last node (by using the<br />
dip-switches). Refer to Section 4.2 for more information about these settings.<br />
RS-232/RS-485 Conversion<br />
Use a communication conversion unit if you are using the PB amplifier via RS-232C communication.<br />
The conversion unit is available as an optional product. Refer to Section 8.3 for more information.<br />
PC I/F<br />
Optional PC software is available for functions including operation verification for installation, point<br />
<strong>and</strong> program data editing / execution, <strong>and</strong> teaching functions. Contact <strong>Sanyo</strong> <strong>Denki</strong> for details<br />
regarding this software.<br />
<br />
3-11
4. Input / Output Signal <strong>Functions</strong><br />
4.1 Input / Output Control Signal <strong>Functions</strong> (CN1)<br />
4.1.1 Point Execution <strong>and</strong> Program Execution<br />
This function allows for I/O signal-controlled execution of a point or program previously stored in<br />
the amplifier’s internal non-volatile memory.<br />
Signal Name <strong>Functions</strong> Logic<br />
EXE<br />
Ack<br />
Point n<br />
SELECT<br />
P.Busy<br />
Switching the EXE signal OFF→ON starts the execution of the target<br />
specified by the SELECT signal <strong>and</strong> the point number<br />
Response signal for EXE<br />
If a non-executable comm<strong>and</strong> is specified, the system does not respond.<br />
* If no point data is stored, Ack does not respond.<br />
* NOP in a program is recognized as normal comm<strong>and</strong>.<br />
Selects the point number or program number<br />
* An input port with a function other than the point assigned is recognized<br />
as point number 0.<br />
* The maximum number of points is 128. The number of programs can be 1<br />
or 32,128, depending on the setting input by comm<strong>and</strong>1Bh.<br />
* Even if points or programs are started remotely via transmission, port<br />
settings are not affected.<br />
The EXE start-up target (point or program) can be selected.<br />
* The SELECT function is enabled when selected with comm<strong>and</strong> 16h.<br />
* Comm<strong>and</strong> 1Ch is used to select a point or program.<br />
This signal is ON during program execution, SOFF <strong>and</strong> Save to non-volatile<br />
memory.<br />
* Enabled if the P.Busy function was set with comm<strong>and</strong> 16h.<br />
ON Active<br />
ON Active<br />
ON=1<br />
OFF=0<br />
Selectable<br />
ON Active<br />
Timing Chart<br />
tDS<br />
SELECT<br />
Point / Prog. Data<br />
EXE Signal<br />
tDE<br />
tEB<br />
ON<br />
tEL<br />
tEA<br />
Ack Output<br />
ON<br />
Point data hold time: tDS<br />
EXE signal hold time: tEL<br />
EXE signal setup time: tDE<br />
Ack signal response delay time: tEA=tEB<br />
2ms min<br />
1ms min<br />
1ms min<br />
1ms max<br />
4-1
4. Input / Output Signal <strong>Functions</strong><br />
4.1.2 CN1 Input Signals<br />
1) Input Signals with Fixed <strong>Functions</strong> Allocated<br />
Signal<br />
Name<br />
STOP<br />
<strong>Functions</strong><br />
This is the emergency stop signal. If input occurs during drive operations, the motor<br />
decelerates at its maximum rate, <strong>and</strong> goes into the servo OFF state. After clearing the<br />
signal, once the motor is stopped <strong>and</strong> at least 200ms have elapsed, the servo will go into<br />
the ON state.<br />
Input during movement<br />
Logic (Initial<br />
setting)<br />
Selectable<br />
(A conn.<br />
: ON Active)<br />
STOP<br />
Active<br />
In-Position<br />
ON<br />
Velocity (operation)<br />
ALMCLR<br />
* Canceling the STOP signal is only possible after the motor has<br />
completely stopped <strong>and</strong> 300ms have elapsed.<br />
* When the STOP is cancelled, the interlock turns OFF, <strong>and</strong> if an ALM is<br />
not issued, automatically changes to servo ON status.<br />
* STOP signal cancel (detection of Active→Non-Active edge) cancels<br />
STOP comm<strong>and</strong>s set remotely via transmission as well.<br />
* Changing to STOP status can be initiated via transmission or the<br />
STOP input port.<br />
Alarm clear signal for alarms that can be cancelled.<br />
ALM issued during operation<br />
ALM<br />
Selectable<br />
(A conn.<br />
:ON Active)<br />
In-Position<br />
ON<br />
ALMCLR<br />
CLR<br />
Velocity (operation)<br />
* The ALM cancel is possible only after the motor has completely<br />
stopped <strong>and</strong> 300ms have elapsed.<br />
* The ALMCLR signal works with edge-detection.<br />
* To clear non-cancelable alarms, reset the system power or use the<br />
initialization comm<strong>and</strong>.<br />
4-2
4. Input / Output Signal <strong>Functions</strong><br />
2) Generic Input Signals<br />
The functions of the generic inputs (IN1 to IN5) on CN1, pins 6 to 9 <strong>and</strong> 12 can be selected using<br />
comm<strong>and</strong> 16h. Refer to Section 5 (comm<strong>and</strong> 16h) for more information.<br />
Selected<br />
Function<br />
Point<br />
Generic<br />
Input<br />
Pause<br />
Function<br />
Selects the point or program number. Refer to Section 4.4.1 for more<br />
information.<br />
Used for jump conditions (comm<strong>and</strong> 63h) during program operation.<br />
For temporary stoppage of operation<br />
If input during drive operations, the motor will decelerate <strong>and</strong> stop using<br />
the pre-set deceleration rate. The target position is maintained, <strong>and</strong><br />
when the signal is cancelled, movement to the target resumes.<br />
Logic (Initial<br />
setting)<br />
ON=1<br />
OFF=0<br />
ON=1<br />
OFF=0<br />
Selectable<br />
(A conn.<br />
:ON Active)<br />
Pause<br />
Velocity (operation)<br />
In-Position<br />
In-Position width<br />
Interlock<br />
* If the Pause comm<strong>and</strong> was input via transmission, canceling the<br />
pause input signal also cancels pause comm<strong>and</strong>s that were set via<br />
transmission as well.<br />
This is an operation stop signal that maintains servo ON status. The<br />
stop position becomes the target position.<br />
Interlock<br />
In-Position<br />
Velocity (operation)<br />
Selectable<br />
(A conn.<br />
:ON Active)<br />
* During interlock, move comm<strong>and</strong>s are not accepted. The transmission<br />
will generate a comm<strong>and</strong> error, <strong>and</strong> the EXE execution will not<br />
respond with Ack.<br />
* During interlock, initialization is not performed.<br />
* The interlock status is cancelled if the deceleration stop is complete<br />
<strong>and</strong> if the signal is OFF.<br />
* Interlock input cancel (detection of ON→OFF edge) cancels interlock<br />
comm<strong>and</strong>s set remotely via transmission as well.<br />
* This function is enabled by operating comm<strong>and</strong>s during program<br />
execution.<br />
4-3
4. Input / Output Signal <strong>Functions</strong><br />
Selected<br />
Function<br />
Zero-return<br />
start<br />
H. Limit<br />
(+/-)<br />
Function<br />
This is a unique execution signal for zero return comm<strong>and</strong>s stored by<br />
comm<strong>and</strong> 53h.<br />
The Ack signal responds to this signal.<br />
* If the zero-sensor (SDN) type zero-return start function is used, pin<br />
9 will be the zero-sensor input. Follow the instructions below to<br />
allocate the zero-sensor signal function using comm<strong>and</strong> 16h. Set<br />
comm<strong>and</strong> 14h, DAT4, Bit7 (SDN) = 0.<br />
a) If H. Limit <strong>and</strong> zero-sensor are shared, set the H. Limit function of the<br />
desired direction.<br />
b) If only the zero-sensor function is used, set the generic input port<br />
function.<br />
c) To use the zero-sensor (SDN) type zero-return function, set the<br />
desired function.<br />
It will be the hard limit signal input for each direction.<br />
After the limit input, the system performs a deceleration stop <strong>and</strong> the stop<br />
position becomes the target position. During the limit period, comm<strong>and</strong>s<br />
for the limit direction are disabled, but comm<strong>and</strong>s for the opposite limit<br />
direction are accepted.<br />
* The limit input is disabled during zero-return movement.<br />
* The limit direction is defined by the positive direction setting of<br />
comm<strong>and</strong> 12h.<br />
* Only NPN output-type limit sensors are supported.<br />
CN1<br />
1<br />
4.7kΩ<br />
Logic (Initial<br />
setting)<br />
A conn.<br />
Selectable<br />
(A conn.<br />
:ON Active)<br />
During drive:<br />
Limit<br />
In-Position<br />
Velocity (operation)<br />
4-4
4. Input / Output Signal <strong>Functions</strong><br />
4.1.3 Output Signal <strong>Functions</strong> (CN1)<br />
1) Input Signals with fixed functions allocated<br />
Signal Name Function Logic (Initial setting)<br />
Ack<br />
Response signal for EXE.<br />
Refer to Section 4.1.1 for more information.<br />
ON Active<br />
ALM This is the alarm output signal. Selectable<br />
(A conn.)<br />
In-Position<br />
Outputs the In-Position status. The In-Position width can be set by<br />
using comm<strong>and</strong> 30h.<br />
Selectable<br />
(ON=In-Position)<br />
Power input<br />
Initialization<br />
Operation<br />
In-Position<br />
In-Position width<br />
* During SOFF, this signal becomes the Out-Position status.<br />
* During Pause stop, signal this becomes the Out-Position status.<br />
* If the zero return is completed normally, the In-Position status is<br />
displayed.<br />
* During limit deceleration this signal is the Out-Position; during<br />
stop, it is the In-Position.<br />
* During push operations, this function determines the In-Position<br />
width for the push target position.<br />
* After the main circuit power is turned ON <strong>and</strong> during the<br />
amplifier’s internal power voltage detection process, this signal is<br />
in the In-Position state.<br />
* During an initialization stop, this signal goes into Out-Position<br />
status.<br />
4-5
4. Input / Output Signal <strong>Functions</strong><br />
2) Generic Output Signals<br />
The functions of the generic inputs (IN1 to IN5) on CN1, pins 16 to 20 can be selected using<br />
comm<strong>and</strong> 16h. Refer to Section 5 (comm<strong>and</strong> 16h) for more information.<br />
Selected<br />
Function<br />
ZONE<br />
Function<br />
Outputs the signal within the coordinate range pre-set by comm<strong>and</strong><br />
2Ah or 31h.<br />
As for the output form, two ways of choice equal to or less than by<br />
setting of comm<strong>and</strong> 16h is possible.<br />
Zone No: It is 1 for a Zone setting range it reply with 1.<br />
Zone No Bit: Output the Zone setting No in a binary.<br />
<br />
Zone setting range = x, y<br />
Logic (Initial<br />
setting)<br />
Selectable<br />
(A conn.)<br />
Operation<br />
Coordinates<br />
x<br />
y<br />
ZONE<br />
Motor<br />
Stop<br />
Zero-return<br />
* This output is independent of amplifier status; however, if a<br />
disconnection alarm is issued, the output status becomes<br />
uncertain.<br />
Outputs the operation complete status of the move comm<strong>and</strong>.<br />
* In the case of undershoot, such as for irregular deceleration;<br />
chattering may occur at the time of the motor stop signal.<br />
* Normally OFF in servo OFF status.<br />
* Does not respond to move comm<strong>and</strong>s less than 1.8 degrees in<br />
machine angles.<br />
Outputs the zero-return complete status.<br />
ON=In-drive<br />
OFF=Operation<br />
complete<br />
ON=Zero-return<br />
Completion<br />
Zero-return operation<br />
1st<br />
2nd<br />
complete<br />
Zero-return complete output<br />
P.Busy<br />
If another zero-return is started after a zero-return completed, this<br />
signal will turn OFF; when the second zero-return is completed<br />
normally, it will turn ON again.<br />
This signal is ON during program execution, SOFF <strong>and</strong> Save to<br />
non-volatile memory.<br />
* Refer to Section 4.1.1 for more information.<br />
ON Active<br />
4-6
4. Input / Output Signal <strong>Functions</strong><br />
Selected<br />
Function<br />
END<br />
Function<br />
The END signal responds only to operations initiated by the EXE<br />
signal.<br />
Abnormal completions, such as stopping by Pause, Limit, interlock,<br />
ALM, STOP, or unloaded push, will leave the signal in the OFF status.<br />
Use this signal to determine if the move comm<strong>and</strong> initiated by the EXE<br />
signal is completed normally.<br />
The move complete determination is based on the In-Position width as<br />
set by comm<strong>and</strong> 30h.<br />
Logic (Initial<br />
setting)<br />
ON=In-operation<br />
In-Position<br />
END signal<br />
SON signal<br />
Velocity (operation)<br />
In-Position<br />
setting<br />
SON<br />
Input<br />
Monitor<br />
Generic<br />
Output<br />
* The signal turns ON at the normal completion of the initialization.<br />
* In order to ensure the proper width of the END signal when<br />
executing short move comm<strong>and</strong>s, this signal turns ON only if the<br />
In-Position condition is fulfilled <strong>and</strong> the Ack output = LO.<br />
* The signal turns ON at the normal completion of a push operation.<br />
* Dribble during push operations (if pushed in the pushing direction<br />
after normal completion) is not observed. The signal stays ON if the<br />
push operation was completed once.<br />
Monitors the amplifier status. Monitors the servo ON/OFF status.<br />
* Refer to the Status change diagram in Section 4.5 regarding<br />
amplifier status.<br />
Monitors the status of an input port.<br />
The following table shows the output port monitor pins for the input port<br />
pins.<br />
Output port Pin 16 Pin 17 Pin 18 Pin 19 Pin 20<br />
Monitor pin Pin 6 Pin 7 Pin 8 Pin 9 Pin 12<br />
* The monitor output monitors the hardware status of the input port,<br />
regardless of the input port functions <strong>and</strong> the amplifier status.<br />
The output status is set by comm<strong>and</strong> 4Bh: Bit Out.<br />
If there is no generic output function selected, the corresponding bit<br />
settings in the Bit Out comm<strong>and</strong> are ignored.<br />
ON=SON status<br />
Input<br />
ON=Output ON<br />
-<br />
4-7
4. Input / Output Signal <strong>Functions</strong><br />
4.2 Switch Settings<br />
The following table describes the function of the switches located on the front panel of the<br />
amplifier.<br />
1) Rotary Switch (node address setting)<br />
Sets the node address when connecting multiple shafts.<br />
The address setting range is 0 to F (maximum 16 nodes).<br />
2) Dip-switches<br />
SW1<br />
Initial factory settings: All ON<br />
SW1<br />
No.<br />
Function<br />
Settings<br />
1,2 Transmission<br />
rate setting 2 1 Transmission<br />
rate (bps)<br />
ON ON 9600<br />
ON OFF 38400<br />
OFF ON 115200<br />
OFF OFF 128000<br />
SW1<br />
1 2 3 4 5 6<br />
3 to 6 - No function assigned<br />
ON<br />
OFF<br />
DIP SWITCHES<br />
SW2<br />
This switch sets the terminating resistor. Set SW1, 2 both ON at the last node.<br />
4.3 Display<br />
LED Color Description<br />
ALM Red Depending on the type of alarm, it is either continuously lit or<br />
flashing.<br />
Refer to Section 4.4, ALM <strong>Functions</strong>, for more information about the<br />
display status.<br />
POW Green Illuminated when the power is on.<br />
Goes dark when the amplifier internal charge voltage is below 50V.<br />
4-8
4. Input / Output Signal <strong>Functions</strong><br />
4.4 ALM Detection Function<br />
The ALM LED indicates the alarm type by the number of flashes.<br />
The ALM status <strong>and</strong> ALM history can be monitored via transmission (see Section 5, Comm<strong>and</strong> 86h).<br />
4.4.1 ALM Description Table<br />
Number of<br />
Abbreviation<br />
Code<br />
ALM Description<br />
Recoverability<br />
Flashes<br />
(hex)<br />
OFF No alarm 00 - -<br />
ON<br />
CPUE - CPU error Unrecoverable<br />
EEPER 10 Nonvolatile memory error Unrecoverable<br />
1<br />
DE 01 Sensor disconnected Unrecoverable<br />
LA 13 Sensor Counter error Unrecoverable<br />
2<br />
OV 02 Input power voltage is above<br />
the specification range<br />
MPE 03 Input power voltage is below<br />
the specification range<br />
Recoverable<br />
Recoverable<br />
3 RSTE 04 Initialization error (overload)<br />
Unrecoverable<br />
Power line disconnected<br />
4<br />
OVF 05 Servo error Recoverable<br />
OL 06 Overload stop Recoverable<br />
OS 07 Overspeed Recoverable<br />
5 RGOL 08 Regeneration voltage is over<br />
Recoverable<br />
the specified value<br />
6 ORG 09 Zero-return error Recoverable<br />
7<br />
Wrap around 0B<br />
Absolute position counter<br />
Recoverable<br />
sign reversal<br />
CNT OVF 0A Counter Over Flow Recoverable<br />
8 Push 0C Push Error Recoverable<br />
9<br />
MO OH 0E Motor overheat detection Recoverable<br />
AMP OH 0F Amplifier overheat detection Recoverable<br />
10 PAM 11 Internal voltage error Unrecoverable<br />
11 OC 1214 Overcurrent detection Unrecoverable<br />
* To cancel unrecoverable alarms, it is necessary to turn off the power, <strong>and</strong> then restart.<br />
4-9
4. Input / Output Signal <strong>Functions</strong><br />
4.4.2 ALM Conditions <strong>and</strong> Causes<br />
ALM Code ALM Description Condition / Cause<br />
CPU error Indicates a CPU error (W.D).<br />
Possible causes<br />
Problem with the amplifier internal control power.<br />
CPU malfunction due to excessive noise.<br />
01h Sensor<br />
disconnected<br />
Indicates the disconnection of the sensor A/B-phase.<br />
Possible causes<br />
Sensor line wiring problem.<br />
Error detected due to excessive noise on the sensor line.<br />
* Disconnection of the C-phase is detected during zero-return (at C-phase detection<br />
type) as a zero-return error.<br />
02h Over-voltage Indicates that the input power voltage is above the specification range.<br />
At power-up, the amplifier automatically recognizes 100/200V power voltage.<br />
After the voltage detection, over-voltage is determined based on the following values:<br />
100V input: approx. 138V AC<br />
200V input: approx. 275V AC<br />
* Not detected during servo ON.<br />
03h Under-voltage Indicates that the input power voltage is below the specification range.<br />
At power-up, the amplifier automatically recognizes 100/200V power voltage.<br />
After the voltage detection, under-voltage is determined based on the following values:<br />
100V input: approx. 75V AC<br />
200V input: approx. 148V AC<br />
* History record of under-voltage error detected during the amplifier’s internal voltage<br />
stabilization period when turning the power off is not recorded in the ALM history.<br />
The ALM history is saved if the voltage returns to normal after under-voltage<br />
detection due to instantaneous under-voltage.<br />
04h Initialization error After the power of the PB system is turned on, tit detects the initial phase, initializes the<br />
internal counter, <strong>and</strong> switches to servo ON status. If the sensor initial phase cannot be<br />
detected correctly, it results in an ALM condition.<br />
Possible causes<br />
Sensor C-phase disconnection.<br />
The load reached the mechanical limit.<br />
Load is out of tolerance range (excessive load).<br />
* If there is an ALM or STOP status after the power is turned ON, the process will not be<br />
executed.<br />
* Refer to Section 7.2 for more information about load tolerance.<br />
4-10
4. Input / Output Signal <strong>Functions</strong><br />
ALM Code ALM Description Condition / cause<br />
05h Servo error Detects an ALM if the position deviation is over the value set by comm<strong>and</strong> 14h.<br />
Possible causes<br />
Delay due to excessive acceleration / deceleration.<br />
Delay due to excessive load.<br />
06h Overload stop Indicates that before reaching the target position, the load was inoperative for a certain time.<br />
The detection time for inoperative status can be set using comm<strong>and</strong> 14h.<br />
Possible causes<br />
The load reached the mechanical limit.<br />
Load is out of tolerance range (excessive load).<br />
07h Velocity error Indicates a velocity error.<br />
Possible causes<br />
Overshoot due to unreasonable acceleration / deceleration.<br />
Overshoot due to excessive load.<br />
08h Regeneration<br />
error<br />
Indicates a motor regeneration voltage error.<br />
Possible causes<br />
Abrupt deceleration due to excessive load.<br />
Stationary drive of excessive negative load.<br />
* The PB amplifier has a st<strong>and</strong>ard internal regenerative control function used during<br />
deceleration. Contact Sano <strong>Denki</strong> for assistance if this function is not sufficient for<br />
regenerative control.<br />
09h Zero-return<br />
error<br />
When using zero-return Type 0,1,3 (C-phase detection zero-return):<br />
Indicates that the C-phase could not be detected within one rotation of the motor shaft.<br />
When using zero-return Type 2,3 (Push zero-return):<br />
Indicates that the collision drive was incomplete within the travel distance range set by<br />
comm<strong>and</strong> E3h.<br />
Possible causes<br />
Coupling slippage.<br />
Sensor C-phase signal disconnection.<br />
Comm<strong>and</strong> E3h setting value inappropriate.<br />
0Ah Counter<br />
Overflow<br />
Remain Pulse Counter Overflow<br />
Possible causes<br />
An additional timing of a movement order is non-appropriate<br />
0Bh Absolute position<br />
sign reversal<br />
Indicates the sign reversal of the absolute position counter inside the amplifier.<br />
Comm<strong>and</strong> 14h can be used to enable or disable detection of this condition.<br />
Possible causes<br />
Detection is enabled during a drive using single rotational direction only.<br />
4-11
4. Input / Output Signal <strong>Functions</strong><br />
ALM Code ALM Description Condition / cause<br />
0Ch Push Error When hard stop occurred, at the time of imposition movement, it is detected. ALM is detected<br />
in the case of CMD14h-DAT4-Bit1 =0.<br />
Possible causes<br />
Setting value of an imposition push current limit is unreasonable<br />
Push travel distance is excessive<br />
0Eh<br />
Motor<br />
overheating<br />
Detects the ambient temperature near the motor’s internal encoder.<br />
The continuous operational area of the motor is limited by heat dissipation <strong>and</strong> drive<br />
conditions.<br />
Possible causes<br />
Insufficient radiation, excessive ambient temperature.<br />
Continuous drive of a momentary operational area.<br />
0Fh Amplifier<br />
overheat<br />
Indicates that the amplifier is overheated.<br />
At certain tines, the amplifier cannot be used for continuous operation, due to heat dissipation<br />
<strong>and</strong> drive conditions.<br />
Possible causes<br />
Insufficient radiation, excessive ambient temperature.<br />
Continuous drive of a momentary operational area.<br />
10h Memory error Indicates a nonvolatile memory data error.<br />
Possible causes<br />
Power interruption during writing to the nonvolatile memory.<br />
Data writing error due to excessive noise.<br />
* After detecting the memory error, the parameters are reset to the initial factory settings.<br />
11h Internal voltage<br />
error<br />
Indicates a problem with the motor applied voltage inside the amplifier.<br />
Possible causes<br />
Insufficient power capacity (refer to Section 7.4 for more information about<br />
consumption current).<br />
Amplifier damage.<br />
12h/14h Over-current Indicates an over-current due to a short circuit on the power line. After detection, the motor<br />
enters into the unexcited state. 12hHard Ware detect14hSoft Ware Detect<br />
Possible causes<br />
Short circuit on the motor line.<br />
Short circuit on the regenerative connection.<br />
Amplifier damage.<br />
13h Sensor Counter<br />
error<br />
Indicates a misalignment of the sensor A/B-phase.<br />
Possible causes<br />
Sensor phase misalignment.<br />
* If this error occurs, motor replacement is necessary.<br />
4-12
4. Input / Output Signal <strong>Functions</strong><br />
4.5 Amplifier Status Change Diagram<br />
Main power ON<br />
Reset incomplete<br />
Reset operation<br />
Servo OFF Status<br />
Reset complete<br />
Idle (Stop status)<br />
Servo ON Status<br />
In-Position operation<br />
Zero-return operation<br />
Cancel<br />
Power Limit 3<br />
Velocity 0<br />
Fixed excitation<br />
STOP<br />
ALM<br />
CLR<br />
Power<br />
Limit 3<br />
Recoverable alarm<br />
Fixed<br />
excitation<br />
Unrecoverable alarm<br />
Power<br />
Limit 3<br />
Fixed<br />
excitation<br />
Alarm status<br />
(1) The reset operation is automatically initiated when the amplifier detects that the power of the<br />
main circuit is within the specified voltage range. After initialization is complete, the status<br />
automatically changes to “Servo ON". If the reset operation is completed once, the<br />
initialization will not be performed. Use the STOP signal to maintain "Servo OFF” status.<br />
(2) If a STOP or alarm occurs, the motor decelerates with fixed excitation until it is stopped. After<br />
the motor stops, the excitation current selected for Power Limit 3 is applied.<br />
4-13
4. Input / Output Signal <strong>Functions</strong><br />
4.6 Adjustments<br />
4.6.1 Comm<strong>and</strong> 21h<br />
Adjustments can be made to the proportional gain <strong>and</strong> the integral gain of the velocity loop from<br />
16 levels of normalized settings.<br />
The proportional gain is set based on the SW setting value, <strong>and</strong> increased gradually.<br />
The integral gain is selected from 3 levels.<br />
The setting values for the Gain Table are shown below:<br />
SW Setting<br />
Proportional<br />
Integral Gain<br />
SW Setting<br />
Proportional<br />
Integral Gain<br />
Value<br />
Gain<br />
Value<br />
Gain<br />
0 4 1 8 20 20<br />
1 6 10 9 22 1<br />
2 8 20 A 24 10<br />
3 10 1 B 26 20<br />
4 12 10 C 28 1<br />
5 14 20 D 30 10<br />
6 16 1 E 32 20<br />
7 18 10 F 34 1<br />
Adjustment method<br />
<strong>Inc</strong>rease the level gradually (0h→3h→6h→...), as long as there is no oscillation in the motor or<br />
the load, <strong>and</strong> select the proportional gain. As the level increases, the gain also increases, <strong>and</strong><br />
the velocity waveform changes as shown below. By increasing the proportional gain as much<br />
as possible without oscillation, high response can be achieved.<br />
Low proportional gain<br />
High proportional gain<br />
Next, select the integral gain (time constant), while checking the load response <strong>and</strong> the<br />
In-Position status. As for the integral, the time fixed number becomes big as raise the<br />
numerical value.<br />
4.6.2 Comm<strong>and</strong> 2Fh<br />
Comm<strong>and</strong> 2Fh can coordinate proportional <strong>and</strong> integral gain individually.<br />
When a fine adjustment of gain setting is necessary, please use this.<br />
* Proportional Gain: Please do not set 0.<br />
* Integral Gain: When set the 0, it does not arrive at order speed.<br />
4-14
<strong>5.</strong> <strong>Comm<strong>and</strong>s</strong> <strong>and</strong> <strong>Functions</strong><br />
<strong>5.</strong> <strong>Comm<strong>and</strong>s</strong><br />
<strong>5.</strong>1 Comm<strong>and</strong> Structure<br />
1) System <strong>Comm<strong>and</strong>s</strong><br />
System comm<strong>and</strong>s configure data save / load operations <strong>and</strong> the amplifier operating conditions.<br />
Confirm that the software switches (11h) <strong>and</strong> the input/output port functions (16h) are configured<br />
before installing the amplifier.<br />
* System comm<strong>and</strong>s cannot be used with points <strong>and</strong> within programs.<br />
2) Direct <strong>Comm<strong>and</strong>s</strong><br />
Direct comm<strong>and</strong>s configure motor operation <strong>and</strong> adjustment functions related to the operation.<br />
All direct comm<strong>and</strong>s can be used with points.<br />
They can also be used in programs, except for the following:<br />
Function<br />
Unuseable Comm<strong>and</strong> Codes<br />
Comm<strong>and</strong> Code<br />
3Bh, 3Dh, 4Ah, 4Ch<br />
3) Point Storing <strong>and</strong> Program <strong>Comm<strong>and</strong>s</strong><br />
These comm<strong>and</strong>s are related to point <strong>and</strong> program functions.<br />
4) RD <strong>Comm<strong>and</strong>s</strong><br />
Reads the configured value of direct comm<strong>and</strong>s, point <strong>and</strong> program data, <strong>and</strong> the amplifier<br />
status.<br />
* Acceptance of these comm<strong>and</strong>s depends on the amplifier status. Refer to the<br />
Amplifier status change diagramChapter4.5, for more information.<br />
5-1
<strong>5.</strong> <strong>Comm<strong>and</strong>s</strong> <strong>and</strong> <strong>Functions</strong><br />
<strong>5.</strong>2 Comm<strong>and</strong> List<br />
1) System comm<strong>and</strong>s<br />
1-1Memory Access<br />
Comm<strong>and</strong> Comm<strong>and</strong> Name Function Initial Value<br />
1 Initialization Initializes the CPU to the power ON state. -<br />
2 Parameter CLR Clears the parameters <strong>and</strong> resets them to their factory<br />
-<br />
settings.<br />
3 Parameter Save Saves the edited parameters to non-volatile memory. -<br />
4 Parameter Load Loads the data from non-volatile memory to RAM. -<br />
5 Point CLR Clears point s <strong>and</strong> proglam data. -<br />
6 ALM history CLR Clears the ALM history. -<br />
<br />
Comm<strong>and</strong> Comm<strong>and</strong> Name Function Initial Value<br />
16 (10h) Response time Sets the response time of communication. 500μs<br />
17 (11h) Software switch Sets the motor model <strong>and</strong> the resolution.<br />
PBM423, 2000P/R<br />
18 (12h) Positive direction<br />
definition<br />
* If the connected motor depends on the initial<br />
value, configure it before installing the amplifier.<br />
Sets the positive direction.<br />
Positive direction=CCW<br />
19(13h)<br />
initialization<br />
Sets the initialization movement direction.<br />
0CW<br />
movement direction<br />
20 (14h) ALM detection<br />
condition<br />
22 (16h) Input/output port<br />
function<br />
24 (18h) Excessive deviation<br />
during push<br />
Enables or disables the overload stop, servo error<br />
detection threshold <strong>and</strong> ALM detection functions.<br />
Sets the logic <strong>and</strong> function of the input / output signals.<br />
* If necessary, modify the initial values for the<br />
application before installing the amplifier.<br />
Sets the threshold for detecting a deviation error due to<br />
pushback during push operations.<br />
Overload stop=8s<br />
Servo error=3 rotations<br />
All A conn.<br />
Input: Point<br />
Output: Zone, END,<br />
SON, Out n<br />
3 rotations<br />
27 (1Bh) Number of programs Selects the number of programs as follows.<br />
1 PRG x 1024 lines128 PRG x 8 lines<br />
1 PRG x 1024 lines<br />
28 (1Bh) Execution target<br />
selection<br />
32PRG32lines<br />
Selects the EXE signal execution target to point or<br />
program when not using the SELECT signal function.<br />
Point<br />
30(1Eh Move Enable Selects the Enable or disables of movement before<br />
0Enable<br />
origin return.<br />
31 (1Fh) User memory Provides 8 bytes of memory for the user. 0 (8bytes)<br />
5-2
<strong>5.</strong> <strong>Comm<strong>and</strong>s</strong> <strong>and</strong> <strong>Functions</strong><br />
2) Direct comm<strong>and</strong>s<br />
2-1Adjust Comm<strong>and</strong><br />
Comm<strong>and</strong> Comm<strong>and</strong> Name Function Initial Value<br />
32 (20h) Power Limit Sets the current limit value based on the following conditions:<br />
used for Torque limit or Power Down.<br />
DAT1: Current limit for SON stop. (Upper limit 7Fh=50%)<br />
DAT2: Current limit during motion (Upper limit FFh=100%)<br />
DAT3: Current limit for SOFF. (Upper limit 7Fh=50%)<br />
33 (21h) Gain parameter 1 Sets the normalized servo parameter.<br />
7Fh<br />
FFh<br />
7Fh<br />
0<br />
For maximum performance for a given load <strong>and</strong><br />
operation conditions, it is necessary to adjust this<br />
parameter.<br />
47(2Fh) Gain parameter 1 Set the proportion / an integral calculus gain individually. 4,4,0<br />
36 (24h) Correction coefficient This is an adjustment parameter for soft l<strong>and</strong>ing. Amplifier specified<br />
value<br />
39(27h) Current offset An adjustment comm<strong>and</strong> when vibration at the time of a stop<br />
0064h<br />
<br />
<br />
was caused.<br />
0<br />
Comm<strong>and</strong> Comm<strong>and</strong> Name Function Initial Value<br />
42(2Bh) ZONE2 Sets the coordinate range for ZONE output.16 area ALL 0<br />
49 (31h) ZONE1 Sets the coordinate range for ZONE output. 1 area 00<br />
Modulo function<br />
Comm<strong>and</strong> Comm<strong>and</strong> Name Function Initial Value<br />
43 (2Bh) Modulo<br />
enabled/disabled<br />
Enables or disables the modulo function (coordinate range<br />
adjustment function). This function is effective for indexing<br />
applications.<br />
Disabled<br />
44 (2Ch) Modulo value Sets the modulo pulse number per rotation. 1 rotation<br />
45 (2Dh) Modulo rotational<br />
Sets the rotational direction for the modulo function.<br />
Shortcut<br />
<br />
direction<br />
Comm<strong>and</strong> Comm<strong>and</strong> Name Function Initial Value<br />
50 (32h) Positive direction soft<br />
limit<br />
51 (33h) Negative direction soft<br />
Sets the soft limit for the positive direction.<br />
Sets the soft limit for the negative direction.<br />
Upper limit<br />
coordinates<br />
Upper limit<br />
<br />
limit<br />
coordinates<br />
5-3
<strong>5.</strong> <strong>Comm<strong>and</strong>s</strong> <strong>and</strong> <strong>Functions</strong><br />
<br />
Push condition<br />
Comm<strong>and</strong> Comm<strong>and</strong> Name Function Initial Value<br />
37 (25h) Push<br />
determination time<br />
Sets the determination time for push completion.<br />
150ms<br />
38 (26h) Push velocity Sets the push velocity of a push operation. 40min -1<br />
<br />
Comm<strong>and</strong> Comm<strong>and</strong> Name Function Initial Value<br />
35 (23h) Maximum travel<br />
distance during<br />
zero-return<br />
Sets the maximum travel distance for push operation <strong>and</strong><br />
SDN zero-return. If there is no normal completion within the<br />
specified range, a zero-return error is generated.<br />
Maximum<br />
48 (30h) In-position width Sets the in-position width. The in-position output signal is<br />
Ah (1. 8 degrees)<br />
based on the position deviation value set here.<br />
52 (34h) Counter preset Presets the absolute position counter inside the amplifier. -<br />
2-3Move<br />
Comm<strong>and</strong> Comm<strong>and</strong> Name Function Initial Value<br />
54 (36h) Velocity Specifies the velocity for comm<strong>and</strong>s 38h <strong>and</strong> 3Ah (move comm<strong>and</strong>:<br />
40min -1<br />
55 (37h) Acceleration /<br />
deceleration rate<br />
56 (38h) <strong>Inc</strong>remental move<br />
comm<strong>and</strong><br />
58 (3Ah) Absolute position<br />
move comm<strong>and</strong><br />
travel distance only), or modifies the velocity during operation.<br />
Specifies the acceleration / deceleration rate for comm<strong>and</strong>s 38h <strong>and</strong><br />
3Ah (move comm<strong>and</strong>: travel distance only), or modifies the<br />
acceleration / deceleration rate during operation.<br />
Initiates an incremental position move.<br />
The comm<strong>and</strong> data specifies only the travel distance.<br />
Initiates an absolute position move.<br />
The comm<strong>and</strong> data specifies only the absolute position.<br />
1min -1 /ms<br />
1min -1 /ms<br />
-<br />
-<br />
62 (3Eh) Slow move comm<strong>and</strong> Specifies a slow move comm<strong>and</strong> using the Open control. -<br />
64 (40h) SCAN operation Initiates continuous rotation. -<br />
65 (41h) SCAN stop Specifies the stop of a continuous rotation. -<br />
66 (42h) <strong>Inc</strong>remental move<br />
comm<strong>and</strong><br />
68 (44h) Absolute move<br />
comm<strong>and</strong><br />
Specifies the velocity, acceleration / deceleration rate, or an<br />
incremental move with push condition.<br />
Specifies the velocity, acceleration / deceleration rate, or an absolute<br />
move with push condition.<br />
-<br />
-<br />
69 (45h) Zero-return Initiates zero-return.<br />
-<br />
* If the input function of the CN1 port is allocated to zero-return start,<br />
then the zero-return operation is set by 53h.<br />
* The zero-return of this comm<strong>and</strong> can be used if it is allocated to a<br />
<br />
direct operation or a point via communication.<br />
5-4
<strong>5.</strong> <strong>Comm<strong>and</strong>s</strong> <strong>and</strong> <strong>Functions</strong><br />
<br />
Comm<strong>and</strong> Comm<strong>and</strong> Name Function Initial Value<br />
53 (35h) Brake Enable Specifies holding brake engage / release when the servo is OFF. -<br />
71 (47h) Deviation clear Initiates deviation clear. The position at the time of receiving this<br />
-<br />
comm<strong>and</strong> will become the target position.<br />
72 (48h) Pause Initiates a Pause (temporary stop). The target position is maintained,<br />
-<br />
<strong>and</strong> when the signal is cancelled, the movement to the target<br />
continues.<br />
73 (49h) Pause clear Cancels the pause signal. Starts movement to the target position. -<br />
74 (4Ah) Alarm clear Specifies the clearing of alarms that may be cancelled. -<br />
75 (4Bh) Bit OUT Controls the output function when the generic output is used for<br />
-<br />
output port functions.<br />
76 (4Ch) STOP comm<strong>and</strong> <strong>Comm<strong>and</strong>s</strong> a STOP. Moves to SOFF state. -<br />
77 (4Dh) STOP clear Clears the STOP status. Moves to SON state. -<br />
78 (4Eh) Interlock Keeps the SON status, <strong>and</strong> stops. -<br />
79 (4Eh) Interlock clear Clears the interlock status. -<br />
5-5
<strong>5.</strong> <strong>Comm<strong>and</strong>s</strong> <strong>and</strong> <strong>Functions</strong><br />
3) Point <strong>and</strong> program comm<strong>and</strong>s<br />
3-1 Store <strong>and</strong> start comm<strong>and</strong>s<br />
Comm<strong>and</strong> Comm<strong>and</strong> Name Function<br />
80 (50h) Remote start Remotely starts a previously stored point or program. First use 55h to<br />
specify the start target.<br />
81 (51h) STEP operation Specifies STEP operation of the program.<br />
82 (52h) Program stop Stops the program.<br />
83 (53h) Zero-return store Stores the zero-return operation of the zero-return start that is allocated<br />
to the CN1 input port function.<br />
84 (54h) Zero-return start Remotely starts the zero-return operation that was stored using 52h, via<br />
communication.<br />
85 (55h) Remote start target Sets the target for remote start by 50h.<br />
86 (56h) Point store This comm<strong>and</strong> stores the point data.<br />
87 (57h) PRG store This comm<strong>and</strong> stores the program data.<br />
3-2Program comm<strong>and</strong>s<br />
Comm<strong>and</strong> Comm<strong>and</strong> Name Function<br />
96 (60h) Program END Ends the program.<br />
97 (61h) Timer Wait Sets the delay timer.<br />
98 (62h) In-Position JMP Jump comm<strong>and</strong> based on in-position status.<br />
99 (63h) In-Port JMP Jump comm<strong>and</strong> based on input port status.<br />
100 (64h) ZONE JMP Jump comm<strong>and</strong> based on ZONE status.<br />
101 (65h) Position JMP Jump comm<strong>and</strong> based on absolute position status.<br />
102 (66h) Unconditional JMP Unconditional jump comm<strong>and</strong>.<br />
103 (67h) Motor stop JMP Jump comm<strong>and</strong> based on motor stop status.<br />
106 (6Ah) FOR Sets the loop counter; nested structures are possible.<br />
107 (6Bh) NEXT Returns to the loop counter.<br />
108 (6Ch) Gosub Calls a subroutine.<br />
109 (6Ch) Return Returns from the subroutine.<br />
5-6
<strong>5.</strong> <strong>Comm<strong>and</strong>s</strong> <strong>and</strong> <strong>Functions</strong><br />
4) RD comm<strong>and</strong>s<br />
Comm<strong>and</strong> Comm<strong>and</strong> Name Function<br />
128 (80h) Parameter RD Reads a direct comm<strong>and</strong>.<br />
129 (81h) Point data RD Reads the point data.<br />
130 (82h) Program data RD Reads the program data.<br />
131 (83h) Amplifier status RD Monitors the amplifier status <strong>and</strong> the input / output status.<br />
132 (84h) Absolute position RD Monitors the absolute position counter.<br />
133 (85h) Velocity monitor Monitors the current velocity.<br />
134 (86h) ALM monitor Reads the alarm history.<br />
135 (87h) Communication error Reads the communication error history.<br />
137 (89h) Software REV Reads the software revision.<br />
138 (8Ah) Program stop line Reads the line number where the program stopped.<br />
140 (8Ch) Loop counter read Reads the current value of the loop counter associated with the For<br />
/ NEXT comm<strong>and</strong> in the program.<br />
143 (8Fh) Operation complete<br />
cause read<br />
Reads the motor stop cause.<br />
5-7
<strong>5.</strong> <strong>Comm<strong>and</strong>s</strong> <strong>and</strong> <strong>Functions</strong><br />
Comm<strong>and</strong> Code:01h<br />
Data Length:0 bytes<br />
Initialization<br />
Initializes the amplifier status to power-up status. ROM parameters are loaded to RAM.<br />
Comm<strong>and</strong> Code:02h<br />
Data Length:0 bytes<br />
Parameter Clear<br />
Resets RAM parameters to their factory settings. (To clear point or program data, use 05h.)<br />
* When resetting the ROM parameters, use the parameter Save comm<strong>and</strong> (03h) after the P. CLR<br />
comm<strong>and</strong>.<br />
Comm<strong>and</strong> Code:03h<br />
Data Length:0 bytes<br />
Parameter Save<br />
Saves RAM parameters to the ROM.<br />
* If a reset is performed without saving the parameters, the values will be lost.<br />
Comm<strong>and</strong> Code:04h<br />
Data Length:0 bytes<br />
Parameter load<br />
Loads the ROM parameters to RAM.<br />
* The same operation is performed at power-up <strong>and</strong> when using the initialization comm<strong>and</strong>.<br />
Comm<strong>and</strong> Code:05h<br />
Point or Program Clear<br />
Immediately clears all point <strong>and</strong> program data.<br />
Data Length:0 bytes<br />
Comm<strong>and</strong> Code:06h<br />
ALM History Clear<br />
Clears the alarm history.<br />
Data Length:0 bytes<br />
5-9
<strong>5.</strong> <strong>Comm<strong>and</strong>s</strong> <strong>and</strong> <strong>Functions</strong><br />
<strong>5.</strong>3.2 Initial Setting Comm<strong>and</strong><br />
Comm<strong>and</strong> Code: 16 (10h)<br />
Data Length: 1 byte<br />
Response Time<br />
DAT No Contents Setting range Setting unit Initial Value<br />
DAT1 Response Time n= 0 to 7 T1500μsec×2 n T22×T1 T32×T2 0<br />
Sets the amplifier status response time. The setting will be valid beginning with the response to this<br />
comm<strong>and</strong>.<br />
* If 0 is specified, the response will be the status immediately after receiving the comm<strong>and</strong>. Certain<br />
cases exist when the amplifier status is not reflected in the response data.<br />
* If a value other than 0 is received, the response will be the amplifier status as a result of the received<br />
data.<br />
* See Chapter 6, Communication Timing Chart, for more information.<br />
Comm<strong>and</strong> Code: 17 (11h)<br />
Data Length: 4 bytes<br />
Software Switch<br />
DAT No Contents Setting range Setting unit Initial Value<br />
DAT1 motor type <strong>and</strong> the resolution Cf. list shown below 10h<br />
DAT3 to 4 <br />
<br />
<br />
<br />
Sets the motor type <strong>and</strong> the resolution.<br />
(2) Resolution<br />
(1)<br />
Motor model<br />
Bit5 Bit4 Bit3<br />
(P/R) Bit2 Bit1 Bit0<br />
0 0 0 500 0 0 0 PBM423<br />
0 0 1 1000 0 0 1 PBM603<br />
0 1 0 2000 0 1 0 PBM604<br />
0 1 1 4000 0 1 1 PBM861<br />
1 0 0 5000 1 0 0 PBM862<br />
1 0 1 10000 1 0 1 Setting prohibited<br />
1 1 0 Setting prohibited 1 1 0 Setting prohibited<br />
1 1 1 Setting prohibited 1 1 1 Setting prohibited<br />
* Before installing the amplifier, always verify the motor model number, <strong>and</strong> set parameters accordingly.<br />
Comm<strong>and</strong> Code: 18 (12h)<br />
Data Length: 1 byte<br />
Rotational Direction Definition<br />
DAT No Contents Setting range Setting unit Initial Value<br />
DAT1 Rotational Direction Definition 0,1 0 (Pos. direction = CW) 1CCW<br />
1 (Pos. direction=CCW)<br />
Defines the positive direction (when viewed from the surface where the motor was installed).<br />
The sign of an incremental move comm<strong>and</strong> is “+” for positive direction, <strong>and</strong> “-“ for negative direction.<br />
<br />
Comm<strong>and</strong> Code: 19 (13h)<br />
Data Length: 1 byte<br />
Initial movement direction<br />
DAT No Contents Setting range Setting unit Initial Value<br />
DAT1 Initial movement direction 0,1 0 (Pos. direction = CW) 0CW<br />
1 (Pos. direction=CCW)<br />
Set the initialization movement direction after power supply injection.<br />
Greatest 1.8 degrees usually move from an default excitation state after power supply injection in<br />
a motor axis.<br />
<br />
5-10
<strong>5.</strong> <strong>Comm<strong>and</strong>s</strong> <strong>and</strong> <strong>Functions</strong><br />
Comm<strong>and</strong> Code: 20 (14h)<br />
Data Length: 4 bytes<br />
ALM Detection Condition<br />
DAT No Contents Setting range Setting unit Initial Value<br />
DAT1 Overload stop time 1 to Ch 1s 8<br />
DAT2, 3 Excessive deviation value 1 to FFFFh 1PLS (equivalent of 2000P/R) 1770h<br />
DAT4<br />
Enables or disables the<br />
optional Alarm <strong>and</strong> Limit<br />
functions.<br />
0 to FFh 0=Detection allowed (enabled)<br />
1=Detection prohibited (disabled)<br />
Sets the enable, disable <strong>and</strong> detection conditions for the ALM detection <strong>and</strong> Limit functions.<br />
DAT1: Sets the detection time for overload stop (stop before reaching the target position).<br />
DAT2, DAT3: Sets the servo error detection condition (enabled if DAT4, Bit 2=0).<br />
DAT4: Enables or disables the optional Alarm <strong>and</strong> Limit functions.<br />
DATA NO Bit7 Bit6 Bit5 Bit4 Bit3 Bit2 Bit1 Bit0<br />
DAT4 SDN * * SL- SL+ SE Push Wrap<br />
WRAP: Enables or disables ALM detection for Wrap Around (coordinate sign reversal).<br />
Select “1” to enable continuous operation in the same direction.<br />
Push: Enables or disables alarm detection for an unloaded push (when the target position set by the<br />
movement distance is reached during the push operation).<br />
SE: Enables or disables the detection of a servo error in the case of excessive deviation. If enabled, the<br />
detection conditions set in DAT2, 3 are used.<br />
SL+: Enables or disables the Positive Soft Limit function set by comm<strong>and</strong> 32h.<br />
SL-: Enables or disables the Negative Soft Limit function set by comm<strong>and</strong> 33h.<br />
SDN: Set to enable (0) if the zero-return sensor signal is input at CN1, pin 9.<br />
*If an external sensor detection-type zero-return is started, the external sensor input on CN1 pin 9<br />
will be interpreted as the zero-return sensor signal, regardless of the function setting status<br />
(comm<strong>and</strong> 16h, DAT6) of that pin.<br />
* Overload stop ALM is not detected during push operation.<br />
81h<br />
5-11
<strong>5.</strong> <strong>Comm<strong>and</strong>s</strong> <strong>and</strong> <strong>Functions</strong><br />
Comm<strong>and</strong> Code:22 (16h)<br />
Data Length:12 (d) bytes<br />
Input / Output Port Function RevBadd Output Function 8 to 22<br />
DAT No Contents Setting range Setting unit Initial Value<br />
DAT1 Input logic See below 0=A conn. (ON Active) 1=B conn. 0<br />
DAT2 Output logic See below 0=A conn. (ON Active) 1=B conn. 0<br />
DAT3 Pin 6 input function 0 to 7 See Table 1 0(Point3)<br />
DAT4 Pin 7 input function 0 to 7 See Table 1 0(Point4)<br />
DAT5 Pin 8 input function 0 to 7 See Table 1 0(Point5)<br />
DAT6 Pin 9 input function 0 to 7 See Table 1 0(Point6)<br />
DAT7 Pin 12 input function 0 to 7 See Table 1 0(Point7)<br />
DAT8 Pin 16 output function 0 to 26 See Table 2 0(ZONE0)<br />
DAT9 Pin 17 output function 0 to 26 See Table 2 1(END)<br />
DAT10 Pin 18 output function 0 to 26 See Table 2 4(SON MON)<br />
DAT11 Pin 19 output function 0 to 26 See Table 2 6Generic output<br />
DAT12 Pin 20 output function 0 to 26 See Table 2 6Generic output<br />
Sets the input/output signal logic of CN1, <strong>and</strong> selects the function of the generic input/output signals.<br />
Refer to Chapter 4 for more information about the input/output port functions.<br />
DATA NO Function Bit7 Bit6 Bit5 Bit4 Bit3 Bit2 Bit1 Bit0<br />
DAT1 Input logic ALM CLR STOP SELECT INT Pause * HL- HL+<br />
DAT2 Output logic * * * * * ZONE ALM In-Pos<br />
Table 1: Input Port <strong>Functions</strong><br />
Table 2: Output Port <strong>Functions</strong><br />
Setting data Function Setting data Function Setting data Function<br />
0 Note 2) Point No. 0 Note 5) ZONE Out 0 8 to 22 Note 5) ZONE Out 1 to 15<br />
1 Note 3) Zero-return start 1 END signal 23 Note 5) Zone No Bit 0<br />
2 Pause 2 P. Busy 24 Note 5) Zone No Bit 1<br />
3 Interlock 3 Zero-return completion monitor 25 Note 5) Zone No Bit 2<br />
4 SELECT 4 SON monitor 26 Note 5) Zone No Bit 3<br />
5 Positive direction H. Limit 5 Note 4) Input pin monitor<br />
6 Negative direction H. Limit 6 Generic output<br />
7 Generic input 7 Motor stop<br />
5-12
<strong>5.</strong> <strong>Comm<strong>and</strong>s</strong> <strong>and</strong> <strong>Functions</strong><br />
Note 1) If the zero-sensor (SDN) type zero-return start function is used, pin 9 will be the zero-sensor<br />
input. Follow the instructions below to allocate the zero-sensor signal function.<br />
Set comm<strong>and</strong> 14h, DAT4, Bit7 (SDN) = 0 to use pin 9 as the zero-sensor input.<br />
a) If the H. Limit <strong>and</strong> zero-sensor are shared: set the H. Limit function of the desired direction.<br />
b) If only the zero-sensor function is used: set the generic input port function.<br />
c) If you want to use the zero-sensor (SDN) type zero-return function: set the desired function.<br />
Note 2) If the point input was selected, see the table below for the point bit number of each input pin.<br />
Input port Pin 6 Pin 7 Pin 8 Pin 9 Pin 12<br />
Point Bit No Point3 Point4 Point5 Point6 Point7<br />
* Input ports with settings other than point functions will be interpreted as point or program bit = 0.<br />
Example: Pin 6 = Generic input, Pin 7 = Point4 (Point1, 2=0 (OFF))<br />
Point1<br />
(Pin 4)<br />
Point2<br />
(Pin 5)<br />
(Pin 6) (Pin 7) Point No<br />
0 0 0 (Fixed) 0 0<br />
0 0 0 (Fixed) 1 8<br />
Note 3) If the zero-return start function is allocated, it is necessary to set the zero-return start<br />
conditions first, using comm<strong>and</strong> 53h.<br />
Note 4) The following table shows the monitored pins when an input pin monitor function is set<br />
to an output port function.<br />
Output port Pin 16 Pin 17 Pin 18 Pin 19 Pin 20<br />
Monitor pin Pin 6 Pin 7 Pin 8 Pin 9 Pin 12<br />
The monitor output monitors the hardware status of the input port, regardless of the input port functions<br />
<strong>and</strong> amplifier status. When the input port coupler is ON, output Tr = ON.<br />
Note 5) Setting method of a Zone output signal<br />
When set the output function which supported with 1 to 1 for ZONE No set in comm<strong>and</strong> 2Ah or<br />
31h, please choose output Type0 <strong>and</strong> 8-22.<br />
When a binary outputs Zone No, please choose output Type23 to 26.<br />
5-13
<strong>5.</strong> <strong>Comm<strong>and</strong>s</strong> <strong>and</strong> <strong>Functions</strong><br />
Comm<strong>and</strong> Code: 24 (18h)<br />
Data Length: 2 bytes<br />
Push Deviation<br />
DAT No Contents Setting range Setting unit Initial Value<br />
DAT1 to 2 Push Deviation 1 to FFFFh 1Pulse (st<strong>and</strong>ard 2000P/R) 1770h<br />
Sets the threshold for detecting a deviation error due to pushback during push operation. Enabling or<br />
disabling the alarm detection is configured by comm<strong>and</strong> code 14h DAT4, Bit 2. (0=Detect, 1=No<br />
detection)<br />
Comm<strong>and</strong> Code: 27 (1Bh)<br />
Data Length: 1 byte<br />
Program number<br />
RevBadd 32 programs<br />
DAT No Contents Setting range Setting unit Initial Value<br />
DAT1 Program number 0 to 2 01PRG1024Line<br />
0<br />
1128PRG×8LINE<br />
232PRG×32LINE<br />
Selects the number of programs.<br />
Comm<strong>and</strong> Code: 28 (1Ch)<br />
Data Length: 1 byte<br />
Execution Target Selection<br />
DAT No Contents Setting range Setting unit Initial Value<br />
DAT1 Execution Target Selection 0,1 0=Point 1=Program 0<br />
Sets the execution target of the EXE signal to point or program when not using the SELECT signal<br />
function.<br />
Comm<strong>and</strong> Code301Eh Data Length1 byte<br />
Move Inable <br />
DAT No Contents Setting range Setting unit Initial Value<br />
DAT1 Movement permission before 01 0Enable<br />
0<br />
origin return completion<br />
1Disable<br />
Enable or Disable the movement before origin return completion. Please use safety of a device for<br />
cases to secure. When set the disable, a movement order before origin return movement becomes<br />
comm<strong>and</strong> error. Ack does not reply in the case of practice by EXE.<br />
Comm<strong>and</strong> Code: 31 (1Fh) Data Length: 8 bytes Initial Value:0, 0,0,0,0,0,0,0<br />
User memory<br />
DAT No Contents Setting range Setting unit Initial Value<br />
DAT1 User memory 0 to FFh ALL 0<br />
Provides 8 bytes of memory for the user, which can be used as the user management data area.<br />
The specified data will be saved to the non-volatile memory by Parameter Save (comm<strong>and</strong> 03).<br />
<br />
5-14
<strong>5.</strong> <strong>Comm<strong>and</strong>s</strong> <strong>and</strong> <strong>Functions</strong><br />
<strong>5.</strong>4 Direct comm<strong>and</strong>s<br />
<strong>5.</strong>4.1 Comm<strong>and</strong> for adjustment<br />
Comm<strong>and</strong> Code: 32 (20h)<br />
Data Length: 3 bytes<br />
Power Limit (Power Down)<br />
DAT No Contents Setting range Setting unit Initial Value<br />
DAT1 Positioning completion Current 0 to 7Fh (Setting value (d) /255) X Rated 7Fh<br />
limit during SON status<br />
current<br />
DAT2 Current upper limit during 0 to FFh FFh<br />
operation<br />
DAT3 Current limit during ALM/STOP 0 to 7Fh<br />
7Fh<br />
Sets the Power Limit value (motor excitation current limit) for each status.<br />
*The maximum torque limit at stop is 50% of the maximum stored torque.<br />
Comm<strong>and</strong> Code: 33 (21h)<br />
Data Length: 1 byte<br />
Gain Parameter 1<br />
DAT No Contents Setting range Setting unit Initial Value<br />
DAT1 Gain Parameter 1 0 to Fh 0<br />
Selects the normalized servo parameter. Refer to Section 4 for more information about the adjustment<br />
method.<br />
* Gain adjustment is necessary for maximizing performance.<br />
Comm<strong>and</strong> Code: 47(2Fh)<br />
Data Length: 1 byte<br />
Gain Parameter 2<br />
DAT No Contents Setting range Setting unit Initial Value<br />
DAT1 Proportion Gain 0 to FFh 4<br />
DAT2 Integral Gain 0 to FFh 4<br />
DAT3 Gain Select 0,1 0CMD21h Enable<br />
1CMD2Fh Enable<br />
0<br />
Set the detailed Gain than order 21h. Refer to Section 4 for more information about the adjustment<br />
method.<br />
* Please do not set proportion Gain0.<br />
* When set the integral Gain0, please warn speed because it does not arrive at order speed.<br />
Comm<strong>and</strong> Code: 36 (24h) Data Length: 2 bytes Initial Value: 0, 0<br />
Correction Coefficient<br />
DAT No Contents Setting range Setting unit Initial Value<br />
DAT1 Correction Coefficient<br />
Enable/Disable<br />
0,1<br />
0<br />
DAT2 Correction Coefficient 0 to FFh<br />
0: Coefficient pre-defined inside the amplifier<br />
1: DAT2 setting enable<br />
1PLS/LSB (equivalent of 2000P/R)<br />
Corrects the deceleration start position calculated inside the amplifier. A large setting value will result in<br />
a gentle deceleration slope near the target position. This function is effective for soft l<strong>and</strong>ing, etc.<br />
Smaller ← Correlation coefficient → Larger<br />
0<br />
* Note that increasing the correlation coefficient will result in increased In-position time.<br />
5-15
<strong>5.</strong> <strong>Comm<strong>and</strong>s</strong> <strong>and</strong> <strong>Functions</strong><br />
<br />
Comm<strong>and</strong> Code3927h Data Length3 byte<br />
Current Offset <br />
DAT No Function Setting range Setting unit Initial Value<br />
DAT1 current addition speedLow byte 01194h 1min -1 LSB 64h100min -1 <br />
DAT2 current addition speedHih byte<br />
DAT3 Current offset 0FF 3A/255/LSB 0<br />
When motor speed is low, an offset is added to an electric current order than setting speed.<br />
When single load to a gravity direction is big, <strong>and</strong> vibration is caused at the time of positioning,<br />
vibration is evaded by adding an electric current.<br />
5-16
<strong>5.</strong> <strong>Comm<strong>and</strong>s</strong> <strong>and</strong> <strong>Functions</strong><br />
<strong>5.</strong>4.2 Function setting<br />
Zone<br />
Use Zone output signal to determine in-work position, <strong>and</strong> as a start trigger for another shaft.<br />
The Zone signal output set in comm<strong>and</strong> 16h replies. As for the output signal, 1 to 1 output either is<br />
chosen for binary output or Zone. Setting of 16 areas is possible at the maximum.<br />
<br />
<br />
<br />
<br />
<br />
Comm<strong>and</strong> Code: 42(2Ah)<br />
ZONE 2<br />
Data Length: 9 bytes<br />
RevBFunction addition<br />
DAT No Function Setting range Setting unit Initial Value<br />
DAT1 Select the Zone No 0 to Fh <br />
DAT2 to 5 Low Zone See below Coordinate 0<br />
DAT6 to 9 High Zone See below Coordinate 0<br />
Sets the coordinate range of the 16 ZONE output as absolute position. Output is performed if the motor<br />
position is within the specified coordinates. This function is effective for monitoring in-position<br />
completion.<br />
Setting range<br />
Basic division setting <br />
POS.upper limit value <br />
Neg.upper limit value <br />
*The sent data should be signed, starting with the low value (negative direction) followed by the high<br />
value (positive direction).<br />
*The zone signal is output within the set coordinate range.<br />
<br />
Comm<strong>and</strong> Code: 49(31h)<br />
ZONE 1<br />
Data Length: 8 bytes<br />
DAT No Function Setting range Setting unit Initial Value<br />
DAT1 to 4 Low Zone See below Coordinate 0<br />
DAT5 to 8 High Zone See below Coordinate 0<br />
Set a ZONE coordinate for ZONE No 0. It is a function same as what set Zone No 0 by Comm<strong>and</strong> 2Ah.<br />
5-17
<strong>5.</strong> <strong>Comm<strong>and</strong>s</strong> <strong>and</strong> <strong>Functions</strong><br />
Modulo Function<br />
The following section describes the modulo function (coordinate range adjustment function).<br />
This function presets the amplifier internal coordinates to the range specified by comm<strong>and</strong> 2Ch. The operation is<br />
performed in the direction selected by comm<strong>and</strong> 2Dh. The modulo function is enabled if comm<strong>and</strong> 2Bh=1.<br />
This function is effective for applications where shortcut-control of rotating loads or switching from velocity control to<br />
in-position control is necessary.<br />
Coordinate value<br />
Modulo function is disabled<br />
Modulo value<br />
(Comm<strong>and</strong> 2Ch value -1)<br />
Valid position range when modulo function is enabled<br />
0<br />
* When using incremental move comm<strong>and</strong>s or SCAN operation, the coordinates (absolute position monitor)<br />
follow the modulo settings.<br />
Comm<strong>and</strong> Code: 43 (2Bh)<br />
Data Length: 1 byte<br />
Modulo Function Enable / Disable<br />
DAT No Function Setting range Setting unit Initial Value<br />
DAT1 Low Zone 0 to 1 0=Modulo function disabled<br />
0<br />
1=Modulo function enabled<br />
Enables or disables the modulo function. When enabled, absolute move comm<strong>and</strong>s perform modulo operation.<br />
* When modulo is enabled, the target position should be set in the following range: 0 ≤ Target position ≤ Modulo value -1<br />
Comm<strong>and</strong> Code: 44 (2Ch) Data Length: 4 bytes<br />
Modulo Value<br />
DAT No Function Setting range Setting unit Initial Value<br />
DAT1 to Modulo Value See below depends on setting resolving Equivalent of 1 rotation<br />
Sets the modulo pulse number per rotation.<br />
* Coordinate setting is not possible for the negative direction.<br />
Setting range<br />
Basic divisions 500 1000 2000 4000 5000 10000<br />
Upper limit coordinate 3333333 6666666 CCCCCCC 19999999 1FFFFFFF 3FFFFFFF<br />
Comm<strong>and</strong> Code: 45 (2Dh)<br />
Data Length: 1 byte<br />
Modulo Direction<br />
DAT No Function Setting range Setting unit Initial Value<br />
DAT1 Modulo Direction 0 to 2 0=Negative direction<br />
2 (Shortcut)<br />
1=Positive direction<br />
2=Shortcut<br />
Sets the direction of the modulo operation.<br />
5-18
<strong>5.</strong> <strong>Comm<strong>and</strong>s</strong> <strong>and</strong> <strong>Functions</strong><br />
Soft Limit<br />
Comm<strong>and</strong> Code: 50(32h)<br />
Pos. Soft Limit<br />
Data Length: 4 bytes<br />
DAT No Function Setting range Setting unit Initial Value<br />
DAT1 to 4 Pos. Soft Limit See below See below Upper coordinate limit<br />
Sets the Positive direction software limit as an absolute position.<br />
The limit is valid if the soft limit function was enabled by comm<strong>and</strong> code 14h.<br />
Setting range<br />
Basic division setting <br />
POS.upper limit value <br />
Neg.upper limit value <br />
(Detection conditions)<br />
When a move comm<strong>and</strong> is received<br />
If the target position exceeds the limit when a move comm<strong>and</strong> is received, a comm<strong>and</strong> error is<br />
generated.<br />
During SCAN operation<br />
If the actual position exceeds the limit, a deceleration stop is performed. During the limit state, a<br />
move comm<strong>and</strong> in the limit direction will generate a comm<strong>and</strong> error. A move comm<strong>and</strong> opposite<br />
to the limit direction will be executed normally.<br />
When performing a zero-return operation<br />
Limit is not monitored if the zero-return is incomplete or the zero-return is still in progress.<br />
<br />
Comm<strong>and</strong> Code: 50(32h)<br />
Neg. Soft Limit<br />
Data Length: 4 bytes<br />
DAT No Function Setting range Setting unit Initial Value<br />
DAT1 to 4 Neg. Soft Limit See below See below Upper coordinate limit<br />
Sets the negative direction software limit as an absolute position.<br />
The limit is valid if the soft limit function was enabled by comm<strong>and</strong> code 14h.<br />
Setting range<br />
Basic division setting <br />
POS.upper limit value <br />
Neg.upper limit value <br />
(Detection conditions)<br />
Same as comm<strong>and</strong> 31h.<br />
5-19
<strong>5.</strong> <strong>Comm<strong>and</strong>s</strong> <strong>and</strong> <strong>Functions</strong><br />
Push Condition<br />
Set the push movement condition. It become effective for all movement with push.<br />
Comm<strong>and</strong> Code: 37 (25h)<br />
Data Length: 1 byte<br />
Push Determination Time<br />
DAT No Function Setting range Setting unit Initial Value<br />
DAT1 Push Determination Time 0 to FFh 10msec/LSB Fh (150ms)<br />
Sets the time for completion determination for push zero-return operation <strong>and</strong> push operation. The<br />
determination time counter starts when the current limit for push set for the respective operation is<br />
reached.<br />
Comm<strong>and</strong> Code: 38 (26h)<br />
Data Length: 2 bytes<br />
Push Velocity<br />
DAT No Function Setting range Setting unit Initial Value<br />
DAT1 to 2 Push Velocity 0 to 1194h<br />
1min -1 /LSB Fh (150ms)<br />
(0 to FA0h for 86 motors)<br />
Sets the velocity for the push operation. Consider the push dynamics, such as push shock, when<br />
setting the velocity.<br />
<br />
Push determination overview<br />
Collision<br />
Velocity waveform<br />
Push velocity<br />
Current comm<strong>and</strong><br />
Push complete determination time<br />
END signal<br />
5-20
<strong>5.</strong> <strong>Comm<strong>and</strong>s</strong> <strong>and</strong> <strong>Functions</strong><br />
Others<br />
Comm<strong>and</strong> Code: 35 (23h)<br />
Zero-return Maximum Travel Distance<br />
Data Length: 4 bytes<br />
DAT No Function Setting range Setting unit Initial Value<br />
DAT1 to 4<br />
Zero-return Maximum<br />
Travel Distance<br />
See below<br />
Depends on the<br />
resolution setting<br />
Maximum<br />
Sets the maximum travel distance from the point where the zero-return was started. It is enabled when<br />
executing zero-return type 1 – 3.<br />
If there is no normal completion within the maximum travel distance, it will generate a zero-return error.<br />
Resolution settings<br />
Basic division setting 500 1000 2000 4000 5000 10000<br />
Setting unit (Deg) 0. 72 0. 36 0. 18 0. 09 0. 072 0. 036<br />
Upper limit (hex) 1999999 3333333 6666666 CCCCCCC 19999999 1FFFFFFF<br />
Comm<strong>and</strong> Code: 48 (30h)<br />
Data Length: 4 bytes<br />
In-position Width<br />
DAT No Function Setting range Setting unit Initial Value<br />
DAT1 to 4 In-position Width 0 to CCCCCCCh 0. 18 degrees<br />
Ah<br />
(st<strong>and</strong>ard 2000P/R)<br />
Sets the in-position width. In-position status results from reaching the range defined by the target<br />
position ± the setting value.<br />
*When a zero-return operation is performed, in-position is output at the time of zero-return completion.<br />
*When move comm<strong>and</strong>s with push are used, in-position will be output in reference to the push target<br />
position. (Use the motor stop signal function to determine push completion.)<br />
Comm<strong>and</strong> Code: 52 (34h)<br />
Data Length: 4 bytes<br />
ABS Counter Preset<br />
DAT No Function Setting range Setting unit<br />
DAT1 to 4 Counter Preset See below See below<br />
Presets the absolute position counter inside the amplifier.<br />
Setting range<br />
Basic division setting 500 1000 2000 4000 5000 10000<br />
Setting unit (Deg) 0. 72 0. 36 0. 18 0. 09 0. 072 0. 036<br />
Upper limit (hex) 1999999 3333333 6666666 CCCCCCC 19999999 1FFFFFFF<br />
* Do not use during operation.<br />
<br />
5-21
<strong>5.</strong> <strong>Comm<strong>and</strong>s</strong> <strong>and</strong> <strong>Functions</strong><br />
<strong>5.</strong>4.3 Move comm<strong>and</strong><br />
Comm<strong>and</strong> Code: 54 (36h)<br />
Data Length: 2 bytes<br />
Velocity<br />
DAT No Function Setting range Setting unit Initial Value<br />
DAT1 to 2 Velocity 0 to 1194h<br />
1min -1 /LSB 28h (40 min -1 )<br />
(0-FA0 for 80 motors)<br />
This comm<strong>and</strong> is used to specify the operation velocity initiated by comm<strong>and</strong> 38h, 3Ah, <strong>and</strong> to modify<br />
the velocity of an operation.<br />
Comm<strong>and</strong> Code: 55 (37h)<br />
Data Length: 2 bytes<br />
Acceleration / Deceleration Rate<br />
DAT No Function Setting range Setting unit Initial Value<br />
DAT1 Acceleration 1 to FFh 1min -1 /ms /LSB 1 (1min -1 /ms)<br />
DAT2 Deceleration 1 to FFh 1min -1 /ms /LSB 1 (1min -1 /ms)<br />
This comm<strong>and</strong> is used to specify the acceleration or deceleration rate for comm<strong>and</strong> 38h, 3Ah <strong>and</strong><br />
zero-return, <strong>and</strong> to modify the acceleration or deceleration rate during an operation.<br />
<br />
5-22
<strong>5.</strong> <strong>Comm<strong>and</strong>s</strong> <strong>and</strong> <strong>Functions</strong><br />
Comm<strong>and</strong> Code: 56 (38h)<br />
Data Length: 4 bytes<br />
<strong>Inc</strong>remental Move Travel Distance (without options)<br />
DAT No Function Setting range Setting unit<br />
DAT1 to 4 <strong>Inc</strong>remental Move Travel Distance See below 360/resolution setting<br />
Initiates an incremental position move. The rotation direction is determined by the sign (+ or -) of the<br />
move comm<strong>and</strong>.<br />
(Positive=positive direction, Negative=negative direction)<br />
The velocity, acceleration or deceleration rate are set by comm<strong>and</strong>s 36h <strong>and</strong> 37h.<br />
<strong>Inc</strong>remental travel distance setting range<br />
Basic division setting <br />
POS.upper limit value <br />
Neg.upper limit value <br />
*If used during operation, it will be treated as an additional move comm<strong>and</strong>. The travel distance will be<br />
added to the original target position before the additional move comm<strong>and</strong>.<br />
<br />
Comm<strong>and</strong> Code: 58 (3Ah)<br />
Data Length: 4 bytes<br />
Absolute Move Travel Distance (without options)<br />
DAT No Function Setting range Setting unit<br />
DAT1 to 4 Absolute Move Travel Distance See below See below<br />
Initiates an absolute position move. The rotation direction is determined by the current position <strong>and</strong> the<br />
comm<strong>and</strong> position at the time of the comm<strong>and</strong>.<br />
Comm<strong>and</strong> position>Current position: Positive direction<br />
Comm<strong>and</strong> position
<strong>5.</strong> <strong>Comm<strong>and</strong>s</strong> <strong>and</strong> <strong>Functions</strong><br />
Comm<strong>and</strong> Code: 62 (3Eh)<br />
Data Length: 6 bytes<br />
Slow Move Comm<strong>and</strong><br />
DAT No Function Setting range Setting unit<br />
DAT1 Velocity See below 1min -1 /LSB<br />
DAT2 Slow move current 1 to 64h (Setting value (d) /255) x Rated current<br />
DAT3 to 6 <strong>Inc</strong>remental move travel distance 0 to 7Fh 1PLS/LSB<br />
Initiates slow movement by open control. Use this comm<strong>and</strong> if a velocity change during a slow<br />
operation causes problems.<br />
<strong>Inc</strong>remental travel distance setting range (depends on the resolution as shown below)<br />
Basic division setting <br />
POS.upper limit value <br />
Neg.upper limit value <br />
* If a slow move comm<strong>and</strong> is entered as an additional comm<strong>and</strong> during operation, the slow move will<br />
start after the current operation is completed. The in-position signal will be output when the slow<br />
move operation completed.<br />
* If there is a position drift during slow move operation, the control will switch to close-control mode.<br />
* The torque generated during slow move operation will not exceed 50% of the maximum stored<br />
torque.<br />
5-24
<strong>5.</strong> <strong>Comm<strong>and</strong>s</strong> <strong>and</strong> <strong>Functions</strong><br />
Comm<strong>and</strong> Code: 64 (40h)<br />
Data Length: 6 bytes<br />
Continuous Rotation (SCAN) Comm<strong>and</strong><br />
DAT No Function Setting range Setting unit<br />
DAT1 Rotational direction 0 to 1 0: Positive direction; 1: Negative direction<br />
DAT2, 3 Velocity 0 to 1194h<br />
1min -1 /LSB<br />
(0-FA0 for 80 motors)<br />
DAT4 Acceleration rate 1 to FFh 1min -1 /ms/LSB<br />
DAT5 Deceleration rate 1 to FFh 1min -1 /ms/LSB<br />
DAT6 Push current limit 0 to FFh (0=no push Setting value (d) /255 x Rated current<br />
current limit)<br />
Initiates continuous rotation<br />
* If the push current limit is other than 0, overload will not be detected during SCAN operation.<br />
* Push completion can be detected by the motor stop signal output or by the END signal. The in-position<br />
signal will stay the same as it was during operation.<br />
* There is no error detection performed during SCAN push operation.<br />
Note) If this function is used for continuous rotation in a single direction only, use comm<strong>and</strong> code<br />
14h, DAT4, Bit0=0 to enable Wrap Around.<br />
Comm<strong>and</strong> Code: 65 (41h)<br />
Data Length: 0 bytes<br />
Continuous Rotation (SCAN) Stop<br />
Specifies the stop of a continuous rotation.<br />
While receiving the comm<strong>and</strong>, the motor will decelerate to a stop using the deceleration rate set for the<br />
SCAN operation. The stop position becomes the target position.<br />
5-25
<strong>5.</strong> <strong>Comm<strong>and</strong>s</strong> <strong>and</strong> <strong>Functions</strong><br />
Comm<strong>and</strong> Code: 66 (42h)<br />
Data Length: 11 (d) bytes<br />
<strong>Inc</strong>remental Move Comm<strong>and</strong> (with velocity, acc/dec. rate, push specifications)<br />
DAT No Function Setting range Setting unit<br />
DAT1,2 Velocity 0 to 1194h<br />
(0-FA0 for 80 motors)<br />
1min -1 /LSB<br />
DAT3 Acceleration rate 1 to FFh 1min -1 /ms/LSB<br />
DAT4 Deceleration rate 1 to FFh 1min -1 /ms/LSB<br />
DAT5 to <br />
<strong>Inc</strong>remental move<br />
travel distance<br />
See below<br />
1PLS/LSB<br />
DAT9 Push current limit 0 to FFh Setting value (d) /255 x Rated current<br />
(0=no push current limit)<br />
DAT10, 11 Push travel distance Depends on the resolution 1PLS/LSB<br />
This is an incremental position move comm<strong>and</strong> with velocity, acceleration/deceleration rate <strong>and</strong> push<br />
condition options. The rotation direction is determined by the sign (+ or -) of the move comm<strong>and</strong>.<br />
(Positive=positive direction, Negative=negative direction)<br />
<strong>Inc</strong>remental travel distance setting range<br />
Basic division setting <br />
POS.upper limit value <br />
Neg.upper limit value <br />
* If there is an incremental position move comm<strong>and</strong> coming in during an operation initiated by an absolute position<br />
move comm<strong>and</strong>, the incremental comm<strong>and</strong> distance will be based on the target position of the absolute position<br />
move comm<strong>and</strong>.<br />
* If the incremental move travel distance is 0, do not set the push travel distance to a value other than 0.<br />
<br />
5-26
<strong>5.</strong> <strong>Comm<strong>and</strong>s</strong> <strong>and</strong> <strong>Functions</strong><br />
Comm<strong>and</strong> Code: 68 (44h)<br />
Data Length: 11 (d) bytes<br />
Absolute Move Comm<strong>and</strong> (with velocity, acc/dec. rate, push specifications)<br />
DAT No Function Setting range Setting unit<br />
DAT1,2 Velocity 0 to 1194h<br />
(0-FA0 for 80 motors)<br />
1min -1 /LSB<br />
DAT3 Acceleration rate 1 to FFh 1min -1 /ms/LSB<br />
DAT4 Deceleration rate 1 to FFh 1min -1 /ms/LSB<br />
DAT5 to <br />
Absolute move<br />
travel distance<br />
See below<br />
1PLS/LSB<br />
DAT9 Push current limit 0 to FFh Setting value (d) /255 x Rated current<br />
(0=no push current limit)<br />
DAT10, 11 Push travel distance Depends on the resolution 1PLS/LSB<br />
This is an absolute position move comm<strong>and</strong> with velocity, acceleration/deceleration rate <strong>and</strong> push<br />
condition options. The rotation direction is determined by the current position <strong>and</strong> the specified position<br />
at the time of the comm<strong>and</strong>.<br />
Comm<strong>and</strong> position>Current position: Positive direction<br />
Comm<strong>and</strong> position
<strong>5.</strong> <strong>Comm<strong>and</strong>s</strong> <strong>and</strong> <strong>Functions</strong><br />
Comm<strong>and</strong> Code: 69 (45h)<br />
Data Length: 10 (d) bytes<br />
Zero Return Comm<strong>and</strong><br />
DAT No Function Setting range Setting unit<br />
DAT1 Zero-return type<br />
Rotational direction<br />
Zero-return type: 0 to 4<br />
Rotational direction: 0 to 1<br />
See (1)<br />
0: Positive direction1: Negative direction<br />
DAT2 Zero-return velocity 1 to C8h 1min -1 /ms<br />
DAT3 Zero-return low velocity 1 to C8h 1min -1 /ms<br />
DAT4 to 5 Grid shift Depends on the resolution 1PLS<br />
DAT6 Zero-return push current limit 0 to FFh Setting value (d) /255 x Rated current<br />
DAT7 to 10 Counter preset value Depends on the resolution 1PLS<br />
Initiates zero-return. The acceleration/deceleration rate is set by comm<strong>and</strong> code 37h.<br />
DATA NO Bit7 Bit6 Bit5 Bit4 Bit3 Bit2 Bit1 Bit0<br />
DAT1 * * * Rotational direction * Zero-return type<br />
(1) : Zero-return type<br />
Bit2 Bit1 Bit0 Zero-return type<br />
0 0 0 C channel detection<br />
0 0 1 SDN detection<br />
0 1 0 SDN + C channel<br />
0 1 1 Push zero detection<br />
1 0 0 Push + C channel detection<br />
Others<br />
Setting prohibited<br />
* The grid shift setting is signed; for push zero-return type set the grid shift for both the<br />
comm<strong>and</strong> direction <strong>and</strong> reverse direction.<br />
* If zero-sensor (SDN: Type 1, 2) is started, pin 9 will be the zero-sensor input. Refer to comm<strong>and</strong><br />
16h to set the input port function as the zero-sensor signal.<br />
In additionSet comm<strong>and</strong> 14h, DAT4, Bit7 (SDN) = 0.<br />
<br />
5-28
<strong>5.</strong> <strong>Comm<strong>and</strong>s</strong> <strong>and</strong> <strong>Functions</strong><br />
Each setting is enabled or disabled based on the type of zero-return.<br />
Zero-return type Zero-return Zero-return low Grid shift Current Preset value<br />
velocity velocity volume limit<br />
C channel detection Disabled Enabled Enabled Disabled Enabled<br />
SDN detection Enabled Enabled Enabled Disabled Enabled<br />
SDN + C channel Enabled Enabled Enabled Disabled Enabled<br />
Push zero detection Enabled Enabled Enabled Enabled Enabled<br />
Push + C channel<br />
detection<br />
Enabled Enabled Enabled Enabled Enabled<br />
Zero-return operation overview<br />
* The zero-return in-position signal is output after the zero detection operation is complete.<br />
1) C-phase detection mode: Type 0<br />
Zero-return is based on detecting the C-phase (1PLS/rotation) of the motor-sensor.<br />
Grid shift travel distance<br />
Operation (velocity waveform)<br />
In-position signal<br />
C-channel signal<br />
* If high velocity is used, an overshoot can occur after detecting the C-phase, causing a return<br />
operation to be performed.<br />
2) SDN detection: Type 1<br />
Zero-return is performed by detecting the edge of the SDN signal connected to Pin 9 of CN1.<br />
Grid shift travel distance<br />
Operation (velocity waveform)<br />
In-Position signal<br />
SDN signal<br />
5-29
<strong>5.</strong> <strong>Comm<strong>and</strong>s</strong> <strong>and</strong> <strong>Functions</strong><br />
3) SDN + C-phase detection mode: Type 2<br />
After detecting the edge of the SDN signal connected to Pin 9 of CN1, movement starts in the<br />
opposite direction <strong>and</strong> zero-return is performed based on C-phase signal detection.<br />
Grid shift travel distance<br />
Operation (velocity waveform)<br />
In-position signal<br />
C-channel signal<br />
SDN signal<br />
4) Push zero detection: Type 3<br />
Zero-return is based on detecting a stop due to pushing against the mechanical end.<br />
Mechanical end<br />
Grid shift travel<br />
Operation (velocity waveform)<br />
In-position signal<br />
Comm<strong>and</strong> code 25h: Push complete<br />
determination time<br />
* The sign of the grid shift volume must be set to the opposite direction of the push direction.<br />
* Confirm that the push current limit setting is a value with which the motor can operate. If the<br />
value is low, a push may be prematurely determined as completed.<br />
5) Push + C-phase detection: Type 4<br />
After detecting a stop due to pushing against the mechanical end, movement starts in the<br />
opposite direction <strong>and</strong> zero-return is performed based on C-phase signal detection.<br />
Mechanical end<br />
Grid shift travel<br />
Operation<br />
In-position signal<br />
C-phase signal<br />
Comm<strong>and</strong> code 25h: Push complete<br />
determination time<br />
5-30
<strong>5.</strong> <strong>Comm<strong>and</strong>s</strong> <strong>and</strong> <strong>Functions</strong><br />
<strong>5.</strong>4.4 State control Comm<strong>and</strong><br />
Comm<strong>and</strong> Code: 53 (35h)<br />
Data Length: 1 byte<br />
Brake Enable<br />
DAT No Function Setting range Setting unit<br />
DAT1 Brake Enable 0 to 1 0=Release; 1=Engage<br />
Directly controls the holding brake status during servo OFF (including Alarm <strong>and</strong> STOP status).<br />
* This status is not saved in the non-volatile memory. (Normally 1 after powering up.)<br />
When switching to servo ON, the status is automatically set to 1, <strong>and</strong> unless 0 was preset, the<br />
holding brake will be engaged when a STOP or ALM occurs.<br />
Comm<strong>and</strong> Code: 71 (47h)<br />
Data Length: 0 bytes<br />
Deviation Clear<br />
This comm<strong>and</strong> initiates deviation clear. The position at the time of receiving this comm<strong>and</strong> becomes the<br />
target position.<br />
* Note that if the comm<strong>and</strong> is sent during rotation, it returns to the original position using the excess<br />
deceleration distance.<br />
Comm<strong>and</strong> Code: 72 (48h)<br />
Data Length:0 bytes<br />
Pause Comm<strong>and</strong><br />
This comm<strong>and</strong> initiates a Pause (temporary stop). The target position is held, <strong>and</strong> a deceleration stop is<br />
performed based on the current deceleration rate settings. When Pause is cancelled, the move to the<br />
target position resumes.<br />
* If the Pause function is allocated to an input port, it will operate with an OR condition with this<br />
comm<strong>and</strong>.<br />
* The Pause input function is allocated by comm<strong>and</strong> 16h.<br />
Comm<strong>and</strong> Code: 73 (49h)<br />
Data Length:0 bytes<br />
Pause Clear<br />
This comm<strong>and</strong> cancels the Pause, <strong>and</strong> at the same time, moving to the target position resumes.<br />
* If the Pause function is active at the input port, it will not be cancelled.<br />
Comm<strong>and</strong> Code: 74 (4Ah)<br />
Data Length:0 bytes<br />
Alarm Clear<br />
This comm<strong>and</strong> clears the alarm.<br />
* Non-recoverable alarms are not cancelable; they can be cleared only by restarting the power, or<br />
using the initialization comm<strong>and</strong>.<br />
* If the ALM clear function is allocated to an input port, it will operate with an OR condition with this<br />
comm<strong>and</strong>.<br />
5-31
<strong>5.</strong> <strong>Comm<strong>and</strong>s</strong> <strong>and</strong> <strong>Functions</strong><br />
Comm<strong>and</strong> Code: 75 (4Bh)<br />
Data Length: 1 byte<br />
Bit Out<br />
DAT No Function Setting range Setting unit<br />
DAT1 Bit Out 0 to 1Fh <br />
Sets the output status of the generic output port.<br />
Bit7 Bit6 Bit5 Bit4 Bit3 Bit2 Bit1 Bit0<br />
* * * Out5 Out4 Out3 Out2 Out1<br />
0: Photocoupler OFF 1: Photocoupler ON<br />
* This comm<strong>and</strong> is valid only at generic output ports set for output port functions using comm<strong>and</strong><br />
16h. For non-generic outputs, this function will be ignored.<br />
Comm<strong>and</strong> Code: 76 (4Ch)<br />
Data Length:0 bytes<br />
STOP Comm<strong>and</strong><br />
This comm<strong>and</strong> initiates an emergency stop. If the motor is in motion, it stops with the maximum<br />
possible deceleration rate, <strong>and</strong> the amplifier status changes to servo OFF.<br />
* The comm<strong>and</strong> operates using an OR condition with the STOP input port.<br />
* If used during program execution, the program execution will stop.<br />
Comm<strong>and</strong> Code: 77 (4Dh)<br />
Data Length:0 bytes<br />
STOP Clear<br />
Cancels the STOP initiated by a STOP comm<strong>and</strong>. At the time of the STOP clear, the amplifier status<br />
automatically changes to servo ON.<br />
* This comm<strong>and</strong> does not clear the STOP signal at an input port.<br />
Comm<strong>and</strong> Code: 78 (4Eh)<br />
Data Length:0 bytes<br />
Interlock<br />
This comm<strong>and</strong> aborts movement. A deceleration stop is performed using the deceleration rate set at<br />
the time of receiving the comm<strong>and</strong>. The stop position becomes the target position. The system keeps<br />
the SON status, <strong>and</strong> performs a deceleration stop. Move comm<strong>and</strong>s during interlock will generate a<br />
comm<strong>and</strong> error.<br />
* During interlock, initialization is not executed.<br />
Comm<strong>and</strong> Code: 79 (4Fh)<br />
Data Length:0 bytes<br />
Interlock Clear<br />
Clears the Interlock initiated by an Interlock comm<strong>and</strong>.<br />
* This comm<strong>and</strong> does not clear the interlock of an input port.<br />
5-32
<strong>5.</strong> <strong>Comm<strong>and</strong>s</strong> <strong>and</strong> <strong>Functions</strong><br />
<strong>5.</strong> 5 Point <strong>and</strong> Program <strong>Comm<strong>and</strong>s</strong><br />
<strong>5.</strong> <strong>5.</strong> 1 Point <strong>and</strong> program control comm<strong>and</strong>s<br />
Comm<strong>and</strong> Code: 80 (50h)<br />
Data Length:0 bytes<br />
START Comm<strong>and</strong><br />
This comm<strong>and</strong> remotely starts the point or program previously specified with 55h.<br />
Before using the START comm<strong>and</strong>, always set the execution target using 55h.<br />
Comm<strong>and</strong> Code: 81 (51h)<br />
STEP Operation<br />
Data Length: 3 bytes<br />
DAT No Function Setting range Setting unit<br />
DAT1 Program number When 1 PRG selected: 0<br />
When 128 PRG selected: 0 to 7Fh<br />
When 32PRG selected: 0 to 1Fh<br />
DAT2,3 Line number When 1 PRG selected: 0 to 3FFh<br />
When 128 PRG selected: 0 to 8<br />
When 32PRG selected: 0 to 1Fh<br />
This comm<strong>and</strong> specifies the STEP operation (line by line execution) of the program.<br />
Note that the range for program number <strong>and</strong> line number depends on the settings performed by<br />
comm<strong>and</strong> 1Bh.<br />
Response:<br />
As a response to the STEP operation comm<strong>and</strong>, the next executable line (2 bytes) is returned. The<br />
response format is the following:<br />
Packet length Address Response status Line number Line number Checksum<br />
(lower)<br />
(higher)<br />
* If the STEP operation is executed in the middle of a Gosub/Return comm<strong>and</strong>, <strong>and</strong> the next<br />
executable line is unknown, the response will be FFFF.<br />
When a Timer Wait is executed in STEP mode, the setting time of the Timer will be disabled.<br />
<br />
<br />
Comm<strong>and</strong> Code: 82 (52h)<br />
Data Length:0 bytes<br />
Program Stop<br />
This comm<strong>and</strong> aborts the program operation. The amplifier maintains the servo ON status.<br />
* Program lines that have already started execution will not be aborted. To abort the movement itself,<br />
use the STOP comm<strong>and</strong>.<br />
* The Program stop comm<strong>and</strong> can only be used during program execution; otherwise, a comm<strong>and</strong><br />
error will be generated.<br />
* Refer to comm<strong>and</strong> code 8Ah to read the stopped program line.<br />
5-33
<strong>5.</strong> <strong>Comm<strong>and</strong>s</strong> <strong>and</strong> <strong>Functions</strong><br />
Comm<strong>and</strong> Code: 83 (53h)<br />
Data Length: 10 bytes<br />
Zero-return Store<br />
This comm<strong>and</strong> stores the details of the zero-return operation to be started by a zero-return start signal<br />
at a generic input port, as specified by comm<strong>and</strong> 16h. The setting is stored in the system’s non-volatile<br />
memory.<br />
Execution starts by comm<strong>and</strong> code 54h, or by the zero-return start signal.<br />
The content of the zero-return operation is the same as comm<strong>and</strong> 45h. Refer to 45h for more<br />
information.<br />
The settings will be cleared by comm<strong>and</strong> 5 (Point CLR).<br />
* For verification, use comm<strong>and</strong> code 81h, Point No=80h to read the setting.<br />
Comm<strong>and</strong> Code: 84 (54h)<br />
Data Length: 0 bytes<br />
Zero-return Start<br />
This comm<strong>and</strong> remotely (via communication) executes the zero-return operation set by comm<strong>and</strong> 53h.<br />
Since there is no default factory setting for zero-return, the user is required to store the data using<br />
comm<strong>and</strong> code 53h before using this comm<strong>and</strong>.<br />
* If no data has been set, a comm<strong>and</strong> error is generated, or if execution was initiated by the<br />
zero-return start signal, the Ack signal output will not respond.<br />
Comm<strong>and</strong> Code: 85 (55h)<br />
Data Length: 2 bytes<br />
Remote Start Target<br />
DAT No Function Setting range Setting unit<br />
DAT1 Start target 0 to 1 0Point 1PRG<br />
DAT2 Point / Program No. For point: 0 to 7Fh<br />
<br />
When PRG No.=0: 0<br />
When PRG No.=128: 0 to 7Fh<br />
When PRG No.=32: 0 to 1Fh<br />
Sets the target for remote start by comm<strong>and</strong> 50h. Sets either point or program.<br />
* If a program is selected, the setting range will depend on the program number selected by comm<strong>and</strong><br />
1Bh.<br />
<br />
5-34
<strong>5.</strong> <strong>Comm<strong>and</strong>s</strong> <strong>and</strong> <strong>Functions</strong><br />
Comm<strong>and</strong> Code: 86 (56h)<br />
Point Store<br />
Data Length: Depends on the comm<strong>and</strong><br />
DAT No Function Setting range Setting unit<br />
DAT1 Point number 0 to 7Fh -<br />
DAT2 Direct comm<strong>and</strong> to be stored Direct comm<strong>and</strong> -<br />
DAT3 <strong>and</strong> Depends on the comm<strong>and</strong> in DAT2 Depends on the comm<strong>and</strong> -<br />
above<br />
Stores a direct comm<strong>and</strong> to the specified point number. The data length depends on the direct<br />
comm<strong>and</strong> being stored.<br />
Transmitted data format:<br />
Packet Length Address Comm<strong>and</strong> code (56h) Point No Direct comm<strong>and</strong> code Data (n bytes) Checksum<br />
Comm<strong>and</strong> Code: 87 (57h)<br />
Data Length: Depends on the comm<strong>and</strong><br />
Program store<br />
DAT No Function Setting range Setting unit<br />
DAT1 PRG No When PRG No.=1: 0<br />
When PRG No.=128: 0 to 7F<br />
When PRG No.=32: 0 to 1F<br />
DAT2, 3 Line number When PRG No.=1: 0 to 3FFh<br />
When PRG No.=128: 0 to 7<br />
When PRG No.=32: 0 to 1Fh<br />
DAT4 Comm<strong>and</strong> code to be stored Direct comm<strong>and</strong> (20h to 4Fh)<br />
Program comm<strong>and</strong> (60h to 6Dh)<br />
DAT5 Depends on the comm<strong>and</strong> in DAT4 Depends on the comm<strong>and</strong><br />
Stores a direct comm<strong>and</strong> line by line to the specified program number. The data length depends on the<br />
direct comm<strong>and</strong> being stored.<br />
Transmitted data format:<br />
Packet<br />
Address<br />
Comm<strong>and</strong><br />
PRG<br />
Line number<br />
Line number<br />
Store<br />
Data<br />
Checksum<br />
Length<br />
(57h)<br />
No.<br />
(lower)<br />
(higher)<br />
comm<strong>and</strong><br />
(n bytes)<br />
5-35
<strong>5.</strong> <strong>Comm<strong>and</strong>s</strong> <strong>and</strong> <strong>Functions</strong><br />
<strong>5.</strong><strong>5.</strong>2 Program <strong>Comm<strong>and</strong>s</strong><br />
1) Definition <strong>and</strong> use of jump conditions<br />
The following section describes the conditions of jump comm<strong>and</strong>s.<br />
Condition = False (0): If the condition does not match, jump to the specified line; if it matches, execute the next line.<br />
Condition = True (1): If the condition matches, jump to the specified line; if it does not match, execute the next line.<br />
Comm<strong>and</strong> 67h (Motor stop jump example)<br />
A) Example using a jump condition to wait for move completion<br />
Data included: Jump condition = False (0), Jump target line =same line (Line No=n)<br />
Motor start<br />
Line No = n<br />
Motor stop<br />
No<br />
YES<br />
B) Example using a jump condition for a simple jump<br />
Data included:<br />
Jump condition = True (1), Jump target line=n Jump condition = False (0), Jump target line=n<br />
Motor stop<br />
YES<br />
Motor stop<br />
No<br />
No<br />
Yes<br />
Comm<strong>and</strong><br />
Comm<strong>and</strong><br />
Line No=n<br />
Line No=n<br />
Comm<strong>and</strong><br />
Comm<strong>and</strong><br />
2) Jump target number<br />
The setting range of the jump target line number depends on the program number selected by 1Bh, as follows:<br />
The line number setting range is omitted from the comm<strong>and</strong> explanations.<br />
No. of Programs 1 (comm<strong>and</strong> 1Bh=0) 128 (comm<strong>and</strong> 1Bh=1) 32 (comm<strong>and</strong> 1Bh=2)<br />
Line number setting range 0 to 3FFh 0 to 7h 0 to 1Fh<br />
5-36
<strong>5.</strong> <strong>Comm<strong>and</strong>s</strong> <strong>and</strong> <strong>Functions</strong><br />
Comm<strong>and</strong> Code: 96 (60h)<br />
Data Length:0 bytes<br />
Program END<br />
This comm<strong>and</strong> ends the program. Program execution stops when the END comm<strong>and</strong> is encountered.<br />
* Empty comm<strong>and</strong> lines are recognized as NOP <strong>and</strong> the program execution continues. It is<br />
necessary to always include the END comm<strong>and</strong> in the program.<br />
* It is possible to have subroutines after the END comm<strong>and</strong>.<br />
Comm<strong>and</strong> Code: 97 (61h)<br />
Data Length: 2 bytes<br />
Timer Wait<br />
DAT No Function Setting range Setting unit<br />
DAT1 to 2 Timer Wait 0 to FFFFh (65535ms) 1ms/LSB<br />
This comm<strong>and</strong> sets the delay timer value.<br />
* This comm<strong>and</strong> is ignored during STEP operations.<br />
Comm<strong>and</strong> Code: 98 (62h)<br />
In-position JMP<br />
Data Length: 3 bytes<br />
DAT No Function Setting range Setting unit<br />
DAT1 Condition 0,1 0: False (jumps to the specified line when in-position)<br />
1: True (jumps to the specified line when out-position)<br />
DAT2 Jump target line No Depends on number of PRG <br />
Sets the jump target according to the In-Position condition set by comm<strong>and</strong> code 30h. If the condition<br />
matches, execution jumps to the specified target. If the condition does not match, the execution<br />
continues on the next line.<br />
5-37
<strong>5.</strong> <strong>Comm<strong>and</strong>s</strong> <strong>and</strong> <strong>Functions</strong><br />
Comm<strong>and</strong> Code: 99 (63h)<br />
Data Length: 4 bytes<br />
In-port JMP<br />
DAT No Function Setting range Setting unit<br />
DAT1 Condition 0,1 0: False<br />
(jumps to the specified line when condition does not match)<br />
1: True<br />
(jumps to the specified line when condition matches)<br />
DAT2 Input Port status 0 to 1Fh 0OFF, 1=ON<br />
DAT2 Jump target line No Depends on number of <br />
PRG<br />
This comm<strong>and</strong> sets the jump target according to the status of the generic input. If the condition<br />
matches, it will jump to the specified target. If the condition does not match, the execution continues on<br />
the next line.<br />
DAT2 input port allocation<br />
Bit7 Bit6 Bit5 Bit4 Bit3 Bit2 Bit1 Bit0<br />
* * * IN5 IN4 IN3 IN2 IN1<br />
Individual input bits cannot be manipulated. The input status of all 5 bits is assessed.<br />
<br />
Comm<strong>and</strong> Code: 100 (64h)<br />
Data Length: 3 bytes<br />
Zone JMP<br />
DAT No Function Setting range Setting unit<br />
DAT1 Jump condition 0,1 0: False (jumps to the specified line when in the Zone range)<br />
1: True (jumps to the specified line when out of the Zone range)<br />
DAT2 Zone No 0 to Fh <br />
DAT34 Jump target line No Depends on<br />
<br />
number of PRG<br />
This comm<strong>and</strong> sets the jump target according to the Zone output condition set by comm<strong>and</strong> code 2A or<br />
31h. If the condition matches, it jumps to the specified target. If the condition does not match, the<br />
execution continues on the next line.<br />
5-38
<strong>5.</strong> <strong>Comm<strong>and</strong>s</strong> <strong>and</strong> <strong>Functions</strong><br />
Comm<strong>and</strong> Code: 101 (65h)<br />
Actual Position JMP<br />
Data Length: 7 bytes<br />
DAT No Function Setting range Setting unit<br />
DAT1 Jump condition 0 to 1 0: False (jumps to the specified line when the<br />
setting ≤ actual position)<br />
1: True (jumps to the specified line when the<br />
setting ≥ actual position)<br />
DAT2 5 Absolute position Depends on the 1PLS<br />
resolution<br />
DAT6,7 Jump target line No Depends on the<br />
PRG No<br />
<br />
This comm<strong>and</strong> sets the jump target according to the current position condition (absolute position). If the<br />
condition matches, the execution jumps to the specified target. If the condition does not match, the<br />
execution continues on the next line.<br />
Specifying multiple shafts at the same time generates a comm<strong>and</strong> error.<br />
Absolute travel distance setting range<br />
Basic division setting <br />
POS.upper limit value <br />
Neg.upper limit value <br />
Comm<strong>and</strong> Code: 102 (66h)<br />
Data Length: 2 bytes<br />
Jump<br />
DAT No Function Setting range Setting unit<br />
DAT1,2 Jump target line No Depends on the PRG No <br />
This comm<strong>and</strong> sets the jump target unconditionally.<br />
Comm<strong>and</strong> Code: 103 (67h)<br />
Data Length: 3 bytes<br />
Motor Stop JMP<br />
DAT No Function Setting range Setting unit<br />
DAT1 Jump condition 0,1 0: False (jumps to the specified line during<br />
operation)<br />
1: True (jumps to the specified line when the<br />
motor is stopped)<br />
DAT2,3 Jump target line No Depends on the PRG No <br />
This comm<strong>and</strong> specifies the jump target according to the motor stop status.<br />
<br />
5-39
<strong>5.</strong> <strong>Comm<strong>and</strong>s</strong> <strong>and</strong> <strong>Functions</strong><br />
Comm<strong>and</strong> Code: 106 (6Ah)<br />
Data Length: 2 bytes<br />
FOR (loop counter)<br />
DAT No Function Setting range Setting unit<br />
DAT1 Variable appointment O to A <br />
DAT2 Loop counter (repetition time) 1 to FFh <br />
This comm<strong>and</strong> repeats the program enclosed by a For <strong>and</strong> a Next (comm<strong>and</strong> 6Bh), using the same<br />
variable, as many times as specified by the loop counter <strong>and</strong> is used together with the Next comm<strong>and</strong>.<br />
* The loop counter increments by 1. The number of loop repetitions is specified by the loop counter.<br />
* Nested loops are allowed within the specified variable range.<br />
* The loop counter clears to 0 when the loop ends.<br />
Comm<strong>and</strong> Code: 107 (6Bh)<br />
Data Length: 1 byte<br />
NEXT (loop counter)<br />
DAT No Function Setting range Setting unit<br />
DAT1 Variable appointment O to A <br />
This comm<strong>and</strong> repeats the program enclosed by a For (comm<strong>and</strong> 6Ah) <strong>and</strong> a Next, using the same<br />
variable, as many times as specified by the loop counter, <strong>and</strong> is used together with the For comm<strong>and</strong>.<br />
* Must use the same variable as the For comm<strong>and</strong>.<br />
Comm<strong>and</strong> Code: 108 (6Ch)<br />
Data Length: 2 bytes<br />
Subroutine call<br />
DAT No Function Setting range Setting unit<br />
DAT12 Subroutine first line number O to A <br />
This comm<strong>and</strong> initiates a subroutine call. The target of the subroutine call is specified by the line<br />
number, <strong>and</strong> is used together with Return (comm<strong>and</strong> 6Dh).<br />
* Nested Gosub/Return comm<strong>and</strong>s are allowed up to 16 levels.<br />
Comm<strong>and</strong> Code: 109 (6Dh)<br />
Data Length: 0 bytes<br />
Return<br />
This comm<strong>and</strong> returns execution from the subroutine to the main program, <strong>and</strong> is used together with<br />
the Gosub comm<strong>and</strong>.<br />
* Nested Gosub/Return comm<strong>and</strong>s are allowed up to 16 levels.<br />
5-40
<strong>5.</strong> <strong>Comm<strong>and</strong>s</strong> <strong>and</strong> <strong>Functions</strong><br />
<strong>5.</strong> 6 RD comm<strong>and</strong>s<br />
Comm<strong>and</strong> Code: 128 (80h)<br />
Data Length: 1 byte<br />
Parameter Read<br />
DAT No Function Setting range Setting unit<br />
DAT1 RD target comm<strong>and</strong> code SysytemDirect Comm<strong>and</strong> <br />
This comm<strong>and</strong> reads the setting data of a direct comm<strong>and</strong> or a system comm<strong>and</strong>.<br />
* The returned data represents the setting data stored in RAM.<br />
Returned data Comm<strong>and</strong> code + data content<br />
Comm<strong>and</strong> Code: 129 (81h)<br />
Data Length: 1 byte<br />
Point Read<br />
DAT No Function Setting range Setting unit<br />
DAT1 RD target point number 0 to 80h80hZero-Return Profile <br />
This comm<strong>and</strong> reads the data content of the specified point number.<br />
Returned data Comm<strong>and</strong> code + data content<br />
Comm<strong>and</strong> Code: 130 (82h)<br />
Data Length: 3 bytes<br />
Program Read<br />
DAT No Function Setting range Setting unit<br />
DAT1 RD target program number Depend on PRG No <br />
DAT2,3 Line number Depend on PRG No <br />
This comm<strong>and</strong> reads a single line of the specified program.<br />
Returned data Comm<strong>and</strong> code + data content<br />
<br />
5-41
<strong>5.</strong> <strong>Comm<strong>and</strong>s</strong> <strong>and</strong> <strong>Functions</strong><br />
Comm<strong>and</strong> Code: 131 (83h)<br />
Amplifier Status Read<br />
This comm<strong>and</strong> returns the amplifier status.<br />
DAT1: Amplifier status 1<br />
Bit<br />
Description<br />
Data<br />
0 1<br />
5-42<br />
Data Length: 0 bytes<br />
Explanation<br />
0 Main power status ON OFF The status of the main power<br />
1 In-position status<br />
Within<br />
range<br />
Out of<br />
range<br />
The status of the in-position signal<br />
2 Amplifier alarm status Normal Alarm The alarm status of the amplifier<br />
3 Initialization operation Complete <strong>Inc</strong>omplete<br />
Completion status of the<br />
initialization process<br />
4 Servo ON/OFF status ON OFF Servo ON/OFF status<br />
5 Stop control status<br />
Normal<br />
status<br />
STOP<br />
status<br />
Stop control status<br />
6 Zero-return completion <strong>Inc</strong>omplete Complete Zero-return completion status<br />
7 Pause control status Non-Pause Pause Pause control status<br />
DAT2: Amplifier Status 2<br />
Bit<br />
Description<br />
Data<br />
0 1<br />
Explanation<br />
0 Positive direction soft limit No Limit Limit Positive direction soft limit status<br />
1 Negative direction soft limit No Limit Limit Negative direction soft limit status<br />
2 Brake Open Excite Holding brake control status<br />
3 Interlock control status No interlock Interlock Interlock control status<br />
4 Positive direction hard limit No Limit Limit Positive direction hard limit status<br />
5 Negative direction hard limit No Limit Limit Negative direction hard limit status<br />
6 * - - Always 0 returned.<br />
7 * - - Always 0 returned.<br />
These status conditions are returned only if the function is enabled by the port settings. If the function is<br />
disabled, it will return 0.<br />
DAT3 to DAT5: I/O status 1=photocoupler ON 0=photocoupler OFF<br />
Bit DAT3 (input port) DAT4 (input port) DAT5 (output port)<br />
0 * Point2 OUT2<br />
1 * IN1 OUT3<br />
2 * IN2 OUT4<br />
3 * IN3 OUT5<br />
4 * IN4 ACK<br />
5 * STOP In-Position<br />
6 EXE ALARM CLEAR ALARM<br />
7 Point1 IN5 OUT1<br />
* The I/O port status monitors the photocoupler ON/OFF status regardless of the amplifier status.
<strong>5.</strong> <strong>Comm<strong>and</strong>s</strong> <strong>and</strong> <strong>Functions</strong><br />
Comm<strong>and</strong> Code: 132 (84h)<br />
Data Length: 0 bytes<br />
Absolute Position Read<br />
This comm<strong>and</strong> reads the absolute position counter inside the amplifier <strong>and</strong> returns a 4 byte signed<br />
data.<br />
Returned data Signed 4 bytes (based on the resolution setting, returned in order, starting with the<br />
lower bytes)<br />
Comm<strong>and</strong> Code: 133 (85h)<br />
Velocity Monitor<br />
This comm<strong>and</strong> monitors the current velocity.<br />
Data Length: 0 bytes<br />
Returned data<br />
The returned data is an absolute value (unit: 1 min -1 , returned in ascending order)<br />
5-43
<strong>5.</strong> <strong>Comm<strong>and</strong>s</strong> <strong>and</strong> <strong>Functions</strong><br />
Comm<strong>and</strong> Code: 134 (86h)<br />
Data Length: 0 bytes<br />
ALM monitor<br />
This comm<strong>and</strong> reads the alarm history.<br />
Returned data The returned data is 8 bytes.<br />
DAT1: Current alarm status<br />
DAT 2 to 8: Alarm history (in the order of most recent to oldest)<br />
* A low voltage ALM is saved only if the power is recovered after detecting the low<br />
voltage.<br />
Abbreviation Code (Hex) ALM description<br />
No alarm 00 Normal status<br />
DE 01 Sensor disconnected<br />
OV 02 Input power voltage is above the specification range<br />
MPE 03 Input power voltage is below the specification range<br />
RSTE 04 Initialization error (overload)<br />
Power line disconnected<br />
OVF 05 Position deviation abnormal<br />
OL 06 Overload stop<br />
OS 07 Overspeed<br />
RGOL 08 Regeneration voltage is over the specified value<br />
ORG 09 Zero-return error<br />
CNT OVF 0A Position Deviation Counter over flow<br />
Wrap around 0B Absolute position counter sign reversal<br />
Push 0C Push ErrorWide swing<br />
MO OH 0E Motor overheat detection<br />
AMP OH 0F Amplifier overheat detection<br />
EEPER 10 Non-volatile memory error<br />
PAM 11 PAM voltage abnormal<br />
OC1 12 Overcurrent detectionHardware<br />
LA 13 Sensor phase error<br />
OC2 14 Overcurrent detectionSoft Ware<br />
5-44
<strong>5.</strong> <strong>Comm<strong>and</strong>s</strong> <strong>and</strong> <strong>Functions</strong><br />
Comm<strong>and</strong> Code: 135 (87h)<br />
Data Length: 0 bytes<br />
Communication Error<br />
This comm<strong>and</strong> returns the history of all past communication errors; the data is cleared at power OFF.<br />
Returned data The returned data is 8 bytes (returned in the order of most recent to oldest)<br />
Communication error codes<br />
Name<br />
Code (hex)<br />
Checksum error 01<br />
Timeout 02<br />
Parity error 08<br />
Framing error 10<br />
Overrun error 20<br />
Comm<strong>and</strong> Code: 137 (89h)<br />
Data Length: 0 bytes<br />
Software Revision<br />
This comm<strong>and</strong> reads the software revision.<br />
Returned<br />
The returned data is 2 bytes.<br />
data<br />
DAT Bit7 Bit6 Bit5 Bit4 Bit3 Bit2 Bit1 Bit0<br />
DAT1 *<br />
DAT2<br />
Software Rev<br />
Comm<strong>and</strong> Code: 138 (8Ah)<br />
Data Length: 0 bytes<br />
Program Stop Line<br />
This comm<strong>and</strong> reads the line where the program stopped if a STOP, program stop, or ALM aborts the<br />
running program.<br />
Returned The returned data is 2 bytes.<br />
data<br />
DAT Bit7 Bit6 Bit5 Bit4 Bit3 Bit2 Bit1 Bit0<br />
DAT1<br />
Stop line (lower byte)<br />
DAT2<br />
Stop line (higher byte)<br />
Comm<strong>and</strong> Code: 140 (8Ch)<br />
Data Length: 0 bytes<br />
Loop Counter Read<br />
This comm<strong>and</strong> is exclusively used in programs; it returns the current value of the For/Next loop counter.<br />
The returned data contains the values of all variables from 0 through A, in that order.<br />
The returned data is 2 bytes (in the order of most recent to oldest)<br />
Returned<br />
DAT Bit7 Bit6 Bit5 Bit4 Bit3 Bit2 Bit1 Bit0<br />
data<br />
DAT1 to 10<br />
Loop counter (variable 0~Ah)<br />
5-45
<strong>5.</strong> <strong>Comm<strong>and</strong>s</strong> <strong>and</strong> <strong>Functions</strong><br />
Comm<strong>and</strong> Code: 143 (8Ch)<br />
Data Length: 0 bytes<br />
Operation Complete Cause Read<br />
This comm<strong>and</strong> returns the cause of a motor stop. This function can be used to analyze the cause of an<br />
unexpected motor stop.<br />
Returned<br />
data<br />
The returned data is 1 byte.<br />
Data<br />
Stop cause<br />
0 Normal completion<br />
1 Stop due to positive direction limit<br />
2 Stop due to negative direction limit<br />
3 Stop due to deviation clear<br />
4 Stop due to STOP<br />
5 Stop due to alarm<br />
6 Stop due to Pause<br />
7 Stop due to Interlock<br />
FF<br />
In motion<br />
* This function cannot be used for zero-return operation.<br />
* The read data is kept only for the move comm<strong>and</strong> immediately before the stop. After<br />
checking the stop cause, the move comm<strong>and</strong> must be updated.<br />
5-46
6. Communication specifications<br />
6.1 Communication Specifications<br />
The following section describes the communication specifications of the PB Series system.<br />
6.1.1 Communication Format<br />
Item<br />
Specifications<br />
Transmission rate* 9600, 38400, 115200, 128000<br />
(Select with dip-switches: see Section 4.2)<br />
Synchronization method<br />
Start-stop synchronization<br />
Databits<br />
8 bit<br />
Parity bit<br />
Even<br />
Stop bit<br />
1 bit<br />
Number of slaves 1 to 15 units (Select with rotary switch; see Section 4.2)<br />
Data length<br />
Maximum of 255 bytes<br />
Data<br />
Hexadecimal<br />
Data transmission<br />
LSB first<br />
Transmission method<br />
Four-wire full duplex polling method<br />
*Contact <strong>Sanyo</strong> <strong>Denki</strong> for information on non-st<strong>and</strong>ard transmission rates.<br />
6.1.2 Hardware<br />
Item<br />
Line driver/Receiver IC<br />
Cable<br />
Termination resistor<br />
Extension length<br />
Insulation<br />
Connector (amplifier side)<br />
Specifications<br />
Full duplex: SN751178(TI) equivalent<br />
3 or 4-wire twisted pair, shielded cable<br />
Both ends of the signal line have a termination resistor<br />
connected (Rt: 150Ω), <strong>and</strong> can be set using dip-switches<br />
(see Section 4.2)<br />
Max. 100m<br />
Photocoupler insulation<br />
S10B-PADSS-1GW(JST)<br />
6-1
6. Communication specifications<br />
6.1.3 Daisy Chaining<br />
A<br />
B<br />
Rt<br />
TXD<br />
RAD RXD RXD<br />
Slave No.0<br />
Slave No.1<br />
Y<br />
Rt<br />
Z<br />
TAD<br />
TXD<br />
TXD<br />
RAD<br />
Master Slave No.0 Slave No.1<br />
Slave No.n (max F)<br />
6-2
6. Communication specifications<br />
6.2 Data Format<br />
6.2.1 Comm<strong>and</strong> Issue (Master → Slave)<br />
Packet Length Address Comm<strong>and</strong> Code Data Checksum<br />
1 byte 1 byte 1 byte n bytes 1 byte<br />
Packet Length<br />
Contains the length of one packet in bytes in hexadecimal notation. Indicates the total number of<br />
transmitted bytes from the packet length to the checksum.<br />
Packet length = Number of databytes (N) + 4<br />
Address<br />
Bit7 Bit6 Bit5 Bit4 Bit3 Bit2 Bit1 Bit0<br />
Address<br />
A maximum of 16 amplifiers can be connected. This value specifies the address set by the rotary<br />
switch. Address=FFh simultaneously specifies all the amplifiers connected to the communication line.<br />
In this case only the amplifier at address 0 will respond.<br />
Comm<strong>and</strong> Code<br />
Specifies the comm<strong>and</strong> code defined in Chapter <strong>5.</strong><br />
Data<br />
The number of data bytes depends on the comm<strong>and</strong>. The data fields contain the actual data for each<br />
comm<strong>and</strong>. Data longer than 2 bytes is sent in lower-higher order.<br />
Checksum<br />
The checksum is calculated by adding all bytes except the checksum, <strong>and</strong> taking the lowest byte.<br />
6-3
6. Communication specifications<br />
6.2.2 Status Response (Slave → Master)<br />
Packet Length Address Transmission Status Response Data Checksum<br />
1 byte 1 byte 1 byte n bytes 1 byte<br />
Packet Length <br />
Contains the length of one packet in bytes in hexadecimal notation.<br />
Packet length = Number of transmitted databytes (N) + 4<br />
Address<br />
Contains the address of the status response-originating slave device in hexadecimal notation.<br />
<br />
Communication Status<br />
The communication status byte contains information about the communication status of the last<br />
comm<strong>and</strong> sent, the device status, etc. for the slave. This is a response data for the status of all<br />
enabled shafts.<br />
Bit<br />
Description<br />
Data<br />
0 1<br />
0 Operation complete <strong>Inc</strong>omplete complete<br />
1 In-Position status Out of range Within range<br />
2 Amplifier alarm status Normal Alarm<br />
3 Servo ON status SOFF SON<br />
4 Limit (hard, soft both) Out of Limit Within Limit<br />
5 Comm<strong>and</strong> error Normal Error<br />
6 STOP control status<br />
Normal<br />
status<br />
STOP status<br />
7 No function assigned - -<br />
* Comm<strong>and</strong> error is generated when the following conditions are met:<br />
If a non-preset comm<strong>and</strong> is received.<br />
If a comm<strong>and</strong> that is not receivable due to the status of the amplifier is received.<br />
Response Data<br />
The number of bytes in the response data depends on the comm<strong>and</strong> sent <strong>and</strong> the data. Responses<br />
to comm<strong>and</strong>s other than RD comm<strong>and</strong>s do not have data attached.<br />
Data longer than 2 bytes is sent in lower-higher order.<br />
<br />
Checksum<br />
The checksum is calculated by adding all bytes except the checksum, <strong>and</strong> taking the lowest byte.<br />
6-4
6. Communication specifications<br />
6.3 Communication Method, Timing Chart<br />
6.3.1 Communication Method (Normal operation)<br />
Comm<strong>and</strong> issue<br />
Status response<br />
<br />
<br />
Time until the slave sends the status response after receiving the comm<strong>and</strong>: Minimum [T1] /<br />
Maximum [T2]<br />
Time until the master is able to issue comm<strong>and</strong>s after receiving the status: Minimum of 1ms<br />
1) The master sends all comm<strong>and</strong>s with an address attached to the header (Packet length).<br />
2) Slave devices can only transmit immediately after receiving a comm<strong>and</strong> with their own address.<br />
3) Slave devices send the status response with their address attached to the header.<br />
4) After receiving the comm<strong>and</strong>, the slave device must start responding after [T1] but before [T2] is<br />
over.<br />
5) After the master receives the response from the slave, it can issue the next comm<strong>and</strong> after [T1]<br />
has passed.<br />
6) If there is no response from the slave after [T3], it will be considered a time-out error, <strong>and</strong> the<br />
master can issue the next comm<strong>and</strong>. (It is possible to re-issue the comm<strong>and</strong>.)<br />
7) If the slave doesn’t complete receiving the data until [T3] is over, it discards the data received,<br />
<strong>and</strong> interprets the next data as a header (packet length).<br />
8) If there is a communication error, the master stops issuing comm<strong>and</strong>s after [T3] <strong>and</strong> clears the<br />
receive buffer of the slave device.<br />
9) If there is a communication error, the slave discards the data received, <strong>and</strong> does not send a<br />
response. A communication error is shown by opening the line longer than [T3].<br />
10) If the slave receives a comm<strong>and</strong> that is not a pre-set comm<strong>and</strong>, it returns the comm<strong>and</strong> error<br />
status.<br />
Note 1: During control power connection / cutoff, when the CPU is not working due to unstable<br />
control power, the amplifier may output some arbitrary data, which should be ignored by the user.<br />
6-5
6. Communication specifications<br />
6.3.2 Communication Method (Abnormal Operation)<br />
1) If the slave device did not send a status response (but a return response is sent)<br />
Master<br />
Comm<strong>and</strong> issue<br />
Transmission enable<br />
Slave<br />
Status response<br />
Transmission enable<br />
Status response does not work for some reason<br />
<br />
i) Time until the master can issue the next comm<strong>and</strong> if there is no status response after issuing the<br />
comm<strong>and</strong>: Minimum [T3]<br />
2) If abnormal data is generated<br />
Abnormal data<br />
Data is interrupted during a packet<br />
Communication error occurred due to noise, etc.<br />
Master<br />
Comm<strong>and</strong> execution<br />
Slave<br />
Status response<br />
<br />
<br />
i) In the case of abnormal data (packet is not recognizable), the master stops issuing of comm<strong>and</strong>s for at<br />
least [T3].<br />
ii) If there is no communication for at least [T3], the slave discards the previously received<br />
unrecognizable data. If the communication continues after [T3], the first data is interpreted as the<br />
header (packet length). If the packet is recognizable, it will be processed normally.<br />
6-6
6. Communication specifications<br />
6.4 St<strong>and</strong>ard Response Time Values<br />
[T1]=500μsec×2 n (n=0 to 7) setting is possible (comm<strong>and</strong> code 10h).<br />
Based on the T1 setting, [T2]=[T1] x2, [T3]=[T1] x4 will be set.<br />
St<strong>and</strong>ard values for [T1] to [T3] are shown in the table below.<br />
<br />
St<strong>and</strong>ard response time values Unit (ms)<br />
Response Time<br />
Response Time<br />
T1 T2 T3<br />
Setting Value n<br />
Setting Value n<br />
T1 T2 T3<br />
0 0.5 1 2 4 8 16 32<br />
1 1 2 4 5 16 32 64<br />
2 2 4 8 6 32 64 128<br />
3 4 8 16 7 64 128 256<br />
6-7
6. Communication specifications<br />
6.5 Communication Example<br />
The following example explains the communication process in detail.<br />
For the purposes of this example, the amplifier’s address is set to 0.<br />
Parameter WR<br />
Transmission example: Setting the Gain parameter1=5 (comm<strong>and</strong> 21h).<br />
Packet Length Address Comm<strong>and</strong> Code Data Checksum<br />
5 0 21h 5 7Bh<br />
Parameter RD<br />
Example: Reading the Gain parameter1 (comm<strong>and</strong> 21h) using Parameter RD (comm<strong>and</strong> 80h).<br />
Transmitted data:<br />
Packet Length Address Comm<strong>and</strong> Code Data Checksum<br />
5 0 80h 21h F6h<br />
Returned data:<br />
Packet Length Address Response Status Data 1 Data 2 Checksum<br />
6 0 21h 5 <br />
Point Data Save<br />
Transmitted data format:<br />
Packet Length Address Comm<strong>and</strong> code (56h) Point No Direct Comm<strong>and</strong> Code Data Checksum<br />
Example: Storing an incremental move comm<strong>and</strong> (comm<strong>and</strong> 38h) = 4000 (FA0h) to Point No=2.<br />
Packet Length Address Comm<strong>and</strong> Code Point No Comm<strong>and</strong> Data Data Data Data Checksum<br />
9 0 56h 2 38h A0h Fh 0 0 48h<br />
Point data RD<br />
Transmitted data format:<br />
Packet Length Address Comm<strong>and</strong> Code (81h) Point No Checksum<br />
Returned data format:<br />
Packet Length Address Response Status Store Comm<strong>and</strong> Data Checksum<br />
* There is no point number attached to the return data.<br />
Example: Reading the Point data stored at .<br />
Transmitted data format:<br />
Packet Length Address Comm<strong>and</strong> Point No Checksum<br />
5 0 81h 2 88h<br />
Returned data format:<br />
Packet Length Address Response Status Store Comm<strong>and</strong> Data Data Data Data Checksum<br />
9 0 * 38h A0h Fh 0 0 *<br />
6-8
6. Communication specifications<br />
<br />
Program Data Save<br />
Transmitted data format:<br />
Packet Length Address 57h Program No. Line Number (2 bytes) Comm<strong>and</strong> Code Data Checksum<br />
Example: This program is PRG number 0, which performs a zero-return <strong>and</strong> a 200ms Timer Wait, <strong>and</strong> then<br />
executes an incremental move.<br />
Line Comm<strong>and</strong> Code<br />
0 Zero-return (each direction push origin, velocity 75min -1 , grid shift=200, counter=0) 45h<br />
1 Zero-return complete wait (false, this line waits to complete) 67h<br />
2 Timer Wait (200ms) 61h<br />
3 Absolute travel distance (velocity: 1000min -1 , accel. / decel. rate: 100min -1 /ms, absolute position=4000) 44h<br />
4 PRG exit 52h<br />
<br />
Packet ADR Comm<strong>and</strong> PRG No. Line (lower) Line (higher) Comm<strong>and</strong> Data (n bytes) Sum<br />
12h 0 57h 0 0 0 45h 13h,4B,4B,C8,0,0,0,0,0,0<br />
Bh 0 57h 0 1 0 67h 0,1,0<br />
Ah 0 57h 0 2 0 61h C8h,0<br />
13h 0 57h 0 3 0 44h E8h,3,64h,64h,A0h,Fh,0,0,0,0,0<br />
8 0 57h 0 4 0 52h -<br />
Program data RD<br />
Transmitted data format:<br />
Packet Length Address 82h Program No. Line Number (2 bytes) Checksum<br />
Returned data format:<br />
Packet Length Address Response Status Comm<strong>and</strong> Code Data (n bytes) Checksum<br />
* There is no program number or line number attached to the return data.<br />
Parameter CLR<br />
Transmitted data format:<br />
Packet Length Address 02h Checksum<br />
Parameter Save<br />
Transmitted data format:<br />
Packet Length Address 03h Checksum<br />
Parameter Load<br />
Transmitted data format:<br />
Packet Length Address 04h Checksum<br />
6-9
7. Specifications<br />
7.1 Amplifier Basic Specifications<br />
Amplifier Model<br />
Control Mode<br />
Power Single Power<br />
PB3A003R200<br />
PWM control SIN drive method<br />
AC100, 115200, 230 -15% +10% 5060Hz<br />
Environment<br />
Ambient Operating 0 to 55 °C<br />
Temp. Storage -20 to 70 °C<br />
Operating <strong>and</strong> Storage Maximum 90% RH (non-condensing)<br />
Humidity<br />
Vibration Resistance 0.5G (tested with frequency range 10 to 55 Hz, X, Y, Z each direction 2H)<br />
Structure<br />
Weight<br />
Tray structure Rear mounting type<br />
Approximately 0.8 kg<br />
Dimensions W 45 × H 150 × D 120<br />
<strong>Functions</strong><br />
Rotation Speed 0 to 4500 min -1 (86º angle is 4000 min -1 )<br />
Resolution (P/R) 500, 1000, 2000, 4000, 5000, 10000<br />
Regeneration Process<br />
Internal (external regeneration available)<br />
Protective <strong>Functions</strong><br />
Power Voltage Error, Regeneration Voltage Error, Over-speed, Encoder<br />
Disconnection, CPU Error, Overload Stop, Excessive Position Deviation,<br />
Motor Overheat, Amplifier Overheat, Zero-return Error, Nonvolatile<br />
Memory Error, Initialization Error, Over-current<br />
Display<br />
Operation <strong>Functions</strong><br />
LED Display (power status, alarm)<br />
Normal Drive (incremental move comm<strong>and</strong>, absolute move comm<strong>and</strong>),<br />
Zero-return, Modulo Operation, Continuous Rotation, Push Operation<br />
Switches<br />
DSW1: Transmission speed setting; DSW2: Terminating resistor setting; RSW:<br />
Node address setting<br />
Input / Output Signals<br />
Input Signals Fixed Function: EXE, ALMCLR, STOP, Point1, 2<br />
Selectable (5): Point, Zero-return Start, Pause, Interlock, SELECT,<br />
Hard Limit (Positive/Negative), Generic Input<br />
Output Signals<br />
Fixed function: Alarm Output, In-Position, Ack<br />
Selectable (5): Motor Stop, END, ZONE, P.Busy, Zero-return Complete,<br />
SON Monitor, Input Pin Monitor, Generic Output<br />
Serial Communication<br />
RS-485 St<strong>and</strong>ard, Start-stop Synchronization, Full Duplex<br />
Transmission Rate: 9600, 38400, 115200, 128000bps<br />
Maximum Connections: 16 devices<br />
7-1
7. Specifications<br />
7.2 Motor St<strong>and</strong>ard Specifications (No gear, no holding brake)<br />
7.2.1 Motor St<strong>and</strong>ard Features<br />
Motor Model<br />
Maximum Stored Torque<br />
Rotor Inertia<br />
Mass<br />
Allowable Thrust<br />
Radial Load Tolerance<br />
(Nm)<br />
(x 10 -4 kgm 2 )<br />
[kg]<br />
Load<br />
(N)<br />
(N)<br />
PBM423FXE20 0.39 0.056 0.35 9.8 49<br />
PBM603FXE20 1.3 0.4 0.85 14.7 167<br />
PBM604FXE20 1.9 0.84 1.42 14.7 167<br />
PBM861FXE20 3.5 1.48 1.9 60 200<br />
<br />
PBM862FXE20 6.6 3 3.1 60 200<br />
* The maximum value of the stop-time holding torque is 50% of the maximum stored torque.<br />
7.2.2 Load Tolerances<br />
Motor Model<br />
Maximum Inertia Tolerance<br />
Maximum Friction Torque<br />
Maximum Side Load Tolerance<br />
(x 10 -4 kgm 2 )<br />
(Nm)<br />
(Nm)<br />
PBM423FXE20 0.56 0.15 0.15<br />
PBM603FXE20 4 0.52 0.52<br />
PBM604FXE20 8.4 0.76 0.76<br />
PBM861FXE20 14.8 1.4 1.4<br />
PBM862FXE20 30 2.64 2.64<br />
7.2.3 Motor Common Specifications<br />
Encoder Specifications<br />
Common Specifications<br />
Basic Divisions P/R 500 x 4 multiplier<br />
Number of Channels - 3<br />
Maximum Response<br />
37.5<br />
kHz<br />
Frequency<br />
Output Method - Line driver<br />
Environment<br />
Ambient<br />
0 to +40<br />
°C<br />
Temperature<br />
Ambient<br />
%R<br />
20 to 90<br />
Humidity<br />
H<br />
Vibration Resistance G 10 (tested with frequency range 10~500 Hz, X, Y, Z each direction 2H)<br />
Shock Tolerance G 30 (shock wave: half sine wave, shock time: 11ms; X, Y, Z direction 3 times each)<br />
Withst<strong>and</strong> Voltage V AC2000V 1 min<br />
Insulation Resistance MΩ 10 min DC500V<br />
Insulation Class - Class B<br />
Protection Method - Fully enclosed, self-cooling type<br />
Motor Surface<br />
Max 85º (consider a radiation cooling method to ensure the temperature is below the<br />
°C<br />
Temperature Tolerance<br />
specified limit)<br />
7-2
7. Specifications<br />
7.3 Motor Option Specifications<br />
7.3.1 Low-backlash gear<br />
1) PBM423<br />
Motor Model PBM423FGAE20 PBM423FGBE20 PBM423FGEE20 PBM423FGGE20 PBM423FGJE20<br />
Reduction Gear Ratio 1 : 3.6 1 : 7.2 1 : 10 1 : 20 1 : 30<br />
Torque Tolerance (N m) 0.343 0.7 0.98 1.47 1.47<br />
Rotation Tolerance (min -1 ) 500 250 180 90 60<br />
Backlash (degree) 0.4 0.4 0.35 0.25 0.25<br />
Rotational Direction (compared to the Forward Forward Forward Reverse Reverse<br />
comm<strong>and</strong> direction)<br />
Thrust Load Tolerance (N) 15<br />
Radial load Tolerance (N)* 20<br />
Motor Weight (kg) 0.48<br />
2) PBM603<br />
Motor Model PBM603FGAE20 PBM603FGBE20 PBM603FGEE20 PBM603FGGE20 PBM603FGJE20<br />
Reduction Gear Ratio 1 : 3.6 1 : 7.2 1 : 10 1 : 20 1 : 30<br />
Torque Tolerance (N m) 1.25 2.5 3 3.5 4<br />
Rotation Tolerance (min -1 ) 500 250 180 90 60<br />
Backlash (degree) 0.55 0.25 0.25 0.17 0.17<br />
Rotational Direction (relative to the<br />
Forward Forward Reverse Reverse Reverse<br />
comm<strong>and</strong> direction)<br />
Thrust Load Tolerance (N) 30<br />
Radial Load Tolerance (N)* 100<br />
Motor Weight (kg) 1.22<br />
There is no low-backlash gear option for the PBM604, PBM861 <strong>and</strong> PBM862.<br />
*The load point is at 1/3 length from the output shaft.<br />
7.3.2 Harmonic gear<br />
Motor Model PBM423FHJE20 PBM423FHLE20 PBM423FHME20 PBM603FHLE20 PBM603FHME20<br />
Reduction Gear Ratio 1 : 30 1 : 50 1 : 100 1 : 50 1 : 100<br />
Torque Tolerance (N m) 2.2 3.5 5 <strong>5.</strong>5 8<br />
Instantaneous Torque Tolerance (N m) 4.5 8.3 11 14 20<br />
Rotation Tolerance (min -1 ) 116 70 35 70 35<br />
Lost Motion (min) - - - 0.4 to 3 (±0.28 Nm) 0.4 to 3 (±0.4 Nm)<br />
Hysteresis Loss (min) 3.6 2.4 2.4 - -<br />
Rotational Direction (relative to the<br />
Reverse<br />
Reverse<br />
comm<strong>and</strong> direction)<br />
Thrust Load Tolerance (N) 1150 400<br />
Radial Load Tolerance (N)* 209 360<br />
Motor Weight (kg) 0.54 1.45<br />
There is no harmonic gear option for the PBM604, PBM861 <strong>and</strong> PBM862.<br />
*The load point is at 1/3 length from the output shaft.<br />
7-3
7. Specifications<br />
7.3.3 Holding brake<br />
Motor model PBM423FCE20 PBM603FCE20 PBM604FCE20<br />
Operation Method<br />
Non-excitation type<br />
Excitation Current (A) 0.08 0.25 0.25<br />
Power Consumption (W) 2 6 6<br />
Friction Torque (N m) 0.22 0.78 0.78<br />
Brake Engage Time (ms) 20<br />
Brake Release Time (ms) 30<br />
Motor Weight (kg) 0.5 1.19 1.76<br />
The holding brake control function is built into the amplifier.<br />
There is no holding brake option for the PBM861 <strong>and</strong> PBM862.<br />
7-4
7. Specifications<br />
7.4 Velocity – Torque, power consumption (during drive) characteristics<br />
<br />
<br />
<br />
<br />
<br />
<br />
<br />
<br />
<br />
<br />
<br />
<br />
<br />
<br />
<br />
<br />
<br />
<br />
<br />
<br />
<br />
<br />
<br />
<br />
<br />
<br />
<br />
<br />
<br />
<br />
<br />
<br />
<br />
<br />
<br />
<br />
<br />
<br />
<br />
<br />
<br />
<br />
<br />
<br />
<br />
<br />
<br />
<br />
<br />
<br />
<br />
<br />
<br />
<br />
<br />
<br />
<br />
<br />
<br />
<br />
<br />
<br />
<br />
<br />
<br />
<br />
<br />
<br />
<br />
<br />
<br />
<br />
<br />
<br />
<br />
<br />
<br />
<br />
<br />
<br />
<br />
<br />
<br />
<br />
<br />
<br />
<br />
<br />
<br />
<br />
<br />
<br />
7-5
7. Specifications<br />
<br />
<br />
<br />
<br />
<br />
<br />
<br />
<br />
<br />
<br />
<br />
<br />
<br />
<br />
<br />
<br />
<br />
<br />
<br />
<br />
<br />
<br />
<br />
<br />
<br />
<br />
<br />
<br />
<br />
<br />
<br />
<br />
<br />
<br />
<br />
<br />
<br />
<br />
<br />
<br />
<br />
<br />
<br />
<br />
<br />
<br />
<br />
<br />
<br />
<br />
<br />
<br />
<br />
7-6
7<br />
9 A B CD E F 08<br />
1<br />
7. Specifications<br />
7.5 Outline Drawings<br />
7.<strong>5.</strong>1 Amplifier Drawing<br />
45<br />
(6.5)<br />
120<br />
7<br />
<br />
33<br />
4<br />
170<br />
160 5<br />
(5)<br />
M TION<br />
SW1<br />
CN3<br />
CN4<br />
5<br />
PB<br />
6<br />
5<br />
4<br />
3<br />
2<br />
C<br />
N<br />
7<br />
C<br />
N<br />
2<br />
S<br />
W<br />
2<br />
C<br />
N<br />
1<br />
C<br />
N<br />
5<br />
C<br />
N<br />
6<br />
(10) 150 10<br />
M<br />
TION<br />
PB<br />
7-7
7. Specifications<br />
7.<strong>5.</strong>2 Motor Drawings<br />
7-8
7. Specifications<br />
7-9
7. Specifications<br />
7-10
8. Options<br />
8. Options<br />
8.1 Optional Cables<br />
8.1.1 Optional Cable Model Number Nomenclature<br />
PBC □ ∆ 0030<br />
A<br />
Design Order<br />
A: St<strong>and</strong>ard<br />
Cable Length (x 10cm)<br />
Cable Type<br />
Management Number<br />
System Series Name PB Cable<br />
8.1.2 Optional Cable Model Numbers<br />
Cable Type Cable St<strong>and</strong>ard Model Number St<strong>and</strong>ard Length Maximum Length<br />
Power cable PBC7P0020A 2m 3m<br />
Motor power cable PBC6M0030A 3m 20m<br />
Sensor cable PBC6E0030A 3m 20m<br />
I/O cable PBC1S0010A 1m 3m<br />
Communication cable (to amplifier) PBC6C0003A 0.3m 100m<br />
* The optional cables are necessary to extend the motor power cable <strong>and</strong> the sensor cable beyond 50cm.<br />
(The motor power cable <strong>and</strong> the sensor cable can be directly connected if the motor side is wthin 50cm.)<br />
* If a set is ordered, the power cable <strong>and</strong> I/O cable will be included.<br />
81
8. Options<br />
82<br />
8.1.3 Cable Drawings
8. Options<br />
8.2 Optional Connectors<br />
Single Item Model No. Connector Type. Packaging Type Model Number Qty. Mfr.<br />
PBC7P0000A Power connector Receptacle housing 1-1778288-5 1<br />
Contact 1-175218-5 5<br />
AMP<br />
PBC1S0000A I/O connector Receptacle 8822E-020-171D 1 KEL<br />
PBC6M0000A Motor power Receptacle housing 1-1318119-3 1 AMP<br />
connector<br />
Receptacle contact 1318107-1 6<br />
Tab housing 1-1318115-3 1<br />
Tab contact 1318111-1 6<br />
PBC6E0000A Sensor connector Receptacle housing 1-1318118-6 1 AMP<br />
Receptacle contact 1318108-1 12<br />
Tab housing 1-1318115-6 1<br />
Tab contact 1318112-1 12<br />
PBC6C0000A Communication Housing PADP-10V-1-S 2 JST<br />
connector Contact SPH-002T-P0.5L 20<br />
* Refer to Section 3.4.3 regarding the appropriate electric wire <strong>and</strong> the maximum length.<br />
* Refer to Section 3.4.4 regarding the connector pin assignment.<br />
* For harness assembly, special crimping <strong>and</strong> pressure welding tools are necessary. Refer to the<br />
manufacturers' specifications regarding each connector.<br />
* The number of contacts included in the package equals the number of connector pins, regardless<br />
of how many will be used.<br />
83
8. Options<br />
8.3 Optional Communication Equipment<br />
Type Model Number Memo<br />
PC software for Windows TM SPBA1W-01 Supports Windows TM 98, 2000, NT, XP<br />
Both Japanese <strong>and</strong> English versions<br />
RS-232C/RS-485 converter unit<br />
* Full duplex<br />
PBFM-U3<br />
(Set number)<br />
Unit configuration<br />
Main unit: PBFM-P2<br />
Cable: PBC3T0005A (50cm)<br />
<br />
PB3A003R200<br />
IBM compatible PC<br />
<br />
<br />
Converter<br />
* The user must supply a commercially available RS-232C straight cable for connecting the PC to<br />
the converter unit.<br />
* Refer to M0006803 for the PC I/F specifications sheet.<br />
* A housing of converter please do not make a common use of amplifier earth. There is the fear that<br />
a PC <strong>and</strong> an amplifier are damaged.<br />
<br />
Cable connection example (for D-Sub 9-pin)<br />
<br />
<br />
<br />
<br />
<br />
<br />
<br />
<br />
<br />
<br />
<br />
<br />
<br />
<br />
<br />
<br />
<br />
<br />
<br />
<br />
<br />
<br />
<br />
<br />
<br />
<br />
<br />
<br />
<br />
<br />
<br />
<br />
<br />
<br />
<br />
<br />
<br />
<br />
<br />
<br />
<br />
<br />
<br />
<br />
<br />
<br />
<br />
<br />
<br />
<br />
<br />
<br />
<br />
<br />
<br />
<br />
<br />
<br />
<br />
<br />
<br />
<br />
<br />
<br />
<br />
<br />
<br />
<br />
<br />
<br />
<br />
<br />
<br />
<br />
<br />
<br />
<br />
<br />
<br />
<br />
<br />
<br />
<br />
<br />
<br />
<br />
<br />
<br />
<br />
<br />
<br />
<br />
<br />
<br />
<br />
<br />
<br />
84
8. Options<br />
Converter Drawing<br />
Full duplex: PBFM-P2<br />
<br />
<br />
<br />
<br />
<br />
<br />
<br />
<br />
85
International St<strong>and</strong>ards Conformity<br />
<br />
International St<strong>and</strong>ards Conformity<br />
<br />
PB driver conforms to the international st<strong>and</strong>ards below.<br />
Mark<br />
International<br />
st<strong>and</strong>ards<br />
St<strong>and</strong>ard number<br />
Certification Organization<br />
<br />
<br />
<br />
<br />
<br />
<br />
UL st<strong>and</strong>ard<br />
CSA st<strong>and</strong>ard<br />
EN st<strong>and</strong>ard<br />
<br />
<br />
<br />
<br />
<br />
PB motor has an article for following st<strong>and</strong>ards.<br />
International<br />
Mark<br />
St<strong>and</strong>ard number<br />
st<strong>and</strong>ards<br />
<br />
<br />
<br />
<br />
<br />
Certification Organization<br />
<br />
<br />
<br />
<br />
<br />
<br />
<br />
UL st<strong>and</strong>ard<br />
EN st<strong>and</strong>ard<br />
<br />
<br />
<br />
<br />
<br />
<br />
<br />
<br />
<br />
Low voltage comm<strong>and</strong><br />
<br />
<br />
overvoltage category<br />
<br />
pollution level<br />
<br />
The control panel installation configuration (under IP54) must exclude exposure to water, oil,<br />
carbon, dust, etc.<br />
Always ground the protective earth terminals of the Driver to the power supply earth. ( )<br />
When connecting grounding wire to the protective earth terminal, always connect one wire in one<br />
terminal; never connect jointly with multiple wires or terminals.<br />
When connecting the leakage stopper, make sure to connect the protective earth terminal to the<br />
power supply earth. ( )<br />
The power supply input department please use IEC or a reinforcement insulation transformer of<br />
<br />
EN st<strong>and</strong>ard conformity.<br />
91
International St<strong>and</strong>ards Conformity<br />
<br />
EMC Directive<br />
<br />
Directive<br />
classification<br />
<br />
<br />
Classification Test st<strong>and</strong>ard<br />
<br />
<br />
<br />
<br />
<br />
<br />
<br />
<br />
<br />
<br />
<br />
<br />
<br />
<br />
<br />
<br />
<br />
<br />
<br />
<br />
<br />
<br />
<br />
<br />
<br />
<br />
<br />
<br />
Precautions for EMC Directives<br />
For the EMC Directives, tests are performed by general installation <strong>and</strong> countermeasure methods, in<br />
our company as machines <strong>and</strong> configurations differ depending on customers’ needs.<br />
This driver has been authorized to display CE marking based on the recognition certificate issued by a<br />
separate, third-party certifying authority. Accordingly, customers are instructed to perform the final<br />
conformity tests for all instruments <strong>and</strong> devices in use.<br />
Use the following guidelines below for the PB system in order to conform the customer’s equipment <strong>and</strong><br />
devices to the EMC Directives.<br />
<br />
<br />
<br />
<br />
Noise Filter Surge protector<br />
Metal Plane<br />
<br />
<br />
<br />
<br />
<br />
<br />
Amplifier<br />
<br />
<br />
<br />
<br />
<br />
<br />
<br />
<br />
<br />
<br />
<br />
<br />
<br />
<br />
Noise suppression components :<br />
Noise Filter: SUP-EK10-ER-6 (OKAYA)<br />
Surge Protector: RCM-781BQZ-4 (OKAYA)<br />
Ferrite Core:<br />
HF60T 381422 (TDK) 2 turns <br />
HF60T 311319 (TDK) 2 turns <br />
92
Closed Loop Stepping System<br />
PB series Type R<br />
Instruction Manual<br />
Copyright 2005, SANYO DENKI Co., Ltd.<br />
All Rights Reserved.<br />
SANYO DENKI CO., LTD.<br />
URL http://www.sanyodenki.co.jp<br />
JAPAN SANYO DENKI CO., LTD. 1-15-1, Kita-Otsuka Toshima-ku Tokyo 170-8451, Japan<br />
International Sales Dept.<br />
PHONE: +81 3 3917 2223 (North <strong>America</strong> area)<br />
+81 3 3917 5157 (Europe area)<br />
+81 3 3917 2814 (Asis area)<br />
FAX: +81 3 3917 4251<br />
U.S.A SANYO DENKI AMERICA, INC. 468 Amapola Avenue Torrance, CA 90501, U.S.A<br />
PHONE: +1 310 783 5400<br />
FAX: +1 310 212 6545<br />
SANYO DENKI AMERICA, INC. 1500 Wyatt Dr.Ste 10 Santa Clara, CA 95054, U.S.A<br />
Silicon Valley Office PHONE: +1 408 988 1700<br />
FAX: +1 408 982 1700<br />
SANYO DENKI AMERICA, INC. 35 Merchant Drive, Walpole, MA 02081 U.S.A<br />
New Engl<strong>and</strong> Office PHONE: +1 508 660 2470<br />
FAX: +1 508 660 7912<br />
SANYO DENKI AMERICA, INC. 100 Fairway Drive, Suite 126 Vernon Hills, IL 60061 U.S.A<br />
Midwest Office PHONE: +1 847 362 3723<br />
FAX: +1 847 362 4903<br />
FRANCE SANYO DENKI EUROPE SA. BP. 50286 95958 Roissy Charles-De-Gaulle Cedex, France<br />
PHONE: +33 1 48 63 26 61<br />
FAX: +33 1 48 63 24 16<br />
GERMANY SANYO DENKI EUROPE SA. Niederlassung Deutschl<strong>and</strong>, Posthof 4 D86609-Donauworth Germany<br />
German Liaison Office PHONE: +49 906 24 57 00<br />
FAX: +49 906 24 57 01<br />
TAIWAN SANYO DENKI CO., LTD Room 401, 4F, No.96, Sec.2, Chung Shan N, Rd, Taipei 104, Taiwan, R.O.C<br />
TAIWAN BRANCH PHONE: +886 2 2511 3938<br />
FAX: +886 2 2511 3975<br />
HONG KONG<br />
SANYO DENKI CO., LTD<br />
New East Ocean Centre 11F, 9 Science Museum Road, TST East, Kowloon,<br />
HONG KONG BRANCH HONG KONG PHONE: +852 2312 6250<br />
FAX: +852 2312 6220<br />
SANYO DENKI