Download the S-xover User Manual in PDF format - Samson
Download the S-xover User Manual in PDF format - Samson
Download the S-xover User Manual in PDF format - Samson

Create successful ePaper yourself
Turn your PDF publications into a flip-book with our unique Google optimized e-Paper software.
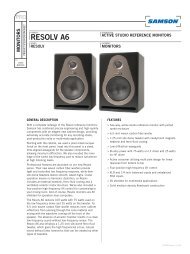
Stereo Two-way Electronic Crossover<br />
S C l a s s S i g n a l P r o c e s s o r s
Table Of Contents<br />
Introduction and Features 3<br />
Front and Rear Panel Layout 4<br />
Operat<strong>in</strong>g <strong>the</strong> S <strong>xover</strong><br />
Sett<strong>in</strong>g Up <strong>the</strong> S <strong>xover</strong> 5-6<br />
Mono Sub Set-up 7<br />
Wir<strong>in</strong>g Guide 8<br />
Specifications 8<br />
Copyright 2004, <strong>Samson</strong> Technologies Corp.<br />
Pr<strong>in</strong>ted June 2004<br />
<strong>Samson</strong> Technologies Corp.<br />
575 Underhill Blvd.<br />
P.O. Box 9031<br />
Syosset, NY 11791-9031<br />
Phone: 1-800-3-SAMSON (1-800-372-6766)<br />
Fax: 516-364-3888<br />
www.samsontech.com
S <strong>xover</strong> Introduction and Features<br />
Introduction<br />
Congratulations on your purchase of <strong>the</strong> S <strong>xover</strong> by <strong>Samson</strong> Audio! The S <strong>xover</strong> is a full<br />
featured, stereo, two-way electronic crossover perfect for a variety of bi-amp speaker<br />
applications <strong>in</strong> studio monitor<strong>in</strong>g, live sound and fixed <strong>in</strong>stallations. With <strong>in</strong>dividual controls<br />
for Input Level, as well as High and Low Frequency outputs, <strong>the</strong> S <strong>xover</strong> is small, but not<br />
short on features. For expanded control, <strong>the</strong> S <strong>xover</strong> provides a Range switch allow<strong>in</strong>g<br />
you to adjust crossover frequency by ten times so you can configure a speaker system<br />
with drivers from subs to tweets. The S <strong>xover</strong>, with its Mono Low switch, is a perfect<br />
complement if youʼre add<strong>in</strong>g a subwoofer to a studio monitor or PA system when us<strong>in</strong>g a<br />
common subwoofer with stereo satellite speakers. Whatever your exact situation, <strong>the</strong> S<br />
<strong>xover</strong> will provide high quality and reliable performance thanks to its solid build construction<br />
based around <strong>the</strong> extruded alum<strong>in</strong>um chassis and oversized rubber bumper feet.<br />
In this manual, youʼll f<strong>in</strong>d a more detailed description of <strong>the</strong> features of <strong>the</strong> S <strong>xover</strong>, as<br />
well as a guided tour through <strong>the</strong> front and rear panels, step-by-step <strong>in</strong>structions for us<strong>in</strong>g<br />
<strong>the</strong> S <strong>xover</strong>, and full specifications. Youʼll also f<strong>in</strong>d a warranty card enclosed—please donʼt<br />
forget to fill it out and mail it so that you can receive onl<strong>in</strong>e technical support and so we<br />
can send you updated <strong>in</strong><strong>format</strong>ion about o<strong>the</strong>r <strong>Samson</strong> products <strong>in</strong> <strong>the</strong> future.<br />
S <strong>xover</strong> Features<br />
• Two-way Stereo Electronic Crossover<br />
• Adjustable Crossover frequency control.<br />
• High and Low Level Outputs.<br />
• Input Level Control.<br />
• Range control cover<strong>in</strong>g frequencies from subs to tweeters.<br />
• Mono Low switch for operat<strong>in</strong>g sub satellite system woofers.<br />
• Large rubber bumper feet.<br />
• Three year extended warranty.<br />
3
S <strong>xover</strong> Front and Rear Panel Layout<br />
Front Panel Layout<br />
<br />
<br />
<br />
<br />
<br />
<br />
<br />
<br />
<br />
<br />
<br />
<br />
<br />
<br />
<br />
<br />
<br />
<br />
<br />
<br />
<br />
1 LEVEL- Used to adjust <strong>the</strong> <strong>in</strong>put ga<strong>in</strong><br />
from –00 to +0dB.<br />
2 LOW - Adjusts <strong>the</strong> output ga<strong>in</strong> of <strong>the</strong> Low<br />
frequency bands from -12 to +12dB.<br />
3 HIGH - Adjusts <strong>the</strong> output ga<strong>in</strong> of <strong>the</strong><br />
High frequency bands from -12 to +12dB.<br />
Rear Panel Layout<br />
<br />
4 FREQUENCY CONTROL- This control<br />
that sets <strong>the</strong> crossover po<strong>in</strong>t divid<strong>in</strong>g<br />
<strong>the</strong> frequency bands.<br />
5 RANGE SWITCH - Selects <strong>the</strong> range at<br />
which <strong>the</strong> frequency control operates,<br />
ei<strong>the</strong>r normal or times 10.<br />
6 MONO LOW - Selects mono operation<br />
for <strong>the</strong> low output.<br />
<br />
<br />
<br />
<br />
<br />
<br />
<br />
<br />
A<br />
IN LEFT - 1/4-<strong>in</strong>ch l<strong>in</strong>e level <strong>in</strong>put for<br />
<strong>the</strong> Left channel.<br />
C<br />
HIGH OUT - TRS connector with Left and<br />
Right High frequency l<strong>in</strong>e outputs.<br />
B<br />
IN RIGHT - 1/4-<strong>in</strong>ch l<strong>in</strong>e level <strong>in</strong>put for<br />
<strong>the</strong> Right channel.<br />
D<br />
LOW OUTPUT - TRS connector with Left<br />
and Right Low frequency l<strong>in</strong>e outputs.<br />
E<br />
4<br />
POWER IN DC INLET - Connect <strong>the</strong> supplied<br />
power adapter here.
CAUTION<br />
RISK OF ELECTRIC SHOCK !<br />
DO NOT OPEN<br />
FUSE<br />
SERIAL<br />
NUMBER<br />
FUSE RATING<br />
12A/250V (115V)<br />
6A/250V (230V)<br />
USE CLASS 2 WIRING MAXIMUM LOAD IMPEDANCE 4<br />
CAUTION<br />
HEATSINK MAY BE<br />
HOT! DO NOT BLOCK<br />
AIRFLOW OR OVER-<br />
HEATING MAY OCCUR<br />
TO PREVENT SHOCK DO<br />
N O T O P E N . N O U S E R +RIGHT GROUND LEFT+<br />
S E R V I C A B L E P A R T S<br />
INSIDE. REFER SERVICING<br />
TO QUALIFIED SERVICE<br />
OUTPUT 250W/4<br />
PERSONNEL. TO PREVENT<br />
FIRE OR SHOCK HAZARD<br />
DO NOT EXPOSE TO RAIN<br />
OR MOISTURE.<br />
RIGHT<br />
LEFT<br />
~AC INPUT<br />
115V/230W, 50/60HZ<br />
510W (115V)900W (230V)<br />
20A/250V<br />
PUSH TO RESET<br />
~AC INPUT<br />
115V 60Hz, 920W<br />
<br />
(4~8)<br />
OUTPUT<br />
(4~8)<br />
(4~8)<br />
(4~8)<br />
CH 2 CH 1<br />
<br />
BALANCED<br />
0dBm<br />
TRS TIP=HOT<br />
RING=COLD<br />
BALANCED SLEEVE=GND<br />
INPUT<br />
BRIDGED PARALLEL<br />
STEREO<br />
BALANCED<br />
0dBm<br />
XLR 3=COLD<br />
2=HOT<br />
BALANCED 1=GND<br />
CH 2 CH 1<br />
BRIDGED<br />
MONO STEREO<br />
LEFT<br />
RIGHT<br />
INPUTS<br />
(BALANCED<br />
10K/0dBm0)<br />
TIP RING SLEEVE<br />
TIP +<br />
RING -<br />
SLEEVE GND<br />
Sett<strong>in</strong>g Up <strong>the</strong> S <strong>xover</strong><br />
Operat<strong>in</strong>g <strong>the</strong> S <strong>xover</strong><br />
The basic procedure for sett<strong>in</strong>g up and us<strong>in</strong>g your S <strong>xover</strong> is simple and takes only a few<br />
m<strong>in</strong>utes. Remove all pack<strong>in</strong>g materials (save <strong>the</strong>m <strong>in</strong> case of need for future service).<br />
There are many different ways to use <strong>the</strong> S <strong>xover</strong>, however <strong>the</strong> basic connection is <strong>the</strong><br />
same <strong>in</strong> most <strong>in</strong>stallations and applications. The follow<strong>in</strong>g example details a typical 2-way<br />
stereo sound system for us<strong>in</strong>g a bi-amp power arrangement. Follow <strong>the</strong> steps below to<br />
connect your bi-amp system.<br />
<br />
<br />
<br />
<br />
<br />
<br />
Servo 550 Power Amp (High)<br />
<br />
<br />
<br />
S1500 Power Amp (Mid)<br />
<br />
<br />
5<br />
<br />
• Connect <strong>the</strong> AC/DC power adapter to <strong>the</strong> DC <strong>in</strong>let, but donʼt plug <strong>the</strong> AC/DC power<br />
adapter <strong>in</strong> just yet.
Operat<strong>in</strong>g <strong>the</strong> S <strong>xover</strong><br />
Sett<strong>in</strong>g Up <strong>the</strong> S <strong>xover</strong><br />
• Set <strong>the</strong> LEVEL, LOW and HIGH Output controls all <strong>the</strong> way down by turn<strong>in</strong>g <strong>the</strong>m fully counter<br />
clockwise.<br />
• Us<strong>in</strong>g two standard 1/4-<strong>in</strong>ch phone cables, connect <strong>the</strong> your mixerʼs left and right output to <strong>the</strong> S<br />
<strong>xover</strong>ʼs LEFT and RIGHT INPUT.<br />
• Use a “Y” cable with a 1/4-<strong>in</strong>ch TRS (TIP RING SLEEVE) to two 1/4-<strong>in</strong>ch TS (TIP SLEEVE) to<br />
connect <strong>the</strong> Left and Right LOW Output to <strong>the</strong> power amp connected to <strong>the</strong> low frequency drivers.<br />
For a detailed wir<strong>in</strong>g diagram for <strong>the</strong> 1/4-<strong>in</strong>ch TRS "Y" cable see page 8 <strong>in</strong> this manual.<br />
• Use a second “Y” cable with a 1/4-<strong>in</strong>ch TRS (TIP RING SLEEVE) to two 1/4-<strong>in</strong>ch TS (TIP<br />
SLEEVE) to connect <strong>the</strong> Left and Right HIGH Output to <strong>the</strong> power amp connected to <strong>the</strong> high<br />
frequency drivers.<br />
• At this po<strong>in</strong>t connect <strong>the</strong> power amplifiers to <strong>the</strong> low and high frequency speakers follow<strong>in</strong>g <strong>the</strong><br />
manufacturers recommended procedures outl<strong>in</strong>ed <strong>in</strong> <strong>the</strong>ir <strong>in</strong>dividual owner manuals.<br />
• Set <strong>the</strong> position of <strong>the</strong> RANGE switch so that <strong>the</strong> FREQ control is operat<strong>in</strong>g <strong>in</strong> <strong>the</strong> desired frequency<br />
range. The Range control operates from 35 Hz to 800 Hz when <strong>the</strong> RANGE switch is out,<br />
but with <strong>the</strong> RANGE switch <strong>in</strong> <strong>the</strong> frequency is multiplied by 10 times so <strong>the</strong> range becomes 350<br />
Hz to 8 kHz.<br />
• Once <strong>the</strong> RANGE switch is properly set, use <strong>the</strong> FREQ control to set <strong>the</strong> crossover po<strong>in</strong>t between<br />
<strong>the</strong> low and high frequency driver. Be sure to check with <strong>the</strong> speaker manufacturerʼs recommended<br />
operat<strong>in</strong>g range for <strong>the</strong> <strong>in</strong>dividual drivers to avoid any serious damage that may result.<br />
• Now, plug <strong>in</strong> <strong>the</strong> AC/DC adapter while appl<strong>in</strong>g <strong>the</strong> “Golden Rule of Audio” to power up your system.<br />
IMPORTANT NOTE: The “Golden Rule of Audio” - LAST ON / FIRST OFF<br />
When runn<strong>in</strong>g a loudspeaker system with one or multiple power amplifiers, it is highly recommended that you<br />
follow <strong>the</strong> LAST ON / FIRST OFF rule. When power<strong>in</strong>g up your sound system, turn your power amplifier on last.<br />
When you power down your system, turn your power amplifiers off first. This will prevent any switch<strong>in</strong>g spikes<br />
you may get from o<strong>the</strong>r gear <strong>in</strong> your system, and help prevent unnecessary pops that can sometimes cause<br />
speaker damage.<br />
• Run a signal from your mixer( like from a CD or MP3 player) and adjust <strong>the</strong> output level so a<br />
good signal is sent to <strong>the</strong> S <strong>xover</strong>. Now adjust <strong>the</strong> LEVEL control to about half way up.<br />
• F<strong>in</strong>ally, set <strong>the</strong> LOW and HIGH controls to about half-way and adjust <strong>the</strong> levels with an RTA<br />
(REAL TIME ANALYZER), like a <strong>Samson</strong> D1500, or use your ears to dial <strong>in</strong> <strong>the</strong> blend between<br />
<strong>the</strong> low and high drivers.<br />
6
S <strong>xover</strong> Sub System Set-up<br />
Typical Set-up for Satellite systems with Mono Sub<br />
The diagram below shows a typical set-up for us<strong>in</strong>g <strong>the</strong> S <strong>xover</strong> with a sub woofer for PA application<br />
us<strong>in</strong>g full range speakers <strong>in</strong> stereo along with a common sub runn<strong>in</strong>g <strong>in</strong> mono. You can use <strong>the</strong> same<br />
type of hook-up for connect<strong>in</strong>g a sub woofer to full range studio monitors <strong>in</strong> record<strong>in</strong>g set-ups. Set <strong>the</strong><br />
RANGE switch out and <strong>the</strong> Mono switch <strong>in</strong> and follow <strong>the</strong> diagram below to connect your system.<br />
7
S <strong>xover</strong> Specifications<br />
1/4-<strong>in</strong>ch TRS (TIP RING SLEEVE) to two 1/4-<strong>in</strong>ch TS (TIP SLEEVE) INSERT Y CABLE Wir<strong>in</strong>g Diagr<br />
Frequency Response<br />
10Hz to 160kHz, -1dB<br />
Dynamic Range<br />
Noise Level<br />
>95dB<br />
-80dBu<br />
THD<br />
.003% typical, 1% at +15dBu out<br />
Maximum Ouput Level<br />
Max Input Level<br />
Input Impedance<br />
Output Impedance<br />
+15 dBu<br />
+22 dBu<br />
10k Ohm<br />
100 Ohm<br />
Dimensions<br />
Weight<br />
5.65” L x 4.13” W x 2” H (144mm L x 105mm<br />
W x 51mm H)<br />
16.5 oz., 419 gm.<br />
<strong>Samson</strong> Technologies Corp.<br />
575 Underhill Blvd.<br />
P.O. Box 9031<br />
Syosset, NY 11791-9031<br />
Phone: 1-800-3-SAMSON (1-800-372-6766)<br />
Fax: 516-364-3888<br />
www.samsontech.com