使用手冊
使用手冊
使用手冊

Create successful ePaper yourself
Turn your PDF publications into a flip-book with our unique Google optimized e-Paper software.
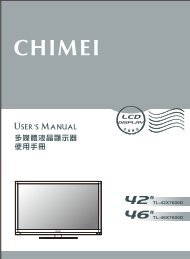
使 用 手 冊<br />
42” 多 媒 體 液 晶 顯 示 器<br />
目 錄<br />
重 要 安 全 性 指 示 ...........................................................................................02<br />
注 意 事 項 .....................................................................................................03<br />
外 觀 說 明 及 附 件 ...........................................................................................08<br />
多 媒 體 液 晶 顯 示 器 與 操 作 方 式<br />
各 項 接 頭 及 插 槽 ...........................................................................................09<br />
繁 體 中 文<br />
控 制 面 板 按 鍵 ..............................................................................................13<br />
遙 控 器 功 能 .................................................................................................14<br />
電 視 選 單<br />
• 畫 面 設 定 .........................................................................................17<br />
• 進 階 設 定 .........................................................................................18<br />
• 音 效 設 定 .........................................................................................19<br />
• 電 視 ...............................................................................................20<br />
• 幾 何 調 整 .........................................................................................21<br />
• 設 定 ...............................................................................................22<br />
其 他 資 料<br />
常 見 問 題 排 除 方 式 ........................................................................................23<br />
規 格 ...........................................................................................................24
重 要 安 全 性 指 示<br />
1. 閱 讀 所 有 指 示 。<br />
2. 妥 善 保 存 指 示 。<br />
3. 牢 記 各 項 警 示 事 項 。<br />
4. 遵 守 所 有 指 示 。<br />
5. 請 勿 於 水 源 附 近 使 用 本 設 備 。<br />
6. 僅 可 使 用 乾 淨 布 料 進 行 清 潔 工 作 。<br />
7. 切 勿 阻 礙 任 何 通 風 開 口 。 請 依 製 造 商 指 示 安 裝 。<br />
8. 請 勿 安 裝 於 任 何 接 近 熱 源 之 處 , 例 如 暖 爐 、 散 熱 器 、 爐 灶 或 其 他 可 能 產 生 熱 能 的 設 備 ( 包 含 擴 大 機 )。<br />
9. 切 勿 擅 自 變 更 專 為 安 全 而 設 計 的 極 化 型 或 接 地 型 插 頭 。 極 化 型 插 頭 具 有 一 寬 一 窄 的 扁 平 接 腳 。 接 地 型<br />
插 頭 則 具 有 兩 支 扁 平 接 腳 及 一 支 圓 形 接 地 接 腳 。 較 寬 的 扁 平 接 腳 或 圓 形 的 接 地 接 腳 均 為 安 全 設 計 。 若<br />
插 頭 與 您 的 電 源 插 座 不 符 , 則 應 洽 請 電 機 專 業 人 員 為 您 汰 換 舊 式 規 格 的 電 源 插 座 。<br />
10. 電 源 線 應 避 免 佈 線 於 人 員 行 經 之 處 , 且 不 可 拉 扯 插 頭 、<br />
電 源 插 座 及 設 備 出 線 處 的 纜 線 部 份 。<br />
11. 務 必 使 用 製 造 商 所 指 定 的 配 件 / 附 件 。<br />
12. 務 必 使 用 製 造 商 所 指 定 或 隨 設 備 所 附 的 台 車 、 腳 架 、 三 角 架 、 支 架 或 機 檯 。 若 使 用 台 車 搬 移 設 備 時 ,<br />
應 特 別 注 意 勿 使 上 層 物 品 掉 落 , 以 免 造 成 人 員 受 傷 。<br />
13. 雷 雨 期 間 或 長 期 不 使 用 本 設 備 時 , 請 將 電 源 插 頭 拔 下 。<br />
14. 所 有 維 修 事 宜 請 洽 合 格 的 維 修 人 員 執 行 。 設 備 若 有 任 何 損 壞 情 形 , 即 應 予 以 維 修 , 例 如 : 電 源 線 或 電<br />
源 插 頭 損 壞 、 液 體 或 異 物 落 入 設 備 內 、 設 備 曾 暴 露 於 雨 中 或 極 度 潮 濕 環 境 中 、 運 作 異 常 或 自 高 處 摔 落 。<br />
15. 本 設 備 不 可 安 裝 於 水 份 滴 落 、 潑 濺 之 處 , 亦 不 可 將 花 瓶 之 類 盛 水 器 具 置 放 於 設 備 上 方 。<br />
16. 請 勿 打 開 本 設 備 的 外 殼 ( 或 後 蓋 ), 以 避 免 電 擊 。 所 有 維 修 事 宜 請 洽 合 格 的 維 修 人 員 執 行 。<br />
17. 即 用 型 家 電 耦 合 裝 置 可 作 為 本 設 備 的 電 力 切 斷 裝 置 。<br />
18. 本 設 備 必 須 連 接 使 用 具 有 接 地 線 的 電 源 插 座 。<br />
19. 為 維 持 良 好 通 風 , 本 設 備 周 圍 須 保 留 10 公 分 的 空 間 。<br />
20. 電 量 耗 盡 或 放 電 完 畢 的 電 池 , 務 必 依 各 項 適 用 的 法 令 與 規 定 進 行 回 收 或 棄 置 。 相 關 詳 盡 資 訊 , 請 洽 您<br />
所 在 國 家 的 固 體 廢 置 物 負 責 單 位 。<br />
21. 若 在 國 外 購 買 與 使 用 本 產 品 , 請 使 用 合 乎 當 地 法 令 的 合 用 電 源 線 。<br />
22. 為 了 避 免 傷 害 , 本 設 備 須 依 據 安 裝 指 示 緊 接 於 地 面 或 牆 上 。<br />
23. 請 勿 將 本 設 備 安 裝 在 侷 限 空 間 內 , 如 書 櫥 或 類 似 裝 置 。<br />
24. 請 勿 將 任 何 無 加 蓋 的 火 源 ( 如 已 點 燃 的 蠟 燭 ) 放 在 本 裝 置 上 。<br />
注 意<br />
為 避 免 電 擊 請 勿 打 開 本 產 品<br />
警 告 : 為 避 免 火 災 或 電 擊 , 請 勿 讓 本 產 品 暴 露 於 雨 水 或<br />
水 氣 中 。<br />
本 標 誌 表 示 產 品 內 部 有 未 絕 緣 的 「 危 險 電 壓 」 存 在 , 有 觸 電 危 險 。<br />
內 部 含 有 驚 嘆 號 的 等 邊 三 角 形 , 主 要 在 提 醒 使 用 者 : 此 處 具 有 重 要 的 操 作 及 保 養 ( 維 修 )<br />
指 示 , 請 參 閱 隨 機 所 附 的 說 明 文 件 。<br />
「 注 意 」<br />
此 處 各 項 維 修 指 示 僅 供 合 格 維 修 人 員 使 用 。 為 避 免 電 擊 危 險 , 非 經 合 格 認 證 者 , 不 得 執 行 操 作 手 冊 範 圍<br />
以 外 的 維 修 工 作 。<br />
2...............................................................................................................................................
注 意 事 項<br />
【 注 意 】<br />
為 避 免 裝 置 遭 受 電 擊 , 請 確 實 將 插 頭 完 全 插 入 插 座 內 。<br />
【 注 意 】<br />
若 您 使 用 本 多 媒 體 液 晶 顯 示 器 來 玩 遊 樂 器 、 電 腦 或 類 似 產 品 , 請 將 亮 度 與 對 比 功 能 保 持 在 較 低<br />
設 定 。 如 果 螢 幕 長 時 間 顯 示 高 亮 度 或 高 對 比 的 固 定 ( 不 移 動 的 ) 影 像 , 則 影 像 可 能 會 永 久 留 存 在<br />
螢 幕 上 。<br />
【 有 關 清 潔 多 媒 體 液 晶 顯 示 器 的 注 意 事 項 】<br />
1. 請 以 柔 軟 的 乾 布 來 清 潔 多 媒 體 液 晶 顯 示 器 。<br />
2. 請 勿 使 用 稀 釋 劑 或 甲 苯 等 強 烈 的 溶 劑 。 否 則 可 能 會 損 傷 多 媒 體 液 晶 顯 示 器 之 外 殼 。<br />
3. 清 潔 多 媒 體 液 晶 顯 示 器 前 , 請 先 確 認 電 源 是 否 已 關 閉 及 插 頭 是 否 已 拔 出 。<br />
4. 本 設 備 僅 適 用 於 一 般 影 音 娛 樂 用 途 。<br />
5. 不 建 議 使 用 於 影 像 專 業 工 作 上 。<br />
6. 液 晶 面 板 結 構 精 密 , 請 勿 以 外 力 施 壓 以 免 破 裂 損 壞 。<br />
7. 為 了 避 免 傷 害 液 晶 面 板 , 請 勿 將 任 何 液 體 沾 附 於 液 晶 面 板 上 , 例 如 : 水 、 化 學 藥 品 、 清 潔 液 或 濕 布 等 。<br />
( 因 本 機 型 設 有 保 護 裝 置 , 於 電 源 開 啟 後 需 等 待 約 十 秒 鐘 , 畫 面 方 能 顯 現 )<br />
【 有 線 電 視 】<br />
本 液 晶 顯 示 器 接 收 器 如 果 非 用 於 私 人 觀 賞 UHF、VHF 或 有 線 電 視 系 統 為 一 般 大 眾 傳 送 的 節 目 廣 播 , 則<br />
可 能 需 要 廣 播 業 者 / 有 線 電 視 業 者 / 節 目 所 有 人 的 授 權 。<br />
【 有 關 安 裝 及 使 用 多 媒 體 液 晶 顯 示 器 的 注 意 事 項 】<br />
1. 多 媒 體 液 晶 顯 示 器 所 使 用 之 電 源 規 格 , 會 詳 列 於 標 有 序 號 / 機 型 的 標 籤 上 。 請 盡 可 能 使 用 標 示 上 之 電<br />
源 規 格 類 型 。 如 果 您 不 確 定 您 家 裡 使 用 的 電 源 類 型 , 請 聯 絡 經 銷 商 或 您 當 地 的 電 力 公 司 。<br />
2. 請 確 保 插 頭 完 全 插 入 插 座 內 。 如 果 您 無 法 將 插 頭 插 入 插 座 內 , 請 聯 絡 經 銷 商 。<br />
為 安 全 起 見 , 多 媒 體 液 晶 顯 示 器 之 插 頭 設 計 只 能 以 特 定 的 方 向 插 入 電 源 插 座 。 如 果 您 無 法 將<br />
插 頭 插 入 電 源 插 座 內 , 請 聯 絡 經 銷 商 。<br />
1. 請 避 免 電 源 插 座 或 延 長 線 負 載 過 量 。 否 則 可 能 會 引 起 火 災 或 導 致 人 員 有 觸 電 之 危 險 。<br />
2. 請 勿 將 任 何 物 品 壓 到 或 纏 繞 到 多 媒 體 液 晶 顯 示 器 之 電 源 線 。 且 避 免 將 多 媒 體 液 晶 顯 示 器 置 於 容 易 磨 損<br />
電 源 線 之 處 。 僅 可 使 用 正 確 的 電 源 線 。<br />
3. 多 媒 體 液 晶 顯 示 器 不 使 用 時 請 將 電 源 關 掉 。 若 將 長 期 不 使 用 本 多 媒 體 液 晶 顯 示 器 , 請 將 插 頭 拔 掉 以 避<br />
免 火 災 。<br />
4. 多 媒 體 液 晶 顯 示 器 背 後 的 通 風 口 係 為 通 風 與 散 熱 所 設 計 。 請 保 持 通 風 口 暢 通 。<br />
5. 請 勿 將 多 媒 體 液 晶 顯 示 器 放 在 床 上 、 沙 發 或 地 毯 上 , 以 免 通 風 口 被 阻 塞 。<br />
6. 請 勿 將 多 媒 體 液 晶 顯 示 器 置 於 密 閉 空 間 中 , 如 書 架 或 是 液 晶 顯 示 器 櫃 子 。<br />
7. 請 避 免 讓 多 媒 體 液 晶 顯 示 器 靠 近 高 溫 物 體 或 任 何 會 發 熱 之 裝 置 。<br />
8. 請 避 免 使 本 多 媒 體 液 晶 顯 示 器 受 到 日 光 直 射 。<br />
9. 請 勿 將 本 多 媒 體 液 晶 顯 示 器 置 於 不 穩 定 的 架 子 或 桌 面 上 。 若 置 於 不 穩 定 的 架 子 或 桌 面 , 可 能 會 造 成 傷<br />
害 。<br />
10. 請 勿 讓 異 物 刺 穿 多 媒 體 液 晶 顯 示 器 外 殼 , 以 避 免 觸 碰 液 晶 顯 示 器 內 部 之 高 壓 電 裝 置 或 導 致 內 部 零 件 受<br />
損 。<br />
11. 當 搬 移 本 多 媒 體 液 晶 顯 示 器 時 請 勿 過 量 施 力 於 喇 叭 處 。 請 務 必 由 兩 人 及 雙 手 同 時 搬 運 , 以 免 掉 落 。<br />
.......................................................................................................................................... 03
注 意 事 項<br />
【 維 護 】<br />
若 發 生 下 列 任 何 一 種 情 況 時 , 請 先 將 本 多 媒 體 液 晶 顯 示 器 的 插 頭 拔 掉 , 然 後 聯 絡 當 地 經 銷 商 或 請 合 格 人<br />
員 來 維 修 本 多 媒 體 液 晶 顯 示 器 :<br />
1. 電 源 線 或 插 頭 損 壞 或 破 損 時 。<br />
2. 有 液 體 濺 入 本 多 媒 體 液 晶 顯 示 器 內 。<br />
3. 本 多 媒 體 液 晶 顯 示 器 受 潮 或 淋 到 雨 。<br />
4. 本 多 媒 體 液 晶 顯 示 器 外 殼 有 損 壞 。<br />
5. 本 多 媒 體 液 晶 顯 示 器 功 能 異 常 。<br />
請 勿 嘗 試 自 行 修 理 本 多 媒 體 液 晶 顯 示 器 。 本 多 媒 體 液 晶 顯 示 器 機 櫃 內 有 高 壓 零 件 , 可 能 導 致 觸 電<br />
的 危 險 。<br />
更 換 零 件<br />
若 本 多 媒 體 液 晶 顯 示 器 需 要 更 新 零 件 , 請 洽 合 格 技 師 索 取 所 需 零 件 的 書 面 證 明 。<br />
安 全 性 檢 查<br />
本 多 媒 體 液 晶 顯 示 器 經 修 理 後 , 請 記 得 要 求 技 師 進 行 定 期 安 全 性 檢 查 ( 依 廠 商 規 定 ), 以 確 保 本 多 媒 體 液<br />
晶 顯 示 器 的 安 全 性 。<br />
如 果 本 多 媒 體 液 晶 顯 示 器 已 經 超 過 使 用 壽 命 , 請 聯 絡 合 格 維 修 技 師 處 理 。<br />
【 使 用 記 錄 】<br />
您 可 以 在 本 多 媒 體 液 晶 顯 示 器 背 面 看 到 此 產 品 之 序 號 和 機 型 標 籤 。 當 聯 絡 經 銷 商 或 合 格 維 修 人 員 時 , 請<br />
提 供 該 序 號 。<br />
請 詳 閱 並 遵 守 手 冊 內 的 所 有 警 告 與 指 示 。 未 詳 閱 並 遵 守 者 , 其 保 固 將 失 效 。<br />
若 未 經 許 可 改 造 本 多 媒 體 液 晶 顯 示 器 , 則 保 固 將 立 刻 失 效 。<br />
FCC 安 全 規 範 符 合 聲 明<br />
本 裝 置 符 合 FCC 規 則 的 第 15 部 份 。 其 操 作 必 須 符 合 下 列 兩 項 條 件 :<br />
(1) 本 裝 置 可 能 不 會 造 成 有 害 的 干 擾 , 以 及 (2) 本 裝 置 必 須 接 受 任 何 接 收 到 的 干 擾 , 包 括 造 成 操 作 不 良 的 干<br />
擾 。<br />
註 : 依 FCC 規 則 第 15 章 , 本 設 備 經 過 測 試 , 證 明 符 合 B 級 數 位 裝 置 的 限 制 標 準 。 這 些 限 制 標 準 用 於 確 認<br />
電 氣 設 備 不 會 對 住 屋 內 安 裝 的 設 備 產 生 有 害 的 干 擾 。 本 設 備 會 產 生 、 使 用 和 發 射 無 線 電 頻 率 能 源 , 而 且<br />
如 果 沒 有 依 照 指 示 安 裝 和 使 用 , 則 會 對 無 線 電 通 訊 產 生 有 害 的 干 擾 。 但 是 不 保 證 不 會 在 特 定 的 安 裝 中 產<br />
生 干 擾 。 如 果 該 設 備 對 收 音 機 或 電 視 機 的 接 收 產 生 不 良 干 擾 ( 可 由 設 備 開 關 來 判 定 ), 則 用 戶 可 以 試 用 以<br />
下 的 方 法 來 消 除 干 擾 :<br />
* 重 新 安 排 或 放 置 接 收 天 線<br />
* 增 加 電 視 和 接 收 器 之 間 的 距 離<br />
* 將 設 備 連 接 到 與 接 收 器 連 接 的 插 座 不 同 電 路 的 插 座 中<br />
注 意 : 為 了 符 合 FCC 的 B 級 計 算 裝 置 限 制 標 準 , 請 使 用 本 裝 置 所 附 的 訊 號 線 和 電 源 線 。 聯 邦 通 訊 委 員<br />
會 警 告 , 未 經 負 責 製 造 商 明 確 允 許 , 而 對 本 產 品 進 行 的 任 何 變 更 或 修 改 , 將 可 能 導 致 使 用 者 無 權 操 作 本<br />
設 備 。<br />
歐 體 通 知<br />
有 CE 標 記 的 產 品 符 合 歐 體 委 員 會 出 版 的 EMC 規 範 (89/336/EEC)、(93/68/EEC) 和 低 電 壓 規 範<br />
(73/23/EEC)。<br />
廢 電 池 請 回 收<br />
06.............................................................................................................................................
注 意 事 項<br />
■ 務 必 使 用 製 造 商 所 指 定 的 配 件 / 附 件 。<br />
■<br />
極 化 型 插 頭 具 有 一 寬 一 窄 的 扁 平 接 腳 。 接 地 型 插<br />
頭 具 有 兩 支 扁 平 接 腳 及 一 支 圓 形 接 地 接 腳 。 較 寬 的<br />
扁 平 接 腳 或 圓 型 接 地 接 腳 均 為 安 全 設 計 , 若 插 頭 與<br />
您 的 電 源 插 座 不 符 , 則 應 洽 請 電 機 專 業 人 員 為 您 汰<br />
換 舊 式 規 格 的 電 源 插 座 。<br />
■<br />
切 勿 擅 自 變 更 專 為 安 全 而 設 計 的 極 化 型 或 接 地<br />
型 插 頭 。<br />
■<br />
請 避 免 任 何 物 品 壓 到 或 纏 繞 到 多 媒 體 液 晶 顯 示<br />
器 之 電 源 線 , 且 避 免 將 多 媒 體 液 晶 顯 示 器 置 於<br />
容 易 磨 損 或 誤 用 電 源 線 之 處 。<br />
■<br />
請 避 免 電 源 插 座 或 延 長 線 負 載 過 量 , 否 則 可 能 會<br />
引 起 火 災 或 導 致 人 員 有 觸 電 之 危 險 。<br />
■ 不 可 將 花 瓶 之 類 盛 水 器 具 置 放 於 設 備 上 方 ,<br />
不 可 安 裝 於 水 份 滴 落 、 潑 濺 之 處 。<br />
.......................................................................................................................................... 05
注 意 事 項<br />
■<br />
由 於 液 晶 面 板 內 液 晶 特 性 , 長 時 間 使 用 4:3 畫<br />
面 觀 賞 , 或 長 時 間 處 於 同 一 畫 面 靜 止 時 , 將 會<br />
導 致 面 板 產 生 影 像 殘 留 (Image Sticking) 問 題 ,<br />
故 建 議 您 不 要 長 時 間 使 用 4:3 畫 面 觀 賞 , 或 是<br />
長 時 間 畫 面 靜 止 , 如 果 因 此 產 生 影 像 殘 留 或 畫<br />
面 異 常 將 無 法 維 修 也 不 在 保 固 範 圍 。<br />
■<br />
多 媒 體 液 晶 顯 示 器 後 方 及 上 方 之 通 風 口 設 計<br />
是 用 來 提 供 必 要 的 通 風 及 散 熱 , 為 維 持 良 好<br />
通 風 , 本 設 備 周 圍 須 保 留 10 公 分 的 空 間 , 請<br />
勿 將 本 設 備 置 於 密 閉 空 間 中 , 如 書 架 或 是 液<br />
晶 顯 示 器 櫃 。<br />
■ 禁 止 將 多 媒 體 液 晶 顯 示 器 安 裝 於 浴 室 或 淋 浴 室 ,<br />
否 則 會 引 起 火 災 或 導 致 人 員 有 觸 電 之 危 險 。<br />
■ 請 勿 安 裝 於 任 何 接 近 熱 源 之 處 , 或 是 油 煙 / 水 氣 多<br />
的 地 方 , 例 如 暖 爐 、 散 熱 器 、 爐 灶 或 其 他 可 能 產 生<br />
熱 能 的 設 備 , 否 則 可 能 會 引 起 火 災 或 導 致 人 員 有 觸<br />
電 之 危 險 。<br />
■ 請 勿 將 任 何 無 加 蓋 的 火 源 ( 例 如 已 點 燃 的 蠟 燭 ) 放<br />
在 本 多 媒 體 液 晶 顯 示 器 旁 。<br />
06.............................................................................................................................................
注 意 事 項<br />
■ 請 勿 將 電 源 線 靠 近 會 產 生 熱 能 的 設 備 , 電 源 線 外<br />
皮 若 熔 化 或 損 壞 , 可 能 會 引 起 火 災 或 觸 電 的 危 險 。<br />
■ 液 晶 面 板 結 構 精 密 , 請 勿 以 外 力 施 壓 以 免 破 裂 損<br />
壞 或 導 致 人 員 受 傷 的 危 險 。<br />
■ 為 了 避 免 傷 害 液 晶 面 板 , 請 勿 將 任 何 液 體 沾 附 於 液<br />
晶 面 板 上 , 例 如 : 水 、 化 學 藥 品 、 清 潔 液 或 濕 布 等 。<br />
■ 請 勿 將 多 媒 體 液 晶 顯 示 器 置 於 不 穩 定 的 架 子 或 桌 面<br />
上 , 以 避 免 液 晶 顯 示 器 掉 落 , 而 導 致 人 員 受 傷 或 多<br />
媒 體 液 晶 顯 示 器 損 壞 。<br />
■<br />
請 勿 打 開 本 設 備 的 外 殼 ( 或 後 蓋 ), 以 避 免 電 擊 。 請<br />
勿 讓 異 物 刺 穿 多 媒 體 液 晶 顯 示 器 外 殼 , 以 避 免 觸 碰<br />
液 晶 顯 示 器 內 部 之 高 壓 電 裝 置 或 導 致 內 部 零 件 受<br />
損 / 短 路 , 引 起 火 災 或 導 致 人 員 受 傷 。 所 有 維 修 事<br />
宜 請 洽 合 格 的 維 修 人 員 執 行 。<br />
若 未 經 許 可 改 造 本 多 媒 體 液 晶 顯 示 器 , 保 固 將 立 刻<br />
失 效 。<br />
.......................................................................................................................................... 07
外 觀 說 明 及 附 件<br />
上 視 面<br />
To p V i ew<br />
側 面<br />
Side View<br />
正 面<br />
Front View<br />
液 晶 顯 示 面 板<br />
LCD Panel<br />
喇 叭<br />
Speakers<br />
背 面 Rear View<br />
控 制 面 板<br />
Control panel<br />
電 源 及 電 源 指 示 燈<br />
紅 外 線 遙 控 訊 號 接 收 器<br />
Power LED<br />
IR Remote receiver<br />
壁 掛 孔<br />
Wall Mount Hole<br />
電 腦 及 影 音 連 接 埠<br />
PC & Video<br />
Connectors<br />
電 源 線 連 接 埠<br />
Power Connector<br />
天 線 連 接 埠<br />
Antenna Connector<br />
防 傾 倒 輔 助 螺 絲 孔<br />
Support Hole<br />
配 件<br />
防 傾 倒 輔 助 螺 絲 孔 :<br />
註 : 操 作 前 , 應 在 穩 固 桌 面 上 安<br />
裝 螺 絲 ( 圖 1)。 如 果 您 擺 放 液 晶 電<br />
視 的 桌 面 無 法 鎖 螺 絲 定 位 時 , 請<br />
您 額 外 使 用 二 顆 螺 絲 栓 於 電 視 的<br />
背 蓋 壁 吊 孔 栓 上 螺 絲 並 拉 線 固 定<br />
在 牆 壁 上 ( 圖 2), 以 策 安 全 。<br />
螺 絲 建 議 尺 寸 :T4X12<br />
1. 遙 控 器 2. 遙 控 器 電 池 X 2 3. 說 明 書 4. 電 源 線 (For TW SP-301+IS- 14 VCTF 1.25/ 3C)<br />
安 裝 電 池<br />
1. 將 兩 顆 四 號 電 池 裝 進 遙 控 器 中 。<br />
注 意 正 、 負 極 的 方 向 是 否 正 確 。<br />
2. 蓋 上 電 池 蓋 。<br />
如 果 長 時 間 沒 有 使 用 遙 控 器 , 請 將 電 池 取 出 , 以 免 液 體 外 漏 而 造 成 損 壞 。<br />
使 用 遙 控 器 時 請 小 心 。 請 勿 將 遙 控 器 掉 落 至 地 面 。 避 免 潮 濕 、 日 光 直 射 以 及 高 溫 。<br />
06.............................................................................................................................................
多 媒 體 液 晶 顯 示 器 安 裝 方 式 及 操 作 方 法 各 項 接 頭 及 插 槽 的 位 置<br />
影 音 及 天 線 連 接 埠<br />
色 差 端 子<br />
視 訊 S<br />
AV 端 子 ( 影 像 輸 出 )<br />
聲 音 輸 出<br />
HDMI 輸 入<br />
電 腦 VGA 訊 號 線<br />
PC 音 源 輸 入 線<br />
聲 音 輸 入<br />
影 像 輸 入<br />
聲 音 輸 入<br />
DVD 播 放 器<br />
VIDEO 錄 影 機 .<br />
遊 戲 機 或 攝 影 機 等<br />
VIDEO 錄 影 機 或<br />
DVD 播 放 器<br />
( 錄 電 視 節 目 時 使 用 )<br />
連 接 埠<br />
YPbPr<br />
色 差 端 子<br />
R/L 聲 音 輸 入<br />
功 能<br />
連 接 這 個 連 接 埠 時 , 可 以 使 用 色 差 端 子 (YPbPr) 視 訊 訊 號 , 例 如 循 序 掃 描<br />
DVD (Progressive 支 援 ) 播 放 器 及 高 階 HDTV 解 碼 器 或 衛 星 接 收 器 , 而 得<br />
到 最 高 解 析 度 的 畫 面 及 搭 配 其 聲 音 訊 號 R/L 接 頭 。<br />
.......................................................................................................................................... 09
連 接 埠<br />
影 像 輸 入<br />
S 端 子 影 像 輸 入<br />
R/L 聲 音 輸 入<br />
影 像 輸 出<br />
R/L 聲 音 輸 出<br />
HDMI 輸 入 ( 數 位 )<br />
VGA 輸 入 ( 類 比 )<br />
與 音 源 輸 入<br />
功 能<br />
連 接 至 複 合 影 像 訊 號 ( 黃 色 ) 或 S 端 子 與 聲 音 R( 右 )/L( 左 ) 線 性 輸 入 。<br />
連 接 至 複 合 影 像 訊 號 ( 黃 色 ):<br />
聲 音 R( 右 )/L( 左 ) 線 性 輸 出 (Line out)。<br />
( 只 有 當 主 畫 面 是 : 電 視 / 視 訊 / 視 訊 S 時 才 會 有 訊 號 輸 出 ) 。<br />
高 解 析 度 多 媒 體 介 面<br />
連 接 到 有 數 位 訊 號 的 裝 置 , 可 支 援 PC 或 是 HDTV 影 像 訊 號 。<br />
連 接 至 VGA 類 比 訊 號 源 。 電 腦 聲 音 支 援 3.5mm 插 孔 。<br />
06.............................................................................................................................................
多 媒 體 液 晶 顯 示 器 安 裝 各 項 接 頭 及 插 槽<br />
天 線 連 接 埠<br />
( 天 線 )<br />
類 比 訊 號 輸 入<br />
連 接 埠<br />
功 能<br />
類 比 訊 號 輸 入 連 接 類 比 電 視 天 線 。<br />
.........................................................................................................................................011
多 媒 體 液 晶 顯 示 器 安 裝 方 式 及 操 作 方 法 各 項 接 頭 及 插 槽 的 位 置<br />
開 啟 多 媒 體 液 晶 顯 示 器<br />
將 電 源 線 插 入 多 媒 體 液 晶 顯 示 器 背 面 的 輸 入 接 頭 , 另 一 端 電 源 線 插 入 電 源 插 座 即 可 。<br />
AC 100~240V<br />
電 源 線 插 頭 會 依 國 家 不 同 而 有 所 不 同 。<br />
開 啟 多 媒 體 液 晶 顯 示 器<br />
按 下 在 顯 示 器 右 下 方 的 電 源 按 鍵 (POWER) 就 可 以 開 啟 及 關 閉 多 媒 體 液 晶 顯 示 器 。<br />
- 電 源 開 啟 , LED 指 示 燈 會 變 成 綠 色<br />
- 電 源 關 閉 , 多 媒 體 液 晶 顯 示 器 會 進 入<br />
待 機 狀 態 , 且 LED 指 示 燈 會 變 成 紅 色 。<br />
電 源 (Power)<br />
頻 道 掃 描<br />
在 第 一 次 裝 機 時 必 須 執 行 自 動 頻 道 掃 描 。( 本 產 品 需 另 購 電 視 視 訊 盒 才 可 使 用 電 視 功 能 )<br />
1. 按 “ 選 單 ” 按 鈕 打 開 OSD 畫 面 。<br />
2. 按 鍵 選 擇 ” 電 視 頻 道 設 定 ”, 再 按 鍵 移 至 ” 頻 道 掃 描 ” 選 項 。<br />
3. 按 確 認 鍵 即 開 始 自 動 執 行 頻 道 掃 描 。( 執 行 自 動 頻 道 掃 描 時 , 會 花 費 數 分 鐘 去 執 行 掃 描 有 效 的 頻 道 )<br />
4. 結 束 自 動 頻 道 掃 描 後 即 可 觀 看 電 視 。 可 按 遙 控 器 上 的 選 台 (CH) 按 鍵 來 選 擇 頻 道 。<br />
12...........................................................................................................................................
多 媒 體 液 晶 顯 示 器 安 裝 方 式 及 操 作 方 法 控 制 面 板<br />
選 單<br />
(MENU)<br />
按 鍵<br />
選 台<br />
CH<br />
(FUNCTION /)<br />
音 量<br />
VOL<br />
(ADJUST / )<br />
輸 入 源<br />
(SOURCE)<br />
耳 機 聲 音 輸 出<br />
(Earphone Output)<br />
功 能<br />
調 整 選 單<br />
在 顯 示 器 右 側 的 選 單 (MENU) 按 鍵 用 來 顯 示 選 單 以 便 修 改 多 媒<br />
體 液 晶 顯 示 器 的 設 定 值 。 若 要 顯 示 多 媒 體 液 晶 顯 示 器 的 螢 幕 控<br />
制 視 窗 , 請 按 下 選 單 (MENU) 按 鍵 。 按 下 調 整 可 調 整 快<br />
速 選 單 項 目 的 內 容 。<br />
選 擇 頻 道 ( 限 電 視 模 式 下 使 用 )<br />
使 用 在 顯 示 器 右 側 的 選 台 (CHANNEL) 按 鍵 來 選 擇 頻<br />
道 。<br />
( 限 電 視 模 式 下 使 用 , 本 產 品 需 另 購 電 視 視 訊 盒 才 可 使 用 電 視 功<br />
能 )<br />
※ 在 操 作 選 單 (MENU) 模 式 下 , 其 功 能 相 當 於 選 擇 功 能 之 上 下<br />
鍵 。<br />
調 整 音 量<br />
在 顯 示 器 右 側 的 音 量 (VOLUME) 按 鍵 可 調 整 多 媒 體 液<br />
晶 顯 示 器 的 音 量 。<br />
※ 在 操 作 選 單 (MENU) 模 式 下 , 其 功 能 相 當 於 調 整 功 能 之 左 右 鍵<br />
選 擇 訊 號 來 源<br />
按 下 在 顯 示 器 右 側 的 輸 入 源 按 鍵 , 可 以 依 序 選 取 電 視 / 視 訊 /<br />
視 訊 S / 色 差 / HDMI / 電 腦 等 模 式 。<br />
※ 在 操 作 選 單 (MENU) 模 式 下 , 此 鍵 做 為 確 認 (ENTER) 鍵 使 用 。<br />
這 個 連 接 埠 可 以 連 接 耳 機 (16Ω 或 32Ω ) 聲 音 輸 出 訊 號 。<br />
.........................................................................................................................................013
多 媒 體 液 晶 顯 示 器 安 裝 方 式 及 操 作 方 法<br />
遙 控 器<br />
1. 電 源 〈POWER〉<br />
開 啟 多 媒 體 液 晶 顯 示 器 , 或 者 進 入 待 機 狀 態 。<br />
2. 靜 音 〈MUTE〉<br />
可 保 持 靜 音 。 再 次 按 下 或 者 按 音 量 +/- 按 鍵 , 便 可 恢 復<br />
原 來 的 音 量 。<br />
3. 畫 面 靜 止 〈FREEZE〉<br />
主 畫 面 可 靜 止 , 再 次 按 下 按 鍵 則 可 恢 復 。<br />
4. 睡 眠 〈SLEEP〉<br />
重 複 按 下 這 個 按 鍵 , 就 可 以 設 定 睡 眠 自 動 關 機 時 間 為<br />
關 /30/60/90/120 分 鐘 (MIN)。<br />
5. 音 量 +/-〈Volume +/-〉<br />
調 整 音 量 大 小 。<br />
6. 選 台 〈Channel 〉<br />
選 擇 頻 道 。<br />
7. 0∼9, 100/- 數 字 鍵<br />
按 下 0∼9,100/- 便 可 選 取 從 02 到 125 的 頻 道 。 按 下 的<br />
頻 道 若 超 出 125, 則 視 窗 將 停 留 在 設 定 時 的 頻 道 不 做 任<br />
何 切 換 。<br />
8. 返 回 〈RETURN〉<br />
回 到 前 一 個 頻 道 。<br />
9. 確 認 〈ENTER〉<br />
選 擇 1∼9 頻 道 時 , 可 直 接 按 1∼9 數 字 鍵 待 數 秒 後 自 動<br />
切 換 ; 或 按 1∼9 數 字 鍵 後 按 確 認 (ENTER) 直 接 切 換 。<br />
10. 顯 示 〈Display〉<br />
可 以 顯 示 目 前 模 式 資 訊 。 包 含 訊 號 來 源 / 頻 道 / 螢 幕 比 例<br />
/ 音 效 模 式 。<br />
11. 字 幕 〈C.C.: Close Caption〉<br />
可 啟 動 字 幕 的 功 能 。( 此 項 功 能 僅 適 用 於 北 美 NT SC 的<br />
系 統 )<br />
12. 選 單 〈MENU〉 及 調 整 功 能 鍵 和 回 上 頁<br />
可 啟 動 多 媒 體 液 晶 顯 示 器 的 選 單 。 再 按 一 次 就 可 以 退<br />
出 選 單 。 並 且 使 用 來 選 擇 選 單 項 目 及 調 整 設 定<br />
值 。 按 ” ” 鍵 即 可 回 覆 至 上 一 頁 。<br />
13. 常 用 頻 道<br />
選 擇 常 用 頻 道 。<br />
快 速 加 入 常 用 頻 道 。<br />
1. 切 換 至 您 將 設 定 的 頻 道 。<br />
2. 按 下 鍵 開 啟 常 用 頻 道 編 輯 畫 面 。<br />
3. 按 鍵 1~9 選 擇 您 要 設 定 的 位 置 .( 共 有 9 組<br />
可 設 定 ), 按 鍵 ” 增 加 ”, 即 可 儲 存 為 常 用 頻 道 ;<br />
反 之 , 按 鍵 即 “ 刪 除 "。<br />
4. . 該 位 置 即 會 顯 示 您 已 設 定 的 頻 道 號 碼 。 未 設 定 的 位<br />
置 會 顯 示 “0”<br />
14.............................................................................................................................................
多 媒 體 液 晶 顯 示 器 安 裝 方 式 及 操 作 方 法<br />
遙 控 器<br />
14. 螢 幕 比 例 〈ASPECT〉<br />
視 窗 比 例 選 擇 模 式 , 依 序 模 式 有 :<br />
16:9 / 放 大 1(Zoom1) / 放 大 2(Zoom2) / 遊 戲 (game)<br />
/ 4:3。<br />
15. 影 像 模 式 〈PICTURE〉<br />
可 選 擇 影 像 進 階 設 定 , 模 式 有 鮮 明 / 影 片 / 運 動 / 遊 戲 / 使<br />
用 者 設 定 。<br />
16. 音 效 模 式 〈MTS〉<br />
可 選 擇 音 效 模 式 , 模 式 有 STEREO( 立 體 聲 ) /<br />
MONO( 單 音 ) / SAP( 副 語 )。<br />
如 果 接 收 的 訊 號 沒 有 第 二 種 語 言 可 選 ,LCD 顯 示 器 將<br />
會 以 MONO( 單 音 ) 聲 音 輸 出 。<br />
17. 電 視 / 影 音 〈TV /V I DE O〉<br />
可 選 擇 主 畫 面 訊 號 來 源 。<br />
1. 您 可 以 藉 由 遙 控 器 上 的 “ 電 視 / 影 音 ” 鍵 (TV/VIDEO)<br />
切 換 主 畫 面 的 訊 號 來 源 。<br />
主 畫 面 切 換 依 序 為 電 視 / 視 訊 / 視 訊 S / 色 差 /<br />
HDMI / 電 腦 。<br />
2. 所 選 擇 的 訊 號 源 會 顯 示 在 螢 幕 的 右 上 方 。<br />
3. 每 種 顯 示 模 式 下 的 選 單 (OSD MENU) 皆 可 設 置 選 定<br />
於 該 模 式 下 所 特 有 的 選 項 。<br />
NTSC<br />
18. 電 子 節 目 表 〈PG〉<br />
( 此 項 功 能 只 限 有 數 位 電 視 接 收 之 機 種 )<br />
19. 此 鍵 , 此 機 種 無 功 能 。<br />
.......................................................................................................................................... 15
螢 幕 顯 示 選 單<br />
如 何 使 用 進 階 螢 幕 顯 示 選 單<br />
1. 使 用 者 可 直 接 使 用 遙 控 器 上 的 “ 電 視 / 影 音 ” 鍵 (TV/VIDEO) 來 選 擇 訊 號 來 源 。<br />
偵 測 到 訊 號 來 源 後 , 在 螢 幕 的 右 上 方 會 顯 示 所 選 擇 的 系 統 模 式 。<br />
2. 選 擇 系 統 模 式 後 , 使 用 者 可 以 按 下 選 單 鍵 (MENU) 執 行 以 下 的 功 能 :<br />
畫 面 設 定 (PICT URE)<br />
根 據 您 所 觀 賞 的 節 目 類 型 , 提 供 更 多 的 畫 面 模 式 及 功 能 , 讓 您 調 整 有 關 畫 面 色 彩<br />
與 亮 度 的 設 定 值 。<br />
進 階 設 定 (ADVANCE)<br />
根 據 您 所 觀 賞 的 節 目 類 型 , 進 一 步 提 供 調 整 有 關 強 化 畫 面 色 彩 與 亮 度 的 設 定 值 。<br />
音 效 設 定 (AUDIO)<br />
提 供 更 多 的 音 效 選 擇 。 您 也 可 以 設 定 自 己 多 媒 體 液 晶 顯 示 器 的 音 效 環 境 。<br />
電 視 (TV) ( 在 TV 模 式 下 使 用 )<br />
設 定 自 己 喜 歡 的 頻 道 。<br />
● 幾 何 調 整 (GEOMETRY): 在 PC 模 式 下 使 用 。<br />
● 相 位 調 整 :PC 與 YPbPr 色 差 端 子 均 可 使 用 。<br />
設 定 (SETUP)<br />
設 定 螢 幕 顯 示 語 言 、 選 單 背 景 顏 色 。<br />
16.............................................................................................................................................
螢 幕 顯 示 選 單<br />
如 何 使 用 進 階 螢 幕 顯 示 選 單<br />
畫 面 設 定 〈PICTURE〉<br />
1. 按 下 遙 控 器 上 的 選 單 按 鈕 , 便 可 顯 示 主 選 單 。<br />
2. 利 用 鍵 選 擇 所 要 調 整 的 主 項 目 ” 畫 面 設 定 (PICTURE)”。<br />
利 用 ► 鍵 移 至 您 所 要 調 整 的 次 項 目 。<br />
3. 利 用 遙 控 器 上 的 鍵 , 選 擇 您 想 要 調 整 之 項 目 。<br />
按 確 認 鍵 進 入 調 整 之 項 目 。<br />
4. 使 用 遙 控 器 上 的 鍵 , 調 整 該 項 目 之 設 定 值 。<br />
5. 再 按 一 下 選 單 按 鍵 , 便 可 離 開 此 畫 面 。<br />
NTSC<br />
選 單<br />
對 比<br />
(Contrast)<br />
亮 度<br />
(Brightness)<br />
飽 和 度<br />
(Saturation)<br />
色 調<br />
(Hue)<br />
清 晰 度<br />
(Sharpness)<br />
背 光<br />
(BackLight)<br />
預 設 值<br />
(Reset)<br />
說 明<br />
按 鍵 讓 畫 面 的 對 比 提 高 或 降 低 。<br />
按 鍵 讓 畫 面 變 亮 或 變 暗 。<br />
按 鍵 調 整 畫 面 色 彩 飽 和 度 。<br />
按 鍵 可 調 整 紅 色 及 綠 色 的 顏 色 。<br />
按 鍵 讓 畫 面 變 得 較 清 晰 或 較 柔 和 。<br />
按 鍵 調 整 畫 面 背 光 亮 度 ( 越 低 背 光 值 越 省 電 , 增 加 壽 命 )。<br />
按 鍵 可 以 回 復 此 選 單 內 所 有 設 定 值 回 至 出 廠 預 設 值 。<br />
.......................................................................................................................................... 17
螢 幕 顯 示 選 單<br />
如 何 使 用 進 階 螢 幕 顯 示 選 單<br />
進 階 設 定 <br />
1. 按 下 遙 控 器 上 的 選 單 按 鈕 , 便 可 顯 示 主 選 單 。<br />
2. 利 用 鍵 選 擇 所 要 調 整 的 主 項 目 ” 進 階 設 定 (ADVANCE)”。<br />
利 用 ► 鍵 移 至 您 所 要 調 整 的 次 項 目 選 單 。<br />
3. 利 用 鍵 , 選 擇 您 想 要 調 整 之 項 目 。<br />
按 確 認 鍵 進 入 調 整 之 項 目 。<br />
4. 使 用 遙 控 器 上 的 鍵 , 調 整 該 項 目 之 設 定 值 。<br />
5. 再 按 一 下 選 單 按 鍵 , 便 可 離 開 此 畫 面 。<br />
選 單<br />
色 溫<br />
(Color Temperature)<br />
對 比 強 化<br />
(Super Contrast)<br />
顏 色 強 化<br />
(Super Color)<br />
說 明<br />
按 鍵 可 調 整 面 之 色 溫 : 冷 色 系 / 正 常 / 暖 色 系 。<br />
按 鍵 可 調 整 畫 面 之 對 比 : 關 / 弱 / 中 / 強 。<br />
※ 在 PC 模 式 (DVI, VGA) 下 不 支 援 此 功 能 。<br />
※ 開 啟 此 功 能 時 , 如 有 高 速 移 動 之 畫 面 , 則 可 能 會 造 成 暫 時 性 亮 度 的 些<br />
許 調 變 , 此 為 正 常 現 象 。<br />
按 鍵 調 整 顏 色 的 強 度 : 關 / 自 然 / 鮮 明 / 影 片 。<br />
Gamma 按 鍵 調 整 畫 面 灰 階 曲 線 :HDTV/ 正 常 / 遊 戲 。<br />
按 鍵 選 擇 開 啟 或 關 閉 。 增 強 畫 面 的 動 態 對 比 。<br />
動 態 對 比<br />
(Dynamic Contrast)<br />
※ 開 啟 此 功 能 時 , 如 有 高 速 移 動 之 畫 面 , 則 可 能 會 造 成 暫 時 性 亮 度 的 些<br />
許 調 變 , 此 為 正 常 現 象 。<br />
※ 動 態 對 比 : 此 模 式 可 節 能 約 平 均 25%, 並 增 加 燈 管 壽 命 。<br />
18.............................................................................................................................................
螢 幕 顯 示 選 單<br />
如 何 使 用 進 階 螢 幕 顯 示 選 單<br />
音 效 設 定 <br />
1. 按 下 遙 控 器 上 的 選 單 按 鈕 , 便 可 顯 示 主 選 單 。<br />
2. 利 用 鍵 選 擇 所 要 調 整 的 主 項 目 ” 音 效 設 定 (AUDIO)”。<br />
利 用 ► 鍵 確 定 您 所 要 調 整 的 主 項 目 。<br />
3. 按 下 遙 控 器 上 的 鍵 , 選 擇 您 想 要 調 整 之 項 目 。<br />
按 確 認 鍵 進 入 您 所 要 調 整 之 項 目 。<br />
4. 使 用 遙 控 器 上 的 鍵 , 調 整 該 項 目 之 設 定 值 。<br />
5. 再 按 一 下 選 單 按 鍵 , 便 可 離 開 此 畫 面 。<br />
NTSC<br />
選 單<br />
平 衡<br />
(Balance)<br />
低 音<br />
(Bass)<br />
高 音<br />
(Treble)<br />
環 繞 音 效<br />
(Surround Mode)<br />
說 明<br />
按 鍵 來 調 整 左 、 右 兩 個 聲 道 的 平 衡 。<br />
按 鍵 以 便 提 高 或 降 低 低 音 的 音 量 。<br />
按 鍵 以 便 提 高 或 降 低 高 音 的 音 量 。<br />
按 鍵 可 控 制 環 繞 音 效 的 開 / 關 。<br />
( 當 Surround 開 啟 時 , 低 音 / 高 音 的 功 能 將 被 取 消 )<br />
預 設 值<br />
(Reset)<br />
按 鍵 可 以 回 復 此 選 項 內 所 有 設 定 值 回 至 出 廠 預 設 值 。<br />
.......................................................................................................................................... 19
螢 幕 顯 示 選 單<br />
如 何 使 用 進 階 螢 幕 顯 示 選 單<br />
電 視 ( 在 TV 模 式 下 )<br />
1. 按 下 遙 控 器 上 的 選 單 按 鈕 , 便 可 顯 示 主 選 單 。<br />
2. 利 用 鍵 選 擇 所 要 調 整 的 主 項 目 ” 電 視 (T V)”。<br />
利 用 ► 鍵 確 定 您 所 要 調 整 的 主 項 目 。<br />
3. 按 下 遙 控 器 上 的 鍵 , 選 擇 您 想 要 調 整 之 項 目 。<br />
按 確 認 鍵 進 入 您 所 要 調 整 之 項 目 。<br />
4. 使 用 遙 控 器 上 的 鍵 , 調 整 該 項 目 之 設 定 值 。<br />
5. 再 按 一 下 選 單 按 鍵 , 便 可 離 開 此 畫 面 。<br />
NTSC<br />
選 單<br />
頻 道 掃 描<br />
(Channel Scan)<br />
有 線 / 無 線 電 視<br />
(CATV/AIR)<br />
頻 道 增 加 / 刪 除<br />
(Channel Add/Del)<br />
說 明<br />
在 頻 道 掃 描 選 項 , 按 確 認 鍵 , 即 可 執 行 自 動 頻 道 掃 描 。<br />
在 第 一 次 裝 機 時 必 須 執 行 自 動 頻 道 掃 描 。<br />
CATV ( 有 線 電 視 ) / AIR ( 無 線 電 視 )<br />
按 下 遙 控 器 上 的 鍵 , 以 便 選 擇 電 視 訊 號 ( 無 線 / 有 線 電 視 )。<br />
AIR ( 無 線 電 視 ): 如 果 您 是 使 用 天 線 , 請 設 定 這 個 項 目 。<br />
CATV ( 有 線 電 視 ): 如 果 您 是 透 過 有 線 電 視 系 統 接 收 節 目 ,<br />
請 設 定 這 個 項 目 。<br />
按 鍵 可 以 選 擇 頻 道 增 加 或 刪 除 。<br />
( 限 電 視 模 式 下 使 用 , 本 產 品 需 另 購 電 視 視 訊 盒 才 可 使 用 電 視 功 能 )<br />
20.............................................................................................................................................
螢 幕 顯 示 選 單<br />
如 何 使 用 進 階 螢 幕 顯 示 選 單<br />
幾 何 調 整 (VGA 模 式 )<br />
1. 按 下 遙 控 器 上 的 選 單 按 鈕 , 便 可 顯 示 主 選 單 。<br />
2. 利 用 鍵 選 擇 所 要 調 整 的 主 項 目 ” 幾 何 調 整 (GEOMETRY)”。<br />
利 用 ► 鍵 確 定 您 所 要 調 整 的 主 項 目 。<br />
3. 按 下 遙 控 器 上 的 鍵 , 選 擇 您 想 要 調 整 之 項 目 。<br />
按 確 認 鍵 進 入 您 所 要 調 整 之 項 目 。<br />
4. 使 用 遙 控 器 上 的 鍵 , 調 整 該 項 目 之 設 定 值 。<br />
5. 再 按 一 下 選 單 按 鍵 , 便 可 離 開 此 畫 面 。<br />
NTSC<br />
選 單<br />
自 動<br />
(Auto)<br />
水 平 位 置<br />
(H-Position)<br />
垂 直 位 置<br />
(V-Position)<br />
相 位<br />
(Phase)<br />
頻 率<br />
(Clock)<br />
說 明<br />
按 鍵 可 自 動 調 整 畫 面 的 焦 點 、 清 晰 度 及 水 平 、 垂 直 位 置 。<br />
按 鍵 可 調 整 畫 面 左 右 位 置 。 當 自 動 調 整 後 左 右 位 置 仍 偏 移 時 , 可 利 用 此 功 能<br />
來 調 整 。<br />
按 鍵 可 調 整 畫 面 上 下 位 置 。 當 自 動 調 整 後 上 下 位 置 仍 偏 移 時 , 可 利 用 此 功<br />
能 來 調 整 。<br />
按 鍵 可 手 動 調 整 畫 面 的 焦 點 。 當 自 動 調 整 後 焦 點 仍 不 佳 時 , 可 利 用 此 功 能 來<br />
調 整 。<br />
按 鍵 可 手 動 調 整 畫 面 的 清 晰 度 。 當 自 動 調 整 後 焦 點 和 清 晰 度 仍 不 佳 時 , 可 利<br />
用 此 功 能 來 調 整 。<br />
預 設 值<br />
(Reset)<br />
按 鍵 可 以 回 復 此 選 項 內 所 有 設 定 值 回 至 出 廠 預 設 值 。<br />
※1 因 電 腦 顯 示 卡 各 廠 牌 特 性 略 有 不 同 , 故 有 時 做 自 動 調 整 後 畫 面 清 晰 度 仍 不 正 常 , 此 時 可 以 利 用 手 動<br />
調 整 功 能 來 進 行 調 整 。<br />
※2 搭 配 不 同 的 線 材 及 視 聽 設 備 , 在 色 差 高 頻 訊 號 畫 面 下 , 若 有 不 清 晰 時 , 可 以 用 手 動 來 調 整 相 位 。<br />
.......................................................................................................................................... 21
螢 幕 顯 示 選 單<br />
如 何 使 用 進 階 螢 幕 顯 示 選 單<br />
設 定 <br />
1. 按 下 遙 控 器 上 的 選 單 按 鈕 , 便 可 顯 示 主 選 單 。<br />
2. 利 用 鍵 選 擇 所 要 調 整 的 主 項 目 ” 設 定 (SETUP)”。<br />
利 用 ► 鍵 確 定 您 所 要 調 整 的 主 項 目 。<br />
3. 按 下 遙 控 器 上 的 鍵 , 選 擇 您 想 要 調 整 之 項 目 。<br />
按 確 認 鍵 進 入 您 所 要 調 整 之 項 目 。<br />
4. 使 用 遙 控 器 上 的 鍵 , 調 整 該 項 目 之 設 定 值 。<br />
5. 再 按 一 下 選 單 按 鍵 , 便 可 離 開 此 畫 面 。<br />
NTSC<br />
選 單<br />
語 言<br />
(Language)<br />
選 單 背 景<br />
(OSD Background)<br />
雜 訊 消 除<br />
(Noise Reduction)<br />
遮 視 範 圍<br />
(Overscan)<br />
說 明<br />
按 鍵 選 擇 使 用 的 語 言 。<br />
按 可 調 整 選 單 (OSD) 的 背 景 為 不 透 明 或 透 明 。<br />
按 鍵 可 調 整 雜 訊 消 除 之 強 弱 。<br />
按 鍵 可 調 整 遮 視 範 圍 之 : 關 / 弱 / 一 般 / 大 。<br />
在 HDMI / YpbPr 1080P60Hz 和 VGA1920x1080@60Hz 由 遮 視 範 圍 來 決 定 是 否 點<br />
對 點 模 式 , 當 遮 視 範 圍 關 閉 時 為 點 對 點 模 式 , 遙 控 器 上 的 畫 面 靜 止 及 螢 幕 比 例<br />
功 能 被 禁 止 。<br />
( 在 觀 賞 電 視 時 , 若 畫 面 有 黑 邊 , 可 經 由 調 整 遮 視 範 圍 功 能 來 調 整 。)<br />
預 設 值<br />
(Reset)<br />
按 鍵 可 以 回 復 此 選 項 內 所 有 設 定 值 回 至 出 廠 預 設 值 。<br />
22.............................................................................................................................................
其 他 資 料 常 見 問 題 排 除 方 式<br />
以 下 的 表 格 中 包 含 一 些 可 能 出 現 的 異 常 情 況 以 及 相 關 的 解 決 的 方 式 , 在 聯 絡 維 修 人 員 之 前 , 請 參 考 這 份<br />
清 單 的 內 容 。<br />
問 題 原 因 解 決 方 式<br />
沒 有 畫 面<br />
1. 您 是 否 已 經 連 接 電 源 線 ?<br />
2. 您 是 否 已 經 打 開 電 源 ?<br />
3. 訊 號 線 是 否 已 正 確 連 接 ?<br />
4. 螢 幕 是 否 是 在 省 電 模 式 下 ?<br />
1. 將 電 源 線 正 確 連 接 好 。<br />
2. 開 啟 電 源 。<br />
3. 將 訊 號 線 正 確 連 接 好 。<br />
4. 接 下 電 腦 上 的 任 何 一 個 按 鍵 。<br />
色 彩 異 常 1. 訊 號 線 是 否 已 正 確 連 接 ? 1. 將 訊 號 線 正 確 連 接 好 。<br />
1. 訊 號 線 是 否 已 正 確 連 接 ?<br />
1. 將 訊 號 線 正 確 連 接 好 。<br />
畫 面 變 形<br />
2. 輸 入 訊 號 是 否 超 過 規 定 的 頻 率 範 圍 ? 2. 請 使 用 頻 率 在 規 定 範 圍 內 的 訊 號 。<br />
畫 面 太 暗 1. 亮 度 和 對 比 是 否 在 最 低 的 設 定 值 ? 1. 調 整 亮 度 和 對 比 。<br />
只 有 聲 音 , 沒 有 影 像<br />
只 有 畫 面 , 沒 有 聲 音<br />
無 法 使 用 遙 控 器<br />
1. 輸 入 訊 號 的 連 接 方 式 是 否 正 確 ?<br />
2. TV 訊 號 是 否 太 弱 ?<br />
1. 訊 號 線 是 否 已 正 確 連 接 ?<br />
2. 音 量 是 否 被 調 整 到 最 小 值 ?<br />
3. 是 否 沒 有 連 接 音 效 訊 號 線 ?<br />
4. TV 訊 號 是 否 太 弱 ?<br />
1. 請 檢 查 電 池 是 否 仍 有 電 ?<br />
2. 是 否 有 靜 電 或 閃 電 的 干 擾 ?<br />
1. 請 檢 查 輸 入 訊 號 是 否 正 確 。<br />
2. 請 檢 查 訊 號 的 連 接 是 否 正 確 。<br />
3. TV-RF 訊 號 不 可 低 於 50dB。<br />
1. 將 訊 號 線 正 確 連 接 好 。<br />
2. 將 音 量 調 整 到 適 當 的 大 小 。<br />
3. 將 音 效 訊 號 線 正 確 連 接 好 。<br />
4. TV-RF 訊 號 不 可 低 於 50dB。<br />
1. 請 更 換 電 池 。<br />
2. 關 閉 電 源 10 秒 鐘 , 然 後 重 新 開 啟 電 源 。<br />
以 下 表 格 中 包 含 一 些 可 能 出 現 的 異 常 情 況 , 以 及 相 關 的 解 決 方 式 。<br />
問 題<br />
可 能 解 決 的 方 式<br />
檢 查 訊 號 線 連 接 處 , 確 實 地 插 入 輸 入 端 。<br />
無 法 從 天 線 接 收 足 夠 的 頻 道 請 使 用 多 方 向 的 室 外 天 線 。( 如 果 您 的 電 視 會 受 到 附 近 的 高 山 或 建 築 物 的 影 響 )<br />
請 使 用 自 動 掃 描 方 式 的 功 能 , 來 新 增 尚 未 被 納 入 記 憶 中 的 頻 道 。<br />
沒 有 彩 色 調 整 選 單 中 的 彩 色 設 定 。<br />
畫 面 會 閃 爍 且 有 雜 訊<br />
線 段 或 線 條 不 連 續<br />
轉 到 某 些 頻 道 時 電 視 會 鎖 住 ( 希<br />
望 新 增 某 些 頻 道 )<br />
檢 查 天 線 / 訊 號 線 的 連 接 。<br />
檢 查 頻 道 是 在 播 放 的 狀 態 。<br />
按 下 訊 號 源 並 改 變 輸 入 模 式 。<br />
調 整 天 線<br />
讓 電 視 遠 離 干 擾 源 : 例 如 汽 車 、 霓 虹 燈 以 及 吹 風 機 。<br />
請 使 用 自 動 掃 描 方 式 的 功 能 , 來 新 增 尚 未 被 納 入 記 憶 中 的 頻 道 。<br />
影 像 會 重 疊 或 有 陰 影<br />
請 使 用 多 方 向 的 室 外 天 線 。<br />
( 如 果 您 的 電 視 會 受 到 附 近 的 高 山 或 建 築 物 的 影 響 )<br />
無 法 使 用 功 能 如 果 您 希 望 選 取 的 項 目 變 成 灰 色 , 表 示 該 項 目 不 能 選 取 。<br />
如 果 閱 讀 以 上 的 說 明 之 後 , 您 對 於 多 媒 體 液 晶 顯 示 器 還 有 其 他 的 疑 問 , 請 聯 絡 您 當 地 經 銷 的<br />
“ 客 戶 服 務 中 心 ”。<br />
.......................................................................................................................................... 23
其 他 資 料 規 格 42” LCD TV<br />
顯 示 面 板<br />
(Display panel)<br />
AV 影 音 輸 入 / 輸<br />
出<br />
(AV I/O Input)<br />
電 腦 輸 入<br />
PC I/O Input<br />
相 容 性<br />
(Compatibility)<br />
電 器 規 格<br />
(Power)<br />
螢 幕 尺 寸 Activ e Area / Screen<br />
Size<br />
長 寬 比 Aspect Ratio Widescreen 16:9<br />
畫 素 數 目 Max. of Pixels<br />
背 光 燈 管 壽 命 Lamp Lif e of<br />
Backlight<br />
液 晶 顯 示 模 式 Mode<br />
930.24 (H) x 523.26 (V) (42.02" diagonal)<br />
1920(H) X 1080(V)<br />
50,000 hrs (min.)<br />
SMVA<br />
亮 度 Brighthess 500 nits (Ty p)<br />
對 比 Contrast Ratio 4000:1 (Ty p)<br />
反 應 速 度 Response Time 6.5ms (gray to gray av erage) (Ty p)<br />
AV 影 音 輸 入 X1<br />
AV 影 音 輸 出 X1<br />
色 差 訊 號 (Component) 輸 入 X1<br />
HDMI 輸 入 X1<br />
VGA 輸 入 X1<br />
影 音 系 統 Audio system<br />
個 人 電 腦 PC<br />
HDMI<br />
HDMI←→ DVI<br />
掃 描 格 式<br />
Scanning f ormat<br />
電 源 電 壓 Input Voltage<br />
S-Video (4 pin Dim)+Audio-R/L (RCA) X1<br />
AV Composite (RCA)<br />
AV Composite (RCA) + Audio-L/R (RCA) X1<br />
YPbPr (RCA) + Audio-R/L (RCA) X1<br />
HDMIX1<br />
RGB (D-sub 15pin)+<br />
PC Audio (3.5mm jack) X1<br />
立 體 聲 / 單 聲 道 / 副 聲 道<br />
●720x400@70Hz<br />
●640x480@60Hz<br />
●800x600@60Hz<br />
●1024x768@60Hz<br />
●1920x1080@60Hz<br />
●1280x720p@60Hz;<br />
●1920x1080i@60Hz<br />
●1920x1080p@24Hz/60Hz<br />
●720x480i / 480p@60Hz<br />
●800x600@60Hz ; 640X480@60Hz<br />
●1024x768@60Hz<br />
●1920x1080@60Hz<br />
●480i / 480p@60Hz<br />
●720p@60Hz<br />
●1080i@60Hz<br />
●1080p@24 / 60 Hz<br />
AC100-240V, 3.5A(max.), 50/60Hz<br />
操 作 功 率 Operation
User’s Manual<br />
42” LCD Display<br />
Table of contents<br />
Important Safety Instructions............................................................................02<br />
Cautions......................................................................................................03<br />
Descriptions and accessories...........................................................................08<br />
LCD Display and How to Use it<br />
Connectors and sockets..................................................................................09<br />
English<br />
Control panel................................................................................................13<br />
Remote control..............................................................................................14<br />
TV menu<br />
• PICTURE.............................................................................................17<br />
• ADVANCE............................................................................................18<br />
• AUDIO.................................................................................................19<br />
• TV ......................................................................................................20<br />
• GEOMETRY.........................................................................................21<br />
• SETUP................................................................................................22<br />
Other Information<br />
Trouble-shooting ...........................................................................................23<br />
Specifications...............................................................................................24
Important Safety Instructions<br />
1. Read these instructions.<br />
2. Keep these instructions.<br />
3. Heed all warnings.<br />
4. Follow all instructions.<br />
5. Do not use this apparatus near water.<br />
6. Clean only with dry cloth.<br />
7. Do not block any vent. Install as per the manuf acturer’s instructions.<br />
8. Do not install near any heat sources such as radiators, heat registers, stov es, or other apparatus<br />
(including amplifiers) that produce heat.<br />
9. Do not def eat the saf ety purpose of the polarized or grounding type plug. Polarized ty pe plug has two<br />
flat pins, one wide and the other narrow. Grounding ty pe plug has two f lat pins and one round<br />
grounding pin. The wider f lat pin and round grounding pin are designed for saf ety. If the provided plug<br />
does not f it into your outlet, consult an electrician f or replacement of the obsolete outlet.<br />
10. Protect the power cord f rom being walked on or pinched<br />
particularly at plugs, convenience receptacles, and the point<br />
where they exit f rom the apparatus.<br />
11. Only use attachments/accessories specif ied by the manufacturer.<br />
12. Use only with the cart, stand, tripod, bracket, or table specif ied by the manufacturer, or supplied with<br />
the apparatus. When a cart is used, use caution when mov ing the cart/apparatus combination to<br />
av oid injury f rom tip-ov er.<br />
13. Unplug this apparatus during lightning storms or when unused f or long periods of time.<br />
14. Ref er all servicing to qualif ied service personnel. Servicing is required when the apparatus has been<br />
damaged in any way, such as: Power-supply cord or plug is damaged, liquid has been spilled or<br />
objects have fallen into the apparatus, the apparatus has been exposed to rain or moisture, does not<br />
operate normally, or has been dropped.<br />
15. Apparatus shall not be exposed to dripping or splashing and no objects f ill with liquids, such as vases,<br />
shall be placed on the apparatus.<br />
16. To reduce the risk of electric shock, do not remov e the cover of the apparatus. Ref er all serv icing to<br />
qualif ied service personnel.<br />
17. The readily operable appliance coupler will serv e as the disconnecting device of this apparatus.<br />
18. The apparatus must be connected to a mains socket outlet with a protected earthed connection.<br />
19. Maintain a minimum of 10cm f ree space around the apparatus for proper v entilation.<br />
20. Used or discharged batteries must be properly disposed of or recycled in compliance with all<br />
applicable laws. For detailed information, contact your local solid waste disposal authority.<br />
21. When purchased or used in different countries, use an appropriate power cable which is compliant<br />
with local laws and regulations.<br />
22. To prev ent injury, this apparatus must be securely attached to the floor/wall in accordance with the<br />
installation instructions.<br />
23. Do not install this equipment in a confined space such a book case or similar unit.<br />
24. No naked f lame sources, (such as lighted candles), should be placed on the apparatus.<br />
Notice<br />
RISK OF ELECTRIC SHOCK DO<br />
NOT OPEN<br />
W ARNING: TO REDUCE THE RISK OF FIRE<br />
OR ELECTRIC SHOCK, DO NOT EXPOSE THIS<br />
PRODUCT TO RAIN OR MOISTURE.<br />
This logo indicates that there’s un-insulated “dangerous voltage” inside the product and<br />
may incur the risk of electric shock.<br />
The exclamation point within an equilateral triangle is intended to alert the user to the<br />
important operating and maintenance (serv icing) instructions in the literature<br />
accompanying the appliance.<br />
[Notice]<br />
These servicing instructions are f or use by qualified serv ice personnel only. To reduce the risk of electric<br />
shock do not perform any servicing other than that contained in the operating instructions unless y ou are<br />
qualif ied to do so.<br />
2...............................................................................................................................................
Cautions<br />
[Notice]<br />
To protect y our dev ice from electrical damage, be sure to plug the cord into socket securely.<br />
[Notice]<br />
If you use the LCD Display with video games, computers, or similar products, keep brightness and<br />
contrast at a low lev el. Images with a high lev els of brightness or contrast the may “burn on” the<br />
screen permanently.<br />
[Tips for cleaning the “LCD Display”]<br />
1. Wipe the LCD Display with soft or dry cloth.<br />
2. DO NOT use solv ent or methy l benzene. Harsh chemicals may damage y our LCD Display.<br />
3. Make sure the LCD Display is unplugged before you clean it.<br />
4. This equipment is f or entertainment use only.<br />
5. Not recommended for professional image work.<br />
6. Please do not pressure on the LCD panel to avoid damage due to its delicate structure.<br />
7. To av oid any damage to the LCD panel, please do not stain it with any kind of liquid, such as: water,<br />
chemicals, cleanser, wet cloth, etc. (As this model f eatures a self -protection mechanism, users hav e to<br />
wait about 10 seconds f or the screen to appear after powering it on)<br />
[CATV]<br />
Be sure to acquire due authorization f rom the broadcaster/CATV service prov ider/program owner bef ore<br />
using the TV receiver to watch programs through UHF, VHF, or CATV.<br />
[Installation and use of “LCD Display”]<br />
1. Check the LCD Display power specification shown on the serial No./model tag. Be sure to use the<br />
power according to the specification. If you are unsure about the power requirement, please contact<br />
y our distributor or local power company.<br />
2. Make sure to plug the power cable into the socket securely. If you have problems plugging in, please<br />
contact your distributor.<br />
The plug is designed in such a manner that you can plug into a socket in a certain<br />
direction. If you have problems with the plug, contact with your distributor.<br />
1. DO NOT ov erload powers sockets or extension cords. Overloading poses a risk of electric shock or fire.<br />
2. DO NOT place any objects on the power cord. Keep your LCD Display away f rom any place that might<br />
cause damage to the LCD Display. Use only the correct power cord.<br />
3. Be sure to turn off your LCD Display when not in use. If the LCD Display will not be in use for a long<br />
time, unplug it to prevent risk of fire.<br />
4. The v ent on the rear and the top of the Multimedia LCD Display is designed f or ventilation and heat<br />
dissipation. Keep the v ent clear to avoid dissipation interruption.<br />
5. DO NOT place the LCD Display on beds, sofas or carpet, as this may block the v ent.<br />
6. DO NOT use the LCD Display in enclosed spaces, such as a bookshelf or TV cabinet, unless good<br />
v entilation is in place.<br />
7. Keep the LCD Display away from high-temperature objects or any heat-generating object.<br />
8. Keep the LCD Display away from direct unlight.<br />
9. DO NOT place the LCD Display on an unstable shelf or desk. Failing to do so may result in injury.<br />
10. Keep away objects that may stab the LCD Display and touch the internal high-v oltage dev ice or parts<br />
inside the LCD Display. It may cause damage, f ire or injury.<br />
11. When transporting the TV, never carry it by holding onto the speakers. Be sure to alway s carry the TV<br />
by two people holding it with two hands.<br />
.......................................................................................................................................... 03
Cautions<br />
[Maintenance]<br />
If any of following occurs, unplug the LCD DISPLAY and contact y our distributor or appointed technician to<br />
repair the LCD DISPLAY:<br />
1. The power cord or plug is damaged.<br />
2. Liquid enters the LCD DISPLAY.<br />
3. LCD DISPLAY is damp or wet.<br />
4. LCD DISPLAY is damaged.<br />
5. LCD DISPLAY malfunctions.<br />
Please do not attempt to repair the LCD Display by y ourself. There are high-v oltage components<br />
inside the housings of this LCD Display that may cause an electric shock.<br />
Changing parts<br />
If you need to replace a new part f or this LCD Display, please contact qualified technician to get the written<br />
warrant f or the part needed.<br />
Safety inspection<br />
When the LCD Display has been f ixed, please remember to ask the technician to perf orm periodic saf ety<br />
inspection (f ollow what the v endor requires) to ensure the safety of the LCD Display.<br />
If the LCD DISPLAY has been used longer than its lif e, please contact qualif ied technician f or repair.<br />
[History of Use]<br />
You can find the serial number and model tag on the back of the LCD Display. Please tell your distributor or<br />
qualif ied technician the serial number when y ou contact them.<br />
Please carefully read and f ollow all of the warnings and instructions in this manual.<br />
Failure to read and f ollow them will v oid the warranty. Modif ication of the LCD Display<br />
without authorization will v oid the warrant immediately.<br />
FCC Compliance Statement<br />
This dev ice complies with Part 15 of the FCC Rules. Operation is subject to the f ollowing two conditions:<br />
(1)This dev ice may not cause harmful interf erence and (2) this dev ice must accept any interf erence<br />
receiv ed, including interference that may cause undesired operation.<br />
Note: This equipment has been tested and found to comply with the limits f or a Class B digital device,<br />
pursuant to part 15 of the FCC Rules. These limits are designed to provide reasonable protection against<br />
harmf ul interf erence in a residential installation. This equipment generates uses and can radiate radio<br />
frequency energy, and if not installed and used in accordance with the instructions, may cause harmf ul<br />
interf erence to radio communications. Howev er, there is no guarantee that interf erence will not occur in a<br />
particular installation. If this equipment does cause harmf ul interference to radio or television reception<br />
(which can be determined by turning the equipment off and on) the user is encouraged to try to correct the<br />
interf erence by one or more of the f ollowing measures:<br />
* Reorient or relocate the receiv ing antenna<br />
* Increase the separation between the equipment and receiv er<br />
* Connect the equipment into an outlet on a circuit different f rom that to which the receiv er is connected<br />
Notice: To comply with the limits f or an FCC Class B computing dev ice, alway s use the signal cord and<br />
power cord supplied with this unit. The Federal Communications Commission warns that changes or<br />
modif ications to the unit not expressly approved by the party responsible for compliance could void the<br />
user’s authority to operate the equipment.<br />
European Notice<br />
Products with the CE Marking comply with both the EMC Directiv e (89/336/EEC), (93/68/EEC) and the Low<br />
Voltage Directive (73/23/EEC) issued by the Commission of the European Community.<br />
Please recycle used batteries.<br />
04.............................................................................................................................................
Cautions<br />
■ Only use attachments/accessories specif ied by the<br />
manuf acturer.<br />
■ Polarized ty pe plug has two flat pins, one wide and<br />
the other narrow. Grounding ty pe plug has two f lat<br />
pins and one round grounding pin. The wider flat pin<br />
and round grounding pin are designed for saf ety. If<br />
the prov ided plug does not fit into y our outlet, consult<br />
an electrician for replacement of the obsolete outlet.<br />
■ Do not def eat the saf ety purpose of the polarized or<br />
grounding ty pe plug.<br />
■ DO NOT place any objects on the power cord.<br />
Keep y our LCD Display away from any place that<br />
might cause damage to the LCD Display. Use only<br />
the correct power cord.<br />
■ DO NOT ov erload powers sockets or extension<br />
cords. Ov erloading poses a risk of electric shock or<br />
fire.<br />
■ The dev ice shall be installed away from the<br />
surroundings with dripping or splashing water, and<br />
no water-f illing objects (e.g. vases) shall be placed<br />
on the device.<br />
.......................................................................................................................................... 05
Cautions<br />
■ Due to the liquid-crystal characteristics of the LCD<br />
panel, if one watches at a 4: 3 picture aspect ratio<br />
or the same picture stays freezed f or a long time, it<br />
will lead to image sticking. Theref ore, y ou are<br />
adv ised not to watch TV at a 4: 3 picture aspect<br />
ratio f or a long time or leav e the picture freezed.<br />
Otherwise, any image sticking or abnormity cannot<br />
be repaired and will not be cov ered under<br />
warranty.<br />
■ The v ent on the rear and top of the Multimedia<br />
LCD Display is designed for ventilation and heat<br />
dissipation. To keep the v ent clear, make sure that<br />
there is at least 10cm f ree space around it, DO<br />
NOT leav e the display in a closed space, e.g. a<br />
bookshelf or a LCD cabinet.<br />
■ NEVER install the LCD Display in the bathroom or<br />
shower room; otherwise there might be risks of f ire<br />
or electric shock.<br />
■ DO NOT install the LCD Display around heat<br />
sources or in places with smoke/moisture, such as<br />
radiators, heat registers, stoves, or other<br />
apparatus; otherwise there might be risks of f ire or<br />
electric shock.<br />
■ DO NOT place naked flame sources (such as lit<br />
candles) around the LCD Display.<br />
06.............................................................................................................................................
Cautions<br />
■ DO NOT put the power cable around any<br />
apparatus that generates heat. If the protectiv e<br />
jacket of the power cable is melted or burnt, there<br />
might be risks of f ire or electric shock.<br />
■ DO NOT apply external f orce to the LCD panel as<br />
its structure is delicate; otherwise there might be<br />
risks of damage or personnel injury.<br />
■ To av oid any damage to the LCD panel, please do<br />
not stain it with any kind of liquid, such as: water,<br />
chemicals, cleanser, wet cloth, etc.<br />
■ DO NOT place the LCD Display on an unstable<br />
shelf or desk. Failing to do so may result in injury.<br />
■ To reduce the risk of electric shock, do not remov e<br />
the cover of the apparatus. Keep away objects that<br />
may stab the LCD Display and touch the internal<br />
high-v oltage device or parts inside the LCD<br />
Display. It may cause damage, fire or injury. Ref er<br />
all serv icing to qualified serv ice personnel.<br />
Modif ication of the LCD Display without<br />
authorization will v oid the warrant immediately.<br />
.......................................................................................................................................... 07
Descriptions and accessories<br />
To p V i ew<br />
Side View<br />
Front View<br />
LCD Panel<br />
Control panel<br />
Speakers<br />
Rear View<br />
Power LED<br />
IR Remote receiver<br />
Wall Mount Hole<br />
Power Connector<br />
PC & Video<br />
Connectors<br />
Antenna Connector<br />
Support Hole<br />
Accessories<br />
Fig.2<br />
Fig.1<br />
Anti-tip Auxil iar y Screw Hole:<br />
Note: Before your operation, screw<br />
installation must be done on a stable<br />
table (Fig. 1). In the event of failure to<br />
fasten the screws on the table, please<br />
use another two bolts to fasten the<br />
screws on the wall mount hole and fix<br />
the LCD display to the wall (Fig. 2)<br />
with a wire for safety.<br />
Recommended Screw Specifications:<br />
T4X12<br />
1.Remote<br />
control<br />
2.Batteries x 2<br />
3.User Manual<br />
Installation of batteries<br />
1. Insert two AAA batteries into the Remote<br />
control. Make sure + and - are facing the<br />
proper direction.<br />
2. Replace the cov er.<br />
4.Power cord (For TW SP-301+IS- 14 VCTF 1.25/ 3C)<br />
If the remote control will not to be used for a long time, remove the batteries.<br />
Use the remote control carefully. Do not drop the remote control on the floor. Keep it away from<br />
moisture, direct sunlight, and high temperatures.<br />
08.............................................................................................................................................
LCD DISPLAY installation & operation<br />
Connectors and sockets<br />
Video & Antenna Connectors<br />
Component Video Connector<br />
S-Video<br />
AV R/L Audio Output<br />
Audio output<br />
HDMI Input<br />
Computer VGA<br />
Signal Cable<br />
PC Audio Input Cable<br />
Audio input<br />
Video Input<br />
Video Input<br />
DVD player<br />
Video Recorder, Video<br />
Game Console or<br />
Camera, etc.<br />
Video Recorder or<br />
DVD Player<br />
(Use when you record<br />
TV programs.)<br />
Port<br />
YPbPr<br />
Component Video<br />
Connector<br />
R/L Audio Input<br />
Functions<br />
Use the video signal of YPbPr component connector f or this port, such as<br />
progressiv e scan supported DVD player (Progressive-support) and high-end<br />
HDTV decoder or satellite receiv er to obtain high definition image and the R/L<br />
connector to use with the audio signal.<br />
.......................................................................................................................................... 09
Port<br />
Video Input<br />
S-Video Input<br />
R/L Audio Input<br />
Video Output<br />
R/L Audio Output<br />
HDMI Input (Digital)<br />
VGA Input (Analog) or<br />
Audio Input<br />
Functions<br />
This port connects to the composite video signal (yellow) or the S-Video and<br />
audio R/L line-in.<br />
This port connects to the composite video signal (yellow):<br />
Audio R/L Line-out.<br />
(Only when the main screen is switched to: TV/ Video/Video S will there be<br />
signal output).<br />
HDMI Interface<br />
Connected to the dev ices with digital signals. It supports PC or HDTV video<br />
signals.<br />
Connected to VGA analog signal source. For PC Audio, it supports 3.5mm jack.<br />
10.............................................................................................................................................
LCD DISPLAY installation & operation<br />
Connectors and sockets<br />
Antenna Connectors<br />
Analog signal<br />
input<br />
(Antenna)<br />
Analog signal input<br />
Port<br />
Functions<br />
Analog signal input<br />
Connected to analog TV antenna.<br />
...........................................................................................................................................11
LCD DISPLAY installation & operation<br />
Connectors and sockets<br />
Turn ON the multimedia LCD display<br />
Plug the power cord into input connector on the back of the multimedia LCD display. Plug the other end of<br />
the power cord into an outlet.<br />
AC 100~240V<br />
Power outlets differ f rom region to region.<br />
Turn ON the multimedia LCD display<br />
Press the (POWER) button on the f ront lower right of the TV to turn on the power or enter standby mode.<br />
-When the power is ON, the LED<br />
indicator will turn green<br />
-When the power is OFF, the LCD<br />
display will enter STANDBY mode,<br />
and the LED indicator will turn red.<br />
Power<br />
Channel Scan<br />
The auto channel scan must be perf ormed for the first installation. (This product requires an optional<br />
LCD TV box to enable the TV function)<br />
1. Press the "MENU" button to open the OSD screen.<br />
2. Press the button to select "TV Channel Scan Setting". Then press the button to move to the<br />
"Channel Scan" option.<br />
3. Press the ENTER button to start auto channel scan. (During the auto channel scan, it will take a f ew<br />
minutes to scan available channels)<br />
4. After the auto channel scan is completed, you may start watching TV. Press the CH button on<br />
the remote control to select a channel.<br />
Step 1<br />
Step 2<br />
Step 3<br />
Step 4<br />
Few<br />
minutes<br />
12...........................................................................................................................................
LCD DISPLAY installation & operation<br />
Control panel<br />
MENU<br />
Button<br />
CH<br />
(FUNCTION /)<br />
VOL<br />
(ADJUST / )<br />
SOURCE<br />
Earphone Output<br />
Functions<br />
Adjustment MENU<br />
Press the MENU button on the right side of the LCD panel to<br />
show the menu to adjust the settings of the LCD display. To<br />
show the screen control window of the multimedia LCD display,<br />
please press the MENU button. Press the Adjust to<br />
adjust the content of each quick menu item.<br />
Channel Selection (Only under the TV mode)<br />
Use the CHANNEL button on the right side of the LCD<br />
panel to select a channel.<br />
(Only under the TV mode. This product requires an optional<br />
LCD TV box to enable the TV function)<br />
※Under the MENU mode, the function work as Up and Down<br />
buttons of the selection f unction.<br />
Volume Adjustment<br />
Use the VOLUME button on the right side of the<br />
display to adjust the v olume of the multimedia LCD display.<br />
※Under the MENU mode, the function work as Left and Right<br />
buttons of the adjustment function.<br />
Signal Input Source Selection<br />
Press the SOURCE button on the right side of the display to<br />
scroll through the following list of inputs: TV/Video/Video<br />
S/Component/HDMI/VGA.<br />
※Under the MENU mode, you can use this button for the<br />
f unction of ENTER button.<br />
This connection port connects earphones (16Ω or 32Ω) f or the<br />
audio output signal.<br />
.......................................................................................................................................... 13
LCD DISPLAY installation & operation<br />
Remote control<br />
1. POWER<br />
To turn on the LCD DISPLAY or enter standby mode.<br />
2. MUTE<br />
Press to toggle audio on and off. You can also press<br />
v olume +/- to restore the prev ious volume lev el.<br />
3. FREEZE<br />
Press to freeze the main screen and press again to<br />
restore live viewing.<br />
4. SLEEP<br />
Press repeatedly to select one of the available sleep<br />
OFF/30/60/90/120 minutes modes.<br />
5. VOL +/- <br />
Press to adjust the volume.<br />
6. CHANNEL<br />
Press to select the channels.<br />
7. 0~9, 100 /- NUMBER KEY<br />
Using the numeric buttons (0 to 9 and 100/-) to select<br />
from CH 02 to CH 125. When the channel selected<br />
exceeds CH 125, the window will stay on the channel<br />
set and won’t be switched.<br />
8. RETURN<br />
Return to the previous channel.<br />
9. ENTER<br />
When entering CH 1 to CH 9, you may just enter<br />
number 1 to 9 and wait f or a few seconds f or auto<br />
changing; or y ou may simply press number 1 to 9 then<br />
the ENTER key to switch to the channel directly.<br />
10. DISPLAY<br />
Press the INFORMATION button to display the current<br />
signal status. Including input<br />
source/channel/aspect/audio mode.<br />
11. C.C.: Close caption<br />
This allows y ou to enable the caption f unction. (This<br />
f unction only applies to the NTSC system used in North<br />
America)<br />
12. and Adjustment button and Back<br />
This allows y ou to activ ate the menu of the multimedia<br />
LCD panel. Press again to exit the menu. Use the<br />
button to select the menu item and adjust its<br />
setting. Press the “ ” button to return to the last<br />
page.<br />
13. Favorite Channels<br />
Select your fav orite channels by using .<br />
Add to Fav orite Channels by using .<br />
1. Switch to the channel to be set.<br />
2. Press the button to activate the screen where<br />
y ou can edit y our Favorite Channels.<br />
3. Press keys, 1-9, to select the position to be<br />
set (There are 9 positions to be set in total). Press<br />
to add a fav orite channel; press to delete a<br />
sav ed fav orite channel.<br />
4. The position will display the channel that you<br />
prev iously set. The position not set will display “0”<br />
14.............................................................................................................................................
LCD DISPLAY installation & operation<br />
Remote control<br />
14. ASPECT<br />
The ASPECT modes include:<br />
16:9 / Zoom 1 / Zoom 2 / game / 4:3.<br />
15. PICTURE<br />
For adv anced picture setup, including<br />
Vivid/Sport/Mov ie/Game/User modes.<br />
16. MTS<br />
The MTS modes include STEREO / MONO / SAP.<br />
If no second language is av ailable to be chosen f rom<br />
the receipted signals, the MONO audio output will<br />
apply.<br />
17. TV/VIDEO<br />
For the signal source of main screen.<br />
1. You can use the “TV/VIDEO” button on the remote<br />
control to switch the signal source of main screen.<br />
The switching sequences of main screen are<br />
TV/Video/S Video/YPbPr/HDMI/PC respectiv ely.<br />
2. The selected signal source will be displayed on upper<br />
right of the screen.<br />
3. The special items to the OSD MENU under each<br />
display mode can be selected.<br />
NTSC<br />
18.PG<br />
(This f unction is only available for models with digital<br />
TV function)<br />
19.The f unction of the button is not av ailable f or the model.<br />
.......................................................................................................................................... 15
LCD Display menu How to use the Advanced LCD Display Menu<br />
1. You can use the “TV/VIDEO” button on the remote control to select the signal source.<br />
Once the signal source is detected, the selected system mode appears in the upper right corner of the<br />
screen.<br />
2. After the system mode is selected, press the (MENU) buttons to perform the f ollowing functions:<br />
PICTURE<br />
According to the ty pe of TV program you are watching, it provides more picture<br />
modes and f unctions for adjusting color and brightness.<br />
ADVANCED<br />
According to the ty pe of program y ou are watching, it prov ides advanced setup for<br />
adjusting color and brightness.<br />
AUDIO<br />
Prov ide more audio selections. You can also set the audio env ironment of the LCD<br />
DISPLAY.<br />
TV(f or use with TV mode)<br />
Set up your fav orite channels.<br />
●GEOMETRY: for use in PC mode<br />
●Phase Adjust: Both PC and YPbPr component connectors can be used.<br />
SETUP<br />
Enable y ou to set the OSD language and OSD background.<br />
16.............................................................................................................................................
LCD Display menu How to use the Advanced LCD Display Menu<br />
PICTURE<br />
1. Press the menu selection button on the remote control to show the main menu.<br />
2. Use the button to select the main item to be adjusted, “PICTURE”.<br />
Press the ► button to enter the sub menu.<br />
3. Use the button on the remote control to select the item to be adjusted.<br />
Press the ENTER button to enter the item to be adjusted.<br />
4. Use the button on the remote control to adjust the value of the item.<br />
5. Press the menu button to exit the screen.<br />
NTSC<br />
Menu<br />
Contrast<br />
Descriptions<br />
Press to increase or decrease the picture contrast.<br />
Brightness<br />
Press to make the picture brighter or darker.<br />
Saturation<br />
Press to adjust color saturation.<br />
Hue<br />
Press to change the hue to make it redder or greener.<br />
Sharpness<br />
Back Light<br />
Reset<br />
Press to make the picture sharper or softer.<br />
Press the button to adjust the brightness of BackLight (the less bright the<br />
BackLight, the more energy sav ed and the longer lif etime).<br />
Press to restore all Display parameters to their default settings.<br />
.......................................................................................................................................... 17
LCD Display menu How to use the Advanced LCD Display Menu<br />
ADVANCE<br />
1. Press the menu selection button on the remote control to show the main menu.<br />
2. Use the button to select the main item to be adjusted,”ADVANCE”.<br />
Use the ► button to move to the sub menu to be adjusted.<br />
3. Use the button to select the item to be adjusted.<br />
Press the ENTER button to enter the item to be adjusted.<br />
4. Use the button on the remote control to adjust the value of the item.<br />
5. Press the menu button to exit the screen.<br />
Menu<br />
Color Temperature<br />
Descriptions<br />
Press to adjust the color temperature: Cool/Normal/Warm.<br />
Press button to adjust the contrast of picture: Off/low/middle/high.<br />
Super Contrast<br />
Super Color<br />
GAMMA<br />
※ PC (DVI, VGA) model does not support the f unction.<br />
※ Opening Super Contrast function causing contrast modulates<br />
temporary at running high f requency pattern that is normality.<br />
Press buttons to adjust color space: Off/Natural/Vivid/Movie.<br />
Press button to adjust the gray scale curve on the picture:<br />
HDTV/Normal/Game<br />
Press button to enable or disable. For improv ement of dy namic<br />
contrast.<br />
Dy namic Contrast<br />
Improv ement<br />
※ Opening Super Contrast function causing contrast modulates<br />
temporary at running high f requency pattern that is normality.<br />
※Dy namic Contrast: This mode saves 25% of energy in av erage and<br />
increases the lifetime of the lamp.<br />
18.............................................................................................................................................
LCD Display menu How to use the Advanced LCD Display Menu<br />
AUDIO<br />
1. Press the menu selection button on the remote control to show the main menu.<br />
2. Use the button to select the main item to be adjusted, “AUDIO”.<br />
Press the ► button to confirm the main item to be adjusted.<br />
3. Press the button on the remote control to select the item to be adjusted.<br />
Press the ENTER button to enter the item to be adjusted.<br />
4. Use the button on the remote control to adjust the value of the item.<br />
5. Press the menu button to exit the screen.<br />
NTSC<br />
Menu<br />
Balance<br />
Bass<br />
Treble<br />
SRS TruSurround XT<br />
Reset<br />
Descriptions<br />
Press the buttons to adjust the balance between right and left<br />
speakers.<br />
Press the buttons to increase or decrease the audio bass lev el.<br />
Press the buttons to increase or decrease the audio treble level.<br />
Press button to control the ON/OFF of the SRS TruSurround XT.<br />
(When Surround is switched on, low/high volume f unction will be<br />
disabled.)<br />
Press to restore all Display parameters to their default settings.<br />
.......................................................................................................................................... 19
LCD Display menu How to use the Advanced LCD Display Menu<br />
TV<br />
(f or TV)<br />
1. Press the menu selection button on the remote control to show the main menu.<br />
2. Press the button to confirm the main item to be adjusted, “TV”.<br />
Press the ► button to confirm the main item to be adjusted.<br />
3. Press the button on the remote control to select the item to be adjusted.<br />
Press the ENTER button to enter the item to be adjusted.<br />
4. Use the button on the remote control to adjust the value of the item.<br />
5. Press the menu button to exit the screen.<br />
NTSC<br />
Menu<br />
Channel Scan<br />
CATV/AIR<br />
Channel Add/Del<br />
Descriptions<br />
In the channel scan menu, press the Enter button to execute the auto channel<br />
scan.<br />
The auto channel scan must be perf ormed for the first installation.<br />
CATV/ AIR<br />
Press the button on the remote control to select the TV signal (antenna or<br />
cable).<br />
AIR: For antenna users, please select this item.<br />
CATV: For cable users, please select this item.<br />
Press the button to add or remove channels.<br />
(Only under the TV mode. This product requires an optional LCD TV box to enable the TV function)<br />
20.............................................................................................................................................
LCD Display menu How to use the Advanced LCD Display Menu<br />
GEOMETRY<br />
(VGA mode)<br />
1. Press the menu selection button on the remote control to show the main menu.<br />
2. Use the button to select the main item to be adjusted, “GEOMETRY”.<br />
Press the ► button to confirm the main item to be adjusted.<br />
3. Press the button on the remote control to select the item to be adjusted.<br />
Press the ENTER button to enter the item to be adjusted.<br />
4. Use the button on the remote control to adjust the value of the item.<br />
5. Press the menu button to exit the screen.<br />
NTSC<br />
Menu<br />
Auto<br />
H-Position<br />
V-Position<br />
Phase<br />
Clock<br />
Reset<br />
Descriptions<br />
Press button to automatically adjust the focus, sharpness, horizontal<br />
and v ertical positions.<br />
Press button to adjust the screen location horizontally. If the<br />
horizontal position is still misplaced after automatic adjustment, you can<br />
use this function to fine tune.<br />
Press button to adjust the screen location vertically. If the v ertical<br />
position is still misplaced after automatic adjustment, y ou can use this<br />
function to fine tune.<br />
Press button to manually adjust the f ocus. If automatic adjustment<br />
does not deliv er ideal focus, y ou can use this function to fine tune.<br />
Press button to manually adjust the sharpness. If automatic<br />
adjustment does not deliver ideal f ocus and sharpness, y ou can use this<br />
function to fine tune.<br />
Press to restore all Display parameters to their default settings.<br />
※1 Due to the different characteristics of computer video adapters, sometimes automatic adjustment<br />
cannot deliver an optimal clearness. You can use this f unction to f ine tune.<br />
※2 With different combinations of wires and audio/v ideo dev ices, if component high f requency signal<br />
pictures are unclear, the phase can be adjusted manually.<br />
.......................................................................................................................................... 21
LCD Display menu How to use the Advanced LCD Display Menu<br />
SETUP<br />
1. Press the menu selection button on the remote control to show the main menu.<br />
2. Press the button to confirm the main item to be adjusted, “SETUP”.<br />
Press the button to confirm the main item to be adjusted.<br />
3. Press the button on the remote control to select the item to be adjusted.<br />
Press the ENTER button to enter the item to be adjusted.<br />
4. Use the button on the remote control to adjust the value of the item.<br />
5. Press the menu button to exit the screen.<br />
NTSC<br />
Menu<br />
Language<br />
OSD Background<br />
Noise Reduction<br />
Ov erscan<br />
Reset<br />
Descriptions<br />
Press the buttons to select language.<br />
Press buttons to select OSD background is opaque or transparent.<br />
Press button to adjust the classes of the noise removal.<br />
Press button to adjust the items of Overscan: Off /small/standard/big.<br />
Under HDMI / YpbPr 1080P60Hz and VGA1920x1080@60Hz, the mode of pixel<br />
to pixel depends on Ov erscan. When Ov erscan is OFF, the Display Standstill<br />
and Aspect Ratio f unctions will be disabled.<br />
(When watching TV, the picture’s black edge can be adjusted by adjusting the<br />
Ov erscan f unction.)<br />
Press to restore all Display parameters to their default settings.<br />
22.............................................................................................................................................
Other Information Trouble-shooting<br />
The following table contains the common problems and the solutions to these problems. Please<br />
check this list before you contact technicians.<br />
Problems Reasons Solutions<br />
No picture<br />
1. Did y ou connect the power cord?<br />
2. Did y ou turn on the power?<br />
3. Is the signal cable connected<br />
correctly?<br />
1. Connect power cord correctly.<br />
2. Turn on power.<br />
3. Connect signal cable correctly.<br />
4. Press any button on the computer.<br />
4. Is the screen in energy-saving<br />
mode?<br />
Abnormal colors 1. Is the signal cable connected 1. Connect signal cable correctly.<br />
Twisted picture<br />
correctly?<br />
1. Is the signal cable connected<br />
correctly?<br />
2. Is signal input over the maximum of<br />
frequency range?<br />
Picture too dark 1. Are brightness and contrast set at the<br />
lowest lev el?<br />
Audio only , no images 1. Is input signal connected correctly ?<br />
2. Is the TV signal too weak?<br />
Picture only, no audio 1. Is the signal cable connected<br />
correctly?<br />
2. Is volume at the minimum level?<br />
3. Is audio signal cable not connected?<br />
4. Is the TV signal too weak?<br />
Cannot use remote<br />
control<br />
1. Is the battery dead?<br />
2. Is there any disturbance from static<br />
or thunder?<br />
1. Connect signal cable correctly.<br />
2. Please use the signal within the<br />
frequency range.<br />
1. Adjust brightness and contrast.<br />
1. Please check if input signal is<br />
connected correctly.<br />
2. Please check if signal is connected<br />
correctly.<br />
3. The TV-RF signal needs to be over<br />
50dB.<br />
1. Connect signal cable correctly.<br />
2. Adjust volume to proper level.<br />
3. Connect audio signal cable<br />
correctly.<br />
4. The TV-RF signal needs to be over<br />
50dB.<br />
1. Please change battery.<br />
2. Turn off power for 10 seconds; and<br />
then restart power.<br />
The following table contains common problems and solutions to these problems.<br />
Problems<br />
Can’t receiv e enough<br />
channels with the antenna.<br />
No colors<br />
Blinking picture accompanied<br />
by ghost image<br />
Broken lines or segments<br />
Certain TV channels are<br />
blocked (Hope to acquire<br />
some channels)<br />
Ov erlapping images or ghost<br />
images<br />
Cannot use a f unction<br />
Possible solutions<br />
Check the cable connection. Make sure it is connected f irmly.<br />
Please use multi-directional outdoor antenna. (If your TV is subject to<br />
the inf luence of nearby mountains or buildings)<br />
Please use the automatic scanning f unction to increase the number of<br />
channels not included in memory.<br />
Please adjust the color setup.<br />
Check the connection of antenna/signal cable.<br />
Check if channel is in play mode.<br />
Press signal source and change input mode.<br />
Adjust antenna<br />
Keep the TV away from noise sources: Such as automobiles, neon<br />
lights, and hair dryers.<br />
Please use the automatic scanning f unction to increase the number of<br />
channels not included in memory.<br />
Please use multi-directional outdoor antenna.<br />
(If your TV is subject to the inf luence of nearby mountains or buildings)<br />
If the item y ou choose turns gray, that item cannot be selected.<br />
If you have further questions after reading the above descriptions, please contact your distributor.<br />
.......................................................................................................................................... 23
Other Information Specifications 42” LCD TV<br />
Display panel<br />
AV I/O Input<br />
PC I/O Input<br />
Compatibility<br />
Power<br />
Env ironment<br />
Active Area / Screen Size<br />
930.24 (H) x 523.26 (V) (42.02" diagonal)<br />
Aspect Ratio Widescreen 16:9<br />
Max. of Pixels<br />
Lamp Life of Backlight<br />
Mode<br />
1920(H) X 1080(V)<br />
50,000 hrs (min.)<br />
SMVA<br />
Brighthess 500 nits (Ty p)<br />
Contrast Ratio 4000:1 (Ty p)<br />
Response Time 6.5ms (gray to gray av erage) (Ty p)<br />
AV Input x 1<br />
AV Output x 1<br />
Component Input x 1<br />
HDMI Input x 1<br />
VGA Input X1<br />
Audio system<br />
PC<br />
HDMI<br />
HDMI←→ DVI<br />
Scanning f ormat<br />
S-Video (4 pin Dim)+Audio-R/L (RCA) X1<br />
AV Composite (RCA)<br />
AV Composite (RCA) + Audio-L/R (RCA) X1<br />
YPbPr (RCA) + Audio-R/L (RCA) X1<br />
HDMIX1<br />
RGB (D-sub 15pin)+<br />
PC Audio (3.5mm jack) X1<br />
Stereo/Mono/SAP<br />
●720x400@70Hz<br />
●640x480@60Hz<br />
●800x600@60Hz<br />
●1024x768@60Hz<br />
●1920x1080@60Hz<br />
●1280x720p@60Hz;<br />
●1920x1080i@60Hz<br />
●1920x1080p@24Hz/60Hz<br />
●720x480i / 480p@60Hz<br />
●800x600@60Hz ; 640X480@60Hz<br />
●1024x768@60Hz<br />
●1920x1080@60Hz<br />
●480i / 480p@60Hz<br />
●720p@60Hz<br />
●1080i@60Hz<br />
●1080p@24 / 60 Hz<br />
Input Voltage<br />
AC100-240V, 3.5A(max.), 50/60Hz<br />
Operation