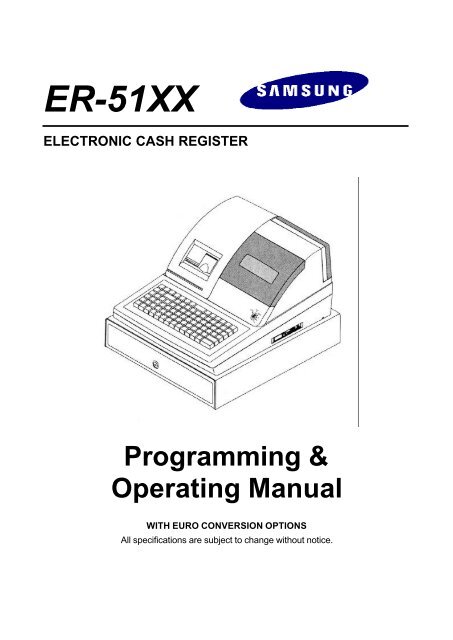
ER-51XX ELECTRONIC CASH REGISTER Programming ...
ER-51XX ELECTRONIC CASH REGISTER Programming ...
ER-51XX ELECTRONIC CASH REGISTER Programming ...

Create successful ePaper yourself
Turn your PDF publications into a flip-book with our unique Google optimized e-Paper software.
<strong>ER</strong>-<strong>51XX</strong><br />
<strong>ELECTRONIC</strong> <strong>CASH</strong> REGIST<strong>ER</strong><br />
<strong>Programming</strong> &<br />
Operating Manual<br />
WITH EURO CONV<strong>ER</strong>SION OPTIONS<br />
All specifications are subject to change without notice.
UNPACKING AND STARTING UP<br />
STEP 1 UNPACKING THE <strong>CASH</strong> REGIST<strong>ER</strong><br />
( 1 ) Unpack and unwrap your cash register.<br />
( 2 ) The following items are in the packing.<br />
- 2 paper rolls<br />
- 1 rewind spindle<br />
- 1 ribbon cartridge<br />
( 3 ) Remove cardboard protectors from the cash drawer.<br />
STEP 2 INS<strong>ER</strong>TING THE PRINT<strong>ER</strong> RIBBON CARTRIDGE<br />
( 1 ) Locate the printer cover key. The printer cover key is the smallest on the key ring.<br />
Insert this key into the printer cover lock. Turn the key and then remove the printer cover.<br />
( 2 ) Locate the ribbon cartridge as shown in the illustration.<br />
( 3 ) Insert the ribbon cartridge and press firmly into the place.<br />
Remove any slack in the ribbon by rotating the cartridge knob counter-clockwise.<br />
1
STEP 3 PUTTING THE PAP<strong>ER</strong> IN THE PRINT<strong>ER</strong><br />
STEP 3.1 LOADING THE DETAIL PRINT<strong>ER</strong><br />
( 1 ) Plug the cash register’s power cord into the properly grounded wall socket.<br />
( 2 ) Place the key marked ‘ REG’ into the control lock and turn to the “ REG” position.<br />
( 3 ) Locate the black plastic rewind spindle in the Styrofoam.<br />
( 4 ) As you face the keyboard, notice two plastic trays at the bottom of the printer compartment.<br />
Place one of the paper rolls into the tray on the right.<br />
Make sure the paper will unwind from the bottom of the roll.<br />
( 5 ) Fold back about 6 inches of paper and insert the folded end of the tape into the feed slot<br />
just in front of the paper tray at the rear of the printer.<br />
( 6 ) Press the “ DETAIL FEED” key on the keyboard until the edge has fed through the printer.<br />
Run 6 ~ 8 inches of paper through the printer.<br />
( 7 ) Hold the black rewind spindle with the gear to the right and the shaft to the left.<br />
Insert the end of the paper into the slot on the shaft of the rewind spindle.<br />
Wind the spindle several times to be sure that the paper will stay on the spindle.<br />
( 8 ) Slide the axle of the rewind spindle ( between the gear and the shaft ) into the notch of the<br />
printer housing.<br />
( 9 ) Press the “ DETAIL FEED” key several times again to make sure that the paper moves properly<br />
through the printer.<br />
NOTE : The socket-outlet shall be near the equipment and it shall be easy accessible.<br />
* LOADING DETAIL PAP<strong>ER</strong> * * LOADING RECEIPT PAP<strong>ER</strong> *<br />
2
THE FABRICATION OF REWIND SPINDLE ><br />
( 1 ) Locate the black plastic rewind spindle ( A ) in the Styrofoam.<br />
( 2 ) Locate the black plastic rewind spindle ( B ) in the manual bag.<br />
( 3 ) Fabricate the black plastic rewind spindle ( A ) and ( B ) as shown in the illustration.<br />
STEP 3.2 LOADING THE RECEIPT PRINT<strong>ER</strong><br />
( 1 ) Place the other paper rolls into the small tray on the left.<br />
Make sure the paper will unwind from the bottom of the roll.<br />
( 2 ) Fold back about 6 inches of paper and insert the folded end of the tape into the feed slot<br />
just in front of the paper tray at the rear of the printer.<br />
( 3 ) Press the “ RECEIPT FEED” key on the keyboard until the paper comes through the printer.<br />
Run 3 ~ 4 inches of paper through the printer.<br />
( 4 ) Replace the printer cover and make sure that the receipt paper comes out through the<br />
opening in the printer cover.<br />
NOTE : Do not pull the paper back through the printer as this may damage it.<br />
PRINT<strong>ER</strong><br />
PRINT<strong>ER</strong><br />
CORRECT<br />
INCORRECT<br />
3
STEP 4 CLEARING THE RAM ( RANDOM ACCESS MEMORY )<br />
( 1 ) Unplug the cash register.<br />
( 2 ) Locate the control lock key marked ‘ C’ .<br />
( 3 ) Insert the key into the control lock and turn clockwise , past the “ P” position<br />
to the “ S<strong>ER</strong>VICE MODE” position.<br />
This position is not marked on the control lock, but the ‘C’ key can travel to this position.<br />
( 4 ) Hold down the “ 00” key on the keyboard.<br />
While holding the “ 00” key down, plug the cash register’s power cord into properly grounded<br />
wall socket.<br />
Continue to hold the “ 00” key down until the receipt printer stops printing and the display<br />
shows 0.00.<br />
!! The cash register is now ready to operate. !!<br />
WARNING : Clearing the RAM is essential before you program the cash register for the first time.<br />
However once the cash register is programmed and operated,<br />
clearing the RAM will cause all programs and totals to be lost.<br />
WARNING : Do not open the printer cover while operating the cash register.<br />
Do not operate the cash register without the ribbon cartridge.<br />
NOTE : When you firstly configure the cash register, it is recommended that the register<br />
remains powered on in the “ REG” mode for at least 24 hours.<br />
This allows the Ni-Cad battery, which maintains the memory of the machine<br />
while the power is off, to charge completely.<br />
4
TABLE OF CONTENTS<br />
UNPACKING AND STARTING UP ................................................................................................ 1<br />
FEATURES ...................................................................................................................................... 9<br />
KEYBOARD LAYOUT ..................................................................................................................... 10<br />
1 <strong>ER</strong>-5115 KEYBOARD LAYOUT ................................................................................................. 10<br />
2 <strong>ER</strong>-5140 KEYBOARD LAYOUT ................................................................................................. 11<br />
FUNCTION KEY DESCRIPTION ................................................................................................... 12<br />
CONTROL LOCK ............................................................................................................................ 14<br />
CONTROL KEYS ............................................................................................................................ 14<br />
DISPLAY .......................................................................................................................................... 15<br />
DISPLAY SYMBOLS ...................................................................................................................... 15<br />
PROGRAMMING NOTE ................................................................................................................ 17<br />
1 S<strong>ER</strong>VICE MODE PROGRAMMING ......................................................................................... 17<br />
1.1 RAM CLEARING ................................................................................................................ 17<br />
1.1.1 INITIAL CLEAR ............................................................................................................... 17<br />
1.1.2 CLEARING TOTALS FROM MEMORY ............................................................................... 18<br />
1.2 SETTING THE NUMB<strong>ER</strong> OF DEPARTMENTS ............................................................... 19<br />
2 P MODE PROGRAMMING ...................................................................................................... 20<br />
2.1 DATE & TIME PROGRAMMING ........................................................................................ 20<br />
2.1.1 DATE PROGRAMMING ................................................................................................... 20<br />
2.1.2 TIME PROGRAMMING .................................................................................................... 20<br />
2.2 REGIST<strong>ER</strong> NUMB<strong>ER</strong> PROGRAMMING ........................................................................... 20<br />
2.3 TAX PROGRAMMING ....................................................................................................... 21<br />
2.4 VAT RATE PROGRAMMING ............................................................................................ 21<br />
2.5 CL<strong>ER</strong>K SECRET CODE & DRAW<strong>ER</strong> ASSIGNMENT PROGRAMMING ............................ 22<br />
2.6 SYSTEM OPTION PROGRAMMING ................................................................................ 23<br />
2.7 DESCRIPTOR PROGRAMMING ....................................................................................... 29<br />
2.7.1 PROGRAMMING ....................................................................................................................... 29<br />
2.7.2 DESCRIPTOR PROGRAMMING EXAMPLES ...................................................................... 30<br />
2.7.3 DESCRIPTOR PROGRAMMING SCAN .............................................................................. 31<br />
2.8 DEPARTMENT PROGRAMMING ....................................................................................... 32<br />
2.8.1 DEPARTMENT STATUS PROGRAMMING .......................................................................... 33<br />
2.8.2 DEPARTMENT PRICE OR HALO PROGRAMMING ............................................................. 33<br />
2.8.3 DEPARTMENT PROGRAMMING EXAMPLES ..................................................................... 35<br />
2.8.4 DEPARTMENT PROGRAMMING SCAN ............................................................................. 36<br />
2.9 PLU PROGRAMMING ........................................................................................................ 37<br />
2.9.1 PLU PROGRAMMING ....................................................................................................... 38<br />
5
2.9.2 PLU PROGRAMMING EXAMPLES ..................................................................................... 39<br />
2.9.3 PLU PROGRAMMING SCAN ............................................................................................. 40<br />
2.9.4 PLU LINK PROGRAMMING ............................................................................................... 41<br />
2.9.5 REMOVING OR DELETING A PLU ..................................................................................... 41<br />
2.10 % KEY PROGRAMMING ................................................................................................... 42<br />
2.10.1 % KEY PROGRAMMING .................................................................................................. 42<br />
2.10.2 % CALCULATION ROUNDING FACTOR ........................................................................... 42<br />
2.11 <strong>CASH</strong>/TEND KEY PROGRAMMING ................................................................................. 43<br />
2.12 CHEQUE KEY PROGRAMMING ....................................................................................... 43<br />
2.13 CHARGE KEY PROGRAMMING ...................................................................................... 43<br />
2.14 PRESET <strong>CASH</strong> KEY PROGRAMMING ............................................................................ 43<br />
2.15 <strong>CASH</strong> IN DRAW<strong>ER</strong> LIMIT PROGRAMMING .................................................................... 43<br />
2.16 CURRENCY CONV<strong>ER</strong>SION KEY PROGRAMMING ......................................................... 44<br />
2.17 EUROPEAN ROUNDING PROGRAMING ........................................................................ 44<br />
2.18 PARAMET<strong>ER</strong>S PROGRAM SCAN ................................................................................... 45<br />
OP<strong>ER</strong>ATING NOTE ........................................................................................................................ 46<br />
1 CL<strong>ER</strong>K SIGN ON ...................................................................................................................... 46<br />
1.1 IN CASE OF 4 CL<strong>ER</strong>KS ( SYSTEM OPTION 28’s VALUE ‘C’ = 0 ) ..................................... 47<br />
1.1.1 PUSH BUTTON SIGN ON .................................................................................................. 46<br />
1.1.2 SECRET CODE SIGN ON .................................................................................................. 46<br />
1.2 IN CASE OF 15 CL<strong>ER</strong>KS ( SYSTEM OPTION 28’s VALUE ‘C’ = 4 ) ................................... 46<br />
1.2.1 PUSH BUTTON SIGN ON .................................................................................................. 47<br />
1.2.2 SECRET CODE SIGN ON .................................................................................................. 47<br />
2 CL<strong>ER</strong>K SIGN OFF .................................................................................................................... 47<br />
2.1 IN CASE OF 4 CL<strong>ER</strong>KS ( SYSTEM OPTION 28’s VALUE ‘C’ = 0 ) .................................... 47<br />
2.2 IN CASE OF 15 CL<strong>ER</strong>KS ( SYSTEM OPTION 28’s VALUE ‘C’ = 4 ) .................................. 47<br />
3 REAL CL<strong>ER</strong>K KEY ENTRY ....................................................................................................... 47<br />
4 CLEARING AN <strong>ER</strong>ROR CONDITION ....................................................................................... 47<br />
5 NO SALE OP<strong>ER</strong>ATION ............................................................................................................ 48<br />
6 NON-ADD NUMB<strong>ER</strong> ENTRIES ................................................................................................. 48<br />
7 PRICE INQUIRY OP<strong>ER</strong>ATION ................................................................................................. 48<br />
8 DEPARTMENT ENTRIES ......................................................................................................... 49<br />
8.1 OPEN DEPARTMENT ENTRIES ........................................................................................ 49<br />
8.2 PRESET DEPARTMENT ENTRIES .................................................................................... 50<br />
8.3 GALLONAGE DEPARTMENT ENTRIES ............................................................................ 51<br />
9 PLU ( PRICE LOOK UP ) ENTRIES .......................................................................................... 51<br />
9.1 OPEN PLU ENTRIES ......................................................................................................... 51<br />
9.2 PRESET PLU ENTRIES ..................................................................................................... 53<br />
6
9.3 PLU TO PLU CHAIN OP<strong>ER</strong>ATION ..................................................................................... 54<br />
9.4 PLU ENTRIES BY CODE ................................................................................................... 54<br />
10 SINGLE ITEM DEPARTMENT OR PLU ENTRIES .................................................................. 55<br />
10.1 SINGLE ITEM PRESET ENTRIES .................................................................................... 55<br />
10.2 SINGLE ITEM OV<strong>ER</strong>RIDE ENTRIES ............................................................................... 55<br />
11 COMPUTATION OF VAT ( Value Added Tax ) .......................................................................... 55<br />
11.1 INCLUSIVE VAT SYSTEM ............................................................................................... 55<br />
11.2 EXCLUSIVE VAT SYSTEM .............................................................................................. 56<br />
12 % KEY ENTRIES .................................................................................................................... 57<br />
12.1 P<strong>ER</strong>CENT RATE DISCOUNT / SURCHARGE .................................................................. 57<br />
12.1.1 ITEM DISCOUNT / SURCHARGE ..................................................................................... 58<br />
12.1.2 SALE DISCOUNT / SURCHARGE .................................................................................... 58<br />
12.2 AMOUNT DISCOUNT / SURCHARGE ............................................................................. 58<br />
12.2.1 ITEM DISCOUNT / SURCHARGE .................................................................................... 58<br />
12.2.2 SALE DISCOUNT / SURCHARGE .................................................................................... 58<br />
13 M<strong>ER</strong>CHANDISE RETURN OP<strong>ER</strong>ATION ................................................................................. 59<br />
14 VOID OP<strong>ER</strong>ATION ................................................................................................................. 59<br />
14.1 VOID OF A LAST ITEM ENTRY ( <strong>ER</strong>ROR CORRECT ) ................................................... 59<br />
14.2 VOID OF A PREVIOUS ITEM ENTRY .............................................................................. 59<br />
14.3 VOID OUTSIDE OF A SALE ............................................................................................. 60<br />
14.4 CANCEL ( VOID 4 ) ............................................................................................................. 60<br />
15 ADD CHECK OP<strong>ER</strong>ATION ..................................................................................................... 61<br />
16 TEND<strong>ER</strong>ING OP<strong>ER</strong>ATION ..................................................................................................... 61<br />
16.1 <strong>CASH</strong> TEND<strong>ER</strong>ING .......................................................................................................... 61<br />
16,2 PRESET <strong>CASH</strong> TEND<strong>ER</strong>ING ........................................................................................... 62<br />
16.3 CHEQUE TEND<strong>ER</strong>ING ..................................................................................................... 62<br />
16.4 CHARGE TEND<strong>ER</strong>ING .................................................................................................... 62<br />
16.5 SPLIT TEND<strong>ER</strong>ING .......................................................................................................... 63<br />
16.6 TEND<strong>ER</strong>ING WITH CURRENCY CONV<strong>ER</strong>SION ............................................................. 64<br />
16.7 POST TEND<strong>ER</strong>ING .......................................................................................................... 64<br />
17 CHEQUE <strong>CASH</strong>ING ................................................................................................................ 65<br />
18 RECEIVED ON ACCOUNT OP<strong>ER</strong>ATION ............................................................................... 66<br />
19 PAID OUT OP<strong>ER</strong>ATION ......................................................................................................... 66<br />
20 TABLE MANAGEMENT .......................................................................................................... 67<br />
20.1 TRANSACTION ................................................................................................................ 67<br />
20.2 CONSOLIDATED RECEIPT PRINTING ............................................................................ 67<br />
21 <strong>CASH</strong>I<strong>ER</strong> OV<strong>ER</strong>LAP .............................................................................................................. 69<br />
21.1 TRANSACTION ................................................................................................................. 69<br />
7
21.2 CONSOLIDATED RECE IPT PRINTING ............................................................................ 69<br />
22 PRINTING A BUFF<strong>ER</strong>ED RECEIPT OP<strong>ER</strong>ATION .................................................................. 71<br />
23 VALIDATION OP<strong>ER</strong>ATION ..................................................................................................... 72<br />
24 RECEIPT MESSAGE PRINTING OP<strong>ER</strong>ATION ....................................................................... 73<br />
24.1 PREAMBLE MESSAGE .................................................................................................... 73<br />
24.2 POSTAMBLE MESSAGE ................................................................................................. 73<br />
25 TRAIN MODE ......................................................................................................................... 74<br />
REPORT AND BALANCING ......................................................................................................... 75<br />
1 REPORT MODES ..................................................................................................................... 76<br />
2 <strong>CASH</strong> DECLARATION .............................................................................................................. 76<br />
3 REPORTS ................................................................................................................................ 77<br />
3.1 OPEN TABLE ( OR OPEN CL<strong>ER</strong>K ) REPORT .................................................................… 77<br />
3.2 FINANCIAL REPORT .......................................................................................................… 78<br />
3.3 TIME REPORT .................................................................................................................… 79<br />
3.4 PLU REPORT ..................................................................................................................... 80<br />
3.5 FROM / TO PLU REPORT ...............................................................................................… 80<br />
3.6 IN-DRAW<strong>ER</strong> REPORT .....................................................................................................… 81<br />
3.7 DAILY SALES REPORT ...................................................................................................… 81<br />
3.8 INDIVIDUAL CL<strong>ER</strong>K REPORT .........................................................................................… 82<br />
3.9 FROM / TO DEPARTMENT REPORT ..............................................................................… 83<br />
3.10 DEPT REPORT ..........................................................................................................……. 83<br />
TROUBLE SHOOTING ................................................................................................................... 84<br />
MEMORY PROTECTION BATT<strong>ER</strong>Y ............................................................................................ 84<br />
SPECIFICATION ............................................................................................................................. 84<br />
APPENDIX ....................................................................................................................................... 84<br />
1 CHARACT<strong>ER</strong> TABLE CODE ..................................................................................................... 85<br />
2 ALPHA-NUM<strong>ER</strong>IC KEYBOARD LAYOUT .................................................................................. 86<br />
2.1 <strong>ER</strong>-5115 ALPHA-NUM<strong>ER</strong>IC KEYBOARD LAYOUT ............................................................ 86<br />
2.2 <strong>ER</strong>-5140 ALPHA-NUM<strong>ER</strong>IC KEYBOARD LAYOUT ............................................................ 87<br />
3 COMMUNICATION INT<strong>ER</strong>FACE ............................................................................................... 88<br />
3.1 PIN DESCRIPTION FOR S<strong>ER</strong>IAL INT<strong>ER</strong>FACE ................................................................. 88<br />
3.2 CABLE SPECIFICATION ..................................................................................................... 88<br />
4 COMMUNICATION WITH PC ................................................................................................... 89<br />
5 PRINTING ON THE ROLL PRINT<strong>ER</strong> ........................................................................................ 89<br />
6 SCALE ...................................................................................................................................... 90<br />
6.1 DIRECT SCALE ENTRY ..................................................................................................... 90<br />
6.2 MANUAL WEIGHT ENTRY ................................................................................................. 90<br />
8
FEATURES<br />
* Two-station printer with one-line validation capability.<br />
* Front and rear ( pop-up ) displays.<br />
* 6-position control locks.<br />
* 24 hour time clock with automatic date change.<br />
* 15 departments ( <strong>ER</strong>-5115 ) / 40 departments ( <strong>ER</strong>-5140 ).<br />
* 1000 open or preset PLUs.<br />
* 4 push-button clerks and 15 soft clerks with separate report totals.<br />
* 4 VAT or straight percentage TAX.<br />
* CANCEL function.<br />
* Post tendering.<br />
* Preset cash tendering.<br />
* Table management / Cashier overlap<br />
* Management reports.<br />
- Daily and period-to-date financial, time, PLU and clerk report.<br />
- Daily sales report.<br />
- Open table ( or Open clerk ) report.<br />
- Optional compulsory cash declaration.<br />
* Train mode.<br />
* Cash drawer compulsory.<br />
* Receipt on/off function.<br />
* Communication<br />
- Download the programming contents from PC, Upload the programming contents and reports to PC.<br />
- Slip printer<br />
- Kitchen printer<br />
- Scale<br />
* Euro Currency Conversion (Curr Conv1) + (Curr Conv2)<br />
9
KEYBOARD LAYOUT<br />
1 <strong>ER</strong>-5115 KEYBOARD LAYOUT<br />
RECEIPT<br />
FEED<br />
DETAIL<br />
FEED<br />
RECEIPT<br />
ON/OFF<br />
RECEIPT<br />
VALID<br />
PLU<br />
CL<strong>ER</strong>K<br />
1<br />
CL<strong>ER</strong>K<br />
2<br />
CL<strong>ER</strong>K<br />
3<br />
CL<strong>ER</strong>K<br />
4<br />
VOID<br />
CHECK<br />
#<br />
CLEAR<br />
#/NS<br />
X/TIME<br />
5<br />
10<br />
15<br />
RECD<br />
ACCT<br />
PAID<br />
OUT<br />
MDSE<br />
RETURN<br />
TAX<br />
7<br />
8<br />
9<br />
4<br />
9<br />
14<br />
ADD<br />
CHECK<br />
CHARGE<br />
1<br />
CANCEL<br />
CONV<br />
1<br />
4<br />
5<br />
6<br />
3<br />
8<br />
13<br />
CHECK<br />
TEND<strong>ER</strong><br />
CHARGE<br />
2<br />
PRICE<br />
INQ.<br />
CONV<br />
2<br />
1<br />
2<br />
3<br />
2<br />
7<br />
12<br />
CHEQUE<br />
SUBTL<br />
% 1<br />
% 2<br />
0<br />
00<br />
.<br />
1<br />
6<br />
11<br />
<strong>CASH</strong>/TEND<br />
Important Note: <strong>ER</strong>5115 only.<br />
The keyboard design for the Cash/Tend & Subtotal keys has<br />
changed with the new Euro Eprom.<br />
The above style is the new keyboard for the Euro Eprom.<br />
Pre-Euro keyboards will have the design shown on right.<br />
SUBTL<br />
PRESET<br />
<strong>CASH</strong><br />
<strong>CASH</strong>/<br />
TEND<br />
10
11<br />
2 <strong>ER</strong>-5140 KEYBOARD LAYOUT<br />
VALID<br />
PLU<br />
TAX<br />
#/NS<br />
% 2<br />
% 1<br />
X/time<br />
VOID<br />
SUBTOTAL<br />
<strong>CASH</strong>/TEND<br />
CANCEL<br />
RECEIPT<br />
CHEQUE<br />
CHARGE<br />
1<br />
CHECK<br />
TENDR<br />
CHECK<br />
#<br />
ADD<br />
CHECK<br />
PRICE<br />
INQ.<br />
MDSE<br />
RETUR<br />
CHARGE<br />
2<br />
PRESET<br />
<strong>CASH</strong><br />
PRESET<br />
<strong>CASH</strong><br />
DETAIL<br />
FEED<br />
RECEIPT<br />
ON/OFF<br />
RECEIPT<br />
FEED<br />
CL<strong>ER</strong>K<br />
1<br />
PAID<br />
OUT<br />
RECD<br />
ACCT<br />
CL<strong>ER</strong>K<br />
4<br />
CL<strong>ER</strong>K<br />
3<br />
CL<strong>ER</strong>K<br />
2<br />
CONV<br />
1<br />
CONV<br />
2<br />
CLEAR<br />
.<br />
00<br />
0<br />
3<br />
2<br />
1<br />
6<br />
5<br />
4<br />
9<br />
8<br />
7<br />
40<br />
35<br />
30<br />
25<br />
20<br />
15<br />
10<br />
5<br />
39<br />
34<br />
29<br />
19<br />
14<br />
9<br />
4<br />
38<br />
33<br />
28<br />
18<br />
13<br />
8<br />
3<br />
37<br />
32<br />
27<br />
22<br />
17<br />
12<br />
7<br />
2<br />
36<br />
31<br />
26<br />
21<br />
16<br />
11<br />
6<br />
1<br />
24<br />
23
FUNCTION KEY DESCRIPTION<br />
KEY<br />
DESCRIPTION<br />
1, 2 ... 9, 0, 00 Use these numeric keys for all numeric entries on the cash register.<br />
ADD CHECK<br />
CANCEL<br />
<strong>CASH</strong>/TEND<br />
CHARGE 1, 2<br />
CHECK #<br />
CHECK TEND<strong>ER</strong><br />
CHEQUE<br />
CLEAR<br />
CL<strong>ER</strong>K 1, 2, 3, 4<br />
CONV 1, 2<br />
DECIMAL ( . )<br />
DEPARTMENTS<br />
DETAIL FEED<br />
MDSE RETURN<br />
#/NS<br />
Use this key to combine individual guest checks that will be tendered together.<br />
Use this key to cancel the present incomplete transactions without updating the<br />
departments, PLUs or function key totals.<br />
Use this key to finalize a sale paid with cash. Enter the amount tendered before<br />
pressing the “<strong>CASH</strong>/TEND” key for change calculation.<br />
Use these keys to finalize a sale paid with a charge account.<br />
Use this key to specify the table number on table management.<br />
Use this key to tender a table as open status.<br />
Use this key to finalize a sale that is paid by cheque.<br />
Use this key to clear the incorrect entries made on the 10 numeric keys<br />
and error conditions.<br />
Use these four keys to log on clerks for operation and reports.<br />
A clerk must be logged on before the cash register will operate.<br />
Use these keys to convert a home currency to the equivalent of another country’ s<br />
currency.<br />
These keys are allowed after the “SUBTOTAL” key, convert and re-display the<br />
subtotal at a preprogrammed exchange rate. Tendering is allowed after using the<br />
currency conversion function. The change amount is calculated in home currency.<br />
The amount of foreign currency tendered is stored in a separated total on the<br />
financial report, but not added to the drawer total.<br />
Use this key for decimal multiplication.<br />
Use these keys to make entries during a sale.<br />
Press this key to advance the detail tape.<br />
Use this key to return merchandise outside of a sale.<br />
MDSE RETURN activity reports to a total on the financial report.<br />
Use this key to open the cash drawer outside of a sale or to enter numbers that<br />
appear on the receipt and detail tapes but do not affect the sale total.<br />
% 1, % 2 Use these keys to register discount and surcharge.<br />
Depending on programming, these keys can be used to register percent or amount<br />
and added to an item or entire sale.<br />
PLU Use this key to register a Price Look Up ( PLU ).<br />
12
KEY<br />
DESCRIPTION<br />
PAID OUT Use this key to register media removed from the cash drawer. ( = Paid Out )<br />
PRESET <strong>CASH</strong><br />
PRICE INQ.<br />
RECD ACCT<br />
RECEIPT<br />
RECEIPT FEED<br />
RECEIPT ON/OFF<br />
Use this key to finalize a sale paid with cash.<br />
These keys are preset amount cash tendering keys which have programmable<br />
values. By pressing this key at the end of a transaction, the preset amount is<br />
automatically tendered and the sale is finalized as a cash transaction.<br />
Use this key to know a HALO or preset amount of a department or PLU.<br />
( = Price Inquiry )<br />
Use this key to register cash and cheque added to the cash drawer.<br />
( = Received Account )<br />
Use this key to issue the buffered receipt.<br />
Press this key to advance the customer’s receipt tape.<br />
Use this key to turn the receipt printer on or off. When the ‘RECEIPT OFF’ sign is<br />
illuminated on the display panel, the receipt printer will be turned off.<br />
SUBTL Use this key to display a subtotal. ( = SUBTOTAL )<br />
TAX<br />
VALID<br />
VOID<br />
X/TIME<br />
Use this key to breakdown the amount due including value added tax<br />
or to shift the tax status of a particular department or PLU.<br />
Use this key to print one line validation on a check or slip.<br />
Use this key to correct entries before a sale is finalized.<br />
Use this key for multiplication, split pricing and triple multiplication.<br />
13
CONTROL LOCK<br />
POSITION<br />
VOID<br />
OFF<br />
REG<br />
X<br />
Z<br />
USE<br />
Void outside of a sale.<br />
The cash register will not operate.<br />
All normal operations.<br />
To issue X level reports.<br />
Also used for manager control of voids & merchandise return.<br />
To issue Z level reports.<br />
To reset totals to zero.<br />
P To program the ECR ( Electronic Cash Register )<br />
CONTROL KEYS<br />
OFF<br />
VOID REG ‘ REG’ key : “ OFF” ~ “ REG”<br />
X ‘ VD’ key : “ VOID” ~ “ X”<br />
‘ Z’ key : “ VOID” ~ “ Z”<br />
Z<br />
‘ P’ key : “ VOID” ~ “ P”<br />
P<br />
S<strong>ER</strong>VICE MODE ‘ C’ key : All position<br />
14
DISPLAY<br />
This cash register has a front ( or operator ) display and a pop up display.<br />
The front display has a indicator lights. These lights provide only the operator with information about the<br />
operation of the cash register.<br />
DPT RPT AMOUNT<br />
RCPT VOID SHIFT VALID<br />
CL<strong>ER</strong>K<br />
OFF<br />
DISPLAY SYMBOLS<br />
SYMBOL<br />
C<br />
CONTENTS<br />
Indicates that the amount displayed is a due as change.<br />
= Indicates that the amount displayed is a total.<br />
- Indicates that the amount displayed is negative.<br />
S<br />
F<br />
SP<br />
PP<br />
PE<br />
CL<br />
SE<br />
This symbol shows directly in front of negative amount.<br />
Indicates that the amount displayed is a subtotal.<br />
Indicates that a table on table management or a clerk on cashier overlap is<br />
temporarily finalized as open status.<br />
Indicates that validation is required.<br />
Indicates paper jam.<br />
Please turn the power off and remove the paper in the printer,<br />
turn the power on again.<br />
Indicates paper ending.<br />
Please remove the printer cover and replace the paper.<br />
And press the “CLEAR” key to print continually.<br />
Indicates that a clerk must be signed on for operating in the ‘X’ or ‘Z’ mode.<br />
Indicates that the maximum slip lines is reached.<br />
Please insert the new slip into the slip printer and press the “ CHECK<br />
TEND<strong>ER</strong>”<br />
15
key.<br />
SYMBOL<br />
E 1<br />
E 2<br />
E 4<br />
E 5<br />
E 6<br />
E 8<br />
E 9<br />
E 10<br />
E 11<br />
E 12<br />
E 13<br />
E 14<br />
CONTENTS<br />
Indicates an error condition.<br />
Press the “ CLEAR” key to clear this condition.<br />
Indicates that the cash drawer must be closed.<br />
Indicates that NON-ADD NUMB<strong>ER</strong> should be entered.<br />
Indicates that the ADD CHECK operation must be performed.<br />
Indicates that the cash declaration operation must be performed.<br />
Indicates that now a table is open.<br />
Indicates that all the open tables or clerks must be finalized.<br />
Indicates that the sale data is too big.<br />
Please issue all Z report. ( ‘100’ – ‘SUBTL’ in Z mode )<br />
Indicates that the scale runtime over.<br />
Indicates that the scale is not measurable things on the scale.<br />
Indicates that the open drawer warning tone sounds by the open drawer alarm.<br />
Please close the cash drawer.<br />
Indicates that the slip printer is disconnected.<br />
Please check if the slip printer is connective.<br />
NO PAP Indicates that the paper run out on the EPSON TM-290 ? .<br />
Please insert the paper to the slip printer and press the “ CLEAR” key.<br />
SYMBOL CONTENTS ( related to CHECKLINE EFT terminal )<br />
E 15 General error like disconnection, timeout and so on.<br />
E 16 Z<strong>ER</strong>O amount<br />
E 17 Call card issuer<br />
E 18 Prevalid date<br />
E 19 Expiry date<br />
E 20 No payee<br />
E 21 No store<br />
E 22 Card rejected<br />
E 23 Over floor limit<br />
E 24 Over trans limit<br />
E 25 Illegal card use<br />
E 26 Sensor problem<br />
E 27 Signature reject<br />
E 28 Function aborted<br />
16
PROGRAMMING NOTE<br />
This ECR ( Electronic Cash Register ) ‘s programming is easy.<br />
In this manual, the programming steps are explained with flow chart boxes.<br />
Each box represents a key on the keyboard.<br />
The flow chart shows each key stroke you need to complete the programming.<br />
Enter the keys in the flow chart from left to right.<br />
DEFAULT PROGRAM : This machine arrives with a default or “ generic” program already installed.<br />
Program options are set to 0(zero), unless otherwise noted, which means<br />
the machine is operational right out-of-the-box.<br />
1 S<strong>ER</strong>VICE MODE PROGRAMMING<br />
Service mode programming is the initial programming that is required when the register is new “out-of-thebox”.<br />
Service mode programming is also used to return the register to this condition.<br />
1.1 RAM CLEARING<br />
1.1.1 INITIAL CLEAR<br />
Keyboard lock-ups and constant error conditions may be cleared by the following procedure.<br />
This procedure will not effect register programming, or clear previously stored totals in RAM memory.<br />
( 1 ) Turn the keylock to the ‘ P’ position and press the “ SUBTL” key.<br />
( 2 ) While holding the “ SUBTL” key down, power the register off, and back on.<br />
Continue to hold the “ SUBTL” key down until the receipt printer stops printing and the<br />
display shows 0.00.<br />
* INITIAL CLEAR *<br />
17
1.1.2 CLEARING TOTALS FROM MEMORY<br />
A. ALL MEMORY RAM CLEAR<br />
All programming and totals are cleared.<br />
Use this procedure the first time when the cash register is programmed.<br />
B. RESET ALL TOTALS & COUNT<strong>ER</strong>S<br />
All totals and counters are cleared. ( Consecutive NO. , Z-Counter, Grand total )<br />
This procedure will not effect register programming.<br />
C. RESET GRAND TOTAL ONLY<br />
The Grand total is only cleared.<br />
( 1 ) Unplug the cash register.<br />
( 2 ) Insert lock key marked ‘ C’ into the control lock and turn clockwise, past the position marked<br />
‘ P’ , to the ‘ S<strong>ER</strong>VICE MODE’ ( Master Clear position ). This position is not marked on the<br />
control lock, but the ‘C’ key will travel to this position.<br />
( 3 ) Choose the desired operation from those listed below.<br />
While holding the SPECIFIED key down, plug-in the cash register.<br />
Continue to hold the specified key down until the receipt printer stops printing and the<br />
display shows 0.00.<br />
KEY<br />
TYPE<br />
00 ALL MEMORY RAM CLEAR<br />
CHEQUE<br />
<strong>CASH</strong>/TEND<br />
RESET ALL TOTALS & COUNT<strong>ER</strong>S<br />
RESET GRAND TOTAL ONLY<br />
* ALL MEMORY RAM CLEAR * * RESET ALL TOTALS & COUNT<strong>ER</strong>S * * RESET GRAND TOTAL ONLY *<br />
18
1.2 SETTING THE NUMB<strong>ER</strong> OF DEPARTMENTS<br />
( X X )<br />
X/TIME<br />
<strong>CASH</strong>/TEND<br />
<strong>ER</strong>-5115 : 0 = 15 Departments <strong>ER</strong>-5140 : 0 = 40 Departments<br />
5 = 5 Departments 20 = 20 Departments<br />
10 = 10 Departments<br />
EX ) If you want to program 5 departments system.<br />
5 X/TIME <strong>CASH</strong>/TEND<br />
NOTE : In order to reprogram the number of departments available, firstly the register should be<br />
RAM cleared and then all programming must be re-entered.<br />
19
2 P MODE PROGRAMMING<br />
2.1 DATE & TIME PROGRAMMING<br />
2.1.1 DATE PROGRAMMING<br />
( 1 ) Enter the date in the form of DD MM YY or MM DD YY or YY MM DD and week.<br />
( The order of date is set by SYSTEM OPTION ADDRESS 25 : Page 25 )<br />
( 2 ) Press the “ X/TIME” key.<br />
( X X X X X X Y )<br />
Date<br />
Week<br />
X/TIME<br />
2.1.2 TIME PROGRAMMING<br />
( 1 ) Enter standard military time in the form of HH MM.<br />
( 2 ) Press the “ X/TIME” key.<br />
EX ) 25 DECEMB<strong>ER</strong> 1998, FRIDAY<br />
12 : 00 noon<br />
( 2 5 12 9 8 5 ) X/TIME<br />
( 1 2 0 0 )<br />
X/TIME<br />
In military time noon = 1200<br />
midnight = 0000<br />
# WEEK TABLE # 1 : 30 PM = 1330<br />
WEEK VALUE :<br />
and so on.<br />
SUNDAY 0 THURSDAY 4<br />
MONDAY 1 FRIDAY 5<br />
TUESDAY 2 SATURDAY 6<br />
WEDNESDAY 3<br />
2.2 REGIST<strong>ER</strong> NUMB<strong>ER</strong> PROGRAMMING<br />
( 1 ) Enter the register number up to 4 digits.<br />
( 2 ) Press the “ MDSE RETURN” key.<br />
D1 D2 D3 D4 MDSE RETURN<br />
20
2.3 TAX PROGRAMMING<br />
You can program 4 tax rates on this cash register.<br />
This cash register can calculate tax by two methods :<br />
A. VAT ( Value Added Taxes ) : Inclusi ve VAT<br />
B. Straight percentage taxes : Exclusive VAT<br />
IMPORTANT : To program tax as INCLUSIVE, set SYSTEM OPTION ADDRESS 4 to 0.<br />
To program tax as EXCLUSIVE, set SYSTEM OPTION ADDRESS 4 to 1.<br />
NOTE : If you clear RAM, the machine has the INCLUSIVE TAX SYSTEM.<br />
2.4 VAT RATE PROGRAMMING<br />
( 1 ) Press the VAT number ( 1, 2, 3 or 4 ) and the “ TAX” key.<br />
( 2 ) Enter the percentage of tax from the numeric key pad.<br />
You must use the decimal ( . ) key.<br />
EX ) 10 % tax by entering : 1 0 . 0 0 0<br />
6.25 % tax by entering : 6 . 2 5 0<br />
NOTE : You must enter 3 number after the decimal key.<br />
( 3 ) Press the “ SUBTL” key.<br />
If you want to use the TAX ROUNDING SYSTEM, refer to SYSTEM OPTION ADDRESS 38<br />
( X ) TAX ( X X . X X X )<br />
SUBTL<br />
VAT NO. ( 1 ~ 4 ) VAT RATE ( 0.001 ~ 99.999 % )<br />
21
2.5 CL<strong>ER</strong>K SECRET CODE & DRAW<strong>ER</strong> ASSIGNMENT PROGRAMMING<br />
NOTE : If you want to use 15 clerks system, you should set the SYSTEM OPTION ADDRESS 28 to 4<br />
( Page 25 ).<br />
When you want to use the CL<strong>ER</strong>K CODE SYSTEM, you should set the SYSTEM OPTION ADDRESS 28.<br />
This programming assigns a clerk code number to each clerk. The code number is used by the clerk to log<br />
on for operations. Although you don’ t program clerk code, each clerk has a default code that is same<br />
as the clerk number.<br />
( 1 ) Press the one of “ CL<strong>ER</strong>K ( 1, 2, 3 or 4 )” keys. Any clerk key makes no difference.<br />
( 2 ) Press the clerk number ( 1 ~ 15 ) and press the “ DECIMAL POINT ( . )” key.<br />
( 3 ) Enter the clerk secret code up to 6 digits, and then press the “ #/NS” key.<br />
( 4 ) Press the drawer number ‘ 1’ or ‘ 2’ and then press the “ <strong>CASH</strong>/TEND” key to finalize the<br />
clerk<br />
programming.<br />
CL<strong>ER</strong>K ( X ) DECIMAL ( . ) ( 6 Digits Code ) #/NS ( X ) <strong>CASH</strong>/TEND<br />
( 1, 2, 3 or 4 ) CL<strong>ER</strong>K NO. ( 1 ~ 15 ) DRAW<strong>ER</strong> NO.<br />
( 1 or 2 )<br />
NOTE : Default drawer assignment for all clerks is drawer 1.<br />
22
2.6 SYSTEM OPTION PROGRAMMING<br />
X/TIME<br />
SUBTL<br />
ADDRESS<br />
STATUS<br />
NOTE : Address 1 ~ 9 should not be entered 01 ~ 09, enter single digit 1 ~ 9.<br />
The value “ 0” is default status.<br />
ADDRESS OPTION VALUE STATUS<br />
1 Subtotal without tax will be printed on the receipt & journal. a YES = 1<br />
Does not require press of the “SUBTL” key.<br />
Print ORD<strong>ER</strong># on receipt<br />
b<br />
NO = 0<br />
YES = 2<br />
NO = 0<br />
SUM<br />
= a + b<br />
2 Tax amount charged will be printed on the receipt at finalization.<br />
The printed tax amount on receipt at finalization is combined =<br />
* Itemized tax printing lists each rate separately, itemized =<br />
while combined tax printing lists the total of all taxes.<br />
Tax print ( first option ) must be set to “ YES” to allow this option.<br />
a YES = 1<br />
NO = 0<br />
b YES = 2<br />
NO = 0<br />
SUM<br />
= a + b + c<br />
Print taxable totals. c YES = 4<br />
NO = 0<br />
3 Tax symbol is printed for item.<br />
VAT percent rate is printed.<br />
Net sale amount is automatically printed by VAT break down.<br />
( Only inclusive VAT )<br />
4 Tax is figured by inclusive VAT.<br />
Tax is figured by exclusive VAT.<br />
5 Cash declaration is compulsory before X/Z reports.<br />
a YES = 0<br />
NO = 1<br />
b YES = 2<br />
NO = 0<br />
c YES = 4<br />
NO = 0<br />
a 0<br />
1<br />
a YES = 1<br />
NO = 0<br />
Cash drawer does not open when reports are run. b YES = 2<br />
NO = 0<br />
6 GRAND total is not printed on financial report. a YES = 1<br />
NO = 0<br />
7 Skip media totals with zero activity on financial report.<br />
a YES = 0<br />
NO = 1<br />
GROSS total is not printed on financial report.<br />
b YES = 2<br />
NO = 0<br />
MODE VOID and RETURN are not printed on financial and clerk c YES = 4<br />
report.<br />
NO = 0<br />
8 Consecutive number resets after Z1 financial report.<br />
a YES = 1<br />
NO = 0<br />
GRAND total resets after Z1 financial report.<br />
b YES = 2<br />
NO = 0<br />
Print full clerk report.<br />
c YES = 4<br />
( See a clerk report section. )<br />
NO = 0<br />
9 PLU is registered by code = a 1<br />
sequential index ( 1 ~ 1000 ) =<br />
0<br />
10 HASH department and PLU operations add to NET sales.<br />
a YES = 1<br />
NO = 0<br />
Print PLUs and DEPT.s with zero totals on report .<br />
b YES = 2<br />
NO = 0<br />
Print sales rate on DEPT. / PLU reports. c YES = 4<br />
NO = 0<br />
SUM<br />
= a + b + c<br />
A<br />
SUM<br />
= a + b<br />
A<br />
SUM<br />
= a + b + c<br />
SUM<br />
= a + b + c<br />
a<br />
SUM<br />
= a + b + c<br />
23
ADDRESS OPTION VALUE STATUS<br />
11 Disable department / PLU preset/HALO override<br />
a YES = 1<br />
Allow 8-digit DEPT. and PLU amount entry. b<br />
NO = 0<br />
YES = 2<br />
SUM<br />
= a + b<br />
NO = 0<br />
12 Negative and zero sales total are not allowed.<br />
a YES = 1<br />
Inhibit printing of positive DEPT. and PLU entries on journal. b<br />
NO = 0<br />
YES = 2<br />
SUM<br />
= a + b<br />
NO = 0<br />
13 Allow the post tender function. a YES = 1 a<br />
NO = 0<br />
14<br />
VOID function is only allowed in the ‘ X’ control lock position.<br />
a YES = 1<br />
NO = 0 SUM<br />
Compulsory validation on VOID function.<br />
b YES = 2<br />
NO = 0 = a + b + c<br />
VOID function is inactive.<br />
c YES = 4<br />
NO = 0<br />
15<br />
16<br />
17<br />
18<br />
19<br />
CANCEL function is only allowed in the ‘ X’ control lock position.<br />
CANCEL function is inactive.<br />
RETURN function is only allowed in the ‘ X’ control lock position.<br />
Compulsory validation on RETURN function.<br />
RETURN function is inactive.<br />
% key function is only allowed in the ‘ X’ control lock position.<br />
Compulsory validation on % key function.<br />
% key function is inactive.<br />
RECD ACCT & PAID OUT are only allowed in the ‘ X’ control lock<br />
position.<br />
Compulsory validation on RECD ACCT & PAID OUT.<br />
RECD ACCT & PAID OUT are inactive.<br />
CHEQUE-<strong>CASH</strong>ING is only allowed in the ‘ X’ control lock<br />
position.<br />
Compulsory validation on CHEQUE-<strong>CASH</strong>ING.<br />
CHEQUE-<strong>CASH</strong>ING is inactive.<br />
a YES = 1<br />
NO = 0<br />
b YES = 2<br />
NO = 0<br />
a YES = 1<br />
NO = 0<br />
b YES = 2<br />
NO = 0<br />
c YES = 4<br />
NO = 0<br />
a YES = 1<br />
NO = 0<br />
b YES = 2<br />
NO = 0<br />
c YES = 4<br />
NO = 0<br />
a YES = 1<br />
NO = 0<br />
b YES = 2<br />
NO = 0<br />
c YES = 4<br />
NO = 0<br />
a YES = 1<br />
NO = 0<br />
b YES = 2<br />
NO = 0<br />
c YES = 4<br />
NO = 0<br />
SUM<br />
= a + b<br />
SUM<br />
= a + b + c<br />
SUM<br />
= a + b + c<br />
SUM<br />
= a + b + c<br />
SUM<br />
= a + b + c<br />
20 Validation amount is amount tendered =<br />
amount of sale =<br />
a YES = 1<br />
NO = 0<br />
Allow multiple validations. b YES = 2<br />
NO = 0<br />
21 Allow multiple buffered receipts.<br />
a YES = 1<br />
NO = 0<br />
Buffered receipt is only issued on the “ RECEIPT OFF” position. b YES = 2<br />
NO = 0<br />
When pushing the “ #/NS” key to open the drawer,receipt ticket is<br />
c YES = 4<br />
NO = 0<br />
not issued.<br />
SUM<br />
= a + b<br />
SUM<br />
= a + b + c<br />
24
ADDRESS OPTION VALUE STATUS<br />
22<br />
Print the “ <strong>CASH</strong>” when only SINGLE ITEM is registered.<br />
a YES = 1<br />
NO = 0 SUM<br />
Print sale item no.<br />
b YES = 2<br />
NO = 0 = a + b + c<br />
c YES = 4<br />
Subtotal is printed when the “ SUBTL” key is pressed.<br />
NO = 0<br />
23 Inhibit TIME print on receipt and journal.<br />
a YES = 1<br />
NO = 0<br />
Inhibit MACHINE NO. print on receipt and journal.<br />
b YES = 2<br />
NO = 0<br />
Inhibit Z REPORT ISSUING COUNT<strong>ER</strong> print on receipt and journal. c YES = 4<br />
NO = 0<br />
24 Inhibit DATE print on receipt and journal.<br />
a YES = 1<br />
NO = 0<br />
Inhibit CONSECUTIVE NO. print on receipt and journal. b YES = 2<br />
NO = 0<br />
25 The date format is Day, Month and Year =<br />
* Same in validation Month, Day and Year =<br />
Year, Month and Day =<br />
26 Decimal for print and display : No decimal =<br />
Set at one place =<br />
Set at three places =<br />
Set at two places =<br />
27 Enter the HDLO ( High Digit Lock Out ) 0.01 ~ 0.09 =<br />
For the total amount allowed for RECD ACCT 0.01 ~ 0.99 =<br />
& PAID OUT transactions. 0.01 ~ 9.99 =<br />
0.01 ~ 99.99 =<br />
0.01 ~ 999.99 =<br />
0.01 ~ 9999.99 =<br />
0.01 ~ 99999.99 =<br />
28 Clerks are Pop-up =<br />
Stay-down =<br />
Secret sign-on code =<br />
Push button =<br />
15 Clerks =<br />
4 Clerks =<br />
a 0<br />
1<br />
2<br />
a 1<br />
2<br />
3<br />
0<br />
a 1<br />
2<br />
3<br />
4<br />
5<br />
6<br />
7<br />
a 1<br />
0<br />
b 2<br />
0<br />
SUM<br />
= a + b + c<br />
SUM<br />
= a + b<br />
= a + b + c<br />
c 4<br />
0<br />
29 Allow clerk change without clerk sign-off operation. a YES = 1 a<br />
NO = 0<br />
30 Home Currency Symbol. (˛= 91, £= 0, Pts= 92) a 0 – 122 a<br />
Other logos ( Refer to page 89 : “ CHARACT<strong>ER</strong> CODE TABLE” )<br />
31 Disable NON-ADD NUMB<strong>ER</strong> function.<br />
“ TRAIN MODE START” message is not printed when train<br />
mode starts.<br />
“ TRAIN MODE END” message is not printed when train mode<br />
ends.<br />
32 Disable NO SALE function.<br />
Inhibit NO SALE after NON-ADD NUMB<strong>ER</strong> entry.<br />
a YES = 1<br />
NO = 0<br />
b YES = 2<br />
NO = 0<br />
c YES = 4<br />
NO = 0<br />
a YES = 1<br />
NO = 0<br />
b YES = 2<br />
NO = 0<br />
Enforce NON-ADD NUMB<strong>ER</strong> entry at the beginning of sale. c YES = 4<br />
NO = 0<br />
33 Number of digits required for NON-ADD NUMB<strong>ER</strong> entry.<br />
a 0<br />
( ‘0’ allows any length, 1 ~ 8 digits )<br />
1 ~ 8<br />
a<br />
a<br />
a<br />
SUM<br />
SUM<br />
= a + b + c<br />
SUM<br />
= a + b + c<br />
a<br />
25
34 ADD CHECK advances the consecutive no. at final tender only.<br />
Compulsory validation on ADD CHECK.<br />
Print the consolidated receipt automatically when finalising<br />
Check sale<br />
a YES = 1<br />
NO = 0<br />
YES = 2<br />
NO = 0<br />
YES = 4<br />
NO = 0<br />
SUM<br />
= a + b + c<br />
ADDRESS<br />
OPTION VALUE STATUS<br />
35 Compulsory drawer is disabled.<br />
a YES = 1<br />
NO = 0 SUM<br />
Validation sensor is activated.<br />
b YES = 2<br />
NO = 0 = a + b + c<br />
Paper sensor is activated. c YES = 4<br />
NO = 0<br />
36 Open drawer alarm is activated. a YES = 1 a<br />
NO = 0<br />
37 The number of seconds before the open drawer warning tone<br />
sounds. ( default = 30 sec. ) a 0 ~ 99 a<br />
38 % and tax calculation will round up at 0.50 = a 0<br />
always round up =<br />
always round down =<br />
1<br />
2<br />
a<br />
39 Rounding factor for split pricing, triple & decimal multiplication<br />
Calculation will round up at 0.50 =<br />
always round up =<br />
always round down =<br />
a 0<br />
1<br />
2<br />
40 European round is activated. a YES = 1<br />
NO = 0<br />
41 X/TIME operation is split pricing = a 0<br />
Triple multiplication =<br />
1<br />
42<br />
“ PRICE INQ.” key is used as “ SCALE” key.<br />
a YES = 1<br />
NO = 0<br />
Allow manual entry of weight.<br />
b YES = 2<br />
NO = 0<br />
Weight symbol for manual entry is kg =<br />
lb =<br />
43 Only stamp will be printed on the receipt. =<br />
Both stamp & preamble message will be printed on the receipt. =<br />
Only preamble message will be printed on the receipt. =<br />
44 Postamble message will be printed on the receipt.<br />
Preamble message will be not printed on the slip printer.<br />
c YES = 4<br />
NO = 0<br />
a 0<br />
1<br />
2<br />
a YES = 1<br />
NO = 0<br />
b YES = 2<br />
NO = 0<br />
Postamble message will be not printed on the slip printer. c YES = 4<br />
NO = 0<br />
45 Train mode<br />
a YES = 1<br />
NO = 0<br />
Train mode title is not printed on the receipt during train mode. b YES = 2<br />
NO = 0<br />
Cash drawer does not open during train mode. c YES = 4<br />
NO = 0<br />
46 Table management =<br />
Cashier overlap =<br />
47 Consolidated receipt on table management or cashier<br />
Overlap is only printed on the receipt of ECR.<br />
Consolidated receipt on table management or cashier<br />
Overlap is printed on the receipt of ECR and the slip printer.<br />
Consolidated receipt on table management or cashier<br />
Overlap is only printed on the slip printer.<br />
48 Slip operation =<br />
KP operation =<br />
49<br />
Amount tender is compulsory on “ <strong>CASH</strong>/TEND” tendering.<br />
a 0<br />
1<br />
a 0<br />
1<br />
2<br />
a 0<br />
1<br />
a YES = 1<br />
NO = 0<br />
a<br />
a<br />
a<br />
SUM<br />
= a + b + c<br />
a<br />
SUM<br />
= a + b + c<br />
SUM<br />
= a + b + c<br />
a<br />
a<br />
a<br />
SUM<br />
26
Under tendering by “ <strong>CASH</strong>/TEND” is not allowed.<br />
Validation on “ <strong>CASH</strong>/TEND” tendering is compulsory.<br />
b YES = 2<br />
NO = 0<br />
c YES = 4<br />
NO = 0<br />
= a + b + c<br />
27
ADDRESS OPTION VALUE STATUS<br />
50<br />
Amount tender is compulsory on “ CHEQUE” tendering.<br />
a YES = 1<br />
NO = 0 SUM<br />
b YES = 2<br />
Under tendering by “ CHEQUE” is not allowed.<br />
NO = 0 = a + b + c<br />
c YES = 4<br />
Validation on “ CHEQUE” tendering is compulsory.<br />
NO = 0<br />
51<br />
NON-ADD NUMB<strong>ER</strong> entry is compulsory on “ CHARGE 1”<br />
tendering.<br />
Over tendering by “ CHARGE 1” is allowed.<br />
Validation on “ CHARGE 1” tendering is compulsory.<br />
a YES = 1<br />
NO = 0<br />
b YES = 2<br />
NO = 0<br />
c YES = 4<br />
NO = 0<br />
SUM<br />
= a + b + c<br />
52<br />
NON-ADD NUMB<strong>ER</strong> entry is compulsory on “ CHARGE 2”<br />
tendering.<br />
Over tendering by “ CHARGE 2” is allowed.<br />
Validation on “ CHARGE 2” tendering is compulsory.<br />
a YES = 1<br />
NO = 0<br />
b YES = 2<br />
NO = 0<br />
c YES = 4<br />
NO = 0<br />
SUM<br />
= a + b + c<br />
53 Clerk key : Button key =<br />
Real clerk key =<br />
54 Printer type : No printer =<br />
EPSON TM-290 =<br />
EPSON TM-300(D) =<br />
EPSON TM-T80 =<br />
CITIZEN iDP 3540/3541 =<br />
STAR SP200 =<br />
SAMSUNG SRP-100/200 =<br />
55 Feed line after printing on the roll printer :<br />
( Default = 7Line )<br />
56 EAT-IN / TAKE-OUT / DRIVE-THRU procedure compulsory<br />
before tendering.<br />
57 Department LEVEL Keys are Stay-down =<br />
Item pop-up =<br />
Ticket pop-up =<br />
58<br />
Disable “LEVEL” Key: LEVEL 1 =<br />
LEVEL 2 =<br />
a 0<br />
1<br />
a<br />
a 0<br />
a<br />
1<br />
2<br />
3<br />
4<br />
5<br />
6<br />
a 0 ~ 99 a<br />
a YES = 1<br />
NO = 0<br />
a 0<br />
1<br />
2<br />
a 1<br />
b 2<br />
LEVEL 3 = c 4<br />
a<br />
a<br />
SUM<br />
= a + b + c<br />
59 Maximum slip line a 0 ~ 99 a<br />
60 Feed lines before printing on the slip printer a 0 ~ 99<br />
61 Reserved for future use<br />
62 Characters entered by: Alpha Numeric Keyboard =<br />
0<br />
a<br />
Character Code =<br />
1<br />
63<br />
Conversion rate 1 currency character code (˛= 91, £ = 0, Pts =92) 0~122<br />
64 Conversion rate 2 currency character code (˛= 91, £ = 0, Pts =92) 0~122<br />
65<br />
Enable printing Conversion 1 TOTAL amount<br />
Enable printing Conversion 1 TEND<strong>ER</strong>ED amount<br />
Enable printing Conversion 1 CHANGE amount<br />
a<br />
b<br />
c<br />
YES = 1<br />
NO = 0<br />
YES = 2<br />
NO = 0<br />
YES =4<br />
NO = 0<br />
a<br />
a<br />
SUM<br />
= a + b + c<br />
28
66 Base currency is:<br />
a Euro = 1<br />
Local = 0<br />
a<br />
ADDRESS OPTION VALUE STATUS<br />
67 When using currency Conversion 2, print TOTAL for both currencies<br />
68<br />
When using currency Conversion 2, print TEND<strong>ER</strong>ED amount for<br />
both currencies<br />
When using currency Conversion 2, print CHANGE for both currencies<br />
Disable printing in FOREIGN AMOUNT during conversion operation<br />
a YES = 1<br />
NO = 0<br />
b YES = 2<br />
NO = 0<br />
c YES = 4<br />
NO = 0<br />
a YES = 1<br />
NO = 0<br />
SUM<br />
= a + b + c<br />
a<br />
The following system options are applicable to the 5115/5140<br />
59 Characters entered by: Alpha Numeric Keyboard =<br />
Character Code =<br />
a<br />
0<br />
1<br />
a<br />
60 Conversion rate 1 currency character code (˛= 91, £ = 0, Pts =92) 0~122<br />
61 Conversion rate 2 currency character code (˛= 91, £ = 0, Pts =92) 0~122<br />
62 Enable printing Conversion 1 TOTAL amount<br />
Enable printing Conversion 1 TEND<strong>ER</strong>ED amount<br />
Enable printing Conversion 1 CHANGE amount<br />
a<br />
b<br />
c<br />
YES =1<br />
NO = 0<br />
YES =2<br />
NO = 0<br />
YES=4<br />
NO = 0<br />
SUM<br />
= a + b + c<br />
63 Base Currency is: a<br />
64<br />
65<br />
When using currency Conversion 2, print TOTAL for both currencies<br />
When using currency Conversion 2, print TEND<strong>ER</strong>ED amount for<br />
both currencies<br />
When using currency Conversion 2, print CHANGE for both<br />
currencies<br />
Disable printing in FOREIGN AMOUNT during conversion operation<br />
a<br />
b<br />
c<br />
a<br />
Euro = 1<br />
Local = 0<br />
YES = 1<br />
NO = 0<br />
YES = 2<br />
NO = 0<br />
YES = 4<br />
NO = 0<br />
YES = 1<br />
NO = 0<br />
a<br />
SUM<br />
= a + b + c<br />
a<br />
29
2.7 DESCRIPTOR PROGRAMMING<br />
You can program descriptors for each DEPARTMENT, PLU, CL<strong>ER</strong>K, DEPARTMENT GROUP, SOME<br />
FUNCTION KEYS and RECEIPT MESSAGE using the following programming procedure.<br />
2.7.1 PROGRAMMING<br />
Y X X X X<br />
PAID OUT<br />
CHARACT<strong>ER</strong><br />
<strong>CASH</strong>/TEND<br />
NOTE : Refer to “ ALPHA-NUM<strong>ER</strong>IC KEYBOARD LAYOUT” ( Page 90, 91 ) for entering characters.<br />
STANDARD<br />
DESCRIPTOR<br />
DEPARTMENT<br />
PLU<br />
CL<strong>ER</strong>K<br />
GROUP0<br />
GROUP1<br />
GROUP2<br />
GROUP3<br />
GROUP4<br />
GROUP5<br />
GROUP6<br />
GROUP7<br />
GROUP8<br />
GROUP9<br />
<strong>CASH</strong><br />
CHEQUE<br />
CHG1<br />
CHG2<br />
CHANGE<br />
TOTAL<br />
RECD ACCT<br />
PAID OUT<br />
NON-ADD#<br />
ADD CHECK<br />
NO SALES<br />
<strong>ER</strong>R CORRECT<br />
PREV VOID<br />
RETURN<br />
ALL CANCEL<br />
% 1<br />
% 2<br />
CONV 1<br />
CONV 2<br />
ADDRESS<br />
Y<br />
1<br />
2<br />
3<br />
3<br />
3<br />
3<br />
3<br />
3<br />
3<br />
3<br />
3<br />
3<br />
3<br />
3<br />
3<br />
3<br />
3<br />
3<br />
3<br />
3<br />
3<br />
3<br />
3<br />
3<br />
3<br />
3<br />
3<br />
3<br />
3<br />
3<br />
3<br />
3<br />
NUMB<strong>ER</strong><br />
X X X X<br />
0001 ~ 0015<br />
0001 ~ 0040<br />
0001 ~ 1000<br />
0001 ~ 0015<br />
0 0 1 6<br />
0 0 1 7<br />
0 0 1 8<br />
0 0 1 9<br />
0 0 2 0<br />
0 0 2 1<br />
0 0 2 2<br />
0 0 2 3<br />
0 0 2 4<br />
0 0 2 5<br />
0 0 2 6<br />
0 0 2 7<br />
0 0 2 8<br />
0 0 2 9<br />
0 0 3 0<br />
0 0 3 1<br />
0 0 3 2<br />
0 0 3 3<br />
0 0 3 4<br />
0 0 3 5<br />
0 0 3 6<br />
0 0 3 7<br />
0 0 3 8<br />
0 0 3 9<br />
0 0 4 0<br />
0 0 4 1<br />
0 0 4 2<br />
0 0 4 3<br />
0 0 4 4<br />
CHARACT<strong>ER</strong><br />
LENGTH<br />
12 CHAR.<br />
12 CHAR.<br />
12 CHAR.<br />
12 CHAR.<br />
12 CHAR.<br />
12 CHAR.<br />
12 CHAR.<br />
12 CHAR.<br />
12 CHAR.<br />
12 CHAR.<br />
12 CHAR.<br />
12 CHAR.<br />
12 CHAR.<br />
12 CHAR.<br />
12 CHAR.<br />
12 CHAR.<br />
12 CHAR.<br />
12 CHAR.<br />
12 CHAR.<br />
12 CHAR.<br />
12 CHAR.<br />
12 CHAR.<br />
12 CHAR.<br />
12 CHAR.<br />
12 CHAR.<br />
12 CHAR.<br />
12 CHAR.<br />
12 CHAR.<br />
12 CHAR.<br />
12 CHAR.<br />
12 CHAR.<br />
12 CHAR.<br />
12 CHAR.<br />
REMARKS<br />
- <strong>ER</strong>-5115<br />
- <strong>ER</strong>-5140<br />
RCPT MSG<br />
RCPT MSG<br />
4<br />
4<br />
0001 ~ 0004<br />
0005 ~ 0006<br />
21 CHAR.<br />
21 CHAR.<br />
PREAMBLE<br />
POSTAMBLE<br />
30
2.7.2 DESCRIPTOR PROGRAMMING EXAMPLES<br />
( 1 ) DEPT.1 = APPLE<br />
1 0 0 0 1 PAID OUT A P<br />
P<br />
L<br />
E<br />
<strong>CASH</strong>/TEND<br />
( 2 ) PLU 10 = ORANGE<br />
2 0 0 1 0<br />
PAID OUT<br />
DOUBLE<br />
O<br />
R<br />
A<br />
N<br />
G<br />
SUBTL KEY<br />
DOUBLE<br />
E<br />
<strong>CASH</strong>/TEND<br />
( 3 ) CL<strong>ER</strong>K 4 = JAMES<br />
3 0 0 0 4<br />
PAID OUT<br />
J<br />
A<br />
M<br />
E<br />
S<br />
<strong>CASH</strong>/TEND<br />
( 4 ) PREAMBLE MESSAGE LINE 1 = Thank You<br />
4 0 0 0 1<br />
PAID OUT<br />
SPACE SPACE DOUBLE T DOUBLE h<br />
SUBTL KEY<br />
DOUBLE<br />
a<br />
DOUBLE<br />
n<br />
DOUBLE<br />
k<br />
DOUBLE<br />
SPACE<br />
DOUBLE<br />
Y DOUBLE o DOUBLE u<br />
<strong>CASH</strong>/TEND<br />
( 5 ) POSTAMBLE MESSAGE LINE 1 = Call Again<br />
4 0 0 0 5<br />
PAID OUT<br />
SPACE<br />
DOUBLE<br />
C<br />
DOUBLE<br />
a<br />
DOUBLE<br />
SUBTL KEY<br />
l<br />
DOUBLE<br />
l<br />
SPACE<br />
DOUBLE<br />
A<br />
DOUBLE<br />
g<br />
DOUBLE<br />
a<br />
DOUBLE<br />
i<br />
DOUBLE<br />
n<br />
<strong>CASH</strong>/TEND<br />
31
2.7.3 DESCRIPTOR PROGRAMMING SCAN<br />
<strong>CASH</strong>/TEND<br />
PAID OUT<br />
32
2.8 DEPARTMENT PROGRAMMING<br />
* HASH Department *<br />
- Typically HASH department may be used to register items such as delivery charges or lottery sales<br />
that a merchant may not want to appear in accumulated sales totals.<br />
- Sales registered into HASH department do not add to the grand total, gross sales total and may<br />
also be programmed not to add to the net sales total.<br />
- HASH departments add to the total of each sale and therefore are included in all media and<br />
the drawer totals. Like normal departments, HASH departments also add to a total of all HASH<br />
departments and PLUs on the financial report.<br />
- SYSTEM OPTION ADDRESS 10 is used to select whether HASH department totals add to the net<br />
sales total or not.<br />
2.8.1 DEPARTMENT STATUS PROGRAMMING<br />
A. PROGRAMMING OPTION<br />
PROGRAMMING OPTION VALUE OPTION DIGIT<br />
Department GROUP NO. 0 ~ 9 N 1<br />
Resettable counter, counter will increase.<br />
Nonresettable counter, counter will increase.<br />
0<br />
1<br />
N 2<br />
Resettable counter, counter will decrease.<br />
Nonresettable counter, counter will decrease.<br />
2<br />
3<br />
HASH department feature<br />
GALLONAGE department feature<br />
a<br />
b<br />
YES = 1<br />
YES = 2<br />
NO = 0<br />
NO = 0 N 3 = a + b + c<br />
NON-ADD NUMB<strong>ER</strong> compulsory<br />
c YES = 4 NO = 0<br />
Department is NEGATIVE.<br />
Department is SINGLE ITEM.<br />
a<br />
b<br />
YES = 1<br />
YES = 2<br />
NO = 0<br />
NO = 0 N 4 = a + b + c<br />
VALIDATION compulsory<br />
c YES = 4 NO = 0<br />
Department is PRESET.<br />
Department is OPEN ( HALO ).<br />
0<br />
1<br />
N 5<br />
Department is DISABLED.<br />
2<br />
Department is not taxable.<br />
Department is taxable by VAT 1.<br />
Department is taxable by VAT 2.<br />
0<br />
1<br />
2<br />
N 6<br />
Department is taxable by VAT 3.<br />
Department is taxable by VAT 4.<br />
Department is taxable by VAT 1 & 3.<br />
3<br />
4<br />
5<br />
Department is printed on KITCHEN PRINT<strong>ER</strong> a YES = 1 NO = 0 N 7<br />
33
B. PROGRAMMING<br />
N1 N2 N3 N4 N5 N6 N7<br />
SUBTL<br />
DEPARTMENT<br />
<strong>CASH</strong>/TEND<br />
STATUS<br />
DEPARTMENT<br />
EXIT<br />
DEPARTMENT<br />
2.8.2 DEPARTMENT PRICE OR HALO PROGRAMMING<br />
A zero amount entry for open department will set the HALO ( High Amount Lock Out ) at the maximum<br />
seven digits ( 99999.99 ) for standard department, and five digits ( 99.999 ) for gallonage department.<br />
Zero preset departments are allowed.<br />
DEPARTMENT<br />
RECD ACCT<br />
<strong>CASH</strong>/TEND<br />
PRESET PRICE ACTIVITY EXIT<br />
OR HALO<br />
DEPARTMENT<br />
COUNT<strong>ER</strong><br />
( 0 ~ 9999 )<br />
DEPARTMENT<br />
34
2.8.3 DEPARTMENT PROGRAMMING EXAMPLES<br />
A. DEPARTMENT STATUS PROGRAMMING<br />
EX 1 ) Program ‘ DEPT 1’ and ‘ DEPT 2’ . ‘DEPT 1’ and ‘DEPT 2’ are VAT 1 and KP items.<br />
1 1 1<br />
SUBTL<br />
DEPT 1<br />
DEPT 2<br />
<strong>CASH</strong>/TEND<br />
EX 2 ) Program ‘ DEPT 3’ so it is a PRESET department, VAT 2 and a KP item.<br />
2 1<br />
SUBTL<br />
DEPT 3<br />
<strong>CASH</strong>/TEND<br />
EX 3 ) Program ‘ DEPT 4’ so it is a PRESET, SINGLE ITEM department and VAT 3.<br />
2 0 3 0<br />
SUBTL<br />
DEPT 4<br />
<strong>CASH</strong>/TEND<br />
EX 4 ) Program ‘ DEPT 5’ so it is a NEGATIVE PRESET and NON TAX with nonresettable and<br />
increasing counter.<br />
1 0 1 0 0 0<br />
SUBTL<br />
DEPT 5<br />
<strong>CASH</strong>/TEND<br />
EX 5 ) Program ‘ DEPT 6’ so it is a PRESET, VAT 1 & 3 and a KP item.<br />
5 1<br />
SUBTL<br />
DEPT 6<br />
<strong>CASH</strong>/TEND<br />
EX 6 ) Program ‘ DEPT 10’ so it is a GALLONAGE and NON TAX.<br />
2 0 1 0 0<br />
SUBTL<br />
DEPT 10<br />
<strong>CASH</strong>/TEND<br />
EX 7 ) Program ‘ DEPT 15’ so it is accumulated to GROUP 7 and HASH, PRESET and VAT 4.<br />
‘DEPT 15’ is a KP item.<br />
7 0 1 0 0 4 1<br />
SUBTL<br />
DEPT 15<br />
<strong>CASH</strong>/TEND<br />
35
B. DEPARTMENT PRICE OR HALO PROGRAMMING<br />
EX 1 ) Program ‘ DEPT 1’ and ‘ DEPT 2’ . ‘DEPT 1’ and ‘DEPT 2’ have a @99.99 HALO.<br />
9 9 9 9<br />
DEPT 1<br />
DEPT 2<br />
<strong>CASH</strong>/TEND<br />
EX 2 ) Program ‘ DEPT 3’ , ‘ DEPT 6’ and ‘ DEPT 15’ . These departments have a price @10.00.<br />
1 0 0 0<br />
DEPT 3<br />
DEPT 6<br />
DEPT 15<br />
<strong>CASH</strong>/TEND<br />
EX 3 ) Program ‘ DEPT 4’ so it has a price @15.00.<br />
1 5 0 0<br />
DEPT 4<br />
<strong>CASH</strong>/TEND<br />
EX 4 ) Program ‘ DEPT 5’ so it has a price @1.00 and activity counter is 50.<br />
1 0 0<br />
DEPT 5<br />
5 0<br />
RECD ACCT<br />
<strong>CASH</strong>/TEND<br />
EX 5 ) Program ‘ DEPT 10’ so it has a price @1.399 ( Gallonage Price ).<br />
1 . 3 9 9 DEPT 10 <strong>CASH</strong>/TEND<br />
36
2.8.4 DEPARTMENT PROGRAMMING SCAN<br />
( 1 ) Press the “ <strong>CASH</strong>/TEND” key.<br />
( 2 ) Press the first “ DEPARTMENT” key you want to scan.<br />
( 3 ) Press the last “ DEPARTMENT” key you want to scan.<br />
If you want to scan only one department, press the same “ DEPARTMENT” key twice.<br />
NOTE : The first department number £ The last department number<br />
EX ) To scan dept. 1 ~ 15<br />
<strong>CASH</strong>/TEND DEPT 1 DEPT 15<br />
37
2.9 PLU PROGRAMMING<br />
HASH PLU’s operation is the same as HASH department operation.<br />
PLU is registered by sequential index ( 1 ~ 1000 ) or by PLU code ( 1 ~ 99999999 ) that you program.<br />
( SYSTEM OPTION ADDRESS 9, Page 23 )<br />
Although you don’ t program PLU code, each PLU has a default code that is same as the PLU<br />
number.<br />
2.9.1 PLU PROGRAMMING<br />
A. PROGRAMMING OPTION<br />
PROGRAMMING OPTION VALUE OPTION DIGIT<br />
Resettable counter, counter will increase.<br />
0<br />
Nonresettable counter, counter will increase.<br />
1<br />
N 1<br />
Resettable counter, counter will decrease.<br />
2<br />
Nonresettable counter, counter will decrease.<br />
3<br />
HASH PLU feature<br />
a<br />
YES = 1<br />
NO = 0<br />
GALLONAGE PLU feature<br />
b<br />
YES = 2<br />
NO = 0<br />
N 2 = a + b + c<br />
NON-ADD NUMB<strong>ER</strong> compulsory<br />
c<br />
YES = 4<br />
NO = 0<br />
PLU is NEGATIVE.<br />
a<br />
YES = 1<br />
NO = 0<br />
PLU is SINGLE ITEM.<br />
b<br />
YES = 2<br />
NO = 0<br />
N 3 = a + b + c<br />
VALIDATION compulsory<br />
c<br />
YES = 4<br />
NO = 0<br />
PLU is PRESET.<br />
0<br />
PLU is OPEN ( HALO ).<br />
1<br />
N 4<br />
PLU is DISABLED.<br />
2<br />
PLU is not taxable.<br />
0<br />
PLU is taxable by VAT 1.<br />
1<br />
PLU is taxable by VAT 2.<br />
2<br />
N 5<br />
PLU is taxable by VAT 3.<br />
3<br />
PLU is taxable by VAT 4.<br />
4<br />
PLU is taxable by VAT 1 & 3.<br />
5<br />
PLU is printed on KITCHEN PRINT<strong>ER</strong> a YES = 1 NO = 0 N 6<br />
38
B. PROGRAMMING<br />
A zero amount entry for open PLU will set the HALO ( High Amount Lock Out ) at the maximum<br />
seven digits ( 99999.99 ) for standard PLU, and five digits ( 99.999 ) for gallonage PLU.<br />
Zero preset PLUs are allowed.<br />
(0 ~ 99999999)<br />
PLU CODE<br />
PRICE<br />
INQ.<br />
STATUS<br />
PL<br />
N1<br />
N2<br />
N3 N4 N5 N6<br />
DEPARTMENT<br />
From PLU NO.<br />
Linked Dept.<br />
Only When resetting<br />
PLU CODE to 0.<br />
X/TIME<br />
PL<br />
To PLU NO. PRESET PRICE ACTIVITY<br />
RECD<br />
ACCT<br />
OR HALO<br />
( 0 ~ 9999 )<br />
COUNT<strong>ER</strong><br />
<strong>CASH</strong>/TEND<br />
EXIT<br />
NOTE : From PLU NO. ( 1 ~ 1000 ) £ To PLU NO. ( 1 ~ 1000 )<br />
39
2.9.2 PLU PROGRAMMING EXAMPLES<br />
IMPORTANT : If PLU is not linked to department, PLU registration is not allowed.<br />
1’ .<br />
EX 1 ) Program ‘ PLU 10’ so it is VAT 1 and a KP item. It has a @99.99 HALO and linked to ‘ DEPT<br />
Its code is ‘ 12345678’ .<br />
1 0<br />
PLU<br />
1 2 3 4 5 6 7 8<br />
PRICE INQ.<br />
1 1 1<br />
DEPT 1<br />
9 9 9 9<br />
X/TIME<br />
<strong>CASH</strong>/TEND<br />
EX 2 ) Program ‘ PLU 20’ so it is VAT 2 and a KP item. It has a PRESET price @10.00 and linked to<br />
‘ DEPT 2’ . Its code is ‘ 20010’ .<br />
2 0<br />
PLU<br />
2 0 0 1 0<br />
PRICE INQ.<br />
2 1<br />
DEPT 2<br />
1 0 0 0<br />
X/TIME<br />
<strong>CASH</strong>/TEND<br />
EX 3 ) Program ‘ PLU 30’ so it is VAT 3, SINGLE ITEM and has a PRESET price @15.00 and linked<br />
to ‘ DEPT 3’ . Its code is ‘ 313131’ .<br />
3 0<br />
PLU<br />
3 1 3 1 3 1<br />
PRICE INQ.<br />
2 0 3 0<br />
DEPT 3<br />
1 5 0 0<br />
X/TIME<br />
<strong>CASH</strong>/TEND<br />
EX 4 ) Program ‘ PLU 40’ so it is VAT 4 and a KP item. It has a PRESET price @1.00 and linked to<br />
‘ DEPT 4’ , initial activity counter is 100 with nonresettable, decreasing status.<br />
4 0<br />
PLU<br />
3 0 0 0 4 1<br />
DEPT 4<br />
1 0 0<br />
X/TIME<br />
1 0 0<br />
RECD ACCT<br />
<strong>CASH</strong>/TEND<br />
EX 5 ) Program ‘ PLU 50’ so it is VAT 1 and a KP item. It has a PRESET price @10.00 and linked to<br />
‘ DEPT 6’ . Its code is ‘ 50100’ .<br />
5 0<br />
PLU<br />
5 0 1 0 0<br />
PRICE INQ.<br />
1 1<br />
DEPT 6<br />
1 0 0 0<br />
X/TIME<br />
<strong>CASH</strong>/TEND<br />
EX 6 ) Program ‘ PLU 1000’ so it is VAT 1 and a KP item. It has a PRESET price @5.00 and linked to<br />
‘ DEPT 6’ .<br />
1 0 0 0<br />
PLU<br />
1 1<br />
DEPT 6<br />
5 0 0<br />
X/TIME<br />
<strong>CASH</strong>/TEND<br />
EX 7 ) Link ‘ PLU 1000’ to ‘ PLU 50’ . ( Refer to next page ‘ 2.9.4 PLU LINK<br />
PROGRAMMING’ )<br />
5 0<br />
PLU<br />
1 0 0 0<br />
#/NS<br />
<strong>CASH</strong>/TEND<br />
40
2.9.3 PLU PROGRAMMING SCAN<br />
( 1 ) Press the “ <strong>CASH</strong>/TEND” key.<br />
( 2 ) Enter the number of the first PLU you want to scan, and press the “ PLU” key.<br />
( 3 ) Enter the number of the last PLU you want to scan, and press the “ PLU” key.<br />
NOTE : The first PLU number £ The last PLU number<br />
EX ) To scan PLU 1 ~ 1000<br />
<strong>CASH</strong>/TEND<br />
1<br />
PLU<br />
1 0 0 0<br />
PLU<br />
41
2.9.4 PLU LINK PROGRAMMING<br />
This programming is used to link two or more PLUs.<br />
The second PLU ( B ) will be automatically registered when the first PLU ( A ) is registered.<br />
X X X X<br />
PLU<br />
X X X X<br />
#/NS<br />
<strong>CASH</strong>/TEND<br />
PLU NO. ( A ) PLU NO. ( B )<br />
2.9.5 REMOVING OR DELETING A PLU<br />
In order to “ de-activate” a PLU, or “ remove” its status and linked department.<br />
Deleted or inactivated PLUs will not be allowed to register.<br />
( 1 ) Enter the PLU number ( 1 ~ 1000 ), and press the “PLU” key.<br />
( 2 ) Press the “VOID” key.<br />
NOTE : PLUs with a total may not be removed ( or deleted ).<br />
Issue the PLU report in “ Z” mode before removing any PLU with a total.<br />
X X X X<br />
PLU<br />
VOID<br />
42
2.10 % KEY PROGRAMMING<br />
This cash register has two % keys.<br />
2.10.1 % KEY PROGRAMMING<br />
A. PROGRAMMING STATUS<br />
PROGRAMMING OPTION VALUE OPTION DIGIT<br />
% key is POSITIVE ( SURCHARGE )<br />
a<br />
1<br />
NEGATIVE ( DISCOUNT )<br />
0<br />
N 1 = a + b<br />
OPEN<br />
b<br />
2<br />
PRESET<br />
0<br />
% key is SALE<br />
a<br />
1<br />
ITEM<br />
0<br />
AMOUNT<br />
b<br />
2<br />
N 2 = a + b + c<br />
P<strong>ER</strong>CENTAGE<br />
0<br />
INACTIVE<br />
c<br />
4<br />
ACTIVE<br />
0<br />
B. PROGRAMMING<br />
( 1 ) Press the “ %” key to be programmed.<br />
( 2 ) Enter the status from the above table and press the “ SUBTL” key.<br />
( 3 ) Enter the percentage or amount up to 5 digits and press the “ <strong>CASH</strong>/TEND” key.<br />
Decimal point is fixed at three places.<br />
EX ) Percent Rate : 10 % would be 1 0 0 0 0<br />
5.6 % would be 5 6 0 0<br />
%<br />
N 1 N 2<br />
SUBTL<br />
<strong>CASH</strong>/TEND<br />
STATUS 5 DIGITS ( Percent or Amount )<br />
2.10.2 % CALCULATION ROUNDING FACTOR<br />
Refer to SYSTEM OPTION ADDRESS 38 ( Page 26 )<br />
43
2.11 <strong>CASH</strong>/TEND KEY PROGRAMMING<br />
<strong>CASH</strong>/TEND<br />
<strong>CASH</strong>/TEND<br />
Tendering HALO ( 0 ~ 999999, 0 for no HALO )<br />
2.12 CHEQUE KEY PROGRAMMING<br />
Change HALO ( 0 ~ 999999, 0 for no HALO )<br />
CHEQUE<br />
#/NS<br />
CHEQUE<br />
Tendering HALO ( 0 ~ 999999, 0 for no HALO )<br />
2.13 CHARGE KEY PROGRAMMING<br />
This cash register has two charge keys.<br />
CHARGE<br />
CHARGE<br />
Tendering HALO ( 0 ~ 999999, 0 for no HALO )<br />
2.14 PRESET <strong>CASH</strong> KEY PROGRAMMING<br />
PRESET <strong>CASH</strong><br />
PRESET <strong>CASH</strong><br />
Desired amount ( 0 ~ 999999 )<br />
2.15 <strong>CASH</strong> IN DRAW<strong>ER</strong> LIMIT PROGRAMMING<br />
#/NS<br />
<strong>CASH</strong>/TEND<br />
Total amount of cash allowed to be in the cash drawer at one time. ( 0 ~ 9999999 )<br />
NOTE : If the cash-in-drawer limit is exceeded, an error tone will sound.<br />
The “ CLEAR” key will stop the error tone.<br />
44
2.16 CURRENCY CONV<strong>ER</strong>SION KEY PROGRAMMING<br />
This cash register has two conversion key.<br />
The foreign exchange rate is determined on a six-digit code entered.<br />
Numbers N1 ~ N5 are the numeric value of the exchange rate, number N6 sets the decimal point<br />
position ( 0 ~ 5 ).<br />
N1 N2 N3 N4 N5 N 6<br />
EX ) £ 1.00 = 2.4455 DM<br />
VALUE<br />
DECIMAL POINT POSITION<br />
( From the right )<br />
CONV<br />
2 4 4 5 5 4 CONV<br />
DECIMAL POINT POSITION<br />
2.17 EUROPEAN ROUNDING PROGRAMMING<br />
If you use the European rounding, after programming the European rounding, set the SYSTEM OPTION<br />
ADDRESS 40 to 1.( Page 26 )<br />
MAX. 5 RANGES<br />
( X X Y Y Z Z Z )<br />
PRICE INQ.<br />
<strong>CASH</strong>/TEND<br />
START OF RANGE VALUE EXIT<br />
END OF RANGE<br />
NOTE : The last end of range should be 9 or 99.<br />
EX )<br />
0 0 0 2 0 0 0<br />
PRICE INQ.<br />
0 3 0 7 0 0 5<br />
PRICE INQ.<br />
0 8 0 9 0 1 0<br />
PRICE INQ.<br />
<strong>CASH</strong>/TEND<br />
45
2.18 PARAMET<strong>ER</strong>S PROGRAM SCAN<br />
<strong>CASH</strong>/TEND<br />
SUBTL<br />
46
OP<strong>ER</strong>ATING NOTE<br />
This section shows you how to operate the cash register during normal use .<br />
The operating steps are explained with flow chart boxes.<br />
Each box represents a key on the keyboard that you should press to complete an operation.<br />
Unless the specified note, the flow charts use the “ <strong>CASH</strong>/TEND” key to finalize the sale.<br />
NOTE : A clerk must be signed on before operation takes place.<br />
All registrations are made in the “ REG” or “ VOID” control lock position.<br />
1 CL<strong>ER</strong>K SIGN ON<br />
1.1 IN CASE OF 4 CL<strong>ER</strong>KS ( SYSTEM OPTION 28’ s VALUE ‘ C’ = 0 )<br />
1.1.1 PUSH BUTTON SIGN ON<br />
CL<strong>ER</strong>K<br />
The clerk key ( 1, 2, 3 or 4 ) to start operation<br />
1.1.2 SECRET CODE SIGN ON<br />
To use this sign on method, SYSTEM OPTION ADDRESS 28 must be set to value ‘ b’ .<br />
The code will not be shown.<br />
CL<strong>ER</strong>K<br />
( 6 digits secret code )<br />
CL<strong>ER</strong>K<br />
The clerk key ( 1, 2, 3 or 4 ) to start operation<br />
1.2 IN CASE OF 15 CL<strong>ER</strong>KS ( SYSTEM OPTION 28’ s VALUE ‘ C’ = 4 )<br />
1.2.1 PUSH BUTTON SIGN ON<br />
( X X )<br />
CL<strong>ER</strong>K 4<br />
CL<strong>ER</strong>K NO. ( 1 ~ 15 )<br />
47
1.2.2 SECRET CODE SIGN ON<br />
To use this sign on method, SYSTEM OPTION ADDRESS 28 must be set to value ‘b’.<br />
The code will not be shown.<br />
CL<strong>ER</strong>K 4<br />
( 6 digits secret code )<br />
CL<strong>ER</strong>K 4<br />
2 CL<strong>ER</strong>K SIGN OFF<br />
2.1 IN CASE OF 4 CL<strong>ER</strong>KS ( SYSTEM OPTION 28’ s VALUE ‘ C’ = 0 )<br />
CL<strong>ER</strong>K<br />
When clerk sign off, the message “ CLOSEd” displays on the display.<br />
1, 2, 3 or 4<br />
2.2 IN CASE OF 15 CL<strong>ER</strong>KS ( SYSTEM OPTION 28’ s VALUE ‘ C’ = 4 )<br />
CL<strong>ER</strong>K 4<br />
When clerk sign off, the message “ CLOSEd” displays on the display.<br />
3 REAL CL<strong>ER</strong>K KEY ENTRY ( Optional Device )<br />
If you want to use the real clerk keys, you should set the SYSTEM OPTION ADDRESS 53 to 1.<br />
4 CLEARING AN <strong>ER</strong>ROR CONDITION<br />
If the error tone is ringing, press<br />
CLEAR<br />
There are several error symbols. Refer to ‘ DISPLAY SYMBOLS’ ( Page 15 )<br />
48
5 NO SALE OP<strong>ER</strong>ATION<br />
A no sale operation is used to open the cash drawer outside of a sale.<br />
#/NS<br />
6 NON-ADD NUMB<strong>ER</strong> ENTRIES<br />
The “ #/NS” key can be used to enter up to eight digits.<br />
This numeric entry will be added to non-add number total.<br />
#/NS<br />
7 PRICE INQUIRY OP<strong>ER</strong>ATION<br />
If you want to know the price ( preset or HALO ) of DEPT. or PLU during registration,<br />
PRICE INQ.<br />
DEPT<br />
OR PRICE INQ.<br />
PLU ( SYSTEM OPTION 9 = 0 )<br />
PLU NO. ( 1 ~ 1000 )<br />
PRICE INQ.<br />
PLU<br />
( SYSTEM OPTION 9 = 1 )<br />
PLU CODE ( 1 ~ 99999999 )<br />
49
8 DEPARTMENT ENTRIES<br />
8.1 OPEN DEPARTMENT ENTRIES<br />
( 1 ) Single open DEPARTMENT entry<br />
( 2 ) Repeat open DEPARTMENT entry<br />
5 0 0<br />
1 0 0 0 DEPT 1<br />
AMOUNT<br />
DEPT 1 DEPT 1<br />
( 3 ) Multiple open DEPARTMENT entry<br />
3 X/TIME 1 0 0 0 DEPT 1<br />
Q’ty ( 1 ~ 999 )<br />
( 4 ) Decimal multiplication<br />
1 . 5 X/TIME 1 0 0 0 DEPT 1<br />
of open DEPARTMENT entry Decimal Q’ty ( 0.001 ~ 999.999 )<br />
( 5 ) Override HALO price entry<br />
1 X/TIME<br />
Q’ty ( 1 ~ 999 )<br />
1 0 0 0 0 DEPT 1<br />
( 6 ) Split pricing on open DEPARTMENT entry ( Triple multiplication : SYSTEM OPTION 41 = 1 )<br />
3 X/TIME 4 X/TIME 1 0 0 0 DEPT 1<br />
Q’ty ( 0.001 ~ 999.999 ) Basic Q’ty ( 0.001 ~ 999.999 )<br />
50
8.2 PRESET DEPARTMENT ENTRIES<br />
( 1 ) Single preset DEPARTMENT entry<br />
DEPT 3<br />
( 2 ) Repeat preset DEPARTMENT entry<br />
DEPT 3<br />
DEPT 3<br />
( 3 ) Multiple preset DEPARTMENT entry<br />
3<br />
X/TIME<br />
DEPT 3<br />
Q’ty ( 1 ~ 999 )<br />
( 4 ) Decimal multiplication<br />
1 . 5 X/TIME DEPT 3<br />
of preset DEPARTMENT entry Decimal Q’ty ( 0.001 ~ 999.999 )<br />
( 5 ) Override preset price entry<br />
2 0 0 0<br />
DEPT 3<br />
( 6 ) Split pricing on preset DEPARTMENT entry ( Triple multiplication : SYSTEM OPTION 41 = 1 )<br />
3<br />
X/TIME 4 X/TIME DEPT 3<br />
Q’ty ( 0.001 ~ 999.999 ) Basic Q’ty ( 0.001 ~ 999.999 )<br />
51
8.3 GALLONAGE DEPARTMENT OP<strong>ER</strong>ATION<br />
NOTE : 1 ) Although gallonage departments are considered open departments,<br />
a price per gallon must be programmed on department programming.<br />
This price is calculated to three decimal points.<br />
2 ) Although gallonage departments are programmed as a preset price,<br />
you must enter amount when gallonage department is registered.<br />
* Same as gallonage PLU<br />
EX ) DEPARTMENT 10 has been programmed as gallonage department and unit price @1.399.<br />
1 0 0 0 DEPT 10 <strong>CASH</strong>/TEND<br />
AMOUNT Gallonage Dept. 10<br />
9 PLU ( PRICE LOOK UP ) ENTRIES<br />
9.1 OPEN PLU ENTRIES<br />
( 1 ) Single open PLU entry<br />
1 0 PLU 1 0 0 0<br />
PLU NO. ( 1 ~ 1000 ) AMOUNT<br />
PLU<br />
( 2 ) Repeat open PLU entry<br />
1 0 PLU 5 0 0<br />
PLU<br />
PLU<br />
( 3 ) Multiple open PLU entry<br />
3 X/TIME<br />
1 0<br />
PLU 5 0 0<br />
PLU<br />
Q’ty ( 1 ~ 999 )<br />
( 4 ) Decimal multiplication of open PLU entry<br />
1 . 5<br />
X/TIME<br />
1 0<br />
PLU<br />
1 0 0 0<br />
PLU<br />
Decimal Q’ty ( 0.001 ~ 999.999 )<br />
52
( 5 ) Override HALO price entry<br />
1 X/TIME 1 0 PLU 1 0 0 0 0<br />
Q’ty ( 1 ~ 999 )<br />
( 6 ) Split pricing on open PLU entry ( Triple multiplication : SYSTEM OPTION 41 = 1 )<br />
PLU<br />
3 X/TIME 4 X/TIME 1 0<br />
PLU<br />
1 0 0 0<br />
PLU<br />
Q’ty ( 0.001 ~ 999.999 ) Basic Q’ty ( 0.001 ~ 999.999 )<br />
53
9.2 PRESET PLU ENTRIES<br />
( 1 ) Single preset PLU entry<br />
2 0 PLU<br />
PLU NO. ( 1 ~ 1000 )<br />
( 2 ) Repeat preset PLU entry<br />
1 0 0 0 PLU PLU<br />
( 3 ) Multiple preset PLU entry<br />
( 4 ) Decimal multiplication of preset PLU entry<br />
3 X/TIME 2 0 PLU<br />
Q’ty ( 1 ~ 999 )<br />
1 . 5 X/TIME 2 0 PLU<br />
Decimal Q’ty ( 0.001 ~ 999.999 )<br />
( 5 ) Override preset price entry<br />
1<br />
X/TIME<br />
2 0<br />
PLU<br />
2 0 0 0 PLU<br />
Only 1<br />
( 6 ) Split pricing on preset PLU entry ( Triple multiplication : SYSTEM OPTION 41 = 1 )<br />
3 X/TIME 4 X/TIME 2 0<br />
Q’ty ( 0.001 ~ 999.999 ) Basic Q’ty ( 0.001 ~ 999.999 )<br />
PLU<br />
54
9.3 PLU TO PLU CHAIN OP<strong>ER</strong>ATION<br />
All preset PLUs in the same chain ( PLU to PLU linking ) will be automatically registered<br />
when the first PLU of the chain is registered.<br />
If a PLU located in the middle of the chain is registered, the following preset PLUs will be<br />
automatically registered.<br />
EX ) PLU 1000 is linked to PLU 50.<br />
9.4 PLU ENTRIES BY CODE<br />
This cash register can register PLU not only sequential index ( 1 ~ 1000 ) but also code up to 8<br />
digits. If you want to register PLU by code, you must program PLU code on PLU programming and<br />
set SYSTEM OPTION ADDRESS 9 to 1.<br />
NOTE : PLU entries by code is same to PLU entries by sequential index.<br />
1 2 3 4 5 6 7 8<br />
PLU CODE<br />
PLU<br />
AMOUNT<br />
1 0 0 0<br />
PLU<br />
2 0 0 1 0 PLU<br />
PLUCODE<br />
55
10 SINGLE ITEM DEPARTMENT OR PLU ENTRIES<br />
Single item operation finalizes transaction without tendering key entry.<br />
But the transaction is not finalized when you register another department or PLU before entering single<br />
item department or PLU.<br />
10.1 SINGLE ITEM PRESET ENTRIES<br />
DEPT 4<br />
10.2 SINGLE ITEM OV<strong>ER</strong>RIDE ENTRIES<br />
1 X/TIME<br />
PLU NO.<br />
3 0 PLU 1 0 0 0 PLU<br />
AMOUNT<br />
11 COMPUTATION OF VAT ( Value Added Tax )<br />
This cash register has four taxes.<br />
NOTE : Refer to SYSTEM OPTION ADDRESS 4 to select inclusive or exclusive VAT.<br />
11.1 INCLUSIVE VAT SYSTEM<br />
( 1 ) Inclusive VAT is used when a tax amount is already included in the item price,<br />
and a breakdown of the various tax charged is separated out.<br />
( No Breakdown )<br />
SUBTL<br />
TAX<br />
TEND<strong>ER</strong><br />
If you set SYSTEM OPTION ADDRESS 3 to value ‘ c’ , breakdown will be automatically done.<br />
( 2 ) VAT SHIFT<br />
when the “ TAX” key is pressed before entering a department or PLU programmed as VAT 1,<br />
their tax status shift VAT 1 to VAT 2.<br />
when the “ TAX” key is pressed before entering a department or PLU programmed as VAT 1&3,<br />
their tax status becomes VAT 1, in that VAT 1 remains unchanged and VAT 3 is deleted.<br />
TAX<br />
DEPT. or PLU<br />
56
11.2 EXCLUSIVE VAT SYSTEM<br />
( 1 ) Exclusive VAT is used when a tax amount is not included in the item price,<br />
and a tax amount is calculated by a tax rate.<br />
( 2 ) TAX EXEMPT<br />
While the exclusive VAT system is in use, you can exempt a taxable department or PLU from<br />
tax.<br />
TAX<br />
DEPT. or PLU<br />
* Inclusive VAT * * Exclusive VAT *<br />
57
12 % KEY ENTRIES<br />
The item discount or surcharge is that discount or surcharge is applied to one item,<br />
while the sale discount or surcharge is that discount or surcharge is applied to the entire sale.<br />
NOTE : If you want to sale discount or surcharge you must press the “ SUBTL” key before<br />
entering the “ %” key.<br />
12.1 P<strong>ER</strong>CENT RATE DISCOUNT / SURCHARGE<br />
12.1.1 ITEM DISCOUNT / SURCHARGE<br />
( 1 ) Preset percent item discount / surcharge<br />
1 0 0 0 DEPT 1 % 1<br />
( 2 ) Override preset item discount / surcharge<br />
1 5 . 5 0 0<br />
DEPT 3 % 2<br />
Percent Rate ( 0.001 ~ 99.999 )<br />
12.1.2 SALE DISCOUNT / SURCHARGE<br />
( 1 ) Preset percent sale discount / surcharge<br />
1 0 0 0 DEPT 1 DEPT 1 SUBTL % 1<br />
( 2 ) Open sale discount / surcharge<br />
1 0 0 0 DEPT 1 DEPT 3 SUBTL 1 5 . 5 0 0 % 2<br />
Percent Rate ( 0.001 ~ 99.999 )<br />
58
12.2 AMOUNT DISCOUNT / SURCHARGE<br />
12.2.1 ITEM DISCOUNT / SURCHARGE<br />
( 1 ) Preset amount item discount / surcharge<br />
1 0 0 0 DEPT 1<br />
% 1<br />
( 2 ) Override amount item discount / surcharge<br />
DEPT 3<br />
1 0 0<br />
AMOUNT<br />
% 2<br />
12.2.2 SALE DISCOUNT / SURCHARGE<br />
( 1 ) Preset amount sale discount / surcharge<br />
1 0 0 0<br />
DEPT 1<br />
DEPT 1<br />
SUBTL<br />
% 1<br />
( 2 ) Open sale discount / surcharge<br />
1 0 0 0<br />
DEPT 1 DEPT 3<br />
SUBTL<br />
5 0 0<br />
% 2<br />
AMOUNT<br />
59
13 M<strong>ER</strong>CHANDISE RETURN OP<strong>ER</strong>ATION<br />
A. Merchandise return of a single department or PLU entry<br />
MDSE RETURN<br />
1 0 0 0 DEPT 1<br />
B. Merchandise return of multiple department or PLU entry<br />
MDSE RETURN<br />
2<br />
X/TIME<br />
2 0<br />
PLU<br />
C. Merchandise return of the discounted / surcharged item<br />
MDSE RETURN<br />
1 0 0 0<br />
DEPT 1<br />
% 1<br />
NOTE : Merchandise return of the negative department or PLU is not allowed,<br />
and void of merchandise return entry is not allowed.<br />
14 VOID OP<strong>ER</strong>ATION<br />
14.1 VOID OF A LAST ITEM ENTRY ( <strong>ER</strong>ROR CORRECT )<br />
Press the “ VOID” key immediately after making an incorrect entry.<br />
DEPT. or PLU<br />
Incorrect Entry<br />
DEPT. or PLU<br />
VOID<br />
14.2 VOID OF A PREVIOUS ITEM ENTRY<br />
You can correct using the “ VOID” key at any point during the sale.<br />
DEPT. or PLU<br />
CLEAR VOID DEPT. or PLU<br />
OR<br />
DEPT. or PLU<br />
X/TIME<br />
VOID<br />
Q’ty<br />
DEPT. or PLU<br />
60
14.3 VOID OUTSIDE OF A SALE<br />
If you want to void a number of items of incorrect entries that were not made void during a sale.<br />
( 1 ) Turn the control lock key to the “ VOID” position.<br />
( 2 ) Make all entries that you want to void in the normal sequence.<br />
( 3 ) All these items will appear as alternative sign amount.<br />
( 4 ) All “VOID” position operations maintain their own total on the report.<br />
14.4 CANCEL ( VOID 4 )<br />
The pressing of the “ CANCEL” key during a transaction cancels the entire transaction.<br />
This is not a tendering key !!<br />
Transactions up to thirty items may be canceled.<br />
If a cancel operation is attempted after the entering of more than thirty items, an error will occur.<br />
DEPT. or PLU<br />
DEPT. or PLU<br />
Up to 30 items<br />
DEPT. or PLU<br />
DEPT. or PLU<br />
CANCEL<br />
61
15 ADD CHECK OP<strong>ER</strong>ATION<br />
Where multiple receipts are required for one purchase.<br />
ie: For admissions where people require separate entrance tickets.<br />
DEPT. or PLU<br />
ADD CHECK<br />
DEPT. or PLU<br />
ADD CHECK<br />
TEND<strong>ER</strong><br />
16 TEND<strong>ER</strong>ING OP<strong>ER</strong>ATION<br />
16.1 <strong>CASH</strong> TEND<strong>ER</strong>ING<br />
DEPT. or PLU<br />
SUBTL<br />
AMOUNT<br />
<strong>CASH</strong>/TEND<br />
62
16.2 PRESET <strong>CASH</strong> TEND<strong>ER</strong>ING<br />
You must program the “ PRESET <strong>CASH</strong>” key.<br />
If you don’t program this key, an error will occur when you enter the “PRESET <strong>CASH</strong>” key.<br />
DEPT. or PLU<br />
SUBTL<br />
AMOUNT<br />
PRESET <strong>CASH</strong><br />
16.3 CHEQUE TEND<strong>ER</strong>ING<br />
DEPT. or PLU<br />
SUBTL<br />
AMOUNT<br />
CHEQUE<br />
63
16.4 CHARGE TEND<strong>ER</strong>ING<br />
The entering amount of charge must not be more than subtotal amount.<br />
DEPT. or PLU<br />
SUBTL<br />
AMOUNT<br />
CHARGE<br />
16.5 SPLIT TEND<strong>ER</strong>ING<br />
You can tender any combination of media.<br />
DEPT. or PLU<br />
SUBTL<br />
AMOUNT<br />
CHECK<br />
AMOUNT<br />
<strong>CASH</strong>/TEND<br />
CHARGE<br />
64
16.6 TEND<strong>ER</strong>ING WITH CURRENCY CONV<strong>ER</strong>SION<br />
You must program the “ CONV” key.<br />
If you don’t program this key, an error will occur when you enter the “CONV” key.<br />
DEPT. or PLU<br />
SUBTL<br />
CONV<br />
<strong>CASH</strong>/TEND<br />
AMOUNT ( Foreign Currency )<br />
16.7 POST TEND<strong>ER</strong>ING<br />
NOTE : If you want to use post tendering function, you must set SYSTEM OPTION ADDRESS 13<br />
to 1 ( Page 24 ).<br />
Post tendering function is only allowed on cash transactions.<br />
After post tendering, the display will show the remaining amount and the drawer will<br />
open.<br />
DEPT. or PLU<br />
SUBTL<br />
<strong>CASH</strong>/TEND<br />
AMOUNT<br />
<strong>CASH</strong>/TEND<br />
EX )<br />
5 0 0 DEPT 1 DEPT 3 SUBTL <strong>CASH</strong>/TEND<br />
2 0 0 0<br />
<strong>CASH</strong>/TEND<br />
65
17 CHEQUE <strong>CASH</strong>ING<br />
If a customer wants to cash a cheque, use this function.<br />
( 1 ) Enter the amount of cheque.<br />
( 2 ) Press the “ CHEQUE” key.<br />
AMOUNT<br />
CHEQUE<br />
66
18 RECEIVED ON ACCOUNT OP<strong>ER</strong>ATION<br />
A. Use the “ RECD ACCT” key to register cash or cheque that is added to the cash drawer.<br />
RECD ACCT<br />
AMOUNT<br />
<strong>CASH</strong>/TEND<br />
CHEQUE<br />
RECD ACCT<br />
B. CHANGE BACK<br />
RECD ACCT<br />
AMOUNT ( A ) AMOUNT ( B )<br />
* ( A )
20 TABLE MANAGEMENT<br />
This cash register can support the table management up to 50 lines.<br />
( 40 item lines + 10 tendering lines ).<br />
NOTE : If you want to use the table management, SYSTEM OPTION ADDRESS 46 must be 0.<br />
20.1 TRANSACTION<br />
TABLE NO.<br />
( 1 ~ 50 )<br />
CHECK #<br />
TRANSACTION<br />
CHECK TEND<strong>ER</strong><br />
TABLE NO.<br />
CHECK #<br />
TRANSACTION<br />
CHECK TEND<strong>ER</strong><br />
TABLE NO.<br />
CHECK #<br />
TRANSACTION<br />
TEND<strong>ER</strong><br />
20.2 CONSOLIDATED RECEIPT PRINTING<br />
If you want to issue the consolidated receipt about the table to be opened or tendered ( by cash or<br />
cheque ... ), press the table number and the “ CHECK TEND<strong>ER</strong>” key.<br />
TABLE NO.<br />
CHECK TEND<strong>ER</strong><br />
NOTE : If you set the SYSTEM OPTION 47 to 0, the consolidated receipt is only printed on the<br />
receipt of ECR.<br />
If you set the SYSTEM OPTION 47 to 1, the consolidated receipt is printed on the<br />
receipt of ECR and the slip printer.<br />
If you set the SYSTEM OPTION 47 to 2, the consolidated receipt is only printed on the<br />
slip printer.<br />
NOTE : If you set the SYSTEM OPTION ADDRESS 48 to 0, when table management, the transaction<br />
will be printed on the slip printer.<br />
( Refer to SYSTEM OPTION ADDRESS 54 ( Page 27 ) to select the printer type. )<br />
68
EX )<br />
STEP 1<br />
1<br />
CHECK #<br />
1 0 0 0<br />
DEPT 1<br />
DEPT 3<br />
CHECK TEND<strong>ER</strong><br />
TABLE NO.<br />
STEP 2<br />
2<br />
CHECK #<br />
DEPT 3<br />
3 X/TIME 2 0<br />
PLU<br />
TABLE NO.<br />
CHECK TEND<strong>ER</strong><br />
STEP 3<br />
1<br />
CHECK #<br />
2<br />
X/TIME<br />
DEPT 3<br />
CHECK TEND<strong>ER</strong><br />
TABLE NO.<br />
STEP 4<br />
2<br />
CHECK #<br />
MDSE RETURN<br />
2 0<br />
PLU<br />
CHECK TEND<strong>ER</strong><br />
TABLE NO.<br />
STEP 5<br />
1<br />
CHECK #<br />
1 5 0 0<br />
<strong>CASH</strong>/TEND<br />
CHARGE 1<br />
TABLE NO.<br />
STEP 6 1 CHECK TEND<strong>ER</strong> * STEP 6 ( SLIP PRINTING ) *<br />
TABLE NO.<br />
STEP 7<br />
2<br />
CHECK #<br />
2 0<br />
PLU<br />
1 0 0 0<br />
CHEQUE<br />
<strong>CASH</strong>/TEND<br />
TABLE NO.<br />
STEP 8 2 CHECK TEND<strong>ER</strong> * STEP 8 ( SLIP PRINTING )<br />
TABLE NO.<br />
69
21 <strong>CASH</strong>I<strong>ER</strong> OV<strong>ER</strong>LAP<br />
NOTE : If you want to use the cashier overlap, SYSTEM OPTION ADDRESS 46 must be 1.<br />
If you set SYSTEM OPTION ADDRESS 29 to 1,<br />
clerk change can be made without clerk sign-off operation.<br />
21.1 TRANSACTION<br />
CL<strong>ER</strong>K X ! =><br />
TRANSACTION<br />
CL<strong>ER</strong>K CHANGE ! ( CL<strong>ER</strong>K X -> Y ) ====><br />
TRANSACTION<br />
CL<strong>ER</strong>K CHANGE ! ( CL<strong>ER</strong>K Y -> Z ) ====><br />
TRANSACTION<br />
TEND<strong>ER</strong><br />
CL<strong>ER</strong>K Z FINALIZES !<br />
CL<strong>ER</strong>K CHANGE ! ( CL<strong>ER</strong>K Z -> Y ) ====><br />
TRANSACTION<br />
TEND<strong>ER</strong><br />
CL<strong>ER</strong>K Y FINALIZES !<br />
CL<strong>ER</strong>K CHANGE ! ( CL<strong>ER</strong>K Y -> X ) ====><br />
TRANSACTION<br />
TEND<strong>ER</strong><br />
CL<strong>ER</strong>K X FINALIZES !<br />
21.2 CONSOLIDATED RECEIPT PRINTING<br />
If you want to issue the consolidated receipt about the clerk to be opened or tendered ( by cash or<br />
cheque ... ), press the clerk number and the “ CHECK TEND<strong>ER</strong>” key.<br />
CL<strong>ER</strong>K NO.<br />
CHECK TEND<strong>ER</strong><br />
70
NOTE : If you set the SYSTEM OPTION 47 to 0, the consolidated receipt is only printed on the<br />
receipt of ECR.<br />
If you set the SYSTEM OPTION 47 to 1, the consolidated receipt is printed on the<br />
receipt of ECR and the slip printer.<br />
If you set the SYSTEM OPTION 47 to 2, the consolidated receipt is only printed on the<br />
slip printer.<br />
NOTE : If you set the SYSTEM OPTION ADDRESS 48 to 0, when cashier overlap, the transaction<br />
will be printed on the slip printer.<br />
( Refer to SYSTEM OPTION ADDRESS 54 ( Page 27 ) to select the printer type. )<br />
EX ) Assume that clerk sign on method is push button type.<br />
STEP 1 CL<strong>ER</strong>K 1 ! =><br />
1 0 0 0<br />
DEPT 1<br />
DEPT 1<br />
2 0<br />
PLU<br />
CL<strong>ER</strong>K 1<br />
STEP 2 CL<strong>ER</strong>K CHANGE ! ( 1 -> 2 ) ====><br />
CL<strong>ER</strong>K 2<br />
1 0<br />
PLU 5 0 0 PLU DEPT 3 CL<strong>ER</strong>K 2<br />
STEP 3 CL<strong>ER</strong>K CHANGE ! ( 2 -> 1 ) ====><br />
CL<strong>ER</strong>K 1<br />
4<br />
X/TIME<br />
DEPT 3<br />
<strong>CASH</strong>/TEND<br />
CL<strong>ER</strong>K 1<br />
CL<strong>ER</strong>K 1 FINALIZES !<br />
STEP 4 1 CHECK TEND<strong>ER</strong> * STEP 4 ( SLIP PRINTING ) *<br />
CL<strong>ER</strong>K NO.<br />
STEP 5 CL<strong>ER</strong>K CHANGE ! ( 1 -> 2 ) ====><br />
CL<strong>ER</strong>K 2<br />
1 0 0 0<br />
<strong>CASH</strong>/TEND<br />
CHEQUE<br />
CL<strong>ER</strong>K 2 FINALIZES !<br />
STEP 6 2 CHECK TEND<strong>ER</strong> * STEP 6 ( SLIP PRINTING ) *<br />
CL<strong>ER</strong>K NO.<br />
71
22 PRINTING A BUFF<strong>ER</strong>ED RECEIPT OP<strong>ER</strong>ATION<br />
If a customer requests a receipt after a sale has been finalized and the “ RECEIPT ON/OFF” key<br />
was in the ‘ OFF’ position during a sale, the press of the “ RECEIPT” key will issue a buffered<br />
receipt.<br />
( Up to 70 lines : 50 item lines + 20 tendering lines )<br />
If more than 50 entries are made in the sale, the cash register will issue a stub receipt only,<br />
show the total net sale and correct the tax totals and payment tendered.<br />
NOTE : The “ RECEIPT ON/OFF” key must be used on “ REG / VOID” position and can’<br />
t be<br />
used<br />
during transactions.<br />
Press the “ RECEIPT ON/OFF” key once to change its status.<br />
When the “ RECEIPT ON/OFF” sign is illuminated on the display panel, the receipt<br />
printer will be turned off.<br />
Refer to SYSTEM OPTION ADDRESS 21 ( Page 24 )<br />
72
23 VALIDATION OP<strong>ER</strong>ATION<br />
First of all, place a check or slip into the slot below the receipt / detail printer.<br />
Upon pressing of the “ VALID” key, validation will be performed on department and PLU entries,<br />
RECD ACCT & PAID OUT operation, % key entries, merchandise return, voids and<br />
tendering operations.<br />
If an operation is programmed as “ Validation Compulsory” , the cash register will not operate until<br />
validation is completed and the message “ S P” will appear on the display.<br />
If any other operations are attempted before validation, an error will occur.<br />
Refer to SYSTEM OPTION ADDRESS 20 ( Page 24 )<br />
* SAMPLE VALIDATION RECEIPTS *<br />
< RECEIPT SIDE > < JOURNAL SIDE ><br />
01 251298 14:10 000068 RTN APPLE -10.00<br />
a b c d e f<br />
01 122598 14:10 000068 DPT DEPT.3 £10.00<br />
a b c d e f<br />
* Date ( b ) = SYSTEM OPTION ADDRESS 25 = 1 ( MM/DD/YY ). ( Page 25 )<br />
01 981225 14:10 000068 AMT <strong>CASH</strong> £10.00<br />
a b c d e f<br />
* Date ( b ) = SYSTEM OPTION ADDRESS 25 = 2 ( YY/MM/DD ). ( Page 25 )<br />
a = Clerk number.<br />
b = Date.<br />
c = Time.<br />
d = Receipt consecutive number.<br />
e = Registration step.<br />
f = Validated transaction content.<br />
73
24 RECEIPT MESSAGE PRINTING OP<strong>ER</strong>ATION<br />
24.1 PREAMBLE MESSAGE<br />
If you want to print the receipt preamble messages on the receipt, you must program SYSTEM<br />
OPTION ADDRESS 43 ( Page 26 ) after programming the preamble message descriptors.<br />
* SYSTEM OPTION 43 = 0 * * SYSTEM OPTION 43 = 1 * * SYSTEM OPTION 43 = 2 *<br />
24.2 POSTAMBLE MESSAGE<br />
If you want to print the receipt postamble messages on the receipt, you must program SYSTEM<br />
OPTION ADDRESS 44 ( Page 26 ) after programming the postamble message descriptors.<br />
74
25 TRAIN MODE<br />
If you want to operate the train mode, you must program SYSTEM OPTION ADDRESS 45.<br />
Refer to SYSTEM OPTION ADDRESS 45 ( Page 26 )<br />
NOTE : All the amounts registered in the training mode are accumulated to the training mode<br />
report area and will not effect the normal report area.<br />
The training mode reports are only daily reports and reset totals to ‘ 0’ after issuing Z<br />
mode reports.<br />
During the training mode, the journal paper will be not printed.<br />
75
REPORT AND BALANCING<br />
REPORT REPORT NO. REPORT TYPE KEY LOCK KEY SEQUENCE<br />
FINANCIAL 1 X<br />
Z<br />
X2<br />
Z2<br />
X<br />
Z<br />
X<br />
Z<br />
1 SUBTL<br />
1 SUBTL<br />
201 SUBTL<br />
201 SUBTL<br />
TIME 2 X<br />
Z<br />
X2<br />
Z2<br />
X<br />
Z<br />
X<br />
Z<br />
2 SUBTL<br />
2 SUBTL<br />
202 SUBTL<br />
202 SUBTL<br />
PLU 3 X<br />
Z<br />
X2<br />
X2<br />
X<br />
Z<br />
X<br />
Z<br />
3 SUBTL<br />
3 SUBTL<br />
203 SUBTL<br />
203 SUBTL<br />
IN-DRAW<strong>ER</strong> 4 X X 4 SUBTL<br />
DAILY SALES 5 X2<br />
Z2<br />
X<br />
Z<br />
205 SUBTL<br />
205 SUBTL<br />
OPEN TABLE<br />
6 X X 6 SUBTL<br />
( or OPEN CL<strong>ER</strong>K )<br />
INDIVIDUAL CL<strong>ER</strong>K<br />
X<br />
Z<br />
X2<br />
Z2<br />
X<br />
Z<br />
X<br />
Z<br />
SUBTL CL<strong>ER</strong>K<br />
SUBTL CL<strong>ER</strong>K<br />
20 SUBTL CL<strong>ER</strong>K<br />
20 SUBTL CL<strong>ER</strong>K<br />
FROM/TO DEPT X X FROM DEPT. KEY<br />
TO DEPT. KEY<br />
FROM/TO PLU X X FROM XXXX ( PLU NO.) PLU<br />
TO XXXX ( PLU NO.) PLU<br />
DEPARTMENT 30 X<br />
Z<br />
X2<br />
Z2<br />
X<br />
Z<br />
X<br />
Z<br />
30 SUBTL<br />
30 SUBTL<br />
230 SUBTL<br />
230 SUBTL<br />
NOTE : You can not issue the PLU report during training mode.<br />
76
1 REPORT MODES<br />
REPORT TYPE TOTALS Z Counter REMARKS<br />
X Not reset Not advance<br />
Z Reset to ‘0’ Advance<br />
X2 Not reset Not advance Period-to-date report<br />
Z2 Reset to ‘0’ Advance Period-to-date report<br />
NOTE : If you don’<br />
t want to open the drawer when the reports are run,<br />
set SYSTEM OPTION ADDRESS 5 to value ‘ b’ . ( Page 23 )<br />
2 <strong>CASH</strong> DECLARATION<br />
If the compulsory cash declaration is programmed ( SYSTEM OPTION ADDRESS 5 ),<br />
the cash declaration must be performed in “ X / Z” mode prior to taking X / Z reports.<br />
<strong>CASH</strong>/TEND<br />
<strong>CASH</strong>/TEND<br />
<strong>CASH</strong>/TEND<br />
START AMOUNT OR EXIT<br />
CHEQUE<br />
NOTE : After doing cash declaration in the ‘ X / Z’ mode, if you turn the control key to any other<br />
position except the ‘ X / Z’ , the cash declaration function will be lost.<br />
So if you want to print the reports, you should perform the cash declaration again.<br />
77
3 REPORTS<br />
3.1 OPEN TABLE ( or OPEN CL<strong>ER</strong>K ) REPORT<br />
NOTE : If you operate table management ( SYSTEM OPTION ADDRESS 46 = 0 ),<br />
open table report will be issued,<br />
while if you operate cashier overlap ( SYSTEM OPTION ADDRESS 46 = 1 ),<br />
open clerk report will be issued.<br />
NOTE : If open table ( or clerk ) exists, the reports in ‘ Z’ mode will not be issued and an error<br />
tone will sound ( ‘ E9’ ).<br />
So if you want to issue the reports in ‘ Z’ mode, you must finalize the open table<br />
( or clerk ).<br />
A. X open table ( or clerk ) report ( Key lock : ‘X’ ) 6 SUBTL<br />
78
3.2 FINANCIAL REPORT<br />
A. X financial report ( Key lock : ‘X’ )<br />
B. Z financial report ( Key lock : ‘Z’ )<br />
1 SUBTL<br />
C. X2 financial report ( Key lock : ‘X’ )<br />
D. Z2 financial report ( Key lock : ‘Z’ )<br />
2 0 1 SUBTL<br />
79
3.3 TIME REPORT<br />
A. X time report ( Key lock : ‘X’ )<br />
B. Z time report ( Key lock : ‘Z’ )<br />
2 SUBTL<br />
C. X2 time report ( Key lock : ‘X’ )<br />
D. Z2 time report ( Key lock : ‘Z’ )<br />
2 0 2 SUBTL<br />
80
3.4 PLU REPORT<br />
A. X PLU report ( Key lock : ‘X’ )<br />
B. Z PLU report ( Key lock : ‘Z’ )<br />
3 SUBTL<br />
C. X2 PLU report ( Key lock : ‘X’ )<br />
D. Z2 PLU report ( Key lock : ‘Z’ )<br />
2 0 3 SUBTL<br />
3.5 FROM / TO PLU REPORT<br />
A. X from / to PLU report ( Key lock : ‘X’ )<br />
PLU<br />
PLU<br />
PLU NO. ( 1 ~ 1000 ) PLU NO. ( 1 ~ 1000 )<br />
a b ( a £ b )<br />
NOTE : If you press the “ <strong>CASH</strong>/TEND” key during issuing the PLU or FROM/TO PLU report,<br />
the report will be finished after printing TOTAL COUNT and TOTAL AMOUNT.<br />
81
3.6 IN-DRAW<strong>ER</strong> REPORT<br />
A. X in-drawer report ( Key lock : ‘X’ )<br />
4 SUBTL<br />
3.7 DAILY SALES REPORT<br />
A. X2 daily sales report ( Key lock : ‘X’ )<br />
B. Z2 daily sales report ( Key lock : ‘Z’ )<br />
2 0 5 SUBTL<br />
82
3.8 INDIVIDUAL CL<strong>ER</strong>K REPORT<br />
3.8.1 IN CASE OF 4 CL<strong>ER</strong>KS ( SYSTEM OPTION 28’ s VALUE ‘ C’ = 0 )<br />
A. X individual clerk report ( Key lock : ‘X’ )<br />
SUBTL CL<strong>ER</strong>K<br />
B. Z individual clerk report ( Key lock : ‘Z’ ) 1, 2, 3 or 4<br />
C. X2 individual clerk report ( Key lock : ‘X’ )<br />
2 0 SUBTL CL<strong>ER</strong>K<br />
D. Z2 individual clerk report ( Key lock : ‘Z’ ) 1, 2, 3 or 4<br />
3.8.2 IN CASE OF 15 CL<strong>ER</strong>KS ( SYSTEM OPTION 28’ s VALUE ‘ C’ = 4 )<br />
A. X individual clerk report ( Key lock : ‘X’ )<br />
SUBTL<br />
CL<strong>ER</strong>K 4<br />
B. Z individual clerk report ( Key lock : ‘Z’ ) CL<strong>ER</strong>K NO. ( 1 ~ 15 )<br />
C. X2 individual clerk report ( Key lock : ‘X’ )<br />
2 0 SUBTL CL<strong>ER</strong>K 4<br />
D. Z2 individual clerk report ( Key lock : ‘Z’ ) CL<strong>ER</strong>K NO. ( 1 ~ 15 )<br />
* OPTIONAL FULL CL<strong>ER</strong>K REPORT ( SYSTEM OPTION 8 ) *<br />
83
3.9 FROM / TO DEPARTMENT REPORT<br />
A. X from / to department report ( Key lock : ‘X’ )<br />
DEPT<br />
a<br />
DEPT<br />
b<br />
( a £ b )<br />
3.10 DEPARTMENT REPORT<br />
A. X department report ( Key lock : ‘X’ )<br />
B. Z department report ( Key lock : ‘Z’ )<br />
3 0 SUBTL<br />
C. X2 department report ( Key lock : ‘X’ )<br />
D. Z2 department report ( Key lock : ‘Z’ )<br />
2 3 0 SUBTL<br />
84
TROUBLE SHOOTING<br />
Check the following items if the cash register does not work correctly !!<br />
* Is the power cord plugged into the main socket correctly ?<br />
* Is the wall outlet supplying power ?<br />
Try plugging in another appliance.<br />
* Is the control lock in the correct position ?<br />
* Did you change the position of the control lock during registration of the transaction ?<br />
If you set the control lock to another position while registration is in progress, an error will occur.<br />
Return to the previous control lock position and press the correct keys to finalize the original transaction<br />
before changing the control lock setting.<br />
MEMORY PROTECTION BATT<strong>ER</strong>Y<br />
Totaled sales and other items are protected during power failures by a built in memory protection<br />
battery.<br />
The memory protection battery is charging when the power is on and discharging when the power is<br />
off. This cause the capacity of the battery to decrease after about one year of use.<br />
A label on the back of the cash register shows the normal service period of the battery installed in your cash<br />
register.<br />
NOTE : A weak battery has the potential of losing valuable transaction data.<br />
SPECIFICATION<br />
POW<strong>ER</strong><br />
AC 230 V , 50 Hz<br />
CABINET ABS ( V0 )<br />
PRINT<strong>ER</strong> <strong>ER</strong>P-300V ( 2 STATION DOT-MATRIX PRINT<strong>ER</strong> )<br />
DISPLAY<br />
FRONT 10 DIGITS / REAR 10 DIGITS<br />
DRAW<strong>ER</strong> METAL ( 8 COINS / 4 BILLS )<br />
WEIGHT<br />
15.0 Kg<br />
DIMENSION SET = 374 (W) x 458 (D) x 195 (H) DRAW<strong>ER</strong> = 400 (W) x 450 (D) x 111 (H)<br />
( Including foot )<br />
USAGE CONDITION TEMP<strong>ER</strong>ATURE : 0°C ~ 40°C HUMIDITY : 10 % ~ 90 %<br />
NOISE<br />
UND<strong>ER</strong> 70 dB<br />
85
APPENDIX<br />
1 CHARACT<strong>ER</strong> CODE TABLE<br />
CHAR á à â ä å Ä Å é è ê<br />
CODE 001 002 003 004 005 006 007 008 009 010<br />
CHAR ë É í ì î ï Í ñ Ñ ó<br />
CODE 011 012 013 014 015 016 017 018 019 020<br />
CHAR ò ô ö Ö ú ù ü û Ü æ<br />
CODE 021 022 023 024 025 026 027 028 029 030<br />
CHAR ß SPACE ! " # $ % & ' (<br />
CODE 031 032 033 034 035 036 037 038 039 040<br />
CHAR ) * + , - . / 0 1 2<br />
CODE 041 042 043 044 045 046 047 048 049 050<br />
CHAR 3 4 5 6 7 8 9 : ; <<br />
CODE 051 052 053 054 055 056 057 058 059 060<br />
CHAR = > ? @ A B C D E F<br />
CODE 061 062 063 064 065 066 067 068 069 070<br />
CHAR G H I J K L M N O P<br />
CODE 071 072 073 074 075 076 077 078 079 080<br />
CHAR Q R S T U V W X Y Z<br />
CODE 081 082 083 084 085 086 087 088 089 090<br />
CHAR ˛ Pts ƒ ^ ? Ft a b c d<br />
CODE 091 092 093 094 095 096 097 098 099 100<br />
CHAR e f g h i j k l m n<br />
CODE 101 102 103 104 105 106 107 108 109 110<br />
CHAR o p q r s t u v w x<br />
CODE 111 112 113 114 115 116 117 118 119 120<br />
CHAR y z<br />
CODE 121 122<br />
86
2 ALPHA-NUM<strong>ER</strong>IC KEYBOARD LAYOUT<br />
2.1 <strong>ER</strong>-5115 ALPHA-NUM<strong>ER</strong>IC KEYBOARD LAYOUT<br />
RECEIPT<br />
FEED<br />
DETAIL<br />
FEED<br />
SPACE<br />
ñ<br />
,<br />
f<br />
F<br />
Ö<br />
2<br />
l<br />
L<br />
æ<br />
8<br />
r<br />
R<br />
#<br />
=<br />
w<br />
W<br />
& = LEVEL 3<br />
@ = LEVEL 2<br />
z = LEVEL 1<br />
Z = LEVEL 0<br />
RECEIPT<br />
ON/OFF<br />
CLEAR<br />
BKSP<br />
Í<br />
+<br />
e<br />
E 5<br />
ö<br />
1<br />
k<br />
K 10<br />
Ü<br />
7<br />
q<br />
Q 15<br />
”<br />
<<br />
v<br />
V<br />
%<br />
?<br />
y<br />
Y<br />
7<br />
8<br />
9<br />
ï<br />
*<br />
d<br />
D 4<br />
ô<br />
0<br />
j<br />
J 9<br />
û<br />
6<br />
p<br />
P 14<br />
!<br />
;<br />
u<br />
U<br />
$<br />
><br />
x<br />
X<br />
4<br />
5<br />
6<br />
î<br />
)<br />
c<br />
C 3<br />
ò<br />
/<br />
i<br />
I 8<br />
ü<br />
5<br />
o<br />
O 13<br />
SPACE<br />
:<br />
t<br />
T<br />
LEVEL<br />
SHIFT<br />
1<br />
2<br />
3<br />
ì<br />
(<br />
b<br />
B 2<br />
ó<br />
.<br />
h<br />
H 7<br />
ù<br />
4<br />
n<br />
N 12<br />
ß<br />
9<br />
s<br />
S<br />
0<br />
00<br />
.<br />
í<br />
’<br />
a<br />
A 1<br />
Ñ<br />
-<br />
g<br />
G 6<br />
ú<br />
3<br />
m<br />
M 11<br />
DOUBLE<br />
<strong>CASH</strong>/<br />
TEND<br />
87
2.2 <strong>ER</strong>-5140 ALPHA-NUM<strong>ER</strong>IC KEYBOARD LAYOUT<br />
RCPT<br />
FEED<br />
DETL<br />
FEED<br />
RCPT<br />
ON/OFF<br />
Space<br />
PAID<br />
OUT<br />
CLEAR<br />
Bksp<br />
W<br />
/<br />
Å 5<br />
Pt<br />
4<br />
É 10<br />
a<br />
9<br />
Í 15<br />
f<br />
><br />
ô 20<br />
k<br />
C<br />
ü 25<br />
p<br />
H<br />
Space<br />
u<br />
M<br />
% 35<br />
= LEVEL 2<br />
= LEVEL 1<br />
= LEVEL 0<br />
7<br />
8<br />
9<br />
V<br />
.<br />
Ä 4<br />
Æ<br />
3<br />
ë 9<br />
Ft<br />
8<br />
ï 14<br />
e<br />
=<br />
ò 19<br />
j<br />
B<br />
ù 24<br />
o<br />
G<br />
ß 29<br />
t<br />
L<br />
$ 34<br />
y<br />
Q<br />
. 39<br />
LEVEL<br />
SHIFT<br />
4<br />
5<br />
6<br />
U<br />
-<br />
å 3<br />
Z<br />
2<br />
ê 8<br />
?<br />
7<br />
î 13<br />
d<br />
<<br />
ó 18<br />
i<br />
A<br />
ú 23<br />
n<br />
F<br />
æ 28<br />
s<br />
K<br />
# 33<br />
x<br />
P<br />
- 38<br />
1<br />
2<br />
3<br />
T<br />
,<br />
ä 2<br />
Y<br />
1<br />
è 7<br />
^<br />
6<br />
ì 12<br />
c<br />
;<br />
Ñ 17<br />
h<br />
@<br />
Ö 22<br />
m<br />
E<br />
Ü 27<br />
r<br />
J<br />
” 32<br />
w<br />
O<br />
’ 37<br />
DOUBLE<br />
0<br />
00<br />
.<br />
S<br />
+<br />
â 1<br />
X<br />
0<br />
é 6<br />
ƒ<br />
5<br />
í 11<br />
b<br />
:<br />
ñ 16<br />
g<br />
?<br />
ö 21<br />
l<br />
D<br />
û 26<br />
q<br />
I<br />
! 31<br />
v<br />
N<br />
& 36<br />
<strong>CASH</strong>/TEND<br />
88
3 COMMUNICATION INT<strong>ER</strong>FACE<br />
3.1 PIN DESCRIPTION FOR S<strong>ER</strong>IAL INT<strong>ER</strong>FACE<br />
5 4 3 2 1<br />
9 8 7 6<br />
S<strong>ER</strong>IAL PORT<br />
S<strong>ER</strong>IAL PORT<br />
PIN NO. SIGNAL<br />
1 Not connect<br />
2 RXD<br />
3 TXD<br />
4 DTR<br />
5 GND<br />
6 Not connect<br />
7 Not connect<br />
8 Not connect<br />
9 Not connect<br />
3.2 CABLE SPECIFICATION<br />
Ferrite core inserted and turned to<br />
50mm<br />
2 ( Core type : OP-18E )<br />
CABLE FOR S<strong>ER</strong>IAL PORT<br />
89
4 COMMUNICATION WITH PC<br />
This cash register can communicate with PC.<br />
The programming contents are downloaded from PC and uploaded to PC.<br />
And the each report is uploaded to PC.<br />
To communicate with PC,<br />
( 1 ) Turn the control lock key to the “ S<strong>ER</strong>VICE MODE” .<br />
( 2 ) Press the “ RECD ACCT” key. The message “ --OnLInE--” will be shown on the display.<br />
NOTE : If you want to escape from “ online” mode, press the “ CLEAR” key.<br />
It is advisable to always shut down ‘WINDOWS’ into ‘DOS’ before using the <strong>ER</strong>5100 Utility program.<br />
5 PRINTING ON THE ROLL PRINT<strong>ER</strong><br />
If you want to print the sale items on the roll printer, set the SYSTEM OPTION ADDRESS 48 to 1.<br />
And then, the sale items will be printed on the roll printer when tendering.<br />
Refer to SYSTEM OPTION ADDRESS 54 ( Page 27 ) to select the printer type.<br />
NOTE : If the roll printer is disconnected, the contents will be printed on the receipt.<br />
EX ) 1 3 CHECK # 1 0 0 0 DEPT 1 3 X/TIME DEPT 3<br />
2 0 PLU <strong>CASH</strong>/TEND<br />
90
6 SCALE<br />
If you want to operate the scale, set the SYSTEM OPTION ADDRESS 42 to 1.<br />
And then you can use the “PRICE INQ.” key as the “SCALE” key.<br />
6.1 DIRECT SCALE ENTRY<br />
When product is placed on the scale and the “SCALE” key is pressed, the weight will be appear on the<br />
display.<br />
EX )<br />
SCALE<br />
2 0<br />
PLU<br />
<strong>CASH</strong>/TEND<br />
6.2 MANUAL WEIGHT ENTRY<br />
If you want to make manual weight entries, set the SYSTEM OPTION ADDRESS 42’ s value ‘ b’ .<br />
EX )<br />
1 . 2 5<br />
SCALE<br />
5 0 0<br />
DEPT 1<br />
<strong>CASH</strong>/TEND<br />
Weight ( 0.001 ~ 999.999 )<br />
91
WIRING SPECIFICATION FOR PC & PRINT<strong>ER</strong><br />
Samsung <strong>ER</strong>-5100 to Personnel Computer.<br />
ECR<br />
Computer<br />
9 pin (male) 9 pin (female) 25 pin female<br />
RXD 2 ……………………………………..TXD 3…………………TXD 2<br />
TXD 3 ……………………………………..RXD 2…………………RXD 3<br />
GND 5……………………………………..GND 5…………………GND 7<br />
Samsung <strong>ER</strong>-5100 to Kitchen/Slip Printer<br />
ECR<br />
Printer<br />
9 pin (male) 25 pin (male)<br />
RXD 2………………………………………………….TXD 2<br />
TXD 3………………………………………………….RXD 3<br />
DTR 4………………………………………………….DSR 6<br />
GND 5…………………………………………………GND 7<br />
DSR 8………………………………………………….DTR 20<br />
92