Kodak Easyshare CX4310 digital camera ... - Foto Source Canada Inc.
Kodak Easyshare CX4310 digital camera ... - Foto Source Canada Inc.
Kodak Easyshare CX4310 digital camera ... - Foto Source Canada Inc.

You also want an ePaper? Increase the reach of your titles
YUMPU automatically turns print PDFs into web optimized ePapers that Google loves.
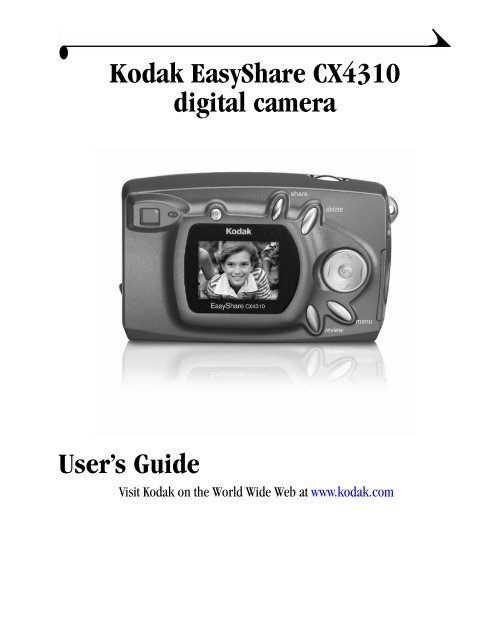
<strong>Kodak</strong> EasyShare <strong>CX4310</strong><br />
<strong>digital</strong> <strong>camera</strong><br />
User’s Guide<br />
Visit <strong>Kodak</strong> on the World Wide Web at www.kodak.com
Eastman <strong>Kodak</strong> Company<br />
343 State Street<br />
Rochester, New York 14650<br />
© Eastman <strong>Kodak</strong> Company, 2003<br />
<strong>Kodak</strong> and EasyShare are trademarks of Eastman <strong>Kodak</strong> Company.<br />
All screen images are simulated.<br />
P/N 6B8606
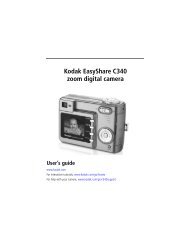
Camera Front<br />
ON<br />
OFF<br />
1<br />
2<br />
3<br />
Camera Bottom<br />
Product Overview<br />
1 Shutter button 5 Viewfinder lens<br />
2 Flash unit 6 Lens<br />
3 On / Off switch 7a USB connector<br />
4 Self Timer light 7b DC in connector<br />
1<br />
2<br />
1 Camera Dock connector 2 Tripod mount socket<br />
(door shown closed) 3 Battery door<br />
4<br />
5<br />
3<br />
6<br />
7a<br />
7b<br />
i
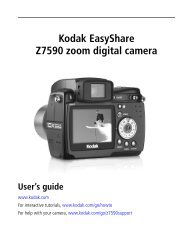
Camera Back<br />
ii<br />
9<br />
10<br />
11<br />
1<br />
12<br />
2<br />
Product Overview<br />
13<br />
3<br />
1 Viewfinder 8 SD/MMC card door<br />
2 Ready light 9 Flash button<br />
3 LCD (Liquid Crystal Display) 10 Share button<br />
4 Shutter button 11 Delete button<br />
5 4-way arrow / Zoom / OK buttons 12 Review button<br />
6 Wrist strap post 13 Menu button<br />
7 Video out port<br />
4<br />
5<br />
6<br />
7<br />
8
Table of Contents<br />
1 Getting Started ...................................................................1<br />
Install the Software First ........................................................1<br />
Need This Guide in Large Print? .............................................1<br />
Camera Package Contents .....................................................2<br />
Attaching the Wrist Strap.................................................... 3<br />
Attaching the Lens Cap.......................................................... 3<br />
Loading the Batteries ............................................................. 4<br />
Turning the Camera On and Off ............................................ 5<br />
Using the 4-Way Arrow/Zoom/OK Button......................... 5<br />
Selecting a Language............................................................... 6<br />
Setting the Clock .......................................................................7<br />
Checking Camera Status........................................................ 8<br />
Inserting an SD/MMC Card.................................................... 9<br />
Choosing Internal Memory or SD/MMC Card...................10<br />
Camera Modes........................................................................... 11<br />
Important Battery Information........................................... 12<br />
2 Taking Pictures—Capture Mode .................................15<br />
Take a Picture Anytime..........................................................15<br />
Taking a Picture........................................................................15<br />
Liveview—Using the LCD to Frame Your Subject ..........16<br />
Quickview—Reviewing the Picture Just Taken ................ 17<br />
iii
iv<br />
Using the Flash.........................................................................18<br />
Using Digital Zoom...................................................................19<br />
Changing Picture-Taking Options.......................................20<br />
3 Reviewing Pictures—Review Mode .............................27<br />
To Enter Review Mode............................................................ 27<br />
To Access the Review Menus ..............................................28<br />
Viewing Single Pictures..........................................................29<br />
Viewing Multiple Pictures......................................................29<br />
Deleting Pictures ....................................................................30<br />
Magnifying Pictures ...............................................................30<br />
Protecting Pictures From Deletion .................................... 31<br />
Running a Slide Show.............................................................. 31<br />
Displaying Pictures on a Television....................................33<br />
Copying Pictures .....................................................................34<br />
Viewing Picture Information .................................................35<br />
4 Tagging Pictures—Share Mode ..................................37<br />
When Can I Tag My Pictures? .............................................. 37<br />
To Access Share Mode/Menus........................................... 37<br />
Tagging Pictures for Printing ..............................................38<br />
Tagging Pictures for Emailing .............................................39<br />
Tagging Pictures as Favorites............................................40
5 Customizing Camera Settings—Setup Mode ........ 41<br />
To Access Setup Mode/Menus ............................................41<br />
Returning to the Previous Menu ........................................ 42<br />
Changing the Print Quantity Default ............................... 42<br />
Turning Off Quickview............................................................. 43<br />
Turning On Liveview................................................................. 43<br />
Setting Video Out................................................................... 44<br />
Formatting Memory or MMC/SD Card ............................ 45<br />
Viewing Camera Information................................................46<br />
6 Installing the Software .................................................47<br />
System Requirements ...........................................................47<br />
Install the Software .............................................................. 49<br />
7 Connecting to the Computer ........................................ 51<br />
Important—Before You Connect ........................................51<br />
Connecting to the Computer.................................................51<br />
Transferring Pictures to Your Computer ........................ 52<br />
Printing Pictures from Your Computer............................ 52<br />
Printing from an SD/MMC Card......................................... 52<br />
Print With or Without a Computer .................................... 52<br />
8 Using the Optional Camera Dock II ...........................53<br />
Camera Dock Package Contents ....................................... 53<br />
Installing the Camera Insert............................................... 54<br />
Connecting the Camera Dock.............................................. 55<br />
Installing the Battery Pack in the Camera.....................56<br />
v
vi<br />
Docking the Camera ............................................................... 57<br />
Charging the Battery Pack..................................................58<br />
Transferring Pictures ............................................................59<br />
Caution When Using a Tripod...............................................59<br />
Earlier Camera Dock Model................................................. 60<br />
9 Troubleshooting ............................................................... 61<br />
Troubleshooting—Camera ....................................................61<br />
Troubleshooting—Camera Dock II ..................................... 74<br />
10 Getting Help ....................................................................77<br />
Helpful Web Links......................................................................77<br />
Help in this User Guide .........................................................78<br />
Software Help ..........................................................................78<br />
Telephone Customer Support..............................................78<br />
11 Appendix ............................................................................. 81<br />
Camera Specifications...........................................................81<br />
Original Factory Settings—Camera.................................83<br />
Upgrading Your Software and Firmware..........................83<br />
Tips, Safety, Maintenance ...................................................84<br />
Picture Storage Capacities.................................................85<br />
Locating Pictures on an MMC/SD Card...........................85<br />
Card File Naming Conventions ........................................... 86<br />
Battery-Saving Features.....................................................87<br />
Optional AC Adapter .............................................................87<br />
Camera Dock II Specifications ........................................... 88<br />
FCC Compliance and Advisory............................................ 89
1 Getting Started<br />
Install the Software First<br />
You must install the <strong>Kodak</strong> EasyShare software on your computer before you<br />
connect the <strong>camera</strong> to the computer or attempt to transfer pictures.<br />
See Chapter 6, Installing the Software, or the Quick Start Guide for directions.<br />
Need This Guide in Large Print?<br />
For a large print version of this User’s Guide:<br />
1 Go to http://www.kodak.com/go/cx4310support.<br />
2 Navigate to the Manuals section.<br />
3 Click View as PDF to open the User’s Guide.<br />
4 On a Windows OS-based computer or Mac OS 8.6 or 9.x:<br />
� From the File menu, select Print.<br />
� In the Print window, select Fit to Page.<br />
On Mac OS X:<br />
� From the File menu, select Page Setup.<br />
� Change Scale to 200%.<br />
5 Print as usual.<br />
1
2<br />
Chapter 1<br />
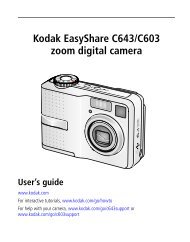
Camera Package Contents<br />
Contents subject to change. Check box for contents listing.<br />
1<br />
2<br />
3<br />
4<br />
2<br />
1<br />
5<br />
Camera<br />
Wrist strap<br />
Lens cap<br />
Custom <strong>camera</strong> insert*<br />
Also included but not shown: 2 <strong>Kodak</strong> <strong>digital</strong> <strong>camera</strong> batteries; User’s Guide or<br />
User’s Guide CD; Quick Start Guide; and <strong>Kodak</strong> EasyShare software CD.<br />
NOTE: *The custom <strong>camera</strong> insert fits your <strong>camera</strong> to the optional <strong>Kodak</strong><br />
EasyShare <strong>camera</strong> dock, <strong>camera</strong> dock II, or EasyShare printer dock<br />
4000. DO NOT DISCARD.<br />
See page 53 for details about purchasing and using a <strong>camera</strong> dock.<br />
5<br />
6<br />
3<br />
6<br />
4<br />
USB cable<br />
Video cable (for viewing<br />
pictures on television)
Chapter 1<br />
Attaching the Wrist Strap<br />
Attaching the Lens Cap<br />
1 Thread the short loop of the strap through<br />
the wrist strap post.<br />
2 Thread the long end of the strap through the<br />
short loop. Pull until secure.<br />
1 Thread the lens cap string through the loop<br />
in the wrist strap as shown.<br />
2 Put the lens cap on the lens. Depress the<br />
tabs on the lens cap, fit the cap on the lens,<br />
and release the tabs.<br />
To protect the lens, put the lens cap on<br />
whenever you are not taking pictures.<br />
3
4<br />
Chapter 1<br />
Loading the Batteries<br />
<strong>Kodak</strong> <strong>digital</strong> <strong>camera</strong> batteries (2, AA) are included with your <strong>camera</strong>.<br />
1 Turn off the <strong>camera</strong>.<br />
2 On the bottom of the <strong>camera</strong>, slide the<br />
battery door and lift to open.<br />
3 Insert the AA batteries as shown.<br />
AA<br />
CRV3<br />
(optional)<br />
4 Close the battery door.<br />
IMPORTANT BATTERY INFORMATION<br />
For acceptable battery life and to make<br />
sure your <strong>camera</strong> operates<br />
dependably, do not use alkaline<br />
batteries.<br />
If you purchased an optional <strong>Kodak</strong> CRV3<br />
lithium battery, insert it as shown.<br />
If you purchased a <strong>Kodak</strong> EasyShare <strong>camera</strong><br />
dock II, see page 56 for details on using the<br />
<strong>Kodak</strong> EasyShare Ni-MH rechargeable<br />
battery pack.<br />
See page 12 for the types of batteries you<br />
can use in your <strong>camera</strong>.
Chapter 1<br />
Turning the Camera On and Off<br />
ON<br />
OFF<br />
1 Slide the On/Off switch to the On position.<br />
The ready light blinks green while the<br />
<strong>camera</strong> performs a self-check, then glows<br />
steady green when the <strong>camera</strong> is ready to<br />
take pictures.<br />
2 To turn off the <strong>camera</strong>, slide the On/Off<br />
switch to the Off position.<br />
The <strong>camera</strong> completes operations that are<br />
in process.<br />
Using the 4-Way Arrow/Zoom/OK Button<br />
OK<br />
View pictures—press to scroll through your pictures. Press to<br />
display multiple thumbnails. See page 29.<br />
Zoom—press to zoom in or out when taking pictures. See page 19.<br />
Check status—press to display the status bar. See page 8.<br />
Navigate menus—press and to scroll through the menus and<br />
fields.<br />
Select—press OK to make a selection.<br />
Magnify—press OK to magnify a picture in Review mode. See page 30.<br />
5
6<br />
Chapter 1<br />
Selecting a Language<br />
You can display menus and screen messages in different languages.<br />
The Language screen is automatically displayed the first time you turn on the<br />
<strong>camera</strong>. If this is the first time the <strong>camera</strong> has been turned on, go to step 4.<br />
To change the language after that:<br />
1 In Capture or Review mode, press the Menu button.<br />
2 Highlight Setup , then press the OK button.<br />
3 Highlight Language , then press the OK<br />
button.<br />
4 Press to highlight a language, then<br />
press the OK button.<br />
5 Press the Menu button to turn off the menu.<br />
Text is displayed in the selected language.<br />
This setting remains until you change it.
Setting the Clock<br />
Chapter 1<br />
The Date & Time screen appears the first time you turn on the <strong>camera</strong> or if the<br />
battery is removed for an extended time. If this is the first time the <strong>camera</strong> has<br />
been turned on, go to step 4.<br />
To set the date and time after that:<br />
1 In Capture or Review mode, press the Menu<br />
OK<br />
button.<br />
2 Highlight Setup , then press the OK<br />
button.<br />
3 Highlight Date & Time , then press the<br />
OK button.<br />
The date format is YYYY/MM/DD in a 24hour<br />
format.<br />
4 Press to move through the fields.<br />
Press to adjust the settings.<br />
Menu 5 Press the OK button to accept the changes.<br />
6 Press the Menu button to turn off the menu.<br />
The setting remains until you change it.<br />
NOTE: Depending on your computer operating system, <strong>Kodak</strong> EasyShare<br />
software may allow your computer to automatically update the <strong>camera</strong><br />
clock when you connect the <strong>camera</strong>. See the <strong>Kodak</strong> EasyShare software<br />
Help for details.<br />
7
8<br />
Chapter 1<br />
Checking Camera Status<br />
To check the current <strong>camera</strong> settings, press the down arrow in Capture mode<br />
or the flash button any time:<br />
Camera Status Icons<br />
Auto<br />
Off<br />
Fill<br />
Red-eye<br />
Best<br />
Better<br />
Good<br />
Date stamp Pictures remaining<br />
Close up Internal<br />
Card<br />
Storage location<br />
Flash mode<br />
Capture<br />
Review<br />
Share<br />
Camera mode<br />
(icons not displayed<br />
in Liveview)<br />
Quality Low Battery<br />
Exhausted battery<br />
(blinking)*<br />
Self Timer Digital Zoom<br />
Battery Status<br />
If no battery icon appears on the LCD, the battery is fully charged.<br />
*A blinking battery icon means the battery is too weak to power the <strong>camera</strong>.<br />
The ready light blinks red for five seconds, then the <strong>camera</strong> turns off.<br />
or<br />
072
Chapter 1<br />
Inserting an SD/MMC Card<br />
Optional SD/MMC cards provide removable, reusable storage for pictures.<br />
Notched<br />
corner<br />
CAUTION:<br />
The card can only be inserted one way; forcing it may<br />
damage the <strong>camera</strong> or card.<br />
Do not insert or remove a card when the green ready light<br />
is blinking; it may damage your pictures, card, or <strong>camera</strong>.<br />
1 Turn off the <strong>camera</strong>.<br />
2 Open the card door.<br />
3 Orient the card as shown.<br />
4 Push the card into the slot to seat the<br />
connector. (To remove the card, push it in,<br />
then release it. When the card is partially<br />
ejected, pull it out.)<br />
5 Close the door.<br />
See page 85 for storage capacities. Purchase SD/MMC cards at a dealer of<br />
<strong>Kodak</strong> products or on our Web site at http://www.kodak.com/go/<br />
cx4310accessories.<br />
9
10<br />
Chapter 1<br />
Choosing Internal Memory or SD/MMC<br />
Card<br />
The <strong>camera</strong> offers two options for storing pictures:<br />
Internal Memory—store up to 14 pictures (at Best quality) in the 16 MB<br />
internal memory.<br />
SD/MMC Card—store as many pictures as you like, depending on the size of<br />
the card.<br />
See page 85 for storage capacities. Purchase SD/MMC cards at a dealer of<br />
<strong>Kodak</strong> products or on our Web site at http://www.kodak.com/go/<br />
cx4310accessories.<br />
Changing Your Storage Location Setting<br />
Use the Image Storage menu, available in Capture and Review modes, to<br />
change the setting.<br />
1 Turn on the <strong>camera</strong>.<br />
2 Press the Menu button.<br />
3 Select Image Storage , then press the OK button.<br />
4 Press to highlight an option, then<br />
press the OK button:<br />
Auto (default)—the <strong>camera</strong> uses the<br />
card if one is in the <strong>camera</strong> ; the<br />
<strong>camera</strong> uses internal memory if no card is<br />
in the <strong>camera</strong> .<br />
Internal Memory—the <strong>camera</strong> always<br />
uses internal memory, even if a card is<br />
installed .<br />
5 Highlight Continue, then press the OK button again.<br />
The <strong>camera</strong> changes storage locations. The setting remains until you<br />
change it and applies to all <strong>camera</strong> functions (Capture, Review).<br />
6 Press the Menu button to turn off the menu.
Camera Modes<br />
Chapter 1<br />
The <strong>camera</strong> has four modes: Capture, Review, Share, and Setup. You can<br />
always tell which mode the <strong>camera</strong> is in:<br />
Capture —the LCD is blank, no image<br />
Capture is displayed. Press the down arrow to<br />
display the status bar and mode icon. Press<br />
OK to enter Liveview. See Chapter 2, Taking<br />
Pictures—Capture Mode. But remember,<br />
you can press the Shutter button and take a<br />
picture anytime, no matter what mode the<br />
<strong>camera</strong> is in!<br />
Review —a picture is displayed; the<br />
Review<br />
mode icon is displayed on the LCD. See<br />
Chapter 3, Reviewing Pictures—Review<br />
Mode.<br />
Share Share—Print, Email, and Favorites appear<br />
in the menu bar; a picture is displayed. See<br />
Chapter 4, Tagging Pictures—Share Mode.<br />
Setup<br />
Setup—Setup mode is an option on both<br />
the Capture and Review menus. The menu<br />
bar is bright yellow; a picture is never<br />
displayed. See Chapter 5, Customizing<br />
Camera Settings—Setup Mode.<br />
11
12<br />
Chapter 1<br />
Important Battery Information<br />
Choose the replacement battery that fits your needs—and get the best<br />
performance.<br />
Battery Replacement Types/Battery Life<br />
Your <strong>camera</strong> can use the following types of <strong>Kodak</strong> batteries. Actual battery life<br />
may vary based on usage.<br />
CRV3 lithium battery<br />
AA (2) lithium batteries<br />
Ni-MH rechargeable<br />
battery pack* (per charge)<br />
AA (2) Ni-MH rechargeable<br />
batteries (per charge)<br />
<strong>Kodak</strong> <strong>digital</strong><br />
<strong>camera</strong> batteries, AA (2)<br />
(included with <strong>camera</strong>)<br />
100 - 140<br />
165 - 205<br />
165 - 205<br />
265 - 365<br />
365 - 455<br />
0 500<br />
Battery Life (Approx. Number of Pictures)<br />
* <strong>Inc</strong>luded with the <strong>Kodak</strong> EasyShare <strong>camera</strong> dock, <strong>camera</strong> dock II,<br />
and printer dock 4000<br />
We do not recommend or support alkaline batteries. For acceptable<br />
battery life, and to make sure your <strong>camera</strong> operates dependably, use the<br />
replacement batteries listed above.<br />
For information on batteries, visit http://www.kodak.com/global/en/service/<br />
batteries/batteryUsage.jhtml
Chapter 1<br />
Extending Battery Life<br />
� Battery life depends significantly on battery age, usage conditions, and type.<br />
Digital <strong>camera</strong>s are demanding on batteries. Not all batteries perform well<br />
under these challenging conditions.<br />
� Limit the following activities that quickly deplete battery power:<br />
– Reviewing your pictures on the <strong>camera</strong> screen (see page 27)<br />
– Using Liveview (see page 16)<br />
– Using Quickview (see page 17).<br />
– Excessive use of the flash<br />
� Purchase an optional <strong>Kodak</strong> 3-volt AC adapter to power your <strong>camera</strong> (see<br />
page 87).<br />
� Purchase an optional <strong>Kodak</strong> EasyShare <strong>camera</strong> dock (see page 53). The<br />
<strong>camera</strong> dock powers your <strong>camera</strong>, transfers pictures, and is also a battery<br />
charger for its included <strong>Kodak</strong> EasyShare Ni-MH rechargeable battery<br />
pack.<br />
� Purchase an optional <strong>Kodak</strong> EasyShare printer dock 4000 (see page 52).<br />
The printer dock 4000 powers your <strong>camera</strong>, makes 4 x 6 prints with or<br />
without a computer, transfers pictures, and is also a battery charger for its<br />
included <strong>Kodak</strong> EasyShare Ni-MH rechargeable battery pack.<br />
� Dirt on the battery contacts can affect battery life. Wipe the contacts with a<br />
clean, dry cloth before loading batteries in the <strong>camera</strong>.<br />
� Battery performance is reduced at temperatures below 41° F (5° C).<br />
Carry spare batteries when using your <strong>camera</strong> in cold weather, and keep<br />
them warm. Do not discard cold batteries that do not work; when they<br />
return to room temperature, they may be usable.<br />
Battery Safety and Handling<br />
� Do not allow batteries to touch metal objects, including coins. Otherwise, a<br />
battery may short circuit, discharge energy, become hot, or leak.<br />
� For rechargeable battery disposal information, visit the Rechargeable<br />
Battery Recycling Corporation Web site at www.rbrc.com.<br />
13
2 Taking Pictures—Capture<br />
Mode<br />
Take a Picture Anytime<br />
The <strong>camera</strong> is in Capture mode when you turn it on. Press the Shutter<br />
button to take a picture. But remember, you can press the Shutter button and<br />
take a picture anytime, no matter what mode the <strong>camera</strong> is in!<br />
Taking a Picture<br />
Before you take a picture, make sure your picture storage location is set the<br />
way you want it (see page 10).<br />
Viewfinder Shutter 1 Use the Viewfinder to frame your subject.<br />
(Or press the OK button to turn on Liveview.<br />
See page 16.)<br />
Ready light<br />
2 Press the Shutter button half-way down to<br />
set the exposure and focus.<br />
3 Press the Shutter button completely down to<br />
take the picture.<br />
The ready light blinks green while the picture is saved. The ready light<br />
blinks orange if the flash is recharging or if there is an auto-exposure<br />
error.<br />
CAUTION:<br />
Do not insert or remove a card when the green ready light<br />
is blinking. It may damage your pictures, card, or <strong>camera</strong>.<br />
15
16<br />
Chapter 2<br />
Liveview—Using the LCD to Frame Your<br />
Subject<br />
When you turn on Liveview, the LCD displays a live image of what the lens sees.<br />
Look at the LCD to frame your picture.<br />
1 Make sure the <strong>camera</strong> is in Capture mode<br />
( on the LCD).<br />
2 Press the OK button to turn on Liveview.<br />
OK<br />
3 Frame your picture in the LCD.<br />
4 Take the picture.<br />
5 To turn off Liveview, press the OK button.<br />
NOTE: Liveview quickly depletes battery power;<br />
use it sparingly. To conserve battery<br />
power, Liveview automatically turns off<br />
after one minute.<br />
To change the Liveview setting so it is on whenever the <strong>camera</strong> is on, see<br />
page 43.
Chapter 2<br />
Quickview—Reviewing the Picture Just<br />
Taken<br />
After you take a picture, the LCD displays a Quickview of that picture for 5<br />
seconds. While the picture is displayed, you can:<br />
� Review It. If you take no action, the picture<br />
Delete<br />
is saved.<br />
� Delete it. Press the Delete button while the<br />
picture and are displayed.<br />
NOTE: To save battery power, you can turn off the Quickview feature. See<br />
page 43.<br />
17
Using the Flash<br />
18<br />
Chapter 2<br />
Use the flash when you take pictures outdoors in heavy shadows, at night, or<br />
indoors. Flash is effective at the distances of 1.6 to 9.8 feet (0.5 to 3 m).<br />
Press the button repeatedly to scroll<br />
through the flash options.<br />
The flash icon displayed on the LCD is the<br />
active option.<br />
Current <strong>camera</strong> status icons are also<br />
displayed (see page 8). The LCD screen<br />
turns off after 3 seconds.<br />
Auto Flash—flash fires when the lighting conditions require it.<br />
When the picture is taken, the <strong>camera</strong> flashes twice, once to set<br />
the exposure and once to take the picture.<br />
Flash Off—flash never fires.<br />
Fill Flash—flash fires every time you take a picture, regardless<br />
of the lighting conditions. When the picture is taken, the <strong>camera</strong><br />
flashes twice, once to set the exposure and once to take the<br />
picture.<br />
Red-eye—flash fires three times, once to set the exposure, once<br />
to reduce red-eye, and once to take the picture. The Red-eye<br />
option remains in effect until you change it. See page 21 for an<br />
exception with Close-up.<br />
NOTE: All flash options (except Red-eye) revert to Auto when the <strong>camera</strong> is<br />
turned off.<br />
The <strong>camera</strong> uses slow shutter speeds in low-light conditions with the<br />
flash turned off. Take care to avoid <strong>camera</strong> shake; use a tripod or place<br />
the <strong>camera</strong> on a steady surface.
Using Digital Zoom<br />
Chapter 2<br />
Use Digital Zoom to zoom in two times closer to your subject. The lens does<br />
not move during Digital Zoom.<br />
IMPORTANT: You may notice a decrease in printed image quality<br />
when using Digital Zoom.<br />
1 Press the OK button to turn on Liveview.<br />
2 Press to activate the <strong>digital</strong> zoom.<br />
The LCD displays the zoomed image and<br />
the <strong>digital</strong> zoom icon .<br />
3 Use the LCD to frame your subject, then take<br />
the picture. You must use Liveview to take<br />
the picture because the zoomed image is<br />
only displayed through the LCD and not the<br />
viewfinder.<br />
NOTE: Digital zoom is turned off when you press the OK button, turn off the<br />
<strong>camera</strong>, turn Close-up on or off, or when the <strong>camera</strong> enters Auto<br />
power-off.<br />
19
20<br />
Chapter 2<br />
Changing Picture-Taking Options<br />
Use the Capture menus to change picture-taking options. If you are in Review,<br />
Share, or Setup modes you must return to Capture mode before you can access<br />
the Capture menus.<br />
To Return to Capture From Another Mode<br />
To return to Capture from:<br />
� Any mode, press the Shutter button to take a picture and revert to Capture.<br />
� Review mode, press the Review button.<br />
� Share mode, press the Share button.<br />
� Setup mode, and you got there from Capture, press the Menu button.<br />
� Setup mode, and you got there from Review mode, press the Menu button.<br />
To Access the Capture Menu<br />
1 In Capture mode (LCD is blank, no picture is displayed), press the Menu<br />
button.<br />
2 Press the Menu button to turn off the menu.<br />
Capture Menus<br />
Close-up (page 21) Quality (page 24)<br />
Self Timer (page 22) Date Stamp (page 25)<br />
Image Storage (page 10) Orientation Sensor (page 26)<br />
Exposure Compensation Setup (page 41)<br />
(page 23)
Chapter 2<br />
Taking Close-up Pictures<br />
The Close-up setting helps you gain sharpness and detail at close range. The<br />
Close-Up focus distance is 5.9 to 19.7 in. (150 to 500 mm).<br />
To turn on Close-up:<br />
1 In Capture mode, press the Menu button.<br />
2 Highlight Close-up , then press the OK<br />
button.<br />
3 Highlight On, then press the OK button.<br />
4 Press the Menu button to turn off the menu<br />
screen.<br />
The Close-up icon appears in the<br />
status bar and the LCD automatically<br />
enters Liveview.<br />
5 Use the LCD to frame your subject and take<br />
the picture as usual.<br />
The Close-up setting turns off when you turn off the <strong>camera</strong>.<br />
NOTE: If the flash is set to Red-eye when you turn on Close-up, the flash setting<br />
changes to Auto; the flash then changes back to Red-eye when you turn<br />
off Close-up.<br />
21
22<br />
Chapter 2<br />
Putting Yourself in the Picture<br />
The Self Timer creates a 10-second delay between the time you press the<br />
Shutter button and the time the picture is taken.<br />
1 In Capture mode, press the Menu button.<br />
2 Highlight Self Timer , then press the OK<br />
button.<br />
3 Highlight On, then press the OK button.<br />
4 Press the Menu button to turn off the menu<br />
screen.<br />
Press Shutter<br />
Self Timer light<br />
5 Place the <strong>camera</strong> on a flat surface or use a<br />
tripod.<br />
6 Press the Shutter button.<br />
The red Self Timer light turns on for 8<br />
seconds, then blinks for 2 seconds. The<br />
picture is taken.<br />
The Self Timer turns off after you take the<br />
picture.
Chapter 2<br />
Setting Exposure Compensation<br />
Use Exposure Compensation to control how much light is allowed into the<br />
<strong>camera</strong>. The exposure range is +2 to -2 in 1/2-step increments.<br />
NOTE: This setting is ideal for controlling pictures in which the light source is<br />
behind the subject (backlit), or for correcting pictures that are too light<br />
or too dark.<br />
1 In Capture mode, press the Menu button.<br />
2 Highlight Exposure Compensation , then press the OK button.<br />
3 Press to select the<br />
Exposure Compensation setting.<br />
� If your pictures are too light,<br />
press to decrease (-) the<br />
value.<br />
� If your pictures are too dark,<br />
press to increase (+) the<br />
value.<br />
4 Press the OK button to accept the<br />
change and return to the menu<br />
screen.<br />
5 Press Menu to exit the menu<br />
screen.<br />
This setting remains until you<br />
change it.<br />
23
24<br />
Chapter 2<br />
Setting Picture Quality<br />
Use the Quality setting to select a picture resolution:<br />
1 In Capture mode, press the Menu button.<br />
2 Highlight Quality , then press the OK button.<br />
The active Quality setting appears in the top left corner.<br />
3 Highlight an option:<br />
Best —(3.2 MP, low<br />
compression) for printing up to<br />
11 x 14 in. (27.9 x 35.6 cm);<br />
produces highest picture<br />
FPO<br />
4 Press the OK button.<br />
5 Press the Menu button to turn off the menu screen.<br />
This setting remains until you change it.<br />
resolution, more detail, and<br />
largest file sizes.<br />
appears in the status<br />
bar.<br />
Better —(3.2 MP, high<br />
compression) for printing up to 8<br />
x 10 in. (20.3 x 25.4 cm);<br />
pictures are medium resolution<br />
with smaller file sizes.<br />
appears in the status<br />
bar.<br />
Good — (0.8 MP) for<br />
emailing or screen display;<br />
pictures are lowest resolution<br />
with smallest file sizes.<br />
appears in the status bar.
Chapter 2<br />
Placing the Date on Pictures<br />
Use Date Stamp to imprint the date on your pictures.<br />
1 Make sure the <strong>camera</strong> clock is set to the correct date (page 7).<br />
2 In Capture mode, press the Menu button.<br />
3 Highlight Date Stamp , then press the OK button.<br />
4 Highlight an option:<br />
Off<br />
YYYY MM DD<br />
MM DD YY<br />
DD MM YYYY<br />
5 Press the OK button.<br />
6 Press the Menu button to turn off<br />
the menu.<br />
The current date is printed in<br />
the bottom right corner of new<br />
pictures. This setting remains<br />
until you change it.<br />
25
26<br />
Chapter 2<br />
Setting the Orientation Sensor<br />
If you rotate the <strong>camera</strong> to take a picture (for example, a portrait shot), the<br />
Orientation Sensor rotates the picture so it is displayed correct side up during<br />
Quickview and Review.<br />
The Orientation Sensor is turned on as the default. You can turn it off so that<br />
pictures are displayed in their original orientation.<br />
NOTE: When your subject is above or below you (such as pictures of an object<br />
in the sky, on the ground, or when pointing down at small objects on a<br />
table), turn off the Orientation Sensor so that pictures are not rotated<br />
unnecessarily.<br />
1 In Capture mode, press the Menu button.<br />
2 Highlight Orientation , then press the OK button.<br />
3 Highlight On or Off, then press the OK button.<br />
4 Press the Menu button to turn off the menu.<br />
This setting remains until you change it.
3 Reviewing Pictures—Review<br />
Mode<br />
Use Review mode to view and work with the pictures that are stored in<br />
internal memory or on a card.<br />
NOTE: Reviewing pictures on the LCD quickly depletes battery power. An<br />
optional AC adapter is available (see page 87).<br />
To Enter Review Mode<br />
1 Press the Review button.<br />
The last picture you took or reviewed is<br />
displayed. The Review icon appears at<br />
the bottom of the LCD.<br />
2 Press the Review button again to exit Review<br />
and return to Capture mode.<br />
Review button The icons displayed with the picture<br />
indicate applied features.<br />
Picture Information Icons<br />
Email Favorite Print tag, #<br />
of copies<br />
Review<br />
2 072 Internal memory<br />
Protected Picture<br />
number<br />
Memory Card<br />
Picture Location<br />
Mode indicator Low battery Exhausted battery (blinking)<br />
27
28<br />
Chapter 3<br />
To Access the Review Menus<br />
Use the Review menus to work with the pictures that are stored in internal<br />
memory or on a card.<br />
1 Press the Review button.<br />
2 Press the Menu button.<br />
3 Press the Menu button to turn off the menus.<br />
Review Menus<br />
Magnify (page 30) Copy (page 34)<br />
Protect (page 31) Multi-up (page 29)<br />
Image Storage (page 10) Picture Information (page 35)<br />
Slide Show (page 31) Setup (page 41)
Chapter 3<br />
Viewing Single Pictures<br />
Review<br />
Viewing Multiple Pictures<br />
Review<br />
1 Press the Review button.<br />
The <strong>camera</strong> displays the last picture that<br />
was taken or reviewed.<br />
2 Press to scroll backward or forward<br />
through the pictures.<br />
1 Press the Review button.<br />
2 Press .<br />
Nine pictures (thumbnails) are displayed<br />
at once.<br />
3 Press to display the previous or next row of thumbnails.<br />
4 Press to scroll through the thumbnails one at a time.<br />
The selected picture is highlighted in yellow.<br />
5 Press the OK button to display a single view of the selected picture.<br />
Viewing Multiple Pictures—Review Menu<br />
You can also view multiple pictures through the Review menu, Multi-up option.<br />
1 Press the Review button, then press the Menu button.<br />
2 Highlight Multi-up , then press the OK button.<br />
Nine pictures (thumbnails) are displayed at once.<br />
3 Navigate through the thumbnails as described above.<br />
29
Deleting Pictures<br />
30<br />
Delete<br />
OK<br />
Review<br />
Chapter 3<br />
1 Press the Review button.<br />
2 Select a picture in single view or highlight a<br />
picture in multiple view, then press the<br />
Delete button.<br />
3 Highlight an option, then press the OK<br />
button:<br />
PICTURE—deletes the displayed picture.<br />
EXIT—exits the Delete screen.<br />
ALL—deletes all pictures from your current<br />
storage location.<br />
NOTE: Protected pictures cannot be deleted; remove protection before deleting<br />
(page 31).<br />
Magnifying Pictures<br />
1 Press the Review button, then press the OK button.<br />
The picture is displayed at 2X magnification. The Magnify icon<br />
and the magnification value are displayed on the screen.<br />
2 Press the OK button again to display the picture at 4X magnification.<br />
3 Press to view different parts of the picture.<br />
4 Press the OK button again to redisplay the picture at the original size.<br />
NOTE: You can also magnify pictures through the Magnify menu: press the<br />
Review button, press the Menu button, highlight Magnify , then<br />
press the OK button.
Chapter 3<br />
Protecting Pictures From Deletion<br />
1 Press the Review button, then locate the picture to protect.<br />
2 Press the Menu button.<br />
3 Highlight Protect , then press the OK<br />
button.<br />
The Protect icon appears with the<br />
protected picture whenever it is displayed<br />
in the status bar. The picture cannot be<br />
deleted. (Formatting deletes even<br />
protected pictures, see page 45).<br />
4 To remove protection, press the OK button again.<br />
5 Press the Menu button to turn off the menu.<br />
Running a Slide Show<br />
Use the Slide Show to display your pictures on the LCD in the order in which<br />
you took them. To run a slide show on a television or other external device, see<br />
page 33.<br />
Starting the Slide Show<br />
1 Press the Review button, then press the Menu button.<br />
2 Highlight Slide Show , then press the OK button.<br />
3 Highlight Begin Show, then press the OK<br />
button.<br />
The pictures are each displayed once in<br />
the order in which you took them. Then<br />
the <strong>camera</strong> returns to the Menu screen.<br />
See Turning On Loop, page 32, for<br />
continual display.<br />
31
32<br />
Chapter 3<br />
4 To cancel the Slide Show, press the OK button.<br />
Changing the Display Interval<br />
The default setting displays each picture for 5 seconds. You can increase the<br />
display interval to up to 60 seconds.<br />
1 On the Slide Show menu, highlight Interval,<br />
then press the OK button.<br />
2 Press to select a display interval.<br />
To scroll through the seconds quickly,<br />
press and hold .<br />
3 Press the OK button.<br />
The Interval setting remains until you change it.<br />
Turning On Loop<br />
When you turn on Loop, the slide show is continuously repeated.<br />
1 On the Slide Show menu, press to<br />
scroll down to Loop; highlight Loop, then<br />
press the OK button.<br />
2 Highlight On, then press the OK button.<br />
The loop slide show begins immediately.<br />
It repeats continuously until you cancel<br />
it by pressing the OK button or until<br />
battery power is exhausted.<br />
Loop reverts to Off when the loop slide<br />
show stops.
Chapter 3<br />
Displaying Pictures on a Television<br />
You can run a slide show or display your pictures on a television, computer<br />
monitor, or <strong>digital</strong> projector (any device equipped with a video input).<br />
NOTE: Ensure that the Video Out setting is correctly set to NTSC or PAL (see<br />
page 44).<br />
Video out<br />
port<br />
1 Connect the video cable from the video out<br />
port on the <strong>camera</strong> to the video in port on<br />
the television. (Refer to your television<br />
User’s Guide for details on video in setup.)<br />
The <strong>camera</strong> LCD turns off; the television<br />
screen acts as the <strong>camera</strong> display.<br />
2 You can now use the television screen to<br />
review your pictures in single or multiple<br />
views, run a slide show, or do anything on<br />
the television screen that you can do on the<br />
<strong>camera</strong> LCD.<br />
NOTE: If you connect or disconnect the video cable while a slide show is<br />
running, the slide show stops.<br />
33
Copying Pictures<br />
34<br />
Chapter 3<br />
You can copy pictures from a card to internal memory, or from internal<br />
memory to a card.<br />
Before you copy make sure that:<br />
� A card is inserted in the <strong>camera</strong>.<br />
� The <strong>camera</strong>’s picture storage location is set to the location from which you<br />
are copying. See Choosing Internal Memory or SD/MMC Card, page 10.<br />
Copy pictures:<br />
1 Press the Review button, then press the Menu button.<br />
2 Highlight Copy , then press the OK button.<br />
3 Highlight an option:<br />
PICTURE—copies the current picture from<br />
your selected storage location to the other<br />
location.<br />
EXIT—returns to the Copy screen.<br />
ALL—copies all pictures from your<br />
selected storage location to the other<br />
location.<br />
4 Press the OK button.<br />
A progress bar monitors the copy process.<br />
NOTE: Pictures are copied, not moved. To remove the pictures from the<br />
original location after they are copied, delete them (see page 30).<br />
Tags and protection are not copied. Print, email, and Favorite tags<br />
are not copied with the picture (see page 37 to re-apply tags).<br />
Protection settings are not copied (see page 31 to re-apply protection).
Chapter 3<br />
Viewing Picture Information<br />
1 Press the Review button, then press the<br />
Menu button.<br />
2 Highlight the Picture Info menu , then<br />
press the OK button.<br />
The information about the displayed<br />
picture is view-only and includes: file<br />
name, location of the file if stored on a<br />
card (there are no directories in internal<br />
memory), date and time the picture was<br />
taken, and the quality setting.<br />
3 Press to display the previous/next picture, with that picture’s<br />
information.<br />
4 To exit Picture Info, press the OK button.<br />
35
4 Tagging Pictures—Share<br />
Mode<br />
Press the Share button to tag your pictures as Favorites and for automatic<br />
printing and emailing. But remember, you can press the Shutter button and<br />
take a picture anytime, no matter what mode the <strong>camera</strong> is in!<br />
NOTE: MAC OS 8.6 and 9.x do not support the Share button functions. OS X is<br />
recommended for full functionality.<br />
When Can I Tag My Pictures?<br />
You can tag pictures whenever they are displayed on the LCD in Review mode<br />
(see page 27).<br />
To Access Share Mode/Menus<br />
1 Press the Share button.<br />
2 Press the Share button again to exit Share mode and return to Capture or<br />
Review mode.<br />
Share Menus<br />
Print (page 38) Print All (page 38)<br />
Email (page 39) Cancel Prints (page 38)<br />
Favorite (page 40)<br />
37
38<br />
Chapter 4<br />
Tagging Pictures for Printing<br />
Share<br />
1 Locate a picture, then press the<br />
Share button.<br />
2 Highlight Print and press<br />
the OK button.<br />
3 Press to select the<br />
number of copies (0-99). Zero<br />
removes the tag for that picture.<br />
The Print icon appears<br />
with the picture.<br />
The default quantity is one. To change the default, see page 42.<br />
4 To tag all pictures on the card or in internal memory, highlight Print All,<br />
press the OK button, then indicate the number of copies as described<br />
above.<br />
5 To remove the print tagging for all pictures on the card or in internal<br />
memory, highlight Cancel Prints, then press the OK button.<br />
6 Press the Share button to return to Capture mode.<br />
Printing Tagged Pictures<br />
When you transfer the tagged pictures to your computer, the <strong>Kodak</strong> EasyShare<br />
software Print screen opens and lets you immediately print your pictures. See<br />
<strong>Kodak</strong> EasyShare software Help for details on printing.
Chapter 4<br />
Tagging Pictures for Emailing<br />
First, use <strong>Kodak</strong> EasyShare software to create an email address book on your<br />
computer, then copy up to 32 email addresses to the <strong>camera</strong>’s internal<br />
memory. See <strong>Kodak</strong> EasyShare software Help for details.<br />
1 Locate a picture, then press the<br />
Share<br />
Share button.<br />
2 Highlight Email , then<br />
press the OK button.<br />
3 Press to highlight an<br />
email address, then press the OK<br />
button.<br />
To send the picture to more than<br />
one person, repeat step 3 for<br />
each address.<br />
Selected addresses are noted with a check mark, and the email icon<br />
appears with the picture.<br />
4 To remove a selection, highlight a checked address and press the OK<br />
button. To remove all email selections, select Clear All.<br />
5 Highlight Exit, then press the OK button.<br />
Your selections are saved.<br />
6 Press the Share button to return to Capture mode.<br />
Emailing Tagged Pictures<br />
When you transfer the tagged pictures to your computer, the <strong>Kodak</strong> EasyShare<br />
software Email screen opens and lets you immediately send the pictures to the<br />
addresses you specified. See the <strong>Kodak</strong> EasyShare software Help for details on<br />
emailing.<br />
39
40<br />
Chapter 4<br />
Tagging Pictures as Favorites<br />
Share<br />
1 Locate a picture, then press the<br />
Share button.<br />
2 Highlight Favorite<br />
the OK button.<br />
, then press<br />
The Favorite icon<br />
with the picture.<br />
appears<br />
3 To remove the tag, press the OK<br />
button again.<br />
4 Press the Share button to return<br />
to Capture mode.<br />
Using Favorites on Your Computer<br />
See the <strong>Kodak</strong> EasyShare software Help for details on retrieving and organizing<br />
Favorites on your computer.
5 Customizing Camera<br />
Settings—Setup Mode<br />
Use Setup mode to customize your <strong>camera</strong> settings. You can access Setup<br />
mode two ways: in the Capture menu screen and the Review menu screen.<br />
In<br />
Capture<br />
mode<br />
In<br />
Review<br />
mode<br />
But remember, you can press the Shutter button and take a picture anytime, no<br />
matter what mode the <strong>camera</strong> is in!<br />
To Access Setup Mode/Menus<br />
1 In Capture or Review mode, press the Menu button.<br />
2 Highlight Setup and press the OK button.<br />
3 Press the Menu button to turn off the Setup menu and return to Capture or<br />
Review mode.<br />
Setup Menus<br />
Return (page 42) Video Out (page 44)<br />
Default Print Quantity (page 42) Language (page 6)<br />
Quickview (page 43) Format (page 45)<br />
Liveview (page 43)<br />
Date/Time (page 7)<br />
About (page 46)<br />
41
42<br />
Chapter 5<br />
Returning to the Previous Menu<br />
The Return feature lets you return to the menu screen from which you entered<br />
the Setup menu.<br />
� In the Setup menu, highlight Return ,<br />
then press the OK button.<br />
You are returned to the menu screen<br />
from which you entered Setup: Capture or<br />
Review.<br />
Changing the Print Quantity Default<br />
The Default Print Quantity setting determines the value that is displayed on the<br />
Share Print screen (see page 38). The default value is one.<br />
1 In Capture or Review mode, press the Menu button.<br />
2 Highlight Setup , then press the OK button.<br />
3 Highlight Default Print Quantity , then<br />
press the OK button.<br />
4 Press to indicate the new default<br />
quantity, then press the OK button.<br />
5 Press the Menu button to turn off the menu.<br />
This setting remains until you change it.
Chapter 5<br />
Turning Off Quickview<br />
After you take a picture, Quickview displays it on the LCD for 5 seconds (see<br />
page 17). The default setting is on. To save battery power, turn off Quickview:<br />
1 In Capture or Review mode, press the Menu button.<br />
2 Highlight Setup , then press the OK button.<br />
3 Highlight Quickview , then press the OK button.<br />
4 Highlight Off, then press the OK button.<br />
5 Press the Menu button to turn off the menu.<br />
The picture is not automatically displayed on the LCD after you take it.<br />
To see the picture, press the Review button.<br />
This setting remains until you change it.<br />
Turning On Liveview<br />
The Liveview feature displays a live image on the LCD so you can frame your<br />
picture in the LCD instead of the Viewfinder (see page 16). The default setting<br />
is Off, which means that you must press the OK button to see the live image.<br />
IMPORTANT: Liveview quickly depletes battery power; use it<br />
sparingly.<br />
Turn on Liveview:<br />
1 In Capture or Review mode, press the Menu button.<br />
2 Highlight Setup , then press the OK button.<br />
3 Highlight Liveview , then press the OK button.<br />
4 Highlight On, then press the OK button.<br />
The live image is displayed whenever the <strong>camera</strong> is on. Liveview<br />
automatically turns off after one minute to conserve battery power.<br />
You can manually turn it back on by pressing the OK button.<br />
5 Press the Menu button to turn off the menu.<br />
This setting remains until you change it.<br />
43
Setting Video Out<br />
44<br />
Chapter 5<br />
The Video Out feature lets you match the <strong>camera</strong>’s video signal to the standard<br />
for your location. Video Out must be set correctly to run a slide show on an<br />
external device (see page 33).<br />
1 In Capture or Review mode, press the Menu button.<br />
2 Highlight Setup , then press the OK button.<br />
3 Highlight Video Out , then press the OK button.<br />
4 Highlight an option:<br />
NTSC—used in the United States and Japan<br />
and most countries outside of Europe.<br />
PAL—used in European countries.<br />
5 Press the OK button to accept the change<br />
and return to the Setup menu.<br />
6 Press the Menu button to turn off the menu.<br />
This setting remains until you change it.
Chapter 5<br />
Formatting Memory or MMC/SD Card<br />
CAUTION:<br />
Formatting deletes everything in memory or on the card,<br />
even protected pictures and the internal email address<br />
book. Removing a card during formatting may damage the<br />
card.<br />
1 In Capture or Review mode, press the Menu button.<br />
2 Highlight Setup , then press the OK button.<br />
3 Highlight Format , then press the OK<br />
button.<br />
4 Highlight an option:<br />
CARD—deletes everything on the card,<br />
even protected pictures, and reformats the<br />
card for use in the <strong>camera</strong>.<br />
CANCEL—exits without making a change.<br />
INTERNAL—reformats and deletes<br />
everything in internal memory, even<br />
protected pictures and the address book.<br />
5 Press the OK button.<br />
6 Highlight Continue, then press the OK button.<br />
Once formatting begins, it is completed even if you turn off the <strong>camera</strong><br />
or change modes.<br />
When the formatting is complete, the Setup menu is redisplayed.<br />
7 Press the Menu button to turn off the menu.<br />
45
46<br />
Chapter 5<br />
Viewing Camera Information<br />
The About feature displays information that is helpful if you need to call for<br />
service on your <strong>camera</strong>.<br />
1 In Capture or Review mode, press the Menu button.<br />
2 Highlight Setup , then press the OK button.<br />
3 Highlight About , then press the OK<br />
button.<br />
The <strong>camera</strong> information is view-only.<br />
4 Press the Menu button to turn off the menu.
6 Installing the Software<br />
System Requirements<br />
Windows System Requirements<br />
� Personal computer for Windows 98, 98SE, ME, 2000*, or XP* operating<br />
systems<br />
� 233 MHz processor or greater<br />
� 64 MB of available RAM (128 MB for Windows XP)<br />
� 100 MB of available hard disk space<br />
� CD-ROM drive<br />
� Available USB port<br />
� Color monitor with a minimum resolution of 800 x 600 pixels; High Color<br />
(16-bit) or True Color (24-bit) recommended<br />
� Internet access for online printing and emailing<br />
* For Windows 2000 and XP operating systems you must have<br />
Administrator rights to install software.<br />
Mac OS X System Requirements<br />
� Power Mac G3, G4, G4 Cube; iMAC; PowerBook G3, G4; iBook computer<br />
� Mac OS 10.1.2, minimum<br />
� 128 MB of available RAM<br />
� 200 MB of available hard disk space<br />
� CD-ROM drive<br />
� Built-in USB port<br />
� Color monitor with a minimum resolution of 800 x 600 pixels; thousands<br />
or millions of colors recommended<br />
� Internet access for online printing and emailing<br />
47
48<br />
Chapter 6<br />
Mac OS 8.6 and 9.x System Requirements<br />
� PowerPC-based Macintosh computer<br />
� Mac OS 8.6/9.x<br />
� 64 MB of available RAM<br />
� 200 MB of available hard disk space<br />
� CD-ROM drive<br />
� Built-in USB port<br />
� Color monitor with a minimum resolution of 800 x 600 pixels; thousands<br />
or millions of colors recommended<br />
� Internet access for online printing and emailing<br />
NOTE: Mac OS 8.6 and 9.x do not support the Share button functions.<br />
Mac OS X is recommended for full functionality.
Install the Software<br />
Chapter 6<br />
For information on the software applications included on the <strong>Kodak</strong> EasyShare<br />
software CD, see the <strong>Kodak</strong> EasyShare software Help.<br />
CAUTION:<br />
Do not install the <strong>Kodak</strong><br />
EasyShare software with the<br />
<strong>camera</strong> or <strong>camera</strong> dock<br />
connected to the computer. It<br />
may cause the software to load<br />
incorrectly. If you have already<br />
connected, disconnect the<br />
<strong>camera</strong> or <strong>camera</strong> dock before<br />
you proceed.<br />
1 Before you begin, close all software applications that are open on your<br />
computer.<br />
2 Place the <strong>Kodak</strong> EasyShare software CD into the CD drive.<br />
3 Load the software:<br />
On a Windows OS-based computer—if the install window does not<br />
appear, choose Run from the Start menu and type d:\setup.exe (if d is<br />
the drive letter that contains the CD).<br />
On Mac OS 8.6 and 9.x—on the install window, click Continue.<br />
On Mac OS X—double-click the CD icon on the desktop, then click the<br />
Install icon.<br />
49
50<br />
Chapter 6<br />
4 Follow the on-screen instructions to install the software. If prompted,<br />
restart the computer when the installation is complete.<br />
� Select Typical to automatically install the needed applications on<br />
Windows OS-based computers. Select Custom to choose the<br />
applications to install.<br />
� Select Easy to automatically install the needed applications on<br />
Macintosh computers running OS 8.6 or 9.x.<br />
� Follow the on-screen instructions to install the software on Macintosh<br />
computers running OS X.<br />
NOTE: When prompted, take a few minutes to electronically register your<br />
<strong>camera</strong> and software. This lets you receive information regarding<br />
software updates and registers some of the products included with the<br />
<strong>camera</strong>. You must be connected to your Internet service provider to<br />
register electronically.<br />
For further installation help, see the Quick Start Guide.
7 Connecting to the Computer<br />
Important—Before You Connect<br />
Install the software from the <strong>Kodak</strong> EasyShare software CD BEFORE you<br />
connect the <strong>camera</strong> or <strong>camera</strong> dock to the computer.<br />
Connecting to the Computer<br />
You can transfer your pictures from the <strong>camera</strong> to the computer using either<br />
the <strong>camera</strong> alone or the optional <strong>Kodak</strong> EasyShare <strong>camera</strong> dock or <strong>camera</strong><br />
dock II. See page 55 for connecting with a <strong>camera</strong> dock.<br />
Transferring Pictures With the USB Cable<br />
1 Turn off the <strong>camera</strong>.<br />
2 Plug the labeled ( ) end of the USB cable<br />
into the labeled USB port on your computer.<br />
See your computer User’s Guide for details.<br />
3 Plug the other end of the USB cable into the<br />
labeled USB port on the <strong>camera</strong>.<br />
4 Turn on the <strong>camera</strong> to begin transferring.<br />
<strong>Kodak</strong> EasyShare software opens on your<br />
computer and prompts you through the<br />
transfer process.<br />
An optional AC adapter is available for your <strong>camera</strong>; it saves battery power<br />
when transferring pictures (see page 87).<br />
NOTE: You can also use a <strong>Kodak</strong> multi-card reader or <strong>Kodak</strong> SD multimedia<br />
card reader-writer to transfer your pictures. See a dealer of <strong>Kodak</strong><br />
products or visit our Web site at http://www.kodak.com/go/<br />
cx4310accessories.<br />
51
52<br />
Chapter 7<br />
Transferring Pictures to Your Computer<br />
For details on transferring pictures, see the Quick Start Guide or the <strong>Kodak</strong><br />
EasyShare software Help.<br />
Printing Pictures from Your Computer<br />
For details on printing pictures from your computer and ordering prints<br />
online, see the <strong>Kodak</strong> EasyShare software Help.<br />
Printing from an SD/MMC Card<br />
� Automatically print tagged pictures when you insert your card into a printer<br />
with an SD/MMC slot. See your printer user guide for details.<br />
� Contact your local retailer for the availability to print professionally from<br />
SD/MMC cards.<br />
� Make your own prints at a <strong>Kodak</strong> picture maker kiosk with a built-in SD/<br />
MMC slot.<br />
Print With or Without a Computer<br />
Dock your <strong>camera</strong> to the <strong>Kodak</strong> EasyShare printer dock 4000 and print<br />
directly—without using a computer. Purchase this and other accessories at a<br />
dealer of <strong>Kodak</strong> products or visit www.kodak.com/go/cx4310accessories.
8 Using the Optional Camera<br />
Dock II<br />
The <strong>Kodak</strong> EasyShare <strong>camera</strong> dock II (<strong>camera</strong> dock) makes it easy to transfer<br />
your pictures to the computer. The <strong>camera</strong> dock is also a rapid battery charger<br />
for the included <strong>Kodak</strong> EasyShare Ni-MH rechargeable battery pack, and<br />
supplies power to the <strong>camera</strong>.<br />
To keep the battery pack charged and the <strong>camera</strong> always ready to take<br />
pictures, store your <strong>camera</strong> in the <strong>camera</strong> dock.<br />
Camera Dock Package Contents<br />
3<br />
4<br />
2<br />
1<br />
1 Camera dock<br />
2 7-volt AC power adapter<br />
Some AC adapters may be different from<br />
the one pictured.<br />
3 Universal insert<br />
4 <strong>Kodak</strong> EasyShare Ni-MH rechargeable<br />
battery pack<br />
5 Quick Start Guide (not shown)<br />
Purchase an optional <strong>Kodak</strong> EasyShare <strong>camera</strong> dock II at a dealer of <strong>Kodak</strong><br />
products or visit our Web site at http://www.kodak.com/go/<br />
cx4310accessories.<br />
CAUTION:<br />
Do not use the <strong>digital</strong> <strong>camera</strong> 3-volt AC adapter with a<br />
<strong>Kodak</strong> EasyShare <strong>camera</strong> dock; it is NOT compatible.<br />
53
54<br />
Chapter 8<br />
Installing the Camera Insert<br />
<strong>Kodak</strong> EasyShare <strong>digital</strong> <strong>camera</strong>s are packaged with a custom <strong>camera</strong> insert,<br />
which is used to perfectly fit the <strong>camera</strong> to the <strong>camera</strong> dock.<br />
1 Place the front tabs on the custom insert<br />
into the slots in the <strong>camera</strong> dock cavity.<br />
2 Fit the insert down into the cavity and snap<br />
the insert into place.<br />
If You Do Not Have the Custom Insert<br />
If you do not have the custom insert that was included with your <strong>camera</strong>, use<br />
the universal insert that is included with the <strong>camera</strong> dock II. The universal<br />
insert works with all <strong>Kodak</strong> EasyShare <strong>camera</strong>s, but it does not fit the <strong>camera</strong>s<br />
perfectly.<br />
To order a custom <strong>camera</strong> insert visit our Web site at http://www.kodak.com/<br />
go/cx4310accessories.
Chapter 8<br />
Connecting the Camera Dock<br />
After the <strong>Kodak</strong> EasyShare software is loaded (see page 49), connect the<br />
<strong>camera</strong> dock to your computer and to an external power source. You will<br />
need:<br />
� the USB cable included with your <strong>camera</strong><br />
� the 7-volt AC adapter included with the <strong>camera</strong> dock<br />
IMPORTANT: Make sure your <strong>camera</strong> is NOT in the <strong>camera</strong> dock<br />
when you are connecting to power and the computer.<br />
1 Plug the labeled ( ) end of the USB cable<br />
1<br />
into the labeled USB port on your computer.<br />
See your computer User’s Guide for details.<br />
2 Plug the other end of the USB cable into the<br />
2<br />
square USB connector on the back of the<br />
<strong>camera</strong> dock.<br />
3<br />
3 Plug the AC adapter into the round power<br />
connector on the back of the <strong>camera</strong> dock<br />
and into a power outlet.<br />
Your AC adapter may be different from<br />
the one pictured or may have additional<br />
plugs. Use the plug that accommodates<br />
your type of power outlet.<br />
Leave the <strong>camera</strong> dock connected to the computer for easy access for<br />
transferring pictures and charging the battery pack.<br />
IMPORTANT: Use only the 7-volt AC adapter included with the<br />
<strong>camera</strong> dock. Other adapters may cause damage to<br />
your <strong>camera</strong>, <strong>camera</strong> dock, or computer.<br />
DC IN 3V<br />
55
56<br />
Chapter 8<br />
Installing the Battery Pack in the Camera<br />
1 Open the battery door on the bottom of the<br />
<strong>camera</strong>.<br />
2 Install the battery pack as illustrated.<br />
CAUTION:<br />
The battery pack can only be<br />
inserted into the <strong>camera</strong> in the<br />
orientation shown. If the<br />
battery pack does not easily<br />
install, reposition it and try<br />
again. DO NOT FORCE IT. Doing<br />
so can damage your <strong>camera</strong>.<br />
3 Close the battery door.<br />
IMPORTANT: The battery pack is not charged when you receive it.<br />
See page 58 for charging instructions.
Docking the Camera<br />
Chapter 8<br />
When you are ready to transfer your pictures from the <strong>camera</strong> to the computer,<br />
or to charge the battery pack, place the <strong>camera</strong> in the <strong>camera</strong> dock.<br />
1 Turn off the <strong>camera</strong>.<br />
2 On the <strong>camera</strong> bottom, slide the connector<br />
cover open.<br />
Connector cover<br />
3 Place the <strong>camera</strong> in the <strong>camera</strong> dock and<br />
push down to seat the connectors.<br />
The Power/Transfer light glows<br />
green when the <strong>camera</strong> is properly<br />
seated.<br />
The <strong>camera</strong> is now powered by the<br />
Connector<br />
<strong>camera</strong> dock instead of the <strong>camera</strong><br />
Power/Transfer light batteries.<br />
NOTE: If the <strong>Kodak</strong> EasyShare Ni-MH rechargeable battery pack is in the<br />
<strong>camera</strong>, the <strong>camera</strong> dock immediately begins charging (see page 58).<br />
57
58<br />
Chapter 8<br />
Charging the Battery Pack<br />
The battery pack is not charged when you receive it.<br />
1 Turn off the <strong>camera</strong>.<br />
2 Make sure the battery pack is installed in the <strong>camera</strong> (see page 56).<br />
3 Place the <strong>camera</strong> in the <strong>camera</strong> dock (see page 57).<br />
� Charging begins immediately.<br />
� The three green charging lights monitor the charging status:<br />
Charging Lights on Dock II<br />
battery low<br />
battery partially charged<br />
battery fully charged<br />
� Full charging takes about 2.5 hours. After the battery pack is fully<br />
charged, leave the <strong>camera</strong> in the <strong>camera</strong> dock to maintain the full<br />
charge.<br />
� Charging stops if you turn on the <strong>camera</strong>. If the <strong>camera</strong> is left in the<br />
<strong>camera</strong> dock with the power on, charging resumes when the <strong>camera</strong><br />
enters Auto Power-off (see page 87).<br />
NOTE: The <strong>camera</strong> dock only charges the provided <strong>Kodak</strong> EasyShare Ni-MH<br />
rechargeable battery pack. If you place the <strong>camera</strong> in the <strong>camera</strong> dock<br />
with any other type of batteries, rechargable or not, no charging takes<br />
place.
Chapter 8<br />
Transferring Pictures<br />
To transfer pictures from your <strong>camera</strong> to your computer:<br />
1 Turn off the <strong>camera</strong> and place the<br />
<strong>camera</strong> in the <strong>camera</strong> dock.<br />
2 Push the Connect button.<br />
The Power/Transfer light blinks<br />
green while the pictures are<br />
transferring. Charging is<br />
Connect suspended during transfer.<br />
Power/Transfer light<br />
blinks<br />
<strong>Kodak</strong> EasyShare software opens<br />
on your computer and prompts<br />
you through the transfer<br />
process.<br />
3 For details on transferring, organizing, printing, emailing, and editing your<br />
pictures, see the <strong>Kodak</strong> EasyShare software Help.<br />
NOTE: When your pictures are transferred, leave the <strong>camera</strong> in the <strong>camera</strong><br />
dock. Eight minutes after the transfer is complete, the <strong>camera</strong> dock<br />
resumes charging as necessary.<br />
Caution When Using a Tripod<br />
Do not connect a tripod to the <strong>camera</strong> dock. Remove the <strong>camera</strong> from the<br />
<strong>camera</strong> dock and connect the tripod directly to the <strong>camera</strong>.<br />
59
60<br />
Chapter 8<br />
Earlier Camera Dock Model<br />
If you have the <strong>Kodak</strong> EasyShare <strong>camera</strong> dock, not the <strong>camera</strong> dock II, the<br />
functionality is exactly the same as described in this chapter. The only<br />
difference is that the earlier <strong>camera</strong> dock has one indicator light.<br />
Indicator light status:<br />
Steady green—<strong>camera</strong> is properly seated<br />
in the <strong>camera</strong> dock.<br />
Blinking green— pictures are<br />
transferring.<br />
Steady red—battery pack is charging.<br />
Blinking red—error condition.<br />
Indicator light
9 Troubleshooting<br />
This chapter contains help for your <strong>Kodak</strong> EasyShare <strong>CX4310</strong> <strong>digital</strong> <strong>camera</strong> or<br />
<strong>camera</strong> dock II.<br />
Additional technical information is available in the ReadMe file located on the<br />
<strong>Kodak</strong> EasyShare software CD. For updates to Troubleshooting information,<br />
visit our Web site at http://www.kodak.com/go/cx4310support.<br />
Troubleshooting—Camera<br />
Camera Problems<br />
Camera<br />
Problem Cause Solution<br />
Camera does not<br />
turn on.<br />
Camera does not<br />
turn on in cold<br />
temperatures.<br />
Battery is not properly<br />
installed.<br />
Remove and reinstall the<br />
batteries (page 4).<br />
Battery is not charged. Replace or recharge the<br />
batteries (page 4, page 58).<br />
On/Off switch is not<br />
completely in the On<br />
position.<br />
The <strong>camera</strong> has been<br />
exposed to temperatures<br />
close to the lower<br />
operating range.<br />
Turn the <strong>camera</strong> off then<br />
back on (page 5).<br />
Remove the batteries and<br />
slowly return the <strong>camera</strong><br />
and batteries to room<br />
temperature. Reinstall or<br />
replace the batteries<br />
(page 4).<br />
61
Camera does not<br />
turn off.<br />
62<br />
Chapter 9<br />
Camera<br />
Problem Cause Solution<br />
Shutter button does<br />
not work.<br />
Alkaline batteries were<br />
installed in the <strong>camera</strong>.<br />
DO NOT USE ALKALINE<br />
BATTERIES. Turn off the<br />
power switch, remove the<br />
alkaline batteries, and<br />
replace with an approved<br />
battery type (page 12).<br />
If the power switch is on<br />
when you replace the<br />
batteries, the <strong>camera</strong> may<br />
not turn back on. In that<br />
case, turn the power switch<br />
off, then on.<br />
Camera is not turned on. Turn on the <strong>camera</strong><br />
(page 5).<br />
The <strong>camera</strong> is<br />
processing a picture; the<br />
ready light is blinking.<br />
The card or internal<br />
memory is full.<br />
Wait until the light stops<br />
blinking before attempting<br />
to take another picture.<br />
Transfer pictures to your<br />
computer (page 52), delete<br />
pictures from the <strong>camera</strong><br />
(page 30), switch storage<br />
locations (page 10), or<br />
insert a card with available<br />
memory (page 9).
Part of the picture<br />
is missing.<br />
Chapter 9<br />
Camera<br />
Problem Cause Solution<br />
In Review mode,<br />
you do not see a<br />
picture on the LCD<br />
or do not see the<br />
picture you<br />
expected.<br />
In Review mode,<br />
pictures are<br />
displayed as black<br />
screens.<br />
Something was blocking<br />
the lens when the<br />
picture was taken.<br />
Your eye or the picture<br />
was not centered<br />
correctly in the<br />
viewfinder.<br />
The <strong>camera</strong> may not be<br />
accessing the correct<br />
storage location.<br />
The pictures were taken<br />
with a different <strong>camera</strong><br />
or were generated with<br />
other software.<br />
Picture is too dark. Flash is not on or did not<br />
function.<br />
The subject is too far<br />
away for the flash to have<br />
an effect.<br />
The subject is in front of<br />
a bright light (backlit).<br />
Lighting condition is too<br />
dark.<br />
Keep hands, fingers, or other<br />
objects away from the lens<br />
when taking pictures.<br />
Leave space around subject<br />
when centering picture in<br />
viewfinder.<br />
Check the picture storage<br />
location setting (page 10).<br />
Transfer the pictures to the<br />
computer (page 52), or<br />
delete the picture (page 30).<br />
Turn on the flash (page 18).<br />
Move so there is no more<br />
than the following distance<br />
between the <strong>camera</strong> and the<br />
subject: 9.8 ft (3 m).<br />
Use Fill flash (page 18) or<br />
change your position so the<br />
light is not behind the<br />
subject.<br />
<strong>Inc</strong>rease exposure<br />
compensation (page 23).<br />
63
Camera freezes up<br />
when a card is<br />
inserted or<br />
removed.<br />
64<br />
Chapter 9<br />
Camera<br />
Problem Cause Solution<br />
Camera detects an error<br />
when the card was<br />
inserted or removed.<br />
Turn the <strong>camera</strong> off, then<br />
back on. Make sure the<br />
<strong>camera</strong> is turned off before<br />
inserting or removing a<br />
card.<br />
Picture is too light. The flash is not needed. Change to Auto flash<br />
(page 18).<br />
Stored pictures are<br />
damaged.<br />
Pictures remaining<br />
number does not<br />
decrease after<br />
taking a picture.<br />
Picture orientation<br />
is not accurate.<br />
The subject was too<br />
close when the flash was<br />
used.<br />
Lighting condition is too<br />
bright.<br />
The card was removed<br />
when the ready light was<br />
blinking.<br />
Picture does not take up<br />
sufficient space to<br />
decrease the picture<br />
remaining number.<br />
The <strong>camera</strong> sensed that<br />
it was rotated or tilted<br />
while the picture was<br />
taken.<br />
Move so there is at least 1.6<br />
ft (0.5 m) between the<br />
<strong>camera</strong> and the subject.<br />
Decrease exposure<br />
compensation (page 23).<br />
Make sure the ready light is<br />
not blinking, then turn off<br />
the <strong>camera</strong> before removing<br />
the card.<br />
The <strong>camera</strong> is operating<br />
normally. Continue taking<br />
pictures.<br />
Set the Orientation Sensor<br />
(page 26). Turn off the<br />
Orientation Sensor when<br />
your subject is above or<br />
below you (such as in the<br />
sky or on the floor).
Chapter 9<br />
Camera<br />
Problem Cause Solution<br />
Picture is not clear. The lens is dirty. Clean the lens (page 84).<br />
Slide show does<br />
not run on external<br />
video device.<br />
Slide show does<br />
not run on LCD<br />
screen.<br />
Subject too close when<br />
taking picture.<br />
Camera may be in Closeup<br />
(page 21) and the<br />
subject is too far away<br />
for proper focus.<br />
Subject or the <strong>camera</strong><br />
moved while the picture<br />
was taken.<br />
The subject is too far<br />
away for the flash to be<br />
effective.<br />
Video Out setting is<br />
incorrect.<br />
External device is set<br />
incorrectly.<br />
The <strong>camera</strong> may not be<br />
accessing the correct<br />
storage location.<br />
Move so there is at least 11.8<br />
in (0.3 m) between the<br />
<strong>camera</strong> and the subject; or<br />
turn on Close-up (page 21).<br />
Turn off Close-up (page 21).<br />
Hold the <strong>camera</strong> steady<br />
while taking the picture and<br />
for at least one second after<br />
pressing the Shutter button.<br />
Move so there is no more<br />
than the following distance<br />
between the <strong>camera</strong> and the<br />
subject: 9.8 ft (3 m).<br />
Adjust the <strong>camera</strong> Video Out<br />
setting (NTSC or PAL,<br />
page 44).<br />
Refer to the external device’s<br />
user’s guide.<br />
Check the picture storage<br />
location setting (page 10).<br />
65
66<br />
Chapter 9<br />
Camera/Computer Communications<br />
Camera Communications<br />
Problem Cause Solution<br />
The computer<br />
cannot<br />
communicate with<br />
the <strong>camera</strong>.<br />
There is a problem with<br />
the configuration of the<br />
USB port on your<br />
computer.<br />
See the following file on the<br />
<strong>Kodak</strong> EasyShare software<br />
CD: USB.html<br />
Or, go to: www.kodak.com/<br />
go/<strong>camera</strong>support<br />
Camera power is off. Turn on the <strong>camera</strong><br />
(page 5).<br />
Battery is not charged. Replace or recharge the<br />
batteries (page 4, page 58).<br />
Some Advanced Power See the Power Management<br />
Management utilities on section of your laptop user’s<br />
laptops can turn off guide to disable this feature.<br />
ports to save battery life.<br />
Software is not installed. Install the software<br />
(page 49).<br />
USB cable is not<br />
securely connected.<br />
There are too many<br />
applications running on<br />
your computer.<br />
The Battery Monitor or<br />
similar software runs<br />
constantly.<br />
Connect cable to <strong>camera</strong> and<br />
computer port (page 51).<br />
Disconnect your <strong>camera</strong><br />
from the computer. Close all<br />
software applications,<br />
reconnect your <strong>camera</strong> and<br />
try again.<br />
Close that software before<br />
starting the <strong>Kodak</strong> software.
Cannot transfer<br />
pictures to<br />
computer. The Add<br />
New Hardware<br />
Wizard cannot<br />
locate drivers.<br />
Cannot transfer<br />
pictures to<br />
computer.<br />
Chapter 9<br />
Camera Communications<br />
Problem Cause Solution<br />
Software is not installed<br />
on computer.<br />
Software is not fully or<br />
correctly installed on<br />
computer.<br />
� Disconnect USB cable, or<br />
<strong>camera</strong> dock, from<br />
computer.<br />
� Install <strong>Kodak</strong> EasyShare<br />
software (page 49).<br />
� Disconnect USB cable, or<br />
<strong>camera</strong> dock, from<br />
computer.<br />
� Uninstall the software:<br />
Start→Settings→<br />
Control Panel→Add/<br />
Remove Programs<br />
� Re-install <strong>Kodak</strong><br />
EasyShare software<br />
(page 49).<br />
� See the <strong>Kodak</strong> Web site<br />
devoted to installing the<br />
<strong>Kodak</strong> EasyShare<br />
software on various<br />
operating systems<br />
(page 77).<br />
67
SD/MMC Cards<br />
68<br />
Chapter 9<br />
SD/MMC Card<br />
Problem Cause Solution<br />
The <strong>camera</strong> does not<br />
recognize your SD/<br />
MMC card.<br />
Camera freezes up<br />
when a card is<br />
inserted or removed.<br />
The card may not be<br />
SD/MMC certified.<br />
The card may be<br />
corrupt.<br />
No card is inserted in<br />
<strong>camera</strong> or card is not<br />
fully inserted.<br />
Camera detects an<br />
error when the card<br />
was inserted or<br />
removed.<br />
Purchase a certified SD/MMC<br />
card (page 9).<br />
Reformat the card (page 45).<br />
Caution: Formatting erases all<br />
pictures from the card.<br />
Insert a card into the card slot,<br />
then push to seat the connector<br />
(page 9).<br />
Turn the <strong>camera</strong> off, then back<br />
on.<br />
Make sure the <strong>camera</strong> is off when<br />
inserting or removing a card.
Camera LCD Messages<br />
Chapter 9<br />
LCD Messages<br />
Message Cause Solution<br />
No images to display There are no pictures<br />
in the current storage<br />
location.<br />
Memory card requires<br />
formatting<br />
The card is corrupted<br />
or formatted for<br />
another <strong>digital</strong> <strong>camera</strong>.<br />
Memory card cannot<br />
be read (Please format<br />
memory card or insert<br />
another memory card)<br />
Internal memory The <strong>camera</strong> internal<br />
requires formatting memory is corrupted.<br />
Internal memory<br />
cannot be read (Please<br />
format internal<br />
memory)<br />
No memory card, Files<br />
not copied<br />
Not enough space to<br />
copy files<br />
Read only memory<br />
card, change to<br />
internal memory to<br />
capture<br />
There is no card in the<br />
<strong>camera</strong>. Your pictures<br />
were not copied.<br />
There is not enough<br />
space in the location<br />
you are copying to<br />
(internal memory or<br />
the card).<br />
The card in the <strong>camera</strong><br />
is write-protected.<br />
Change your picture<br />
storage location setting<br />
(page 10).<br />
Insert a new card or format<br />
the card (page 45).<br />
Format the internal<br />
memory (page 45).<br />
Turn off the <strong>camera</strong> and<br />
insert a card.<br />
Delete pictures from the<br />
location you are copying to<br />
(page 30), or insert a new<br />
card.<br />
To take a picture, insert a<br />
new card or change storage<br />
location to internal<br />
memory (page 10).<br />
69
Memory card is<br />
protected<br />
Reset switch on card<br />
70<br />
Chapter 9<br />
LCD Messages<br />
Message Cause Solution<br />
Switch on card is in<br />
write-protect position.<br />
Card is locked The card in the <strong>camera</strong><br />
is write-protected.<br />
Date/Time entry screen<br />
appears automatically<br />
High <strong>camera</strong><br />
temperature. (Camera<br />
will be turned off.)<br />
This is the first time you<br />
turned on the <strong>camera</strong>;<br />
or the batteries have<br />
been removed for an<br />
extended period of<br />
time; or the batteries<br />
are exhausted.<br />
The internal<br />
temperature of the<br />
<strong>camera</strong> is too high for<br />
the <strong>camera</strong> to operate.<br />
The viewfinder light<br />
glows red and the<br />
<strong>camera</strong> will turn off in<br />
five seconds.<br />
Memory Card is full There is no more space<br />
on the card in the<br />
<strong>camera</strong>.<br />
Reset the switch as shown<br />
on LCD.<br />
To take a picture, insert a<br />
new card or change storage<br />
location to internal<br />
memory (page 10).<br />
Reset the clock (page 7).<br />
Leave the <strong>camera</strong> off for<br />
several minutes, then turn<br />
it back on.<br />
If the message reappears,<br />
repeat the sequence above<br />
until the message does not<br />
appear.<br />
Delete pictures from the<br />
card (page 30), insert a<br />
new card, or change<br />
storage location to internal<br />
memory (page 10).
Chapter 9<br />
LCD Messages<br />
Message Cause Solution<br />
Internal Memory is full There is no more space<br />
in the <strong>camera</strong>’s internal<br />
memory.<br />
Unrecognized File<br />
Format<br />
No Address Book in<br />
Camera (Connect with<br />
computer to import<br />
address book)<br />
Delete pictures from the<br />
internal memory (page 30)<br />
or change storage location<br />
to Auto and insert card<br />
(page 10).<br />
The <strong>camera</strong> cannot Transfer the unreadable<br />
read the picture format. picture to the computer<br />
(page 52), or delete the<br />
picture (page 30).<br />
No email addresses<br />
appear because there is<br />
no address book.<br />
Create and copy address<br />
book from your computer.<br />
See <strong>Kodak</strong> EasyShare<br />
software Help.<br />
71
72<br />
Chapter 9<br />
Camera Ready Light Status<br />
Camera Ready Light<br />
Light Status Cause Solution<br />
Ready light does not<br />
turn on and the<br />
<strong>camera</strong> does not<br />
work.<br />
Ready light glows<br />
steady green.<br />
Ready light<br />
Camera is not turned<br />
on.<br />
Batteries are<br />
exhausted.<br />
Power switch was on<br />
when batteries were<br />
reloaded.<br />
Camera is on; ready<br />
to take a picture.<br />
Ready light blinks red. Batteries are low or<br />
exhausted.<br />
Turn on the <strong>camera</strong><br />
(page 5).<br />
Replace or recharge the<br />
batteries (page 4, page 58).<br />
Turn <strong>camera</strong> off, then back<br />
on.<br />
The <strong>camera</strong> is operating<br />
normally.<br />
Replace or recharge the<br />
batteries (page 4, page 58).
Ready light glows<br />
steady red.<br />
Chapter 9<br />
Camera Ready Light<br />
Light Status Cause Solution<br />
Ready light blinks<br />
green.<br />
Ready light blinks<br />
orange.<br />
Camera’s internal<br />
memory or card is<br />
full.<br />
Camera processing<br />
memory is full.<br />
Your card is readonly.<br />
Picture is being<br />
processed and saved<br />
to the <strong>camera</strong>.<br />
Transfer pictures to your<br />
computer (page 52), delete<br />
pictures from the <strong>camera</strong><br />
(page 30), switch storage<br />
locations (page 10), or<br />
insert a card with available<br />
memory.<br />
Wait. Resume picture taking<br />
when the light turns green.<br />
Change your storage location<br />
to internal memory (see<br />
page 10), or use a different<br />
card.<br />
Camera is operating<br />
normally.<br />
Flash is not charged. Wait. Resume picture taking<br />
when the light stops blinking<br />
and turns green.<br />
Auto exposure or<br />
auto focus are not<br />
locked.<br />
Release the Shutter button<br />
and recompose the picture.<br />
73
74<br />
Chapter 9<br />
Troubleshooting—Camera Dock II<br />
Camera Dock II Problems<br />
Camera Dock<br />
Problem Cause Solution<br />
Pictures are not<br />
transferred to the<br />
computer<br />
AC adapter or USB<br />
cable is not<br />
securely<br />
connected.<br />
Software is not<br />
installed.<br />
There are too<br />
many applications<br />
running on your<br />
computer.<br />
Camera was<br />
removed from the<br />
<strong>camera</strong> dock<br />
during picture<br />
transfer.<br />
Connect button<br />
was not pressed.<br />
Check the connections (page 55).<br />
Install the software (page 49).<br />
Close all software applications<br />
and try again.<br />
Replace the <strong>camera</strong> on the<br />
<strong>camera</strong> dock and press the<br />
Connect button.<br />
Press the Connect button.
Chapter 9<br />
Camera Dock II Light Status<br />
Camera Dock Power/Transfer Light<br />
Light Status Cause Comment<br />
Light glows steady<br />
green<br />
Camera is properly seated in<br />
the <strong>camera</strong> dock.<br />
Light blinks green Pictures are being<br />
transferred to the computer.<br />
Light is off Camera is not properly<br />
seated in <strong>camera</strong> dock.<br />
Camera Dock Charging Lights<br />
Light Status Cause Comment<br />
No lights<br />
Charging has not<br />
started.<br />
Battery charging<br />
lights<br />
Power/Transfer<br />
light<br />
The <strong>camera</strong> and <strong>camera</strong><br />
dock are operating<br />
normally.<br />
Remove the <strong>camera</strong> and<br />
re-seat it (page 57).<br />
The <strong>camera</strong> is not in the <strong>camera</strong><br />
dock.<br />
Camera is turned on. Turn off to<br />
begin charging.<br />
Battery in <strong>camera</strong> is not a <strong>Kodak</strong><br />
EasyShare Ni-MH rechargeable<br />
battery pack.<br />
75
76<br />
Chapter 9<br />
Camera Dock Charging Lights<br />
Light Status Cause Comment<br />
Battery is low. The <strong>camera</strong> and <strong>camera</strong> dock<br />
One green light<br />
Battery is partially<br />
are operating normally.<br />
Two green lights charged.<br />
Battery is fully<br />
Three green lights charged.<br />
Camera Dock Error Light<br />
Light Status Cause Comment<br />
One blinking red<br />
light<br />
Battery pack is installed<br />
incorrectly.<br />
The battery pack or<br />
connector pins are<br />
damaged.<br />
The <strong>camera</strong> and battery pack<br />
have been exposed to very<br />
high or low temperatures.<br />
Battery in <strong>camera</strong> is not<br />
rechargeable or no battery<br />
pack is installed in <strong>camera</strong>.<br />
Reinstall the battery pack<br />
(page 56).<br />
Check for damage.<br />
Slowly return the <strong>camera</strong><br />
and battery pack to room<br />
temperature.<br />
Install a <strong>Kodak</strong> EasyShare<br />
Ni-MH rechargeable<br />
battery pack (page 56).
10Getting Help<br />
Helpful Web Links<br />
http://www.kodak.com/go/pcbasics For help navigating through a<br />
Windows OS-based computer<br />
and working with <strong>digital</strong><br />
pictures.<br />
http://www.kodak.com/go/cx4310support For help with your <strong>Kodak</strong><br />
EasyShare <strong>CX4310</strong> <strong>digital</strong><br />
<strong>camera</strong>.<br />
http://www.kodak.com/go/<br />
cx4310downloads<br />
To download the latest <strong>camera</strong><br />
software and firmware.<br />
http://www.kodak.com/go/onetouch To optimize your printer for<br />
prints with truer, vibrant colors.<br />
http://www.kodak.com/go/<strong>camera</strong>support For product support on <strong>camera</strong>s,<br />
software, accessories, and more.<br />
http://www.kodak.com/go/<br />
cx4310accessories<br />
http://www.kodak.com/go/<br />
EasyShareSWHelpWin<br />
http://www.kodak.com/go/<br />
EasyShareSWHelpMacOS9<br />
http://www.kodak.com/go/<br />
EasyShareSWHelpMacOSX<br />
To purchase a full range of<br />
<strong>digital</strong> <strong>camera</strong> accessories.<br />
To get help installing the <strong>Kodak</strong><br />
EasyShare software.<br />
http://www.kodak.com/go/register To register your new <strong>Kodak</strong><br />
EasyShare <strong>CX4310</strong> <strong>digital</strong><br />
<strong>camera</strong>.<br />
77
78<br />
Chapter 10<br />
Help in this User Guide<br />
See Chapter 9, Troubleshooting, for help with problems you may have with<br />
your <strong>camera</strong>, <strong>camera</strong>/computer connections, <strong>camera</strong> dock, or SD/MMC cards.<br />
Software Help<br />
For help with the software included on the <strong>Kodak</strong> EasyShare software CD, see<br />
the Quick Start Guide or the <strong>Kodak</strong> EasyShare software Help.<br />
Telephone Customer Support<br />
If you have questions concerning the operation of the software or <strong>camera</strong>, you<br />
may speak directly to a customer support representative.<br />
Customer support hours vary by location.<br />
Before You Call<br />
Before you call to speak to a customer support representative, please have the<br />
<strong>camera</strong> connected to your computer, be at your computer, and have the<br />
following information available:<br />
Operating system __________________________________________<br />
Processor speed (MHz) _____________________________________<br />
Computer model __________________________________________<br />
Amount of memory (MB) ____________________________________<br />
Exact error message you received_______________________________<br />
Version of installation CD____________________________________<br />
Camera serial number______________________________________
Telephone Numbers<br />
Chapter 10<br />
Australia 1800 147 701<br />
Austria/Osterreich 0179 567 357<br />
Belgium/Belgique 02 713 14 45<br />
Brazil 0800 150000<br />
<strong>Canada</strong> 1 800 465 6325<br />
China 800 820 6027<br />
Denmark/Danmark 3 848 71 30<br />
Ireland/Eire 01 407 3054<br />
Finland/Suomi 0800 1 17056<br />
France 01 55 1740 77<br />
Germany/Deutschland 069 5007 0035<br />
Greece 00800 441 25605<br />
Hong Kong 800 901 514<br />
India 91 22 617 5823<br />
Italy/Italia 02 696 33452<br />
Japan 81 3 5644 5500<br />
Korea 0798 631 0024<br />
Netherlands/Nederland 020 346 9372<br />
New Zealand 0800 440 786<br />
Norway/Norge 23 16 21 33<br />
Philippines 1 800 1 888 9600<br />
Portugal 021 415 4125<br />
Singapore 800 6363 036<br />
79
80<br />
Chapter 10<br />
Spain/España 91 749 76 53<br />
Sweden/Sverige 08 587 704 21<br />
Switzerland/Schweiz/Suisse 01 838 53 51<br />
Taiwan 0080 861 008<br />
Thailand 001 800 631 0017<br />
UK 0870 243 0270<br />
United States 1 800 235 6325<br />
Outside the United States 585 726 7260<br />
International Toll Line +44 131 458 6714<br />
International Toll Fax Number +44 131 458 6962<br />
These telephone numbers change occasionally. For the most up-to-date<br />
listings, visit: http://www.kodak.com/US/en/<strong>digital</strong>/contacts/<br />
DAIInternationalContacts.shtml.
11 Appendix<br />
This appendix serves as a resource for technical information about your <strong>Kodak</strong><br />
EasyShare <strong>CX4310</strong> <strong>digital</strong> <strong>camera</strong>, <strong>Kodak</strong> EasyShare <strong>camera</strong> dock II, SD/MMC<br />
cards, batteries, and available accessories.<br />
Camera Specifications<br />
Specifications—<strong>Kodak</strong> EasyShare <strong>CX4310</strong> <strong>digital</strong> <strong>camera</strong><br />
Pixel Resolution<br />
(by Quality<br />
setting)<br />
Best - 3.2 MP, low<br />
compression<br />
Better - 3.2 MP,<br />
high compression<br />
2080 x 1544, 1/5 JPEG compressed<br />
2080 x 1544, 1/10 JPEG compressed<br />
Good - 0.8 MP 1024 x 768, 1/5 JPEG compressed<br />
Color 24-bit, millions of colors<br />
Picture File Format EXIF 2.2 (JPEG compression)<br />
Picture Storage 16 MB internal memory<br />
MMC (MultiMedia) or SD card, optional<br />
Viewfinder Optical—Reverse Galilean<br />
ISO Sensitivity 100<br />
Flash Range 1.6 to 9.8 ft (0.5 to 3 m)<br />
Tripod Socket .25 in. (6 mm) threaded<br />
Video Out NTSC or PAL<br />
Operating Temperature 32 to 104° F (0 to 40° C)<br />
81
82<br />
Chapter 11<br />
Specifications—<strong>Kodak</strong> EasyShare <strong>CX4310</strong> <strong>digital</strong> <strong>camera</strong><br />
Power Batteries 2 Ni-MH, AA rechargeable<br />
2 <strong>Kodak</strong> AA <strong>digital</strong> <strong>camera</strong> batteries<br />
<strong>Kodak</strong> CRV3 lithium battery<br />
2 Lithium, AA<br />
Alkaline batteries not recommended<br />
Battery pack,<br />
<strong>camera</strong> dock only<br />
<strong>Kodak</strong> EasyShare Ni-MH rechargeable<br />
battery pack, recharge in <strong>camera</strong> dock<br />
only.<br />
Dock provides power to the <strong>camera</strong>.<br />
3V, DC power in Optional AC adapter available (see<br />
page 87)<br />
Lens Type Optical quality glass<br />
Maximum<br />
Aperture<br />
f/3.5<br />
Zoom, 2X 2X Digital zoom<br />
Focal Length 36 mm (equivalent to 35 mm <strong>camera</strong>)<br />
Focus Distance 11.8 in. (300 mm) to infinity<br />
Focus Distance,<br />
Close-Up<br />
5.9 to 19.7 in. (150 to 500 mm)<br />
Dimensions Width 4.3 in. (109 mm)<br />
Length 1.6 in. (41 mm)<br />
Height 2.6 in. (66 mm)<br />
Weight 7.1 oz (200 g) without batteries or card
Chapter 11<br />
Original Factory Settings—Camera<br />
Feature Factory Setting<br />
Date/Time 2001/1/1; 12:00<br />
Date Stamp Off<br />
Exposure Compensation 0<br />
Flash Auto<br />
Image Storage Auto<br />
Liveview Off<br />
Orientation Sensor On<br />
Print Quantity 1<br />
Quality Best 3.2 MP, low compression<br />
Quickview On<br />
Self Timer Off<br />
Slide Show Interval 5 seconds<br />
Video Out NTSC<br />
Upgrading Your Software and Firmware<br />
Take advantage of the latest enhancements to your <strong>Kodak</strong> software and <strong>camera</strong><br />
firmware. Software refers to the applications included on the <strong>Kodak</strong> EasyShare<br />
software CD. Camera firmware is the internal software that runs on the <strong>camera</strong>.<br />
To download the latest versions of software and firmware, go to: http://<br />
www.kodak.com/go/cx4310downloads<br />
83
84<br />
Chapter 11<br />
Tips, Safety, Maintenance<br />
� Always follow basic safety precautions. Refer to the “Important Safety<br />
Instructions” booklet packed with your <strong>camera</strong>.<br />
� Do not allow any chemicals, such as suntan lotion, to come into contact<br />
with the painted surface of the <strong>camera</strong>.<br />
� If the <strong>camera</strong> has been subjected to inclement weather or you suspect<br />
water has gotten inside the <strong>camera</strong>, turn off the <strong>camera</strong> and remove the<br />
battery and card. Allow all components to air-dry for at least 24 hours<br />
before using the <strong>camera</strong> again.<br />
� Clean the lens and LCD:<br />
1 Blow gently on the lens or LCD to remove dust and dirt.<br />
2 Moisten the lens or LCD by breathing lightly on it.<br />
3 Wipe the lens or LCD gently with a soft, lint-free cloth or an untreated<br />
lens-cleaning tissue.<br />
Do not use cleaning solutions unless they are designed specifically for<br />
<strong>camera</strong> lenses. Do not wipe the <strong>camera</strong> lens or LCD with chemically<br />
treated eyeglass lens tissue. It may scratch the lens.<br />
� Clean the outside of the <strong>camera</strong> by wiping with a clean, dry cloth. Never use<br />
harsh or abrasive cleaners or organic solvents on the <strong>camera</strong> or any of its<br />
parts.<br />
� Service agreements are available in some countries. Please contact a dealer<br />
of <strong>Kodak</strong> products for more information.<br />
� For <strong>digital</strong> <strong>camera</strong> disposal or recycling information, please contact your<br />
local authorities. In the US, visit the Electronics Industry Alliance Web site<br />
at www.eiae.org or the <strong>Kodak</strong> Web site at<br />
www.kodak.com/go/cx4310support.
Chapter 11<br />
Picture Storage Capacities<br />
Picture file sizes can vary. You may be able to store more or fewer pictures.<br />
Purchase cards on our Web site at http://www.kodak.com/go/<br />
cx4310accessories.<br />
Store this many pictures at:<br />
Best Better Good<br />
16 MB internal memory 14 29 59<br />
8 MB MMC/card 7 14 29<br />
16 MB card 14 29 59<br />
32 MB card 29 59 120<br />
64 MB card 59 120 240<br />
96 MB card 90 180 360<br />
192 MB card 180 360 720<br />
Locating Pictures on an MMC/SD Card<br />
Pictures stored on MMC/SD Cards use a standard agreed upon by many <strong>camera</strong><br />
manufacturers. This lets you use the cards in different <strong>camera</strong>s. If you use a<br />
card reader to retrieve your files, the following description of the card file<br />
structure may be helpful.<br />
MISC folder—contains the order files created when you use the Share<br />
feature to tag files for printing, emailing, and as Favorites.<br />
SYSTEM folder—used for updating <strong>camera</strong> firmware.<br />
DCIM folder—root level folder, contains the 100K4310 folder. Each time you<br />
turn on the <strong>camera</strong> or insert a different card, any empty folders within the<br />
DCIM folder are removed.<br />
100K4310 subfolder—contains all the pictures on the card.<br />
85
86<br />
Chapter 11<br />
Card File Naming Conventions<br />
� Pictures are named DCP_nnnn.JPG, and are numbered in the order in<br />
which they are taken. The first picture is named DCP_0001.JPG; the highest<br />
number allowed is DCP_9999.JPG.<br />
� When a card contains a picture named DCP_9999.JPG in the<br />
\DCIM\100K4310 folder, subsequent pictures appear in a new folder<br />
(\DCIM\101K4310), beginning with picture DCP_0001.JPG.<br />
� Even if you transfer pictures to the computer or delete pictures from the<br />
<strong>camera</strong>, the <strong>camera</strong> continues to use consecutive numbers for all<br />
subsequent pictures. For example, if the last picture taken was<br />
DCP_0007.JPG and you delete it, the next picture you take is named<br />
DCP_0008.JPG.<br />
� When you insert a different card into your <strong>camera</strong>, the next picture number<br />
is defined by incrementing the higher of the last picture taken by the<br />
<strong>camera</strong>, or the highest existing picture number in the folder.<br />
� If you use the card in a <strong>camera</strong> other than the <strong>Kodak</strong> EasyShare <strong>CX4310</strong><br />
<strong>digital</strong> <strong>camera</strong>, and that <strong>camera</strong> manufacturer adheres to this file structure<br />
standard, the \DCIM folder contains a folder named by that <strong>camera</strong>. For<br />
more information, refer to the documentation that accompanied that<br />
<strong>camera</strong>.
Chapter 11<br />
Battery-Saving Features<br />
The LCD or <strong>camera</strong> turn off when the <strong>camera</strong> has been inactive.<br />
Camera state If no activity, LCD<br />
turns off after:<br />
Optional AC Adapter<br />
If no activity,<br />
<strong>camera</strong> turns<br />
off after:<br />
LCD Off N/A<br />
LCD On; Liveview,<br />
Review, any menu<br />
screen<br />
1 minute<br />
Quickview on 5 seconds<br />
Slide show 1 minute after slide<br />
show ends<br />
Any state N/A 1 hour<br />
(Camera off)<br />
8 minutes<br />
(Auto Power-off)<br />
To reactivate<br />
<strong>camera</strong>:<br />
Press any button<br />
To save battery power, purchase a <strong>Kodak</strong> 3-volt AC adapter on our Web site at<br />
http://www.kodak.com/go/cx4310accessories.<br />
� Use the 3-volt AC adapter when reviewing,<br />
copying, and transferring pictures.<br />
DC-in<br />
port<br />
Turn power<br />
switch off and on<br />
� Connect the 3-volt AC adapter to the<br />
<strong>camera</strong>’s DC-in port and to a power outlet.<br />
CAUTION:<br />
Do not use the 3-volt AC adapter with a <strong>Kodak</strong> EasyShare<br />
<strong>camera</strong> dock; it is NOT compatible.<br />
87
88<br />
Chapter 11<br />
Camera Dock II Specifications<br />
Specifications—<strong>Kodak</strong> EasyShare <strong>camera</strong> dock II<br />
Communication with<br />
computer<br />
Dimensions<br />
(without insert)<br />
USB Cable included with <strong>Kodak</strong> EasyShare<br />
<strong>camera</strong>s<br />
Width/Depth/<br />
Height<br />
Indicator lights Power/<br />
Transfer<br />
Charging, 3<br />
lights<br />
5.9 in. /4.1 in. /1.4 in.<br />
(150 mm/104 mm/35 mm)<br />
Weight 5.5 oz (156 g)<br />
Indicates operating/transferring<br />
pictures<br />
Indicate charging and error conditions<br />
Input voltage 7 ±0.7 V DC<br />
Power DC input AC adapter included with <strong>camera</strong> dock
Chapter 11<br />
FCC Compliance and Advisory<br />
<strong>Kodak</strong> EasyShare <strong>CX4310</strong> <strong>digital</strong> <strong>camera</strong><br />
Tested to comply with FCC Standards.<br />
FOR HOME OR OFFICE USE<br />
This equipment has been tested and found to comply with the limits for a Class<br />
B <strong>digital</strong> device, pursuant to Part 15 of the FCC Rules. These limits are designed<br />
to provide reasonable protection against harmful interference in a residential<br />
installation.<br />
This equipment generates, uses, and can radiate radio frequency energy and, if<br />
not installed or used in accordance with the instructions, may cause harmful<br />
interference to radio communications. However, there is no guarantee that<br />
interference will not occur in a particular installation.<br />
If this equipment does cause harmful interference to radio or television<br />
reception, which can be determined by turning the equipment off and on, the<br />
user is encouraged to try to correct the interference by one or more of the<br />
following measures: 1) reorient or relocate the receiving antenna; 2) increase<br />
the separation between the equipment and the receiver; 3) connect the<br />
equipment to an outlet on a circuit different from that to which the receiver is<br />
connected; 4) consult the dealer or an experienced radio/TV technician for<br />
additional suggestions.<br />
Any changes or modifications not expressly approved by the party responsible<br />
for compliance could void the user’s authority to operate the equipment.<br />
Where shielded interface cables have been provided with the product or<br />
specified additional components or accessories elsewhere defined to be used<br />
with the installation of the product, they must be used in order to ensure<br />
compliance with FCC regulation.<br />
Canadian DOC Statement<br />
DOC Class B Compliance—This Class B <strong>digital</strong> apparatus complies with<br />
Canadian ICES-003.<br />
Observation des normes-Class B—Cet appareil numérique de la classe B<br />
est conforme à la norme NMB-003 du <strong>Canada</strong>.<br />
89
A<br />
about<br />
<strong>camera</strong> information, 46<br />
picture information, 35<br />
AC adapter, optional, 87<br />
accessories<br />
battery, 13<br />
printer dock, 52<br />
accessories, buying, 77<br />
adjusting<br />
exposure, 23<br />
picture quality,<br />
resolution, 24<br />
alkaline batteries, warning, 4<br />
arrow button, 5<br />
auto<br />
flash, 18<br />
power-off, 87<br />
storage location, 10<br />
B<br />
backlit scenes, 23<br />
batteries<br />
alkaline warning, 4<br />
capacities, 12<br />
charging battery pack, 58<br />
Index<br />
expected life, 12<br />
extending life, 13<br />
loading, 4<br />
loading battery pack, 56<br />
power level icon, 27<br />
power status, 8<br />
replacement types, 12<br />
safety, 13<br />
buttons, <strong>camera</strong>, ii<br />
C<br />
cables<br />
power, <strong>camera</strong> dock, 55<br />
power, <strong>camera</strong> optional, 87<br />
USB, connect <strong>camera</strong>, 51<br />
USB, connect dock, 55<br />
video, 33<br />
<strong>camera</strong> dock<br />
charging battery pack, 58<br />
docking <strong>camera</strong>, 57<br />
earlier model, 60<br />
installing insert, 54<br />
lights status, 75<br />
package contents, 53<br />
power connection, 55<br />
specifications, 88<br />
91
transferring pictures, 59<br />
USB connection, 55<br />
using, 53<br />
Canadian compliance, 89<br />
cap, lens, 3<br />
capacity<br />
internal memory/cards, 85<br />
capture mode<br />
accessing menus, 20<br />
overview, 11<br />
returning from other<br />
modes, 20<br />
taking pictures, 15<br />
card, memory, 9, 10, 85, 86<br />
caring for your <strong>camera</strong>, 84<br />
changing storage location, 10<br />
charging battery pack, 58<br />
charging lights, <strong>camera</strong> dock<br />
II, 58, 75<br />
cleaning <strong>camera</strong>, lens, 84<br />
clock, setting, 7<br />
close-up scenes, 21<br />
communication problems, 66<br />
compensation, exposure, 23<br />
computer<br />
connecting <strong>camera</strong>, 51<br />
connecting <strong>camera</strong> dock, 55<br />
system requirements, 47<br />
transferring pictures, 52, 59<br />
92<br />
Index<br />
connecting the <strong>camera</strong><br />
first, important note, 51<br />
to <strong>camera</strong> dock, 57<br />
to computer, USB cable, 51<br />
connecting the <strong>camera</strong> dock, 55<br />
contents<br />
<strong>camera</strong> dock package, 53<br />
<strong>camera</strong> package, 2<br />
copying pictures<br />
memory to card, 34<br />
to computer, 52, 59<br />
CRV3 battery, installing, 4<br />
custom insert, 54<br />
customer support numbers, 78<br />
customizing <strong>camera</strong> settings, 41<br />
D<br />
date<br />
imprinting on pictures, 25<br />
setting, 7<br />
date stamp, 25<br />
DCIM folder, card, 85<br />
defaults<br />
changing print quantity, 42<br />
original factory settings, 83<br />
delete button, ii<br />
deleting<br />
by formatting, 45<br />
during quickview, 17
last picture, 17<br />
pictures, 30<br />
protected pictures, 31<br />
<strong>digital</strong> pictures, using, 52<br />
<strong>digital</strong> zoom, 19<br />
display problems, 63<br />
displaying pictures, 27<br />
distance limits, close-up, 21<br />
dock<br />
printer, 52<br />
dock insert<br />
custom, 2<br />
universal, 54<br />
dock, <strong>camera</strong>. See <strong>camera</strong> dock<br />
downloading<br />
pictures, 52, 59<br />
software/firmware, 83<br />
E<br />
EasyShare software,<br />
installing, 49<br />
email icon, 27<br />
emailing pictures, 39<br />
error light, <strong>camera</strong> dock, 76<br />
error messages, 69<br />
exposure, adjusting, 23<br />
external video device<br />
setting video out, 44<br />
Index<br />
viewing pictures on, 33<br />
F<br />
favorites<br />
icon, 27<br />
tagging for, 40<br />
FCC compliance, 89<br />
features, <strong>camera</strong> overview, i—ii<br />
file names, card, 86<br />
fill flash, 18<br />
firmware<br />
upgrading, 77, 83<br />
version, 46<br />
flash button, ii<br />
flash, setting, 18<br />
focus distance, close-up, 21<br />
folders, card, 85<br />
formatting, memory/cards, 45<br />
four-way arrow button, 5<br />
G<br />
guidelines, battery, 13<br />
H<br />
help<br />
software, 78<br />
telephone support, 78<br />
troubleshooting<br />
93
94<br />
<strong>camera</strong>, 61—73<br />
troubleshooting <strong>camera</strong><br />
dock, 74—76<br />
web links, 77<br />
with computers, 77<br />
I<br />
icons<br />
<strong>camera</strong> status, 8<br />
capture menus, 20<br />
picture information, 27<br />
review menus, 28<br />
setup menus, 41<br />
share menus, 37<br />
image storage menu, 10<br />
information<br />
about <strong>camera</strong>, 46<br />
about pictures, 35<br />
product support, 77<br />
insert, for <strong>camera</strong> dock<br />
custom, 54<br />
universal, 53, 54<br />
installing<br />
batteries, 4<br />
battery pack, 56<br />
insert, <strong>camera</strong> dock, 54<br />
MMC/SD card, 9<br />
software, 49<br />
Index<br />
internal memory<br />
change storage location, 10<br />
format, 45<br />
internet, helpful web links, 77<br />
K<br />
<strong>Kodak</strong> <strong>digital</strong> <strong>camera</strong> batteries, 4<br />
<strong>Kodak</strong> EasyShare software, 52<br />
<strong>Kodak</strong> software<br />
getting help, 52, 78<br />
installing, 49<br />
transferring pictures, 52<br />
<strong>Kodak</strong> web sites, 77<br />
L<br />
language, setting, 6<br />
large print, this user guide, 1<br />
LCD (Liquid Crystal Display)<br />
display languages, 6<br />
error messages, 69<br />
picture location icon, 8<br />
reviewing last picture, 17<br />
status bar, 8<br />
turning off quickview, 43<br />
turning on liveview, 43<br />
using as viewfinder, 16<br />
viewing pictures, 29<br />
lens
cleaning, 84<br />
specifications, 82<br />
lens cap, 3<br />
lights<br />
<strong>camera</strong> dock, 60<br />
<strong>camera</strong> dock II, 58, 75—76<br />
ready, <strong>camera</strong>, 15, 72<br />
self timer, <strong>camera</strong>,i,22<br />
links, world wide web, 77<br />
liveview<br />
turning on, 43<br />
using LCD as viewfinder, 16<br />
loading<br />
batteries, 4<br />
battery pack, 56<br />
insert, <strong>camera</strong> dock, 54<br />
MMC/SD card, 9<br />
software, 49<br />
loop, slide show, 32<br />
M<br />
Macintosh<br />
installing software on, 49<br />
system requirements, 47, 48<br />
magnify picture, 30<br />
maintenance, <strong>camera</strong>, 84<br />
memory<br />
internal or card, 10<br />
storage location setting, 10<br />
Index<br />
memory card<br />
inserting, 9<br />
storage capacities, 85<br />
menu button, ii<br />
menus<br />
capture mode, 20<br />
image storage, setting, 10<br />
review mode, 28<br />
setup mode, 41<br />
share mode, 37<br />
tagging pictures, 37<br />
taking pictures, 20<br />
MISC folder, card, 85<br />
MMC/SD card<br />
file name conventions, 86<br />
file structure, 85<br />
formatting, 45<br />
inserting, 9<br />
picture location, 10<br />
printing from, 52<br />
setting storage location, 10<br />
storage capacities, 85<br />
troubleshooting<br />
problems, 68<br />
mode indicator icon, 27<br />
modes<br />
<strong>camera</strong>, overview, 11<br />
capture, 15, 20<br />
review, 27<br />
95
setup, 41<br />
share, 37<br />
monitor, requirements, 47<br />
multi-up, viewing thumbnails, 29<br />
N<br />
NTSC, video out setting, 44<br />
O<br />
OK button, ii, 5<br />
on/off switch, i, 5<br />
orientation sensor, 26<br />
overview<br />
<strong>camera</strong> features, i—ii<br />
<strong>camera</strong> modes, 11<br />
P<br />
package contents<br />
<strong>camera</strong>, 2<br />
<strong>camera</strong> dock, 53<br />
PAL, video out setting, 44<br />
picture information icons, 27<br />
pictures<br />
close-ups, 21<br />
copying, 34<br />
date imprint, 25<br />
deleting, 30<br />
downloading, 52, 59<br />
e-mailing, tagged, 39<br />
96<br />
Index<br />
file naming, 86<br />
information, viewing, 35<br />
locating on card, 86<br />
magnifying, 30<br />
printing, 52<br />
printing tagged, 38<br />
protecting, 31<br />
quality settings, 24<br />
reviewing, 17, 27<br />
status info, 27<br />
storage capacity, 85<br />
storage location, 10<br />
tagging, 38, 39, 40<br />
taking, 15<br />
transferring to<br />
computer, 52, 59<br />
using on computer, 52<br />
viewing, 29, 33<br />
power<br />
battery status, 8<br />
<strong>camera</strong> dock, 55<br />
optional AC adapter,<br />
<strong>camera</strong>, 87<br />
turning <strong>camera</strong> on, 5<br />
power light, <strong>camera</strong> dock, 75<br />
powerdown, automatic, 87<br />
print icon, 27<br />
print sizes, per quality setting, 24<br />
printer dock, 52
printing<br />
changing default quantity, 42<br />
from a card, 52<br />
optimizing printer, 77<br />
pictures, 52<br />
tagged pictures, 38<br />
this user guide, 1<br />
without a computer, 52<br />
protect icon, 27<br />
protecting pictures, 31<br />
Q<br />
quality<br />
print with <strong>digital</strong> zoom, 19<br />
settings, 24, 85<br />
quickview<br />
deleting pictures, 17<br />
reviewing last picture, 17<br />
turning off, 43<br />
R<br />
readme file, 61<br />
ready light<br />
status, 72<br />
taking pictures, 15<br />
red-eye, flash, 18<br />
register your <strong>camera</strong>, web, 77<br />
regulatory information, 89<br />
removeable memory card, 9<br />
Index<br />
requirements<br />
Mac OS, 47, 48<br />
Windows OS-based, 47<br />
resolution, setting, 24<br />
return to previous menu, 42<br />
review button, ii<br />
review mode<br />
getting there, 27<br />
menus, 28<br />
overview, 11<br />
picture information, 27<br />
reviewing pictures, 27<br />
reviewing pictures<br />
as you take them, 17<br />
deleting, 30<br />
magnifying, 30<br />
on LCD, 29<br />
picture information, 35<br />
protecting, 31<br />
slide show, 31<br />
running slide show, 31<br />
S<br />
safety, 84<br />
batteries, 13<br />
SD card, inserting, 9<br />
self timer, 22<br />
service and support, 78<br />
setting<br />
97
clock, 7<br />
date and time, 7<br />
flash, 18<br />
language, 6<br />
NTSC/PAL, 44<br />
picture quality, 24<br />
picture storage location, 10<br />
resolution, 24<br />
self timer, 22<br />
video out, 44<br />
setup mode<br />
getting there, 41<br />
overview, 11<br />
returning to previous, 42<br />
using, 41<br />
share button, ii<br />
share mode<br />
email tagging, 39<br />
getting there, 37<br />
overview, 11<br />
print tagging, 38<br />
tagging favorites, 40<br />
shutoff, auto, 87<br />
shutter button<br />
location, ii<br />
problems, 62<br />
self timer delay, 22<br />
taking pictures, 15<br />
sleep mode, 87<br />
98<br />
Index<br />
slide show<br />
continuous loop, 32<br />
problems, 65<br />
running, 31<br />
software<br />
help, 52, 78<br />
installing, 49<br />
upgrading, 77, 83<br />
specifications<br />
<strong>camera</strong>, 81<br />
<strong>camera</strong> dock II, 88<br />
Mac OS, 47, 48<br />
Windows OS-based, 47<br />
status, <strong>camera</strong>, 8<br />
storage capacity, memory, 85<br />
storage location, 10<br />
strap, wrist, 3<br />
support, technical, 77—80<br />
system folder, card, 85<br />
system requirements<br />
Mac OS, 47, 48<br />
Windows OS-based, 47<br />
T<br />
tagging pictures<br />
for email, 39<br />
for favorites, 40<br />
for print, 38<br />
print quantity default, 42
share mode, 37<br />
when and where, 37<br />
taking pictures<br />
capture mode, 15<br />
changing options, 20—26<br />
close-up, 21<br />
menus, 20<br />
self timer, 22<br />
setting quality, 24<br />
using LCD as viewfinder, 16<br />
telephone support, 78<br />
television, viewing pictures, 33<br />
thumbnails, viewing on LCD, 29<br />
time, setting, 7<br />
timer, shutter delay, 22<br />
tips<br />
battery guidelines, 13<br />
maintenance, 84<br />
readme file, 61<br />
safety, 84<br />
transfer light, <strong>camera</strong> dock, 75<br />
transferring pictures to<br />
computer, 52, 59<br />
trash can, deleting, 17, 30<br />
tripod, connecting, i, 59<br />
troubleshooting problems<br />
<strong>camera</strong>, 61—73<br />
<strong>camera</strong> dock, 74—76<br />
<strong>camera</strong> dock lights, 75—76<br />
Index<br />
<strong>camera</strong> ready light, 72<br />
communications, 66<br />
error messages, 69<br />
SD/MMC card, 68<br />
turning <strong>camera</strong> on and off, 5<br />
U<br />
universal insert, 54<br />
upgrading software,<br />
firmware, 83<br />
URLs, <strong>Kodak</strong> web sites, 77<br />
USB cable, connector, i, 51, 55<br />
V<br />
video out, setting, 33, 44<br />
viewfinder<br />
lens, i<br />
taking pictures, 15<br />
using LCD instead, 16<br />
viewing<br />
<strong>camera</strong> information, 46<br />
picture information, 35<br />
viewing picture<br />
after taking, 17<br />
magnified, 30<br />
on an external device, 33<br />
on LCD, 29<br />
99
W<br />
web links, 77<br />
Windows<br />
installing software, 49<br />
system requirements, 47<br />
wrist strap, attaching, 3<br />
Z<br />
zoom<br />
button, ii, 5<br />
optical, <strong>digital</strong>, 19<br />
100<br />
Index