Create successful ePaper yourself
Turn your PDF publications into a flip-book with our unique Google optimized e-Paper software.
1.0 Key Features<br />
<strong>Addonics</strong><br />
T E C H N O L O G I E S<br />
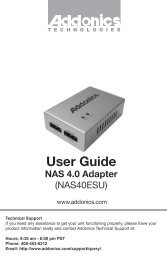
NAS Adapter<br />
Model: NASU2<br />
User Manual<br />
• Convert any USB 2.0 / 1.1 mass storage device into a Network Attached<br />
Storage device<br />
• Great for adding <strong>Addonics</strong> Storage Tower, Storage Rack or any<br />
<strong>Addonics</strong> USB storage device onto the network<br />
• USB port can be use to power most 2.5" USB hard drive or any low<br />
power USB devices<br />
• Connect a USB printer to share it over the network<br />
• One Fast Ethernet 10/100Mbps port<br />
• Can be set as a DHCP server or client depending on whether a DHCP<br />
server is present<br />
• Support Samba server, by which the server hosts 64 clients on line<br />
• Support FTP server allowing up to 8 FTP users at the same time<br />
• Built-in Bit torrent client to download files directly off the internet onto<br />
the attached USB storage device<br />
• UPnP AV server can be used to share photo/music files stored on the<br />
file server with XBOX 360 video game consoles connected to the LAN<br />
• Supports USB 2.0 / 1.1 specification.<br />
• User Management capability to allow read only or read/write access to<br />
folders<br />
• Administrative management access via web browser with password<br />
security.<br />
• Compatible with Windows 2000/XP/Vista, Mac 10.5.4 and above, and<br />
Linux 2.6.x and above<br />
The NAS adapter is a flexible, economical and powerful unit for your Network.<br />
Follow the instructions to help you connect, setup, and configure it.<br />
FCC Warning Statement<br />
This equipment has been tested and found to comply with the limits for a class B digital<br />
device pursuant to Part 15 of the FCC rules. These limits are designed to provide<br />
reasonable protection against harmful interference in a residential installation. This<br />
equipment generates, uses and can radiate radio frequency energy. If not installed and<br />
used in accordance with the instructions, it may cause harmful interference to radio<br />
communications. However, there is no guarantee that interference will not occur in a<br />
particular installation. If the equipment does cause harmful interference to radio or<br />
television reception, which can be determined by turning the equipment on and off, the user<br />
is encouraged to try and correct the interference by one or more of the following<br />
suggestions.<br />
Reorient or relocate the receiving antenna<br />
Increase the distance between the equipment and the receiver<br />
Connect the equipment to a different power outlet other than the one where receiver is<br />
connected<br />
Consult a certified television or radio technician<br />
Note:<br />
Any external USB storage device that you connect to the NAS<br />
adapter must be first initialized and formatted. This means that if<br />
you are connecting an external USB drive with data on it, you will<br />
need to make a backup of this data and transfer them back to the<br />
USB drive after the drive finishes the formatting by the NAS<br />
adapter.
Network Environment<br />
There are 3 different setup conditions you can choose:<br />
A. Setup NAS Adapter as a DHCP Client:<br />
If your NAS adapter is connected to a LAN network with an active DHCP server,<br />
it will obtain an IP address from DHCP server automatically.<br />
Note:<br />
“SDisk utility” was written with JAVA script, please make sure your<br />
computer has installed JAVA before, if not please install the JAVA script<br />
form the CD drive.<br />
B. Setup NAS Adapter as DHCP Server:<br />
If your LAN network does not have an active DHCP server, NAS adapter will<br />
immediately act as DHCP server and assign itself an IP address for installation.<br />
2. When NAS Adapter has been found, click “Connect” to enter configurations.<br />
C. Setup NAS Adapter in Static IP environment:<br />
You need first configure the IP address for NAS adapter to operate in the static<br />
IP environment. For Configuring details, please refer to “IP Config” setup page.<br />
2.0 NAS Adapter Hardware Installation<br />
Connections:<br />
1. Connect external USB Storage device into USB port of the NAS<br />
Adapter. Power on the USB Storage device.<br />
2. Connect LAN cable via LAN switch and Router.<br />
3. Connect 5V power adapter to power up the NAS adapter<br />
Open NAS Adapter web GUI by using web browser.<br />
1. Open web browser and type default host name “storage” in the<br />
search bar.<br />
2. Default login is “admin” for both User name and password. Click<br />
“OK” to enter configurations.<br />
NAS Adapter connected directly to a computer’s NIC card<br />
If you connect the NAS adapter to a computer directly, the adapter will act as a<br />
DHCP server, assigning itself an IP address automatically and also will assign an<br />
IP address to the computer’s network card.<br />
NAS Adapter connected to a Router or Switch<br />
If your NAS adapter is connected to a LAN network with an active DHCP server,<br />
it will obtain an IP address from DHCP server automatically. Or if your LAN<br />
network does not have an active DHCP server, NAS adapter will immediately act<br />
as DHCP server and assign itself an IP address for installation<br />
3.0 Search NAS Adapter by SDisk Utility<br />
1. Browse the CD enclosed in the product package. Copy and paste “SDisk<br />
Utility” in to your computer then double click the icon to start search.
Status<br />
Provide the basic information for NAS Adapter.<br />
Identification<br />
You can change and modify your host, group name and password from this<br />
page. Click “Apply” to save the setting.<br />
Host name: This is used to identify your device on the network. If you prefer<br />
a different name, type in the new name and click “Apply” to save setting.<br />
Date/ Time Setting<br />
You can change time setting from this page. Clicks “Apply” to save the setting.<br />
By default SNTP is set to Network Time Service otherwise select synchronize to<br />
PC. If internet access is available, we recommended setting SNTP to Network<br />
Time Service instead.<br />
Group Name: This should be the same as your workgroup. In general, the<br />
default “WORKGROUP” will be OK. But if your workstation belongs to<br />
different workgroup, type in the correct group name to modify.<br />
For Window OS, right click on “My computer” and choose “Properties”, go to<br />
the computer name tab to see your current workgroup.<br />
If using a Mac OS system, to join a Windows workgroup, open the directory<br />
access utility (under Applications-> utilities). Select SMB and click configure to<br />
modify the settings (administrator access required to access this option.)<br />
Note: We strongly suggest you to change the password as soon as you logged<br />
in, to prevent unauthorized access.
IP Configuration<br />
By default, “IP Config” is set to “Automatic IP”. This will allow the NAS adapter to<br />
obtain its IP address automatically. If you prefer setting it manually, select the<br />
static IP option, enter your own value and click “Apply” to confirm the new<br />
setting.<br />
Disk Utility<br />
In this page, you can manage hard disk settings of the USB storage device.<br />
Format: For first time installation, you need to format hard disk into FAT32<br />
file system. Formatting the drive will erase all data on the hard drive.<br />
Warning: For hard drives with data on it, be fore you have a backup<br />
before proceeding to format the hard drive!<br />
Tip: You can transfer back the backup data to the NAS Public folder for<br />
sharing via the network or USB connection of the USB Storage device.<br />
Sleep Time: This is to select hard disk sleeping mode.<br />
Scan Disk: After the scan, it will show file content information and health<br />
status for the hard disk.<br />
Maintenance<br />
This page allows you to update the NAS adapter firmware, to go back to factory<br />
default settings or reboot NAS system.<br />
Firmware update: Follow the steps below to update the loader and firmware<br />
for NAS adapter.<br />
1. <strong>Download</strong> the latest firmware.<br />
2. Store the firmware file on your computer and decompress them if<br />
necessary.<br />
3. Browse your system and locate the firmware (BIN file).<br />
4. Click on “Upload”.<br />
5. Confirm the pop-up massage to start the update.<br />
6. Wait and DO NOT click anywhere else or turn off the power. The<br />
upgrade might take a few minutes.<br />
7. Once the update is done, it will prompt you to reboot the device.<br />
8. Click on ”reboot” to restart the device.<br />
9. Wait for about one minute and then go to the status page to confirm the<br />
update was successful.<br />
Factory defaults: If you experience problems after a firmware update, it is<br />
recommended to reset all settings.<br />
Note: Resetting the device will remove all folder from the sharing list, erase<br />
the FTP accounts, and reset all other settings! Please do not power off or<br />
disconnect NAS adapter connection during the firmware update process.<br />
System reboot: This can be used to restart the network drive after a<br />
firmware update.
Click “Modify” to share a folder.<br />
SMB Server<br />
SMB server allows you to share data or files through the network LAN. When a<br />
USB storage device is connected, a default Public folder is available to be shared<br />
among Guest users. A default Guest user is also created.<br />
Note: Only use English alphabet for folder names and no special characters<br />
when creating new folders.<br />
Select “User1” from Folder List and click the “<br />
List”.<br />
” to add user on “Sharing<br />
How to create a user<br />
Click on the “Add” button and type new account name and password. Click<br />
“OK”. The NAS adapter will also create a SAMBA folder named “User1”.<br />
To Access the folder<br />
From the Windows start button, type “Run”, and type \\ follow by the IP<br />
address.<br />
Eg:\\192.168.1.121 and click OK to continue.
Type “User1” and password to login.<br />
Enter new password then click “Apply” to save setting.<br />
Now you have set up the folder that you wish to share on your NAS adapter. This<br />
folder can be access from other computer on your local network.<br />
How to delete a SAMBA account<br />
Select an account you wish to delete. Click “Delete” to proceed. Please<br />
note that all the data inside the folder will be lost after the delete.<br />
How to modify account password<br />
Select “User1” and then click “Modify”.
FTP Server<br />
Remember to “Enable” the FTP service on the status page, when you plan on<br />
using the FTP server.<br />
FTP server Configuration: The standard port for FTP service is 21. If<br />
required, you can change it from any port between 1025-65500. But in<br />
general, we recommended using the default port of 21.<br />
File language support: By default, the encoding is set to English. If you<br />
want to store or transfer files with a different encoding (different language),<br />
choose the corresponding language for the drop down list. In order to<br />
transfer and view the files correctly, it is important that you select the correct<br />
language!<br />
Anonymous: By default an anonymous user name has been created, it<br />
allows FTP users to login without username and password. For security<br />
reasons, it is best to add a password!<br />
Note: To be able share FTP resource you need a router to assign the IP address.<br />
Enter a name and password for the new FTP account and click “Next” to<br />
continue. In the account list, you can see an overview of the existing<br />
accounts and status. Click “Apply”.<br />
For FTP file transfers, we recommend to use other dedicated FTP client<br />
software e.g.: SyncQuick FTP, Cute FTP etc.<br />
Note: When creating FTP accounts, please use only English alphabet and<br />
no special character or space for FTP account name.<br />
How to delete FTP account<br />
In the “Account List”, you can see an overview of the existing account and<br />
status. You can change them at any time by selecting the account and<br />
modifying, disabling or deleting it.<br />
Note: Deleting a folder will erase all the files on the hard drive that are stored<br />
inside that folder.<br />
How to create FTP account<br />
FTP allows you to share your data through the internet. An internet<br />
connection is required before setting up FTP server.<br />
Select FTP server and click the “Add” button.
Same procedure applies for the Music and Video folders.<br />
On your Xbox 360, go to “Media” tab, select either Music or Pictures and press A<br />
button of the Xbox console to continue.<br />
XBOX 360 Media Server<br />
The Media server can be used to share your photo and music files stored on the<br />
NAS adapter with an X-BOX360 video game console from Microsoft.<br />
Before you start, make sure both devices are connected to the same local<br />
network and turned on.<br />
Go to the X-BOX360 Media Server page, select the folder where your photo files<br />
is located using the drop down menu. Once you have selected the folder, click on<br />
the “Set” button. This will enable this folder as the shared folder. In the example<br />
below “PUBLIC” is Share directory.<br />
Press X button of the Xbox console to change the source and select your<br />
network drive. It should show up as storagexxx and display the folder that you<br />
have set up earlier on your NAS adapter.
Printer Server<br />
Inside the share folder, you can access your picture or music files, depending on<br />
which mode you are currently using. Select the files you would like to see or to<br />
listen, and start playback.<br />
1. Install printer driver, (for example. if Epson PL-6200L Printer is connected to<br />
the NAS adapter, you must install PL-6200L driver into the computer first.)<br />
After driver installation, click “Start” • “Setting” • “Printer and Faxes” •<br />
“Add a printer”• “Next”.
2. Connect USB printer to NAS adapter. Your network environment should be<br />
similar with diagram below:<br />
3. Select “Local printer” and click “Next” to continue.<br />
5. Enter the NAS adapter IP address then click “Next” to continue.<br />
4. Select “Create a new port type of port:” then choose “Standard TCP/IP Port”<br />
then click “Next” to continue.<br />
6. Select “Custom” and go to “Setting”.
8. Click “Finish” to complete TCP/IP printer setup.<br />
7. Select “LPR” under protocol, and give a queue name eg:LRxxx; select LPR<br />
Byte Counting Enabled then click “OK” to finish the port setting.<br />
Note: The NAS adapter printer server does not support GDI/Host-based<br />
printers. For some Multi Function Printers (MFP); scanning functions might<br />
not be functional probably. Please contact Printer Manufacture for detail<br />
Specifications.<br />
Bit Torrent server<br />
The NAS adapter supports Bit Torrent download without using PC resource.<br />
A maximum of 4 bit torrent downloads can be running at the same time.
1. Select “Bit Torrent” and select the “<strong>Download</strong> Path” you wish to use.<br />
Then click “Apply” to save setting. (DO NOT change path setting while<br />
performing BT download, otherwise downloading jobs will disappear)<br />
2. Server Port range can be from 6881 to 65535. (6881 is default setting)<br />
3. Type an upload speed limit: 0= unlimited upload speed, and 4 KB is<br />
minimum speed. Then click “Set” to save setting.<br />
Mail Notification<br />
After a download is successful, an email will be sent to the designated email<br />
address. Click “Mail setup” and input SMTP server, recipient email, SMTP<br />
A/C, Password, than click “Apply” to save setting.<br />
4. Click “Browse” and select torrent file then click “Upload” The file will<br />
show up to the download queue.<br />
Note: Jobs listed in the <strong>Download</strong> Queue will be removed when NAS<br />
adapter is turned off or USB storage is removed.
Mac installations (Mac 10.5.4 or above)<br />
Open the Mac browser “Safari” and key-in the host name of the NAS adapter (for<br />
example, “Storage-0000”). It will detect the NAS adapter automatically.<br />
3. Click on the Storage-xxxx (or the correct name of the NAS adapter).<br />
How to setup SAMBA in Mac OS X 10.5.4<br />
1. Click “Go” on the toolbar, and select ”Network” as the screenshot<br />
shown below.<br />
4. Select the folder you wish to share, and click “OK” to share the folder.<br />
2. Double Click “WORKGROUP” (or the correct group name of the NAS<br />
adapter), you will find the NAS adapter “STORAGE-xxxx” (or the<br />
correct name of the NAS adapter) in following window.<br />
5. Click “OK” to show the folder in the Desktop.
How to Map your NAS Adapter to your system.<br />
Showing NAS Disk Drive in network<br />
1. Press “Start” button on Windows desktop<br />
2. Press “Search”<br />
3. Select Folders<br />
4. Select Computer or people<br />
5. Select a computer on the network and a new window will appear.<br />
6. Key in the host name, (For example “storage-xxxx”) in the “Computer<br />
name” column and then press “Search” button. You will see the<br />
following window.<br />
Map Network Window appears<br />
Note: For faster connection and usability, we recommend that you map a drive.<br />
This creates a direct access to the shared drive from My Computer (for more<br />
information about drive mapping, refer to your Windows manual).<br />
7. Point to the “Storage-xxxx”, double click the mouse. Choose the folder<br />
you wish to map, click mouse on its right button and click “Map Network<br />
Drive”.<br />
Access SMB folder of NAS Adapter in Ubuntu 8.04<br />
First, using the console get the prerequisites for the samba file system:<br />
$ sudo aptitude install samba smbfs<br />
$ mkdir /mnt/NAS<br />
$ sudo mount.cifs //NAS_adapter_IP_address/Public /mnt/NAS -o<br />
username=Guest<br />
Search NAS Adapter by SDisk Utility in Ubuntu 8.04<br />
You are going to be installing the JRE and the web browser plug-in. Use the<br />
following command from a terminal<br />
$ sudo apt-get install sun-java6-jre sun-java6-plugin sun-java6-fonts<br />
Check that the JRE is properly installed by running the following command from<br />
a terminal.<br />
$ java -version<br />
You should get similar output<br />
java version “1.6.0•<br />
Java(TM) SE Runtime Environment (build 1.6.0-b105)<br />
Java HotSpot(TM) Client VM (build 1.6.0-b105, mixed mode, sharing)<br />
Navigate to the folder where the jar file is located<br />
$ java –jar Sdisk.jar
Technical Support<br />
If you need assistance to get your unit functioning properly, please call <strong>Addonics</strong><br />
Technical Support. Our technical staff will be happy to assist you, but they will<br />
need your help to do so. Calling the technical support staff without all the proper<br />
information can be both time consuming and frustrating. Here are some tips to<br />
help you out:<br />
MODEL NUMBER – Please have this number on hand.<br />
SYSTEM INFORMATION – Type of computer, peripherals, etc.<br />
OPERATING SYSTEM – What version of Windows<br />
WHAT’S THE TROUBLE? – Give enough information<br />
about your problem so that we can recreate and diagnose it.<br />
FREE Software Drivers for all <strong>Addonics</strong> Technologies<br />
Products are available 24 hours per day at the<br />
World Wide Web Site: www.addonics.com<br />
Contact Information<br />
Phone: 408-573-8580<br />
Fax: 408-573-8588<br />
Email: http://www.addonics.com/sales/query/<br />
Internet: http://www.addonics.com<br />
TECHNICAL SUPPORT<br />
Phone: 408-453-6212<br />
Hours: 8:30 am - 6:00 pm PST<br />
Email: http://www.addonics.com/support/query/


