Model: AEIUDMD - Addonics
Model: AEIUDMD - Addonics
Model: AEIUDMD - Addonics

Create successful ePaper yourself
Turn your PDF publications into a flip-book with our unique Google optimized e-Paper software.
<strong>Addonics</strong> IDE Ultra Digidrive Installation Manual<br />
( <strong>Model</strong>: <strong>AEIUDMD</strong> )<br />
(<strong>Model</strong>: <strong>AEIUDMD</strong>9 includes optional Flash Memory Adapters)<br />
Thank you for purchasing <strong>Addonics</strong> IDE Ultra Digidrive. This drive provides you the easiest way to<br />
Read/Write to your ATA Flash Cards. It utilizes IDE/ATAPI Interface. This drive is to be used for all<br />
systems running on the Intel or AMD (or equivalent) Microprocessors.<br />
Introduction:<br />
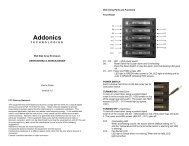
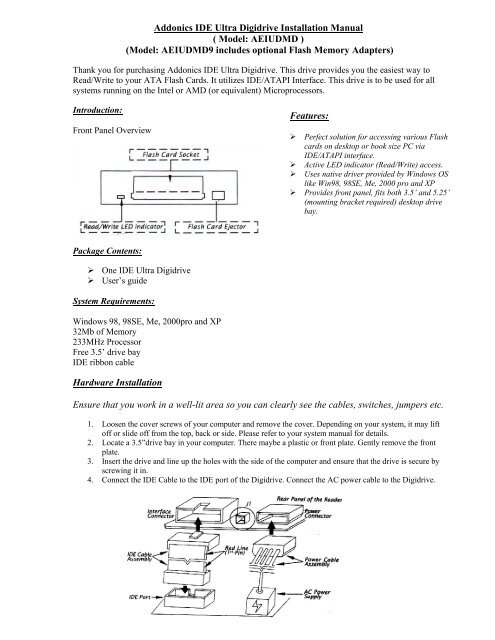
Front Panel Overview<br />
Features:<br />
‣ Perfect solution for accessing various Flash<br />
cards on desktop or book size PC via<br />
IDE/ATAPI interface.<br />
‣ Active LED indicator (Read/Write) access.<br />
‣ Uses native driver provided by Windows OS<br />
like Win98, 98SE, Me, 2000 pro and XP<br />
‣ Provides front panel, fits both 3.5’ and 5.25’<br />
(mounting bracket required) desktop drive<br />
bay.<br />
Package Contents:<br />
‣ One IDE Ultra Digidrive<br />
‣ User’s guide<br />
System Requirements:<br />
Windows 98, 98SE, Me, 2000pro and XP<br />
32Mb of Memory<br />
233MHz Processor<br />
Free 3.5’ drive bay<br />
IDE ribbon cable<br />
Hardware Installation<br />
Ensure that you work in a well-lit area so you can clearly see the cables, switches, jumpers etc.<br />
1. Loosen the cover screws of your computer and remove the cover. Depending on your system, it may lift<br />
off or slide off from the top, back or side. Please refer to your system manual for details.<br />
2. Locate a 3.5”drive bay in your computer. There maybe a plastic or front plate. Gently remove the front<br />
plate.<br />
3. Insert the drive and line up the holes with the side of the computer and ensure that the drive is secure by<br />
screwing it in.<br />
4. Connect the IDE Cable to the IDE port of the Digidrive. Connect the AC power cable to the Digidrive.
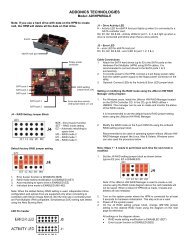
5. If there is another IDE/ATAPI device on the same IDE cable, you should adjust the jumper on J1 to fit<br />
for proper Master/Slave device setting. When (1,2) if closed, the device is Slave. When (3,4) is closed,<br />
the device is Master.<br />
6. Put the cover back on and secure the cover of your computer. Connect all the necessary cables.<br />
7. Power on the computer, the computer will auto-detect the Ultra Digidrive.<br />
8. While entering the Windows system, the system will auto-detect and register your IDE Ultra Digidrive.<br />
9. There will be a new Removable Disk Icon under My Computer.<br />
10. You may now access the IDE Ultra Digidrive, just like a regular floppy drive.<br />
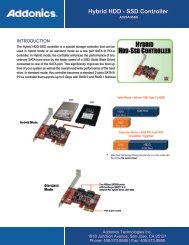
(Any Flash media below is compatible to use with the IDE Ultra Digidrive, Using the optional<br />
<strong>Addonics</strong> CF DigiAdapter and 4-in-1 DigiAdapter or equivalent third party adapter)<br />
Technical Support<br />
If you need assistance to get your unit functioning properly, please call <strong>Addonics</strong> Technical Support. Our<br />
technical staff will be happy to assist you, but they will need your help to do so. Calling the technical support<br />
staff without all the proper information can be both time consuming and frustrating. Please have all the<br />
information handy like the model number, operating system etc.<br />
Contact Information<br />
<strong>Addonics</strong> Technologies<br />
2466 Kruse Drive<br />
San Jose CA, 95131<br />
Phone: 408-433-3899<br />
Fax: 408-433-3898<br />
TECHNICAL SUPPORT<br />
Phone: 408-433-3855<br />
Email: Techinfo@addonics.com