NP AC6000 - Lionel
NP AC6000 - Lionel
NP AC6000 - Lionel
You also want an ePaper? Increase the reach of your titles
YUMPU automatically turns print PDFs into web optimized ePapers that Google loves.
72-8299-250<br />
10/08<br />
Rev. 1<br />
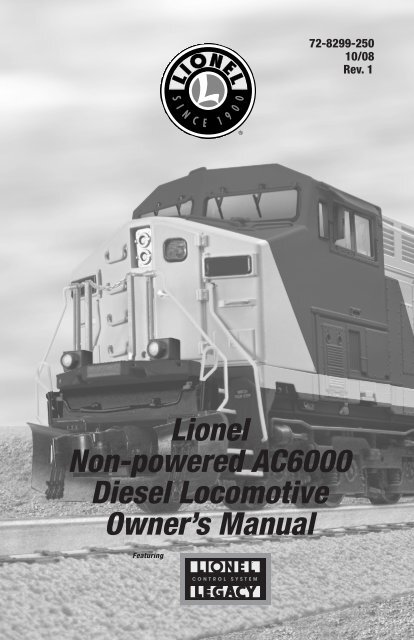
<strong>Lionel</strong><br />
Non-powered <strong>AC6000</strong><br />
Diesel Locomotive<br />
Owner’s Manual<br />
Featuring
Congratulations!<br />
Congratulations on your purchase of the <strong>Lionel</strong> Non-Powered <strong>AC6000</strong> Diesel Locomotive!<br />
On the outside, this locomotive features numerous prototypical details and expert<br />
decoration in your favorite livery. Inside the body, this locomotive is equipped with some of the<br />
most advanced controls in model railroading. The Non-Powered <strong>AC6000</strong> is ready for duty on<br />
your layout.<br />
Features of the non-powered locomotive<br />
• LEGACY Control System equipped—able to run with the new LEGACY<br />
Control system, in the TrainMaster Command Control environment, or in<br />
the conventional environment with only a standard transformer<br />
• Directional lighting including operating LED headlights<br />
• Oscillating ditch lights<br />
• Ground lights<br />
• Two ElectroCouplers<br />
• Fan-driven smoke unit<br />
• Lighted number boards<br />
• Lighted cab interior<br />
• Minimum curve: O-36<br />
The following <strong>Lionel</strong> marks may be used throughout this instruction manual and are protected under law. All<br />
rights reserved.<br />
<strong>Lionel</strong> ® , TrainMaster ® , Odyssey ® , RailSounds ® , CrewTalk , TowerCom , DynaChuff , StationSounds ,<br />
Pullmor ® , ElectroCoupler , Magne-Traction ® , CAB-1 ® Remote Controller, PowerMaster ® , <strong>Lionel</strong> ZW ® , ZW ® ,<br />
PowerHouse ® , TMCC ® , <strong>Lionel</strong>ville, Lockon ® , Wireless Tether , LionMaster ® , FatBoy , American Flyer ® ,<br />
TrainSounds , PowerMax , LEGACY , PowerMax Plus, Odyssey II , LEGACY RailSounds <br />
The name FasTrack ® is used with permission from Pitsco, Inc.<br />
2
Table of contents<br />
LEGACY Control Systems operations<br />
Get ready to run 4<br />
The LEGACY CAB-2 Remote Controller 5<br />
Ground Light Control 6<br />
Non-powered locomotive switch function overview<br />
Switch overview 7<br />
TrainMaster Command Control operations<br />
TrainMaster Command Control operations 8<br />
Ground Lights 8<br />
Operating your non-powered locomotive in the Command Control environment 9<br />
CAB-1 Remote Controller commands 10<br />
CAB-1 Remote Controller numeric keypad commands 11<br />
Assigning your non-powered locomotive a new ID# 11<br />
Building a lash-up 12<br />
Reprogramming your non-powered locomotive to restore features 13<br />
Conventional transformer operations<br />
Ground lights 14<br />
Operating your non-powered locomotive in the conventional environment 15<br />
Uncoupling your non-powered locomotive in the conventional environment 16<br />
Maintaining and servicing your non-powered locomotive<br />
Lubricating your non-powered locomotive 17<br />
Adding fluid to your non-powered locomotive’s smoke generator 18<br />
Adjusting the smoke output 19<br />
Replacing your non-powered locomotive’s LEDs and lamps 19<br />
Limited Warranty/<strong>Lionel</strong> Service 20<br />
3
LEGACY Control System operations–overview<br />
Please note that not all LEGACY products have all the features<br />
mentioned in this section.<br />
Note!<br />
This section is a brief overview of the LEGACY Control System. For a more in<br />
depth explanation of the LEGACY Control System features, please see your LEGACY<br />
Control System Operations Manual. Couple your non-powered locomotive to a<br />
powered locomotive for operation with the LEGACY Control System.<br />
GET READY TO RUN<br />
Note!<br />
Couple your non-powered locomotive to a powered locomotive for operation in the<br />
LEGACY Control System environment.<br />
Get your engine running now by following the instructions in this guide. We'll power<br />
up the track and “address the engine” so it can be controlled by your CAB-2 remote<br />
controller.<br />
Power Up The Track<br />
Refer to PowerMaster, TPC, or ZW manual for the correct method to power up. With your<br />
locomotive on the track, power-up your track to a constant 18 volts. If a circuit breaker trips when<br />
you turn on the <strong>Lionel</strong> power supply, check the wheels of your locomotive to make sure they are all<br />
securely on the track. Check to make sure the track is free of all metals that may cause a short circuit.<br />
Address Your Engine<br />
First, you must address the engine. This "tells" your CAB-2 which locomotive you want to control.<br />
This is important when you have more than one engine on your layout.<br />
To address an engine:<br />
1. Press ENG<br />
2. Press 1<br />
3. Press Start Up<br />
See reference numbers 1, 2, and 3<br />
4
LEGACY Control System operations–overview<br />
The LEGACY CAB-2 Remote Controller<br />
Main Display<br />
Displays real-time information about your railroad<br />
system. Displays real-time feedback of operation.<br />
Scroll Button<br />
Navigates through the entire list<br />
of Engines, Trains, Switches, etc.<br />
Select Button<br />
Performs addressing by<br />
3-4 digit road number.<br />
Touch Screen Key Pad<br />
A group of touch sensitive keys<br />
with icons for each function. These<br />
keys serve many purposes and<br />
their icons change accordingly.<br />
Train Brake Slider<br />
This slider is used to increase<br />
or decrease the amount of Train<br />
Brake effecting the engine or train.<br />
Train Link Button<br />
For future use.<br />
AUX-1/Thru Button<br />
Press to view the Control Panel<br />
while operating. Controls switch<br />
direction.<br />
AUX-2/Out Button<br />
Controls switch direction.<br />
Emergency Halt Button<br />
Stops everything on<br />
layout, also stops<br />
recording playback.<br />
Record Button<br />
Used to record and<br />
playback events.<br />
Velocity Throttle<br />
Throttle control over<br />
engines, also used<br />
to navigate thru info/<br />
options.<br />
Set Button<br />
Used to set Engine address and for<br />
programming.<br />
Info Button<br />
Used to enter/view the info/options of<br />
selected components.<br />
CTC Button<br />
Turns the Remote Control ON and<br />
OFF. Used to enter the Remote and<br />
Base options. Pressing CTC while<br />
in a menu will always bring you<br />
back to main screen.<br />
Soft Keys<br />
These keys directly correlate to the<br />
5 selection boxes located at the<br />
bottom of the main screen. These<br />
are also used in the info/option<br />
menus to select options.<br />
Warning Sound Controller<br />
Warning Bell and Variable Whistle/<br />
Horn control. Pull down to sound<br />
Whistle/Horn. Push up and release<br />
to trigger Warning Bell.<br />
Official R.R. Speed Control Bar<br />
Toggles the touchscreen display of R.R.<br />
preset speeds and control panel.<br />
Multi Controller<br />
Boost, Brake, and Direction control.<br />
Rock forward for Boost, rock<br />
backward for engine brake, and<br />
press down for direction change.<br />
Click-hold-and rock for absolute<br />
direction select.<br />
Front & Rear Coupler Buttons<br />
Fire couplers.<br />
Feedback Buttons<br />
Toggle ON/OFF the vibration feedback<br />
feature in the CAB-2 Remote.<br />
Low, Medium, High Momentum Buttons<br />
Used to select the desired momentum of<br />
your addressed engine/train/accessory.<br />
5
LEGACY Control System operations–overview<br />
GROUND LIGHT CONTROL<br />
Your non-powered locomotive is equipped with<br />
functional Ground Lights. There is one Ground Light<br />
located on each side of the frame, near the center of the<br />
front truck. Prototypically, it is difficult to determine<br />
when a diesel locomotive is moving at very slow speeds<br />
in extreme low light, or darkness. When operating the<br />
locomotive under these conditions, the Ground Lights<br />
provide the engineer and fireman with a visual reference<br />
to the ground and allow them to more accurately judge<br />
the motion of the locomotive.<br />
AUTO MODE is the default operation of the Ground Lights. In AUTO MODE, the Ground<br />
Lights are ON when the locomotive is stopped and they remain ON when the locomotive is<br />
in motion through speed step 24. At speed step 25 and above, the Ground Lights are OFF.<br />
When the locomotive slows to speed step 24, the Ground Lights will turn ON. In the Legacy<br />
environment, you may activate the Ground Lights when the locomotive is in motion at speed<br />
step 25 and above using the icon shown below to turn the Ground Lights ON. When the<br />
locomotive comes to a stop by either throttling down or by pressing the DIRECTION button,<br />
the Ground Lights will default to AUTO MODE. You may also set the Ground Lights so that<br />
they will remain OFF when the locomotive is stopped or in motion by using the icon shown<br />
below to turn the Ground Lights OFF. When the Ground lights are set to OFF, The AUTO<br />
MODE is de-activated.<br />
Note!<br />
FRONT<br />
Ground<br />
light<br />
For optimal effect of the functional Ground Lights, operate your non-powered<br />
locomotive in low light conditions.<br />
Ground Light ON<br />
6<br />
Ground Light OFF
Non-powered locomotive switch function overview<br />
Switch overview<br />
Note!<br />
Carefully lift up and remove the rear radiator vent to access the switches.<br />
Command Reverse Unit Switch<br />
Used to assign an ID# and reprogram the non-powered locomotive in LEGACY and Command<br />
operation when the switch is in the “PGM” position. See pages 11, 12, and 13.<br />
Smoke Unit Switch<br />
Used to turn the smoke unit function “on” and “off”. See pages 11 and 18.<br />
Rear radiator vent<br />
Command reverse<br />
unit switch<br />
REAR<br />
SMK NO SMK<br />
RUN PGM<br />
Smoke unit<br />
switch<br />
Figure 1. Switch locations<br />
7
TrainMaster Command Control operations<br />
TrainMaster Command Control operations<br />
Note! Couple your non-powered locomotive to a powered locomotive for operation in the<br />
TrainMaster Command Control environment.<br />
In addition to your transformer, to operate your non-powered locomotive in the Command<br />
Control environment, you need a Command Base (available separately, 6-12911) and a<br />
CAB-1 Remote Controller (available separately, 6-12868).<br />
Your commands are sent by the CAB-1 Remote Controller to the Command Base, which<br />
then translates the command into digital code. That code is sent through the outside rails<br />
to your locomotive, which will not respond until it recognizes its unique ID#. TrainMaster<br />
Command Control gives you the power to operate multiple Command-equipped locomotives<br />
on the same track at the same time.<br />
Ground lights<br />
Your non-powered locomotive is equipped with<br />
functional Ground Lights. There is one Ground Light<br />
located on each side of the frame, near the center of the<br />
front truck. Prototypically, it is difficult to determine<br />
when a diesel locomotive is moving at very slow speeds<br />
in extreme low light, or darkness. When operating the<br />
locomotive under these conditions, the Ground Lights<br />
provide the engineer and fireman with a visual reference<br />
to the ground and allow them to more accurately judge<br />
the motion of the locomotive.<br />
The Ground Lights function automatically and are not user controlled. With the<br />
Momentum set to “L”, the Ground Lights are ON when the locomotive is stopped and they<br />
remain ON when the locomotive is in motion through speed step 4. At speed step 5 and above,<br />
the Ground Lights are OFF. When the locomotive slows to speed step 4, the Ground Lights will<br />
turn ON.<br />
With the Momentum set to “M” or “H”, the Ground Lights are ON when the locomotive<br />
is stopped and they remain ON when the locomotive is in motion through speed step 12. At<br />
speed step 13 and above, the Ground Lights are OFF. When the locomotive slows to speed step<br />
12, the Ground Lights will turn ON.<br />
Note!<br />
FRONT<br />
Ground<br />
light<br />
For optimal effect of the functional Ground Lights, operate your non-powered<br />
locomotive in low light conditions.<br />
8
Operating your non-powered locomotive in the Command Control<br />
environment<br />
Note!<br />
Couple your non-powered locomotive to a powered locomotive for operation in the<br />
TrainMaster Command Control environment.<br />
1. Turn off track power and plug-in the Command Base. Be sure that the<br />
Command Base is connected to the outside rail or to the Common/Ground/U terminal on<br />
your track power supply.<br />
2. Place your non-powered locomotive on <strong>Lionel</strong> or <strong>Lionel</strong>-compatible O-36<br />
or larger track.<br />
3. Increase track voltage to full power (no more than 19 volts AC). On<br />
PowerMasters, slide the CMD/CONV switch to CMD. Program Track Power Controllers to<br />
Command Control operation.<br />
Caution!<br />
Power your non-powered locomotive with an alternating-current (AC)<br />
transformer only. Powering your locomotive with a direct-current (DC)<br />
transformer, or in excess of 19 volts AC, may result in damage to sensitive<br />
electronic components.<br />
4. Press ENG and enter the ID# to address your locomotive with your CAB-1<br />
Remote Controller. All <strong>Lionel</strong> locomotives come factory-programmed as ID# 1. To<br />
change the ID#, see page 11.<br />
5. Throttle up and move ‘em out! Your locomotive will respond to every command from<br />
your CAB-1 Remote Controller.<br />
9
TrainMaster Command Control operations<br />
CAB-1 Remote Controller commands<br />
The CAB-1 Remote Controller commands are detailed<br />
below.<br />
Releases the front coupler.<br />
Releases the rear coupler.<br />
Activates the numeric keypad.<br />
Toggles all directional lighting on and off.<br />
Toggles the interior cab light on<br />
and off when the locomotive is<br />
either stopped or in motion.<br />
Shuts down all PowerMasters on your railroad.<br />
Stops all TrainMaster Command Controlequipped<br />
locomotives in operation. Use HALT<br />
only in emergency situations.<br />
SET L M H<br />
10
TrainMaster Command Control operations<br />
CAB-1 Remote Controller numeric keypad commands<br />
When you press the AUX1 button on your CAB-1 Remote Controller, you turn the numeric<br />
keypad into ten command buttons. These commands are specific to your locomotive. After<br />
you press the AUX1 button, you will be able to press any numbered button until you address a<br />
different Command Control equipped product.<br />
Resets the locomotive.<br />
Turns off the smoke unit.<br />
Turns on the smoke unit if the smoke unit switch is in the SMK position. Be sure to add smoke<br />
fluid before turning on the smoke unit to prevent damage to your locomotive.<br />
Note!<br />
AUX1, 8 and 9 function only if the locomotive’s smoke unit switch is in the SMK<br />
position.<br />
Assigning your non-powered locomotive a new ID#<br />
As your roster of TrainMaster Command Control-equipped locomotives grows, you will want to<br />
give each unit a unique ID#. The locomotive will respond to commands associated with its ID#<br />
while all other units will disregard these commands.<br />
Note!<br />
To restore your non-powered locomotive’s functions, see page 13.<br />
1. Slide the Command reverse unit switch on your locomotive to the PGM position. See Figure 1 on<br />
page 7.<br />
2. Place the non-powered locomotive on the track.<br />
3. Connect the Command Base and plug it in.<br />
4. Power up the track.<br />
5. Press ENG.<br />
6. Enter the unique ID#. Choose any number from 1 to 99 that has not been assigned to another<br />
locomotive (ENG). We recommend using a part of your locomotive’s cab number.<br />
7. Press SET. The locomotive’s headlights will flash.<br />
8. Slide the Command reverse unit switch back to the RUN position.<br />
The non-powered locomotive’s ID# has been set. Be sure to record the new ID# for your<br />
reference.<br />
11
TrainMaster Command Control operations<br />
Building a lash-up<br />
TrainMaster Command Control allows you to couple your Command Control-equipped<br />
locomotives together, forming a multiple unit lash-up. Just like with the real railroads, lash-ups<br />
allow you to pull longer trains and climb steeper grades. You will find that the lighting operates<br />
prototypically—the lead unit’s headlight is illuminated when the train is in forward, and the<br />
rear unit’s headlight is illuminated the train is in reverse. For more information, refer to your<br />
TrainMaster Command Control manual.<br />
To build a lash-up, assign a unique engine (ENG) ID# to each unit. Arrange the units on the<br />
track and couple them together. The Command reverse unit switch must be set to RUN. See Figure 1<br />
on page 7.<br />
Note!<br />
If you press a wrong button, start over with that particular unit. The assignment isn’t<br />
saved until you press SET.<br />
Start with the lead (front) unit<br />
1. Press TR and enter your lash-up ID# (1-9) on your CAB-1 Remote Controller. No other lash-up<br />
or track should share this ID#.<br />
2. Enter the unique ID# of the lead unit.<br />
3. Press F.<br />
4. Press SET on the CAB-1 Remote Controller.<br />
Add the middle units, one at a time<br />
1. Press TR and enter the lash-up ID# (1-9) on your CAB-1 Remote Controller.<br />
2. Enter the unique ID# of the middle unit.<br />
3. Press the DIRECTION button if the unit is facing rearward.<br />
4. Press SET on the CAB-1 Remote Controller.<br />
5. Repeat these steps for any additional middle units.<br />
Complete the lash-up by adding the rear unit<br />
1. Press TR and enter the lash-up ID# (1-9) on your CAB-1 Remote Controller.<br />
2. Enter the unique ID# of the rear unit.<br />
3. Press R.<br />
4. Press the DIRECTION button if the unit is facing rearward.<br />
5. Press SET on the CAB-1 Remote Controller.<br />
You are now ready to operate your locomotive as a lash-up. Simply press TR and enter the<br />
lash-up ID#, then use your CAB-1 Remote Controller to operate your locomotives. To operate an<br />
individual unit within the lash-up, press ENG and enter the ID# for that particular unit.<br />
12
TrainMaster Command Control operations<br />
Reprogramming your non-powered locomotive to restore features<br />
If your non-powered locomotive is unresponsive to your commands in the TrainMaster<br />
Command Control environment, we recommend that you follow this procedure to reset your<br />
locomotive.<br />
1. Slide the Command reverse unit switch to the PGM position. See Figure 1 on page 7.<br />
2. Plug in and connect your Command Base.<br />
3. Place your non-powered locomotive on the track, then power up the track.<br />
4. Press ENG and enter the locomotive’s ID#.<br />
5. Press SET.<br />
6. Press ENG and enter the locomotive’s ID# again.<br />
7. Press AUX1.<br />
8. Enter 2 for this particular locomotive.<br />
9. Turn off track power and wait ten seconds.<br />
10. Slide the Command reverse unit switch back to the RUN position.<br />
At this point, your non-powered locomotive has been reset. Restore power to the track and<br />
operate the locomotive as usual. Be sure to use the ID# entered in Step 4.<br />
13
Conventional transformer operations<br />
Ground lights<br />
Note!<br />
Couple your non-powered locomotive to a powered locomotive for operation in the<br />
conventional environment.<br />
Your non-powered locomotive is equipped with functional<br />
Ground Lights. There is one Ground Light located on<br />
each side of the frame, near the center of the front truck.<br />
Prototypically, it is difficult to determine when a diesel<br />
locomotive is moving at very slow speeds in extreme low<br />
light, or darkness. When operating the locomotive under<br />
these conditions, the Ground Lights provide the engineer<br />
and fireman with a visual reference to the ground and allow<br />
them to more accurately judge the motion of the locomotive.<br />
The Ground Lights function automatically and are<br />
not user controlled. In Conventional transformer operation, the Ground Lights are ON when the<br />
locomotive is stopped and they remain ON as the locomotive starts to move. As the locomotive gains<br />
speed, the Ground Lights will turn OFF. As the speed of the locomotive slows, the Ground Lights will<br />
turn ON.<br />
Note!<br />
FRONT<br />
Ground<br />
light<br />
For optimal effect of the functional Ground Lights, operate your non-powered locomotive<br />
in low light conditions.<br />
14
Conventional transformer operations<br />
Operating your non-powered locomotive in the conventional<br />
environment<br />
Your non-powered locomotive is capable of operating in the conventional environment with<br />
nothing more than a standard <strong>Lionel</strong> alternating-current (AC) transformer.<br />
To experience all of your non-powered locomotive’s features, we recommend operating in the<br />
LEGACY Command Control environment. With a simple one-wire connection, you can use the CAB-2<br />
Remote Controller to access all of the functions of your locomotive. Refer to pages 4-6 to see how to<br />
operate your locomotive in the LEGACY Command Control environment.<br />
Note!<br />
Couple your non-powered locomotive to a powered locomotive for operation in the<br />
conventional environment.<br />
1. Place your non-powered locomotive on <strong>Lionel</strong> or <strong>Lionel</strong>-compatible O-36 or<br />
larger track.<br />
2. Power your non-powered locomotive at 12-18 volts with your alternating<br />
current (AC) transformer.<br />
Caution!<br />
Power your non-powered locomotive with an alternating-current (AC) transformer<br />
only. Powering your locomotive with a direct-current (DC) transformer, or in excess<br />
of 19 volts AC, may result in damage to sensitive electronic components. 60 HZ AC is<br />
required. Do not power with 50 HZ AC.<br />
3. Wait three to eight seconds as your non-powered locomotive determines<br />
whether it is in a conventional environment or a TrainMaster Command Control<br />
environment.<br />
When the non-powered locomotive has determined that a TrainMaster Command Base is not<br />
connected to the track, the locomotive’s headlight will illuminate. You are ready for operation in<br />
the conventional environment.<br />
15
Conventional transformer operations<br />
Uncoupling your non-powered locomotive in the conventional<br />
environment<br />
Your non-powered locomotive features two ElectroCouplers that are released by remote<br />
control at any point around your layout in the TrainMaster Command Control<br />
environment.<br />
In the conventional environment, the ElectroCouplers will not open manually or by using a<br />
Remote-Control Track section. To couple your locomotive in the conventional environment, you<br />
must rely on a piece of rolling stock equipped with a magnetic coupler. Simply release the magnetic<br />
coupler and couple the rolling stock to the locomotive, even if the ElectroCoupler is closed.<br />
Keep in mind that you may still make use of <strong>Lionel</strong> Remote-Control Track sections (6-65530<br />
for O gauge; 6-12746 and 6-65149 for O-27 gauge; and 6-12020 and 6-12054 for FasTrack layouts)<br />
with the magnetic couplers on the rolling stock. Place the trigger disc on the magnetic coupler over<br />
the central coil on the Remote-Control Track section, then press UNCOUPLE on the track section’s<br />
controller. As illustrated in Figure 2, the magnetic field pulls the disc downward, releasing the<br />
coupler.<br />
Remote-Control<br />
Track Section<br />
Figure 2. Magnetic coupler operation<br />
16
Maintaining and servicing your locomotive<br />
Lubricating your non-powered locomotive<br />
Help your <strong>Lionel</strong> non-powered locomotive lead a long and productive life on your railroad by<br />
maintaining it properly. To keep your locomotive lubricated, we recommend that you purchase a<br />
<strong>Lionel</strong> Lubrication and Maintenance Kit (6-62927), available from your authorized <strong>Lionel</strong> dealer.<br />
When you find that the lubrication points illustrated in Figure 3 appear dry, lubricate your<br />
locomotive after you have removed any accumulated dirt and dust. There are two basic rules to keep<br />
in mind when you are lubricating your locomotive: use only a small amount of lubrication and avoid<br />
getting grease or oil on your locomotive’s wheels, roller pick-ups, or the track.<br />
FRONT<br />
Lubricate the axles<br />
with <strong>Lionel</strong> oil<br />
sparingly<br />
Lubricate the axles<br />
with <strong>Lionel</strong> oil<br />
sparingly<br />
Figure 3. Underside details and lubrication points<br />
17<br />
REAR
Maintaining and servicing your locomotive<br />
Adding fluid to your non-powered locomotive’s smoke generator<br />
Your non-powered locomotive is equipped with a smoke generator that produces a safe,<br />
clean, white smoke during operation. In order to function, the smoke generator requires<br />
the periodic addition of <strong>Lionel</strong> smoke fluid. A small bottle of smoke fluid is included with your<br />
locomotive.<br />
To add smoke fluid, press down and unscrew the cap of the smoke fluid bottle. Pierce<br />
the tip of the nozzle with a pin. Then add 10 to 15 drops of fluid into the stack of your<br />
locomotive as illustrated in Figure 4. Power up your locomotive, and smoke production will<br />
start momentarily. Smoke production will start faster if you operate your locomotive at higher<br />
speeds. Smoke production is greatest at high voltages and when the locomotive pulls a heavy<br />
load. When smoke production decreases, add four to eight additional drops of smoke fluid.<br />
If you prefer to operate your non-powered locomotive without smoke, locate the smoke unit<br />
switch under the rear radiator vent and slide it to the NO SMK position. Refer to Figure 1 on<br />
page 7 for the location of this switch.<br />
When the smoke unit switch is in the SMK position, always keep a small amount of smoke<br />
fluid in the smoke unit. Operating your locomotive’s smoke unit without smoke fluid will<br />
cause damage to the heating element.<br />
Caution!<br />
Always operate your non-powered locomotive’s smoke unit with the addition of<br />
smoke fluid to prevent damage to the heating element.<br />
Add fluid here (no more<br />
than 10 to 15 drops total)<br />
FRONT<br />
Figure 4. Stack location<br />
18
Maintaining and servicing your locomotive<br />
Adjusting the smoke output<br />
Your non-powered locomotive features an improved smoke unit with variable smoke output. In<br />
the TrainMaster Command Control environment, you may select low, medium, or high smoke<br />
output using your CAB-1 Remote Controller. Your locomotive is shipped from the factory in the<br />
medium smoke output setting.<br />
To adjust the smoke output, bring the locomotive to a stop, press AUX1, AUX2, 9, then press<br />
L for low smoke, M for medium smoke, or H for high smoke. Press AUX2 again to complete the<br />
setting. See page 10 for the location of these buttons on the CAB-1 Remote Controller.<br />
Your locomotive will remember its new setting until you change it again.<br />
Note!<br />
Note!<br />
It may take up to a minute for the smoke unit to heat up or cool down to the new setting.<br />
In the conventional environment, smoke output is always at the medium level. Smoke<br />
output is not variable in the conventional environment.<br />
Replacing your non-powered locomotive’s LEDs and lamps<br />
Y<br />
our non-powered locomotive is illuminated by several LEDs and lamps. During the course of<br />
normal operations, they may require replacement.<br />
We recommend that you have the LED and lamp replacemenst done at an authorized<br />
<strong>Lionel</strong> Service Center. See the <strong>Lionel</strong> Service section on page 20 for more information.<br />
19
<strong>Lionel</strong> Limited Warranty Policy & Service<br />
This <strong>Lionel</strong> product, including all mechanical and electrical components, moving parts, motors and structural components,<br />
with the exception of LIGHT BULBS & LED’s are warranted to the original owner-purchaser for a period of one<br />
year from the original date of purchase against original defects in materials or workmanship when purchased<br />
through a <strong>Lionel</strong> Authorized Retailer*.<br />
This warranty does NOT cover the following: Normal wear and tear, Light bulbs or LED’s, Defects appearing in the course of<br />
commercial use, or Damage resulting from abuse/misuse of the product.<br />
Transfer of this product by the original owner-purchaser to another person voids this warranty in its entirety. Modification of<br />
this product in any way; visually mechanically or electronically, voids the warranty in its entirety.<br />
Any warranted product which is defective in original materials or workmanship and is delivered by the original ownerpurchaser<br />
(this warranty is non-transferrable) to <strong>Lionel</strong> LLC or any <strong>Lionel</strong> Authorized Service Station MUST be accompanied<br />
by the original receipt for purchase (or copy) from an <strong>Lionel</strong> Authorized Retailer*, will at the discretion of <strong>Lionel</strong> LLC,<br />
be repaired or replaced, without charge for parts or labor. In the event the defective product cannot be repaired, and a suitable<br />
replacement is not available, <strong>Lionel</strong> will offer to replace the product with a comparable model (determined by <strong>Lionel</strong><br />
LLC), if available. In the event a comparable model is not available the customer will be refunded the original purchase<br />
price (requires proof of purchase from the <strong>Lionel</strong> Authorized Retailer* it was originally purchased). Any products on<br />
which warranty service is sought must be sent freight or postage prepaid (<strong>Lionel</strong> will refuse any package when postage is due).<br />
Transportation and shipping charges are not covered as part of this warranty.<br />
NOTE: Products that require service that do not have a receipt from an LIONEL AUTHORIZED<br />
RETAILER* will be required to pay for all parts required to repair the product (labor will not incur<br />
a charge) providing the product is not older than 5 years from date of manufacture and is within 1<br />
year from date of purchase. A copy of the original sales receipt is required.<br />
In no event shall <strong>Lionel</strong> LLC be held liable for incidental or consequential damages.<br />
Some states do not allow the exclusion or limitation of incidental or consequential damages, so the above exclusion may not<br />
apply to you.<br />
This warranty gives you specific legal rights and you may have other rights which vary from state to state.<br />
Instructions for Obtaining Service<br />
If service for this <strong>Lionel</strong> LLC product is required; bring the item, along with your DATED sales receipt and completed warranty<br />
information (at the bottom of this page) to the nearest <strong>Lionel</strong> Authorized Service Station. Your nearest <strong>Lionel</strong> Service Station<br />
can be found by calling 1-800-4-LIONEL or by accessing the website at www.lionel.com.<br />
If you prefer to send your <strong>Lionel</strong> product directly to <strong>Lionel</strong>, for repair you must FIRST call 586-949-4100 extension 9105 or<br />
FAX <strong>Lionel</strong> at 586-949-5429 or write to Customer Service, 50625 Richard W. Blvd, Chesterfield, MI 48051-2493. Please have the<br />
6-digit <strong>Lionel</strong> product number, the date of original purchase, the dealer where the item was purchased and what seems to be<br />
the problem. You will receive a Verbal return authorization (RA) number to ensure your merchandise will be properly tracked<br />
and handled upon receipt at <strong>Lionel</strong> LLC.<br />
Once you have your Return Authorization (RA) number, make sure the item is packed in its original Styrofoam inner container<br />
which is placed inside the original outer display box (this will help prevent damage during shipping and handling).<br />
This shipment MUST be prepaid and we recommend that it be insured with the carrier of your choice.<br />
Please make sure you have followed all of the above instructions carefully before returning any merchandise for service. You<br />
may choose to have your product repaired by one of <strong>Lionel</strong> LLC’s Authorized Service Stations after its warranty has expired. A<br />
reasonable service fee should be expected once the product warranty has expired.<br />
Warranty Information<br />
Please complete the information below and keep it, along with your DATED ORIGINAL SALES RECEIPT. You MUST<br />
present this form AND your DATED SALES RECEIPT when requesting warranty service.<br />
*A complete listing of <strong>Lionel</strong> Authorized retailers can be found by calling 1-800-4-LIONEL or by visiting our website at<br />
www.lionel.com.<br />
Products that are more than 5 years old, from date of manufacture, are not applicable for warranty coverage, even<br />
if they have never been sold prior to this date. (Under no circumstance shall any components or labor be provided free<br />
of charge.)<br />
Name<br />
Address<br />
Place of Purchase <br />
Date of Purchase<br />
Product Number<br />
Product Description<br />
©2008 LIONEL L.L.C., CHESTERFIELD, MI 48051-2493<br />
UNITED STATES OF AMERICA<br />
PRINTED IN CHINA


