
Create successful ePaper yourself
Turn your PDF publications into a flip-book with our unique Google optimized e-Paper software.
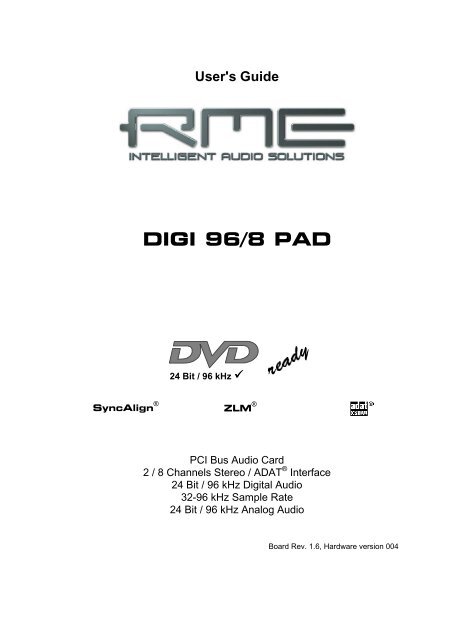
User's Guide<br />
<strong>DIGI</strong> <strong>96</strong>/8 <strong>PAD</strong><br />
24 Bit / <strong>96</strong> kHz ü<br />
SyncAlign ®<br />
ZLM ®<br />
PCI Bus Audio Card<br />
2 / 8 Channels Stereo / ADAT ® Interface<br />
24 Bit / <strong>96</strong> kHz Digital Audio<br />
32-<strong>96</strong> kHz Sample Rate<br />
24 Bit / <strong>96</strong> kHz Analog Audio<br />
Board Rev. 1.6, Hardware version 004
Contents<br />
1 Introduction............................................................ 3<br />
2 Package Contents .................................................. 3<br />
3 System Requirements............................................ 3<br />
4 Brief Description and Characteristics................... 3<br />
5 Technical Specifications<br />
5.1 Digital.................................................................... 4<br />
5.2 Analog................................................................... 4<br />
5.3 Digital Interface..................................................... 4<br />
5.4 Transfer Modes: Resolution/Bits per Sample......... 4<br />
6 Hardware Installation............................................. 5<br />
7 Software Installation<br />
7.1 Windows 98/SE/ME............................................... 5<br />
7.2 Windows NT.......................................................... 5<br />
7.3 Windows 2000/XP ................................................. 6<br />
7.4 Driver Deinstallation.............................................. 6<br />
7.5 Linux/Unix............................................................. 6<br />
8 Operation and Usage<br />
8.1 External Connectors .............................................. 7<br />
8.2 Internal Connectors ............................................... 7<br />
8.3 Playback (Windows MME)..................................... 8<br />
8.4 Recording Digital (Windows MME) ........................ 9<br />
8.5 Recording Analog.................................................10<br />
8.6 Record while Play ................................................10<br />
8.7 DVD Playback (AC-3/DTS) under MME................10<br />
8.8 Low Latency under MME......................................11<br />
9 Configuring the <strong>DIGI</strong> <strong>96</strong>/8 <strong>PAD</strong><br />
9.1 General................................................................12<br />
9.2 Force Adat ...........................................................14<br />
9.3 Analog Output ......................................................14<br />
9.4 Tab Mode.............................................................15<br />
9.5 Boot Option ADAT................................................15<br />
9.6 Clock Modes - Synchronization ............................16<br />
10 Using more than one <strong>DIGI</strong> <strong>96</strong>/8 <strong>PAD</strong> ....................17<br />
11 Special Features of the Digital Output.................18<br />
12 Notes on the ADAT Interface ................................19<br />
13 Multiclient Operation<br />
13.1 General ..............................................................19<br />
13.2 Multichannel DirectSound...................................20<br />
14 Operation under ASIO 2.0<br />
14.1 General ..............................................................21<br />
14.2 Buffer Size - Latency..........................................22<br />
14.3 Known Problems ................................................22<br />
15 Operation under GSIF<br />
15.1 Windows 98/SE/ME............................................23<br />
15.2 Windows 2000/XP ..............................................23<br />
16 Hotline – Troubleshooting<br />
16.1 General ..............................................................24<br />
16.2 Installation..........................................................25<br />
17 <strong>DIGI</strong>Check..............................................................26<br />
18 TECH INFO ............................................................26<br />
19 Warranty ................................................................27<br />
20 Appendix ...............................................................27<br />
21 Diagrams................................................................28<br />
User's Guide <strong>DIGI</strong><strong>96</strong>/8 <strong>PAD</strong> © <strong>RME</strong> 2
1. Introduction<br />
Thank you for choosing the <strong>RME</strong> <strong>DIGI</strong><strong>96</strong>/8 <strong>PAD</strong>. This card is capable of transferring<br />
digital and analog audio data directly from DAT, Sampler or other sources to your computer.<br />
Installation is simple, even for the inexperienced user, thanks to latest Plug & Play technology<br />
and full interrupt-sharing. Numerous unique features and a well thought-out configuration dialog<br />
have turned the <strong>DIGI</strong><strong>96</strong> series into a renowned and accepted industry standard.<br />
Drivers for Windows (95/98, NT, 2000, XP) and MacOS (> 8.6) allow a problem-free, comfortable<br />
and powerful usage on computer systems with PCI bus technology. Drivers for Unix, Linux<br />
and Solaris are also available (see chapter 7.5). With this the <strong>DIGI</strong><strong>96</strong> series is supported<br />
by a variety of Operating Systems like no other digital audio card.<br />
Our Hi-Performance philosophy guarantees full system performance in all possible functions<br />
not carried out by the driver (the computer´s CPU), but carried out by the <strong>DIGI</strong><strong>96</strong> series hardware.<br />
2. Package Contents<br />
Please ensure that all the following parts are included in <strong>DIGI</strong><strong>96</strong>/8 <strong>PAD</strong>’s packaging box:<br />
• PCI card <strong>DIGI</strong><strong>96</strong>/8 <strong>PAD</strong><br />
• Quick Info guide<br />
• <strong>RME</strong> Driver CD<br />
• Adapter cable (D-type - XLR/Phono)<br />
• Internal cable (2 core)<br />
3. System Requirements<br />
• Windows 95/98/NT/2000/XP, Linux or MacOS<br />
• A free PCI bus slot<br />
Additional system requirements such as CPU, memory etc. depend on the software being used<br />
for recording, playing and editing the audio data.<br />
4. Brief Description and Characteristics<br />
• All settings can be changed in real-time, all output options even in playback mode<br />
• Separate record- and playback circuits; complete master mode<br />
• Enhanced Full Duplex: Different sample rates at input and output possible<br />
• Mixed mode: ADAT in - SPDIF out and vice versa<br />
• Automatic and intelligent master/slave clock control<br />
• Unsurpassed Bitclock-PLL (audio synchronization) in ADAT mode<br />
• Optional Word Clock Module (WCM) provides word clock input and output<br />
• Track Marker Support: Supports CD/DAT Start-IDs and read out of CD subcode<br />
• Comes with <strong>DIGI</strong>Check: the ultimate measurement, analysis and test tool<br />
• ADAT tracks routeable to analog output<br />
• Enhanced Zero Latency Monitoring: hardware bypass per track, controlled by Punch-I/O<br />
• SyncAlign guarantees sample aligned and never swapping channels<br />
• Full interrupt-sharing<br />
• Windows driver with Pentium optimization (quad times memory transfer)<br />
• 32 bit memory transfer and fast 128 kB SRAM guarantee very low system load<br />
User's Guide <strong>DIGI</strong><strong>96</strong>/8 <strong>PAD</strong> © <strong>RME</strong> 3
5. Technical Specifications<br />
5.1 Digital<br />
• Ultra-low jitter SPDIF: < 1 ns in PLL mode (44.1 kHz, optical in)<br />
• Ultra-low jitter ADAT: < 2 ns in PLL mode (44.1 kHz, optical in)<br />
• Input PLL ensures zero dropout, even at more than 40 ns jitter<br />
• Bitclock PLL for trouble-free varispeed in ADAT mode<br />
• High-sensitivity input stage (< 0.2 Vss input level)<br />
• Output voltage 0.8V (phono), 3.5V (XLR)<br />
• Supported sample rates: 32 / 44.1 / 48 / 64 / 88.2 / <strong>96</strong> kHz and variable (word clock)<br />
• Supports all known formats mono/stereo from 16 to 24 bit<br />
• Supports all known multi channel formats from 16 to 24 bit<br />
5.2 Analog<br />
• Input sensitivity adjustable through jumper +4 dBu / -10 dBV<br />
• Dynamic range input: 105 dB (RMS unweighted, unmuted), 109 dBA<br />
• THD+N input: < -100 dB / < 0.001 %<br />
• Frequency response AD, -0.1 dB: 10 Hz - 20,3 kHz (sf 44.1 kHz)<br />
• Frequency response AD, -0.5 dB: 5 Hz - 44,8 kHz (sf <strong>96</strong> kHz)<br />
• Sample rates record: 32 / 44.1 / 48 / 64 / 88.2 / <strong>96</strong> kHz and variable (word clock)<br />
• Input impedance: 10 kOhm<br />
• Channel separation: > 110 dB<br />
• Analog output fixed +10 / +4 / -2 / -8 dBu @ 0 dBFS, and variable (fader)<br />
• Dynamic range output: 108 dB (RMS unweighted, unmuted), 112 dBA<br />
• THD+N output: -100 dB / 0.001%<br />
• Frequency response DA, -0.1 dB: 20 Hz - 20.8 kHz (sf 44,1 kHz)<br />
• Frequency response DA, -0.5 dB: 10 Hz - 44 kHz (sf <strong>96</strong> kHz)<br />
• Sample rates playback: 32 / 44.1 / 48 / 64 / 88.2 / <strong>96</strong> kHz and variable (word clock)<br />
• Ouput impedance: 75 Ohm<br />
• Channel separation: > 110 dB<br />
5.3 Digital Interface<br />
• Inputs and outputs ground-free transformer coupled<br />
• Connectors: optical (TOSLINK), coaxial (phono), XLR, internal (CD-ROM/Sync-In / Out)<br />
• Formats: SPDIF, AES/EBU (Consumer/Professional), ADAT optical<br />
5.4 Transfer Modes: Resolution / Bits per Sample<br />
• 16 bit 2 bytes (stereo 4 bytes) (*)<br />
• 20 bit 3 bytes MSB (stereo 6 bytes)<br />
• 20 bit 4 bytes MSB (stereo 8 bytes) (*)<br />
• 24 bit 3 bytes (stereo 6 bytes)<br />
• 24 bit 4 bytes MSB (stereo 8 bytes) (*)<br />
• 32 bit 4 bytes (stereo 8 bytes) (*)<br />
All the above formats are also available in Multi-Device mode (4 x stereo = 8 channels). The<br />
Channel Interleave mode (1 x 8) provides the following resolutions:<br />
• 16 bit 16 bytes (*)<br />
• 24 bit 24 bytes<br />
• 24 bit 32 bytes (*)<br />
User's Guide <strong>DIGI</strong><strong>96</strong>/8 <strong>PAD</strong> © <strong>RME</strong> 4
6. Hardware Installation<br />
Important: Switch off the computer and remove the power cable from the power supply before<br />
fitting the <strong>DIGI</strong><strong>96</strong>/8 <strong>PAD</strong>. Inserting and removing the card while the computer is in<br />
operation will more than likely lead to irreparable damage to the mainboard!<br />
1. Disconnect the power cord and all other cables from the computer<br />
2. Remove the computer's housing; further information on how to do this can be obtained from<br />
your computer´s instruction manual<br />
3. Important: Before removing the <strong>DIGI</strong><strong>96</strong>/8 <strong>PAD</strong> from its protective bag, discharge any<br />
static in your body by touching the metal chassis of the PC.<br />
4. Insert <strong>DIGI</strong><strong>96</strong>/8 <strong>PAD</strong> firmly into a free PCI slot, press and fasten the screw.<br />
5. Replace the computer's housing and tighten the screws.<br />
6. Reconnect the power cable and all other cables/connections.<br />
7. Software Installation<br />
7.1 Windows 95/98/SE/ME<br />
After the hardware has been installed correctly (see 6. Hardware Installation), and the computer<br />
has been switched on, Windows will recognize the new hardware component and start its ‘Add<br />
New Hardware Wizard’. Insert the <strong>RME</strong> Driver CD into your CD-ROM drive, and follow further<br />
instructions which appear on your computer screen. The driver files are located in the directory<br />
\<strong>DIGI</strong><strong>96</strong> W9x on the <strong>RME</strong> Driver CD.<br />
Windows will install the <strong>DIGI</strong> driver, and will register the card in the system as a new audio<br />
device. The computer should now be re-booted.<br />
Unfortunately, in seldom cases, the path to the CD-ROM (i.e. its drive-letter) has to be typed<br />
in again during the copy process.<br />
All cards of the <strong>DIGI</strong><strong>96</strong> series are quickly and easily configured through the Settings dialog of<br />
the <strong>DIGI</strong><strong>96</strong> driver. The Settings dialog is started in three different ways:<br />
• by clicking on the <strong>DIGI</strong> icon in the Taskbar's system tray<br />
• by starting the 'Digi<strong>96</strong>' link from the Desktop<br />
• via ‘shortcut key’ as defined in the 'Digi<strong>96</strong>' link (default: Ctrl-Num2)<br />
7.2 Windows NT<br />
As automatic hardware recognition has not been implemented in Windows NT 4.0 the drivers<br />
have to be installed ‘by hand’.<br />
After the hardware has been installed correctly (see 6. Hardware Installation) and Windows NT<br />
has been booted, insert the <strong>RME</strong> Driver CD into your CD-ROM drive. Register the new device<br />
by starting >Control Panel /Multimedia /Devices /Audio Devices /Add
7.3 Windows 2000/XP<br />
After the hardware has been installed correctly (see 6. Hardware Installation), and the computer<br />
has been switched on, Windows will recognize the new hardware component and start its<br />
‘Hardware Wizard’. Insert the <strong>RME</strong> Driver CD into your CD-ROM drive, and follow further instructions<br />
which appear on your computer screen. The driver files are located in the directory<br />
\<strong>DIGI</strong><strong>96</strong> W2k on the <strong>RME</strong> Driver CD.<br />
Windows will install the <strong>DIGI</strong><strong>96</strong> driver, and will register the card in the system as a new audio<br />
device. The card now ready for use.<br />
All cards of the <strong>DIGI</strong><strong>96</strong> series can be easily configured using the <strong>RME</strong> <strong>DIGI</strong> Settings dialog.<br />
The panel 'Settings' can be opened<br />
• by clicking on the <strong>DIGI</strong> icon in the Taskbar's system tray<br />
In case the warning messages 'Digital signature not found', 'Do not install driver', 'not certified<br />
driver' or similar come up: Don't listen to Microsoft, listen to us and continue with the installation.<br />
7.4 Deinstalling the Drivers<br />
A deinstallation of the <strong>DIGI</strong><strong>96</strong> series driver files is not necessary – and not supported by Windows<br />
anyway. Thanks to full Plug & Play support, the driver files will not be loaded after the<br />
hardware has been removed. If desired these files can then be deleted manually.<br />
Unfortunately Windows Plug & Play methods do not cover the additional autorun entries of the<br />
Settings dialog, and the registering of the ASIO driver. Those entries can be removed from the<br />
registry through a software deinstallation request. This request can be found (like all deinstallation<br />
entries) in Control Panel, Software. Click on the entry '<strong>DIGI</strong><strong>96</strong> Link and Tray Autostart', or<br />
'<strong>RME</strong> <strong>DIGI</strong>32, <strong>DIGI</strong><strong>96</strong> and Hammerfall Series'.<br />
7.5 Linux/Unix<br />
Drivers for Linux, Unix and Solaris are available at 4Front Technology. Information:<br />
http://www.opensound.com<br />
Another source of (free) drivers is the ALSA project:<br />
http://www.alsa-project.org<br />
User's Guide <strong>DIGI</strong><strong>96</strong>/8 <strong>PAD</strong> © <strong>RME</strong> 6
8. Operation and Usage<br />
8.1 External Connectors<br />
The <strong>DIGI</strong><strong>96</strong>/8 <strong>PAD</strong> has 3 external inputs and outputs. The current input is activated<br />
through 'Settings', available by a click on the <strong>DIGI</strong> symbol in the Taskbar's system tray. The<br />
card accepts all commonly used digital sources as well as SPDIF and AES/EBU. Channel status<br />
and copy protection are ignored.<br />
Use the supplied breakout cable to connect coaxial (SPDIF) or XLR (AES/EBU) devices. The<br />
red phono socket of the breakout cable is the SPDIF output, the white one is the SPDIF input.<br />
The ground-free design, with transformers for digital inputs and outputs, offers a problem-free<br />
connection of all devices along with perfect hum rejection.<br />
All outputs are driven in<br />
parallel, therefore carrying<br />
identical signals. In<br />
the simplest situation,<br />
connect 3 devices at the<br />
outputs and use the<br />
card as a splitter (distribution<br />
1 to 3).<br />
Two ¼" TRS (stereo)<br />
jacks are fitted to provide a 2-channel unbalanced analog input and output. The analog output<br />
is directly driven from the digital output. A superior 24 bit DAC, followed by a low impedance<br />
driver stage, allows the connection of stereo headphones. The settings dialog allows to change<br />
the output level from 0 dB down to -78 dB. A special mute circuit reduces noise when switching<br />
the computer on and off. The sensitivity of the analog input can be set per channel to +4 dBu or<br />
-10 dBV by jumpers on the board. A sensitivity control by the driver or Settings dialog is not<br />
available.<br />
8.2 Internal Connectors<br />
The <strong>DIGI</strong><strong>96</strong>/8 <strong>PAD</strong> has one internal digital input and output, provided by 2-pin connectors<br />
on the board. The internal input ST3, labelled CD IN / Sync In, can be connected to an<br />
internal CD-ROM drive having a digital audio output (advantage: the built in CD-ROM drive is<br />
sufficient for digital recording and the need for external cabling does not arise). Or it can be<br />
connected with the internal output of another <strong>DIGI</strong><strong>96</strong> series card (synchronizing multiple cards),<br />
or an AEB4/8-I. The latter is possible because the internal input accepts both SPDIF and ADAT<br />
format.<br />
The internal output ST4, labelled Sync Out, provides a copy of the current external output<br />
signal, no matter if SPDIF or ADAT. Besides connecting a AEB4/8-O for an output of up to 8<br />
analog channels, the internal loopback proves to be a useful application. Use the supplied two<br />
pin cable to connect Sync In and Sync Out, set the card to Clock Mode 'Master' and selectal<br />
'Internal' as input. Now the output signal shows up directly at the card's input. This allows you to<br />
record the playback signal, or to display the playback signals with our <strong>DIGI</strong>Check software.<br />
The two connectors ST6 and ST7 provide a connection to the optional Word Clock Module<br />
WCM. ST7 is also needed when connecting a AEB4/8-I. See the manuals of these products for<br />
more information.<br />
User's Guide <strong>DIGI</strong><strong>96</strong>/8 <strong>PAD</strong> © <strong>RME</strong> 7
8.3 Playback (Windows MME)<br />
<strong>DIGI</strong><strong>96</strong>/8 <strong>PAD</strong> can play back audio data only in supported formats (sample rate, bit resolution).<br />
Otherwise an error message appears (for example at 22 kHz and 8 bit).<br />
In the audio application being used, <strong>DIGI</strong><strong>96</strong>/8 <strong>PAD</strong> must be selected as the output device. This<br />
can often be found in the Options, Preferences or Settings menus under Playback Device, Audio<br />
Devices, Audio etc. Only a few programs exclusively use Windows' Preferred Playback<br />
Device. This setting can be changed in >Control Panel /Multimedia /AudioControl Panel /SoundsControl<br />
Panel /Multimedia /Audio
8.4 Recording Digital (Windows MME)<br />
Unlike analog soundcards, which produce empty wave files (or noise) when no input signal is<br />
present, digital I/O cards always need a valid input signal to start recording (this includes the<br />
correct sample frequency as well).<br />
To take this into account, <strong>RME</strong> has included three unique features in the <strong>DIGI</strong><strong>96</strong> series: an<br />
error LED for the active digital input in use, a comprehensive I/O signal status display (showing<br />
sample frequency, lock and format) in the Settings dialog, and the protective Check Input function.<br />
The error LED indicates whether the card gets power and a valid digital input signal. Whenever<br />
an error occurs (wrong input, invalid data, signal transmitting device delivers nothing), the LED<br />
will light red. As soon as a valid input signal is present the LED will turn off. The display of the<br />
sample frequency (see chapter 9, picture Settings) in the Status display offers a similar function.<br />
If no sample frequency can be recognized ‘Out Of Range’ will be shown, in case of an error<br />
detection ‘No Lock’.<br />
If a 48 kHz signal is fed to the input and the application is set to 44.1 kHz, Check Input stops<br />
the system from recording. This prevents faulty takes, which often go unnoticed until later on in<br />
the production. Such tracks appear to have the wrong playback rate - the audio quality as such<br />
is not affected. 'Check Input' may be switched off for vari-speed purposes.<br />
Therefore configuring the software to perform a digital recording is child´s play. After selecting<br />
the required input <strong>DIGI</strong><strong>96</strong>/8 <strong>PAD</strong> displays the current sample frequency. This parameter<br />
can then be changed in the application’s audio attributes (or similar) dialog.<br />
The screenshot to the right shows a typical dialog<br />
used for changing basic parameters such as<br />
sample frequency and resolution in an audio<br />
application.<br />
Any bit resolution can be selected, providing it is<br />
supported by both the audio hardware and the<br />
software. Even if the input signal is 24 bit, the<br />
application can still be set to record at 16-bit<br />
resolution. The lower 8 bits (and therefore any<br />
signals about <strong>96</strong>dB below maximum level) are<br />
lost entirely. On the other hand, there is nothing<br />
to gain from recording a 16-bit signal at 24-bit<br />
resolution - this would only waste precious space<br />
on the hard disk.<br />
It often makes sense to monitor the input signal or send it directly to the output. The <strong>DIGI</strong><strong>96</strong><br />
series includes a useful input monitor function, which can be set in the <strong>RME</strong> <strong>DIGI</strong> Settings<br />
(Output/Automatic). Activating Record or Pause in the application causes the input signal to be<br />
passed directly to the digital and analog output. However, some applications block monitoring<br />
by constantly activating playback, even if the played back track is empty. This is often required<br />
by programs to ensure that timing and punch I/O will work correctly.<br />
Currently two solutions exist which enable real-time monitoring even when playback is active.<br />
Our ZLM (Zero Latency Monitoring) technology allows monitoring in Punch I/O mode - with this<br />
the card behaves like a tape machine. This method has been implemented in all versions of<br />
Samplitude (by SEK’D), and can be activated using the global track option 'Hardware monitoring<br />
during Punch'.<br />
The other solution is to use our ASIO 2.0 drivers with a ASIO 2.0 compatible program. When<br />
'ASIO Direct Monitoring' has been switched on, the input signal is routed in real-time to the<br />
output whenever record is started.<br />
User's Guide <strong>DIGI</strong><strong>96</strong>/8 <strong>PAD</strong> © <strong>RME</strong> 9
8.5 Recording Analog<br />
Use the <strong>RME</strong> Settings dialog to set the active input to 'Analog' and to activate the line inputs<br />
(stereo ¼" TRS jack, wiring diagram see appendix). Two jumpers labelled J2/J3 allow you to<br />
change the input sensitivity to the most common levels +4 dBu (jumper pulled) and -10 dBV<br />
(jumper in place). A full scale level (0 dBFS) requires +19 dBu respectively +2 dBV analog<br />
input level. In most cases the factory default -10 dBV proves to be a good choice, because it is<br />
highly compatible to many analog devices.<br />
8.6 Record while Play<br />
<strong>DIGI</strong><strong>96</strong>/8 <strong>PAD</strong> allows the playback of audio data during the recording of further audio<br />
data, even at different sample frequencies. This feature, known as Enhanced Full Duplex or<br />
Record while play, is a must for multitrack harddisk recording, but it has to be supported by the<br />
recording software.<br />
8.7 DVD-Playback (AC-3/DTS) under MME<br />
When using popular DVD software player like WinDVD and PowerDVD, their audio data stream<br />
can be send to any AC-3/DTS capable receiver, using the <strong>DIGI</strong><strong>96</strong> series' SPDIF output. For this<br />
to work the <strong>DIGI</strong><strong>96</strong> output wave device has to be selected in 'Control Panel/Sounds and Multimedia/Audio'.<br />
Also check 'use preferred device only'.<br />
You will notice that the DVD software's audio properties now allow to use 'SPDIF Out' or to<br />
'activate SPDIF output'. When selecting these, the software will transfer the non-decoded digital<br />
multichannel data stream using the <strong>RME</strong> card.<br />
This 'SPDIF' signal sounds like chopped noise at highest level. Therefore check 'Non-audio' in<br />
the card's Settings dialog, to prevent most SPDIF receivers from accepting the signal, and to<br />
prevent any attached equipment from being damaged.<br />
Setting the card to be used as system playback device is against common sense, as professional<br />
cards are not specialized to play back system sounds, and shouldn't be disturbed by<br />
system events. To prevent this, be sure to re-assign this setting after usage, or to disable any<br />
system sounds (tab Sounds, scheme 'No audio').<br />
Note: The DVD player will be synced backwards from the <strong>RME</strong> card. This means when using<br />
AutoSync and/or word clock, the playback speed and pitch follows the incoming clock signal.<br />
User's Guide <strong>DIGI</strong><strong>96</strong>/8 <strong>PAD</strong> © <strong>RME</strong> 10
8.8 Low Latency under MME (Buffer Size Adjustment)<br />
Using Windows 95 or 98 the MME buffer size was nothing to worry about. Latencies below 46<br />
ms were not possible. Meanwhile both computers and operating system have become much<br />
more powerful, and since Windows ME/2000/XP latencies far lower can be used. SAWStudio<br />
and Sonar allowed to use such low settings from the start. Sequoia was updated in version<br />
5.91, WaveLab in version 3.04.<br />
In the Settings dialog the MME buffersize (in fact the DMA buffer size) is set with the same<br />
buttons as the ASIO buffer size. Please note that this setting only defines the buffer size of the<br />
hardware. The true and effective latency is configured within the MME application!<br />
Attention: the DMA buffers must not be larger than the application's buffers. This case can<br />
happen unnoticed when using ASIO and MME at the same time (multiclient) and setting<br />
MODE to 2048 (46 ms), while the buffers in the MME application are still set for a lower latency.<br />
Playback will be stuttering and audio will be distorted.<br />
Example: when you set the <strong>DIGI</strong><strong>96</strong> to 2048 you can't use 1024 in any program. But setting the<br />
card's MME buffer to 256 allows to use 512 and all higher values within the MME software.<br />
User's Guide <strong>DIGI</strong><strong>96</strong>/8 <strong>PAD</strong> © <strong>RME</strong> 11
9. Configuring the <strong>DIGI</strong><strong>96</strong>/8 <strong>PAD</strong><br />
9.1 General<br />
The hardware of the <strong>DIGI</strong><strong>96</strong> series includes a number of helpful, well thought-of, practical functions<br />
and options, which allow you to configure the behaviour of the card to suit many different<br />
requirements. Through ‘Settings’ you will gain access to:<br />
• Input selection<br />
• Output operation<br />
• Output Channel Status<br />
• Synchronization behaviour<br />
• Input and output status display<br />
The display of the current input frequency and format is updated every 0.5 seconds. When<br />
choosing an input with a signal including errors or without any input signal the statement ‘No<br />
Lock’ appears, in vari-speed operation or with sample frequencies widely out of tune ‘Out of<br />
Range’ is shown. If the current signal has SPDIF or AES/EBU format then 'Stereo' is displayed,<br />
with ADAT format ‘ADAT' is shown.<br />
The three states of the output<br />
selected through the choicebox<br />
‘Output’ control the monitoring<br />
behaviour of the card.<br />
‘Automatic’ sets the normal<br />
mode where the input signal<br />
reaches the output only whilst<br />
recording. In this mode, when<br />
starting a recording, feedback<br />
occurs very often when using<br />
digital mixing desks. ‘Play only’<br />
solves this problem by making<br />
sure that the input signal is never<br />
passed to the output.<br />
After selecting ‘Input’, the input<br />
signal appears at the output<br />
whenever playback is not active.<br />
<strong>DIGI</strong><strong>96</strong>/8 <strong>PAD</strong> saves a<br />
continual record standby mode<br />
and can switch itself to monitoring<br />
without active software. As<br />
switching between the inputs is<br />
carried out in realtime, stepping<br />
through the inputs gives a fast<br />
check of the incoming signals.<br />
Settings should not be changed during playback or record if it can be avoided, as this can cause<br />
unwanted noises. Also, please note that even in 'Stop' mode, several programs keep the<br />
recording and playback devices open, which means that any new settings might not be applied<br />
immediately.<br />
Specific information about the right choice of the output's Channel Status (output format Consumer<br />
/ Professional) can be found in chapter 11.<br />
User's Guide <strong>DIGI</strong><strong>96</strong>/8 <strong>PAD</strong> © <strong>RME</strong> 12
Input<br />
Defines the current input. Under W9x an additional option called Autoselect can be selected.<br />
When active, the digital inputs will be changed automatically until a valid input signal is detected.<br />
Stereo Devices (W2k only)<br />
SyncAlign operates fully automated and should be kept active all the time. Only in case the<br />
stereo devices must operate completetely independent, deactivating this setting may be necessary.<br />
Safe Mode<br />
Check Input verifies the current input signal against the settings in the record program. When<br />
de-activated a recording will always be allowed, even with non-valid input signals.<br />
W9x only: 'Disable DS' deactivates the DirectSound support of the driver (see chapter 13.2).<br />
Output<br />
With ‘Automatic’ active, the input signal reaches the output only whilst recording. ‘Play only’<br />
prevents the input signal from being passed to the output. After selecting ‘Input’, the input signal<br />
appears at the output whenever playback is not active.<br />
Output Format<br />
'Automatic' sets the output to 2-channel SPDIF or 8-channel ADAT mode, according to the<br />
current use of the card's devices. Select 'Force Adat' to constantly have the output operating in<br />
ADAT mode. 'A/S Conv.' forces the card's output into stereo operation.<br />
Specific information about 'Professional', 'Emphasis' and 'Non-Audio' can be found in chapter<br />
11.<br />
Analog Output<br />
Track<br />
Defines, which of the four channel pairs is sent to the analog output.<br />
Attenuation<br />
Attenuation of the analog output level in steps of 6 dB.<br />
Volume<br />
Attenuation of the analog output level via fader. With 'Couple' activated, both faders move<br />
simultaneously.<br />
Clock Mode<br />
The card can be configured to use the selected input (AutoSync), a word clock signal (Word<br />
Clock), or its internal clock (Master) as clock source.<br />
Status Displays<br />
The displays at the bottom of the dialog box give precise information about the current status of<br />
the card like format of input and output signal, sample rate at input and output, or current clock<br />
mode.<br />
User's Guide <strong>DIGI</strong><strong>96</strong>/8 <strong>PAD</strong> © <strong>RME</strong> 13
9.2 Force Adat<br />
The function 'Force Adat' is a mighty feature of the <strong>DIGI</strong><strong>96</strong>/8 series. It forces the digital output<br />
into ADAT mode (i.e. 8-channel operation).<br />
When using a 'normal' 2-track program to play a stereo file, you're not only able to send the<br />
data to any SPDIF device, but also to any other ADAT interface! Just activate 'Force Adat' and<br />
choose the stereo pair that corresponds to the channels you want the data being transfered to<br />
(for example <strong>DIGI</strong><strong>96</strong>/8 <strong>PAD</strong> (3+4)).<br />
When 'Force Adat' is activated, more than one 2-channel (stereo) program can access the<br />
ADAT interface simultaneously (see chapter 12).<br />
If the software being used requires a continuous ADAT mode, activate the switch ‘Force Adat'<br />
in the <strong>RME</strong> <strong>DIGI</strong> Settings dialog.<br />
When using ASIO and only one stereo output bus, activated 'Force ADAT' causes the output<br />
to operate in ADAT format (see chapter 13).<br />
When the <strong>DIGI</strong> is set to pass-through operation (constant monitoring of the input signal by<br />
selecting 'Input' mode) it turns into a real-time SPDIF to/from ADAT converter, processed by<br />
the hardware without any additional software. Activated 'Force Adat' allows you to use the card<br />
as a format converter from SPDIF to ADAT. The stereo signal at the input is copied to all 4<br />
stereo pairs of the output. The option 'A/S Conv.' forces the card's output into stereo operation.<br />
Then the card works as format converter from ADAT to SPDIF. Use the 'Track' buttons to<br />
define which one of the 4 stereo input pairs will be routed to the SPDIF output.<br />
9.3 Analog Output<br />
Whenever the card's output operates in ADAT format, the 2-channel analog output will play<br />
back one of the four stereo pairs. The desired pair can be selected in the 'Track' field of the<br />
Settings dialog. In SPDIF (stereo) mode the Track selection has no functionality.<br />
The analog output level can be set coarse (four 6 dB steps) or fine using the faders in the field<br />
'Volume'. Both methods operate simultaneously and with digital precision. The shown damping<br />
values are exactly the ones used. The used technique avoids changes in frequency response<br />
and distortion. Only the dynamic range will decrease at higher dampings, as the noise level of<br />
the analog output stage remains unchanged.<br />
User's Guide <strong>DIGI</strong><strong>96</strong>/8 <strong>PAD</strong> © <strong>RME</strong> 14
9.4 Tab 'Mode'<br />
The Buffer Size value can be set in the <strong>RME</strong> <strong>DIGI</strong> Settings dialog, tab 'Mode'. This setting determines<br />
the latency (the delay) between the audio application and the <strong>DIGI</strong><strong>96</strong> series, as well<br />
as general system stability. The higher the value, the more tracks can be recorded and played<br />
back simultaneously, and the longer the system takes to react.<br />
In <strong>RME</strong> <strong>DIGI</strong> Settings, tab 'Mode', 4 different buffer sizes are available: 256 (6 ms), 512 (11<br />
ms), 1024 (23 ms), 2048 (46 ms). As the real latency depends on the used sample rate, the<br />
values are different for different sample rates:<br />
Choice Buffer size Resolution 44.1 kHz 48 kHz 88.2 kHz <strong>96</strong> kHz<br />
46 ms/16 bit 2048 s 16 bit 46.4 ms 42.7 ms 23.2 ms 21.3 ms<br />
23 ms/32 bit 1024 s 32 bit 23.2 ms 21.3 ms 11.6 ms 10.7 ms<br />
11 ms/16 bit 512 s 16 bit 11.6 ms 10.7 ms 5.8 ms 5.3 ms<br />
6 ms/32 bit 256 s 32 bit 5.8 ms 5.3 ms 2.9 ms 2.7 ms<br />
The stated latency describes only one way. The complete path through the computer (record<br />
plus playback, monitoring) gives double values.<br />
The setting of the buffer size affects all formats.<br />
MME: Defines lowest possible latency. The current latency and bit resolution is set in the MME<br />
application.<br />
ASIO: Sets current latency. Defines the effective interface resolution to 16 or 32 bit.<br />
GSIF: Sets current latency and locks the current interface resolution to 16 or 32 bit. In Gigastudio's<br />
Hardware Settings the same (and only this) resolution will be displayed, either 24 (32) or<br />
16 bit.<br />
9.5 Boot-Option ADAT<br />
The jumper JP4, labelled 'Boot ADAT', configures the card's state between power-on of the<br />
computer and completed boot of the OS. The card is shipped with the jumper set, thus starting<br />
in ADAT mode. This option was introduced because several external devices, especially digital<br />
mixing desks like Yamaha's 01V or Spirit's 328 will produce noise when an SPDIF signal is<br />
present at their ADAT input.<br />
The other way round will normally not cause any problem, as most SPDIF and AES/EBU input<br />
circuits recognize 'wrong' formats, and automatically mute the digital audio signal. To start the<br />
card in SPDIF mode simply pull off jumper JP4.<br />
User's Guide <strong>DIGI</strong><strong>96</strong>/8 <strong>PAD</strong> © <strong>RME</strong> 15
9.6 Clock Modes - Synchronization<br />
In the digital world, all devices are either the 'Master' (clock source) or a 'Slave' synchronized to<br />
the master. Whenever several devices are linked within a system, there must always be a single<br />
master. The <strong>DIGI</strong><strong>96</strong> series includes a very user-friendly intelligent clock control, which<br />
handles the clock switching between master and slave on its own. Click on 'AutoSync' to activate<br />
this mode.<br />
In AutoSync mode, the card constantly scans for a valid input signal at the active input. As<br />
soon as this matches the current playback sample rate, the card switches from the internal<br />
quartz (display 'Clock Master') to the clock generated from the input signal (display 'Clock Slave').<br />
This allows on-the-fly recording, even during playback, without having to synchronize the<br />
card to the input signal first. It also allows immediate playback at any sample rate without having<br />
to reconfigure the card.<br />
'AutoSync’ guarantees a fault-free function of the modes Record, Record while Play and while<br />
using more than one card (see chapter 10). In certain cases however, e.g. when the inputs and<br />
outputs of a DAT machine are connected directly to the <strong>DIGI</strong><strong>96</strong>/8 <strong>PAD</strong>, AutoSync causes<br />
feedback in the digital carrier, so synchronization breaks down. To remedy this, switch the<br />
card's clock mode over to 'Master'.<br />
Due to the outstanding clock control and PLL a synchronization of the output signal to the input<br />
signal is not only possible at identical sample rates, but also at double/half sample rates.<br />
AutoSync allows multiple cards to be easily synchronized by applying one input signal to all<br />
inputs simultaneously (see chapter 10).<br />
Thanks to the described AutoSync technology and a lightning fast PLL the <strong>DIGI</strong><strong>96</strong> Series is not<br />
only capable of handling standard frequencies, but also any sample rate between 25 and 105<br />
kHz. The digital input serves as synchronization source. Please note that at the start of a record<br />
or playback a valid sample frequency (32 kHz, 44.1 kHz, 48 kHz, 64 kHz, 88.2 kHz, <strong>96</strong> kHz)<br />
has to be fed. When started the sample frequency can be pitched to whatever is needed,<br />
<strong>DIGI</strong><strong>96</strong>/8 <strong>PAD</strong> will follow theses changes immediately.<br />
When using the optional Word Clock Module (clock mode 'Word Clock') the word clock input<br />
can serve as synchronization source. In vari-speed operation any sample frequency between<br />
25 kHz and 105 kHz is allowed.<br />
Only one device can be master in a digital system! When <strong>DIGI</strong><strong>96</strong>/8 <strong>PAD</strong> operates in clock<br />
mode 'Master', all other devices have to be 'Slave'.<br />
More information on these subjects can be found in the HTML document 'sync<strong>96</strong>.htm', located<br />
in the directory \rmeaudio.web\english\techinfo on the <strong>RME</strong> Driver CD, or on our web site.<br />
User's Guide <strong>DIGI</strong><strong>96</strong>/8 <strong>PAD</strong> © <strong>RME</strong> 16
10. Using more than one <strong>DIGI</strong><strong>96</strong>/8 <strong>PAD</strong><br />
All our drivers can communicate simultaneously with all the cards registered in the system. The<br />
driver marks them with different numbers after the device's name, like ‘<strong>DIGI</strong><strong>96</strong>/8 <strong>PAD</strong> In (1)’.<br />
Thanks to our AutoSync technology multiple cards can be synchronized easily by applying one<br />
input signal to all inputs simultaneously.<br />
In order to connect more than one <strong>DIGI</strong><strong>96</strong>/8 <strong>PAD</strong> to a digital mixing desk they must all<br />
get the same clock(ed input signal). This is easy to achieve: just connect at least one input of<br />
each card to one output of the mixing desk.<br />
Example 1: All <strong>DIGI</strong>'s digital inputs are connected to other devices synced to the word clock<br />
net.<br />
Activate the corresponding input of each card in its Settings dialog, and activate the mode AutoSync<br />
at all cards.<br />
Example 2: Only the outputs of the <strong>DIGI</strong>s are connected to other devices.<br />
Connect the internal Sync-Out of the master card to the Sync-In (CD-ROM) of the second card,<br />
activate its internal input and AutoSync mode. Next connect the third card in the same way,<br />
from the second's card Sync-Out to the third's card Sync-In. Configure this card like the second<br />
one. The necessary 2-wire cables are the ones supplied with the <strong>DIGI</strong> cards. Of course this<br />
method is also operational with the external connectors, like optical or coaxial, as long as the<br />
corresponding input is activated.<br />
A convenient alternative is the test mode of the optional Word Clock Module WCM.<br />
Please note when using more than one card plus the word clock output that only one card<br />
can be master!<br />
Example 3: All <strong>DIGI</strong>s are correctly connected to the Word Clock Module.<br />
Activate the test mode by pushing the test switch, so the red LED lights up. Next activate the<br />
mode 'Word Clock' in all card's settings dialogs. Now all cards should show 'Word Clock' in the<br />
third line of 'Output Status'.<br />
After activating the test mode all internally connected cards are immediately synchronized, in<br />
case clock mode 'Word Clock' was activated in all settings dialogs.<br />
More information on this subject can be found in the HTML document 'sync<strong>96</strong>.htm', located in<br />
the directory \rmeaudio.web\english\techinfo on the <strong>RME</strong> Driver CD, or on our web site.<br />
User's Guide <strong>DIGI</strong><strong>96</strong>/8 <strong>PAD</strong> © <strong>RME</strong> 17
11. Special Features of the Digital Output<br />
Apart from the audio data itself, digital audio signals in SPDIF or AES/EBU format include a<br />
header containing Channel Status information. False Channel Status is a common cause of<br />
malfunction. The <strong>DIGI</strong><strong>96</strong> series ignores the received header and creates a totally new one for<br />
the output signal.<br />
Note that in record or monitor modes, set emphasis bits will disappear. Recordings originally<br />
done with emphasis should always be played back with the emphasis bit set!<br />
This can be done by selecting the ‘Emphasis’ switch in the Settings dialogue. The changes in<br />
sound caused by this setting can be monitored in real-time at the analog output jack. At 64,<br />
88.2 and <strong>96</strong> kHz sample rate the analog output does not support De-Emphasis, so no change in<br />
sound will be audible.<br />
The <strong>DIGI</strong><strong>96</strong> series' new output header is optimized for largest compatibility with other digital<br />
devices:<br />
• 32 kHz, 44.1 kHz, 48 kHz, 64 kHz, 88.2 kHz, <strong>96</strong> kHz, depending on the current sample rate<br />
• Audio use, Non-Audio<br />
• No copyright, copy permitted<br />
• Format Consumer or Professional<br />
• Category General, generation not indicated<br />
• 2-Channel, No Emphasis or 50/15 µs<br />
• Aux bits audio use<br />
Note that most consumer-orientated equipment (with optical or phono SPDIF inputs) will<br />
only accept signals in ‘Consumer’ format!<br />
The status 'Professional' should always be activated when using AES/EBU format (when the<br />
XLR connectors are used).<br />
The audio bit in the header can be set to 'Non-Audio'. This is necessary when Dolby AC-3 encoded<br />
data is sent to external decoders (surround-sound receivers, television sets etc. with AC-<br />
3 digital inputs), as these decoders would otherwise not recognize the data as AC-3.<br />
When playing back in multi channel mode (using the optical ADAT interface) the XLR and<br />
coaxial connectors will be turned off. This prevents sound disturbance by the ADAT signal fed<br />
to SPDIF or AES/EBU inputs.<br />
User's Guide <strong>DIGI</strong><strong>96</strong>/8 <strong>PAD</strong> © <strong>RME</strong> 18
12. Notes on the ADAT Interface<br />
<strong>DIGI</strong><strong>96</strong>/8 <strong>PAD</strong> comes with two different driver methods in one driver. Using channel<br />
interleave there is only one device, the software in use divides the channels into 8 mono tracks.<br />
Because this easy to handle 'Windows native' method is not widely used the <strong>DIGI</strong><strong>96</strong>/8<br />
<strong>PAD</strong> also supports Multi-Device operation. The driver routes the 8 tracks in 4 stereo devices.<br />
These 4 stereo devices can be used by nearly any software to record or playback more than 2<br />
channels simultaneously, making <strong>DIGI</strong><strong>96</strong>/8 <strong>PAD</strong> compatible to a wide range of already<br />
existing software.<br />
<strong>DIGI</strong><strong>96</strong>/8 <strong>PAD</strong> includes an intelligent hardware controller for ease of use. Whenever<br />
more than 2 channels are used, no matter with record, playback or both, the card switches into<br />
ADAT mode. Whenever an ADAT signal is present at the optical input the settings dialog of the<br />
<strong>DIGI</strong><strong>96</strong>/8 <strong>PAD</strong> indicates ‘ADAT 44,1 kHz' or 'ADAT 48 kHz'. If now the output function is<br />
set to ‘Input’ while AutoSync is active the card's output changes to ADAT mode to allow input<br />
monitoring of up to 8 channels. The analog output allows you to listen to any of the four stereo<br />
pairs. The desired pair can be selected in the 'Track' field of the Settings dialogue.<br />
If the software being used requires a continuous ADAT mode activate the switch ‘Force Adat' in<br />
the Settings dialog.<br />
When using a 'normal' 2 track program to play or record a stereo file, you're not only able to<br />
send the data to any SPDIF device but also to any other ADAT interface! Just activate 'Force<br />
Adat' and choose the stereo pair that corresponds to the desired channels (for example<br />
<strong>DIGI</strong><strong>96</strong>/8 <strong>PAD</strong> (3+4)).<br />
In SPDIF mode it doesn't matter which stereo device is being used.<br />
13. Multiclient Operation<br />
13.1 General<br />
The <strong>DIGI</strong><strong>96</strong>/8 series supports multiclient operation. That means more than one program can be<br />
used at the same time. But this mode is only available as long as certain rules are followed. For<br />
a flawless multiclient operation with multiple programs the below guidelines have to be followed<br />
precisely.<br />
Rule 1: Multiclient operation always requires the activation of Force Adat!<br />
After an activation of Force Adat all 4 output pairs can be used freely. You can use 4 different<br />
MME programs, or two stereo pairs under ASIO, one under GSIF and one under MME – any<br />
combination is allowed.<br />
Rule 2: Multiclient operation always requires identical sample rates and bit resolutions!<br />
It is not possible to run one program at 44.1 kHz and another one at 48 kHz. Also it's not possible<br />
to run one program in 16 bit and another one in 24 (32) bit resolution. Please note that the<br />
selected latency (Mode) also sets the bit resolution for GSIF and ASIO!<br />
User's Guide <strong>DIGI</strong><strong>96</strong>/8 <strong>PAD</strong> © <strong>RME</strong> 19
Rule 3: It is not possible to use the same channels with different programs simultaneously.<br />
If for example Cubase uses channels 1/2 (default in Cubase, Master bus), this output pair can't<br />
be used in Gigasampler/Studio (default) nor under MME.<br />
13.2 Multi Channel Direct Sound (Win 9x only)<br />
The Windows 95/98 driver of the <strong>DIGI</strong><strong>96</strong> series supports DirectSound. Due to compatibility<br />
reasons DirectSound is de-activated by default. To activate the DirectSound support un-check<br />
'Disable DS' in the Settings dialog.<br />
Additionally the driver offers multi-device DirectSound. This mode is not officially supported by<br />
Windows 95/98, but works perfectly for example with BPM-Studio. In this mode<br />
DS/ASIO/MME/GSIF can be used simultaneously, as long as different channels are assigned to<br />
each driver format. Only the combination ASIO/MME is not supported.<br />
The multi-device mode for DirectSound requires 'Force ADAT' to be set in the Settings dialog!<br />
The <strong>DIGI</strong><strong>96</strong> series requires identical formats when used in multi-client operation! All programs<br />
simultaneously accessing the <strong>DIGI</strong> MUST use the same sample rate and bit resolution.<br />
User's Guide <strong>DIGI</strong><strong>96</strong>/8 <strong>PAD</strong> © <strong>RME</strong> 20
14. Operation under ASIO 2.0<br />
14.1 General<br />
As Steinberg is the inventor of ASIO we have chosen Steinberg's Cubase VST as example on<br />
how to use and setup our cards in ASIO operation.<br />
Our ASIO driver supports any<br />
combination of cards from the<br />
<strong>DIGI</strong><strong>96</strong> series. Important: Multiple<br />
cards MUST be synchronized<br />
among themselves! This<br />
may be done by using the<br />
input signal (having a common<br />
clock source, for example a<br />
digital mixing desk), several<br />
synchronized ADATs or the<br />
<strong>RME</strong> Word Clock Module.<br />
Start the ASIO application, go<br />
to ASIO/System and choose<br />
the device 'ASIO <strong>DIGI</strong><strong>96</strong> Series'.<br />
The button 'ASIO system<br />
control' directly starts the Settings<br />
dialog of the <strong>DIGI</strong><strong>96</strong><br />
series (see chapter 9).<br />
Switching between SPDIF (2 channel) and ADAT (8 channel) is done in a very easy and convenient<br />
way.<br />
Playback: When using more than 2 tracks (Master bus plus at least one other) the card switches<br />
into ADAT mode. Simply activate 'Force Adat' in the settings dialog in case the ADAT<br />
format is desired when playing back only 2 tracks.<br />
Record: The card automatically recognizes ADAT or SPDIF signals and immediately switches<br />
into the corresponding mode. It doesn't matter how many inputs are activated. When more than<br />
one input is active and a SPDIF signal is present at the input this (stereo) signal will be routed<br />
to input 1+2.<br />
Mixed Mode: Because of the extended ASIO driver concept it is possible to record from a<br />
SPDIF source while playing back in ADAT format and vice versa (Mixed Mode). Under certain<br />
configurations sync problems might occur, which make it neccessary to use an external word<br />
clock for all participating devices.<br />
The Enhanced Zero Latency mode of the <strong>DIGI</strong><strong>96</strong> series enables the 'ASIO Direct Monitoring'<br />
feature of the ASIO 2.0 standard to be used. Please note that in this mode neither routing nor<br />
pan are supported so the input signals will only be routed to the same output channel. Other<br />
VST mixer settings have no effect.<br />
User's Guide <strong>DIGI</strong><strong>96</strong>/8 <strong>PAD</strong> © <strong>RME</strong> 21
14.2 Buffer Size - Latency<br />
The Buffer Size value in the <strong>RME</strong> <strong>DIGI</strong> Settings dialog determines the latency (in this case the<br />
delay) between the audio application and the <strong>DIGI</strong><strong>96</strong> series as well as general system stability.<br />
The higher the value, the more tracks can be recorded and played back simultaneously, and<br />
the longer the system takes to react.<br />
The indicated bit resolution is independent from the chosen bit resolution in Cubase. Selecting<br />
16 bit in the driver and 24 bit in Cubase will cause Cubase to record 16 bit data and 8 bit zeroes.<br />
Selecting 24 bit in the driver and 16 bit in Cubase, the bits 17 to 24 get lost (which only<br />
matters if they included information at all).<br />
Please note that the latency setting describes only one way. The complete path through the<br />
computer (record plus playback, monitoring) gives double values.<br />
More information on how to set up the latency under ASIO can be found in chapter 9.4, Tab<br />
'Mode'.<br />
14.3 Known problems<br />
In case the used computer has no sufficient CPU-power and/or sufficient PCI-bus transfer rates,<br />
then drop outs, crackling and noise will appear. We also recommend to deactivate all PlugIns<br />
to verify that these are not the reason for such effects.<br />
Unfortunately some newer UltraATA66 and UltraATA100 hard disk controller (also Raid controller)<br />
seem to violate against the PCI specs. To achieve the highest throughput they hog the PCI<br />
bus, even in their default setting. Thus when working with low latencies heavy drop outs (clicks)<br />
are heard. Try to solve this problem by changing the default setting of the controller (for e-<br />
xample by reducing the 'PCI Bus Utilization').<br />
Another typical source of trouble is wrong synchronization. ASIO does not support asynchronous<br />
operation. This means input and output signal must not only have the same sample frequency,<br />
but must also be 'in sync' for error-free Full Duplex operation.<br />
User's Guide <strong>DIGI</strong><strong>96</strong>/8 <strong>PAD</strong> © <strong>RME</strong> 22
15. Operation under GSIF (Gigasampler Interface)<br />
15.1 Windows 98/SE/ME<br />
The GSIF interface of the <strong>DIGI</strong><strong>96</strong> series Windows 98/SE/ME driver allows direct operation with<br />
Gigasampler and Gigastudio, with up to 8 channels, <strong>96</strong>kHz and 24bit. Additionally the driver<br />
supports multi-client operation. For example ASIO can use channels 1/2 and Gigastudio (with<br />
GSIF) channels 3/4 simultaneously, and so on.<br />
In case more than 2 channels shall be used under GSIF, activate 'Force ADAT' in the Settings<br />
dialog before starting the software.<br />
Gigasampler/Studio requires a lot of the computer’s calculation power. An optimum performance<br />
is achieved with a stand-alone GSIF PC. Else we recommend not to use the <strong>DIGI</strong><strong>96</strong> ASIO<br />
driver, but the ASIO Multimedia driver. It can be set to much higher latencies (i.e. 750 ms),<br />
thus providing a problem-free simultaneous operation of ASIO and Gigastudio. Gigastudio itself<br />
will still work at a very low latency.<br />
The <strong>DIGI</strong><strong>96</strong> series requires identical formats when used in multi-client operation! All programs<br />
simultaneously accessing the hardware MUST use the same sample rate and bit<br />
resolution. Otherwise de-tuned sound or no sound at all will be heared.<br />
Additional simultaneous operation of GSIF and ASIO requires to use different channels. As<br />
Cubase VST always uses tracks 1/2 these tracks must not be activated in Gigastudio/Sampler.<br />
The tracks activated under GSIF have to be de-activated in ASIO.<br />
Please note that the ASIO Multimedia driver will use the maximum bit resolution by default. If<br />
the bit resolution of Gigasampler/Studio and other programs do not match, audio output will be<br />
stopped, until the settings match and a reset is initiated ('Reset Devices' or software restart).<br />
15.2 Windows 2000/XP<br />
Basically as under Windows 9x. Differences: GSIF under W2k/XP uses a modified interface,<br />
which needs interrupts (similar to ASIO). Therefore the user can now set and change the latency<br />
(under W9x latency was fixed inside Gigastudio). However, when using the Hammerfall<br />
DSP, the latency is always the same as the one selected for ASIO operation. This can cause<br />
performance problems on slower machines when using GSIF and ASIO at the same time.<br />
Please note that the W2k/XP driver fully supports multiclient operation, including the combination<br />
MME/ASIO. So for example Cubase, Gigastudio and Sonar can be used simultaneously,<br />
provided each of these programs uses its own audio channels exclusively. Please also note<br />
that Gigastudio is running unexpectedly in the background (thus blocking its assigned audio<br />
channels), as soon as the Gigastudio MIDI ports are used – even when Gigastudio itself hasn't<br />
been started.<br />
User's Guide <strong>DIGI</strong><strong>96</strong>/8 <strong>PAD</strong> © <strong>RME</strong> 23
16. Hotline - Troubleshooting<br />
16.1 General<br />
The newest information can always be found on our website www.rme-audio.com, section FAQ,<br />
Latest Additions.<br />
Playback works but recording doesn´t:<br />
• Check that a valid input signal is at hand. In this case the Error LED on the hardware turns<br />
off, and the current sample frequency is shown under 'Settings'.<br />
• If you are sure that a valid signal is being sent but the LED is still red, then check the currently<br />
selected input in the Settings dialogue.<br />
• Check whether the <strong>DIGI</strong><strong>96</strong>/8 <strong>PAD</strong> has been selected as recording device in the audio<br />
application.<br />
• Check whether the sample frequency set in the audio application (‘Recording properties’ or<br />
similar) matches the input signal.<br />
• Check that there is no loop cabling present. If so set 'Clock Mode' to 'Master'.<br />
The input signal cannot be monitored in real-time<br />
• Monitoring has not been enabled (for example 'Global disable' in Cubase).<br />
Only the playback signal, but not the record (input) signal is present at the output<br />
• The <strong>DIGI</strong><strong>96</strong> series has no hardware mixer. Therefore while playback is running only the<br />
playback signal is present at the output. The mixing of record and playback signal has to be<br />
done in the software (for example deactivate Cubase's 'ASIO Direct Monitoring').<br />
The SPDIF output does not work<br />
• The output operates in ADAT Mode, see Output Status Display. This may be caused by<br />
Force Adat being activated, an activation of more than the first (1/2) Master output busses in<br />
Cubase, or when 'Max I/O' (under Hardware & Driver) wasn't set to 2 in Logic.<br />
Low Latency ASIO operation under Windows 2000/XP on single CPU systems:<br />
• To use ASIO at lowest latencies under Windows 2000/XP even when only having one CPU,<br />
the system performance has to be optimized for background tasks. Go to Control Panel/System/Advanced/Performance<br />
Options. Change the default 'Applications' to 'Background<br />
tasks'. The lowest usable latency will drop from 23 ms to around 3 ms. This is no issue<br />
when using dual CPU systems.<br />
The recording or the playback is disturbed by crackling:<br />
• Increase the quantity and size of the buffers in the software being used.<br />
• Use a different cable (coaxial or optical) to cross-check them for defects.<br />
• Check that there is no loop cabling present. If so set 'Clock Mode' to 'Master'.<br />
• In case of loop cabling with an ADAT we recommend to use the ADAT as master (Int) and<br />
the <strong>DIGI</strong> as slave (AutoSync).<br />
• Increase the buffer size of the hard disk cache (example: from 64 kB to 256 kB).<br />
• Activate Busmaster mode for the hard disks. Windows: Device Manager, double-click on<br />
‘Disk drives’, then on the required hard disk(s). Select ‘DMA’ in the Properties dialog.<br />
User's Guide <strong>DIGI</strong><strong>96</strong>/8 <strong>PAD</strong> © <strong>RME</strong> 24
Cubase seems to work, but no signal shows up at the output of the <strong>DIGI</strong><strong>96</strong><br />
• This can also happen with Logic or other programs. Most propably Gigasampler/Gigastudio<br />
has been installed. Programs like Cubase then use the newly installed Gigastudio MIDI-<br />
Ports, thus activating GSIF on the audio channels which are set inside Gigastudio (default:<br />
1/2). As a result ASIO (also 1/2) is blocked. This effect vanishes as soon as the Gigastudio<br />
ports are deactivated in Cubase' Setup MME.<br />
16.2 Installation<br />
More information on installation problems (which fortunately are very seldom, thanks to Plug<br />
and Play), can be found in the Tech Info 'Installation problems', located in the directory<br />
\rmeaudio.web\techinfo on the <strong>RME</strong> Driver CD.<br />
The card is normally found in the Device Manager (>Settings/Control Panel/System
17. <strong>DIGI</strong>Check: Analysis, Test and Measurements using the <strong>DIGI</strong><strong>96</strong> series<br />
The <strong>DIGI</strong><strong>96</strong> series from <strong>RME</strong> is accompanied by a world wide unique software tool: <strong>DIGI</strong>Check,<br />
the incredible utility for test, measure and analysis of the digital audio data stream.<br />
<strong>DIGI</strong>Check is based on functions of our well-known DAM-1, the Digital Audio Monitor. This<br />
device uses a built-in DSP for its calculations. Therefore <strong>DIGI</strong>Check is not able to realize all the<br />
functions of the DAM-1. Additionally, the DAM-1 works perfectly in the background while <strong>DIGI</strong>-<br />
Check will cause a certain CPU load.<br />
<strong>DIGI</strong>Check also includes test routines from our research lab and our production site. Thus you<br />
are able for the first time to run a detailed function and performance test with your own audio<br />
card in your own computer, like it isn't possible with any other test tool.<br />
Although the <strong>DIGI</strong>Check software is fairly self-explanatory, it still includes a comprehensive<br />
online help. A detailed description of all functions and the technical background is also available<br />
in HTML format (digich.htm, in the \techinfo directory on the <strong>RME</strong> Drivers CD or from our<br />
website). The following is a short summary of the available functions:<br />
• Level Meter. High precision 24-bit resolution, 2/8 channels. Application examples: Peak<br />
level measurement, RMS level measurement, Over detection, phase correlation measurement,<br />
dynamic range and signal-to-noise ratios, RMS to peak difference (loudness), long<br />
term peak measurement, input check<br />
• Channel Status Display. Shows the channel status information contained in the digital<br />
audio data stream. Sample rate measurement<br />
• Bit Statistics. Shows the true resolution of audio signals as well as errors and DC offset<br />
• Performance Test. Measurement of the PCI-bus data transfer<br />
• Memory Test. Tests the on board SRAM and the entire data path in the PC<br />
To install <strong>DIGI</strong>Check, go to the \<strong>DIGI</strong>Check directory on the <strong>RME</strong> Drivers CD and run setup.exe.<br />
Follow the instructions prompted on the screen.<br />
18. TECH INFO<br />
<strong>RME</strong> provides more information on the TECH INFO pages in the web (http://www.rmeaudio.com/techinfo/index.htm),<br />
and in the directory \rmeaudio.web\techinfo on the <strong>RME</strong><br />
Driver CD. Here are some examples of available Tech Infos:<br />
Synchronization II (<strong>DIGI</strong><strong>96</strong> series)<br />
Digital audio synchronization: technical background, problems<br />
Installation Problems<br />
..and their solutions<br />
List of Driver Updates<br />
Lists all driver updates and the changes in them<br />
Configuration of Samplitude, Cubase, Logic, Cakewalk 7.0, Sonar and SAWPlus32 using the<br />
<strong>DIGI</strong><strong>96</strong> series. Step by step instructions<br />
<strong>DIGI</strong>Check: Analysis, tests and measurements with the <strong>DIGI</strong><strong>96</strong> series<br />
A description of <strong>DIGI</strong>Check, including technical basics.<br />
TMS (Track Marker Support)<br />
Description of the TMS technology to transfer CD- and DAT information.<br />
User's Guide <strong>DIGI</strong><strong>96</strong>/8 <strong>PAD</strong> © <strong>RME</strong> 26
19. Warranty<br />
Each individual <strong>DIGI</strong><strong>96</strong>/8 <strong>PAD</strong> undergoes comprehensive quality control and a complete<br />
test in a PC environment at <strong>RME</strong> before shipping. This may cause very slight signs of wear on<br />
the contacts (if the card looks like it was used one time before - it was). The usage of high grade<br />
components allows us to offer a full two year warranty. We accept a copy of the sales receipt<br />
as valid warranty legitimation.<br />
<strong>RME</strong>’s replacement service within this period is handled by the retailer. If you suspect that your<br />
card is faulty, please contact your local retailer. The warranty does not cover damage caused<br />
by improper installation or maltreatment - replacement or repair in such cases can only be carried<br />
out at the owner’s expense.<br />
<strong>RME</strong> does not accept claims for damages of any kind, especially consequential damage. Liability<br />
is limited to the value of the <strong>DIGI</strong><strong>96</strong>/8 <strong>PAD</strong>. The general terms of business drawn up<br />
by Synthax OHG apply at all times.<br />
20. Appendix<br />
<strong>RME</strong> news, driver updates and further product information are available on our website:<br />
http://www.rme-audio.com<br />
If you prefer to read the information off-line, you can load a complete copy of the <strong>RME</strong> website<br />
from the <strong>RME</strong> Driver CD (in the \rmeaudio.web directory) into your browser.<br />
Distributor in Germany:<br />
Synthax Audio AG, Am Pfanderling 62, D-85778 Haimhausen, Tel.: (49) 08133 / 91810<br />
Manufacturer:<br />
IMM Elektronik, Leipziger Str. 27, D-0<strong>96</strong>48 Mittweida<br />
Trademarks<br />
All trademarks and registered trademarks belong to their respective owners. <strong>RME</strong>, <strong>DIGI</strong><strong>96</strong>,<br />
SyncAlign, <strong>DIGI</strong>Check and ZLM are registered trademarks of <strong>RME</strong> Intelligent Audio Solutions.<br />
SyncCheck is a trademark of <strong>RME</strong> Intelligent Audio Solutions. Alesis and ADAT are registered<br />
trademarks of Alesis Corp. ADAT optical is a trademark of Alesis Corp. Microsoft, Windows,<br />
Windows 98/NT/2000/XP are trademarks of Microsoft Corp. Apple and MacOS are registered<br />
trademarks of Apple Computer Inc. Cubase and VST are registered trademarks of Steinberg<br />
Soft- und Hardware GmbH. ASIO is a trademark of Steinberg Soft- und Hardware GmbH. e-<br />
magic and Logic Audio are registered trademarks of emagic Soft- und Hardware GmbH. Pentium<br />
is a registered trademark of Intel Corp.<br />
Copyright © Matthias Carstens, 5/2002. Version 1.9<br />
Current driver version: W98: 4.<strong>96</strong>, NT 3.86, W2k/XP: 2.0<br />
This manual applies to board revision 1.6 or lower, hardware version 004.<br />
Although the contents of this User’s Guide have been thoroughly checked for errors, <strong>RME</strong> can not guarantee that it is correct<br />
throughout. <strong>RME</strong> does not accept responsibility for any misleading or incorrect information within this guide. Lending or<br />
copying any part of the guide or the <strong>RME</strong> drivers CD, or any commercial exploitation of these media without express written<br />
permission from <strong>RME</strong> Intelligent Audio Solutions is prohibited. <strong>RME</strong> reserves the right to change specifications at any time<br />
without notice.<br />
User's Guide <strong>DIGI</strong><strong>96</strong>/8 <strong>PAD</strong> © <strong>RME</strong> 27
Analog input and output: Pin assignment of the TRS jacks<br />
Analog input and output are accessible<br />
through stereo ¼" TRS jacks. This allows<br />
a direct connection of headphones<br />
at the output. In case the output<br />
should operate as line out an adapter<br />
TRS plug to RCA phono plugs, or TRS<br />
plug to TS plugs is required.<br />
The pin assignment follows international<br />
standards. The left channel is connected<br />
to the tip, the right channel to<br />
the ring of the TRS jack/plug.<br />
Pin assignment of the jumpers next to the D-type connector<br />
The optional jumpers (not fitted, not<br />
supplied) next to the D-type connector<br />
allow an internal cabling, for example when<br />
the XLR input and output jacks shall be<br />
build into the PC housing, so that the<br />
supplied cable adapter is no longer needed.<br />
When using a 10 wire computer flat<br />
cable with the appropriate connector the<br />
connection between XLR jacks and card<br />
will be removable.<br />
The pins are numbered as shown in the<br />
diagram. For a better overview the table<br />
lists the pin assignment sorted by numbers<br />
and names.<br />
Pin number Name Name Pin number<br />
1 SPDIF Out - AES In + 7<br />
2 GND AES In - 10<br />
3 SPDIF In - SPDIF In - 3<br />
4 SPDIF Out + SPDIF In + 6<br />
5 AES Out + AES Out+ 5<br />
6 SPDIF In + AES Out - 8<br />
7 AES In + SPDIF Out + 4<br />
8 AES Out - SPDIF Out - 1<br />
9 NC NC 9<br />
10 AES In - GND 2<br />
Pin assignment of the XLR/RCA Cable's D-type connector<br />
Pin Name Pin Name Pin Name<br />
1 GND 4 AES Out + 7 SPDIF In -<br />
2 SPDIF Out + 5 AES In + 8 AES Out -<br />
3 SPDIF In + 6 SPDIF Out - 9 AES In -<br />
User's Guide <strong>DIGI</strong><strong>96</strong>/8 <strong>PAD</strong> © <strong>RME</strong> 28
Block diagram<br />
User's Guide <strong>DIGI</strong><strong>96</strong>/8 <strong>PAD</strong> © <strong>RME</strong> 29
CE<br />
This device has been tested and found to comply with the limits of the European Council Directive<br />
on the approximation of the laws of the member states relating to electromagnetic compatibility<br />
(EMVG) according to EN 55022 class B and EN50082-1.<br />
FCC Compliance Statement<br />
Certified to comply with the limits for a Class B computing device according to subpart J or part<br />
15 of FCC rules. See instructions if interference to radio reception is suspected.<br />
FCC Warning<br />
This equipment has been tested and found to comply with the limits for a Class B digital device,<br />
pursuant to part 15 of the FCC rules. These limits are designed to provide reasonable protection<br />
against harmful interference in a residential installation.<br />
This device complies with part 15 of FCC rules. Operation is subject to the following two conditions:<br />
1. This device may not cause harmful interference<br />
2. This device must accept any interference received, including interference that may cause<br />
undesired operation.<br />
However, there is no guarantee that interference will not occur in a particular installation. If this<br />
equipment does cause harmful interference to radio or television reception, which can be determined<br />
by turning the equipment off and on, the user is encouraged to try to correct the interference<br />
by one or more of the following measures:<br />
• Reorient or relocate the receiving antenna<br />
• Increase the seperation between the equipment and receiver<br />
• Connect the equipment into an outlet on a circuit different from that to which the receiver is<br />
connected<br />
• Consult the dealer or an experienced radio/TV technician for help.<br />
In order for an installation of this product to maintain compliance with the limits for a Class B<br />
device, shielded cables must be used for the connection of any devices external to this product.<br />
User's Guide <strong>DIGI</strong><strong>96</strong>/8 <strong>PAD</strong> © <strong>RME</strong> 30