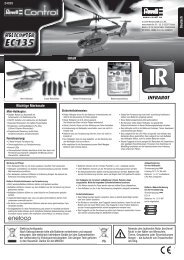
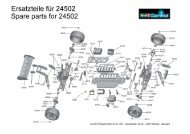
SINGLE ROTOR - Revell Control
SINGLE ROTOR - Revell Control
SINGLE ROTOR - Revell Control

Create successful ePaper yourself
Turn your PDF publications into a flip-book with our unique Google optimized e-Paper software.
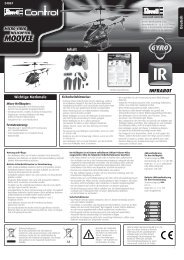
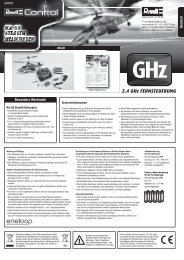
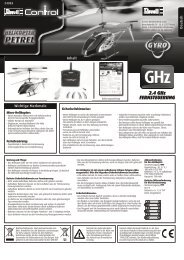
Helicopter and <strong>Control</strong>ler<br />
HELICOPTER<br />
Stabilizer<br />
Tail rotor<br />
Central rotor<br />
LED indicator<br />
Fuselage fi xing pins<br />
Landing skid<br />
Battery compartment on underside<br />
English<br />
CONTROLLER<br />
Starting position<br />
Note: The throttle stick and<br />
trimming dial must be in<br />
the down position when<br />
the controller is turned on.<br />
HELICOPTER BATTERY:<br />
Removable<br />
helicopter battery<br />
Antenna<br />
Removable battery<br />
holder on underside<br />
of helicopter<br />
Hook for<br />
carry strap<br />
Handle<br />
LED display<br />
Throttle trim dial<br />
Throttle stick /<br />
left/right rotation (yaw)<br />
Yaw trim dial<br />
Forward/backward<br />
trim dial<br />
Forward/backward<br />
fl ight (pitching) /<br />
Left/right fl ight (rolling)<br />
Roll trim dial<br />
ACCESSORIES:<br />
Automatic LiPo charger<br />
Mains adapter for charger<br />
DVD with instructions<br />
ON/OFF<br />
switch<br />
<strong>Control</strong> reverse<br />
switches<br />
Spare rotor blades<br />
Mode 2 controller functions (throttle on left side)<br />
Inserting the Batteries<br />
1. To open the battery cover, slide<br />
it downwards.<br />
2. Insert eight 1.5 V AA batteries according to the<br />
polarity in the battery compartment.<br />
3. Slide the battery compartment<br />
cover back up and close.<br />
Charging the Helicopter Battery<br />
4. If the LED indicator emits a continuous green<br />
light, the battery charge is OK. A continuous<br />
red light means the batteries are too weak<br />
and must be recharged.<br />
Note: Before charging, always wait 10 to 15 minutes for the battery to cool down in order to avoid damage.<br />
1. Turn off the helicopter and the controller. Separate the red connectors on the<br />
helicopter’s fl ight cable (pic. 1).<br />
2. Remove the battery holder from the mount (pic. 2).<br />
3. Connect the 230 V mains adapter to the LiPo charger. Insert the mains adapter<br />
into a plug socket. The RED LED on the charger lights up. Connect the LiPo battery<br />
to the charger. The GREEN LED lights up (pic. 3). Do not force.<br />
4. The battery is fully charged after 60 minutes. The GREEN LED goes out.<br />
pic. 1<br />
Disconnect the battery immediately from the charger.<br />
5. Insert the battery in the battery holder and snap it into place in the helicopter<br />
(pic. 4). Make sure that the cables do not come into contact with the landing gear on landing.<br />
pic. 4<br />
pic. 2 pic. 3<br />
The helicopter can fly for about 10 minutes after approximately 60 minutes of charging.<br />
The charging process is electronically monitored and stops automatically after 60 minutes. Never leave the helicopter unattended when recharging.<br />
7