Converting a VHF MVS radio to 220 MHz - The Repeater Builder's ...
Converting a VHF MVS radio to 220 MHz - The Repeater Builder's ...
Converting a VHF MVS radio to 220 MHz - The Repeater Builder's ...

You also want an ePaper? Increase the reach of your titles
YUMPU automatically turns print PDFs into web optimized ePapers that Google loves.
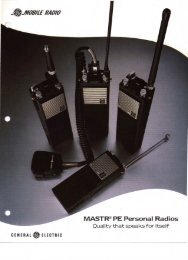
Technical Service Bulletin:<br />
FXR-14<br />
Modifying GE <strong>MVS</strong> <strong>VHF</strong> Group 2<br />
150 – 174 <strong>MHz</strong> for<br />
Amateur Radio Applications<br />
in the 219 – <strong>220</strong> & 222 – 225 <strong>MHz</strong> Band<br />
A FluX Research project in several<br />
phases<br />
Release Date: 04-01-2011<br />
Last Update: v1.2 03-01-2011<br />
Radio Model #:<br />
GE <strong>MVS</strong> - NPFH3OSS<br />
By: Matt Krick, K3MK<br />
DCFluX@yahoo.com
Warning:<br />
Please be aware that this document may contain several omissions and or<br />
typographical errors, continue reading at your own risk.<br />
Background:<br />
Special thanks <strong>to</strong> Mohave Amateur Radio Club, K7MPR for providing the <strong>radio</strong>s for<br />
experimentation.<br />
<strong>The</strong> following LBIs may be helpful:<br />
LBI-31919E <strong>VHF</strong> High band 40 watt <strong>MVS</strong> maintenance manual<br />
LBI-31920D <strong>VHF</strong> High band RF board 19D901835G2 (150-174 <strong>MHz</strong>)<br />
LBI-31921C <strong>VHF</strong> High band Power Amplifier board 19C851540G2 (150-174 <strong>MHz</strong>)<br />
LBI-31922D Audio board 19D901870G1<br />
LBI-31924F MDR, MTD, <strong>MVS</strong>, TMX-8825 System Board 19D901891G1<br />
LBI-31926C Service section for <strong>VHF</strong> high band combinations<br />
LBI-31927D <strong>MVS</strong> Opera<strong>to</strong>rs manual Covers 2 channel, 8 or 16 channel, scan,<br />
selective calling (SelCal) and PA operation
LBI-38387B <strong>MVS</strong> Front cap assembly 19D901913G1 (this is the front panel)<br />
LBI-38465B Remote mount option 19A705306G3<br />
LB-I38899 <strong>MVS</strong> / MCS / TMX-8712 / TMX-8310 Logic boards 19D901690G11<br />
Phase 0: Preparations<br />
Make sure the <strong>radio</strong> <strong>to</strong> be converted is in good working order on its original frequencies<br />
before attempting conversion <strong>to</strong> Amateur Radio use.<br />
Phase 1: Operating Frequency Reprogramming<br />
Option 1: Hack Original GE <strong>MVS</strong> v3.0 software <strong>to</strong> allow out of range programming.<br />
Copy <strong>MVS</strong>.EXE <strong>to</strong> <strong>MVS</strong><strong>220</strong>.EXE<br />
Using a suitable hex edi<strong>to</strong>r such as XVI32, Edit <strong>MVS</strong><strong>220</strong>.EXE and make the following<br />
changes:<br />
Hex Address Original Data New Data<br />
&H1A328 C0 62 00 60<br />
&H1A33F C0 65 20 6C<br />
&H1B8E9 C0 62 00 60<br />
&H1B8F1 C0 65 20 6C<br />
This changes the programming range of the software <strong>to</strong> allow 128 <strong>to</strong> 225 <strong>MHz</strong>. Transmit<br />
frequencies will show true, Receive frequencies will now have <strong>to</strong> be programmed minus<br />
90 <strong>MHz</strong>. I.E. 223.500 <strong>MHz</strong> RX is programmed as 133.500 <strong>MHz</strong>.<br />
Option 2: Use alternate firmware on the logic board.<br />
Please refer <strong>to</strong> the following website:<br />
http://www.dave-page.com/projects.html<br />
This firmware was originally designed <strong>to</strong> run the 900 <strong>MHz</strong> GE TMX-9315 in amateur<br />
bands, provisions were made <strong>to</strong> port the code <strong>to</strong> the GE <strong>MVS</strong> and one of the bands was<br />
<strong>220</strong>.<br />
It is also meant <strong>to</strong> be used with the GE TMX test handset, or a modified GE CF-1000<br />
car phone as the display. It will not drive the s<strong>to</strong>ck <strong>MVS</strong> front panel. <strong>The</strong>re is a handset<br />
emula<strong>to</strong>r program that can get the <strong>radio</strong> programmed and is useful for making link<br />
<strong>radio</strong>s where VFO programming is not needed.
<strong>The</strong> firmware requires a large EPROM with a built in latch buffer. 87C257. Later G11<br />
logic boards have this IC installed and no further modifications are necessary. Early<br />
logic boards such as the G5 have the smaller EPROM. This must be replaced for the<br />
87C257 and some modifications are needed <strong>to</strong> the G5 board as outlined in the<br />
documentation.<br />
Also note that the author of the firmware recommends using a TMX audio board in the<br />
<strong>MVS</strong> and there may be additional modifications required that are not documented.<br />
For testing program the <strong>radio</strong> <strong>to</strong> the following:<br />
Channel 1 – 223.500 <strong>MHz</strong> Simplex<br />
Channel 2 – 224.800 <strong>MHz</strong> Simplex
Phase 2: VCO<br />
Cut the trace on the RF board, feeding the DPTT signal <strong>to</strong> R208 and R209 after the<br />
trace that goes <strong>to</strong> R248. Scrape solder mask and expose the copper trace that is the<br />
original DPTT signal.<br />
Install a logic inverter consisting of a NPN transis<strong>to</strong>r with 2.2-10K resis<strong>to</strong>r on the base<br />
lead. Solder emitter <strong>to</strong> ground, base resis<strong>to</strong>r <strong>to</strong> the bare trace and collec<strong>to</strong>r <strong>to</strong> R208 and<br />
R209 junction.
Installed VCO Inverter Transis<strong>to</strong>r<br />
This effectively makes the VCO band select backwards so the VCO runs in the 222<br />
<strong>MHz</strong> range on TX and around 178 <strong>MHz</strong> on RX.<br />
Set the <strong>radio</strong> <strong>to</strong> receive on 224.80 <strong>MHz</strong>. Adjust R218 for 6.5 VDC as measured on test<br />
point J201.<br />
Phase 3: Low Pass Filter<br />
With the RF board out of the <strong>radio</strong> the Low Pass Filter can be modified easily.<br />
Remove the 18pF capaci<strong>to</strong>r at position C2 and replace with 10pF. Remove the 11pF<br />
capaci<strong>to</strong>r at C3 and replace with 4.7pF.<br />
This raises the 3dB corner frequency <strong>to</strong> approximately 250 <strong>MHz</strong>. <strong>The</strong> loss at the 2 nd<br />
harmonic frequency of 447 <strong>MHz</strong> was measured <strong>to</strong> be -56dB
Modified Low Pass Filter Installed on RF Board<br />
Frequency Response of Modified Low Pass Filter
Phase 4: Receiver<br />
Remove RF board from chassis again.<br />
Replace L405 with a 110uH coil, 9 Turns of #22 wire closely spaced on a 1/8” drill bit.<br />
<strong>The</strong> magnet wire is available from Radio Hut in the 315 ft. Magnet Wire Kit #278-1345,<br />
It is the spool that is gold in color. Remove the enamel from the ends of the coil and tin<br />
it. I like <strong>to</strong> do both operations at once with a pool of solder on the end of a broad tipped<br />
iron. Leave the coil on the drill bit while tinning <strong>to</strong> act as a heat sink.<br />
Replace L402 with a 44uH coil. 4 ½ turns of #22 closely spaced on a 1/8” drill bit.<br />
Follow same procedure as L405.<br />
Remove Z401. This is a 3 pole tuned helical filter set <strong>to</strong> cover 136-174 <strong>MHz</strong>. <strong>The</strong> filter<br />
was determined <strong>to</strong> be <strong>to</strong>o small <strong>to</strong> work on.<br />
Frequency Response of 136-174 <strong>MHz</strong> 3 Pole Helical Image Filter<br />
Construct a replacement image rejection filter for with the following components:<br />
2 x 4.7pF capaci<strong>to</strong>rs<br />
1 x 90 degree open coax stub cut <strong>to</strong> 133.5 <strong>MHz</strong> + 0.5” (15.25” for RG-174u)
Replacement Image Filter Schematic<br />
Install filter in original position of Z401. Solder the capaci<strong>to</strong>rs <strong>to</strong> the I/O holes of Z401<br />
and solder the outer conduc<strong>to</strong>r of the coax stub <strong>to</strong> ground.<br />
Replacement Image Filter Measured Performance<br />
Reinstall RF board in chassis. Tune receiver. Adjust the spacing of L402, L405 and turn<br />
C408. My receiver came <strong>to</strong> -118dB for 12dB SINAD.
Modified RF board, showing replaced L402, L405 and Replacement Image Filter.<br />
Tune image filter. Set a signal genera<strong>to</strong>r for the current receive frequency minus 90<br />
<strong>MHz</strong>. Trim stub for lowest received signal, increase genera<strong>to</strong>r output as necessary. Test<br />
<strong>radio</strong> was able <strong>to</strong> make 86dB of image rejection.<br />
Phase 5: 200mW <strong>VHF</strong> TX Exciter<br />
Remove the TX Exciter from the RF board using a wide braid solder wick and suitable<br />
iron.<br />
Remove the 39pF capaci<strong>to</strong>r at C6 and replace with 22pF. Replace the capaci<strong>to</strong>r at C1<br />
with the 39pF capaci<strong>to</strong>r removed from C6. This raises the 3dB corner frequency of the<br />
exciter <strong>to</strong> approximately 275 <strong>MHz</strong>.
Modified TX Exciter Board<br />
Reinstall TX Exciter in<strong>to</strong> RF board. Keep boards at 90 degree angle <strong>to</strong> each other while<br />
soldering.
Modified TX Exciter Board Power Output<br />
Phase 6: 10W <strong>VHF</strong> Power Amplifier Replacement<br />
<strong>The</strong> following Power Modules are in the H2 style case and are drop in replacements for<br />
the M57719 which is currently in the <strong>radio</strong>.<br />
Module Part Number Power Input Power Output<br />
M57774 300mW 30W (Class C)<br />
M68729 300mW 30W (Class C)<br />
SAV15 200mW 30W (Class C)
SAV15 Power Module<br />
While it is pin compatible with the <strong>radio</strong>, the RA30H2127M requires some additional<br />
modifications.<br />
Module Part Number Power Input Power Output<br />
RA30H2127M * 50mW 30W (MOSFET)<br />
Pin 2 of the RA30H2127M is Vgate instead of 1 st Amplifier Vcc. This pin requires 5 volts<br />
<strong>to</strong> reach full gain of the module. Voltage above 6.5 VDC may cause damage. It is<br />
recommended <strong>to</strong> add a 470 ohm resis<strong>to</strong>r between the base of Q101 and ground, but<br />
this has not been tested.<br />
It is also recommended that the metal case of the module be machined flat for optimum<br />
contact with the heat sink <strong>to</strong> enhance the impedance <strong>to</strong> ground and thermal transfer. It<br />
is possible <strong>to</strong> do this with a belt sander and a fine grit belt such as <strong>220</strong> and higher. Care<br />
must be taken not <strong>to</strong> absorb the metal particles in<strong>to</strong> your skin or breathe them,<br />
otherwise metal poisoning may result.<br />
Remove the module currently in the <strong>radio</strong> and clean the holes with solder wick. Insert<br />
the new module in<strong>to</strong> the board but do not solder it until the RF board is inserted back<br />
in<strong>to</strong> the <strong>radio</strong> and the rear case screws are in place. <strong>The</strong>re should be enough excess<br />
thermal paste on the heat sink and additional compound should not be necessary.<br />
<strong>The</strong>se modules may provide the user with adequate power and the 45W <strong>VHF</strong> Power<br />
Amplifier stage can be bypassed by placing a coax jumper between J102 and J103 on
the RF board. <strong>The</strong> test <strong>radio</strong> was able <strong>to</strong> produce 25 watts after the low pass filter using<br />
the SAV15. If used in conjunction with the 45W PA, power output of the module should<br />
not exceed 10W.<br />
Phase 7: 45W <strong>VHF</strong> Power Amplifier<br />
Remove C151<br />
Replace L151 with wire jumper close <strong>to</strong> PCB<br />
Replace C152 with 56pF ceramic 1206<br />
Remove C156 & C157<br />
Install a pair of 43pF ceramic 1206 capaci<strong>to</strong>rs or 1 each 39 and 47pF on Q151 Collec<strong>to</strong>r<br />
and emitter leads<br />
Remove C158, 33pF and install at C157<br />
Remove L156 and modify <strong>to</strong> 1/2 turn and reinstall<br />
Install 20pF ceramic 1206 at C158<br />
Modified 45W PA Spectral Purity<br />
<strong>The</strong> test <strong>radio</strong> was able <strong>to</strong> produce 45 watts after the low pass filter. 3 rd harmonic was<br />
approximately -54dBc<br />
Optional Modification: Internal Speaker Audio Level
By design the <strong>radio</strong> will not silence the speaker audio. This can be annoying if the <strong>radio</strong><br />
is placed in<strong>to</strong> link service, APRS and other applications where speaker audio is only<br />
occasionally needed.<br />
To remedy this, replace R811 on the Front panel board with a 0 ohm resis<strong>to</strong>r or wire<br />
lead. If wire lead is used, leave clearance space as there is a via right under the resis<strong>to</strong>r<br />
landing area.<br />
Modified Front Cap Assembly
This work was cus<strong>to</strong>m generated for the <strong>Repeater</strong> Builders Technical Information Page,<br />
www.repeater-builder.com<br />
Pho<strong>to</strong>graphs by: Matt Krick, K3MK<br />
Legal notice – Material in this technical service bulletin is Copyright 2011 Matt Krick,<br />
K3MK. All Rights Reserved.<br />
<strong>The</strong> author takes no responsibility for any damage during the modification or for any<br />
wrong information made on this modification. Your results may vary.<br />
Commercial use of this bulletin is not authorized without express written permission of<br />
the author.<br />
Furthermore, this work is specifically prohibited from being posted <strong>to</strong> www.mods.dk or<br />
any other ‘limited free site’. Please ask for permission before posting elsewhere.