Toko Wax Manual - Reliable Racing
Toko Wax Manual - Reliable Racing
Toko Wax Manual - Reliable Racing

You also want an ePaper? Increase the reach of your titles
YUMPU automatically turns print PDFs into web optimized ePapers that Google loves.
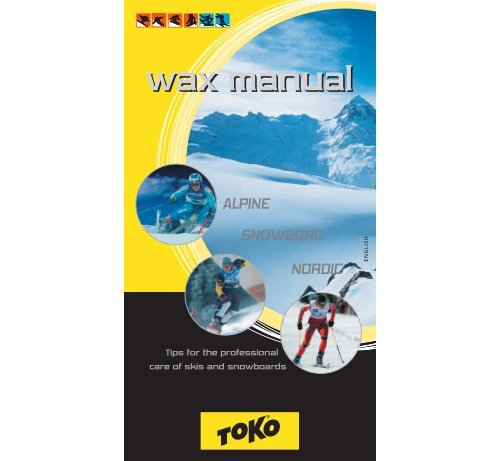
wax manual<br />
ALPINE<br />
SNOWBORD<br />
NORDIC<br />
ENGLISH<br />
Tips for the professional<br />
care of skis and snowboards
Alpine and Snowboard<br />
Table of contents<br />
ALL SPORTS<br />
Table of contents 3<br />
Why wax? 4<br />
Base structures 5<br />
Snow 6–7<br />
<strong>Racing</strong> mixtures 50<br />
Types of application 51<br />
Fixing devices 53<br />
All around the world leading teams<br />
trust in leading technology - <strong>Toko</strong>.<br />
<strong>Toko</strong> products belong to winter just as much as snow does to white<br />
pistes and cross-country tracks. For many top athletes they are a<br />
guarantee for success when competing – more than 80% of all top<br />
teams don't work with us for nothing.<br />
ALPINE & SNOWBOARD<br />
Alpine testing 8<br />
Base repair 10–11<br />
Edge tuning 12–13<br />
Edge tuning »Profi« 14–15<br />
Base cleaning 16–17<br />
Hot wax 18–21<br />
JetStream 22–23<br />
X-Cold powder 24<br />
<strong>Toko</strong> HelX 25<br />
Liquid, rub-on and paste waxes 26–27<br />
NORDIC<br />
Nordic testing 28<br />
Base repair 30–31<br />
Base cleaning 32–33<br />
Hot wax 34–37<br />
JetStream 38–39<br />
Liquid waxes, <strong>Toko</strong> HelX 40–41<br />
Rub-on and paste waxes 42–43<br />
Grip<strong>Wax</strong> 44–45<br />
Klister 46–47<br />
<strong>Toko</strong> XC 48–49<br />
2<br />
3
All Sports<br />
Alpine and Snowboard<br />
Important:<br />
Why you should wax!<br />
Base structures<br />
<strong>Wax</strong>ing is not simply something for professionals. Even beginners can achieve<br />
a better, safer and faster performance with well waxed and cared for material.<br />
Moreover, they'll have much more fun with their sporting activities.<br />
As a result of friction produced by the ski gliding on snow, snow crystals are<br />
partially melted at the points of contact. Microscopically small droplets of water<br />
produce a lubricating effect between the ski and snow. If you take into account<br />
the fact that, when skiing and snowboarding, the means of lubrication are first<br />
created by friction, the significance of the amount of friction becomes evident.<br />
In these terms, the correct wax mixture has, in many ways, a huge influence on<br />
friction interrelation between ski and snow. Firstly, with the hardness of the wax<br />
mixture, the hardness of the base surface is matched to the hardness of the<br />
snow. Secondly, with special mixtures of paraffin and fluorine, suction created by<br />
water between the ski base and the snow can be greatly reduced.<br />
As the base of your ski or snowboard glides over the<br />
snow, small droplets of water form at the points of<br />
contact between base and snow. If the area of contact<br />
is too large, friction increases - this can lead to the<br />
creation of a large film of water, which in turn can<br />
produce a strong vacuum effect.<br />
Of course, with a small area of contact and little friction,<br />
it can be more difficult to achieve the desired<br />
lubricating effect.<br />
Base structures can provide the solution in these situations.<br />
In order to create an optimal area of contact<br />
between ski and snow, a structure is ground into the<br />
surface of the base. In racing sports, these structures<br />
are tailored to the texture of the surface of the snow<br />
on a quite individual basis - whereby they guarantee<br />
an optimally gliding ski.<br />
Linear structure<br />
Crossed structure<br />
;;;;; yyyyy<br />
;;;;; yyyyy<br />
Cold, aggressive snow<br />
Fine structure, small snow<br />
crystals = low friction<br />
Coarse structure, small snow<br />
crystals = increased friction<br />
Fine structure, large snow<br />
crystals = increased friction<br />
+<br />
–<br />
Coarse grained snow<br />
–<br />
The selection criteria: with low temperatures and<br />
fine snow crystals a fine structure is needed, so as to<br />
maximize the contact area and friction strengths. In<br />
warmer temperatures, coarsely grained snow and<br />
wet snow demand coarsely grained structures in<br />
order to reduce the contact area, thus hindering the<br />
unwanted, braking vacuum effect.<br />
Specialist sports shops can grind almost any structure<br />
desired into bases. Moreover, they use special stone<br />
grinding machines, which manufacture the desired<br />
structures with high-quality diamonds.<br />
Structurite Nordic<br />
Slanting crossed structure<br />
Coarse structure, large snow<br />
crystals = reduced friction<br />
+<br />
With the manual Structurite<br />
Nordic appliance, cross-country<br />
skiers have the possibility of<br />
structuring their bases individually.<br />
4<br />
5
Snow<br />
Alpine and Snowboard<br />
A brief lesson on Snow<br />
from <strong>Toko</strong><br />
Snow is a true »gift from heaven« – it comes in an unending variety of types.<br />
It is also often known as »hot material«, because snow, in comparison to other<br />
materials, is very close to its melting point (even when at minus 20 °C). Thus,<br />
snow reacts in a very sensitive manner to outside influences such as wind, sun,<br />
cloud, etc., it is also subject to constant change.<br />
In order that skis glide in the best possible manner, the wax mixture must be<br />
perfectly tailored to the prevailing snow conditions. The most important types<br />
of snow and their characteristics:<br />
New snow<br />
In low temperatures, the points and edges of new snow exert huge friction on<br />
the surface of the base. In temperatures around 0 degrees the crystals quickly<br />
lose shape, then these half melted snow crystals lead to the creation of a large<br />
contact area between ski and snow, thereby increasing braking friction.<br />
Old snow<br />
Around 48 hours after a snowfall we talk about old snow – but it is important<br />
to distinguish between large and small crystals. Small crystals display larger<br />
thickness and, therefore, a larger contact area with greater friction. In general,<br />
old snow crystals are rounder than new snow crystals and thus produce less<br />
friction.<br />
Artificial snow<br />
In contrast to natural snow, the crystals of artificial snow freeze from the outside<br />
in. Often, in the case of fresh snow crystals, not all of the water is frozen.<br />
However, if it freezes completely, crystals break apart from one another, which<br />
leads to the formation of sharp edges. If artificial snow is prepared too early,<br />
the unfrozen water flows to the surface and creates a sheet of ice.<br />
As the crystals are some 10 times smaller than natural snow crystals, a great<br />
depth of snow can be created on the piste in a short matter of time. However,<br />
great depth also means a large contact area - and in combination with sharp<br />
types of crystal – a large amount of friction.<br />
Wet snow (snow humidity)<br />
If snow crystals are warmed to 0 degrees they begin to melt. The water thus<br />
formed – but also water from precipitation - creates a larger contact area<br />
between ski and snow and consequently increases friction (vacuum effect).<br />
New snow<br />
Old snow<br />
Artificial snow<br />
Wet snow<br />
<strong>Toko</strong> thanks the experts<br />
We would like to thank Hansueli Rhyner<br />
from the Eidgenössisches Institut für<br />
Schnee- und Lawinenforschung (Swiss<br />
Institute for Snow and Avalanche Research),<br />
Davos, for his expert support.<br />
<strong>Toko</strong> works in close cooperation with<br />
leading experts from all over the world<br />
on snow and avalanche research. In the<br />
past few years various projects have scientifically<br />
dealt with the theme of »gliding<br />
on snow«; the findings have been<br />
implemented in innovative <strong>Toko</strong> products.<br />
6<br />
7
Alpine testing<br />
Alpine and Snowboard<br />
Tests for Alpine racing<br />
It is the middle of the night in Kaunertal. At five in the morning, only<br />
the <strong>Toko</strong> testing team – Hansjürgen Hüppi and Heinz Kolly – is making<br />
its way to carry out tests on the glacier at an altitude of 3000 m. The<br />
anemometer lies still, the sun is still hiding behind the mountains,<br />
the snow temperature is -15 °C: ideal conditions for a test day.<br />
Today, five pairs of skis are being tested from each brand. In order to<br />
obtain true average values for individual skis, one line will be used<br />
3–4 times in all. In addition to that, the weather station communicates<br />
all relevant data and the data logger provides information on snow<br />
temperature, atmospheric temperature and humidity, wind direction,<br />
wind speed and radiation. Incidentally, <strong>Toko</strong> is the only company in<br />
the world that carries out testing using such a modern system.<br />
After four hours of intensive tests, it's back to the hotel, where, after<br />
a short break, work continues. The afternoon is dedicated to analysing<br />
the test runs. Using the test times and the correct weather value classifications,<br />
new wax mixtures are devised. Then it's waxing and more<br />
waxing. Hansjürgen writes the test report, carries out analyses and<br />
creates new mixtures. Following dinner, the prepared skis are loaded<br />
up, ready for the beginning of yet another test day for the crew.<br />
Before they appear at the starting lines of Olympic, World Championship<br />
and World Cup races, all <strong>Toko</strong> products have to undergo these<br />
endurance tests. This is how we achieve the basis for success for top<br />
athletes. In this line of work, no goal is too distant, no mountain too<br />
high and no piste too steep.<br />
8<br />
9
Base Repair<br />
Repair Candle<br />
You can easily repair minor base damage<br />
yourself after skiing/snowboarding<br />
using the two following techniques.<br />
1. Light the candle<br />
Hold the lit repair candle horizontally<br />
and let it drip onto a metal<br />
stripping blade.<br />
2. Fill damaged spots<br />
Drip the liquid repair material onto<br />
the damaged spot and allow it to<br />
cool completely.<br />
Alpine and Snowboard<br />
Repair Powder<br />
1. Sprinkle on powder<br />
Sprinkle the repair powder on the<br />
damaged spot.<br />
3. Scrape off<br />
excess material<br />
Scrape off excess material in layers<br />
with the radial file.<br />
Tip:<br />
Wrap sticky tape around the file<br />
at the support points to avoid<br />
scratching the base.<br />
4. Scrape off any remaining<br />
unevenness with the<br />
steel stripping blade.<br />
5. Brush out the base with a<br />
copper brush.<br />
2. Position the foil<br />
Lay the foil over the powder.<br />
3. Iron in<br />
Set the wax iron to 140 °C and place<br />
it on the repair foil. Move the iron<br />
gently backwards and forwards<br />
over the repair spot for about<br />
10–15 seconds.<br />
After the material has cooled down<br />
completely, remove the foil.<br />
Scrape off and brush out<br />
as described on previous<br />
page.<br />
Tip:<br />
If reworking with abrasive paper,<br />
the base can be protected with<br />
<strong>Toko</strong> Base Tex.<br />
1. Repair Candle<br />
graphite<br />
2. Repair Candle<br />
transparent<br />
3. Base File Radial<br />
4. Steel Scraper Blade<br />
5. Copper Brush<br />
6. Repair Powder<br />
transparent<br />
7. Repair Powder<br />
graphite<br />
8. <strong>Wax</strong>Iron 1200/600W<br />
9. <strong>Toko</strong> Base Tex<br />
10<br />
1. 2. 3. 4. 5. 6. 7. 8.<br />
9.<br />
11
Edge Tuning<br />
Alpine and Snowboard<br />
»Express edge tuning«<br />
After a day on your skis/snowboard, the<br />
edges can simply be filed again.<br />
1. Remove ridges<br />
Use the universal grinding stone to<br />
smooth over protruding damaged<br />
edges on the base side.<br />
2. Grind the side edges<br />
Pre-file the damaged side edges<br />
with the grinding stone likewise.<br />
3. File with the<br />
Edge Control Pocket<br />
Skis and boards can be very easily<br />
filed using the Edge Control Pocket.<br />
3. File with the<br />
Precision File Guide<br />
Filing with the File Guide is very<br />
easy. The hands are well protected<br />
by the grip. Any edge angle can<br />
be set.<br />
4. Break the edges<br />
The blades are easily rounded off<br />
at both the tip and end of the<br />
ski/snowboard.<br />
1. Universal Edge Grinder<br />
2. Edge Control Pocket<br />
1° F.E.T.S.<br />
3. Precision File Guide<br />
4. Edge Grinding Rubber<br />
12<br />
Tip:<br />
With race carving skis and fun carving skis, do not detune the edges too<br />
much. With these skis, the aim is to avoid lateral sliding, or »drifting«.<br />
1. 2. 3.<br />
4.<br />
13
Edge Tuning<br />
»Professional«<br />
base edge and side edge<br />
If the running surface of the ski/snowboard is too concave (hollow)<br />
or too convex (rounded, it is almost impossible to use the ski/snowboard.<br />
In such cases it is worth taking the ski/snowboard to your ski<br />
shop, who can grind the surface for you professionally.<br />
Today's slopes are often extremely hard and icy (artificial snow slopes),<br />
which is why edge preparation is gaining increasing significance<br />
(carving skis, snowboards).<br />
The following procedure applies to<br />
daily manual preparation:<br />
Base edge<br />
1. Pre-file<br />
with the diamond file<br />
Remove ridges (caused by stones)<br />
with the diamond file (blue).<br />
2. Check the base with<br />
the straight edge<br />
Use the straight edge to check the<br />
evenness of the base and the edge<br />
offset.<br />
3. Use the Base File Control<br />
for hanging edge filing<br />
If the edges of the ski are not filed<br />
sufficiently on the base side degree<br />
(ski turns badly or is heavy to turn),<br />
the Base File Control is used to file<br />
the hanging edge to 0.5° or 1.0°.<br />
Use the Prisma straight edge to<br />
check the angle.<br />
Alpine and Snowboard<br />
Side edges<br />
1. File like the pros<br />
The professionals use an edge angle,<br />
a file and a clamp file for filing. The<br />
87° edge angle (blue) is the most<br />
frequently used in all disciplines.<br />
88° and 89° edge angles are used<br />
in the child and youth area.<br />
Tip:<br />
It is easy to check the result with the<br />
edge angle and straight edge. The<br />
current angle of the edges is also<br />
easy to ascertain.<br />
1. File with the<br />
<strong>Toko</strong> Ergo Multi Guide<br />
Edges can easily be filed using the<br />
<strong>Toko</strong> Ergo Multi Guide. Thanks to<br />
the use of ball-mounted guidance<br />
rollers, the <strong>Toko</strong> Ergo Multi Guide is<br />
a precise and base-friendly tool. All<br />
<strong>Toko</strong> files and diamond tools can be<br />
fitted to the <strong>Toko</strong> Ergo Multi Guide.<br />
2. Remove ridges<br />
Ridges develop during filing. These<br />
can be removed using the red or<br />
green diamond file. The diamond<br />
files are easier to pull across the<br />
base when they have been dipped<br />
in water (friction reduction).<br />
3. Planing the sidewalls<br />
If the file rubs against the sidewall,<br />
we remove sidewall material with<br />
the sidewall planer.<br />
1. DMT Daimond File<br />
extra fine, green,<br />
grain 1200<br />
2. DMT Daimond File<br />
fine, red, grain 600<br />
3. DMT Daimond File<br />
coarse, blue 325<br />
4. Prisma Straight Edge<br />
5. Base File Control 0.5°<br />
Base File Control 1.0°<br />
6. Edge Angle Pro 89°<br />
7. Edge Angle Pro 88°<br />
8. Edge Angle Pro 87°<br />
9. Edge Angle Pro Clamp<br />
10. Sidewall Planner Pro<br />
11. Spare Knife, round<br />
Sidewall Planner Pro<br />
12. Edge Grinding Rubber<br />
13. World Cup File Chrome<br />
M 200 mm<br />
14. World Cup File Chrome<br />
M 120 mm<br />
15. World Cup File Chrome S<br />
16. <strong>Toko</strong> Ergo Multi Guide<br />
14<br />
1. 2. 3. 4. 5.<br />
6. 7. 8.<br />
9. 10. 11. 12. 13. 14. 15. 16.<br />
15
Base Cleaning<br />
Alpine and Snowboard<br />
Hot waxing<br />
(professional method)<br />
1. Iron in soft wax<br />
Choose a soft wax to iron on<br />
(System-3 yellow or All-in-One).<br />
Drip on wax and iron in.<br />
After repairing the base, after filing and before waxing, the base needs<br />
to be cleaned. Dirty residue and filing particles that have been pressed<br />
into the base must be removed.<br />
The following techniques are suitable for this process:<br />
<strong>Wax</strong> Remover<br />
1. Spray on <strong>Wax</strong> Remover<br />
The wax remover is sprayed on or<br />
applied using Base Tex.<br />
2. Scrape off the wax while<br />
it is still warm<br />
While the wax is still warm, scrape<br />
it off using the Plexi stripping<br />
blade.<br />
2. Rub off with Base Tex<br />
Leave the wax remover on for a<br />
short period of time and then rub<br />
it off thoroughly with the cleaning<br />
cloth.<br />
Tip:<br />
After using the wax remover, let the<br />
base air for about 15 minutes. It is<br />
then ready to be waxed.<br />
Tip:<br />
Repeat the process in the case of<br />
excessive dirt.<br />
3. Brush out<br />
with copper brush<br />
After waxing, the base needs to<br />
be brushed out thoroughly in the<br />
running direction using the copper<br />
brush.<br />
1. <strong>Wax</strong>remover HC3<br />
2. <strong>Toko</strong> Base Tex<br />
3. All-in-one <strong>Wax</strong><br />
4. System-3 yellow,<br />
0– -4°C<br />
5. System-3 yellow/red,<br />
Set<br />
6. Plexi Blade 3 mm<br />
7. Plexi Blade<br />
for snowboards 4 mm<br />
8. Copper Brush<br />
9. <strong>Wax</strong>Iron 1200/600W<br />
16<br />
1. 2. 3. 4. 5. 6. 7. 8. 9.<br />
17
Hot <strong>Wax</strong><br />
Alpine and Snowboard<br />
Applying hot wax<br />
1. Melt wax on the plate<br />
of the iron<br />
Drip wax onto the base. Ensure<br />
that wax is applied evenly.<br />
Tip:<br />
For mixtures, simply hold the wax<br />
sticks together and possibly tie an<br />
elastic band around them.<br />
2. Iron in the wax<br />
Push or pull the iron over the gliding<br />
surface. If the iron does not glide<br />
smoothly, drip on a little more wax.<br />
5. Sharpening the Plexi blade<br />
Pull the Plexi blade over the blade<br />
sharpener, which is suitable for<br />
various blade widths.<br />
3. Uncover side edges<br />
After allowing a short period of time<br />
for cooling, scrape the edges (the<br />
professional technique).<br />
6. Brush out the<br />
base structure<br />
Using the copper brush, brush out<br />
the base structure in the running<br />
direction. Afterwards, for cold snow<br />
conditions (harder waxes), use the<br />
nylon brush to polish the base. Use<br />
the horsehair brush for the finish.<br />
4. Scrape off wax<br />
Use the Plexi blade to scrape off the<br />
wax from the base in the running<br />
direction after about an hour.<br />
Tip:<br />
The longer you leave the wax to<br />
cool and, therefore, harden, the<br />
faster the skis/boards will be.<br />
1. <strong>Wax</strong>Iron 1200/600W<br />
2. Multi-purpose Scraper<br />
3. Plexi Blade 3 mm<br />
4. Plexi Blade 5 mm<br />
5. Plexi Blade<br />
for snowboards 4 mm<br />
6. Scraper Sharpener<br />
7. Copper Brush<br />
7. Steel Wire<br />
Tip:<br />
The professional service technician<br />
uses the <strong>Toko</strong> Steel Wire to brush<br />
out the ski especially for speed<br />
disciplines. The structure is thus<br />
perfectly freed-up – these skis have<br />
optimal "pull” at high speeds.<br />
8. Nylon Brush<br />
9. Horsehair Brush<br />
10. Steel Wire<br />
18<br />
1. 2. 3. 4. 5. 6.<br />
7. 8. 9. 10.<br />
19
Hot <strong>Wax</strong><br />
Alpine and Snowboard<br />
Adapted to the corresponding temperature range, Dibloc High Fluoro guarantees a professionally<br />
prepared base for high-performance use in races. Ideal as a base for JetStream or <strong>Toko</strong> HelX.<br />
1. 2. 3.<br />
4.<br />
1. Dibloc High Fluoro<br />
yellow, 0 °C/-4 °C<br />
2. Dibloc High Fluoro<br />
red, -4 °C/-10 °C<br />
3. Dibloc High Fluoro<br />
blue, -10 °C/-30 °C<br />
4. Dibloc High Fluoro<br />
grey, Molybdenum -4 °C/-10 °C<br />
Highly fluorinated hot wax system for competition use<br />
1. 2. 3.<br />
4.<br />
1. Dibloc Low Fluoro<br />
yellow, 0 °C/-4 °C<br />
2. Dibloc Low Fluoro<br />
red, -4 °C/-10 °C<br />
3. Dibloc Low Fluoro<br />
blue, -10 °C/-30 °C<br />
4. Dibloc Low Fluoro<br />
grey, Molybdenum -4 °C/-10 °C<br />
Lightly fluorinated hot wax system for competition and training use<br />
Dibloc High Fluoro<br />
Snow temperatures<br />
0 ➞ -3°C<br />
32 ➞ 27°F<br />
-3 ➞ -8°C<br />
27 ➞ 18°F<br />
-8 ➞ -12°C<br />
18 ➞ 10°F<br />
-12 ➞ -30°C<br />
10 ➞ 22°F<br />
Dibloc Low Fluoro<br />
Snow temperatures<br />
0 ➞ -3°C<br />
32 ➞ 27°F<br />
-3 ➞ -8°C<br />
27 ➞ 18°F<br />
-8 ➞ -12°C<br />
18 ➞ 10°F<br />
-12 ➞ -30°C<br />
10 ➞ 22°F<br />
These high-quality hydrocarbon waxes guarantee excellent<br />
gliding and easier turning for skis and snowboards.<br />
System-3<br />
Snow temperatures<br />
0 ➞ -4°C<br />
32 ➞ 25°F<br />
-4 ➞ -10°C<br />
25 ➞ 14°F<br />
-10 ➞ -30°C<br />
14 ➞ 22°F<br />
1. System-3, yellow, 0 °C/-4 °C<br />
2. System-3, red, -4 °C/-10 °C<br />
3. System-3, yellow/red, Set<br />
20<br />
yellow<br />
red<br />
blue<br />
Molybdenum<br />
1. 2. 3.<br />
4.<br />
4. System-3, blue -10 °C/-30 °C<br />
21
JetStream<br />
Alpine and Snowboard<br />
JetStream Powder<br />
1. Sprinkle<br />
on JetStream Powder<br />
Sprinkle JetStream Powder evenly<br />
onto the base.<br />
Applying JetStream<br />
JetStream Bloc<br />
1. Rub on JetStream<br />
Rub JetStream onto the prepared<br />
ski with even pressure.<br />
2. Cork<br />
Use the wax cork to cork the powder<br />
(the more frictional heat that is produced,<br />
the better JetStream adheres<br />
to the base).<br />
3. Brush out with<br />
the polishing brush<br />
The powder should be lightly brushed<br />
out with the polishing brush.<br />
2. Polish with<br />
the Thermo Pad<br />
Use the Thermo Pad to polish the<br />
JetStream onto the base and into<br />
the base structure.<br />
4. Polish with the Thermo Pad<br />
At the end, the »JetStream dust«<br />
should again be thoroughly polished<br />
in using the Thermo Pad.<br />
Tip:<br />
A high degree of frictional heat<br />
generates better adhesion.<br />
1. JetStream New Snow<br />
Race Bloc<br />
2. Jet Stream<br />
Old & Artificial Snow<br />
Race Bloc<br />
3. Thermo Pad<br />
4. Polishing Brush<br />
5. JetStream, New Snow<br />
Race Powder<br />
6. JetStream<br />
Old & Artifical Snow<br />
Race Powder<br />
7. <strong>Wax</strong> Cork<br />
22<br />
1. 2.<br />
3.<br />
4.<br />
5.<br />
6.<br />
7.<br />
23
X-Cold Powder | <strong>Toko</strong> HelX<br />
Alpine and Snowboard<br />
X-Cold Powder<br />
X-Cold Powder is our hardest wax, in<br />
powder form for easier application.<br />
X-Cold is often used on the edge<br />
area in order to prevent the base<br />
from becoming burned from high<br />
friction.<br />
Applying <strong>Toko</strong> HelX<br />
Wherever fractions of a second play a<br />
decisive role in racing, <strong>Toko</strong> HelX can be<br />
found at the starting line. To ensure optimal<br />
performance we recommend a base<br />
treatment with <strong>Toko</strong> Dibloc High Fluoro.<br />
1. Pre-polishing<br />
Pre-polish the base using the yellow<br />
side of the Dual Pad.<br />
Sprinkle X-Cold Powder onto the<br />
wax coating in the edge area.<br />
Using a Plexi stripping blade, scrape<br />
the powder to the inner and outer<br />
edges at the binding area.<br />
2. Spray on<br />
from a distance of around 10 cm<br />
spray <strong>Toko</strong> HelX (Warm or Cold) in<br />
a thin, even coating then leave to<br />
dry completely at room temperature<br />
for at least 3 mins.<br />
Or sprinkle over the whole surface.<br />
3. Polish<br />
After drying, polish the base well<br />
using the white side of the Dual Pad.<br />
Having briefly dabbed down the<br />
wax with a soft cloth to obtain an<br />
even layer, use the Tex supplied to<br />
iron it in.<br />
The <strong>Toko</strong> Polishing Brush is often<br />
used to lightly brush out the base<br />
for an extra polish at the starting<br />
line.<br />
1. X-Cold Powder<br />
2. <strong>Wax</strong>Iron 1200/600W<br />
1. <strong>Toko</strong> HelX warm<br />
2. <strong>Toko</strong> HelX cold<br />
3. Dual Pad<br />
4. Polishing Brush<br />
24<br />
1. 2.<br />
1. 2. 3.<br />
4.<br />
25
Liquid, rub-on and paste waxes<br />
Alpine and Snowboard<br />
Liquid waxes<br />
<strong>Toko</strong> is one of the world's leading producers of liquid waxes. Fast, clean,<br />
reliable and great performance. It is not only the professional but also the<br />
amateur sports enthusiast who can benefit from this.<br />
Rub-on waxes<br />
1. Spray on<br />
Simply spray on NanoTec HF2 warm<br />
or cold and leave to dry.<br />
1. Rubbing on and polishing<br />
Rub-on waxes can be applied quite<br />
easily. After rubbing on, polish with<br />
the <strong>Toko</strong> Thermo Pad.<br />
1. Apply<br />
Apply Express Line evenly using the<br />
sponge applicator and then leave<br />
to dry.<br />
Paste waxes<br />
2. Polish<br />
After the base has dried, polish well<br />
with Dual Pad or Thermo Pad.<br />
1. Applying and polishing<br />
Paste waxes are a popular type of<br />
wax that can be carried in a daypack<br />
or in a jacket. They are easily applied<br />
and, after a short drying time,<br />
should be polished.<br />
1. Nano Tec HF2 warm<br />
2. Nano Tec HF2 cold<br />
3. Express Mini<br />
4. Express Pocket<br />
5. Express Maxi<br />
6. Dibloc High Fluoro Rub-on-Set<br />
7. Express Blocx Rub-on <strong>Wax</strong><br />
8. Express TF90 Universal Paste <strong>Wax</strong><br />
9. Dibloc High Fluoro Paste <strong>Wax</strong><br />
26<br />
1.<br />
2.<br />
3. 4. 5.<br />
6. 7. 8.<br />
9.<br />
27
Nordic testing<br />
Nordic<br />
<strong>Toko</strong> service:<br />
a guarantee for success.<br />
In the Nordic World Cup, increasing emphasis is being laid on hightech<br />
methods and, as a result, the competition is becoming even more<br />
professional. Today it is only hundredths of a second that stand between<br />
victory and defeat. As a result, the expense for <strong>Toko</strong> racing<br />
services is also increasing. Steffen Hoos and Thorsten Walter are responsible<br />
for tests, service and looking after international pros.<br />
In all tests, various factors are observed, such as snow and atmospheric<br />
temperature and atmospheric humidity, wind or radiation. The basis<br />
for this is the revolutionary <strong>Toko</strong> testing programme. A specially<br />
developed weather station also delivers all the relevant weather<br />
information, so that test runs can be reliably analysed under the<br />
same conditions. The person responsible for this area is our R&D<br />
colleague, Hansjürgen Hüppi.<br />
For racing team technicians, Steffen and Thorsten, the days already<br />
start very early. In the morning 8–16 pairs of test skis are prepared<br />
with various paraffin, powder and liquid waxes. The skis are passed<br />
through the photoelectric barrier and subjected to test runs numerous<br />
times throughout the day. After this, the test reports go to the teams<br />
to help them choose the best possible wax mixture. The test results, as<br />
well as feedback from the teams, will be implemented in product<br />
improvements and innovations. It is this optimum cooperation with<br />
top teams that enables us to be so successful with our <strong>Toko</strong> products<br />
time and time again.<br />
We will intensify this cooperation in the future. Indeed, we want all<br />
of our World Cup experience to profit. Top products for top athletes:<br />
that is <strong>Toko</strong>’s promise and the target.<br />
28<br />
29
Base Repair<br />
Nordic<br />
Base repair with<br />
<strong>Toko</strong> Repair Powder & Repair Candle<br />
With a little skill, you can repair small scratches, damage<br />
caused by stones or at home.<br />
Repair Candle<br />
1. Light the candle<br />
Light the Repair Candle and let it<br />
drip onto a metal blade until the<br />
material is no longer smoking and<br />
the flame is burning blue.<br />
Repair Powder<br />
1. Apply<br />
After cleaning the base, apply the<br />
required amount of powder (transparent<br />
or black) to the damaged<br />
area.<br />
2. Drip on<br />
Drip the liquid matter onto the<br />
damaged area and allow to cool.<br />
3. Scrape off<br />
Scrape off excess repair material<br />
in layers with the steel scraper<br />
blade.<br />
2. Iron in<br />
Set the wax iron to 140 °C and press<br />
it onto the repair foil. Move the<br />
iron gently backwards and forwards<br />
over the repair spot for around<br />
15–20 seconds.<br />
After the material has cooled down<br />
completely, remove the foil.<br />
Scrape off and brush out<br />
as described on previous<br />
page.<br />
4. Brush out<br />
Thoroughly brush out the whole<br />
base using the copper brush.<br />
1. Repair Powder<br />
graphite<br />
2. Repair Powder<br />
transparent<br />
3. Repair Candle<br />
graphite<br />
4. Repair Candle<br />
transparent<br />
5. Steel Scraper Blade<br />
6. Copper Brush<br />
7. <strong>Wax</strong>Iron 1200/600W<br />
8. <strong>Wax</strong>Mouse 800W<br />
30<br />
1. 2. 3. 4. 5. 6.<br />
7.<br />
8.<br />
31
Base Cleaning<br />
Nordic<br />
Base Cleaning<br />
All skis become dirty to some extent with use. If this dirt is<br />
not removed prior to waxing, it is literally worked into the<br />
base and thus reduces gliding properties.<br />
Care starts with base cleaning.<br />
<strong>Wax</strong> Remover<br />
1. Scrape off base<br />
Scrape off dirt and wax residue with<br />
the universal scraper.<br />
Hot waxing<br />
1. <strong>Wax</strong>ing<br />
Drip on and iron in a soft wax<br />
(e.g. World Loppet yellow).<br />
2. Spray on<br />
<strong>Wax</strong> Remover<br />
Spray or rub on the wax remover<br />
and leave it for a short while.<br />
3. Rub off thoroughly<br />
Rub it off thoroughly with Base Tex<br />
or the cleaning cloth and repeat if<br />
the degree of dirt so requires.<br />
2. Scrape off<br />
While the wax is still warm scrape it<br />
off with the Plexi blade. This removes<br />
dirt particles from the upper<br />
layers of the base.<br />
3. Brush out<br />
Uncover the base structure once<br />
again using the copper brush.<br />
1. <strong>Wax</strong>remover HC3 200 ml<br />
2. <strong>Wax</strong>remover HC3 500 ml<br />
3. <strong>Wax</strong>remover HC3 1000 ml<br />
4. <strong>Wax</strong>remover HC3 2500 ml<br />
5. <strong>Wax</strong>remover HC3 5000 ml<br />
6. Multi-purpose Scraper<br />
7. <strong>Toko</strong> Base Tex<br />
8. Plexi Blade<br />
9. <strong>Wax</strong>Iron 1200/600W<br />
10. System-3 yellow, 0 – -4°C.<br />
11. Copper Brush<br />
32<br />
1.<br />
2. 3. 4. 5.<br />
6. 7. 8. 9. 10. 11.<br />
33
Hot <strong>Wax</strong><br />
Nordic<br />
Applying hot wax<br />
1. Drip on<br />
After cleaning the base, drip on the<br />
wax. Ensure that wax is applied<br />
evenly.<br />
Tip:<br />
For mixtures, simply hold the wax<br />
sticks together and possibly tie an<br />
elastic band around them.<br />
2. Iron in<br />
Push or pull the wax iron over the<br />
base slowly and evenly.<br />
3. Scrape off<br />
Scrape sidewalls and groove while<br />
wax is still warm. Allow to cool to<br />
room temperature and then use the<br />
Plexi scraper blade to scrape off<br />
the wax in the running direction.<br />
1. <strong>Wax</strong>Iron 1200/600W<br />
3. Multi-purpose Scraper<br />
5. Groove Pin Nordic<br />
4. Brush out<br />
Brush out the remaining wax with a<br />
nylon brush.<br />
2. <strong>Wax</strong>Mouse 800W<br />
4. Plexi Blade<br />
6. Nylon Brush<br />
7. Scraper Sharpener<br />
34<br />
1. 2. 3. 4. 5. 6. 7.<br />
35
Hot <strong>Wax</strong><br />
Nordic<br />
The highly fluorinated series is impressive in its perfect gliding properties and unmatched wax<br />
adhesion time over very long distances. The extremely smooth wax can be ironed on wonderfully<br />
and penetrates the base deeply. Adapted to the corresponding temperature range, Dibloc<br />
High Fluoro ensures a professionally prepared base for exacting racing demands.<br />
1. 2. 3.<br />
4.<br />
1. Dibloc High Fluoro<br />
yellow, 0 °C/-4 °C<br />
2. Dibloc High Fluoro<br />
red, -4 °C/-10 °C<br />
3. Dibloc High Fluoro<br />
blue, -10 °C/-30 °C<br />
4. Dibloc High Fluoro<br />
grey, Molybdenum -4 °C/-10 °C<br />
Highly fluorinated hot wax system for competition use<br />
1. 2. 3.<br />
4.<br />
1. Dibloc Low Fluoro<br />
yellow, 0 °C/-4 °C<br />
2. Dibloc Low Fluoro<br />
red, -4 °C/-10 °C<br />
3. Dibloc Low Fluoro<br />
blue, -10 °C/-30 °C<br />
4. Dibloc Low Fluoro<br />
grey, Molybdenum -4 °C/-10 °C<br />
Lightly fluorinated hot wax system for competition and training use<br />
Dibloc High Fluoro<br />
Snow temperatures<br />
0 ➞ -3°C<br />
32 ➞ 27°F<br />
-3 ➞ -8°C<br />
27 ➞ 18°F<br />
-8 ➞ -12°C<br />
18 ➞ 10°F<br />
-12 ➞ -30°C<br />
10 ➞ 22°F<br />
Dibloc Low Fluoro<br />
0 ➞ -3°C<br />
32 ➞ 27°F<br />
-3 ➞ -8°C<br />
27 ➞ 18°F<br />
-8 ➞ -12°C<br />
18 ➞ 10°F<br />
Snow temperatures<br />
-12 ➞ -30°C<br />
10 ➞ 22°F<br />
These high-quality waxes produce excellent gliding in training,<br />
provide high-quality base care and are ideal for treating both new<br />
and worn bases.<br />
System-3<br />
Snow temperatures<br />
0 ➞ -4°C<br />
32 ➞ 25°F<br />
-4 ➞ -10°C<br />
25 ➞ 14°F<br />
-10 ➞ -30°C<br />
14 ➞ 22°F<br />
1. System-3, yellow, 0 °C/-4 °C<br />
2. System-3, red, -4 °C/-10 °C<br />
3. System-3, yellow/red, Set<br />
36<br />
yellow<br />
red<br />
blue<br />
Molybdenum<br />
1. 2. 3.<br />
4.<br />
4. System-3, blue -10 °C/-30 °C<br />
37
JetStream<br />
Nordic<br />
Applying JetStream<br />
Powder & Bloc<br />
In order to guarantee effective application of this wax,<br />
we recommend a base with <strong>Toko</strong> Dibloc High Fluoro.<br />
JetStream Powder<br />
1. Sprinkle on<br />
JetStream Powder<br />
Sprinkle JetStream Powder evenly<br />
onto the base<br />
JetStream Bloc<br />
2. Iron in<br />
Dab at the powder with the wax<br />
iron and then glide over the base<br />
slowly but evenly (160 °C).<br />
1. Rub on<br />
JetStream Bloc<br />
Rub on JetStream Bloc using even<br />
pressure.<br />
3. Scrape off<br />
After allowing to dry completely,<br />
scrape off excess material with the<br />
Plexi blade.<br />
4. Brush out<br />
Use the horsehair brush to brush out<br />
the base thoroughly in the running<br />
direction.<br />
2. Polish in<br />
Use the Thermo Pad to polish in<br />
vigorously. The more friction that is<br />
produced the better JetStream<br />
adheres to the base.<br />
Tip:<br />
JetStream Bloc can also be ironed<br />
in. Application involves the same<br />
steps as ironing in JetStream<br />
Powder.<br />
Tip:<br />
At the end, polish in the<br />
»JetStream dust« again using the<br />
Thermo Pad.<br />
1. JetStream New Snow<br />
Race Bloc<br />
2. JetStream<br />
Old & Artificial Snow<br />
Race Bloc<br />
3. JetStream, New Snow<br />
Race Powder<br />
4. JetStream<br />
Old & Artifical Snow<br />
Race Powder<br />
5. Thermo Pad<br />
6. Horsehair, Antistatic Effect<br />
7. Plexi Blade<br />
8. <strong>Wax</strong>Iron 1200/600W<br />
38<br />
1. 2.<br />
3.<br />
4.<br />
5.<br />
6. 7.<br />
8.<br />
39
Liquid <strong>Wax</strong><br />
Nordic<br />
Applying <strong>Toko</strong> HelX<br />
(100 % Fluoro <strong>Racing</strong> Liquid <strong>Wax</strong>)<br />
For the gliding zones of skating and classic skis<br />
In order to guarantee efficient application of this wax, we recommend<br />
a base with <strong>Toko</strong> Dibloc High Fluoro.<br />
Tip:<br />
A »foundation treatment« with<br />
JetStream Powder or Bloc guarantees<br />
even higher performance on tracks<br />
over 25 km. (see section entitled<br />
Applying JetStream)<br />
1. Pre-polish<br />
Pre-polish the base with the yellow<br />
side of the Dual Pad.<br />
Liquid waxes<br />
1. Apply<br />
Spray on NanoTec HF2 or simply<br />
apply Express Maxi, Express Pocket<br />
and Express Mini and allow to dry.<br />
2. Spray on<br />
From a distance of around 10 cm,<br />
spray a thin, even coating onto the<br />
base.<br />
3. Polish<br />
Allow <strong>Toko</strong> HelX to dry completely<br />
at room temperature and then<br />
polish well to a good shine using<br />
the white side of the Dual Pad.<br />
2. Polish<br />
After allowing to dry, polish the<br />
base well with the Thermo Pad.<br />
1. <strong>Toko</strong> HelX warm<br />
2. <strong>Toko</strong> HelX cold<br />
3. Dual Pad<br />
4. NanoTec HF2 warm<br />
5. NanoTec HF2 cold<br />
6. Express Pocket<br />
Universal Liquid Fluoro <strong>Wax</strong><br />
7. Express Mini<br />
Universal Liquid Fluoro <strong>Wax</strong><br />
8. Express Maxi<br />
Universal Liquid Fluoro <strong>Wax</strong><br />
40<br />
1. 2. 3. 4.<br />
5. 6.<br />
7. 8.<br />
41
Rub-on and paste waxes<br />
Nordic<br />
Applying<br />
rub-on and paste waxes<br />
For the gliding zones of skating and classic<br />
Rub-on waxes<br />
1. Rub on<br />
Rub-on <strong>Wax</strong> is rubbed into the base<br />
in a thin, even layer.<br />
2. Polish<br />
In order to achieve an improved<br />
gliding effect, it is recommended<br />
that the waxed ski should be polished<br />
with a Thermo Pad.<br />
Paste waxes<br />
1. Apply<br />
Paste wax is applied to the base in<br />
a thin, even layer.<br />
2. Polish<br />
In order to achieve an improved<br />
gliding effect, it is recommended<br />
that the waxed ski should be polished<br />
with a Thermo Pad.<br />
1. Express TF90 Universal Paste <strong>Wax</strong><br />
2. Express Blocx Rub-on <strong>Wax</strong><br />
3. Dibloc High Fluoro, Rub-on-Set<br />
4. Dibloc High Fluoro, Paste <strong>Wax</strong><br />
5. Thermo Pad<br />
Tip:<br />
Paste waxes require adequate time<br />
to dry and harden.<br />
42<br />
1.<br />
2.<br />
3.<br />
4. 5.<br />
43
Grip<strong>Wax</strong><br />
Nordic<br />
Classic Cross country skiing –<br />
an adventure and a challenge!<br />
It is classic cross-county skiing that places the greatest demands on<br />
material. Since there are two different characteristics that are at play<br />
here, base preparation takes on particular significance. Indeed, classic<br />
cross-country skis have to achieve something highly contradictory in<br />
nature: gliding forwards quickly and effortlessly, yet holding sure<br />
when kicking and when stepping into skis. And: the flex distribution<br />
and hardness of the ski construction must be tailored to the weight<br />
of the skier.<br />
Grip<strong>Wax</strong>es<br />
...for maximum grip with<br />
optimal gliding properties.<br />
1. Roughen the kick zone<br />
Use sand paper to roughen the kick<br />
zone and remove dust with Base Tex.<br />
2. Apply Base Green<br />
Base Green serves as an unbeatable<br />
base for all grip waxes. It dramatically<br />
increases wax adhesion.<br />
Glide zone<br />
Glide zone<br />
Kick zone<br />
Kick zone<br />
Glide zone<br />
Glide zone<br />
In the classic ski, the kick zone stretches<br />
from the heel of the boot forwards by<br />
around 30–60 cm. The length depends on<br />
terrain, snow and ski flex, as well as the<br />
condition and technique of the skier.<br />
If everything is working optimally only the<br />
glide zones are in contact with the snow<br />
when gliding. In this case, glide wax reduces<br />
glide-resistance to a minimum. However, in order to ensure that<br />
when kicking-off, the ski does not slide backwards or slip, and when<br />
gliding it does not exert any braking action, the ideal grip wax displays<br />
the greatest possible static friction coefficient at the lowest gliding<br />
friction.<br />
3. Iron in<br />
Iron in the base wax and allow the<br />
ski to cool down well in the cold.<br />
4. Cork<br />
Cork the base lightly with the<br />
Plasto cork.<br />
The leg-push begins from a stationary ski; the kick zone is completely<br />
depressed. It is then that grip waxes (dry waxes, klisters) »grip« the<br />
snow and provide hold for the kick process. Classic skis with scales, mechanical<br />
or chemical kick zones should not, under any circumstances,<br />
be treated with grip wax. In such cases, special cleaning products cause<br />
problems by leading to the collection of dirt and excess wax from the<br />
track in the climb aid and prevent the climb zones from icing over.<br />
5. Apply the wax<br />
Apply the desired dry wax in 3-4<br />
thin layers.<br />
6. Cork<br />
Cork each layer separately.<br />
Kitted out with excellent ski equipment and the first-class grip waxes<br />
from <strong>Toko</strong>, every »classic« trip out on the cross-country tracks of this<br />
world will become an unforgettable experience. That's a promise.<br />
1. Carbon Base<strong>Wax</strong> green<br />
2. Carbon Grip<strong>Wax</strong> silver<br />
3. Carbon Grip<strong>Wax</strong> yellow<br />
4. Carbon Grip<strong>Wax</strong> red<br />
5. Carbon Grip<strong>Wax</strong> viola<br />
6. Carbon Grip<strong>Wax</strong> blue<br />
7. Carbon Grip<strong>Wax</strong> mint<br />
8. Sportline Grip<strong>Wax</strong> warm<br />
9. Sportline Grip<strong>Wax</strong> cold<br />
10. Sportline Grip<strong>Wax</strong> Xcold<br />
11. <strong>Wax</strong>Mouse 800W<br />
12. Plasto Cork<br />
13. <strong>Wax</strong> Cork<br />
44<br />
1. 2. 3. 4. 5. 6. 7. 8. 9. 10. 11.<br />
Carbon Gripwax-Line<br />
Sportline<br />
12. 13.<br />
45
Klister<br />
Nordic<br />
...for maximum grip<br />
with optimal gliding.<br />
1. Roughen the kick zone<br />
Use sand paper to roughen the kick<br />
zone and remove dust with Base Tex.<br />
2. Apply Base Green<br />
Base Green serves as an unbeatable<br />
base for all klisters. It dramatically<br />
increases the adhesion of the klister.<br />
3. Iron in<br />
Iron in the base klister and allow<br />
the ski to cool down well in the cold.<br />
Tip:<br />
After use, clean the iron well using<br />
wax remover.<br />
4. Apply the Klister<br />
Apply the klister to the kick zone<br />
spaced equidistantly<br />
1. Grip & Glide <strong>Wax</strong><br />
Liquid wax for the glide and kick<br />
zones of nordic skis with mechanical<br />
climb aids.<br />
Apply, leave to dry and polish with<br />
the Thermo Pad.<br />
5. Cork<br />
Cork the klister with the Plasto cork<br />
or rub it into the kick zone with the<br />
ball of your hand.<br />
1. BaseKlister green<br />
2. CarbonKlister silver<br />
3. CarbonKlister orange<br />
4. CarbonKlister multiviola<br />
5. CarbonKlister viola<br />
6. Sportline Klister warm<br />
7. Sportline Klister cold<br />
8. <strong>Toko</strong> Nordic Sportline Set<br />
9. Grip & Glide <strong>Wax</strong><br />
10. <strong>Wax</strong>Mouse 800W<br />
11. Plasto Cork<br />
12. <strong>Wax</strong> Cork<br />
46<br />
1. 2. 3. 4. 5. 6. 7. 8. 9.<br />
Carbon Klister-Line Sportline X-PRESS<br />
10. 11. 12.<br />
47
<strong>Racing</strong> mixtures<br />
Fixing devices<br />
0 ➞ -4°C<br />
32 ➞ 25°F<br />
Schneetemperatur in °C + °F<br />
Snow temperature in °C + °F<br />
Ungemischte <strong>Wax</strong>e<br />
Pure <strong>Wax</strong>es<br />
Dibloc HF yellow<br />
Dibloc LF yellow<br />
10.0<br />
9.5<br />
9.0<br />
8.5<br />
Härtegrad<br />
Grade of hardness<br />
Gemischte <strong>Wax</strong>e<br />
Mixed waxes<br />
Dibloc HF<br />
yellow/red<br />
2:1 0 ➞ -2°C<br />
32 ➞ 28°F<br />
Schneetyp<br />
Snow type<br />
Verhältnis<br />
Ratio<br />
Schneetemperatur in °C + °F<br />
Snow temperature in °C + °F<br />
1.<br />
Downhill/snowboard<br />
and cross-country<br />
Whether you are a beginner or a professional service technician when<br />
it comes to waxing or tuning, it is always recommended to fix the<br />
sporting appliance securely. <strong>Toko</strong> offers several useful fixing devices.<br />
1. Workbench<br />
with Ski Vise World Cup<br />
The table with its clamping device is the<br />
perfect combination for preparing skis.<br />
All skis available on the market can be<br />
easily fixed with the Ski Vise World Cup.<br />
The Ski Vise World Cup can also be<br />
attached to a work surface.<br />
8.0<br />
7.5<br />
Dibloc HF<br />
yellow/red<br />
1:1 0 ➞ -4°C<br />
32 ➞ 25°F<br />
2.<br />
2. Nordic Ski Support<br />
Slot-in supports for cross-country skis<br />
to fit the Ski Vise World Cup.<br />
7.0<br />
3. Ski Vise World Cup<br />
0 ➞ -4°C<br />
32 ➞ 25°F<br />
-4 ➞ -10°C<br />
25 ➞ 14°F<br />
-4 ➞ -10°C<br />
25 ➞ 14°F<br />
-4 ➞ -10°C<br />
25 ➞ 14°F<br />
-10 ➞ -30°C<br />
14 ➞ 22°F<br />
Dibloc HF<br />
System-3 yellow 6.5<br />
yellow/red<br />
1:2<br />
System-3 red<br />
Dibloc HF red<br />
Dibloc LF red<br />
Dibloc HF molyb.<br />
Dibloc LF molyb.<br />
System-3 blue<br />
6.0<br />
5.5<br />
5.0<br />
4.5<br />
4.0<br />
3.5<br />
3.0<br />
2.5<br />
2.0<br />
1.5<br />
Dibloc HF<br />
yellow/molyb.<br />
Dibloc HF<br />
yellow/blue<br />
Dibloc HF<br />
red/molyb.<br />
Dibloc HF<br />
red/blue<br />
Dibloc HF<br />
blue/molyb.<br />
1:1<br />
1:1<br />
1:2<br />
2:1<br />
1:1<br />
-2 ➞ -6°C<br />
28 ➞ 21°F<br />
-1 ➞ -5°C<br />
30 ➞ 23°F<br />
-2 ➞ -6°C<br />
28 ➞ 21°F<br />
-5 ➞ -10°C<br />
23 ➞ 14°F<br />
-7 ➞ -12°C<br />
19 ➞ 10°F<br />
-9 ➞ -14°C<br />
16 ➞ 7°F<br />
6.<br />
3.<br />
5.<br />
4.<br />
4. Compact Vise<br />
Ski holder for working on skis. The holder<br />
protrudes over the edge of the table<br />
and can thus be used independently of<br />
high bindings or binding plates.<br />
5. Board Grip<br />
Non-slip grip for preparing bases. The<br />
board can be attached vertically for<br />
working on the edges.<br />
6. Table with <strong>Wax</strong> & Service Boy<br />
Fastening device for cross-country skis.<br />
Can be easily mounted to any kind of<br />
table or work surface using the clamps<br />
supplied with the kit.<br />
7. Supports for the<br />
<strong>Wax</strong> & Service Boy<br />
Supports for the <strong>Wax</strong> & Service Boy.<br />
1.0<br />
Dibloc HF<br />
blue/red<br />
2:1<br />
-12 ➞ -20°C<br />
10 ➞ -4°F<br />
0.5<br />
7.<br />
-10 ➞ -30°C<br />
14 ➞ 22°F<br />
Dibloc HF blue<br />
Dibloc LF blue<br />
0.0<br />
Dibloc HF<br />
blue<br />
-15 ➞ -30°C<br />
5 ➞ 22°F<br />
50<br />
53
Types of application<br />
Types of application<br />
The more fluorine a wax contains, the more water can be displaced.<br />
This enables the ski/snowboard to glide better.<br />
Hot Liquid Rub-on Paste<br />
100% Fluoro<br />
JetStream Bloc<br />
Alpine – page 22<br />
Nordic – page 38<br />
JetStream Powder<br />
Alpine – page 23<br />
Nordic – page 38<br />
<strong>Toko</strong> HelX<br />
Alpine – page 25<br />
Nordic – page 40<br />
JetStream Bloc<br />
Alpine – page 22<br />
Nordic – page 38<br />
JetStream Powder<br />
Alpine – page 23<br />
Nordic – page 38<br />
High Fluoro<br />
Dibloc High Fluoro<br />
Alpine – page 20<br />
NanoTec LF2<br />
Alpine – page 26<br />
Nordic – page 41<br />
Dibloc High Fluoro<br />
Alpine – page 27<br />
Nordic – page 43<br />
Dibloc High Fluoro Paste<br />
Alpine – page 27<br />
Nordic – page 43<br />
Nordic – page 36<br />
Low Fluoro<br />
Dibloc Low Fluoro<br />
Alpine – page 20<br />
Express Universal<br />
Alpine – page 26<br />
Nordic – page 41<br />
Express Blocx<br />
Alpine – page 27<br />
Nordic – page 43<br />
Express TF90<br />
Alpine – page 27<br />
Nordic – page 43<br />
Nordic – page 36<br />
No Fluoro<br />
All-in-one <strong>Wax</strong><br />
Alpine – page 16 and 25<br />
System 3<br />
Alpine – page 21<br />
Nordic – page 37<br />
X-Cold<br />
Powder<br />
page 24<br />
51