Instruction manuals - Rain Bird irrigation
Instruction manuals - Rain Bird irrigation
Instruction manuals - Rain Bird irrigation

You also want an ePaper? Increase the reach of your titles
YUMPU automatically turns print PDFs into web optimized ePapers that Google loves.
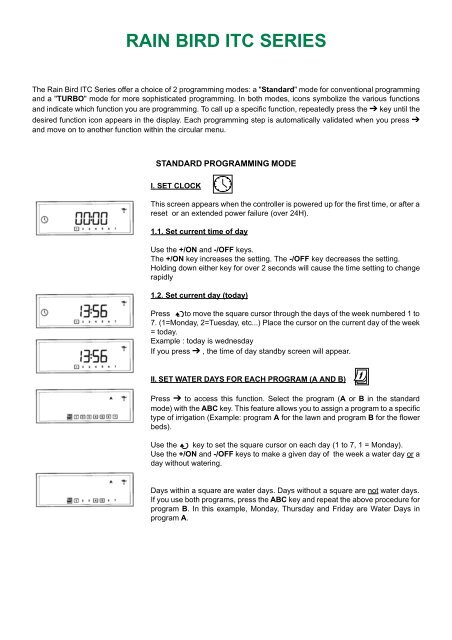
RAIN BIRD ITC SERIES<br />
The <strong>Rain</strong> <strong>Bird</strong> ITC Series offer a choice of 2 programming modes: a "Standard" mode for conventional programming<br />
and a "TURBO" mode for more sophisticated programming. In both modes, icons symbolize the various functions<br />
and indicate which function you are programming. To call up a specific function, repeatedly press the ➔ key until the<br />
desired function icon appears in the display. Each programming step is automatically validated when you press ➔<br />
and move on to another function within the circular menu.<br />
STANDARD PROGRAMMING MODE<br />
I. SET CLOCK<br />
This screen appears when the controller is powered up for the first time, or after a<br />
reset or an extended power failure (over 24H).<br />
1.1. Set current time of day<br />
Use the +/ON and -/OFF keys.<br />
The +/ON key increases the setting. The -/OFF key decreases the setting.<br />
Holding down either key for over 2 seconds will cause the time setting to change<br />
rapidly<br />
1.2. Set current day (today)<br />
Press to move the square cursor through the days of the week numbered 1 to<br />
7. (1=Monday, 2=Tuesday, etc...) Place the cursor on the current day of the week<br />
= today.<br />
Example : today is wednesday<br />
If you press ➔ , the time of day standby screen will appear.<br />
II. SET WATER DAYS FOR EACH PROGRAM (A AND B)<br />
Press ➔ to access this function. Select the program (A or B in the standard<br />
mode) with the ABC key. This feature allows you to assign a program to a specific<br />
type of <strong>irrigation</strong> (Example: program A for the lawn and program B for the flower<br />
beds).<br />
Use the key to set the square cursor on each day (1 to 7, 1 = Monday).<br />
Use the +/ON and -/OFF keys to make a given day of the week a water day or a<br />
day without watering.<br />
Days within a square are water days. Days without a square are not water days.<br />
If you use both programs, press the ABC key and repeat the above procedure for<br />
program B. In this example, Monday, Thursday and Friday are Water Days in<br />
program A.
III. SET TIME OF DAY TO START WATERING (START TIMES)<br />
Press ➔ to access this function. You can start each program (A and B) up to 2<br />
times a day. Enter the time of day (start time) when the first valve should open.<br />
The other valves in the program will automatically open in sequential order and<br />
water for the length of time you will enter in step IV. To enter a start time, select<br />
the program with the ABC key. Then set the start time with the +/ON and -/OFF<br />
keys. To enter a 2 nd start time (optional), press the key and use the +/ON and<br />
-/OFF keys to set the 2 nd start time.<br />
If you wish to set start time(s) for the other program, press ABC and repeat the<br />
above procedure. To cancel a start time, repeatedly press until the stored start<br />
time you wish to cancel appears. Hold down for at least 2 seconds. Press ➔<br />
to validate and move to the next function.<br />
Note : The controller will automatically file the start times in chronological<br />
order from 00:00 to 23:59. If a start time is programmed before a previous<br />
watering has been completed, the controller will "stack" the 2 nd start time<br />
and defer it until the <strong>irrigation</strong> underway has finished.<br />
IV. SET THE LENGTH OF WATERING TIME FOR EACH VALVE<br />
Repeatedly press ➔ to access this function if it is not already displayed.<br />
Each valve must be assigned to a program (A or B) by using the ABC key.<br />
Use the +/ON and -/OFF keys to set the watering duration from 1 minute to 4<br />
hours in 1-minute increments. The valve number appears on the left of the screen.<br />
Press to move to the next valve and repeat the above procedure.<br />
Note : if programs overlap with a 2 nd watering set to start before the 1 st has<br />
finished, the controller will "stack" the 2 nd start and delay it until the previous<br />
watering cycle has been completed.<br />
Press ➔ to validate and move to the next function.<br />
V. WATER BUDGET<br />
%<br />
The Water Budget function is used to adjust the watering duration for all programs<br />
(A and B; A, B and C in the TURBO mode) from 0 to 200% without re-programming<br />
the watering time for each valve. The water budget can cut back watering duration<br />
during cool weather or increase watering duration during hot summers.<br />
A setting of 100% means that all valves will operate for the length of time<br />
programmed in step IV. Use the +/ON and -/OFF keys to increase or decrease<br />
watering time in 10% increments.<br />
A setting under 100% decreases watering time.<br />
A setting over 100% increases watering time.
Example : "80" in the display means you have reduced watering time by 20% for<br />
all valves. A valve initially programmed to water during 10 minutes will now water<br />
only 8 minutes.<br />
To turn off the water budget, repeatedly press Ä to access the % function. Use the<br />
+/ON and -/OFF keys to set the percentage to 100.<br />
NOTE : The increased or decreased duration will not appear in the step IV display.<br />
However, the % icon will appear in the standby time of day display to indicate that<br />
the Water budget is being used.<br />
VI. SYSTEM ON/SHUTDOWN<br />
The default mode is "ON" which allows programmed watering to take place, but<br />
you can prevent both automatic and manually started watering (rainy weather<br />
shutdown) without changing the scheduled watering you have programmed.<br />
Repeatedly press ➔ to display the function with a blinking cross on the sprinkler.<br />
To prevent watering, press -/OFF. The cross on the sprinkler stops blinking. If you<br />
move through the menu by pressing the ➔ key, you will see that the non-blinking<br />
cross appears in all the displays except one. To return to the watering mode,<br />
repeatedly press ➔ until the blinking cross display appears. Now press +/ON: the<br />
cross disappears. Press ➔ to return to the time of day standby screen.<br />
If you have selected the Standard programming mode, your controller is now<br />
operational.<br />
<strong>Instruction</strong>s on manual functions are found in the "Manual Functions"<br />
section of this manual.
TURBO PROGRAMMING MODE<br />
TURBO<br />
Hold down the TURBO key until the non-blinking «Turbo» appears in the display.<br />
Important : this will erase all previously entered programming data except the<br />
current time setting entered in step I.<br />
The TURBO mode offers additional functions. If you change your mind, you can<br />
exit from the TURBO mode by holding down the TURBO key for 5 seconds. All<br />
previously entered TURBO programming data will be erased.<br />
T1. SET CURRENT YEAR, MONTH, DATE.<br />
Use the +/ON and -/OFF keys to set the current year.<br />
Press and enter the current month with the +/ON and -/OFF keys.<br />
Press and enter today’s date with the +/ON and -/OFF keys. Press<br />
to access the time of day screen<br />
T2. SET CURRENT TIME<br />
The screen automatically shows "Today" within a square (1=Monday, 2=Tuesday,<br />
etc...). Use the +/ON and -/OFF to set the current time. Holding down either key<br />
will cause the setting to change rapidly. You can display the time in the 24 hour<br />
international mode or the 12-hour AM/PM mode. Press ABC to switch from 1 time<br />
mode to the other.<br />
IMPORTANT : This screen allows you to change the time of day setting (example<br />
: daylight saving time). If you have made a mistake entering the year, month, or<br />
date, press to access the year screen and repeat step T I.<br />
Press ➔ to validate and the standby screen appears.<br />
T3. SET WATER DAYS<br />
Carefully read all of the following section before you continue to program.<br />
T3.1 Select <strong>irrigation</strong> cycle<br />
Press ➔ to access this function. You have a choice:<br />
- A 7-day custom cycle for each program (A,B and C). Any days of the week can<br />
be water days. See step T 3.2.<br />
- Watering on every even date (all programs)<br />
- Watering on every odd date except the 31 st (all programs)<br />
- Watering on every odd date including the 31 st (all programs)<br />
- 6 custom cycles from 1-6 days for all programs with only 1 water day per cycle.<br />
See step T 3.3.<br />
Repeatedly press to access the desired cycle. If you select an odd or even<br />
date cycle, press ➔ twice and move to step T 4. If you select a custom cycle,<br />
follow directions below.
T3.2 Set water days for each program (A, B and C) in a 7-day cycle<br />
Press ➔ and "CYC" disappear. B and C also disappear.<br />
Use the ABC key to select the program.<br />
Use the key to move the cursor through the days of the week (1-7,<br />
1= Monday). Use the +/ON and -/OFF keys to set or cancel water days. A number<br />
in a square is a water day. The -/OFF key cancels water days and the square<br />
disappears. To set a water day, place the cursor on the corresponding day number<br />
and press +/ON.<br />
If you wish, repeat the above procedure for the other programs after pressing the<br />
ABC key.<br />
In this example, Monday, Thursday and Friday are water days in program A.<br />
Press ➔ to move to step T 4.<br />
T3.3. Select only 1 water day for each program (A,B and C) in a 1 to 6-day<br />
cycle<br />
Repeatedly press to set the number of days in the cycle (1-6)<br />
Press ➔, "CYC" disappears. Use the ABC key to select the program (A, B or C).<br />
Use the key to move the square to the desired water day. Day 1 is "today".<br />
Only one day is a water day (square) in a 1-6 day cycle. Repeat the above for the<br />
other programs if desired.<br />
Each program may have a different water day.<br />
In this example, watering will occur once every 6 days in program A.<br />
Then press ➔ to move to step T4.<br />
T4. SET TIME OF DAY TO START WATERING<br />
If this screen is not already displayed, repeatedly press ➔ until it appears. You<br />
can start each program (A, B and C) up to 8 times per day. At each start time, the<br />
first valve in the program will open followed by the other valves in sequential<br />
order. The valves will operate for the length of time you will enter in step T.5.<br />
To set a start time, select the desired program with the ABC key.<br />
Use the +/ON and -/OFF keys to set the first start time. If you wish a 2 nd start time<br />
(optional) press and set the 2 nd start time with the +/ON and -/OFF keys.<br />
Repeat the procedure if you wish additional start times.<br />
Note : it is not necessary to use all 8 start times!<br />
If you wish to set start times for the other programs, press the ABC key and<br />
repeat above procedure.<br />
To cancel a start time: repeatedly press to display the start times. When<br />
you see the start time you want to cancel, hold down the key for at least 2<br />
seconds.<br />
Now press ➔ to validate and move to next function.<br />
Note : The controller will automatically file your start times in chronological<br />
order from 00:00 to 23:59. If a start time is programmed to begin watering<br />
before a previously started <strong>irrigation</strong> cycle has ended, the 2 nd start time will<br />
be "stacked". Irrigation will start only after the first watering cycle has ended.
T5. SET THE LENGTH OF WATERING TIME (RUN TIME) FOR EACH<br />
VALVE<br />
Repeatedly press ➔ to access this function if this screen is not displayed.<br />
Each valve must be assigned to a program (A, B or C) by using the ABC key.<br />
The valve number appears on the left in the display. Use the +/ON and -/OFF<br />
keys to set the watering time from 1 minute to 4 hours in 1-minute increments.<br />
Press to move to the next valve and repeat above procedure.<br />
Note : Remember the start times set in step T4. The run time should not<br />
exceed the time interval between 2 start times. Otherwise the 2 nd start<br />
time will be "stacked" and start only after the first watering cycle has<br />
ended.<br />
T6. WATER BUDGET<br />
%<br />
See step V.<br />
T7. SYSTEM ON/SHUTDOWN<br />
See step VI.<br />
T8. RAIN DELAY<br />
Repeatedly press ➔ to display this screen.<br />
This function is used to suspend watering from 1 to 9 days. Example: suspend<br />
watering during a period of rainy weather. Use the +/ON and -/OFF keys to<br />
make the setting. The icon appears in all screens. The sprinkler with the "X"<br />
also appears in all screens to indicate that <strong>irrigation</strong> is suspended. Each day,<br />
the controller will count down the days remaining before automatic <strong>irrigation</strong><br />
resumes.<br />
The return to programmed <strong>irrigation</strong> is automatic. To cancel a rain delay,<br />
repeatedly press ➔ to access this screen. Use the +/ON and -/OFF keys to<br />
change the setting to "0".<br />
Note : Manually started <strong>irrigation</strong> is prevented during a <strong>Rain</strong> Delay. Press<br />
➔ twice to return to the standby screen.<br />
You have now completed programming the TURBO mode.
MANUAL FUNCTIONS<br />
Access these functions with the<br />
modes<br />
key in both the standard and TURBO<br />
M1. MANUAL SINGLE VALVE START<br />
This icon will appear in the screen. The valve number appears on the left.<br />
Press to move to the other valves.<br />
Example : to manually start valve number 2, repeatedly press until the<br />
number «2» appears in the display. Then press +/ON to open the valve.<br />
Watering starts and is indicated on the screen by a blinking sprinkler stream.<br />
The display counts down the remaining programmed watering time (ex.: 12<br />
minutes) in 1-minute increments. If you want to stop watering before the<br />
programmed time is completed, press -/OFF. The blinking stream disappears.<br />
Note : Water budgeting does not operate in the manual single valve mode.<br />
To exit from the manual functions, press and the standby screen<br />
will appear.<br />
M2. MANUAL PROGRAM START<br />
Press<br />
and then ➔ to access this function.<br />
The icon appears in the screen. Use the ABC key to select the program.<br />
Then press +/ON to start the program.<br />
The blinking sprinkler stream indicates that watering is taking place. The 1 st<br />
valve number in the program appears at the left of the screen and the<br />
remaining programmed watering time for the valve is counted down.<br />
Example : 12 minutes.<br />
In this example, after 12 minutes the 1 st valve will close and the next valve will<br />
begin watering. The rest of the valves will water in sequence until the program<br />
is completed. The number of the valve currently in operation appears at the<br />
left of the screen.<br />
If the water budget is used with a setting higher or lower than 100%, the % icon<br />
will appear next to A, B or C and the increased or decreased watering time will<br />
appear in the display. To stop watering before the program is completed, press<br />
-/OFF.<br />
Note : If the controller is in the <strong>Rain</strong> Delay or OFF mode (a non-blinking<br />
cross on the sprinkler), no manually starting watering is possible.<br />
M3. MANUAL TEST PROGRAM<br />
Press the<br />
key. Then press ➔ twice to access this function.<br />
The icon will appear in the display.<br />
This function allows you to test your system and adjust your sprinklers if<br />
necessary. Each valve will operate for 3 minutes. Press +/ON to operate each<br />
valve in sequence regardless of the program to which the valve has been<br />
assigned (A, B or C). The valve number appears at the left of the screen.<br />
To stop the test before it is over, press -/OFF. To exit the manual functions,<br />
press .<br />
Note : If no watering time has been programmed for a valve, the valve<br />
will not operate during the test.
ACTION DURING POWER FAILURE<br />
If the LCD is blank, there is no 230V power input. No <strong>irrigation</strong> will take place.<br />
However, the ITC has an electronic memory component that will maintain the<br />
<strong>irrigation</strong> programs for at least 24 hours.<br />
If the power outage lasts longer, the programs are lost. When power is restored,<br />
each valve is automatically assigned to program A. A backup program will begin<br />
operating 8 hours after power is restored. Each valve will open for 10 minutes<br />
every 24 hours. It is then necessary to reprogram your ITC.<br />
SHORT CIRCUIT "ERR" DISPLAY<br />
The controller has a diagnostic circuit breaker which indicates which valve has an<br />
electrical overload/short circuit. If the controller detects a short circuit on a valve,<br />
the screen will briefly go blank and the valve will stop operating during 20<br />
seconds. Then the valve automatically resumes operation. If the short circuit is<br />
confirmed, the valve completely stops operating and the error message appears.<br />
The problem valve number is displayed and blinks along with "ERR" until any key<br />
is pressed. The controller will continue to water with all other operable valves. The<br />
same sequence will occur until the short circuit is repaired.<br />
If a short circuit occurs on the pump start relay or the master valve (terminal P),<br />
the same display appears. However, in this case, all <strong>irrigation</strong> is stopped until the<br />
problem is fixed. Short circuits most often occur in the valve solenoid or in the wire<br />
connectors to the valve wires.<br />
ERASE ALL PROGRAMS<br />
CAUTION! : make sure you want to do this. This will erase all the data stored in the ITC (programs and dates). Use a<br />
metallic object (screwdriver, paperclip, etc.) to touch the 2 rectangular metal plates under "reset" to the right of the<br />
terminal strip. Maintain the contact until the screen becomes blank. This screen will then appear.<br />
Reset<br />
24 V 24 V C P V1 V2 V3 V4 V5 V6