100W 2-Way 6.5'' In-wall Speaker - Radio Shack
100W 2-Way 6.5'' In-wall Speaker - Radio Shack
100W 2-Way 6.5'' In-wall Speaker - Radio Shack
You also want an ePaper? Increase the reach of your titles
YUMPU automatically turns print PDFs into web optimized ePapers that Google loves.
®<br />
THE PERFORMANCE YOU NEED<br />
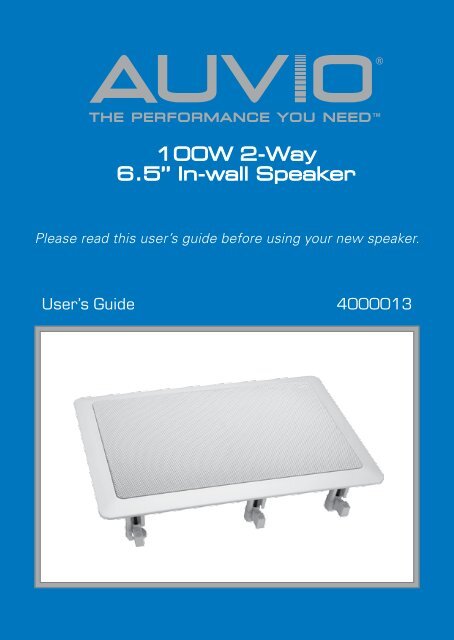
<strong>100W</strong> 2-<strong>Way</strong><br />
6.5’’ <strong>In</strong>-<strong>wall</strong> <strong>Speaker</strong><br />
TM<br />
Please read this user’s guide before using your new speaker.<br />
User’s Guide 4000013
Package Contents<br />
• <strong>Speaker</strong><br />
• Template/Paint mask<br />
Features<br />
<br />
• User’s Guide<br />
• Mounts flush inside your <strong>wall</strong> for a sleek appearance<br />
• Tweeter can be tilted to direct the sound to best suit<br />
the room<br />
• Two-way acoustic design provides great audio quality<br />
from both ends of the sound spectrum<br />
• Spring-loaded terminals work with any standard<br />
speaker wire<br />
• Foam edge forms a snug fit to reduce disruptive<br />
vibrations<br />
• Grille and frame can be painted to match your decor<br />
• Easy to install using the included template<br />
Required Tools<br />
To mount your speaker, you need these tools<br />
(not supplied):<br />
• Dry<strong>wall</strong> or keyhole saw<br />
• Phillips screwdriver<br />
• 18-20 gauge speaker wire<br />
1 Prepare <strong>Speaker</strong> and<br />
Location<br />
• Wire stripper<br />
• Pencil or marker<br />
Be sure the mounting surface:<br />
• Is between 2 / 5 – 1 3 / 8 inch (10 – 35 mm) thick.<br />
2
• Has at least 3 inch (76 mm) clearance behind the<br />
surface. Avoid <strong>wall</strong> studs or other objects that might<br />
block the back of the speaker.<br />
1. Remove the inner cardboard disc from<br />
the supplied template/paint mask and<br />
keep it for later. Use the outer portion<br />
of the mask as a template to mark<br />
the cutout hole size and location for<br />
mounting the speaker.<br />
2. Use a dry<strong>wall</strong> or keyhole saw to cut<br />
the hole.<br />
(Optional) Paint the Grille<br />
nNote: Do not paint internal speaker<br />
components. Use spray paint on the<br />
grille so no paint gets in or blocks the<br />
holes.<br />
1. Push any two opposite mounting<br />
tabs and remove the grille.<br />
2. Remove the dust cloth from behind<br />
Mounting Tab<br />
the grille.<br />
3. Paint the grille and replace the dust cloth after the<br />
paint is dry.<br />
Paint mask<br />
(Optional) Paint the Frame<br />
To avoid paint entering the speaker,<br />
remove the grille and insert the supplied<br />
cardboard paint mask. After the paint is<br />
dry, remove the paint mask and replace<br />
the grille.<br />
Template<br />
3
FM UNBAL<br />
AM<br />
75 Ω LOOP ANTENNA<br />
S-VIDEO cable Coaxial digital cable<br />
Composite Video Cables Audio Cables Component Video Cables<br />
S R<br />
K<br />
E<br />
R<br />
S<br />
FRONT<br />
SPEAKERS<br />
SURROUND<br />
CENTER<br />
L R<br />
L<br />
2 Connect to Your Amplifier<br />
Connect the speaker to your amplifier outputs, using wire<br />
that is color-coded or otherwise marked to help connect<br />
the wires correctly.<br />
1. Turn off the amplifier and all associated equipment.<br />
2. Route speaker wire from your amplifier to the speaker.<br />
3. Separate about 2 inches (50 mm) of wire at each end.<br />
4. Using a wire stripper, remove<br />
about ½ inch (13 mm) of<br />
1<br />
/2<br />
1/4 inch<br />
inch<br />
insulation from each wire. Then<br />
twist the ends.<br />
4 2 inches<br />
5. Connect the wire from the<br />
red speaker terminal to the amplifier’s positive (+)<br />
terminal, then connect the wire from the black<br />
speaker terminal to the amplifier’s negative (–)<br />
terminal.<br />
6. Connect the wire coming from the red terminal to<br />
your amplifier’s positive (+) terminal. Connect the wire<br />
from the black terminal to your amplifier’s negative (–)<br />
terminal.<br />
Tab<br />
Screw<br />
4
n Notes:<br />
<br />
<br />
<br />
<br />
Make sure that the polarities and impedance of the<br />
speaker and amplifier match.<br />
Avoid routing the speaker wire near electrical wires.<br />
Do not nail, staple, or otherwise puncture the<br />
speaker wire.<br />
Use a speaker wire no thicker than 14 gauge A.W.G.<br />
and no longer than 30 ft to avoid signal loss in the<br />
cable.<br />
3 Mount the <strong>Speaker</strong><br />
1. Remove the grille to expose the mounting screws.<br />
2. Turn in the mounting tabs, allowing the speaker to fit<br />
into the mounting hole. Then insert the speaker into<br />
the hole.<br />
Tweeter<br />
3. Turn out the tabs and use the supplied screws to<br />
tighten the speaker to the <strong>wall</strong> or ceiling. Be careful<br />
not to overtighten the screws.<br />
5
4. Press to adjust the tweeter to best suit the room’s<br />
acoustics and replace the grille.<br />
n Note: When removing the speaker from the <strong>wall</strong><br />
or ceiling, loosen the screws just enough to remove<br />
the speaker. This will prevent loss of the mounting tabs<br />
behind your <strong>wall</strong>.<br />
Maintenance<br />
• To avoid damaging the speaker, turn down the<br />
volume of your amplifier before turning it on.<br />
• Do not use overrating power, which can damage<br />
sound quality and loudspeaker drivers.<br />
• Clean your speaker with a soft cloth.<br />
• This speaker is not magnetically shielded. Placing<br />
it near a TV set may magnetize the TV’s screen and<br />
cause viewing issues.<br />
Specifications<br />
Power Handling........................................ 50W RMS, <strong>100W</strong> max.<br />
Frequency Response...............................................60–22,000 Hz<br />
Crossover Frequency.......................................................3500 Hz<br />
Impedance.......................................................... 8 ohms nominal<br />
Sensitivity..............................................................88 dB @ 1W/M<br />
Woofer................................................................. 6.5-in (16.5 cm)<br />
Tweeter......................................................................1-in (2.5 cm)<br />
Cutout Dimensions.................... 7.36 × 10.75-in (187 ×273.1 mm<br />
Mounting Depth..................................................3.5-in (88.9 mm)<br />
Specifications are subject to change and improvement without notice.<br />
Actual product may vary from the images found in this document.<br />
6
Limited Warranty<br />
Ignition L.P. warrants this product against defects in materials and<br />
workmanship under normal use by the original purchaser for one (1)<br />
year after the date of purchase. IGNITION L.P. MAKES NO OTHER<br />
EXPRESS WARRANTIES.<br />
This warranty does not cover: (a) damage or failure caused by or<br />
attributable to abuse, misuse, failure to follow instructions, improper<br />
installation or maintenance, alteration, accident, Acts of God (such<br />
as floods or lightning), or excess voltage or current; (b) improper or<br />
incorrectly performed repairs by persons who are not a Ignition L.P.<br />
Authorized Service Facility; (c) consumables such as fuses or batteries;<br />
(d) ordinary wear and tear or cosmetic damage; (e) transportation,<br />
shipping or insurance costs; (f) costs of product removal, installation,<br />
set-up service, adjustment or reinstallation; and (g) claims by persons<br />
other than the original purchaser.<br />
Should a problem occur that is covered by this warranty, take the<br />
product and the sales receipt as proof of purchase date to the place of<br />
purchase in the U.S. Ignition L.P. will, at its option, unless otherwise<br />
provided by law: (a) repair the product without charge for parts and<br />
labor; (b) replace the product with the same or a comparable product;<br />
or (c) refund the purchase price. All replaced parts and products, and<br />
products on which a refund is made, become the property of Ignition<br />
L.P. New or reconditioned parts and products may be used in the<br />
performance of warranty service. Repaired or replaced parts and<br />
products are warranted for the remainder of the original warranty<br />
period. You will be charged for repair or replacement of the product<br />
made after the expiration of the warranty period.<br />
IGNITION L.P. EXPRESSLY DISCLAIMS ALL WARRANTIES AND CON-<br />
DITIONS NOT STATED IN THIS LIMITED WARRANTY. ANY IMPLIED<br />
WARRANTIES THAT MAY BE IMPOSED BY LAW, INCLUDING THE<br />
IMPLIED WARRANTY OF MERCHANTABILITY AND, IF APPLICABLE,<br />
THE IMPLIED WARRANTY OF FITNESS FOR A PARTICULAR<br />
PURPOSE, SHALL EXPIRE ON THE EXPIRATION OF THE STATED<br />
WARRANTY PERIOD.<br />
EXCEPT AS DESCRIBED ABOVE, IGNITION L.P. SHALL HAVE NO<br />
LIABILITY OR RESPONSIBILITY TO THE PURCHASER OF THE<br />
PRODUCT OR ANY OTHER PERSON OR ENTITY WITH RESPECT<br />
TO ANY LIABILITY, LOSS OR DAMAGE CAUSED DIRECTLY OR<br />
INDIRECTLY BY USE OR PERFORMANCE OF THE PRODUCT OR<br />
ARISING OUT OF ANY BREACH OF THIS WARRANTY, INCLUD-<br />
ING, BUT NOT LIMITED TO, ANY DAMAGES RESULTING FROM<br />
INCONVENIENCE AND ANY LOSS OF TIME, DATA, PROPERTY,<br />
REVENUE, OR PROFIT AND ANY INDIRECT, SPECIAL, INCIDENTAL,<br />
7
OR CONSEQUENTIAL DAMAGES, EVEN IF IGNITION L.P. HAS BEEN<br />
ADVISED OF THE POSSIBILITY OF SUCH DAMAGES.<br />
Some states do not allow limitations on how long an implied warranty<br />
lasts or the exclusion or limitation of incidental or consequential<br />
damages, so the above limitations or exclusions may not apply to you.<br />
This warranty gives you specific legal rights, and you may also have<br />
other rights which vary from state to state. You may contact Ignition L.P.<br />
at:<br />
Ignition L.P., 3102 Maple Ave., Suite 450, Dallas, TX 75201<br />
02/09<br />
For product support, call<br />
1-866-315-0426<br />
Complies with the European Union’s “Restriction of Hazardous<br />
Substances Directive,” which protects the environment by<br />
restricting specific hazardous materials and products.<br />
Protect the environment by recycling used electronics. Go to<br />
E-CyclingCentral.com to find an electronic recycling center near you.<br />
Get more from your audio and video equipment. See what<br />
you’ve been missing. With Auvio, you control the experience.<br />
Auvio was established by a group of technophiles to provide<br />
high quality audio and video products without the high sticker<br />
price. The Auvio philosophy is for you to experience audio<br />
and video as it was intended to be: pure and distortion free.<br />
We know electronics can be intimidating. Auvio simplifies<br />
your experience by providing the right products, with the<br />
right specs, to work with your equipment.<br />
Be confident about your purchase: your new Auvio product<br />
incorporates the latest technology, is built to the highest<br />
quality standards, and reduces environmental impact by<br />
complying with RoHS environmental restrictions.<br />
© 2010. Ignition L. P. All rights reserved. Auvio is a registered trademark used by<br />
Ignition L.P. Package and insert are recyclable. <strong>In</strong>sert contains recycled material.<br />
8<br />
Printed<br />
in China<br />
09A10<br />
4000013


