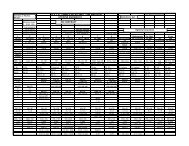
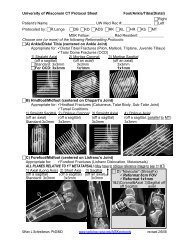
CT Protocols: (Brain, ENT, Spine, Vascular) - Department of Radiology
CT Protocols: (Brain, ENT, Spine, Vascular) - Department of Radiology
CT Protocols: (Brain, ENT, Spine, Vascular) - Department of Radiology

Create successful ePaper yourself
Turn your PDF publications into a flip-book with our unique Google optimized e-Paper software.
136 Revised 7/22/09 (Gentry/Ranallo)<br />
o. You must straighten the Axis line by grabbing the boxes at either end to split the<br />
brain into two equal hemispheres.<br />
p. After you have done this, hold the control key down and click on all ROI’s and the axis line.<br />
This will turn them all green. Go back to the symmetry button and there is a little black tab,<br />
open that and click on that button. This will place the ROI’s on the left side. Now you are<br />
ready to film.<br />
q. In the upper left port, right mouse click and save view.<br />
r. In the upper right port go outside yellow box and right mouse click and save view. After<br />
doing that there are some numbers in red at the top and bottom left <strong>of</strong> the grid. Grab the<br />
numbers at the top and middle mouse scroll to the left. This should move your 1 and 2<br />
graph up and out <strong>of</strong> the yellow box and bring the ROI’s you just created up in view. If it<br />
doesn’t, you can also grab the numbers at the bottom and bring them up. Once they are in<br />
view right mouse click and click on multiple graphs. This will show them in a nice graph.<br />
s. Go out <strong>of</strong> the yellow box again and save view.<br />
t. Place your cursor in the lower right port and on your keyboard hit the key with the (?/).<br />
This will bring up all 4 views at once. Now you can film them in order without having to<br />
change each one. Film Mean Transit Time first, then Blood Flow, Blood Volume, and<br />
Permeability Surface.<br />
u. Go Back up to your upper left port and hold down the control key and click on your ROI’s<br />
to turn them green. Hit <strong>CT</strong>RL-C to copy. Go to the image location and right mouse click to<br />
go to the next level. This will take a minute to process. Once it is done, Hit <strong>CT</strong>RL-V to<br />
paste or you can also use the right click menu.<br />
v. Now all ROI’s will be in the same spot as before. You may need to move them just a hair if<br />
they get too close to bone or a big blood vessel but otherwise try to leave them in the<br />
same spot.<br />
w. Now repeat all filming. Upper left port first, upper right port next, Mean Transit Time, Blood<br />
Flow, Blood Volume, Permeability Surface. This time when you finish you just click on the<br />
next level. You don’t need to copy again because you have already done it once. If you<br />
move them a lot you will need to make them green again and recopy. When you get to the<br />
third level, <strong>CT</strong>RL-V or right click to paste your ROI’s, adjust them if necessary, then film.<br />
x. After you have done all four/eight levels, click on film/save.<br />
Choose Functional Data and<br />
hit save. This will bring up a graph to the right called functional data. Click next until the<br />
button goes gray, and go back to the film/save box and click save again.<br />
y. Now you can exit and go back to the patient list. Send to ALI-STORE.<br />
1. <strong>CT</strong>RL-C copy<br />
2. <strong>CT</strong>RL-V or right click menu to paste<br />
3. <strong>CT</strong>RL-X cut<br />
4. <strong>CT</strong>RL and click to make ROI’s green