Cottage Farms Direct Cottage Farms Direct - QVC.com
Cottage Farms Direct Cottage Farms Direct - QVC.com
Cottage Farms Direct Cottage Farms Direct - QVC.com

Create successful ePaper yourself
Turn your PDF publications into a flip-book with our unique Google optimized e-Paper software.
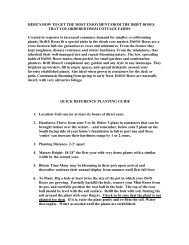
OUT OF THE BOX<br />
DAYLILIES<br />
<strong>QVC</strong> item #M7579 /M11121 /M15390 /M15732 /M16323<br />
/M16587 /M20812 /M23634 /M23635<br />
Your plants have been shipped to<br />
you in a dormant, bare-root state<br />
(no foliage). Once planted they<br />
may take 4-6 weeks, depending<br />
upon the weather and other environmental<br />
conditions, to wake up<br />
and start growing. You can be<br />
assured they will begin setting<br />
roots and start growing very soon<br />
after planting. They will grow<br />
quickly and amaze you with their<br />
performance. Please plant as soon<br />
as possible, provide reasonable<br />
care, and be patient.<br />
<strong>Cottage</strong> <strong>Farms</strong> urges you to plant your new arrivals as<br />
soon as possible. In the event that planting must be<br />
delayed due to weather or other unforeseen circumstances,<br />
bare-root plants should be left in the poly bags<br />
and kept in a cool, dark location. A refrigerator is ideal,<br />
but an unheated garage or a basement is also acceptable.<br />
Keep roots moist but not soaking wet. A spray<br />
bottle can be used to mist roots.<br />
Upon arrival, your daylilies may have some green<br />
emerging from the crown (top). Follow the planting<br />
instructions found in this guide to determine how<br />
deeply to plant the bare-root daylily. Depending upon<br />
its length, some of the new, green growth may be visible<br />
above soil level after planting. If in doubt, you can<br />
plant daylilies on their side and they will orient themselves<br />
and grow just fine.<br />
Occasionally, daylilies may arrive with a small amount of<br />
mold on them. Simply wipe the mold off with a paper<br />
towel and plant them. In the industry the mold is known<br />
as "storage mold" and is a <strong>com</strong>mon occurrence during<br />
shipping that rarely affects the plant.<br />
*Image on cover is representative of the type of plant(s)<br />
in this offer and not necessarily indicative of actual size or<br />
color for the included variety.<br />
www.cottagefarmsdirect.<strong>com</strong><br />
Thank you for your order<br />
Your satisfaction is of primary concern to us. Please<br />
use the following resources for questions regarding<br />
your order:<br />
Email us at help@cottagefarmsdirect.<strong>com</strong>.<br />
Visit www.<strong>Cottage</strong><strong>Farms</strong><strong>Direct</strong>.<strong>com</strong> for our library<br />
of Planting and Growing Guides and Frequently<br />
Asked Questions.<br />
Call us toll free 1.888.593.3644 or write to:<br />
COTTAGE FARMS DIRECT<br />
<strong>Cottage</strong> Hill Nursery, Inc.<br />
9960 PADGETT SWITCH ROAD<br />
IRVINGTON, ALABAMA 36544<br />
<strong>Cottage</strong> <strong>Farms</strong>’ Guarantee<br />
We aren't happy if you aren't happy. In addition<br />
to <strong>QVC</strong>'s 30-day guarantee, <strong>Cottage</strong> <strong>Farms</strong> warrants<br />
its perennials for 1 year and annuals for 90<br />
days from the time of the shipment. If for any reason<br />
you are dissatisfied, <strong>Cottage</strong> <strong>Farms</strong> will<br />
replace your plant with a similar or <strong>com</strong>parable<br />
one, at no charge. If your replacement is not available<br />
or it is too late in the season to ship, it will<br />
reship the following shipping season.<br />
CAUTION: Not all plant material is edible. Though<br />
most plants are harmless, some contain toxic substances<br />
which can cause headaches, nausea, dizziness,<br />
or other dis<strong>com</strong>forts. As a general rule, only<br />
known food products should be eaten. In case of<br />
ingestion, please contact your local poison control<br />
center at once and advise them of the plant ingested.<br />
Keep out of reach of children.<br />
<strong>QVC</strong>, the Q and the Q Ribbon Logo are<br />
registered service marks of ER Marks, Inc.<br />
© 2010 <strong>Cottage</strong> <strong>Farms</strong> - Printed in USA<br />
<strong>Cottage</strong> <strong>Farms</strong> <strong>Direct</strong><br />
PLANTING AND GROWING GUIDE<br />
DAYLILIES
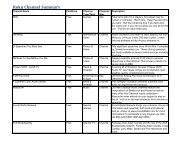
QUICK REFERENCE PLANTING GUIDE<br />
LIGHT/SUN EXPOSURE<br />
USDA<br />
HARDINESS ZONES<br />
PLANT TYPE<br />
PLANTING DISTANCE<br />
IN-GROUND<br />
CONTAINER<br />
SIZE<br />
MATURE<br />
HEIGHT / SPREAD<br />
BLOOM TIME<br />
Full sun to partial shade.<br />
Zones 3 to 9<br />
to -25 degrees F.<br />
Perennial.<br />
Dwarfs: 2 feet apart.<br />
Standards: 2-3 feet apart.<br />
1 plant per 8-inch container.<br />
3 plants per 12-inch container.<br />
4 plants per 16-inch container.<br />
6 plants per 18-inch container.<br />
8 plants per 24-inch container.<br />
Dwarfs: 12 to 24 inches tall.<br />
Standards: 2 to 3 feet tall.<br />
Mature height reached within two<br />
years with a similar spread.<br />
Early to mid-Summer with a possible<br />
repeat bloom in early Fall<br />
after establishing their roots the<br />
first season. Sporadic blooming<br />
can be expected the first year<br />
depending upon variety.<br />
SOIL PREPARATION<br />
Although these plants will perform well in average garden<br />
soils of all types, we re<strong>com</strong>mend having your soil<br />
tested periodically by the local County Extension Office.<br />
These tests can determine if the soil needs any amendments<br />
to enhance your plants' growth and performance.<br />
See below for our re<strong>com</strong>mended practice to improve<br />
your soil without any additional testing:<br />
Spade or till the soil to a depth of 12-18<br />
1 inches.<br />
To provide nutrients and improve drainage, add<br />
organic matter to your soil by mixing in a 2 to 4-<br />
2 inch layer of dehydrated manure, garden <strong>com</strong>post,<br />
shredded leaves, and/or peat moss.<br />
After active growth begins, periodically feed with<br />
<strong>Cottage</strong> <strong>Farms</strong>' water soluble Carefree Bud-N-<br />
3 Flower Booster. Plants in containers need more<br />
frequent watering and feeding, especially when in<br />
active growth and bloom.<br />
PLANTING INSTRUCTIONS<br />
Dig a hole at least twice as wide and<br />
twice as deep as the crown (where the<br />
root mass meets the foliage - see illustration<br />
at right). Spread the roots of<br />
the plant out and cover with soil so<br />
that no more than 1 inch of soil covers<br />
the crown. Firm the soil around the<br />
crown. Water thoroughly.<br />
WATERING<br />
MULCHING<br />
GROOMING WEEDING<br />
CONTINUING CARE<br />
Your plants require 1" of rainfall (or equivalent<br />
watering) each week when planted in the ground.<br />
Do not allow plants in containers to dry out. In a<br />
container that is exposed to full sun, water it well<br />
at least once every other day, and possibly every<br />
day, during periods of intense summer heat. You<br />
may wish to temporarily move containerized<br />
plants to an area where they are shielded from the<br />
hot summer sun (i.e., in the shade of a tree, on a<br />
porch near an overhang).<br />
Apply a 2-4 inch layer of shredded bark, <strong>com</strong>post<br />
or other organic mulch around your plants to promote<br />
moisture retention, maintain even soil temperatures,<br />
and to discourage weed growth.<br />
Keep the area around your plants free of weeds.<br />
Weeds <strong>com</strong>pete with all plants for food, water<br />
and light. Walk around the garden periodically<br />
and pull weeds, including the roots, as soon as<br />
you see them.<br />
Clip off unsightly or dead growth to maintain<br />
good form and shape. Remove spent blossoms<br />
before seed heads form to promote heavier<br />
reblooming. Cut off flower stalks when blooms<br />
have faded but leave as much foliage as possible.<br />
As long as the foliage remains green it will gather<br />
sunlight and transmit energy into the root system<br />
for the following growing season. Remove dead<br />
foliage in late fall by cutting down the stalks.<br />
FEEDING<br />
WINTERIZING<br />
CONTINUING CARE (cont)<br />
Feed your plants once every 2-3 weeks during<br />
the growing season with a water-soluble fertilizer<br />
such as <strong>Cottage</strong> <strong>Farms</strong>' Carefree Bud-N-<br />
Flower Booster. Discontinue feeding after<br />
September 1st so your plants can harden off<br />
for winter dormancy. Resume fertilizing when<br />
new growth appears in the spring.<br />
After frost has blackened the foliage of your<br />
Daylilies, apply a winter mulch of evergreen<br />
boughs, straw, or leaves to in-ground plantings<br />
to prevent lifting of the plant's roots during<br />
alternating periods of freezing and thawing.<br />
For container planting, move plants next to<br />
your home's southern foundation for added<br />
warmth and protection. They may also be<br />
moved into an unheated, protected area such<br />
as a garage or cellar. If moved to a protected<br />
area be sure you water them well once every 7<br />
to 10 days.<br />
In Spring, remove mulch from in-ground plantings.<br />
Also, bring containerized plants back out<br />
into the garden sunlight where they will immediately<br />
begin to repeat their yearly garden performance.<br />
FREQUENTLY ASKED QUESTIONS<br />
How often and when should I divide my daylilies?<br />
You should divide your daylilies when they be<strong>com</strong>e<br />
overcrowded, usually every 3 to 5 years, in late summer<br />
or early fall. This gives the plants time to be<strong>com</strong>e<br />
re-established before winter sets in.<br />
How do I divide my daylilies?<br />
Dig up the clump and wash off the dirt. Cut the leaves<br />
back so that they are approximately 6 inches above<br />
the roots. Use a shovel or fork to gently break the root<br />
structure apart.<br />
How long do daylilies bloom?<br />
Daylilies received their <strong>com</strong>mon name because each<br />
flower only lasts one day. Hemerocallis in Greek<br />
means "beautiful for a day" which refers to the shortlived<br />
nature of the flowers. One flower stalk, however,<br />
can have up to 20 buds allowing a single plant to<br />
bloom for several weeks.