Lead-Acid Battery Charger Electronic Kit - Quasar Electronics
Lead-Acid Battery Charger Electronic Kit - Quasar Electronics
Lead-Acid Battery Charger Electronic Kit - Quasar Electronics

Create successful ePaper yourself
Turn your PDF publications into a flip-book with our unique Google optimized e-Paper software.
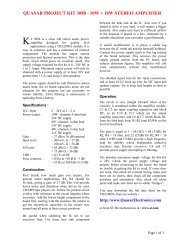
QUASAR ELECTRONICS KIT No. 1095<br />
LEAD-ACID BATTERY CHARGER<br />
General Description<br />
This circuit is a classic design for a lead-acid battery charger. It has a rectifier and a<br />
voltage stabiliser, and also features an electronic switch to change its state from quick to<br />
slow charge giving a visual indication of the state of its operation by means of an LED.<br />
The circuit is easy to build and very reliable.<br />
Technical Specifications - Characteristics<br />
Working voltage: 12V DC<br />
Current: 100 mA<br />
How it Works<br />
Before trying to explain the operation of the charger let us first have a look at lead-acid<br />
battery and its operation.<br />
The lead acid battery is not a source of electricity in the sense that it does not generate<br />
electricity itself. This type of battery is an accumulator, it must be charged first in order to<br />
be able to release the stored energy. A typical lead-acid battery consists of cells, each of<br />
which has a voltage across its poles, of 2.2 VDC when fully charged. A 6 V battery<br />
consists of three such cells and a 12 V one as those used in most cars today consists of 6<br />
cells.<br />
Inside every cell there are specially built lead plates which form the electrodes and a<br />
solution of sulphuric acid (H2SO4) diluted in distilled water.<br />
A typical characteristic of this type of battery is that it requires a constant voltage for its<br />
charge and this is 2.2 V for slow and 2.3 V for quick charge.<br />
This type of battery is widely used in cars, motorbikes, alarm systems, emergency lighting<br />
etc.<br />
The circuit of the charger is very simple. The four diodes D3,4,5,6 connected as a rectifier<br />
bridge convert the AC input to DC and the capacitor C3 smoothes it. The DC current is<br />
then taken to the voltage regulator IC LM317 which stabilises the output voltage. The<br />
trimmer P2 is used to adjust the output voltage of the LM317.<br />
The trimmer P1 is used to set the current limit for the operation of the thyristor in order to<br />
achieve the automatic switching from quick to slow charge. If the output current is very<br />
high as is the case when we connect a discharged battery to the charger the voltage<br />
across the THYRISTOR gate is low, the device is cut off and the output voltage is high in<br />
order to maintain the quick charge rate. If the voltage in the battery rises above a certain<br />
level as charge progresses the current logically falls, the voltage drop across R7 becomes<br />
lower and this triggers the THYRISTOR. When the THYRISTOR is on the resistor R4 is<br />
connected in parallel with R6 and P2 and this makes the output voltage to drop slightly and<br />
the circuit passes in the slow charge state.<br />
For the AC input is used a 12 V/2 A transformer the secondary winding of which is<br />
connected across the input of the circuit at points 1 and 2. The output is taken from points
5 (+) and 9 (-).<br />
The button switch is used to force the circuit to the quick charge state.<br />
Construction<br />
First of all let us consider a few basics in building electronic circuits on a printed circuit<br />
board. The board is made of a thin insulating material clad with a thin layer of conductive<br />
copper that is shaped in such a way as to form the necessary conductors between the<br />
various components of the circuit. The use of a properly designed printed circuit board is<br />
very desirable as it speeds construction up considerably and reduces the possibility of<br />
making errors. QUASAR ELECTRONICS <strong>Kit</strong> boards also come pre-drilled and with the<br />
outline of the components and their identification printed on the component side to make<br />
construction easier. To protect the board during storage from oxidation and assure it gets<br />
to you in perfect condition the copper is tinned during manufacturing and covered with a<br />
special varnish that protects it from getting oxidised and makes soldering easier.<br />
Soldering the components to the board is the only way to build your circuit and from the<br />
way you do it depends greatly your success or failure. This work is not very difficult and if<br />
you stick to a few rules you should have no problems. The soldering iron that you use<br />
must be light and its power should not exceed the 25 Watts. The tip should be fine and<br />
must be kept clean at all times. For this purpose come very handy specially made sponges<br />
that are kept wet and from time to time you can wipe the hot tip on them to remove all the<br />
residues that tend to accumulate on it. DO NOT file or sandpaper a dirty or worn out tip. If<br />
the tip cannot be cleaned, replace it. There are many different types of solder in the market<br />
and you should choose a good quality one that contains the necessary flux in its core, to<br />
assure a perfect joint every time. DO NOT use soldering flux apart from that which is<br />
already included in your solder. Too much flux can cause many problems and is one of the<br />
main causes of circuit malfunction. If nevertheless you have to use extra flux, as it is the<br />
case when you have to tin copper wires, clean it very thoroughly after you finish your work.<br />
In order to solder a component correctly you should do the following:<br />
- Clean the component leads with a small piece of emery paper.<br />
- Bend them at the correct distance from the component’s body and insert the component<br />
in its place on the board.<br />
- You may find sometimes a component with heavier gauge leads than usual, that are too<br />
thick to enter in the holes of the p.c. board. In this case use a mini drill to enlarge the holes<br />
slightly. Do not make the holes too large as this is going to make soldering difficult<br />
afterwards.<br />
- Take the hot iron and place its tip on the component lead while holding the end of the<br />
solder wire at the point where the lead emerges from the board. The iron tip must touch<br />
the lead slightly above the p.c. board.<br />
- When the solder starts to melt and flow, wait till it covers evenly the area around the hole<br />
and the flux boils and gets out from underneath the solder. The whole operation should not<br />
take more than 5 seconds. Remove the iron and leave the solder to cool naturally without<br />
blowing on it or moving the component. If everything was done properly the surface of the<br />
joint must have a bright metallic finish and its edges should be smoothly ended on the<br />
component lead and the board track. If the solder looks dull, cracked, or has the shape of<br />
a blob then you have made a dry joint and you should remove the solder (with a pump, or<br />
a solder wick) and redo it.<br />
- Take care not to overheat the tracks as it is very easy to lift them from the board and<br />
break them.<br />
- When you are soldering a sensitive component it is good practice to hold the lead from
the component side of the board with a pair of long-nose pliers to divert any heat that<br />
could possibly damage the component.<br />
- Make sure that you do not use more solder than it is necessary as you are running the<br />
risk of short-circuiting adjacent tracks on the board, especially if they are very close<br />
together.<br />
- When you finish your work cut off the excess of the component leads and clean the<br />
board thoroughly with a suitable solvent to remove all flux residues that still remain on it.<br />
First of all identify the components and make sure nothing is missing. Start building the<br />
circuit by soldering the pins in their places on the board. Continue the construction by<br />
soldering the resistors in their places and then solder the capacitors as well, taking care<br />
not to insert the electrolytic the wrong way round. The diodes and the THYRISTOR are<br />
then soldered in place carefully as overheating can cause them serious damage. These<br />
components are also polarised and should be inserted in their places the right way round.<br />
Finally mount the IC on the heatsink that comes with the kit and using short pieces of<br />
cable connect it to points 3, 4 and 6 of the circuit taking care not to apply too much heat on<br />
its leads as it is also very sensitive to heat. When all the components have been soldered<br />
on the p.c. board, make a visual inspection of the work done so far and then make the<br />
following connections:<br />
Points 1 and 2 of the circuit to the secondary of the transformer.<br />
Points 7 and 8 to the push button, and points 5 (+) and 9 (-) to the output connectors.<br />
Connect the transformer’s primary to the mains and measure the voltage across the output<br />
of the circuit. Provided that the LED is glowing adjust the trimmer P2 till you get a reading<br />
of 13.2 Volts in the output. If you now press the button, the LED should turn itself OFF and<br />
the voltage should rise to 13.8 volts which is the voltage for the quick charge. The trimmer<br />
P1 is used to adjust the circuit according to the capacity of the battery to change its<br />
charging rate automatically when the current drops under a certain minimum level.<br />
This circuit is NOT designed for recharging a car battery overnight or fully charging a new<br />
battery. It has been designed with the small capacity batteries in mind, as they are the<br />
ones used in alarms, safety lighting etc. It is also very good for maintaining the charge of a<br />
battery that is not in use but must be always ready to enter in service.<br />
Adjustments<br />
This kit does not need any adjustments, if you follow the building instructions.<br />
Warning<br />
QUASAR ELECTRONICS kits are sold as stand alone training kits.<br />
If they are used as part of a larger assembly and any damage is caused, our company<br />
bears no responsibility.<br />
While using electrical parts, handle power supply and equipment with great care, following<br />
safety standards as described by international specs and regulations.
If it does not work<br />
Check your work for possible dry joints, bridges across adjacent tracks or soldering flux<br />
residues that usually cause problems.<br />
Check again all the external connections to and from the circuit to see if there is a mistake<br />
there.<br />
- See that there are no components missing or inserted in the wrong places.<br />
- Make sure that all the polarised components have been soldered the right way round. -<br />
Make sure the supply has the correct voltage and is connected the right way round to your<br />
circuit.<br />
- Check your project for faulty or damaged components.<br />
If your project still fails to work, please contact us for information about our Get-You-Going<br />
service.<br />
<strong>Electronic</strong> Diagram<br />
Parts List<br />
All components including printed circuit board, assembly instructions including schematics<br />
and detailed parts list are supplied when you purchase the kit.<br />
Ordering<br />
For pricing info and online ordering please visit:<br />
http://www.quasarelectronics.com/1095.htm<br />
For further info please contact us by e-mail:<br />
mailto: sales@<strong>Quasar</strong><strong>Electronic</strong>s.com
COPYRIGHT © 2003 <strong>Quasar</strong> <strong>Electronic</strong>s Limited. All rights reserved. Reproduction of this document in<br />
whole or in part in any form or medium without express written permission of <strong>Quasar</strong> <strong>Electronic</strong>s Limited is<br />
prohibited.<br />
E&OE