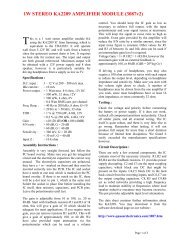
LM1875 25W Mono Hi-Fi Audio Amplifier Module (3050) - Quasar ...
LM1875 25W Mono Hi-Fi Audio Amplifier Module (3050) - Quasar ...
LM1875 25W Mono Hi-Fi Audio Amplifier Module (3050) - Quasar ...

You also want an ePaper? Increase the reach of your titles
YUMPU automatically turns print PDFs into web optimized ePapers that Google loves.
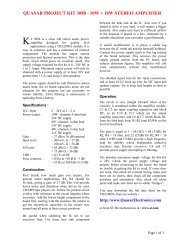
QUASAR PROJECT KIT # <strong>3050</strong> - <strong>25W</strong> HI-FI AUDIO AMPLIFIER MODULE<br />
INTRODUCTION<br />
This kit contains the essential components needed to build<br />
a high fidelity amplifier module using the National<br />
Semiconductor <strong>LM1875</strong> IC. With the addition of a<br />
handful of parts and a suitable power supply, this module<br />
will deliver <strong>25W</strong> RMS into 8 ohms @ 1% THD. PCB<br />
dimensions are a tiny 53 x 50mm (2.1” x 2”).<br />
Heatsink, speaker and cables are not included. This is not<br />
only to save weight in the kit but also because such items<br />
are often a matter of personal preference by the user.<br />
Some users may choose to spend more money to buy top<br />
quality cables, connectors and speakers, while others may<br />
have all these items already in their junk box.<br />
The kit is constructed on single-sided printed circuit<br />
board. Protel Autotrax & Schematic were used in the<br />
design.<br />
<strong>LM1875</strong> SPECIFICATIONS<br />
• Up to 30W output power into 8 ohms<br />
• Typical THD of 0.015% @ 1kHz, 20W output<br />
• Short circuit protection<br />
• 94dB supply rejection ratio<br />
• In-built thermal protection<br />
• S/N ratio in excess of 100dB<br />
• Open loop gain typically 90dB<br />
• 70mA quiescent current (typical)<br />
CONSTRUCTION<br />
Start with the lowest height components first, resistors and<br />
capacitors. Be careful to get the electrolytic capacitors in<br />
the correct way around. The positive lead is marked on the<br />
overlay. The negative lead is marked on the body of each<br />
capacitor. Leave the fuse holders and IC to last.<br />
The following items have to be supplied by you:<br />
• a heatsink with a thermal resistance of 1.4 C/W or<br />
better. Use the silicon impregnated washer supplied<br />
when attaching it to the IC.<br />
• 8 ohm speaker of suitable power<br />
• suitable cables.<br />
Solder the power and audio cables directly to the pads<br />
provided on the PCB.<br />
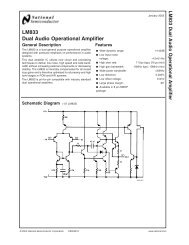
CIRCUIT DESCRIPTION<br />
The IC can be used with two power supply arrangements -<br />
single supply and dual supply. We have decided to use the<br />
dual supply version. The single supply version would<br />
require the use of 63V electrolytic capacitors, thus<br />
increasing the cost and overall size of the module.<br />
The output appears at pin 4 of the IC and drives a<br />
loudspeaker directly. Long speaker leads can produce<br />
enough capacitance to drive amplifiers into VHF<br />
oscillation. Resistor R6 (1Ω) and capacitor C4 (0.22uF)<br />
help prevent this. They are connected across the output<br />
and form a Zobel network which provides high-frequency<br />
stability when driving capacitive loads.<br />
The IC power supply is connected via 2A fuses to protect<br />
against any external shorts to ground. Capacitors C5 and<br />
C7 provide further on-board supply decoupling.<br />
POWER SUPPLY<br />
The module is powered by a dual +/- 25V supply. These<br />
rails are supplied by a separate power supply board.<br />
We have one kit available for this purpose - Kit 3114. It<br />
consists of four diodes (1N5401) connected as a bridge<br />
rectifier and four electrolytic capacitors (2200uF) to<br />
smooth out the ripple.<br />
The mains transformer used to power the module should<br />
be rated at 60VA with a 35V centre-tapped secondary<br />
winding. A 30V secondary winding transformer could<br />
also be used but the lower DC output would result in<br />
reduced power output.<br />
If you want to run two modules in a stereo amplifier you<br />
can use a common power supply. In this case the<br />
transformer should be rated at 80VA.<br />
TESTING<br />
Before applying power, check that all parts are inserted in<br />
the correct locations. Make sure that the electrolytic<br />
capacitors are the right way round. Connect the power<br />
supply leads with a multimeter (set to read amps) in series<br />
with the positive rail. Do not connect a speaker or audio<br />
input yet.<br />
Switch on the power and check that the current settles<br />
down to 50-70mA. There will be a brief suge as the main<br />
filter capacitor (C7) charges.<br />
Note: You must have the heatsink fitted, otherwise the<br />
thermal overload protection circuit will cut in and switch<br />
the device off.<br />
If the quiescent current is correct, check the DC offset<br />
volrage across the speaker terminals. It should be less than<br />
+/- 50mV. If all is well, switch off the power and connect<br />
a speaker and an audio input signal.<br />
The input signal is coupled via R1 and C1 to the noninverting<br />
input (pin 1) of the IC. The closed loop gain of<br />
the amplifier is set to 19 by resistors R5 (180K) and R4<br />
(10K). R4 and C3 (22uF) set the lower 3dB frequency<br />
point to 7Hz.<br />
PAGE 1
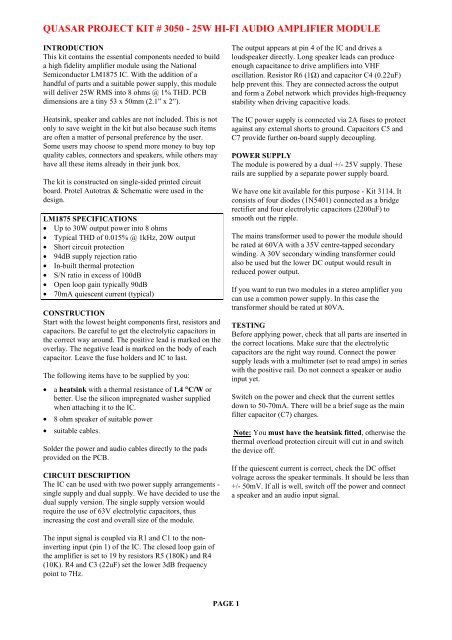
QUASAR PROJECT KIT # <strong>3050</strong> - <strong>25W</strong> HI-FI AUDIO AMPLIFIER MODULE<br />
OPERATION<br />
Do not operate the module without a heatsink.<br />
The heatsink tab on the <strong>LM1875</strong> IC is internally<br />
connected to the negative supply pin (3) and therefore the<br />
negative supply rail. If the module is mounted inside an<br />
earthed metal chassis then it must be isolated from the<br />
heatsink using an insulating washer. If not, the negative<br />
supply rail will be shorted to ground.<br />
The <strong>LM1875</strong> can drive either 4Ω or 8Ω loads but it<br />
delivers slightly more power into 8Ω loads. Maximum<br />
output power into 4Ω loads is 20W. It is recommended to<br />
use an 8Ω speaker.<br />
To minimize noise and distortion, keep the input signal<br />
leads away from the power supply leads.<br />
IF IT DOES NOT WORK<br />
Poor soldering (“dry joints”) is the most common reason<br />
that the circuit does not work. Check all soldered joints<br />
carefully under a good light. Re-solder any that look<br />
suspicious. Check that all components are in their correct<br />
position on the PCB. Are the electrolytic capacitors the<br />
right way round? Are the fuses OK?<br />
If the negative supply fuse (FS2) blows, check the<br />
insulating washer between the <strong>LM1875</strong> IC and the<br />
heatsink. This will happen when the heatsink is bolted to<br />
an earthed metal chassis. Remember that the metal tab on<br />
the IC is internally connected to the negative supply rail.<br />
PARTS LIST - KIT <strong>3050</strong><br />
Resistors (0.<strong>25W</strong> carbon)<br />
1R brown black gold .......... R6 ..................................1<br />
1K brown black red ............ R1 ..................................1<br />
10K brown black orange .... R4 ..................................1<br />
22K red red orange............. R3 ..................................1<br />
180K brown grey yellow .... R5 ..................................1<br />
1M brown black green........ R2 ..................................1<br />
Capacitors<br />
100nF monobloc................. C2,6 ...............................2<br />
0.22uF polyester film.......... C4 ..................................1<br />
1uF 50V electrolytic........... C1 ..................................1<br />
22uF 63V electrolytic......... C3 ..................................1<br />
220uF 50V electrolytic....... C5,7...............................2<br />
Semiconductors<br />
<strong>LM1875</strong>.............................. IC1.................................1<br />
<strong>25W</strong> <strong>Audio</strong> Power <strong>Amplifier</strong> IC<br />
Miscellaneous<br />
Fuse holder & cover ........... FS1,2 .............................2<br />
2 amp fuses.................................................................2<br />
Silicon impregnated insulated TO-220 washer...........1<br />
Screw, 3 x 12mm........................................................1<br />
Nut, 3mm....................................................................1<br />
Washer, 3mm..............................................................1<br />
PCB <strong>3050</strong> ...................................................................1<br />
Download the <strong>LM1875</strong> data sheet from the National<br />
Semiconductor website at<br />
http://www.national.com<br />
PAGE 2