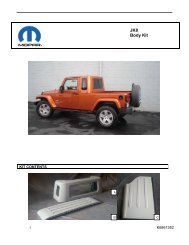
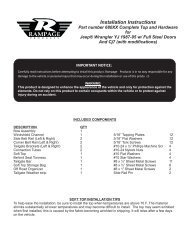
Installation instructions for 5128 hi-Lift jack mounting kit ... - Quadratec
Installation instructions for 5128 hi-Lift jack mounting kit ... - Quadratec
Installation instructions for 5128 hi-Lift jack mounting kit ... - Quadratec

Create successful ePaper yourself
Turn your PDF publications into a flip-book with our unique Google optimized e-Paper software.
Body Armor 4x4 by Tolar Mfg.<br />
258 Mariah Circle, Corona CA 92879<br />
Ph: 951-808-0750<br />
Customer service hours:<br />
7:30am to 4:30pm M-TH<br />
8am-12pm Fri. (PST)<br />
www.bodyarmor4x4.com<br />
<strong>Installation</strong> <strong>instructions</strong> <strong>for</strong> <strong>5128</strong> <strong>hi</strong>-<strong>Lift</strong> <strong>jack</strong><br />
<strong>mounting</strong> <strong>kit</strong> <strong>for</strong> swing arm PN 5293 and 5294<br />
** Inspect bumper and all parts prior to installation. Contact us at 951-808-0750 <strong>for</strong> missing parts.
Hardware list:<br />
10mm-25mm-1.5 Hex head bolts Qty 4<br />
10mm-40mm-1.5 Hex head bolts Qty 1<br />
10mm-30mm-1.5Hex head bolts Qty 2<br />
10mm Lock washers Qty 3<br />
10mm Flat washers Qty 4<br />
10mm hex nut Qty 1<br />
8mm Flat washers Qty 4<br />
8mm lock washers Qty 4<br />
Upper bracket Qty 1<br />
Bottom bracket Qty 1<br />
Top arm bracket Qty 1<br />
T<strong>hi</strong>s three piece <strong>kit</strong> is designed to work with Body Armor swing arms part numbers 5293 and<br />
5294. If you are using the Body Armor 5127 can system you will be using the vertical brackets,<br />
if not you need only the top arm bracket.<br />
Horizontal Top Mount<br />
Vertical mount
<strong>Installation</strong> on swing arm 5294:<br />
1. Horizontal mount: Use t<strong>hi</strong>s bracket when not using the 5127 can system. Install with the 2<br />
8mm hex head nuts, flat washer and lock washer. The weld nuts should be on the tire side of<br />
the swing arm. Attach the <strong>jack</strong> by using the two 10mm-30mm hex head bolts and flat washers.<br />
2. Vertical mount: T<strong>hi</strong>s position is if the 5127 can system is being used. Attach the bottom plate<br />
(the flat plate with the two upward tabs). Use the 8MM hex head bolts, flat washers and lock<br />
washers to attach the plate to the swing arm. The upper bracket will attach to the all thread<br />
rod on the carrier. Spin the bracket onto the all thread rod, then use the 10mm-40mm bolt 2<br />
flat washers, lock washer and hex nut to attach the <strong>jack</strong> to the bracket.<br />
<strong>Installation</strong> on the 5293 Swing Arm:<br />
**The installation on the 5293 requires drilling into the swing arm and tapping a thread. The hole size<br />
is 8MM and thread count is 1.25 coarse thread.<br />
1. Horizontal mount: measure in from either side 1 3/8” from the edge of the joint and 1” across<br />
the center. Mark the drill points, confirm that the holes line up. Once the location is confirmed<br />
drill and tap the two 8mm holes. You can use self tapping bolts if you wish, just make sure<br />
they are grade 5 or better. Refer to step 1 of the 5294 <strong>instructions</strong> <strong>for</strong> installation of the<br />
bracket<br />
2. Vertical mount: Bottom mount, measure in 5 ¼” from the swing arm stop. Mark your hole at<br />
the center (1” across the tube). The second hole is 2” on center from the first. Confirm t<strong>hi</strong>s by<br />
placing the bracket over the marked holes. Once the locations are confirmed, drill and tap the<br />
two 8mm holes. Refer to step 2 of the 5294 <strong>instructions</strong> <strong>for</strong> the installation of the brackets.<br />
***Our parts feature our dual process painting process. T<strong>hi</strong>s process is designed to keep rust and corrosion to a<br />
minimum but it may not prevent rust entirely. Due to environmental issues we cannot guarantee the products against<br />
rust as a manufacturer defect <strong>for</strong> more than 90 days. Beyond that time rust that develops is typically a maintenance<br />
issue and not covered under warranty. If you do scratch the finish we recommend that you use a flat black spray paint or<br />
flat black automotive touch up paint to seal any scratches or dings. T<strong>hi</strong>s will help to preserve the look of your Body<br />
Armor product <strong>for</strong> years to come.<br />
Thank you <strong>for</strong> your purchase of Body Armor products. Please feel free to contact us if you have any<br />
questions. 951-808-0750.