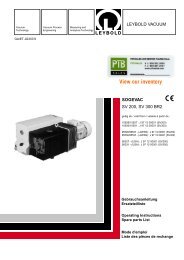
CPS 1001/S/13.56MHz RF POWER SUPPLY - PTB Sales
CPS 1001/S/13.56MHz RF POWER SUPPLY - PTB Sales
CPS 1001/S/13.56MHz RF POWER SUPPLY - PTB Sales

Create successful ePaper yourself
Turn your PDF publications into a flip-book with our unique Google optimized e-Paper software.
5. Rotate power control knob fully counter-clockwise.<br />
6. Check that cooling water is on.<br />
7. Turn on front panel main power breaker.<br />
8. Turn power control knob clockwise until 200 W is indicated on the <strong>RF</strong> wattmeter.<br />
9. Turn adjustment until the reflected power indication on the wattmeter just starts to drop.<br />
10. Slowly turn power control knob clockwise if the reflected power indicated on the<br />
wattmeter starts to rise, then go to step 9. Repeat this loop until the power control has<br />
reached its maximum setting.<br />
C. Output Power and Forward Power Monitor Calibration<br />
The <strong>CPS</strong>-<strong>1001</strong>/S has a DC voltage output proportional to forward power. This voltage is<br />
factory adjusted for 5 VDC on J1 Pin 3 when the generator is running at 1000W forward into a<br />
50 ohm load. (The forward power calibration can be optionally set at other levels.)<br />
1. Install 50 ohm coaxial cable from the output of the generator to the input of a <strong>RF</strong><br />
wattmeter and from the meter to a 50 ohm coaxial load. The generator is normally<br />
supplied with Type N coaxial connectors. RG8/u cable is sufficient to carry the output<br />
power from generator to load. Load and <strong>RF</strong> wattmeter should have at least a 1500W<br />
dissipation rating.<br />
2. Pin 11 of rear panel connector J1 must be grounded to enable the main power contactor<br />
(Pin 12 is ground). Pin 4 of rear panel connector J1 must be connected to Pin 9 (<strong>RF</strong><br />
enable).<br />
3. With front panel circuit breaker in the “OFF” position, attach primary supply line to<br />
appropriate supply mains.<br />
NOTE: Units are shipped wired for 208V, 3 phase, 50/60 Hz unless specified by<br />
customer.<br />
4. Place local/remote switch in “LOCAL” position.<br />
5. Rotate power control knob fully counter-clockwise.<br />
6. Check that cooling water is on.<br />
7. Turn on front panel main power breaker.<br />
8. Turn power control knob clockwise until there is 10.00 VDC on the SETPT (set point) test<br />
point in the oscillator control module (OCB).<br />
9. Adjust the FWD OUT pot (R34) until there is 5 VDC at the R40 FO test point.<br />
10. Set the CAL pot (R44) until there is 1000W displayed on the <strong>RF</strong> wattmeter.<br />
11. Turn power control knob until there is 1.00 VDC on the SETPT (set point) test point.<br />
12. Adjust the CAL ZERO pot (R56) until there is 100W displayed on the <strong>RF</strong> wattmeter.<br />
13. Go to step 8. Repeat this loop until the generator outputs the correct power at the 1.00 and<br />
10.00 VDC setpoints.<br />
15