Levelone User Manual WBR-3600 11g Wireless ADSL2+ Router
Levelone User Manual WBR-3600 11g Wireless ADSL2+ Router
Levelone User Manual WBR-3600 11g Wireless ADSL2+ Router

You also want an ePaper? Increase the reach of your titles
YUMPU automatically turns print PDFs into web optimized ePapers that Google loves.
LevelOne<br />
<strong>User</strong> <strong>Manual</strong><br />
<strong>WBR</strong>-<strong>3600</strong><br />
<strong>11g</strong> <strong>Wireless</strong> <strong>ADSL2+</strong> <strong>Router</strong><br />
V1.0.1-0809<br />
1
FCC Statement<br />
This equipment has been tested and found to comply with the limits for a Class B<br />
digital device, pursuant to Part 15 of the FCC Rules. These limits are designed to<br />
provide reasonable protection against harmful interference in a residential installation.<br />
This equipment generates, uses and can radiate radio frequency energy and, if not<br />
installed and used in accordance with the instructions, may cause harmful interference<br />
to radio communications. However, there is no guarantee that interference will not<br />
occur in a particular installation. If this equipment does cause harmful interference to<br />
radio or television reception, which can be determined by turning the equipment off<br />
and on, the user is encouraged to try to correct the interference by one of the following<br />
measures:<br />
� Reorient or relocate the receiving antenna.<br />
� Increase the separation between the equipment and receiver.<br />
� Connect the equipment into an outlet on a circuit different from that to which the<br />
receiver is connected.<br />
� Consult the dealer or an experienced radio/TV technician for help.<br />
To assure continued compliance, any changes or modifications not expressly approved<br />
by the party responsible for compliance could void the user's authority to<br />
operate this equipment. (Example - use only shielded interface cables when connecting<br />
to computer or peripheral devices).<br />
FCC Radiation Exposure Statement<br />
This equipment complies with FCC RF radiation exposure limits set forth for an uncontrolled<br />
environment. This equipment should be installed and operated with a minimum<br />
distance of 20 centimeters between the radiator and your body.<br />
This device complies with Part 15 of the FCC Rules. Operation is subject to the following<br />
two conditions:<br />
(1) This device may not cause harmful interference, and<br />
(2) This device must accept any interference received, including interference that may<br />
cause undesired operation.<br />
This transmitter must not be co-located or operating in conjunction with any other<br />
antenna or transmitter.<br />
CE Declaration of conformity<br />
This product complies with the 99/5/EEC directives, including the following safety and<br />
EMC standards:<br />
� EN300328-2<br />
� EN301489-1/-17<br />
� EN60950<br />
CE Marking Warning<br />
This is a Class B product. In a domestic environment this product may cause radio<br />
interference in which case the user may be re-quired to take adequate measures.<br />
2
General Public License<br />
This product incorporates open source code into the software and therefore falls under<br />
the guidelines governed by the General Public License (GPL) agreement.<br />
Adhering to the GPL requirements, the open source code and open source license for<br />
the source code are available for free download at http://global.level1.com.<br />
If you would like a copy of the GPL or other open source code in this software on a<br />
physical CD medium, LevelOne (Digital Data Communications) offers to mail this CD<br />
to you upon request, for a price of US$9.99 plus the cost of shipping.<br />
3
Table of Contents<br />
CHAPTER 1 INTRODUCTION....................................................................................... 6<br />
<strong>WBR</strong>-<strong>3600</strong> <strong>Router</strong> Features .................................................................................. 6<br />
Package Contents ................................................................................................. 9<br />
Physical Details ................................................................................................... 10<br />
CHAPTER 2 INSTALLATION ...................................................................................... 12<br />
Requirements ...................................................................................................... 12<br />
Procedure ............................................................................................................. 12<br />
CHAPTER 3 SETUP .................................................................................................... 14<br />
Overview .............................................................................................................. 14<br />
Configuration Program ....................................................................................... 16<br />
Setup Wizard ........................................................................................................ 18<br />
Configuring VCs .................................................................................................. 21<br />
Home Screen ....................................................................................................... 23<br />
LAN Screen .......................................................................................................... 24<br />
<strong>Wireless</strong> Screen ................................................................................................... 26<br />
<strong>Wireless</strong> Security................................................................................................. 30<br />
Trusted <strong>Wireless</strong> Stations .................................................................................. 36<br />
Password Screen ................................................................................................ 38<br />
Mode Screen ........................................................................................................ 39<br />
CHAPTER 4 PC CONFIGURATION ............................................................................ 40<br />
Overview .............................................................................................................. 40<br />
Windows Clients.................................................................................................. 40<br />
Macintosh Clients................................................................................................ 46<br />
Linux Clients ........................................................................................................ 46<br />
Other Unix Systems ............................................................................................ 46<br />
<strong>Wireless</strong> Station Configuration .......................................................................... 47<br />
<strong>Wireless</strong> Configuration on Windows XP ........................................................... 47<br />
CHAPTER 5 OPERATION AND STATUS ................................................................... 57<br />
Operation - <strong>Router</strong> Mode .................................................................................... 57<br />
Status Screen ...................................................................................................... 57<br />
Connection Status - PPPoE & PPPoA ............................................................... 61<br />
Connection Details - Dynamic IP Address ........................................................ 62<br />
Connection Details - Fixed IP Address ............................................................. 63<br />
CHAPTER 6 ADVANCED FEATURES ........................................................................ 64<br />
Overview .............................................................................................................. 64<br />
Internet ................................................................................................................. 64<br />
Access Control .................................................................................................... 67<br />
Dynamic DNS (Domain Name Server) ............................................................... 69<br />
Options ................................................................................................................. 71<br />
Schedule .............................................................................................................. 72<br />
Port Trigger .......................................................................................................... 73<br />
Port Forward ........................................................................................................ 75<br />
Port Range Forward ............................................................................................ 76<br />
QoS ....................................................................................................................... 77<br />
CHAPTER 7 ADVANCED ADMINISTRATION ............................................................ 79<br />
Overview .............................................................................................................. 79<br />
PC Database ........................................................................................................ 80<br />
Config File ............................................................................................................ 81<br />
Logs ...................................................................................................................... 82<br />
E-mail .................................................................................................................... 84<br />
4
Diagnostics .......................................................................................................... 86<br />
Remote Administration ....................................................................................... 87<br />
Routing ................................................................................................................. 89<br />
Upgrade Firmware ............................................................................................... 93<br />
CHAPTER 8 MODEM MODE ...................................................................................... 94<br />
Overview .............................................................................................................. 94<br />
Management Connections ................................................................................. 94<br />
Home Screen ....................................................................................................... 95<br />
Mode Screen ........................................................................................................ 96<br />
Operation ............................................................................................................. 96<br />
Status Screen ...................................................................................................... 97<br />
APPENDIX A TROUBLESHOOTING .......................................................................... 99<br />
Overview .............................................................................................................. 99<br />
General Problems ................................................................................................ 99<br />
Internet Access .................................................................................................... 99<br />
<strong>Wireless</strong> Access ................................................................................................ 100<br />
APPENDIX B ABOUT WIRELESS LANS.................................................................. 102<br />
Modes ................................................................................................................. 102<br />
BSS/ESS ............................................................................................................. 102<br />
Channels ............................................................................................................ 103<br />
WEP .................................................................................................................... 103<br />
WPA-PSK ............................................................................................................ 103<br />
WPA-802.1x ........................................................................................................ 104<br />
WPA2-802.1x ...................................................................................................... 104<br />
<strong>Wireless</strong> LAN Configuration ............................................................................. 104<br />
APPENDIX C SPECIFICATIONS ............................................................................... 105<br />
Multi-Function <strong>11g</strong> <strong>Wireless</strong> <strong>ADSL2+</strong> <strong>Router</strong> ................................................. 105<br />
<strong>Wireless</strong> Interface .............................................................................................. 105<br />
5
Chapter 1<br />
Introduction<br />
This Chapter provides an overview of the <strong>WBR</strong>-<strong>3600</strong> <strong>Router</strong>'s features<br />
and capabilities.<br />
Congratulations on the purchase of your new <strong>WBR</strong>-<strong>3600</strong> <strong>Router</strong>. The <strong>WBR</strong>-<strong>3600</strong><br />
<strong>Router</strong> is a multi-function device providing the following services:<br />
� <strong>ADSL2+</strong> Modem.<br />
� Shared Broadband Internet Access for all LAN users.<br />
� <strong>Wireless</strong> Access Point for 802.11b and 802.<strong>11g</strong> <strong>Wireless</strong> Stations.<br />
� 4-Port Switching Hub for 10BaseT or 100BaseT connections.<br />
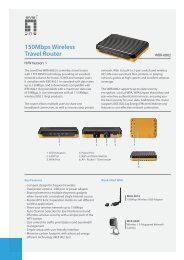
<strong>WBR</strong>-<strong>3600</strong> <strong>Router</strong> Features<br />
Figure 1: <strong>Wireless</strong> <strong>ADSL2+</strong> <strong>Router</strong><br />
The <strong>WBR</strong>-<strong>3600</strong> <strong>Router</strong> incorporates many advanced features, carefully designed to<br />
provide sophisticated functions while being easy to use.<br />
Internet Access Features<br />
� Shared Internet Access. All users on the LAN or WLAN can access the<br />
Internet through the <strong>Wireless</strong> <strong>ADSL2+</strong> <strong>Router</strong>, using only a single external IP Address.<br />
The local (invalid) IP Addresses are hidden from external sources. This<br />
process is called NAT (Network Address Translation).<br />
� Built-in <strong>ADSL2+</strong> Modem. The <strong>Wireless</strong> <strong>ADSL2+</strong> <strong>Router</strong> has a built-in <strong>ADSL2+</strong><br />
modem, supporting all common <strong>ADSL2+</strong> connections.<br />
� IPoA, PPPoE, PPPoA, Direct Connection Support. The <strong>Wireless</strong> <strong>ADSL2+</strong><br />
<strong>Router</strong> supports all common connection methods.<br />
6
� Auto-detection of Internet Connection Method. In most situations, the<br />
<strong>Wireless</strong> <strong>ADSL2+</strong> <strong>Router</strong> can test your <strong>ADSL2+</strong> and Internet connection to determine<br />
the connection method used by your ISP.<br />
� Fixed or Dynamic IP Address. On the Internet (ADSL port) connection, the<br />
<strong>Wireless</strong> <strong>ADSL2+</strong> <strong>Router</strong> supports both Dynamic IP Address (IP Address is allocated<br />
on connection) and Fixed IP Address.<br />
Advanced Internet Functions<br />
� Application Level Gateways (ALGs). Applications which use non-standard<br />
connections or port numbers are normally blocked by the Firewall. The ability to<br />
define and allow such applications is provided, to enable such applications to be<br />
used normally.<br />
� Port Triggering. This feature, also called Special Applications, allows you to<br />
use Internet applications which normally do not function when used behind a firewall.<br />
� Port Forwarding. This feature allows Internet users to access Internet servers<br />
on your LAN. The required setup is quick and easy.<br />
� Dynamic DNS Support. DDNS, when used with the Virtual Servers feature,<br />
allows users to connect to Servers on your LAN using a Domain Name, even if you<br />
have a dynamic IP address which changes every time you connect.<br />
� URL Filter. Use the URL Filter to block access to undesirable Web sites by LAN<br />
users.<br />
� Scheduling. Both the URL Filter and Firewall rules can be scheduled to operate<br />
only at certain times. This provides great flexibility in controlling Internet -bound<br />
traffic.<br />
� Logs. Define what data is recorded in the Logs, and optionally send log data to a<br />
Syslog Server. Log data can also be E-mailed to you.<br />
� VPN Pass through Support. PCs with VPN (Virtual Private Networking)<br />
software using PPTP, L2TP and IPSec are transparently supported - no configuration<br />
is required.<br />
<strong>Wireless</strong> Features<br />
� Standards Compliant. The <strong>Wireless</strong> <strong>ADSL2+</strong> <strong>Router</strong> complies with the<br />
IEEE802.<strong>11g</strong> (DSSS) specifications for <strong>Wireless</strong> LANs.<br />
� Supports both 802.11b and 802.<strong>11g</strong> <strong>Wireless</strong> Stations. The 802.<strong>11g</strong><br />
standard provides for backward compatibility with the 802.11b standard, so both<br />
802.11b and 802.<strong>11g</strong> <strong>Wireless</strong> stations can be used simultaneously.<br />
� Speeds to 54Mbps. All speeds up to the 802.<strong>11g</strong> maximum of 54Mbps are<br />
supported.<br />
� WEP support. Support for WEP (Wired Equivalent Privacy) is included. Key<br />
sizes of 64 Bit and 128 Bit are supported. WEP encrypts any data before transmission,<br />
providing protection against snoopers.<br />
� WPA-PSK support. Like WEP, WPA-PSK encrypts any data before transmission,<br />
providing protection against snoopers. The WPA-PSK is a later standard than<br />
WEP, and provides both easier configuration and greater security than WEP.<br />
� <strong>Wireless</strong> MAC Access Control. The <strong>Wireless</strong> Access Control feature can<br />
check the MAC address (hardware address) of <strong>Wireless</strong> stations to ensure that<br />
only trusted <strong>Wireless</strong> Stations can access your LAN.<br />
7
� Simple Configuration. If the default settings are unsuitable, they can be<br />
changed quickly and easily.<br />
� WPS Support. Wi-Fi Protected Setup (WPS) is based on push-button or PIN<br />
entry authentication to provide strong WPA/WPA2 encryption keys to client devices.<br />
LAN Features<br />
� 4-Port Switching Hub. The <strong>Wireless</strong> <strong>ADSL2+</strong> <strong>Router</strong> incorporates a 4-port<br />
10/100BaseT switching hub, making it easy to create or extend your LAN.<br />
� DHCP Server Support. Dynamic Host Configuration Protocol provides a<br />
dynamic IP address to PCs and other devices upon request. The <strong>Wireless</strong><br />
<strong>ADSL2+</strong> <strong>Router</strong> can act as a DHCP Server for devices on your local LAN and<br />
WLAN.<br />
Configuration & Management<br />
� Easy Setup. Use your WEB browser from anywhere on the LAN or WLAN for<br />
configuration.<br />
� Configuration File Upload/Download. Save (download) the configuration<br />
data from the <strong>Wireless</strong> <strong>ADSL2+</strong> <strong>Router</strong> to your PC, and restore (upload) a previously-saved<br />
configuration file to the <strong>Wireless</strong> <strong>ADSL2+</strong> <strong>Router</strong>.<br />
� Remote Management. The <strong>Wireless</strong> <strong>ADSL2+</strong> <strong>Router</strong> can be managed from<br />
any PC on your LAN or <strong>Wireless</strong> LAN. And, if the Internet connection exists, it can<br />
also (optionally) be configured via the Internet.<br />
� Network Diagnostics. You can use the <strong>Wireless</strong> <strong>ADSL2+</strong> <strong>Router</strong> to perform a<br />
Ping or DNS lookup.<br />
Security Features<br />
� Password - protected Configuration. Password protection is provided to<br />
prevent unauthorized users from modifying the configuration data and settings.<br />
� <strong>Wireless</strong> LAN Security. WPA-802.1x, WPA2-802.1x and WEP and <strong>Wireless</strong><br />
access control by MAC address are all supported. The MAC-level access control<br />
feature can be used to prevent unknown wireless stations from accessing your<br />
LAN.<br />
� NAT Protection. An intrinsic side effect of NAT (Network Address Translation)<br />
technology is that by allowing all LAN users to share a single IP address, the location<br />
and even the existence of each PC is hidden. From the external viewpoint,<br />
there is no network, only a single device - the <strong>Wireless</strong> <strong>ADSL2+</strong> <strong>Router</strong>.<br />
� Firewall. All incoming data packets are monitored and all incoming server requests<br />
are filtered, thus protecting your network from malicious attacks from<br />
external sources.<br />
� Protection against DoS attacks. DoS (Denial of Service) attacks can flood<br />
your Internet connection with invalid packets and connection requests, using so<br />
much bandwidth and so many resources that Internet access becomes unavailable.<br />
The <strong>Wireless</strong> <strong>ADSL2+</strong> <strong>Router</strong> incorporates protection against DoS attacks.<br />
8
Package Contents<br />
The following items should be included. If any of these items are damaged or missing,<br />
please contact your dealer immediately.<br />
� <strong>WBR</strong>-<strong>3600</strong><br />
� Power Adapter<br />
� Antenna<br />
� Cat.5 Cable<br />
� CD <strong>Manual</strong><br />
� Quick Installation Guide<br />
9
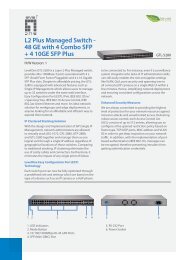
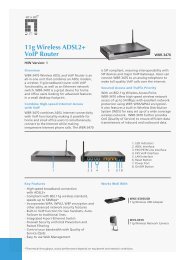
Physical Details<br />
Front-Panel LEDs<br />
PWR On - Power on.<br />
Off - No power.<br />
WLAN On - <strong>Wireless</strong> enabled.<br />
Figure 2: Front Panel<br />
Off - No <strong>Wireless</strong> connections currently exist.<br />
Flashing - Data is being transmitted or received via the <strong>Wireless</strong><br />
access point. This includes "network traffic" as well as user data.<br />
LAN It indicates the connection of each port.<br />
If neither LED is on, there is no active connection on the corresponding<br />
LAN port.<br />
ADSL On - ADSL connection established.<br />
Off - No ADSL connection currently exists.<br />
Flashing - ADSL is synchronizing.<br />
NET On - Internet connection is available.<br />
Off - No Internet connection available.<br />
Flashing - Data is being transmitted or received via the ADSL<br />
connection.<br />
10
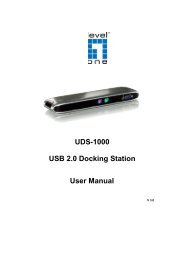
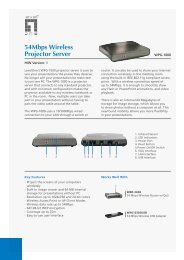
Rear Panel<br />
Figure 3: Rear Panel<br />
WAN Connect this port to your ADSL line.<br />
LAN Use standard LAN cables (RJ45 connectors) to connect your<br />
PCs to these ports.<br />
Reset Button<br />
(Reset to Defaults)<br />
Note:<br />
Any LAN port on the <strong>Wireless</strong> ADSL <strong>Router</strong> will automatically<br />
function as an "Uplink" port when required. Just connect any<br />
port to a normal port on the other hub, using a standard LAN<br />
cable.<br />
This button will reset the <strong>Wireless</strong> <strong>ADSL2+</strong> <strong>Router</strong> to the<br />
factory default settings.<br />
To do this, press and hold the Reset Button for five (5)<br />
seconds, until the Power LED is lit, then release the Reset<br />
Button, and wait the <strong>Wireless</strong> <strong>ADSL2+</strong> <strong>Router</strong> to restart using<br />
the factory default values.<br />
Power Connect the supplied power adapter here.<br />
11
Chapter 2<br />
Installation<br />
This Chapter covers the physical installation of the <strong>Wireless</strong> <strong>ADSL2+</strong><br />
<strong>Router</strong>.<br />
Requirements<br />
� Network cables. Use standard 10/100BaseT network (UTP) cables with RJ45<br />
connectors.<br />
� TCP/IP protocol must be installed on all PCs.<br />
� For Internet Access, an Internet Access account with an ISP, and a DSL connection.<br />
� To use the <strong>Wireless</strong> Access Point, all <strong>Wireless</strong> devices must be compliant with the<br />
IEEE 802.<strong>11g</strong> or IEEE 802.11b specifications.<br />
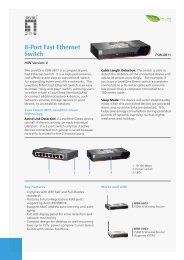
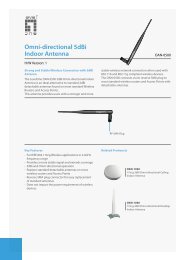
Procedure<br />
1. Choose an Installation Site<br />
Figure 4: Installation Diagram<br />
Select a suitable place on the network to install the <strong>Wireless</strong> <strong>ADSL2+</strong> <strong>Router</strong>.<br />
For best <strong>Wireless</strong> reception and performance, the <strong>Wireless</strong> <strong>ADSL2+</strong><br />
<strong>Router</strong> should be positioned in a central location with minimum<br />
obstructions between the <strong>Wireless</strong> <strong>ADSL2+</strong> <strong>Router</strong> and the PCs.<br />
Also, if using multiple Access Points, adjacent Access Points<br />
should use different Channels.<br />
12<br />
2
Installation<br />
2. Connect LAN Cables<br />
Use standard LAN cables to connect PCs to the Switching Hub ports on the <strong>Wireless</strong><br />
<strong>ADSL2+</strong> <strong>Router</strong>. Both 10BaseT and 100BaseT connections can be used<br />
simultaneously.<br />
If required, connect any port to a normal port on another Hub, using a standard<br />
LAN cable. Any LAN port on the <strong>Wireless</strong> <strong>ADSL2+</strong> <strong>Router</strong> will automatically function<br />
as an "Uplink" port when required.<br />
3. Connect ADSL Cable<br />
Connect the supplied ADSL cable from to the ADSL port on the <strong>Wireless</strong> <strong>ADSL2+</strong><br />
<strong>Router</strong> (the RJ11 connector) to the ADSL terminator provided by your phone company.<br />
4. Power Up<br />
Connect the supplied power adapter to the <strong>Wireless</strong> <strong>ADSL2+</strong> <strong>Router</strong>. Use only the<br />
power adapter provided. Using a different one may cause hardware damage.<br />
5. Check the LEDs<br />
� The PWR LED should be ON.<br />
� For the LAN (PC) connection, one of the LAN LEDs should be ON (provided the<br />
PC is also ON.)<br />
� The WLAN LED should be ON<br />
� The DSL LED should be ON if ADSL line is connected.<br />
� The NET LED may be OFF. After configuration, it should come ON.<br />
For more information, refer to Front-Panel LEDs in Chapter 1.<br />
13
Chapter 3<br />
Setup<br />
Overview<br />
This Chapter provides Setup details of the <strong>WBR</strong>-<strong>3600</strong> <strong>Router</strong>.<br />
This chapter describes the setup procedure for:<br />
� Internet Access<br />
� LAN configuration<br />
� <strong>Wireless</strong> setup<br />
� Assigning a Password to protect the configuration data.<br />
PCs on your local LAN may also require configuration. For details, see Chapter 4 - PC<br />
Configuration.<br />
Other configuration may also be required, depending on which features and functions<br />
of the <strong>WBR</strong>-<strong>3600</strong> <strong>Router</strong> you wish to use. Use the table below to locate detailed instructions<br />
for the required functions.<br />
To Do this: Refer to:<br />
Configure PCs on your LAN. Chapter 4:<br />
PC Configuration<br />
Check <strong>Wireless</strong> <strong>ADSL2+</strong> <strong>Router</strong> operation and<br />
Status.<br />
Use any of the following Advanced features:<br />
� Internet (DMZ, URL Filter)<br />
� Access Control<br />
� Dynamic DNS<br />
� Options<br />
� Schedule<br />
� Port Trigger<br />
� Port Forward<br />
� Port Range Forward<br />
� QoS<br />
14<br />
Chapter 5:<br />
Operation and Status<br />
Chapter 6:<br />
Advanced Features<br />
3
Use any of the following Administration Configuration<br />
settings or features:<br />
� PC Database<br />
� Config File<br />
� Logs<br />
� E-mail<br />
� Diagnostics<br />
� Remote Admin<br />
� Routing<br />
� Upgrade Firmware<br />
15<br />
Chapter 7<br />
Advanced Administration
Configuration Program<br />
The <strong>WBR</strong>-<strong>3600</strong> <strong>Router</strong> contains an HTTP server. This enables you to connect to it,<br />
and configure it, using your Web Browser. Your Browser must support JavaScript.<br />
The configuration program has been tested on the following browsers:<br />
� Netscape 7.1 or later.<br />
� Mozilla 1.6 or later<br />
� Internet Explorer V5.5 or later<br />
Preparation<br />
Before attempting to configure the <strong>WBR</strong>-<strong>3600</strong> <strong>Router</strong>, please ensure that:<br />
� Your PC can establish a physical connection to the <strong>WBR</strong>-<strong>3600</strong> <strong>Router</strong>. The PC<br />
and the <strong>WBR</strong>-<strong>3600</strong> <strong>Router</strong> must be directly connected (using the Hub ports on the<br />
<strong>WBR</strong>-<strong>3600</strong> <strong>Router</strong>) or on the same LAN segment.<br />
� The <strong>WBR</strong>-<strong>3600</strong> <strong>Router</strong> must be installed and powered ON.<br />
� If the <strong>WBR</strong>-<strong>3600</strong> <strong>Router</strong>'s default IP Address (192.168.0.1) is already used by<br />
another device, the other device must be turned OFF until the <strong>WBR</strong>-<strong>3600</strong> <strong>Router</strong><br />
is allocated a new IP Address during configuration.<br />
Using your Web Browser<br />
To establish a connection from your PC to the <strong>WBR</strong>-<strong>3600</strong> <strong>Router</strong>:<br />
1. After installing the <strong>WBR</strong>-<strong>3600</strong> <strong>Router</strong> in your LAN, start your PC. If your PC is<br />
already running, restart it.<br />
2. Start your WEB browser.<br />
3. In the Address box, enter "HTTP://" and the IP Address of the <strong>WBR</strong>-<strong>3600</strong> <strong>Router</strong>,<br />
as in this example, which uses the <strong>WBR</strong>-<strong>3600</strong> <strong>Router</strong>'s default IP Address:<br />
HTTP://192.168.0.1<br />
4. When prompted for the <strong>User</strong> name and Password, enter values as follows:<br />
� <strong>User</strong> name: admin<br />
� Password: password<br />
16
If you can't connect<br />
If the <strong>WBR</strong>-<strong>3600</strong> <strong>Router</strong> does not respond, check the following:<br />
� The <strong>WBR</strong>-<strong>3600</strong> <strong>Router</strong> is properly installed, LAN connection is OK, and it is powered<br />
ON. You can test the connection by using the "Ping" command:<br />
� Open the MS-DOS window or command prompt window.<br />
� Enter the command:<br />
ping 192.168.0.1<br />
If no response is received, either the connection is not working, or your PC's IP<br />
address is not compatible with the <strong>WBR</strong>-<strong>3600</strong> <strong>Router</strong>'s IP Address. (See next<br />
item.)<br />
� If your PC is using a fixed IP Address, its IP Address must be within the range<br />
192.168.0.2 to 192.168.0.254 to be compatible with the <strong>WBR</strong>-<strong>3600</strong> <strong>Router</strong>'s default<br />
IP Address of 192.168.0.1. Also, the Network Mask must be set to<br />
255.255.255.0. See Chapter 4 - PC Configuration for details on checking your<br />
PC's TCP/IP settings.<br />
� Ensure that your PC and the <strong>WBR</strong>-<strong>3600</strong> <strong>Router</strong> are on the same network segment.<br />
(If you don't have a router, this must be the case.)<br />
� Ensure you are using the wired LAN interface. The <strong>Wireless</strong> interface can only be<br />
used if its configuration matches your PC's wireless settings.<br />
17
Setup Wizard<br />
The first time you connect to the <strong>WBR</strong>-<strong>3600</strong> <strong>Router</strong>, you should run the Setup Wizard<br />
to configure the ADSL and Internet Connection.<br />
1. Click the Setup Wizard link on the main menu<br />
2. On the first screen, select VC 1 (<strong>Router</strong> - Primary Internet Connection), then click<br />
"Next"<br />
Figure 5: Setup Wizard Home Page<br />
3. On the VC1 screen, shown below, enter the VPI and VCI values provided by your<br />
ISP, then click "Next".<br />
Figure 6: Setup Wizard - VC1<br />
18
Figure 7: Setup Wizard - Internet Access<br />
4. On the Internet Access Screen, shown above, select the correct connection type,<br />
as used by your ISP. Click "Next" and complete the configuration for your connection<br />
method.<br />
� You need the data supplied by your ISP. Your ISP's data will also have the<br />
DSL Multiplexing Method ( LLC or VC )<br />
� The common connection types are explained in the following table..<br />
Connection<br />
Type<br />
Dynamic<br />
IP Address<br />
Static (Fixed)<br />
IP Address<br />
Details ISP Data required<br />
Your IP Address is allocated<br />
automatically, when you<br />
connect to you ISP.<br />
Your ISP allocates a permanent<br />
IP Address to you.<br />
Usually, the connection is<br />
"Always on".<br />
PPPoE, PPPoA You connect to the ISP only<br />
when required. The IP address<br />
is usually allocated<br />
automatically.<br />
IPoA<br />
(IP over ATM)<br />
Normally, the connection is<br />
"Always on".<br />
19<br />
Often, none.<br />
Some ISP's may require you to<br />
use a particular Hostname or<br />
Domain name, or MAC (physical)<br />
address.<br />
IP Address allocated to you, and<br />
related information, such as Network<br />
Mask, Gateway IP address,<br />
and DNS address.<br />
a) <strong>User</strong> name and password are<br />
always required.<br />
b) If using a Static (Fixed) IP<br />
address, you need the IP address<br />
and related information (Network<br />
Mask, Gateway IP address, and<br />
DNS address)<br />
IP Address allocated to you, and<br />
related information, such as Network<br />
Mask, Gateway IP address,<br />
and DNS address.
5. Step through the Wizard until finished.<br />
6. On the final screen of the Wizard, run the test and check that an Internet connection<br />
can be established.<br />
7. If the connection test fails:<br />
� Check all connections, and the front panel LEDs.<br />
� Check that you have entered all data correctly.<br />
20
Configuring VCs<br />
The <strong>WBR</strong>-<strong>3600</strong> <strong>Router</strong> supports multiple VCs (Virtual Circuits) on the ADSL connection.<br />
VC1 must be used for general-purpose Internet access. The other VCs are available<br />
for special purposes, such as Video-on-Demand.<br />
You can only use these VCs if supported by your ISP and ADSL service provider. In<br />
that case, they will provide the necessary configuration data.<br />
Some ISP's allow multiple PPPoE connections. This allows multiple<br />
PCs to connect to the Internet using PPPoE client software. When<br />
using the <strong>WBR</strong>-<strong>3600</strong> <strong>Router</strong>, multiple PPPoE connections are neither<br />
necessary nor supported.<br />
To Configure additional VCs<br />
1. Start the Setup Wizard again.<br />
2. On the first screen, select VC2, and click "Next"<br />
3. Configure the VC setup screen as described below, then click "Next".<br />
Setup Wizard VC Screen<br />
Figure 8: Setup Wizard - VC2<br />
VC The VC number is displayed<br />
Enable To use this VC, you must enable it by checking this checkbox.<br />
VPI Enter the VPI value provided by your ISP.<br />
VCI Enter the VPI value provided by your ISP.<br />
Multiplexing Select the multiplexing value provided by your ISP.<br />
21
ATM Service Select the multiplexing value provided by your ISP.<br />
LAN IP<br />
Address<br />
Enter the IP address of the device on your LAN which will receive<br />
the data on this VC.<br />
� For Video-on-Demand, this would be the IP address of your<br />
SetTop Box.<br />
� For VoIP, this would be the IP address of your VoIP TA.<br />
� Note that this IP address does not have to be in the same IP<br />
address range as other devices on your local LAN.<br />
4. When finished, click "Next" and complete the Wizard.<br />
5. After completing the Wizard, you can check the Status screen to see the VC has<br />
been corrected established.<br />
22
Home Screen<br />
After finishing the Setup Wizard, you will see the Home screen. When you connect in<br />
future, you will see this screen when you connect. An example screen is shown below.<br />
Main Menu<br />
Figure 9: Home Screen<br />
The main menu, on the left, contains links to the most-commonly used screen. To see<br />
the links to the other available screens, click "Advanced" or "Administration".<br />
The main menu also contains one (1) button:<br />
� Log Out - When finished, you should click this button to logout.<br />
Navigation & Data Input<br />
� Use the menu bar on the left of the screen, and the "Back" button on your Browser,<br />
for navigation.<br />
� Changing to another screen without clicking "Save" does NOT save any changes<br />
you may have made. You must "Save" before changing screens or your data will<br />
be ignored.<br />
On each screen, clicking the "Help" button will display help for that<br />
screen.<br />
23
LAN Screen<br />
Use the LAN link on the main menu to reach the LAN screen. An example screen is<br />
shown below.<br />
Data - LAN Screen<br />
TCP/IP<br />
Figure 10: LAN Screen<br />
IP Address IP address for the <strong>WBR</strong>-<strong>3600</strong> <strong>Router</strong>, as seen from the local<br />
LAN. Use the default value unless the address is already in use<br />
or your LAN is using a different IP address range. In the latter<br />
case, enter an unused IP Address from within the range used by<br />
your LAN.<br />
Subnet Mask The default value 255.255.255.0 is standard for small (class "C")<br />
networks. For other networks, use the Subnet Mask for the LAN<br />
segment to which the <strong>WBR</strong>-<strong>3600</strong> <strong>Router</strong> is attached (the same<br />
value as the PCs on that LAN segment).<br />
DHCP Server � If Enabled, the <strong>WBR</strong>-<strong>3600</strong> <strong>Router</strong> will allocate IP Addresses<br />
to PCs (DHCP clients) on your LAN when they start up. The<br />
default (and recommended) value is Enabled.<br />
� If you are already using a DHCP Server, this setting must be<br />
Disabled, and the existing DHCP server must be reconfigured<br />
to treat the <strong>WBR</strong>-<strong>3600</strong> <strong>Router</strong> as the default Gateway.<br />
See the following section for further details.<br />
� The Start IP Address and Finish IP Address fields set the<br />
values used by the DHCP server when allocating IP Addresses<br />
to DHCP clients. This range also determines the<br />
number of DHCP clients supported. Enter the desired value<br />
for the Lease Time, which should be between 1 and 7.<br />
See the following section for further details on using DHCP.<br />
24
DHCP<br />
What DHCP Does<br />
A DHCP (Dynamic Host Configuration Protocol) Server allocates a valid IP address to<br />
a DHCP Client (PC or device) upon request.<br />
� The client request is made when the client device starts up (boots).<br />
� The DHCP Server provides the Gateway and DNS addresses to the client, as well<br />
as allocating an IP Address.<br />
� The <strong>WBR</strong>-<strong>3600</strong> <strong>Router</strong> can act as a DHCP server.<br />
� Windows 95/98/ME and other non-Server versions of Windows will act as a DHCP<br />
client. This is the default Windows setting for the TCP/IP network protocol. However,<br />
Windows uses the term Obtain an IP Address automatically instead of<br />
"DHCP Client".<br />
� You must NOT have two (2) or more DHCP Servers on the same LAN segment. (If<br />
your LAN does not have other <strong>Router</strong>s, this means there must only be one (1)<br />
DHCP Server on your LAN.)<br />
Using the <strong>WBR</strong>-<strong>3600</strong> <strong>Router</strong>'s DHCP Server<br />
This is the default setting. The DHCP Server settings are on the LAN screen. On this<br />
screen, you can:<br />
� Enable or Disable the <strong>WBR</strong>-<strong>3600</strong> <strong>Router</strong>'s DHCP Server function.<br />
� Set the range of IP Addresses allocated to PCs by the DHCP Server function.<br />
You can assign Fixed IP Addresses to some devices while using<br />
DHCP, provided that the Fixed IP Addresses are NOT within the<br />
range used by the DHCP Server.<br />
Using another DHCP Server<br />
You can only use one (1) DHCP Server per LAN segment. If you wish to use another<br />
DHCP Server, rather than the <strong>WBR</strong>-<strong>3600</strong> <strong>Router</strong>'s, the following procedure is required.<br />
� Disable the DHCP Server feature in the <strong>WBR</strong>-<strong>3600</strong> <strong>Router</strong>. This setting is on the<br />
LAN screen.<br />
� Configure the DHCP Server to provide the <strong>WBR</strong>-<strong>3600</strong> <strong>Router</strong>'s IP Address as the<br />
Default Gateway.<br />
To Configure your PCs to use DHCP<br />
This is the default setting for TCP/IP for all non-Server versions of Windows.<br />
See Chapter 4 - Client Configuration for the procedure to check these settings.<br />
25
<strong>Wireless</strong> Screen<br />
The <strong>WBR</strong>-<strong>3600</strong> <strong>Router</strong>'s settings must match the other <strong>Wireless</strong> stations.<br />
Note that the <strong>WBR</strong>-<strong>3600</strong> <strong>Router</strong> will automatically accept both 802.11b and 802.<strong>11g</strong><br />
connections, and no configuration is required for this feature.<br />
To change the <strong>WBR</strong>-<strong>3600</strong> <strong>Router</strong>'s default settings for the <strong>Wireless</strong> Access Point<br />
feature, use the <strong>Wireless</strong> link on the main menu to reach the <strong>Wireless</strong> screen. An<br />
example screen is shown below.<br />
Data - <strong>Wireless</strong> Screen<br />
Identification<br />
Figure 11: <strong>Wireless</strong> Screen<br />
Region Select the correct domain for your location. It is your responsibility<br />
to ensure:<br />
� That the <strong>WBR</strong>-<strong>3600</strong> <strong>Router</strong> is only used in domains for<br />
which is licensed.<br />
� That you select the correct domain, so that only the legal<br />
channels for that domain can be selected.<br />
Station name This is the same as the "Device Name" for the <strong>WBR</strong>-<strong>3600</strong> <strong>Router</strong>.<br />
26
SSID This is also called the "Network Name".<br />
Options<br />
� If using an ESS (Extended Service Set, with multiple access<br />
points) this ID is called an ESSID (Extended Service Set<br />
Identifier).<br />
� To communicate, all <strong>Wireless</strong> stations should use the same<br />
SSID/ESSID.<br />
Mode Select the desired mode:<br />
� 802.<strong>11g</strong> & 802.11b - Both 802.11.g and 802.11b <strong>Wireless</strong><br />
stations will be able to use the <strong>WBR</strong>-<strong>3600</strong> <strong>Router</strong>.<br />
� 802.<strong>11g</strong> only - Only 802.<strong>11g</strong> <strong>Wireless</strong> stations can use the<br />
<strong>WBR</strong>-<strong>3600</strong> <strong>Router</strong>.<br />
� 802.11b only - Only 802.11b connections are available.<br />
802.<strong>11g</strong> <strong>Wireless</strong> Stations will only be able to use the <strong>WBR</strong>-<br />
<strong>3600</strong> <strong>Router</strong> if they are fully backward-compatible with the<br />
802.11b standard.<br />
Channel No. Select the Channel you wish to use on your <strong>Wireless</strong> LAN.<br />
Broadcast<br />
SSID<br />
� If you experience interference (shown by lost connections<br />
and/or slow data transfers) you may need to experiment with<br />
different channels to see which is the best.<br />
� If using multiple Access Points, adjacent Access Points<br />
should use different Channels to reduce interference.<br />
If enabled, the <strong>WBR</strong>-<strong>3600</strong> <strong>Router</strong> will broadcast its SSID. This<br />
allows PCs and other wireless stations to detect this Access<br />
Point and use the correct SSID.<br />
If disabled, PC users will have to manually enter the SSID and<br />
other details of the wireless interface before they can connect to<br />
this Access Point.<br />
WMM Support WMM provides improved QoS over wireless connections for<br />
better video and voice performance. The default is Enable.<br />
<strong>Wireless</strong> Security<br />
Current Setting The current <strong>Wireless</strong> security is displayed. The default value is<br />
Disabled.<br />
Configure<br />
Button<br />
Access Point<br />
Enable <strong>Wireless</strong><br />
Access<br />
Point<br />
Click this button to access the <strong>Wireless</strong> security sub-screen, and<br />
view or change the settings. See the following section for details.<br />
Enable this if you want to use <strong>Wireless</strong> Access Point function.<br />
If disabled, no <strong>Wireless</strong> stations can use the Access Point function,<br />
and all connections must be made via the wired LAN.<br />
27
Allow access<br />
by …<br />
Set Stations<br />
Button<br />
Use this feature to determine which <strong>Wireless</strong> stations can use<br />
the Access Point. The options are:<br />
� All <strong>Wireless</strong> Stations - All wireless stations can use the<br />
access point, provided they have the correct SSID and security<br />
settings.<br />
� Trusted <strong>Wireless</strong> stations only - Only wireless stations you<br />
designate as "Trusted" can use the Access Point, even if<br />
they have the correct SSID and security settings.<br />
This feature uses the MAC address to identify <strong>Wireless</strong> stations.<br />
The MAC address is a low-level network identifier<br />
which is unique to each PC or network device.<br />
To define the trusted wireless stations, use the "Set Stations"<br />
button.<br />
Click this button to manage the trusted PC database.<br />
28
Wi-Fi Protect Setup<br />
Wi-Fi Protected Setup (WPS) is based on push-button or PIN (Personal Identification<br />
Number) entry authentication to provide strong WPA/WPA2 encryption keys to client<br />
devices. <strong>User</strong>s can push a button on the <strong>WBR</strong>-<strong>3600</strong> router and the client device to<br />
exchange the encryption key. With a PIN, users can enter a code generated by the<br />
client device to connect to the network.<br />
View the Wi-Fi Protect Setup on the <strong>Wireless</strong> screen like the following.<br />
Data – Wi-Fi Protect Setup Screen<br />
Wi-Fi Protect Setup<br />
Figure 12: Wi-Fi Protect Setup Screen<br />
Enable WPS Enable this if you want to use <strong>Wireless</strong> WPS function.<br />
(If enabled the WPS then it only can support Disabled And WPA-<br />
PSK/WPA2-PSK.)<br />
AP PIN Code Click the Regenerate button to have the new pin code displayed<br />
in the field.<br />
WPS Push<br />
Button<br />
Input Client PIN<br />
Code<br />
Push the WPS PBC button on the wireless screen to establish<br />
the wireless connection.<br />
Enter the PIN code and click OK to add the client device.<br />
The WPS Function only provides strong WPA/WPA2 encryption<br />
keys to client devices. Please check the wireless security is select<br />
WPA-PSK or WPA2-PSK.<br />
29
<strong>Wireless</strong> Security<br />
This screen is accessed by clicking the "Configure" button on the <strong>Wireless</strong> screen.<br />
There are 5 options for <strong>Wireless</strong> security:<br />
� Disabled - no data encryption is used.<br />
� WEP - data is encrypted using the WEP standard.<br />
� WPA-PSK - data is encrypted using the WPA-PSK standard. This is a later standard<br />
than WEP, and provides much better security than WEP. If all your <strong>Wireless</strong><br />
stations support WPA-PSK, you should use WPA-PSK rather than WEP.<br />
� WPA2-PSK - This is a further development of WPA-PSK, and offers even greater<br />
security, using the AES (Advanced Encryption Standard) method of encryption.<br />
� WPA-802.1x - This version of WPA requires a Radius Server on your LAN to<br />
provide the client authentication according to the 802.1x standard. Data transmissions<br />
are encrypted using the WPA standard.<br />
If this option is selected:<br />
� This Access Point must have a "client login" on the Radius Server.<br />
� Each user must have a "user login" on the Radius Server.<br />
� Each user's wireless client must support 802.1x and provide the login data<br />
when required.<br />
� All data transmission is encrypted using the WPA standard. Keys are automatically<br />
generated, so no key input is required.<br />
� WPA2-802.1x - This version of WPA2 requires a Radius Server on your LAN to<br />
provide the client authentication according to the 802.1x standard. Data transmissions<br />
are encrypted using the WPA2 standard.<br />
If this option is selected:<br />
� This Access Point must have a "client login" on the Radius Server.<br />
� Each user must authenticate on the Radius Server. This is usually done using<br />
digital certificates.<br />
� Each user's wireless client must support 802.1x and provide the Radius authentication<br />
data when required.<br />
� All data transmission is encrypted using the WPA2 standard. Keys are automatically<br />
generated, so no key input is required.<br />
30
WEP <strong>Wireless</strong> Security<br />
Data - WEP Screen<br />
WEP Data Encryption<br />
WEP Data<br />
Encryption<br />
Figure 13: WEP<br />
Select the desired option, and ensure the <strong>Wireless</strong> Stations use<br />
the same setting.<br />
� 64 Bit - data is encrypted, using the default key, before being<br />
transmitted. You must enter at least the default key. For 64<br />
Bit Encryption, the key size is 10 chars in HEX (0~9 and<br />
A~F).<br />
� 128 Bit - data is encrypted, using the default key, before<br />
being transmitted. You must enter at least the default key.<br />
For 128 Bit Encryption, the key size is 26 chars in HEX (0~9<br />
and A~F).<br />
Default Key Select the key you wish to be the default. Transmitted data is<br />
ALWAYS encrypted using the Default Key; the other Keys are for<br />
decryption only.<br />
You must enter a Key Value for the Default Key.<br />
Key Value Enter the key value or values you wish to use. The Default Key<br />
is required, the other keys are optional. Other stations must have<br />
the same key.<br />
Passphrase If desired, you can generate a key from a phrase, instead of<br />
entering the key value directly. Enter the desired phrase, and<br />
click the "Generate Keys" button.<br />
31
WPA-PSK <strong>Wireless</strong> Security<br />
Data - WPA-PSK Screen<br />
Figure 14-1: WPA-PSK<br />
PSK Enter the PSK (network key). Data is encrypted using a key<br />
derived from the network key. Other <strong>Wireless</strong> Stations must<br />
use the same network key. The PSK must be from 8 to 63<br />
characters in length.<br />
Encryption The WPA-PSK standard allows different encryption methods to<br />
be used. Select the desired option. <strong>Wireless</strong> Stations must use<br />
the same encryption method.<br />
If enabled the WPS then it only can support WPA-PSK and WPA2-<br />
PSK encryption keys to client devices.<br />
32
WPA2-PSK <strong>Wireless</strong> Security<br />
Data - WPA-PSK Screen<br />
Figure 15-2: WPA2-PSK<br />
PSK Enter the PSK (network key). Data is encrypted using a key<br />
derived from the network key. Other <strong>Wireless</strong> Stations must<br />
use the same network key. The PSK must be from 8 to 63<br />
characters in length.<br />
Encryption The encryption method is AES. <strong>Wireless</strong> Stations must also<br />
use AES.<br />
If enabled the WPS then it only can support WPA-PSK and WPA2-<br />
PSK encryption keys to client devices.<br />
33
WPA-802.1x <strong>Wireless</strong> Security<br />
Data - WPA-802.1x Screen<br />
Figure 16: WPA-802.1x<br />
Server Address Enter the server address here.<br />
Radius Port Enter the port number used for connections to the Radius<br />
Server.<br />
Shared Key Enter the shared key. Data is encrypted using a key derived<br />
from the network key. Other <strong>Wireless</strong> Stations must use the<br />
same key. The key must be from 8 to 63 characters in length.<br />
Encryption The encryption method is TKIP. <strong>Wireless</strong> Stations must also<br />
use TKIP.<br />
34
WPA2-802.1x <strong>Wireless</strong> Security<br />
Data - WPA2-802.1x Screen<br />
Figure 17: WPA2-802.1x<br />
Server Address Enter the server address here.<br />
Radius Port Enter the port number used for connections to the Radius<br />
Server.<br />
Shared Key Enter the shared key. Data is encrypted using a key derived<br />
from the network key. Other <strong>Wireless</strong> Stations must use the<br />
same key. The key must be from 8 to 63 characters in length.<br />
Encryption The encryption method is AES. <strong>Wireless</strong> Stations must also<br />
use AES.<br />
35
Trusted <strong>Wireless</strong> Stations<br />
This feature can be used to prevent unknown <strong>Wireless</strong> stations from using the Access<br />
Point. This list has no effect unless the setting Allow access by trusted stations only is<br />
enabled.<br />
To change the list of trusted wireless stations, use the Modify List button on the<br />
Access Control screen. You will see a screen like the sample below.<br />
Data - Trusted <strong>Wireless</strong> Stations<br />
Trusted <strong>Wireless</strong><br />
Stations<br />
Other <strong>Wireless</strong><br />
Stations<br />
Figure 18: Trusted <strong>Wireless</strong> Stations<br />
This lists any <strong>Wireless</strong> Stations which you have designated<br />
as “Trusted”.<br />
This list any <strong>Wireless</strong> Stations detected by the Access Point,<br />
which you have not designated as "Trusted".<br />
Name The name assigned to the Trusted <strong>Wireless</strong> Station. Use this<br />
when adding or editing a Trusted Station.<br />
Address The MAC (physical) address of the Trusted <strong>Wireless</strong> Station.<br />
Use this when adding or editing a Trusted Station.<br />
Buttons<br />
Delete a Trusted <strong>Wireless</strong> Station from the list (move to the<br />
"Other Stations" list).<br />
� Select an entry (or entries) in the "Trusted Stations" list.<br />
� Click the " >> " button.<br />
Edit Use this to change an existing entry in the "Trusted Stations"<br />
list:<br />
1. Select the Station in the Trusted Station list.<br />
2. Click the Edit button. The address will be copied to the<br />
"Address" field, and the Add button will change to Update.<br />
3. Edit the address (MAC or physical address) as required.<br />
4. Click Update to save your changes.<br />
Add (Update) To add a Trusted Station which is not in the "Other <strong>Wireless</strong><br />
Stations" list, enter the required data and click this button.<br />
When editing an existing <strong>Wireless</strong> Station, this button will<br />
change from Add to Update.<br />
Clear Clear the Name and Address fields.<br />
37
Password Screen<br />
The password screen allows you to assign a password to the <strong>WBR</strong>-<strong>3600</strong> <strong>Router</strong>.<br />
Figure 19: Password Screen<br />
Old Password Enter the existing password in this field.<br />
New password Enter the new password here.<br />
Verify password Re-enter the new password here.<br />
You will be prompted for the password when you connect, as shown below.<br />
� The "<strong>User</strong> Name" is always admin<br />
Figure 20: Password Dialog<br />
� Enter the password for the <strong>WBR</strong>-<strong>3600</strong> <strong>Router</strong>, as set on the Password screen<br />
above.<br />
38
Mode Screen<br />
Use this screen to change the mode between <strong>Router</strong> mode and Modem (Bridge) mode.<br />
Select the desired option, and click "Save".<br />
Figure 21: Mode Screen<br />
<strong>Router</strong> Both the <strong>ADSL2+</strong> Modem and the <strong>Router</strong> features are operational. In<br />
this mode, this device can provide shared Internet Access to all your<br />
LAN users. Also, by default, it acts a DHCP Server, providing an IP<br />
address and related information to all <strong>Wireless</strong> and LAN users.<br />
Modem Only the <strong>ADSL2+</strong> Modem component is operational.<br />
Notes:<br />
� All <strong>Router</strong> features are disabled. This device is "transparent" - it<br />
does not perform any operations or make any changes to the<br />
network traffic passing through it.<br />
� You need to have a DHCP Server on your LAN to provide IP<br />
addresses to the <strong>Wireless</strong> clients using this Access Point.<br />
� All traffic received on either the <strong>Wireless</strong> or LAN interface will be<br />
sent over the ADSL connection.<br />
� Generally, you should NOT use modem mode. Only select this mode if you are<br />
sure this is what you want.<br />
� After changing the mode, this device will restart, which will take a few seconds.<br />
The menu will also change, depending on the mode you are in.<br />
� The <strong>Wireless</strong> Access Point can function in either <strong>Router</strong> or Modem mode. But<br />
generally it is not a good idea to combine a Modem with an Access Point, because<br />
all data received from the wireless stations will be sent over the modem connection.<br />
(Since the modem is transparent, it does not examine the traffic to determine<br />
whether the traffic is for the LAN or the WAN.)<br />
� For details on using Modem Mode, see Chapter 8.<br />
39
Chapter 4<br />
PC Configuration<br />
Overview<br />
This Chapter details the PC Configuration required on the local ("Internal")<br />
LAN.<br />
For each PC, the following may need to be configured:<br />
� TCP/IP network settings<br />
� Internet Access configuration<br />
� <strong>Wireless</strong> configuration<br />
Windows Clients<br />
This section describes how to configure Windows clients for Internet access via the<br />
<strong>WBR</strong>-<strong>3600</strong> <strong>Router</strong>.<br />
The first step is to check the PC's TCP/IP settings.<br />
The <strong>WBR</strong>-<strong>3600</strong> <strong>Router</strong> uses the TCP/IP network protocol for all functions, so it is<br />
essential that the TCP/IP protocol be installed and configured on each PC.<br />
TCP/IP Settings - Overview<br />
If using the default <strong>WBR</strong>-<strong>3600</strong> <strong>Router</strong> settings, and the default Windows<br />
TCP/IP settings, no changes need to be made.<br />
� By default, the <strong>WBR</strong>-<strong>3600</strong> <strong>Router</strong> will act as a DHCP Server, automatically providing<br />
a suitable IP Address (and related information) to each PC when the PC boots.<br />
� For all non-Server versions of Windows, the default TCP/IP setting is to act as a<br />
DHCP client.<br />
If using a Fixed (specified) IP address, the following changes are required:<br />
� The Gateway must be set to the IP address of the <strong>WBR</strong>-<strong>3600</strong> <strong>Router</strong><br />
� The DNS should be set to the address provided by your ISP.<br />
If your LAN has a <strong>Router</strong>, the LAN Administrator must re-configure<br />
the <strong>Router</strong> itself. Refer to Chapter 8 - Advanced Setup for details.<br />
40<br />
4
Checking TCP/IP Settings - Windows 2000:<br />
1. Select Control Panel - Network and Dial-up Connection.<br />
2. Right - click the Local Area Connection icon and select Properties. You should see<br />
a screen like the following:<br />
Figure 22: Network Configuration (Win 2000)<br />
3. Select the TCP/IP protocol for your network card.<br />
4. Click on the Properties button. You should then see a screen like the following.<br />
Figure 23: TCP/IP Properties (Win 2000)<br />
41
5. Ensure your TCP/IP settings are correct, as described below.<br />
Using DHCP<br />
To use DHCP, select the radio button Obtain an IP Address automatically. This is the<br />
default Windows setting. Using this is recommended. By default, the <strong>WBR</strong>-<strong>3600</strong><br />
<strong>Router</strong> will act as a DHCP Server.<br />
Restart your PC to ensure it obtains an IP Address from the <strong>WBR</strong>-<strong>3600</strong> <strong>Router</strong>.<br />
Using a fixed IP Address ("Use the following IP Address")<br />
If your PC is already configured, check with your network administrator before making<br />
the following changes.<br />
� Enter the <strong>WBR</strong>-<strong>3600</strong> <strong>Router</strong>'s IP address in the Default gateway field and click OK.<br />
(Your LAN administrator can advise you of the IP Address they assigned to the<br />
<strong>WBR</strong>-<strong>3600</strong> <strong>Router</strong>.)<br />
� If the DNS Server fields are empty, select Use the following DNS server addresses,<br />
and enter the DNS address or addresses provided by your ISP, then click OK.<br />
42
Checking TCP/IP Settings - Windows XP<br />
1. Select Control Panel - Network Connection.<br />
2. Right click the Local Area Connection and choose Properties. You should see a<br />
screen like the following:<br />
Figure 24: Network Configuration (Windows XP)<br />
3. Select the TCP/IP protocol for your network card.<br />
4. Click on the Properties button. You should then see a screen like the following.<br />
Figure 25: TCP/IP Properties (Windows XP)<br />
43
5. Ensure your TCP/IP settings are correct.<br />
Using DHCP<br />
To use DHCP, select the radio button Obtain an IP Address automatically. This is the<br />
default Windows setting. Using this is recommended. By default, the <strong>WBR</strong>-<strong>3600</strong><br />
<strong>Router</strong> will act as a DHCP Server.<br />
Restart your PC to ensure it obtains an IP Address from the <strong>WBR</strong>-<strong>3600</strong> <strong>Router</strong>.<br />
Using a fixed IP Address ("Use the following IP Address")<br />
If your PC is already configured, check with your network administrator before making<br />
the following changes.<br />
� In the Default gateway field, enter the <strong>WBR</strong>-<strong>3600</strong> <strong>Router</strong>'s IP address and click<br />
OK. Your LAN administrator can advise you of the IP Address they assigned to the<br />
<strong>WBR</strong>-<strong>3600</strong> <strong>Router</strong>.<br />
� If the DNS Server fields are empty, select Use the following DNS server addresses,<br />
and enter the DNS address or addresses provided by your ISP, then click OK.<br />
44
Internet Access<br />
To configure your PCs to use the <strong>WBR</strong>-<strong>3600</strong> <strong>Router</strong> for Internet access:<br />
� Ensure that the DSL modem, Cable modem, or other permanent connection is<br />
functional.<br />
� Use the following procedure to configure your Browser to access the Internet via<br />
the LAN, rather than by a Dial-up connection.<br />
For Windows 2000<br />
1. Select Start Menu - Settings - Control Panel - Internet Options.<br />
2. Select the Connection tab, and click the Setup button.<br />
3. Select "I want to set up my Internet connection manually, or I want to connect<br />
through a local area network (LAN)" and click Next.<br />
4. Select "I connect through a local area network (LAN)" and click Next.<br />
5. Ensure all of the boxes on the following Local area network Internet Configuration<br />
screen are unchecked.<br />
6. Check the "No" option when prompted "Do you want to set up an Internet mail<br />
account now?".<br />
7. Click Finish to close the Internet Connection Wizard.<br />
Setup is now completed.<br />
For Windows XP<br />
1. Select Start Menu - Control Panel - Network and Internet Connections.<br />
2. Select Set up or change your Internet Connection.<br />
3. Select the Connection tab, and click the Setup button.<br />
4. Cancel the pop-up "Location Information" screen.<br />
5. Click Next on the "New Connection Wizard" screen.<br />
6. Select "Connect to the Internet" and click Next.<br />
7. Select "Set up my connection manually" and click Next.<br />
8. Check "Connect using a broadband connection that is always on" and click Next.<br />
9. Click Finish to close the New Connection Wizard.<br />
Setup is now completed.<br />
Accessing AOL<br />
To access AOL (America On Line) through the <strong>WBR</strong>-<strong>3600</strong> <strong>Router</strong>, the AOL for Windows<br />
software must be configured to use TCP/IP network access, rather than a dial-up<br />
connection. The configuration process is as follows:<br />
� Start the AOL for Windows communication software. Ensure that it is Version 2.5,<br />
3.0 or later. This procedure will not work with earlier versions.<br />
� Click the Setup button.<br />
� Select Create Location, and change the location name from "New Locality" to<br />
"<strong>WBR</strong>-<strong>3600</strong> <strong>Router</strong>".<br />
� Click Edit Location. Select TCP/IP for the Network field. (Leave the Phone Number<br />
blank.)<br />
� Click Save, then OK.<br />
Configuration is now complete.<br />
� Before clicking "Sign On", always ensure that you are using the "<strong>WBR</strong>-<strong>3600</strong> <strong>Router</strong>"<br />
location.<br />
45
Macintosh Clients<br />
From your Macintosh, you can access the Internet via the <strong>WBR</strong>-<strong>3600</strong> <strong>Router</strong>. The<br />
procedure is as follows.<br />
1. Open the TCP/IP Control Panel.<br />
2. Select Ethernet from the Connect via pop-up menu.<br />
3. Select Using DHCP Server from the Configure pop-up menu. The DHCP Client ID<br />
field can be left blank.<br />
4. Close the TCP/IP panel, saving your settings.<br />
Note:<br />
If using manually assigned IP addresses instead of DHCP, the required changes are:<br />
� Set the <strong>Router</strong> Address field to the <strong>WBR</strong>-<strong>3600</strong> <strong>Router</strong>'s IP Address.<br />
� Ensure your DNS settings are correct.<br />
Linux Clients<br />
To access the Internet via the <strong>WBR</strong>-<strong>3600</strong> <strong>Router</strong>, it is only necessary to set the <strong>WBR</strong>-<br />
<strong>3600</strong> <strong>Router</strong> as the "Gateway".<br />
Ensure you are logged in as "root" before attempting any changes.<br />
Fixed IP Address<br />
By default, most Unix installations use a fixed IP Address. If you wish to continue using<br />
a fixed IP Address, make the following changes to your configuration.<br />
� Set your "Default Gateway" to the IP Address of the <strong>WBR</strong>-<strong>3600</strong> <strong>Router</strong>.<br />
� Ensure your DNS (Name server) settings are correct.<br />
To act as a DHCP Client (recommended)<br />
The procedure below may vary according to your version of Linux and X -windows<br />
shell.<br />
1. Start your X Windows client.<br />
2. Select Control Panel - Network<br />
3. Select the "Interface" entry for your Network card. Normally, this will be called<br />
"eth0".<br />
4. Click the Edit button, set the "protocol" to "DHCP", and save this data.<br />
5. To apply your changes<br />
� Use the "Deactivate" and "Activate" buttons, if available.<br />
� OR, restart your system.<br />
Other Unix Systems<br />
To access the Internet via the <strong>WBR</strong>-<strong>3600</strong> <strong>Router</strong>:<br />
� Ensure the "Gateway" field for your network card is set to the IP Address of the<br />
<strong>WBR</strong>-<strong>3600</strong> <strong>Router</strong>.<br />
� Ensure your DNS (Name Server) settings are correct.<br />
46
<strong>Wireless</strong> Station Configuration<br />
This section applies to all <strong>Wireless</strong> stations wishing to use the <strong>WBR</strong>-<strong>3600</strong> <strong>Router</strong>'s<br />
Access Point, regardless of the operating system which is used on the client.<br />
To use the <strong>Wireless</strong> Access Point in the <strong>WBR</strong>-<strong>3600</strong> <strong>Router</strong>, each <strong>Wireless</strong> Station<br />
must have compatible settings, as follows:<br />
Mode The mode must be set to Infrastructure (rather than Ad-hoc)<br />
Access points only operate in Infrastructure mode.<br />
SSID (ESSID) This must match the value used on the <strong>WBR</strong>-<strong>3600</strong> <strong>Router</strong>. The<br />
default value is <strong>Wireless</strong>.<br />
<strong>Wireless</strong><br />
Security<br />
Note! The SSID is case sensitive.<br />
By default, <strong>Wireless</strong> security on the <strong>WBR</strong>-<strong>3600</strong> <strong>Router</strong> is disabled.<br />
� If <strong>Wireless</strong> security remains disabled on the <strong>WBR</strong>-<strong>3600</strong> <strong>Router</strong>,<br />
all stations must have wireless security disabled.<br />
� If <strong>Wireless</strong> security is enabled on the <strong>Wireless</strong> <strong>Router</strong> (either<br />
WEP or WPA-PSK), each station must use the same settings<br />
as the <strong>Wireless</strong> ADLS <strong>Router</strong>.<br />
<strong>Wireless</strong> Configuration on Windows XP<br />
If using Windows XP to configure the <strong>Wireless</strong> interface on your PC, the configuration<br />
procedure is as follows:<br />
1. Open the Network Connections folder. (Start - Settings - Network Connections).<br />
Figure 26: Network Connections (Windows XP)<br />
2. Right-click the <strong>Wireless</strong> Network Connection, check that it is enabled (menu option<br />
says Disable, rather than Enable) and then select View Available <strong>Wireless</strong> Networks.<br />
3. You will then see a list of wireless networks.<br />
47
Figure 27 <strong>Wireless</strong> Networks (Windows XP)<br />
If the "Broadcast SSID" setting on the <strong>WBR</strong>-<strong>3600</strong> <strong>Router</strong> has been<br />
disabled, its SSID will NOT be listed.<br />
See the following section "If the SSID is not listed" for details of<br />
dealing with this situation.<br />
4. The next step depends on whether or not <strong>Wireless</strong> security has been enabled on<br />
the <strong>WBR</strong>-<strong>3600</strong> <strong>Router</strong>.<br />
If <strong>Wireless</strong> Security is Disabled<br />
If <strong>Wireless</strong> security on the <strong>WBR</strong>-<strong>3600</strong> <strong>Router</strong> is disabled, Windows will warn you that<br />
the <strong>Wireless</strong> network is not secure.<br />
Figure 28 Insecure <strong>Wireless</strong> Network (Windows XP)<br />
48
To connect:<br />
� Check the checkbox Allow me to connect to the selected wireless network, even<br />
though it is not secure.<br />
� The Connect button will then be available. Click the Connect button, and wait a few<br />
seconds for the connection to be established.<br />
If using WEP Data Encryption<br />
If WEP data encryption has been enabled on the <strong>WBR</strong>-<strong>3600</strong> <strong>Router</strong>, Windows will<br />
detect this, and show a screen like the following.<br />
To connect:<br />
Figure 29: WEP (Windows XP)<br />
� Enter the WEP key, as set on the <strong>WBR</strong>-<strong>3600</strong> <strong>Router</strong>, in the Network Key field.<br />
� Re-enter the WEP key into the Confirm Network key field.<br />
� Disable the checkbox Enable IEEE 802.1x authentication for this network.<br />
� Click the Connect button.<br />
If this fails, click the Advanced button, to see a screen like the following:<br />
49
Figure 30: Advanced - <strong>Wireless</strong> Networks<br />
Select the SSID for the <strong>WBR</strong>-<strong>3600</strong> <strong>Router</strong>, and click Configure, to see a screen like<br />
the following:<br />
Configure this screen as follows:<br />
Figure 31: <strong>Wireless</strong> Network Properties - WEP<br />
� Set Network Authentication to match the <strong>WBR</strong>-<strong>3600</strong> <strong>Router</strong>. (If the setting on the<br />
<strong>WBR</strong>-<strong>3600</strong> <strong>Router</strong> is "Auto", then either Open or Shared can be used.)<br />
� For Data Encryption, select WEP.<br />
50
� For the Network key and Confirm network key, enter the default key value used<br />
on the <strong>WBR</strong>-<strong>3600</strong> <strong>Router</strong>. (Windows will determine if 64bit or 128bit encryption is<br />
used.)<br />
� The Key index must match the default key index on the <strong>WBR</strong>-<strong>3600</strong> <strong>Router</strong>. The<br />
default value is 1.<br />
� Ensure the options The key is provided for me automatically and This is a computer-to-computer<br />
(ad hoc) network are unchecked.<br />
� Click OK to save and close this dialog.<br />
� This wireless network will now be listed in Preferred Networks on the screen below.<br />
Figure 32: Preferred Networks<br />
Click OK to establish a connection to the <strong>WBR</strong>-<strong>3600</strong> <strong>Router</strong>.<br />
51
If using WPA-PSK Data Encryption<br />
If WPA-PSK data encryption has been enabled on the <strong>WBR</strong>-<strong>3600</strong> <strong>Router</strong>, it does not<br />
matter which network is selected on the screen below. Just click the Advanced button.<br />
Figure 33: <strong>Wireless</strong> Networks (Windows XP)<br />
You will then see a screen like the example below.<br />
Figure 34: Advanced - <strong>Wireless</strong> Networks<br />
Select the SSID for the <strong>WBR</strong>-<strong>3600</strong> <strong>Router</strong>, and click Configure, to see a screen like<br />
the following:<br />
52
Figure 35: <strong>Wireless</strong> Network Properties- WPA-PSK<br />
Configure this screen as follows:<br />
� Set Network Authentication to WPA-PSK.<br />
� For Data Encryption, select TKIP.<br />
� For the Network key and Confirm network key, enter the network key (PSK) used<br />
on the <strong>WBR</strong>-<strong>3600</strong> <strong>Router</strong>.<br />
� Ensure the option This is a computer-to-computer (ad hoc) network is unchecked.<br />
� Click OK to save and close this dialog.<br />
� This wireless network will now be listed in Preferred Networks on the screen below.<br />
Figure 36: Preferred Networks<br />
53
Click OK to establish a connection to the <strong>WBR</strong>-<strong>3600</strong> <strong>Router</strong>.<br />
If the SSID is not listed<br />
If the "Broadcast SSID" setting on the <strong>WBR</strong>-<strong>3600</strong> <strong>Router</strong> has been disabled, its SSID<br />
will NOT be listed on the screen below.<br />
Figure 37: <strong>Wireless</strong> Networks (Windows XP)<br />
In this situation, you need to obtain the SSID from your network administrator, then<br />
follow this procedure:<br />
1. Click the Advanced button to see a screen like the example below.<br />
Figure 38: Unlisted <strong>Wireless</strong> Network<br />
54
2. Click the Add button. You will see a screen like the example below.<br />
3. Configure this screen as follows:<br />
Figure 39: Add <strong>Wireless</strong> Network<br />
� Enter the correct SSID, as used on the <strong>WBR</strong>-<strong>3600</strong> <strong>Router</strong>. Remember the<br />
SSID is case-sensitive, so be sure to match the case, not just the spelling.<br />
� Set Network Authentication and Data Encryption to match the <strong>WBR</strong>-<strong>3600</strong><br />
<strong>Router</strong>.<br />
� If using data encryption (WEP or WPA-PSK), enter the key used on the <strong>WBR</strong>-<br />
<strong>3600</strong> <strong>Router</strong>. See the preceding sections for details of WEP and WPA-PSK.<br />
� Uncheck the options The key is provided for me automatically and This is a<br />
computer-to-computer (ad hoc) network.<br />
� Click OK to save and exit.<br />
55
4. This wireless network will then be listed in Preferred Networks on the screen below.<br />
Figure 40: Preferred Networks<br />
5. Click OK to establish a connection to the <strong>WBR</strong>-<strong>3600</strong> <strong>Router</strong>.<br />
56
Chapter 5<br />
Operation and Status<br />
This Chapter details the operation of the <strong>WBR</strong>-<strong>3600</strong> <strong>Router</strong> and the<br />
status screens. For Details of operation in Bridge (Modem) mode, see<br />
Chapter 8 - Modem Mode.<br />
Operation - <strong>Router</strong> Mode<br />
Once both the <strong>WBR</strong>-<strong>3600</strong> <strong>Router</strong> and the PCs are configured, operation is automatic.<br />
However, there are some situations where additional Internet configuration may be<br />
required. Refer to Chapter 6 - Advanced Features for further details.<br />
Status Screen<br />
Use the Status link on the main menu to view this screen.<br />
57<br />
5
Data - Status Screen<br />
ADSL<br />
Figure 41: Status Screen<br />
Modem Status This indicates the status of the <strong>ADSL2+</strong> modem component.<br />
DownStream<br />
Connection Speed<br />
UpStream<br />
Connection Speed<br />
VC 1 ~ 8 Status<br />
Displays the speed for the DownStream Connection.<br />
If connected, displays the speed for the Up Stream (upload)<br />
ADSL Connection.<br />
For each VC (Virtual Circuit), the current status is displayed.<br />
This will be either "Enabled" or "Disabled".<br />
Note: VC 1 is a standard (Routed) Internet connection.<br />
Other VCs are Bridge-mode connections.<br />
ADSL Details Click this button to open a sub-window and view the details<br />
of each VC (Virtual Circuit).<br />
58
Internet (VC1)<br />
Connection Method Displays the current connection method, as set in the Setup<br />
Wizard.<br />
Connection Status This indicates the current status of the Internet Connection<br />
� Active - Connection exists<br />
� Idle - No current connection, but no error has been<br />
detected. This condition normally arises when an idle<br />
connection is automatically terminated.<br />
� Failed - The connection was terminated abnormally.<br />
This could be caused by Modem failure, or the loss of<br />
the connection to the ISP's server.<br />
If there is an error, you can click the "Connection Details"<br />
button to find out more information.<br />
Internet IP Address This IP Address is allocated by the ISP (Internet Service<br />
Provider). If using a dynamic IP address, and no connection<br />
currently exists, this information is unavailable.<br />
WAN MAC Address It displays the MAC address for the WAN.<br />
Connection Details Click this button to open a sub-window and view a detailed<br />
description of the current connection. Depending on the<br />
type of connection, a "log" may also be available.<br />
LAN<br />
IP Address The IP Address of the <strong>WBR</strong>-<strong>3600</strong> <strong>Router</strong>.<br />
Network Mask The Network Mask (Subnet Mask) for the IP Address<br />
above.<br />
DHCP Server This shows the status of the DHCP Server function. The<br />
value will be "Enabled" or "Disabled".<br />
MAC Address This shows the MAC Address for the <strong>WBR</strong>-<strong>3600</strong> <strong>Router</strong>, as<br />
seen on the LAN interface.<br />
<strong>Wireless</strong><br />
Name (SSID) If using an ESS (Extended Service Set, with multiple access<br />
points) this ID is called an ESSID (Extended Service Set<br />
Identifier).<br />
Region The current region, as set on the <strong>Wireless</strong> screen.<br />
Channel This shows the Channel currently used, as set on the <strong>Wireless</strong><br />
screen.<br />
<strong>Wireless</strong> AP This indicates whether or not the <strong>Wireless</strong> Access Point<br />
feature is enabled.<br />
Broadcast Name This indicates whether or not the SSID is Broadcast. This<br />
setting is on the <strong>Wireless</strong> screen.<br />
System<br />
Device Name The current name of the <strong>Router</strong>. This name is also the<br />
"hostname" for users with an "@Home" type connection.<br />
Firmware Version The version of the current firmware installed.<br />
59
Buttons<br />
ADSL Details View the details of each VC (Virtual Circuit).<br />
Connection Details Click this button to open a sub-window and view a detailed<br />
description of the current connection.<br />
Attached Devices This will open a sub-window, showing all LAN and <strong>Wireless</strong><br />
devices currently on the network.<br />
Refresh Screen Update the data displayed on screen.<br />
60
Connection Status - PPPoE & PPPoA<br />
If using PPPoE (PPP over Ethernet) or PPPoA (PPP over ATM), a screen like the<br />
following example will be displayed when the "Connection Details" button is clicked.<br />
Data - PPPoE/PPPoA Screen<br />
Figure 42: PPPoE Status Screen<br />
Connection Time This indicates how long the current connection has been<br />
established.<br />
PPPoE Link Status This indicates whether or not the connection is currently<br />
established.<br />
� If the connection does not exist, the "Connect" button<br />
can be used to establish a connection.<br />
� If the connection currently exists, the "Disconnect"<br />
button can be used to break the connection.<br />
Negotiation This indicates the status of the PPPoE Server login.<br />
IP Address The IP Address of this device, as seen by Internet users.<br />
This address is allocated by your ISP (Internet Service<br />
Provider).<br />
Network Mask The Network Mask associated with the IP Address above.<br />
Buttons<br />
Connect If not connected, establish a connection to your ISP.<br />
Disconnect If connected to your ISP, hang up the connection.<br />
Close Close this window.<br />
61
Connection Details - Dynamic IP Address<br />
If your access method is "Direct" (no login), with a Dynamic IP address, a screen like<br />
the following example will be displayed when the "Connection Details" button is clicked.<br />
Figure 43: Connection Details - Fixed/Dynamic IP Address<br />
Data - Dynamic IP address<br />
Internet<br />
IP Address The current IP Address of this device, as seen by Internet<br />
users. This address is allocated by your ISP (Internet Service<br />
Provider).<br />
Network Mask The Network Mask associated with the IP Address above.<br />
Default Gateway The IP address of the remote Gateway or <strong>Router</strong> associated<br />
with the IP Address above.<br />
DHCP Server The IP address of your ISP's DHCP Server.<br />
DNS Server The IP address of the Domain Name Server which is currently<br />
used.<br />
Lease Obtained<br />
Lease Expires<br />
Buttons<br />
This indicates when the current IP address was obtained, and<br />
how long before this IP address allocation (the DCHP lease)<br />
expires.<br />
Release If an IP Address has been allocated to the <strong>WBR</strong>-<strong>3600</strong> <strong>Router</strong><br />
(by the ISP's DHCP Server, clicking the "Release" button will<br />
break the connection and release the IP Address.<br />
Renew If the ISP's DHCP Server has NOT allocated an IP Address for<br />
the <strong>WBR</strong>-<strong>3600</strong> <strong>Router</strong>, clicking the "Renew" button will attempt<br />
to re-establish the connection and obtain an IP Address from<br />
the ISP's DHCP Server.<br />
Close Close this window.<br />
62
Connection Details - Fixed IP Address<br />
If your access method is "Direct" (no login), with a fixed IP address, a screen like the<br />
following example will be displayed when the "Connection Details" button is clicked.<br />
Figure 44: Connection Details - Fixed/Dynamic IP Address<br />
Data - Fixed IP address Screen<br />
Internet<br />
IP Address The IP Address of this device, as seen by Internet users. This<br />
address is allocated by your ISP (Internet Service Provider).<br />
Network Mask The Network Mask associated with the IP Address above.<br />
Default Gateway The IP Address of the remote Gateway or <strong>Router</strong> associated<br />
with the IP Address above.<br />
DNS Server The IP Address of the Domain Name Server which is currently<br />
used.<br />
63
Chapter 6<br />
Advanced Features<br />
Overview<br />
This Chapter explains when and how to use the <strong>WBR</strong>-<strong>3600</strong> <strong>Router</strong>'s<br />
"Advanced" Features.<br />
The following advanced features are provided:<br />
� Internet:<br />
� DMZ<br />
� URL filter<br />
� Access Control<br />
� Dynamic DNS<br />
� Options<br />
� Schedule<br />
� Port Trigger<br />
� Port Foward<br />
� Port Range Forward<br />
� QoS<br />
Internet<br />
This screen provides access to the DMZ, Special Applications and URL Filter features.<br />
Figure 45-1: Internet Screen<br />
64<br />
6
DMZ<br />
This feature, if enabled, allows the DMZ computer on your LAN to be exposed to all<br />
users on the Internet.<br />
� This allows almost any application to be used on the "DMZ PC".<br />
� The "DMZ PC" will receive all "Unknown" connections and data.<br />
� If the DMZ feature is enabled, you must select the PC to be used as the "DMZ PC".<br />
URL Filter<br />
The "DMZ PC" is effectively outside the Firewall, making it more<br />
vulnerable to attacks. For this reason, you should only enable the<br />
DMZ feature when required.<br />
If you want to limit access to certain sites on the Internet, you can use this feature. The<br />
URL filter will check each Web site access. If the address, or part of the address, is<br />
included in the block site list, access will be denied.<br />
On the Advanced Internet screen, select the desired setting:<br />
� Disable - disable this feature.<br />
� Block Always - allow blocking all of the time, independent of the Schedule page.<br />
� Block By Schedule - block according to the settings on the Schedule page.<br />
Click the Configure URL Filter button to open the URL Filter screen, allowing you to<br />
create or modify the filter strings which determine which sites will be blocked.<br />
The URL Filter screen is displayed when the Configure URL Filter button on the<br />
Advanced Internet screen is clicked.<br />
Figure 46: URL Filter Screen<br />
65
Data - URL Filter Screen<br />
Current Filter Strings<br />
Current Filter<br />
Strings<br />
Add Filter<br />
String<br />
Trusted PC<br />
Allow this PC<br />
to..<br />
The list contains the current list of items to block.<br />
� To add to the list, use the "Add" option below.<br />
� To delete an entry, select it and click Delete button.<br />
� To delete all entries, click the Delete All button.<br />
To add to the current list, type the word or domain name you<br />
want to block into the field provided, then click the Add button.<br />
Filter strings should be as specific as possible. Otherwise, you<br />
may block access to many more sites than intended.<br />
Enable this to allow one computer to have unrestricted access to<br />
the Internet. For this PC, the URL filter will be ignored.<br />
If enabled, you must select the PC to be the trusted PC.<br />
Trusted PC Enter the PC to be the Trusted PC.<br />
66
Access Control<br />
This feature is accessed by the Access Control link on the Advanced menu. The<br />
Access Control feature allows administrators to restrict the level of Internet Access<br />
available to PCs on your LAN.<br />
Access Control Screen<br />
To view this screen, select the Access Control link on the Advanced menu.<br />
Data - Access Control Screen<br />
Internet Access<br />
Figure 47-1: Access Control Screen<br />
Access Control Select the desired options for the current group:<br />
Blocked<br />
Services<br />
� Disable - No outgoing traffic is blocked.<br />
� Block all Internet access - All outgoing traffic via the WAN port<br />
is blocked. Only the "Trusted PCs" have Internet access.<br />
� Block selected Services - You can select which Services are<br />
to block. Use this to gain fine control over the Internet access<br />
available.<br />
This lists all defined Services. Select the Services you wish to<br />
block. To select multiple services, hold the CTRL key while<br />
selecting.<br />
Schedule If Internet access is being blocked, you can choose to apply the<br />
blocking only during scheduled times. (If access is not blocked,<br />
no Scheduling is possible, and this setting has no effect.)<br />
67
Trusted PCs<br />
Click to enable<br />
Trusted PCs<br />
Set Trusted<br />
PCs Button<br />
Trusted <strong>Wireless</strong> Stations<br />
Enable this to allow one computer to have unrestricted access to<br />
the Internet. If enabled, you must select the PC to be the trusted<br />
PC.<br />
Click this button to manage the trusted PC database.<br />
This feature can be used to prevent unknown PCs from using the <strong>Router</strong>. This list has<br />
no effect unless the setting Allow access by trusted PCs only is enabled.<br />
You will see a screen like the sample below.<br />
Data - Trusted <strong>Wireless</strong> Stations<br />
Figure 48: Trusted PCs<br />
Trusted PCs This lists any PCs which you have designated as “Trusted”.<br />
Other PCs This list any PCs detected by the <strong>Router</strong>, which you have not<br />
designated as "Trusted".<br />
Buttons<br />
Delete a Trusted PCs from the list (move to the "Other PCs"<br />
list).<br />
� Select an entry (or entries) in the "Trusted PCs" list.<br />
� Click the " >> " button.<br />
68
Dynamic DNS (Domain Name Server)<br />
This free service is very useful when combined with the Virtual Server feature. It allows<br />
Internet users to connect to your Virtual Servers using a URL, rather than an IP Address.<br />
This also solves the problem of having a dynamic IP address. With a dynamic IP<br />
address, your IP address may change whenever you connect, which makes it difficult<br />
to connect to you.<br />
DDNS Services work as follows:<br />
1. You must register for the service at one of the listed DDNS Service providers.<br />
2. After registration, use the Service provider's normal procedure to obtain your<br />
desired Domain name.<br />
3. Enter your DDNS data on the <strong>WBR</strong>-<strong>3600</strong> <strong>Router</strong>'s DDNS screen, and enable the<br />
DDNS feature.<br />
4. The <strong>WBR</strong>-<strong>3600</strong> <strong>Router</strong> will then automatically ensure that your current IP Address<br />
is recorded at the DDNS service provider's Domain Name Server.<br />
5. From the Internet, users will be able to connect to your Virtual Servers (or DMZ PC)<br />
using your Domain name, as shown on this screen.<br />
Dynamic DNS Screen<br />
Select Advanced on the main menu, then Dynamic DNS, to see a screen like the<br />
following:<br />
Figure 49: DDNS Screen<br />
69
Data - Dynamic DNS Screen<br />
DDNS Service<br />
Use a Dynamic<br />
DNS Service<br />
Use this to enable or disable the DDNS feature as required.<br />
Service Provider Select the desired DDNS Service provider.<br />
Web Site Click this button to open a new window and connect to the Web<br />
site of the selected DDNS service provider.<br />
DDNS Data<br />
Host Name Enter the domain name allocated to you by the DDNS Service.<br />
If you have more than one name, enter the name you wish to<br />
use.<br />
<strong>User</strong> Name Enter your <strong>User</strong>name for the DDNS Service. (TZO.com uses<br />
your E-mail address.)<br />
Password Enter your current password for the DDNS Service. (TZO.com<br />
calls this a key.)<br />
DDNS Status � This message is returned by the DDNS Server.<br />
� Normally, this message should be "Update successful"<br />
� If the message indicates some problem, you need to<br />
connect to the DDNS Service provider and correct this<br />
problem.<br />
70
Options<br />
This screen allows advanced users to enter or change a number of settings. For<br />
normal operation, there is no need to use this screen or change any settings.<br />
An example Options screen is shown below.<br />
Data - Options Screen<br />
Internet<br />
Respond to<br />
Ping<br />
Figure 50: Options Screen<br />
� If checked, the <strong>Wireless</strong> <strong>Router</strong> will respond to Ping (ICMP)<br />
packets received from the Internet.<br />
� If not checked, Ping (ICMP) packets from the Internet will be<br />
ignored. Disabling this option provides a slight increase in<br />
security.<br />
MTU Size Enter a value between 1 and 1500.<br />
UPnP<br />
Note: MTU (Maximum Transmission Unit) size should only be<br />
changed if advised to do so by Technical Support.<br />
UPnP � UPnP (Universal Plug and Play) allows automatic discovery<br />
and configuration of equipment attached to your LAN. UPnP<br />
is by supported Windows ME, XP, or later.<br />
Advertisement<br />
Period<br />
Advertisement<br />
Time to Live<br />
� If Enabled, this device will be visible via UPnP.<br />
� If Disabled, this device will not be visible via UPnP.<br />
Enter the desired value, in minutes. The valid range is from 1 to<br />
1440.<br />
Enter the desired value, in hops. The valid range is from 1 to<br />
255.<br />
71
Schedule<br />
This Schedule can be used for the Firewall Rules and the URL filter.<br />
Data - Schedule Screen<br />
Schedule<br />
Figure 51: Schedule Screen<br />
Day Each day of the week can scheduled independently.<br />
Session 1<br />
Session 2<br />
Two (2) separate sessions or periods can be defined. Session<br />
2 can be left blank if not required.<br />
Start Time Enter the start using a 24 hr clock.<br />
Finish Time Enter the finish time using a 24 hr clock.<br />
Local Time<br />
Time Zone In order to display your local time correctly, you must select<br />
your "Time Zone" from the list.<br />
Adjust for Daylight<br />
Savings<br />
Time<br />
Use this NTP<br />
Server<br />
If your region uses Daylight Savings Time, you must manually<br />
check "Adjust for Daylight Savings Time" at the beginning of<br />
the adjustment period, and uncheck it at the end of the Daylight<br />
Savings period.<br />
If you prefer to use a particular NTP server as the primary NTP<br />
server, check the checkbox "Use this NTP Server" and enter<br />
the Server's IP address in the fields provided. If this setting is<br />
not enabled, the default NTP Servers are used.<br />
Current Time This displays the current time on the <strong>WBR</strong>-<strong>3600</strong> <strong>Router</strong>, at the<br />
time the page is loaded.<br />
72
Port Trigger<br />
If you use Internet applications which use non-standard connections or port numbers,<br />
you may find that they do not function correctly because they are blocked by the <strong>WBR</strong>-<br />
<strong>3600</strong> <strong>Router</strong>'s firewall. In this case, you can define the application as a "Port Trigger".<br />
The Port Trigger screen can be reached by clicking the Port Trigger on the screen.<br />
You can then define your Port Trigger. You will need detailed information about the<br />
application; this is normally available from the supplier of the application.<br />
Also, note that the terms "Incoming" and "Outgoing" on this screen refer to traffic from<br />
the client (PC) viewpoint<br />
Figure 52: Port Trigger Screen<br />
73
Data - Port Trigger Screen<br />
Port Trigger<br />
Enable Use this to Enable or Disable this Special Application as<br />
required.<br />
Name Enter a descriptive name to identify this Special Application.<br />
Outgoing<br />
Ports<br />
Incoming<br />
Ports<br />
� Type - Select the protocol (TCP or UDP) used when you<br />
send data to the remote system or service.<br />
� Start - Enter the beginning of the range of port numbers<br />
used by the application server, for data you send to it. If<br />
the application uses a single port number, enter it in both<br />
the "Start" and "Finish" fields.<br />
� Finish - Enter the end of the range of port numbers used<br />
by the application server, for data you send to it. If the<br />
application uses a single port number, enter it in both the<br />
"Start" and "Finish" fields.<br />
� Type - Select the protocol (TCP or UDP) used when you<br />
receive data from the special application or service.<br />
(Note: Some applications use different protocols for outgoing<br />
and incoming data).<br />
� Start - Enter the beginning of the range of port numbers<br />
used by the application server, for data you receive. If the<br />
application uses a single port number, enter it in both the<br />
"Start" and "Finish" fields.<br />
� Finish - Enter the end of the range of port numbers used<br />
by the application server, for data you receive.<br />
74
Port Forward<br />
This feature allows you to make Servers on your LAN accessible to Internet users.<br />
Normally, Internet users would not be able to access a server on your LAN because:<br />
� Your Server does not have a valid external IP Address.<br />
� Attempts to connect to devices on your LAN are blocked by the firewall in this<br />
device.<br />
Data - Port Forwarding Screen<br />
Port Forwarding<br />
Figure 53: Port Forwarding Screen<br />
Application Enter the desired application type.<br />
External Port Traffic from the Internet using this port number will be sent to<br />
the Server. This is normally the same as the Internal Port<br />
Number. If it is different, this device will perform a "mapping"<br />
or "translation" function, allowing the server to use a different<br />
port to the clients.<br />
Internal Port Enter the port numbers which the Server software is configured<br />
to use.<br />
Protocol Select the protocol (TCP or UDP) used by the Server.<br />
IP Address Enter the desired IP address.<br />
Enabled Use this to Enable or Disable support for this Server, as<br />
required.<br />
75
Port Range Forward<br />
This feature allows you to make Servers on your LAN accessible to Internet users.<br />
Normally, Internet users would not be able to access a server on your LAN because:<br />
Figure 54: Port Range Forwarding Screen<br />
Data - Port Range Forwarding Screen<br />
Port Range Forwarding<br />
Application Enter the desired application type.<br />
Start Enter the beginning of the range of port numbers used by the<br />
application server.<br />
End Enter the end of the range of port numbers used by the<br />
application server.<br />
Protocol Select the protocol (TCP or UDP) used by the Server.<br />
IP Address Enter the desired IP address.<br />
Enable Use this to Enable or Disable support for this Server, as<br />
required.<br />
76
QoS<br />
The QoS (Quality of Service) feature allows you specify priorities for different traffic.<br />
Lower priority traffic will be slowed down to allow greater throughput or less delay for<br />
high priority traffic.<br />
An example QoS screen is shown below.<br />
Data - QoS Screen<br />
QoS Setting<br />
Figure 55: QoS Screen<br />
QoS Setting To disable QoS (Quality of Service), keep the default setting,<br />
Disable. To enable QoS (Quality of Service), click Enable and<br />
follow these instructions.<br />
Management<br />
Type<br />
There are 2 options:<br />
� Rate Control - The QoS will be managed by the size of the<br />
bandwidth.<br />
� Priority - The QoS will be managed by the priority.<br />
Bandwidth Enter the desired value of the bandwidth.<br />
77
Category<br />
Summary<br />
� Applications:<br />
� Add a New Application (Once selected, please complete<br />
the following setups.)<br />
� Ip/Net: Enter the IP address.<br />
� Rate: Enter the desired rate value.<br />
� Priority: Select the desired option (High, Normal, Low)<br />
� Direct: Select Upstream or Downstream as required.<br />
� Self-Define<br />
� Name. Enter a name for your device.<br />
� Port Range: Enter the value for the desired port range.<br />
� Protocol: Select the desired option.<br />
� Ip/Net: Enter the IP address of your device.<br />
� Rate: Enter the desired rate value.<br />
� Priority: Select the option (High, Normal, Low) from the<br />
list.<br />
� Direct: Select Upstream or Downstream as required.<br />
Priority The general Information of this Application or IP Address.<br />
Name<br />
Information<br />
The Name of this Application or IP Address.<br />
The general Information of this Application or IP Address.<br />
78
Chapter 7<br />
Advanced Administration<br />
Overview<br />
This Chapter explains the settings available via the "Administration"<br />
section of the menu.<br />
Normally, it is not necessary to use these screens, or change any settings. These<br />
screens and settings are provided to deal with non-standard situations, or to provide<br />
additional options for advanced users.<br />
The available settings and features are:<br />
PC Database This is the list of PCs shown when you select the "DMZ PC"<br />
or a "Virtual Server". This database is maintained automatically,<br />
but you can add and delete entries for PCs which use<br />
a Fixed (Static) IP Address.<br />
Config File Backup or restore the configuration file for the <strong>WBR</strong>-<strong>3600</strong><br />
<strong>Router</strong>. This file contains all the configuration data.<br />
Logs Set system log options, include contents in log, handle<br />
system log.<br />
Email Select options for E-mail notifications, alerts and logs.<br />
Diagnostics Perform a Ping or DNS Lookup.<br />
Remote Admin Allow settings to be changed from the Internet.<br />
Routing Only required if your LAN has other <strong>Router</strong>s or Gateways.<br />
Upgrade Firmware Upgrade the Firmware (software) installed in your <strong>WBR</strong>-<br />
<strong>3600</strong> <strong>Router</strong>.<br />
79<br />
7
PC Database<br />
The PC Database is used whenever you need to select a PC (e.g. for the "DMZ" PC).<br />
� It eliminates the need to enter IP addresses.<br />
� Also, you do not need to use fixed IP addresses on your LAN.<br />
However, if you do use a fixed IP address on some devices on your LAN, you should<br />
enter details of each such device into the PC database, using the PC Database screen.<br />
PC Database Screen<br />
An example PC Database screen is shown below.<br />
Figure 56: PC Database<br />
� PCs which are "DHCP Clients" are automatically added to the database, and<br />
updated as required.<br />
� The <strong>WBR</strong>-<strong>3600</strong> <strong>Router</strong> uses the "Hardware Address" to identify each PC, not the<br />
name or IP address. The "Hardware Address" can only change if you change the<br />
PC's network card or adapter.<br />
Data - PC Database Screen<br />
Known PCs This lists all current entries. Data displayed is name (IP Address)<br />
type. The "type" indicates whether the PC is connected to the<br />
LAN.<br />
Name If adding a new PC to the list, enter its name here. It is best if this<br />
matches the PC's "hostname".<br />
IP Address Enter the IP Address of the PC. The PC will be sent a "ping" to<br />
determine its hardware address. If the PC is not available (not<br />
connected, or not powered On) you will not be able to add it.<br />
Buttons<br />
Refresh Update the data on screen.<br />
80
Config File<br />
This feature allows you to download the current settings from the <strong>WBR</strong>-<strong>3600</strong> <strong>Router</strong>,<br />
and save them to a file on your PC.<br />
You can restore a previously-downloaded configuration file to the <strong>WBR</strong>-<strong>3600</strong> <strong>Router</strong>,<br />
by uploading it to the <strong>WBR</strong>-<strong>3600</strong> <strong>Router</strong>.<br />
This screen also allows you to set the <strong>WBR</strong>-<strong>3600</strong> <strong>Router</strong> back to its factory default<br />
configuration. Any existing settings will be deleted.<br />
An example Config File screen is shown below.<br />
Data - Config File Screen<br />
Figure 57: Config File Screen<br />
Backup Config Use this to download a copy of the current configuration, and<br />
store the file on your PC. Click Backup to start the download.<br />
Restore Config This allows you to restore a previously-saved configuration file<br />
back to the <strong>WBR</strong>-<strong>3600</strong> <strong>Router</strong>.<br />
Click Browse to select the configuration file, then click Restore to<br />
upload the configuration file.<br />
WARNING!<br />
Uploading a configuration file will destroy (overwrite) ALL of the<br />
existing settings.<br />
Default Config Clicking the Factory Defaults button will reset the <strong>WBR</strong>-<strong>3600</strong><br />
<strong>Router</strong> to its factory default settings.<br />
WARNING!<br />
This will delete ALL of the existing settings.<br />
81
Logs<br />
The Logs record various types of activity on the <strong>WBR</strong>-<strong>3600</strong> <strong>Router</strong>. This data is useful<br />
for troubleshooting, but enabling all logs will generate a large amount of data and<br />
adversely affect performance.<br />
Since only a limited amount of log data can be stored in the <strong>WBR</strong>-<strong>3600</strong> <strong>Router</strong>, log<br />
data can also be E-mailed to your PC. Use the E-mail screen to configure this feature.<br />
Data - Logs Screen<br />
Logs<br />
Figure 58: Logs Screen<br />
Current Time The current time on the <strong>WBR</strong>-<strong>3600</strong> <strong>Router</strong> is displayed.<br />
Log Data Current log data is displayed in this panel.<br />
Buttons There are three (3) buttons<br />
� Refresh - Update the log data.<br />
� Clear Log - Clear the log, and restart it. This makes<br />
new messages easier to read.<br />
� Send Log - E-mail the log immediately. This is only<br />
functional if the E-mail screen has been configured.<br />
82
Include in Log<br />
Include (Checkboxes)<br />
Syslog<br />
Use these checkboxes to determine which events are<br />
included in the log. Checking all options will increase the<br />
size of the log, so it is good practice to disable any events<br />
which are not really required.<br />
� Attempted access to blocked sites - If checked,<br />
attempted Internet accesses which were blocked are<br />
logged.<br />
� Connections to the Web-based interface of this<br />
<strong>Router</strong> - If checked, this will log connections TO this<br />
<strong>Router</strong>, rather than through this <strong>Router</strong> to the Internet.<br />
� <strong>Router</strong> operation - If checked, other <strong>Router</strong> operations<br />
(not covered by the selections above) will be logged.<br />
� Known DoS attacks and Port Scans - If checked,<br />
Denial of Service attacks, as well as port scans, will be<br />
logged.<br />
Disable Data is not sent to a Syslog Server.<br />
Broadcast on LAN The Syslog data is broadcast, rather than sent to a specific<br />
Syslog server. Use this if your Syslog Server does not have<br />
a fixed IP address.<br />
Send to this Syslog<br />
Server<br />
If your Syslog server has a fixed IP address, select this<br />
option, and enter the IP address of your Syslog server.<br />
83
E-mail<br />
This screen allows you to E-mail Logs and Alerts. A sample screen is shown below.<br />
Data - E-mail Screen<br />
E-Mail Notification<br />
Turn E-mail<br />
Notification on<br />
Send to this Email<br />
address<br />
Outgoing<br />
(SMTP) Mail<br />
Server<br />
My SMTP Mail<br />
Server requires<br />
authentication<br />
Figure 59: E-mail Screen<br />
Check this box to enable this feature. If enabled, the E-mail<br />
address information (below) must be provided.<br />
Enter the E-mail address the Log is to be sent to. The E-mail<br />
will also show this address as the Sender's address.<br />
Enter the address or IP address of the SMTP (Simple Mail<br />
Transport Protocol) Server you use for outgoing E-mail.<br />
To stop spanners, many SMTP mail servers require you to log<br />
in to send mail. In this case, enable this checkbox, and enter<br />
the login information (<strong>User</strong> name and Password) in the fields<br />
below.<br />
<strong>User</strong> Name If you have enabled "My SMTP Mail Server requires authentication"<br />
above, enter the <strong>User</strong> Name required to login to your<br />
SMTP Server.<br />
Password If you have enabled "My SMTP Mail Server requires authentication"<br />
above, enter the password required to login to your SMTP<br />
Server.<br />
84
E-mail Alerts<br />
Send E-mail<br />
alerts immediately<br />
E-mail Logs<br />
You can choose to have alerts E-mailed to you, by checking the<br />
desired checkboxes. The <strong>WBR</strong>-<strong>3600</strong> <strong>Router</strong> can send an<br />
immediate alert when it detects a significant security incident<br />
such as<br />
� A known hacker attack is directed at your IP address<br />
� A computer on the Internet scans your IP address for open<br />
ports<br />
� Someone on your LAN (Local Area Network) tries to visit a<br />
blocked site.<br />
Send Logs Select the desired option for sending the log by E-mail.<br />
� Never (default) - This feature is disabled; Logs are not<br />
sent.<br />
� When log is full - The time is not fixed. The log will be<br />
sent when the log is full, which will depend on the volume<br />
of traffic.<br />
� Hourly, Daily, Weekly... - The log is sent on the interval<br />
specified.<br />
Note:<br />
� If Daily is selected, the log is sent at the time specified.<br />
Select the time of day you wish the E-mail to be sent.<br />
� If Weekly is selected, the log is sent once per week, on<br />
the specified day, at the specified time.<br />
Select the day and the time of day you wish the E-mail<br />
to be sent.<br />
If the log is full before the time specified to send it, it will be<br />
sent regardless of the day and time specified.<br />
85
Diagnostics<br />
This screen allows you to perform a "Ping" or a "DNS lookup". These activities can be<br />
useful in solving network problems.<br />
An example Network Diagnostics screen is shown below.<br />
Data - Network Diagnostics Screen<br />
Ping<br />
Ping this<br />
IP Address<br />
Figure 60: Network Diagnostics Screen<br />
Enter the IP address you wish to ping. The IP address can be<br />
on your LAN, or on the Internet. Note that if the address is on<br />
the Internet, and no connection currently exists, you could get a<br />
"Timeout" error. In that case, wait a few seconds and try again.<br />
Ping Button After entering the IP address, click this button to start the "Ping"<br />
procedure. The results will be displayed in the Ping Results<br />
pane.<br />
DNS Lookup<br />
Internet name Enter the Domain name or URL for which you want a DNS<br />
(Domain Name Server) lookup. Note that if the address in on<br />
the Internet, and no connection currently exists, you could get a<br />
"Timeout" error. In that case, wait a few seconds and try again.<br />
Lookup Button After entering the Domain name/URL, click this button to start<br />
the "DNS Lookup" procedure.<br />
Routing<br />
Display Click this button to display the internal routing table. This information<br />
can be used by Technical Support and other staff who<br />
understand Routing Tables.<br />
86
Remote Administration<br />
If enabled, this feature allows you to manage the <strong>WBR</strong>-<strong>3600</strong> <strong>ADSL2+</strong> <strong>Router</strong> via the<br />
Internet.<br />
Figure 61: Remote Administration Screen<br />
Data - Remote Administration Screen<br />
Remote Administration<br />
Enable Remote<br />
Management<br />
Current<br />
IP Address<br />
Check to allow administration/management via the Internet. (To<br />
connect, see below).<br />
If Disabled, this device will ignore Administration connection<br />
attempts from the Internet.<br />
This is the current address you will use when accessing this<br />
device from the Internet. To connect, see details and an example<br />
below.<br />
Port Number Enter a port number between 1 and 65535. The default for<br />
HTTP (Web) connections is port 80, but using port 80 will<br />
prevent the use of a Web "Virtual Server" on your LAN. So<br />
using a different port number is recommended. The default<br />
value is 8080.<br />
Access Permission<br />
Allow Remote<br />
Access<br />
The port number must be specified in your Browser when you<br />
connect. See the following section for details.<br />
Select the desired option.<br />
� Everyone - allow access by everyone on the Internet.<br />
� Only This Computer - allow access by only one IP address.<br />
Enter the desired IP address.<br />
� IP Address Range - allow access from a range of IP<br />
addresses on the Internet. Enter a beginning and ending IP<br />
87
address to define the allowed range.<br />
For security, you should restrict access to as few external IP<br />
addresses as practical.<br />
To connect from a remote PC via the Internet<br />
1. Ensure your Internet connection is established, and start your Web Browser.<br />
2. In the "Address" bar, enter "HTTP://" followed by the Internet IP Address of the<br />
<strong>WBR</strong>-<strong>3600</strong> <strong>Router</strong>. If the port number is not 80, the port number is also required.<br />
(After the IP Address, enter ":" followed by the port number.)<br />
e.g.<br />
HTTP://123.123.123.123:8080<br />
This example assumes the WAN IP Address is 123.123.123.123, and the port<br />
number is 8080.<br />
3. You will then be prompted for the login name and password for this device.<br />
88
Routing<br />
Overview<br />
� If you don't have other <strong>Router</strong>s or Gateways on your LAN, you can ignore the<br />
"Routing" page completely.<br />
� If the <strong>WBR</strong>-<strong>3600</strong> <strong>Router</strong> is only acting as a Gateway for the local LAN segment,<br />
ignore the "Routing" page even if your LAN has other <strong>Router</strong>s.<br />
� If your LAN has a standard <strong>Router</strong> (e.g. Cisco) on your LAN, and the <strong>WBR</strong>-<strong>3600</strong><br />
<strong>Router</strong> is to act as a Gateway for all LAN segments, enable RIP (Routing Information<br />
Protocol) and ignore the Static Routing table.<br />
� If your LAN has other Gateways and <strong>Router</strong>s, and you wish to control which LAN<br />
segments use each Gateway, do NOT enable RIP (Routing Information Protocol).<br />
Configure the Static Routing table instead. (You also need to configure the other<br />
<strong>Router</strong>s.)<br />
� If using Windows 2000 Data center Server as a software <strong>Router</strong>, enable RIP on<br />
the <strong>WBR</strong>-<strong>3600</strong> <strong>Router</strong>, and ensure the following Windows 2000 settings are correct:<br />
� Open Routing and Remote Access<br />
� In the console tree, select Routing and Remote Access , [server name], IP<br />
Routing, RIP<br />
� In the "Details" pane, right-click the interface you want to configure for RIP<br />
version 2, and then click "Properties".<br />
� On the "General" tab, set Outgoing packet protocol to "RIP version 2 broadcast",<br />
and Incoming packet protocol to "RIP version 1 and 2".<br />
Routing Screen<br />
The routing table is accessed by the Routing link on the Administration menu.<br />
Using this Screen<br />
Generally, you will use either RIP (Routing Information Protocol) OR the Static Routing<br />
Table, as explained above, although is it possible to use both methods simultaneously.<br />
Static Routing Table<br />
� If RIP is not used, an entry in the routing table is required for each LAN segment<br />
on your Network, other than the segment to which this device is attached.<br />
� The other <strong>Router</strong>s must also be configured. See Configuring Other <strong>Router</strong>s on<br />
your LAN later in this chapter for further details and an example.<br />
89
Data - Routing Screen<br />
RIP<br />
Figure 62: Routing Screen<br />
RIP Direction Select the desired RIP Direction.<br />
RIP Version Select RIP-1/RIP-2B/RIP-2M from the drop down list box.<br />
Static Routing<br />
Static Routing<br />
Table Entries<br />
Buttons<br />
This list shows all entries in the Routing Table.<br />
� This area shows details of the selected item in the list.<br />
� Change any the properties as required, then click the "Edit"<br />
button to save the changes to the selected entry.<br />
Add Add a new entry to the Static Routing table, using the data<br />
shown in the "Properties" area on screen. The entry selected in<br />
the list is ignored, and has no effect.<br />
Edit Update the current Static Routing Table entry, using the data<br />
shown in the table area on screen.<br />
Delete Delete the current Static Routing Table entry.<br />
Save Save the RIP setting. This has no effect on the Static Routing<br />
Table.<br />
90
Configuring Other <strong>Router</strong>s on your LAN<br />
It is essential that all IP packets for devices not on the local LAN be passed to the<br />
<strong>WBR</strong>-<strong>3600</strong> <strong>Router</strong>, so that they can be forwarded to the external LAN, WAN, or Internet.<br />
To achieve this, the local LAN must be configured to use the <strong>WBR</strong>-<strong>3600</strong> <strong>Router</strong><br />
as the Default Route or Default Gateway.<br />
Local <strong>Router</strong><br />
The local router is the <strong>Router</strong> installed on the same LAN segment as the <strong>WBR</strong>-<strong>3600</strong><br />
<strong>Router</strong>. This router requires that the Default Route is the <strong>WBR</strong>-<strong>3600</strong> <strong>Router</strong> itself.<br />
Typically, routers have a special entry for the Default Route. It should be configured as<br />
follows.<br />
Destination IP Address Normally 0.0.0.0, but check your router documentation.<br />
Network Mask Normally 0.0.0.0, but check your router documentation.<br />
Gateway IP Address The IP Address of the <strong>WBR</strong>-<strong>3600</strong><br />
Metric 1<br />
Other <strong>Router</strong>s on the Local LAN<br />
Other routers on the local LAN must use the <strong>WBR</strong>-<strong>3600</strong> <strong>Router</strong>'s Local <strong>Router</strong> as the<br />
Default Route. The entries will be the same as the <strong>WBR</strong>-<strong>3600</strong> <strong>Router</strong>'s local router,<br />
with the exception of the Gateway IP Address.<br />
� For a router with a direct connection to the <strong>WBR</strong>-<strong>3600</strong> <strong>Router</strong>'s local <strong>Router</strong>, the<br />
Gateway IP Address is the address of the <strong>WBR</strong>-<strong>3600</strong> <strong>Router</strong>'s local router.<br />
� For routers which must forward packets to another router before reaching the<br />
<strong>WBR</strong>-<strong>3600</strong> <strong>Router</strong>'s local router, the Gateway IP Address is the address of the intermediate<br />
router.<br />
91
Static Routing - Example<br />
For the <strong>WBR</strong>-<strong>3600</strong>'s Routing Table<br />
Figure 63: Routing Example<br />
For the LAN shown above, with 2 routers and 3 LAN segments, the <strong>WBR</strong>-<strong>3600</strong> <strong>Router</strong><br />
requires 2 entries as follows.<br />
Entry 1 (Segment 1)<br />
Destination IP Address 192.168.1.0<br />
Network Mask 255.255.255.0 (Standard Class C)<br />
Gateway IP Address 192.168.0.100 (<strong>WBR</strong>-<strong>3600</strong> <strong>Router</strong>'s local<br />
<strong>Router</strong>)<br />
Metric 2<br />
Entry 2 (Segment 2)<br />
Destination IP Address 192.168.2.0<br />
Network Mask 255.255.255.0 (Standard Class C)<br />
Gateway IP Address 192.168.0.100<br />
Metric 3<br />
For <strong>Router</strong> A's Default Route<br />
Destination IP Address 0.0.0.0<br />
Network Mask 0.0.0.0<br />
Gateway IP Address 192.168.0.1 (<strong>WBR</strong>-<strong>3600</strong>'s IP Address)<br />
For <strong>Router</strong> B's Default Route<br />
Destination IP Address 0.0.0.0<br />
Network Mask 0.0.0.0<br />
Gateway IP Address 192.168.1.80 (<strong>WBR</strong>-<strong>3600</strong>'s local router)<br />
92
Upgrade Firmware<br />
The firmware (software) in the <strong>WBR</strong>-<strong>3600</strong> <strong>Router</strong> can be upgraded using your Web<br />
Browser.<br />
You must first download the upgrade file, then select Upgrade Firmware on the Administration<br />
menu. You will see a screen like the following.<br />
To perform the Firmware Upgrade:<br />
Figure 64: <strong>Router</strong> Upgrade Screen<br />
1. Click the Browse button and navigate to the location of the upgrade file.<br />
2. Select the upgrade file. Its name will appear in the Upgrade File field.<br />
3. Click the Upload button to commence the firmware upgrade.<br />
The <strong>WBR</strong>-<strong>3600</strong> <strong>Router</strong> is unavailable during the upgrade process,<br />
and must restart when the upgrade is completed. Any connections<br />
to or through the <strong>WBR</strong>-<strong>3600</strong> <strong>Router</strong> will be lost.<br />
93
Chapter 8<br />
Modem Mode<br />
Overview<br />
This Chapter explains configuration and operation when in "Modem" or<br />
"Bridge" mode”.<br />
There are two modes available on the Mode screen.<br />
� <strong>Router</strong> - Both the <strong>ADSL2+</strong> Modem and the <strong>Router</strong> features are operational. In this<br />
mode, this device can provide shared Internet Access to all your LAN users. Also,<br />
by default, it acts a DHCP Server, providing an IP address and related information<br />
to all <strong>Wireless</strong> and LAN users.<br />
� Modem - Only the <strong>ADSL2+</strong> Modem component is operational. All <strong>Router</strong> features<br />
are disabled. This device is "transparent" - it does not perform any operations or<br />
make any changes to the network traffic passing through it. You need to have a<br />
DHCP Server on your LAN to provide IP addresses to the <strong>Wireless</strong> clients using<br />
this Access Point.<br />
This Chapter describes operation while in Modem Mode, also called Bridge Mode.<br />
Management Connections<br />
When this device restarts in Modem mode, the IP address does not change, but the<br />
DHCP server is disabled. However, your PC will usually retain the IP address provided<br />
by the DHCP Server, so the connection will be automatically re-established. You then<br />
need to ensure that the IP address of this modem is suitable for your LAN.<br />
� You need to have a DHCP Server on your LAN to provide IP addresses to the<br />
<strong>Wireless</strong> clients using this Access Point.<br />
� This Modem/AP must be a valid device on your LAN, to allow management connections.<br />
You must assign a (fixed) IP address which is within the address range<br />
used on your LAN, but not within the address range used by your DHCP server.<br />
When you connect in future, just connect normally, using the IP address you assigned.<br />
1. Start your WEB browser.<br />
2. In the Address box, enter "HTTP://" and the current IP Address of the <strong>WBR</strong>-<strong>3600</strong><br />
Modem, as in this example, which uses the <strong>WBR</strong>-<strong>3600</strong> Modem's default IP Address:<br />
HTTP://192.168.0.1<br />
3. When prompted for the <strong>User</strong> name and Password, enter admin for the user name,<br />
and the current password, as set on the password screen. (The password is the<br />
same regardless of the mode.)<br />
94<br />
8
Home Screen<br />
If in Modem mode, the home screen will look like the example below.<br />
Figure 65: Home Screen - Modem Mode<br />
Note that the menu has changed, many of the options in <strong>Router</strong> mode are not available.<br />
The screens available are:<br />
� Mode - change back to <strong>Router</strong> mode, if desired.<br />
� LAN - set IP address, mask and gateway. This is the same as in <strong>Router</strong> mode,<br />
except that the DHCP server is not available while in Modem mode.<br />
� <strong>Wireless</strong> - this screen, and related sub-screens, is the same as in <strong>Router</strong> mode.<br />
� Password - this screen is the same as in <strong>Router</strong> mode.<br />
� Upgrade Firmware - this screen is the same as in <strong>Router</strong> mode.<br />
� Status - displays current settings and status. See the following section for details.<br />
95
Mode Screen<br />
This screen is change back to <strong>Router</strong> mode, if desired.<br />
Data - Mode Screen<br />
Device<br />
Name<br />
Device<br />
Mode<br />
Operation<br />
Figure 66: Mode Screen<br />
This field displays the current name of this device.<br />
Select the desired device mode for the router:<br />
� <strong>Router</strong> - Both the <strong>ADSL2+</strong> Modem and the <strong>Router</strong> features are<br />
operational. In this mode, this device can provide shared Internet<br />
Access to all your LAN users. Also, by default, it acts a<br />
DHCP Server, providing an IP address and related information<br />
to all <strong>Wireless</strong> and LAN users.<br />
� Modem - Only the <strong>ADSL2+</strong> Modem component is operational.<br />
All <strong>Router</strong> features are disabled. This device is "transparent" - it<br />
does not perform any operations or make any changes to the<br />
network traffic passing through it. You need to have a DHCP<br />
Server on your LAN to provide IP addresses to the <strong>Wireless</strong><br />
clients using this Access Point.<br />
This mode is also called Bridge Mode.<br />
After changing the mode, this device will restart, which will take a<br />
few seconds. The menu will also change, depending on the mode<br />
you are in.<br />
Operation is automatic and transparent.<br />
� <strong>Wireless</strong> clients can connect to the Access Point if they have the correct SSID and<br />
security, but they must obtain an IP address from the DHCP Server on your LAN.<br />
� The modem will act like any other <strong>ADSL2+</strong> modem. No routing will be performed,<br />
and no client login will be done. If a client login is required, it must be performed by<br />
your <strong>Router</strong>/Gateway or by software on your PC.<br />
96
Status Screen<br />
In Modem mode, the Status screen looks like the example below.<br />
Data - Status Screen (Bridge Mode)<br />
ADSL<br />
Figure 67: Status Screen - Bridge Mode<br />
Modem Status This indicates the status of the <strong>ADSL2+</strong> modem component.<br />
DownStream<br />
Connection Speed<br />
UpStream<br />
Connection Speed<br />
VC 1 Status<br />
VC 2 Status<br />
VC 3 Status<br />
VC 4 Status<br />
Displays the speed for the DownStream Connection.<br />
If connected, displays the speed for the Up Stream (upload)<br />
ADSL Connection.<br />
For each VC (Virtual Circuit), the current status is displayed.<br />
This will be either "Enabled" or "Disabled".<br />
ADSL Details Click this button to open a sub-window and view the details<br />
of each VC (Virtual Circuit).<br />
97
LAN<br />
IP Address The IP Address of the <strong>WBR</strong>-<strong>3600</strong> <strong>Router</strong>.<br />
Network Mask The Network Mask (Subnet Mask) for the IP Address<br />
above.<br />
MAC Address This shows the MAC Address for the <strong>WBR</strong>-<strong>3600</strong> <strong>Router</strong>, as<br />
seen on the LAN interface.<br />
<strong>Wireless</strong><br />
Name (SSID) If using an ESS (Extended Service Set, with multiple access<br />
points) this ID is called an ESSID (Extended Service Set<br />
Identifier).<br />
Region The current region, as set on the <strong>Wireless</strong> screen.<br />
Channel This shows the Channel currently used, as set on the <strong>Wireless</strong><br />
screen.<br />
<strong>Wireless</strong> AP This indicates whether or not the <strong>Wireless</strong> Access Point<br />
feature is enabled.<br />
Broadcast Name This indicates whether or not the SSID is Broadcast. This<br />
setting is on the <strong>Wireless</strong> screen.<br />
System<br />
Device Name The current name of the <strong>Router</strong>. This name is also the<br />
"hostname" for users with an "@Home" type connection.<br />
Firmware Version The version of the current firmware installed.<br />
Buttons<br />
ADSL Details View the details of each VC (Virtual Circuit).<br />
Attached Devices This will open a sub-window, showing all LAN and <strong>Wireless</strong><br />
devices currently on the network.<br />
Refresh Screen Update the data displayed on screen.<br />
98
Appendix A<br />
Troubleshooting<br />
Overview<br />
This Appendix covers the most likely problems and their solutions.<br />
This chapter covers some common problems that may be encountered while using the<br />
<strong>WBR</strong>-<strong>3600</strong> <strong>Router</strong> and some possible solutions to them. If you follow the suggested<br />
steps and the <strong>WBR</strong>-<strong>3600</strong> <strong>Router</strong> still does not function properly, contact your dealer<br />
for further advice.<br />
General Problems<br />
Problem 1: Can't connect to the <strong>WBR</strong>-<strong>3600</strong> <strong>Router</strong> to configure it.<br />
Solution 1: Check the following:<br />
Internet Access<br />
� The <strong>WBR</strong>-<strong>3600</strong> <strong>Router</strong> is properly installed, LAN connections are<br />
OK, and it is powered ON.<br />
� Ensure that your PC and the <strong>WBR</strong>-<strong>3600</strong> <strong>Router</strong> are on the same<br />
network segment. (If you don't have a router, this must be the<br />
case.)<br />
� If your PC is set to "Obtain an IP Address automatically" (DHCP<br />
client), restart it.<br />
� If your PC uses a Fixed (Static) IP address, ensure that it is using<br />
an IP Address within the range 192.168.0.2 to 192.168.0.254 and<br />
thus compatible with the <strong>WBR</strong>-<strong>3600</strong> <strong>Router</strong>'s default IP Address of<br />
192.168.0.1.<br />
Also, the Network Mask should be set to 255.255.255.0 to match<br />
the <strong>WBR</strong>-<strong>3600</strong> <strong>Router</strong>.<br />
In Windows, you can check these settings by using Control Panel-<br />
Network to check the Properties for the TCP/IP protocol.<br />
Problem 1: When I enter a URL or IP address I get a time out error.<br />
Solution 1: A number of things could be causing this. Try the following troubleshooting<br />
steps.<br />
� Check if other PCs work. If they do, ensure that your PCs IP settings<br />
are correct. If using a Fixed (Static) IP Address, check the<br />
Network Mask, Default gateway and DNS as well as the IP Address.<br />
� If the PCs are configured correctly, but still not working, check the<br />
<strong>WBR</strong>-<strong>3600</strong> <strong>Router</strong>. Ensure that it is connected and ON. Connect to<br />
it and check its settings. (If you can't connect to it, check the LAN<br />
and power connections.)<br />
� Check the <strong>WBR</strong>-<strong>3600</strong> <strong>Router</strong>'s status screen to see if it is working<br />
99<br />
A
correctly.<br />
Problem 2: Some applications do not run properly when using the <strong>WBR</strong>-<strong>3600</strong><br />
<strong>Router</strong><br />
Solution 2: The <strong>WBR</strong>-<strong>3600</strong> <strong>Router</strong> processes the data passing through it, so it is<br />
not transparent.<br />
<strong>Wireless</strong> Access<br />
For incoming connections, you must use the Virtual Server or Firewall<br />
Rules to specify the PC which will receive the incoming traffic.<br />
You can also use the DMZ function. This should work with almost every<br />
application, but:<br />
� It is a security risk, since the firewall is disabled.<br />
� Only one (1) PC can use this feature.<br />
Problem 1: My PC can't locate the <strong>Wireless</strong> Access Point.<br />
Solution 1: Check the following.<br />
� Your PC is set to Infrastructure Mode. (Access Points are always in<br />
Infrastructure Mode)<br />
� The SSID on your PC and the <strong>Wireless</strong> Access Point are the same.<br />
Remember that the SSID is case-sensitive. So, for example<br />
"Workgroup" does NOT match "workgroup".<br />
� Both your PC and the <strong>WBR</strong>-<strong>3600</strong> <strong>Router</strong> must have the same<br />
setting for WEP. The default setting for the <strong>WBR</strong>-<strong>3600</strong> <strong>Router</strong> is<br />
disabled, so your wireless station should also have WEP disabled.<br />
� If WEP is enabled on the <strong>WBR</strong>-<strong>3600</strong> <strong>Router</strong>, your PC must have<br />
WEP enabled, and the key must match.<br />
� If the <strong>WBR</strong>-<strong>3600</strong> <strong>Router</strong>'s <strong>Wireless</strong> screen is set to Allow Trusted<br />
PCs only, then each of your <strong>Wireless</strong> stations must have been designated<br />
as "Trusted", or the <strong>Wireless</strong> station will be blocked.<br />
� To see if radio interference is causing a problem, see if connection<br />
is possible when close to the <strong>WBR</strong>-<strong>3600</strong> <strong>Router</strong>. Remember that<br />
the connection range can be as little as 100 feet in poor environments.<br />
Problem 2: <strong>Wireless</strong> connection speed is very slow.<br />
Solution 2: The wireless system will connect at the highest possible speed, depending<br />
on the distance and the environment. To obtain the highest<br />
possible connection speed, you can experiment with the following:<br />
� <strong>WBR</strong>-<strong>3600</strong> <strong>Router</strong> location.<br />
Try adjusting the location and orientation of the <strong>WBR</strong>-<strong>3600</strong> <strong>Router</strong>.<br />
� <strong>Wireless</strong> Channel<br />
If interference is the problem, changing to another channel may<br />
show a marked improvement.<br />
� Radio Interference<br />
Other devices may be causing interference. You can experiment by<br />
switching other devices Off, and see if this helps. Any "noisy" devices<br />
should be shielded or relocated.<br />
� RF Shielding<br />
Your environment may tend to block transmission between the wire-<br />
100
less stations. This will mean high access speed is only possible<br />
when close to the <strong>WBR</strong>-<strong>3600</strong> <strong>Router</strong>.<br />
101
Appendix B<br />
About <strong>Wireless</strong> LANs<br />
Modes<br />
This Appendix provides some background information about using<br />
<strong>Wireless</strong> LANs (WLANs).<br />
<strong>Wireless</strong> LANs can work in either of two (2) modes:<br />
� Ad-hoc<br />
� Infrastructure<br />
Ad-hoc Mode<br />
Ad-hoc mode does not require an Access Point or a wired (Ethernet) LAN. <strong>Wireless</strong><br />
Stations (e.g. notebook PCs with wireless cards) communicate directly with<br />
each other.<br />
Infrastructure Mode<br />
In Infrastructure Mode, one or more Access Points are used to connect <strong>Wireless</strong><br />
Stations (e.g. Notebook PCs with wireless cards) to a wired (Ethernet) LAN. The<br />
<strong>Wireless</strong> Stations can then access all LAN resources.<br />
BSS/ESS<br />
BSS<br />
Access Points can only function in "Infrastructure" mode, and can<br />
communicate only with <strong>Wireless</strong> Stations which are set to "Infrastructure"<br />
mode.<br />
A group of <strong>Wireless</strong> Stations and a single Access Point, all using the same ID (SSID),<br />
form a Basic Service Set (BSS).<br />
Using the same SSID is essential. Devices with different SSIDs are unable to communicate<br />
with each other.<br />
ESS<br />
A group of <strong>Wireless</strong> Stations, and multiple Access Points, all using the same ID<br />
(ESSID), form an Extended Service Set (ESS).<br />
Different Access Points within an ESS can use different Channels. In fact, to reduce<br />
interference, it is recommended that adjacent Access Points SHOULD use different<br />
channels.<br />
As <strong>Wireless</strong> Stations are physically moved through the area covered by an ESS, they<br />
will automatically change to the Access Point which has the least interference or best<br />
performance. This capability is called Roaming. (Access Points do not have or require<br />
Roaming capabilities.)<br />
102<br />
B
Channels<br />
The <strong>Wireless</strong> Channel sets the radio frequency used for communication.<br />
� Access Points use a fixed Channel. You can select the Channel used. This allows<br />
you to choose a Channel which provides the least interference and best performance.<br />
In the USA and Canada, 11 channels are available. If using multiple<br />
Access Points, it is better if adjacent Access Points use different Channels to reduce<br />
interference.<br />
� In "Infrastructure" mode, <strong>Wireless</strong> Stations normally scan all Channels, looking for<br />
an Access Point. If more than one Access Point can be used, the one with the<br />
strongest signal is used. (This can only happen within an ESS.)<br />
� If using "Ad-hoc" mode (no Access Point), all <strong>Wireless</strong> stations should be set to<br />
use the same Channel. However, most <strong>Wireless</strong> stations will still scan all Channels<br />
to see if there is an existing "Ad-hoc" group they can join.<br />
WEP<br />
WEP (Wired Equivalent Privacy) is a standard for encrypting data before it is transmitted.<br />
This is desirable because it is impossible to prevent snoopers from receiving any data<br />
which is transmitted by your <strong>Wireless</strong> Stations. But if the data is encrypted, then it is<br />
meaningless unless the receiver can decrypt it.<br />
If WEP is used, the <strong>Wireless</strong> Stations and the Access Point must have the same<br />
settings for each of the following:<br />
WEP Off, 64 Bit, 128 Bit<br />
Key For 64 Bit encryption, the Key value must match.<br />
For 128 Bit encryption, the Key value must match<br />
WEP Authentication Open System or Shared Key.<br />
WPA-PSK<br />
WPA-PSK is another standard for encrypting data before it is transmitted. This is a<br />
later standard than WEP (Wired Equivalent Privacy), and provides greater security for<br />
your data. Data is encrypted using a 256Bit key which is automatically generated and<br />
changed often.<br />
If all your <strong>Wireless</strong> stations support WPA-PSK, you should use this instead of WEP.<br />
If WPA-PSK is used, the <strong>Wireless</strong> Stations and the Access Point must have the<br />
same settings for each of the following:<br />
WPA PSK<br />
(Pre-shared Key)<br />
Enter the same value on every station and the AP. The PSK<br />
must be from 8 to 63 characters in length. The 256Bit key<br />
used for the actual encryption is derived from this key.<br />
Encryption The same encryption method must be used. The most common<br />
encryption method is TKIP. Another widely-supported<br />
method is AES.<br />
103
WPA-802.1x<br />
This version of WPA requires a Radius Server on your LAN to provide the client authentication<br />
according to the 802.1x standard. Data transmissions are encrypted using<br />
the WPA standard.<br />
If this option is used:<br />
� The Access Point must have a "client login" on the Radius Server.<br />
� Each user must have a "user login" on the Radius Server.<br />
� Each user's wireless client must support 802.1x and provide the login data when<br />
required.<br />
All data transmission is encrypted using the WPA standard. Keys are automatically<br />
generated, so no key input is required.<br />
WPA2-802.1x<br />
This version of WPA2 requires a Radius Server on your LAN to provide the client<br />
authentication according to the 802.1x standard. Data transmissions are encrypted<br />
using the WPA2 standard.<br />
If this option is used:<br />
� The Access Point must have a "client login" on the Radius Server.<br />
� Each user must have a "user login" on the Radius Server.<br />
� Each user's wireless client must support 802.1x and provide the login data when<br />
required.<br />
All data transmission is encrypted using the WPA2 standard. Keys are automatically<br />
generated, so no key input is required.<br />
<strong>Wireless</strong> LAN Configuration<br />
To allow <strong>Wireless</strong> Stations to use the Access Point, the <strong>Wireless</strong> Stations and the<br />
Access Point must use the same settings, as follows:<br />
Mode On client <strong>Wireless</strong> Stations, the mode must be set to "Infrastructure".<br />
(The Access Point is always in "Infrastructure" mode.)<br />
SSID (ESSID) <strong>Wireless</strong> Stations should use the same SSID (ESSID) as the<br />
Access Point they wish to connect to. Alternatively, the SSID can<br />
be set to "any" or null (blank) to allow connection to any Access<br />
Point.<br />
<strong>Wireless</strong><br />
Security<br />
The <strong>Wireless</strong> Stations and the Access Point must use the same<br />
settings for <strong>Wireless</strong> security. (None, WEP, WPA-PSK, WPA-<br />
802.1x, WPA2-802.1x).<br />
104
Appendix C<br />
Specifications<br />
Multi-Function <strong>11g</strong> <strong>Wireless</strong> <strong>ADSL2+</strong> <strong>Router</strong><br />
Model <strong>WBR</strong>-<strong>3600</strong> <strong>11g</strong> <strong>Wireless</strong> <strong>ADSL2+</strong> <strong>Router</strong><br />
ADSL Interface MultiMode, T1.413, G.DMT, G.lite, ADSL2, <strong>ADSL2+</strong><br />
Operating Temperature<br />
0� C to 40� C<br />
Storage Temperature -10� C to 70� C<br />
Network Protocol: TCP/IP<br />
Network Interface: 4 * 10/100BaseT (RJ45) LAN connection<br />
LEDs 8<br />
1 * RJ11 for ADSL line<br />
Power Adapter 12VDC 1A External<br />
<strong>Wireless</strong> Interface<br />
Standards IEEE802.11b, IEEE802.<strong>11g</strong><br />
Frequency 2.4 to 2.4835GHz (Industrial Scientific Medical Band )<br />
Channels Maximum 13 Channels, depending on regulatory authorities<br />
Modulation CCK, DQPSK, DBPSK, OFDM/CCK<br />
Data Rate Up to 54 Mbps (802.<strong>11g</strong>)<br />
Security WEP, WPA-PSK, WPA2-PSK, WPA-802.1x, WPA2-802.1x<br />
Output Power 13dBm (typical)<br />
Receiver Sensitivity -80dBm Min.<br />
105<br />
C