Download Manual For Panasonic PT-L785U - MyProjectorLamps.com
Download Manual For Panasonic PT-L785U - MyProjectorLamps.com
Download Manual For Panasonic PT-L785U - MyProjectorLamps.com

You also want an ePaper? Increase the reach of your titles
YUMPU automatically turns print PDFs into web optimized ePapers that Google loves.
RGB<br />
ALL<br />
VIDEO<br />
SET<br />
R<br />
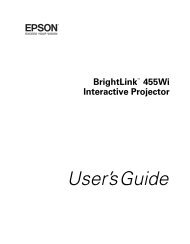
LCD Projector Commercial Use<br />
Operating Instructions<br />
Model No. <strong>PT</strong>-<strong>L785U</strong><br />
ENGLISH<br />
A<br />
Before operating this product, please read the instructions carefully and save this<br />
manual for future use.<br />
TQBJ 0150
Dear <strong>Panasonic</strong> Customer:<br />
This instruction booklet provides all the necessary operating information that you<br />
might require. We hope it will help you to get the most out of your new product,<br />
and that you will be pleased with your <strong>Panasonic</strong> LCD projector.<br />
The serial number of your product may be found on its bottom. You should note<br />
it in the space provided below and retain this booklet in case service is required.<br />
Model number: <strong>PT</strong>-<strong>L785U</strong><br />
Serial number:<br />
IMPORTANT SAFETY NOTICE<br />
WARNING: TO REDUCE THE RISK OF FIRE OR ELECTRIC SHOCK, DO<br />
NOT EXPOSE THIS PRODUCT TO RAIN OR MOISTURE.<br />
Power Supply: This LCD Projector is designed to operate on 100 V – 240 V, 50 Hz/60<br />
Hz AC, house current only.<br />
CAUTION: The AC power cord which is supplied with the projector as an accessory can<br />
only be used for power supplies up to 125 V, 7 A. If you need to use higher<br />
voltages or currents than this, you will need to obtain a separate 250 V<br />
power cord. If you use the accessory cord in such situations, fire may result.<br />
The lightning flash with arrowhead symbol, within an<br />
equilateral triangle, is intended to alert the user to the<br />
presence of uninsulated “dangerous voltage” within the<br />
product’s enclosure that may be of sufficient magnitude to<br />
constitute a risk of electric shock to persons.<br />
The exclamation point within an equilateral triangle is<br />
intended to alert the user to the presence of important<br />
operating and maintenance (servicing) instructions in the<br />
literature ac<strong>com</strong>panying the product.<br />
CAUTION:<br />
This equipment is equipped with a three-pin grounding-type power<br />
plug. Do not remove the grounding pin on the power plug. This<br />
plug will only fit a grounding-type power outlet. This is a safety<br />
feature. If you are unable to insert the plug into the outlet, contact<br />
an electrician. Do not defeat the purpose of the grounding plug.<br />
Do not remove<br />
2-ENGLISH
WARNING:<br />
This equipment has been tested and found to <strong>com</strong>ply with the limits for a<br />
Class B digital device, pursuant to Part 15 of the FCC Rules. These limits<br />
are designed to provide reasonable protection against harmful interference<br />
in a residential installation. This equipment generates, uses and can<br />
radiate radio frequency energy and, if not installed and used in accordance<br />
with the instructions, may cause harmful interference to radio<br />
<strong>com</strong>munications. However, there is no guarantee that interference will not<br />
occur in a particular installation. If this equipment does cause harmful<br />
interference to radio or television reception, which can be determined by<br />
turning the equipment off and on, the user is encouraged to try to correct<br />
the interference by one or more of the following measures:<br />
– Reorient or relocate the receiving antenna.<br />
– Increase the separation between the equipment and receiver.<br />
– Connect the equipment into an outlet on a circuit different from that to<br />
which the receiver is connected.<br />
– Consult the dealer or an experienced radio/TV technician for help.<br />
FCC CAUTION: To assure continued <strong>com</strong>pliance, use only shielded<br />
interface cables when connecting to <strong>com</strong>puters or<br />
peripheral devices.<br />
Any unauthorized changes or modifications to this<br />
equipment will void the users authority to operate.<br />
Preparation<br />
WARNING:<br />
B Not for use in a <strong>com</strong>puter room as defined in the Standard for the<br />
Protection of Electronic Computer/Data Processing Equipment,<br />
ANSI/NFPA 75.<br />
Declaration of Conformity<br />
Model Number: <strong>PT</strong>-<strong>L785U</strong><br />
Trade Name: <strong>Panasonic</strong><br />
Responsible party: Matsushita Electric Corporation of America.<br />
Address: One <strong>Panasonic</strong> Way Secaucus New Jersey 07094<br />
Telephone number: 1-800-528-8601 or 1-800-222-0741<br />
Email:<br />
pbtsservice@panasonic.<strong>com</strong><br />
This device <strong>com</strong>plies with Part 15 of the FCC Rules, Operation is subject to<br />
the following two conditions: (1) This device may not cause harmful<br />
interference, and (2) this device must accept any interference received,<br />
including interference that may cause undesired operation.<br />
ENGLISH-3
Contents<br />
Preparation<br />
IMPORTANT SAFETY NOTICE ...2<br />
Precautions with regard to safety...5<br />
Accessories .................................9<br />
Before use ..................................10<br />
Location and function of each part...12<br />
Getting started<br />
Setting-up...................................18<br />
Projection methods, Projector<br />
position, Projection distances<br />
Connections...............................20<br />
Connecting to video equipment,<br />
Connecting to <strong>com</strong>puter<br />
Preparation for the remote<br />
control unit..............................22<br />
Setting the projector ID number<br />
for remote control unit ...........23<br />
Basic operation<br />
Turning on the power................24<br />
Turning off the power................26<br />
Useful functions<br />
Correcting the image position<br />
automatically...........................28<br />
Turning off the picture and sound<br />
momentarily ............................29<br />
Pausing a picture.......................29<br />
Enlarging the picture.................30<br />
Adjusting the volume ................30<br />
Adjusting the zoom and focus...31<br />
Useful functions of the remote<br />
control unit..............................32<br />
Laser beam pointer, Wireless mouse<br />
Adjustments and settings<br />
On-screen menus ......................34<br />
Menu screens, Menu operation guide,<br />
Returning a setting to the factory default<br />
Adjusting the picture.................39<br />
PICTURE MODE, CONTRAST,<br />
BRIGHT, COLOR, TINT, SHARPNESS,<br />
COLOR TEMP., Noise Reduction (NR),<br />
WHITE BALANCE R/G/B, TV-SYSTEM,<br />
Projecting sRGB-<strong>com</strong>patible pictures<br />
Adjusting the position...............42<br />
POSITION, DOT CLOCK, CLOCK<br />
PHASE, KEYSTONE, OSD<br />
4-ENGLISH<br />
POSITION, ASPECT, RESIZING,<br />
AUTO SETUP, FRAME LOCK<br />
Audio adjustment ......................46<br />
VOLUME, MUTE<br />
Changing the display language...46<br />
Option settings ..........................47<br />
OSD, AUTO SEARCH, AUTO SIGNAL, RGB2<br />
SELECT, RGB/YPBPR, VGA60/480p, BACK<br />
COLOR, CINEMA REALITY, FRONT/REAR,<br />
DESK/CEILING, FAN CONTROL, LAMP<br />
POWER, LAMP RUN TIME, FUNC 1,<br />
CONTROL KEY, AUTO POWER OFF, SET ID<br />
Adjusting the lens .....................50<br />
ZOOM/FOCUS, LENS SELECT<br />
Network setup............................50<br />
Setting up the security function...51<br />
PASSWORD SETTING, CHANGE<br />
PASSWORD, TEXT DISPLAY,<br />
CHANGE TEXT, LOGO DISPLAY,<br />
LOGO CLEAR, LOGO CA<strong>PT</strong>URE<br />
Care and maintenance<br />
When the TEMP indicator and the<br />
LAMP indicator are illuminated...54<br />
Cleaning and replacing the air filter...56<br />
Replacing the lamp unit ............57<br />
Before calling for service..........60<br />
Cleaning and maintenance .......61<br />
Others<br />
Using the cable cover ...............62<br />
Putting the mains lead and remote<br />
control unit away, Covering the<br />
connector panel<br />
Replacing the projection lens ...64<br />
Projection distance for each<br />
projection lens (sold separately)<br />
Specifications ............................68<br />
Appendix ....................................70<br />
List of <strong>com</strong>patible signals, Using the<br />
REMOTE connector, Using the SERIAL<br />
connector, Pin assignments, Projection<br />
dimensions calculation methods<br />
Dimensions ................................76<br />
Trademark acknowledgements...76<br />
NOTES IMPORTANTES<br />
CONCERNANT LA SECURITE ..77<br />
Précautions de sécurité .............78<br />
Avant l’utilisation .........................82<br />
Remplacement du bloc de lampe...84
Precautions with regard to safety<br />
WARNING<br />
If you notice smoke, strange smells or noise <strong>com</strong>ing from the projector,<br />
disconnect the power cord plug from the wall outlet.<br />
B Do not continue to use the projector in such cases, otherwise fire or<br />
electric shocks could result.<br />
B Check that no more smoke is <strong>com</strong>ing out, and then contact an Authorized<br />
Service Center for repairs.<br />
B Do not attempt to repair the projector yourself, as this can be dangerous.<br />
Do not install this projector in a place which is not strong enough to<br />
take the full weight of the projector.<br />
B If the installation location is not strong enough, it may fall down or tip over,<br />
and severe injury or damage could result.<br />
Installation work (such as ceiling suspension) should only be carried<br />
out by a qualified technician.<br />
B If installation is not carried out correctly, there is the danger that injury or<br />
electric shocks may occur.<br />
If foreign objects or water get inside the projector, or if the projector is<br />
dropped or the cabinet is broken, disconnect the power cord plug from<br />
the wall outlet.<br />
B Continued use of the projector in this condition may result in fire or electric<br />
shocks.<br />
B Contact an Authorized Service Center for repairs.<br />
Do not overload the wall outlet.<br />
B If the power supply is overloaded (for example, by using too many<br />
adapters), overheating may occur and fire may result.<br />
Do not remove the cover or modify it in any way.<br />
B High voltages can cause fire or electric shocks.<br />
B <strong>For</strong> any inspection, adjustment and repair work, please contact an<br />
Authorized Service Center.<br />
Clean the power cord plug regularly to prevent it from be<strong>com</strong>ing<br />
covered in dust.<br />
B If dust builds up on the power cord plug, the resulting humidity can<br />
damage the insulation, which could result in fire. Pull the power cord plug<br />
out from the wall outlet and wipe it with a dry cloth.<br />
B If not using the projector for an extended period of time, pull the power<br />
cord plug out from the wall outlet.<br />
Preparation<br />
ENGLISH-5
Do not do anything that might damage the power cord or the power cord<br />
plug.<br />
B Do not damage the power cord, make any modifications to it, place it near<br />
any hot objects, bend it excessively, twist it, pull it, place heavy objects on<br />
top of it or wrap it into a bundle.<br />
B If the power cord lead is used while damaged, electric shocks, shortcircuits<br />
or fire may result.<br />
B Ask an Authorized Service Center to carry out any repairs to the power<br />
cord that might be necessary.<br />
Do not handle the power cord plug with wet hands.<br />
B Failure to observe this may result in electric shocks.<br />
Insert the power cord plug securely into the wall outlet.<br />
B If the plug is not inserted correctly, electric shocks or overheating could<br />
result.<br />
B Do not use plugs which are damaged or wall outlets which are <strong>com</strong>ing<br />
loose from the wall.<br />
Do not place the projector on top of surfaces which are unstable.<br />
B If the projector is placed on top of a surface which is sloped or unstable, it<br />
may fall down or tip over, and injury or damage could result.<br />
Do not place the projector into water or let it be<strong>com</strong>e wet.<br />
B Failure to observe this may result in fire or electric shocks.<br />
Do not place liquid containers on top of the projector.<br />
B If water spills onto the projector or gets inside it, fire or electric shocks<br />
could result.<br />
B If any water gets inside the projector, contact an Authorized Service Center.<br />
Do not insert any foreign objects into the projector.<br />
B Do not insert any metal objects or flammable objects into the projector or<br />
drop them onto the projector, as doing so can result in fire or electric<br />
shocks.<br />
Keep the batteries out of the reach of infants.<br />
B If the batteries are swallowed, death by suffocation may result. If you<br />
believe that the batteries may have been swallowed, seek medical advice<br />
immediately.<br />
Do not allow the + and - terminals of the batteries to <strong>com</strong>e into contact<br />
with metallic objects such as necklaces or hairpins.<br />
B Failure to observe this may cause the batteries to leak, overheat, explode<br />
or catch fire.<br />
B Store the batteries in a plastic bag and keep them away from metallic<br />
objects.<br />
During a thunderstorm, do not touch the projector or the cable.<br />
B Electric shocks can result.<br />
Do not use the projector in a bath or shower.<br />
B Fire or electric shocks can result.<br />
6-ENGLISH
Do not look into the lens while the projector is being used.<br />
B Strong light is emitted from the projector’s lens. If you look directly into this<br />
light, it can hurt and damage your eyes.<br />
B Be especially careful not to let young children look into the lens. In<br />
addition, turn off the power and disconnect the power cord plug when you<br />
are away from the projector.<br />
Keep the remote control unit out of the reach of children, and do not<br />
look into the laser beam or point it towards other people.<br />
B If the laser beam which is emitted by the remote control unit transmitter is<br />
pointed directly into the eyes, it may cause visual ability to be impaired.<br />
Do not place your hands or other objects close to the air outlet port.<br />
B Heated air <strong>com</strong>es out of the air outlet port. Do not place your hands or<br />
face, or objects which cannot withstand heat close to this port, otherwise<br />
burns or damage could result.<br />
Replacement of the lamp unit should only be carried out by a qualified<br />
technician.<br />
B The lamp unit has high internal pressure. If improperly handled, explosion<br />
might result.<br />
B The lamp unit can easily be<strong>com</strong>e damaged if struck against hard objects<br />
or dropped, and injury or malfunctions may result.<br />
When replacing the lamp, allow it to cool for at least one hour before<br />
handling it.<br />
B The lamp cover gets very hot, and contact with it can cause burns.<br />
Before replacing the lamp, be sure to disconnect the power cord plug<br />
from the wall outlet.<br />
B Electric shocks or explosions can result if this is not done.<br />
Preparation<br />
Caution<br />
Do not cover the air inlet port or the air outlet port.<br />
B Doing so may cause the projector to overheat, which can cause fire or<br />
damage to the projector.<br />
B Do not place the projector in narrow, badly ventilated places such as<br />
closets or bookshelves.<br />
Do not set up the projector in humid or dusty places or in places where<br />
the projector may <strong>com</strong>e into contact with smoke or steam.<br />
B Using the projector under such conditions may result in fire or electric shocks.<br />
When disconnecting the power cord, hold the plug, not the lead.<br />
B If the power cord itself is pulled, the lead will be<strong>com</strong>e damaged, and fire,<br />
short-circuits or serious electric shocks may result.<br />
Always disconnect all cables before moving the projector.<br />
B Moving the projector with cables still attached can damage the cables,<br />
which could cause fire or electric shocks to occur.<br />
ENGLISH-7
Do not place any heavy objects on top of the projector.<br />
B Failure to observe this may cause the projector to be<strong>com</strong>e unbalanced<br />
and fall, which could result in damage or injury.<br />
Do not short-circuit, heat or disassemble the batteries or place them<br />
into water or fire.<br />
B Failure to observe this may cause the batteries to overheat, leak, explode<br />
or catch fire, and burns or other injury may result.<br />
When inserting the batteries, make sure the polarities (+ and -) are<br />
correct.<br />
B If the batteries are inserted incorrectly, they may explode or leak, and fire,<br />
injury or contamination of the battery <strong>com</strong>partment and surrounding area<br />
may result.<br />
Use only the specified batteries.<br />
B If incorrect batteries are used, they may explode or leak, and fire, injury or<br />
contamination of the battery <strong>com</strong>partment and surrounding area may<br />
result.<br />
Do not mix old and new batteries.<br />
B If the batteries are inserted incorrectly, they may explode or leak, and fire,<br />
injury or contamination of the battery <strong>com</strong>partment and surrounding area<br />
may result.<br />
Insulate the battery using tape or similar before disposal.<br />
B If the battery <strong>com</strong>es into contact with metallic objects or other batteries, it<br />
may catch fire or explode.<br />
Do not put your weight on this projector.<br />
B You could fall or the projector could break, and injury may result.<br />
B Be especially careful not to let young children stand or sit on the projector.<br />
Do not lift up the projector by holding the cable cover.<br />
B Failure to observe this may cause the cable cover to <strong>com</strong>e off and the<br />
projector might fall, which could result in injury.<br />
Disconnect the power cord plug from the wall outlet as a safety<br />
precaution before carrying out any cleaning.<br />
B Electric shocks can result if this is not done.<br />
Ask an Authorized Service Center to clean inside the projector at least<br />
once a year.<br />
B If dust is left to build up inside the projector without being cleaned out, it<br />
can result in fire or problems with operation.<br />
B It is a good idea to clean the inside of the projector before the season for<br />
humid weather arrives. Ask your nearest Authorized Service Center to<br />
clean the projector when required. Please discuss with the Authorized<br />
Service Center regarding cleaning costs.<br />
We are constantly making efforts to preserve and maintain a clean<br />
environment. Please take non repairable units back to your dealer or a<br />
recycling <strong>com</strong>pany.<br />
8-ENGLISH
NOTICE:<br />
B This product has a High Intensity Discharge (HID) lamp that contains a<br />
small amount of mercury. It also contains lead in some <strong>com</strong>ponents.<br />
Disposal of these materials may be regulated in your <strong>com</strong>munity due to<br />
environmental considerations. <strong>For</strong> disposal or recycling information<br />
please contact your local authorities, or the Electronics Industries<br />
Alliance: <br />
Preparation<br />
Accessories<br />
Check that all of the accessories shown below have been included with your<br />
projector.<br />
Remote control unit<br />
(N2QAEA000022 x1)<br />
AAA batteries for<br />
remote control unit (x2)<br />
RGB signal cable<br />
[3.0 m (9´10˝),<br />
K1HB15FA0001 x1]<br />
RGB<br />
VIDEO<br />
Power cord<br />
(K2CG3FZ00008 x 1)<br />
Cable cover<br />
(TXFKR01VJX7 x1)<br />
A<br />
ALL<br />
SET<br />
ENGLISH-9
Before use<br />
Caution when moving the projector<br />
Be sure to attach the lens cover before moving the projector.<br />
The projection lens is extremely susceptible to vibration and shocks. Be<br />
careful not to subject it to excessive vibration and shock when moving the<br />
projector.<br />
Cautions regarding setting-up<br />
Avoid setting up in places which are subject to vibration or shocks.<br />
The internal parts can be damaged, which may cause malfunctions or<br />
accidents.<br />
Do not set up the projector near high-voltage power lines or near<br />
motors.<br />
The projector may be subject to electromagnetic interference.<br />
If installing the projector to the ceiling, ask a qualified technician to<br />
carry out all installation work.<br />
You will need to purchase the separate installation kit (Model No.ET-PK780).<br />
Furthermore, all installation work should only be carried out by a qualified<br />
technician.<br />
If using this projector at high elevations (above 1 400 m), set the “FAN<br />
CONTROL” to “HIGH”. (Refer to page 48.)<br />
Failure to observe this may result in malfunctions.<br />
10-ENGLISH
Notes on use<br />
In order to get the best picture quality<br />
Draw curtains or blinds over any windows and turn off any lights near the<br />
screen to prevent outside light or light from indoor lamps from shining onto<br />
the screen.<br />
Preparation<br />
Do not touch the surfaces of the lens with your bare hands.<br />
If the surface of the lens be<strong>com</strong>es dirty from fingerprints or anything else, this<br />
will be magnified and projected onto the screen. Moreover, when not using<br />
the projector, retract the lens and then cover it with the lens cover.<br />
Screen<br />
Do not apply any volatile substances which may cause discoloration to the<br />
screen, and do not let it be<strong>com</strong>e dirty or damaged.<br />
Lamp<br />
The lamp may need to be replaced earlier due to variables such as individual<br />
lamp characteristics, usage conditions and the installation environment,<br />
especially when the projector is subjected to continuous use for more than<br />
10 hours or the power is frequently turned on and off, as the operations that<br />
prevent blackening of the bulb (the action of the halogen cycle) do not work<br />
enough during short periods of time.<br />
Liquid crystal panel<br />
The liquid crystal panel of the projector is built with very high precision<br />
technology to provide fine picture details. Occasionally, a few non-active<br />
pixels may appear on the screen as fixed points of blue, green or red.<br />
Please note that this does not affect the performance of your LCD.<br />
ENGLISH-11
Location and function of each part<br />
Projector <br />
# $<br />
%<br />
(<br />
0<br />
+<br />
*<br />
/<br />
&<br />
.<br />
- ,<br />
+ *<br />
)<br />
(<br />
'<br />
# Projector control panel (page 14)<br />
$ Speaker<br />
% Connector panel (page 16)<br />
& MAIN POWER switch (pages 24 and 26)<br />
' Power input socket (AC IN) (page 24)<br />
The accessory power cord is connected here.<br />
Do not use any power cord other than the accessory power cord.<br />
( Air inlet ports<br />
Do not cover these ports.<br />
) Air filter (page 56)<br />
* Front adjustable legs(L/R) (page 25)<br />
+ Leg adjuster buttons(L/R) (page 25)<br />
These buttons are used to unlock the front adjustable legs. Press to adjust<br />
the angle of tilt of the projector.<br />
, Remote control signal receptor (page 22)<br />
- Focus ring (page 25)<br />
. Lens cover<br />
/ Projection lens<br />
0 Lens release button (page 64)<br />
This button is used when using a projection lens that is sold separately.<br />
12-ENGLISH
Projector <br />
# $ %<br />
&<br />
Preparation<br />
'<br />
# Remote control signal receptor (page 22)<br />
$ Lamp unit holder (page 57)<br />
% Air outlet port<br />
Do not cover this port.<br />
& Carrying handle<br />
' Security lock<br />
This can be used to connect a <strong>com</strong>mercially-available theft-prevention<br />
cable (manufactured by Kensington). This security lock is <strong>com</strong>patible with<br />
the Microsaver Security System from Kensington.<br />
NOTE:<br />
B During projection of an image, the cooling fan will operate, emitting a<br />
small noise as it operates. Turning the lamp on or off will cause this<br />
noise to increase a little.<br />
B By using the “O<strong>PT</strong>ION” menu to set “LAMP POWER” to “LOW”, the<br />
operating sound of the fan can be reduced. (Refer to page 48.)<br />
WARNING<br />
Do not place your hands or other objects close to the air outlet port.<br />
B Heated air <strong>com</strong>es out of the air outlet port. Do not place your hands or<br />
face, or objects which cannot withstand heat close to this port, otherwise<br />
burns or damage could result.<br />
ENGLISH-13
Remote control unit<br />
6<br />
+<br />
RGB<br />
VIDEO<br />
/<br />
&<br />
7<br />
1 0 2<br />
*<br />
)<br />
Projector control panel<br />
/<br />
.<br />
-<br />
,<br />
#<br />
POWER<br />
STANDBY(R)<br />
ON(G)<br />
– FOCUS +<br />
– ZOOM +<br />
$<br />
RGB INPUT<br />
AUTO SETUP VIDEO<br />
MENU<br />
%<br />
LAMP<br />
&<br />
INPUT<br />
TEMP<br />
RGB<br />
'<br />
SHUTTER<br />
ENTER<br />
(<br />
3<br />
4<br />
5<br />
ALL<br />
A<br />
SET<br />
*<br />
8<br />
(<br />
9<br />
:<br />
.<br />
;<br />
<<br />
+ * )<br />
# Power indicator (pages 24, 26 and 27)<br />
This indicator illuminates red when the MAIN POWER switch is turned on,<br />
and illuminates green when the power is turned on and a picture starts to<br />
be projected.<br />
When the projector is in “WEB STANDBY” mode, this indicator flashes slowly<br />
in red.<br />
$ RGB INPUT indicator (page 27)<br />
This indicator illuminates when a signal is input into the connector that is<br />
selected with the input select buttons.<br />
% LAMP indicator (page 55)<br />
This indicator illuminates when it is time to replace the lamp unit. It flashes<br />
if a circuit abnormality is detected.<br />
& INPUT (RGB, VIDEO) buttons (page 25)<br />
These buttons are used to select the input signals. When “AUTO SEARCH” in the<br />
“O<strong>PT</strong>ION” menu is set to “ON”, the input signal will be detected and selected<br />
automatically by pressing this button for a few seconds. (Refer to page 47.)<br />
' TEMP indicator (page 54)<br />
This indicator illuminates if an abnormally high temperature is detected inside<br />
the projector or around it. If the temperature rises above a certain level, the<br />
power supply will be turned off automatically and the indicator will flash.<br />
( SHUTTER button (page 29)<br />
This button is used to momentarily turn off the picture and sound.<br />
) ENTER button (page 38)<br />
This button is used to accept and to activate items selected in the onscreen<br />
menus.<br />
14-ENGLISH
*When in <strong>com</strong>puter operating mode, this button on the remote control unit<br />
functions differently. (page 33)<br />
* Arrow (FGI and H) buttons (page 37)<br />
These buttons are used to select and adjust items in the on-screen menus.<br />
*When in <strong>com</strong>puter operating mode, these buttons on the remote control<br />
unit function differently. (page 33)<br />
+ MENU button (pages 34 and 37)<br />
This button is used to display the menu screens. When a menu screen is<br />
being displayed, this button can be used to return to a previous screen or<br />
to clear the screen.<br />
, ZOOM +/- buttons (page 25)<br />
These buttons are used to adjust the size of the projected image.<br />
- FOCUS +/- buttons (page 25)<br />
These buttons are used to adjust the focus of the projected image.<br />
. AUTO SETUP button (pages 25 and 28)<br />
If this button is pressed while a picture is being projected, the projection settings<br />
will be adjusted automatically in accordance with the signal being input.<br />
/ POWER button (pages 24 and 26)<br />
These buttons are used to turn the power on and off when MAIN POWER<br />
is turned on.<br />
(<strong>For</strong> the remote control unit, the “ ” button is for turning on the power and<br />
the “ ” button is for turning off the power.)<br />
0 Laser emitter (page 32)<br />
1 Infrared emitter (page 22)<br />
2 Click button (page 33)<br />
This button can be used when the operating mode select switch is moved<br />
to the left (Computer).<br />
3 STD (standard) button (page 38)<br />
This button is used to reset the projector adjustment values to the factory<br />
default settings.<br />
4 FUNC1 button (pages 43, 46 and 49)<br />
This button can be used for 1) switching on and off the sound volume and<br />
2) entering into the keystone distortion correction mode. Adjust “FUNC1”<br />
in the “O<strong>PT</strong>ION” menu to select which you wish to use.<br />
5 LENS button (page 31)<br />
This button is used to display the zoom and focus adjustment screen.<br />
6 Operation indicator (page 32)<br />
This indicator illuminates while a laser beam is being emitted (while the LASER<br />
button is being pressed). It flashes when any other buttons are being pressed.<br />
7 LASER button (page 32)<br />
A beam of laser light is emitted while this button is being pressed. This<br />
laser beam can be used as a pointer to point to something on the screen.<br />
8 FREEZE button (page 29)<br />
This button is used to momentarily freeze projection so that a still picture is displayed.<br />
9 D.ZOOM +/- buttons (page 30)<br />
These buttons are used to enlarge the projected image.<br />
(continued on next page)<br />
ENGLISH-15<br />
Preparation
(continued from previous page)<br />
: VOLUME +/- buttons (page 30)<br />
These buttons are used to adjust the volume of the sound that is output<br />
from the projector’s built-in speakers and AUDIO OUT connector. Refer to<br />
page 46 for details on how to adjust the volume using the buttons on the<br />
projector control panel.<br />
; ID SET/ALL button (page 23)<br />
These buttons are used to set the projector ID number into the remote<br />
control unit when using multiple projectors with a single remote control<br />
unit.<br />
< Operating mode (Computer, Projector) select switch (page 33)<br />
Move this switch to the left side to use the remote control unit to operate a<br />
<strong>com</strong>puter, and move it to the right side to operate the projector.<br />
Connector panel<br />
#<br />
$<br />
%<br />
& ' ( )<br />
*<br />
+<br />
, - .<br />
# Wired LAN connector<br />
This connector is used to connect a personal <strong>com</strong>puter to the projector in<br />
order to externally control the projector. (10 Base-T/100 Base-TX)<br />
Refer to the “Network Function Edition” operating instructions for details.<br />
$ SERIAL connector (pages 20, 21 and 72)<br />
This connector is used to connect a personal <strong>com</strong>puter to the projector in<br />
order to externally control the projector. (RS-232C <strong>com</strong>patible)<br />
% RGB1 IN connector (pages 20 and 21)<br />
This connector is used to input RGB signals and YPBPR signals.<br />
16-ENGLISH
& RGB2 IN/RGB OUT connector (pages 20, 21 and 47)<br />
This connector is used to input or output RGB signals and YPBPR signals.<br />
Adjust “RGB2 SELECT” in the “O<strong>PT</strong>ION” menu to select whether you want<br />
input or output with this connector.<br />
' DVI-D IN connector (page 21)<br />
This connector is used to input DVI-D signals.<br />
( AUDIO OUT connector (pages 20 and 21)<br />
This connector is used to output the audio signals which are input to the<br />
projector. If audio equipment is connected to this connector, no sound will<br />
be output from the built-in speakers.<br />
) S-VIDEO IN connector (pages 20 and 45)<br />
This connector is used to input signals from a S-VIDEO-<strong>com</strong>patible<br />
equipment such as a video deck. The connector is S1 signal <strong>com</strong>patible,<br />
and it automatically switches between 16:9 and 4:3 aspect ratios in<br />
accordance with the type of signal being input.<br />
* AUDIO IN L-R connectors (for S-VIDEO/VIDEO) (page 20)<br />
Only one system is provided, so connect the appropriate connectors when<br />
using S-VIDEO or VIDEO.<br />
+ REMOTE connector (page 71)<br />
This connector is used to control the projector from the remote control set<br />
up in wired mode.<br />
, RGB3 IN connector (pages 20 and 21)<br />
This connector is used to input RGB signals and YPBPR signals.<br />
- RGB AUDIO IN connector (pages 20 and 21)<br />
Only one system is provided, so connect the appropriate connector when<br />
using RGB1, RGB2 or RGB3.<br />
. VIDEO IN connector (page 20)<br />
This connector is used to input video signals from a video equipment such<br />
as a video deck.<br />
Preparation<br />
ENGLISH-17
Setting-up<br />
Projection methods<br />
In way of installing projector, any one of the following four projection methods<br />
are used. Select whichever projection method matches the setting-up<br />
method. (The projection method can be set from the “O<strong>PT</strong>ION” menu. Refer<br />
to page 48 for details.)<br />
BFront-desk projection<br />
BFront-ceiling projection<br />
Menu items<br />
Setting<br />
Menu items<br />
Setting<br />
FRONT/REAR<br />
FRONT<br />
FRONT/REAR<br />
FRONT<br />
DESK/CEILING<br />
DESK<br />
DESK/CEILING<br />
CEILING<br />
BRear-desk projection<br />
(Using a translucent screen)<br />
BRear-ceiling projection<br />
(Using a translucent screen)<br />
Menu items<br />
Setting<br />
Menu items<br />
Setting<br />
FRONT/REAR<br />
REAR<br />
FRONT/REAR<br />
REAR<br />
DESK/CEILING<br />
DESK<br />
DESK/CEILING<br />
CEILING<br />
NOTE:<br />
B You will need to purchase the separate ceiling bracket (ET-PK780)<br />
when using the ceiling installation method.<br />
B If you set up the projector vertically, it may cause<br />
damage to the projector.<br />
B It is re<strong>com</strong>mended that you set up the projector<br />
in a place that is tilted at less than ±30°. Setting<br />
up the projector in places that are tilted at more<br />
than ±30° may cause malfunctions.<br />
18-ENGLISH
Projector position<br />
SH<br />
Top edge of screen<br />
Screen<br />
L<br />
Bottom edge of screen<br />
L: Projection distance<br />
SH: Image height<br />
SW:Image width<br />
SW<br />
Screen<br />
L<br />
25 mm<br />
(-31/32˝)<br />
Getting started<br />
Projection distances*<br />
Screen size (4:3)<br />
Projection distance (L)<br />
Diagonal<br />
length<br />
Height<br />
(SH)<br />
Width<br />
(SW)<br />
Wide<br />
(LW)<br />
Telephoto<br />
(LT)<br />
1.01 m(40˝) 0.61 m(2´) 0.81 m(2´8˝) 1.6 m(5´2˝) 2.0 m(6´6˝)<br />
1.27 m(50˝) 0.76 m(2´6˝) 1.02 m(3´4˝) 2.0 m(6´6˝) 2.6 m(8´6˝)<br />
1.52 m(60˝) 0.91 m(3´) 1.22 m(4´) 2.4 m(7´10˝) 3.1 m(10´2˝)<br />
1.77 m(70˝) 1.07 m(3´6˝) 1.42 m(4´8˝) 2.8 m(9´2˝) 3.6 m(11´9˝)<br />
2.03 m(80˝) 1.22 m(4´) 1.63 m(5´4˝) 3.2 m(10´5˝) 4.2 m(13´9˝)<br />
2.28 m(90˝) 1.37 m(4´6˝) 1.83 m(6´) 3.6 m(11´9˝) 4.7 m(15´5˝)<br />
2.54 m(100˝) 1.52 m(5´) 2.03 m(6´8˝) 4.0 m(13´1˝) 5.3 m(17´4˝)<br />
3.81 m(150˝) 2.29 m(7´6˝) 3.05 m(10´) 6.1 m(20´) 7.9 m(25´11˝)<br />
5.08 m(200˝) 3.05 m(10´) 4.06 m(13´4˝) 8.1 m(26´6˝) 10.6 m(34´9˝)<br />
6.35 m(250˝) 3.81 m(12´6˝) 5.08 m(16´8˝) 10.1 m(33´1˝) 13.3 m(43´7˝)<br />
7.62 m(300˝) 4.57 m(15´) 6.10 m(20´) 12.2 m(40´) 16.0 m(52´5˝)<br />
*<strong>For</strong> standard lens which is supplied with the projector. Refer to pages 65 –<br />
67 for details on the projection distances for the optional lenses.<br />
NOTE:<br />
B The dimensions in the table above are approximate.<br />
B If you use the projection distance for the 16:9 screen,<br />
the 4:3 projection image overflows the screen at the top<br />
and bottom.<br />
B <strong>For</strong> details about projected image distances, refer to page 75.<br />
ENGLISH-19
Connections<br />
Notes on connections<br />
B Read the instruction manual for each peripheral device carefully before connecting it.<br />
B Turn off the power supply for all peripheral devices before making any connections.<br />
B If the cables necessary for connection are not included with the peripheral device or<br />
available as an option, you may need to prepare a proper cable for the device concerned.<br />
B If there is a lot of jitter in the video signal, the projected image may flicker. In such<br />
cases, it will be necessary to connect a TBC (time base corrector).<br />
B Refer to the list on page 70 for details on <strong>com</strong>patible signals which can be input to<br />
the projector.<br />
B Only one audio system circuit is available for each of the AUDIO IN L-R connectors for<br />
S-VIDEO/VIDEO signals and the RGB AUDIO IN connector, so if you wish to change<br />
the audio input source, you will need to remove and insert the appropriate plugs.<br />
Connecting to video equipment<br />
Computer for<br />
control use<br />
D-sub 15-pin (male) - BNCx5 (male) adapter cable<br />
Red (connect to PR signal connector)<br />
Blue (connect to PB signal connector)<br />
Green (connect to Y signal connector)<br />
BNC/RCA adapter<br />
DVD player<br />
(with <strong>com</strong>ponent<br />
video connectors)<br />
D-sub 9-pin<br />
(male)<br />
DVD player<br />
Video deck<br />
20-ENGLISH<br />
DVD player<br />
Audio system<br />
Red (connect to PR signal connector)<br />
Blue (connect to PB signal connector)<br />
Green (connect to Y signal connector)<br />
NOTE:<br />
B If the signal cables are disconnected or if the power supply for the<br />
<strong>com</strong>puter or video deck is turned off while “D.ZOOM”(digital zoom) is<br />
being used, this function will be cancelled.
ON<br />
DIP<br />
1 2 3 4 5 6<br />
Connecting to <strong>com</strong>puter<br />
Computer for<br />
control use<br />
Computer<br />
Monitor<br />
D-sub 9-pin<br />
(male)<br />
Getting started<br />
Computer<br />
Audio system<br />
DVI cable<br />
(ET-SCDV03: sold<br />
separately)<br />
Computer (with<br />
DVI-D OUT connector)<br />
NOTE:<br />
B Do not input the signal to the RGB2 IN/RGB OUT connector when<br />
“RGB2 SELECT” in the “O<strong>PT</strong>ION” menu is set to “OUTPUT”. (Refer to<br />
page 47.)<br />
Refer to the “Network Function Edition” operating instructions for<br />
details on connecting the projector to a personal<br />
<strong>com</strong>puter using the wired LAN connector.<br />
ENGLISH-21
Preparation for the remote control unit<br />
# Open the cover.<br />
$ Insert the batteries so that the polarities<br />
are correct, and then close the cover.<br />
AAA batteries<br />
(two)<br />
NOTE:<br />
B Do not drop the remote control unit.<br />
B Keep the remote control unit away from liquids.<br />
B Remove the batteries if not using the remote control unit for long periods.<br />
B Do not use rechargeable batteries.<br />
B If the remote control unit is held so that it is facing directly in front of the<br />
remote control signal receptors on the front or rear of the projector, the<br />
operating range is within approximately 7 m (23´) from the surfaces of<br />
the receptors. Furthermore, the remote control unit can be operated<br />
from an angle of ±30° to the left or right and ±15° above or below the<br />
receptors.<br />
B If there are any obstacles in between the remote control unit and the<br />
receptors, the remote control unit may not operate correctly.<br />
B If strong light is allowed to shine onto the remote control signal receptor,<br />
correct projector operation may not be possible. Place the projector as<br />
far away from light sources as possible.<br />
B If facing the remote control unit toward the screen to operate the projector,<br />
the operating range of the remote control unit will be limited by the amount<br />
of light reflection loss caused by the characteristics of the screen used.<br />
22-ENGLISH
Setting the projector ID number for<br />
the remote control unit<br />
When controlling multiple projectors individually or simultaneously with a<br />
single remote control unit, a projector ID number must be set into the remote<br />
control unit as described in the following steps.<br />
RGB<br />
ALL<br />
VIDEO<br />
A<br />
SET<br />
# When setting the projector ID number, move<br />
the mode switch to the left side (Numeric).<br />
$ Press the ID SET button on the remote<br />
control unit.<br />
The projector ID number which is currently set<br />
will be displayed on the screen.<br />
% Press the numeric (0 - 9) buttons on the<br />
remote control unit to set the ID number.<br />
The entered ID number will be displayed on the<br />
screen. (You can set from the number 1 to the<br />
number 64.)<br />
B If the entered ID number is 10 - 64, the ID number<br />
setting will be <strong>com</strong>pleted.<br />
B If the ID number entered is less than 10, press<br />
any button other than the numeric buttons or the<br />
ID SET/ALL button, or wait for about 5 seconds<br />
to <strong>com</strong>plete the setting.<br />
Getting started<br />
Mode switch<br />
NOTE:<br />
B If the entered ID number is more than 64, the ID number will return to<br />
the one set before the ID SET button was pressed.<br />
B The ID number setting screen will be canceled if no number is entered<br />
for 5 seconds or if any button except the numeric buttons is pressed.<br />
B If the ID SET button is pressed after a number less than 10 is entered,<br />
the entered number will be cancelled.<br />
B If ID number is set to “ALL” by pressing the ID ALL button, the<br />
projectors can be controlled regardless of their ID number setting.<br />
B The projector cannot be turned on and off from the remote control unit if<br />
the “CONTROLLER ID” does not match the projector ID number. <strong>For</strong><br />
more details on projector ID number setting, see page 49.<br />
B The projector ID number in the remote control unit is set to “ALL” by<br />
default. It is therefore not necessary to set a projector ID number when<br />
only one projector is used.<br />
ENGLISH-23
Turning on the power<br />
Before turning on the power<br />
1, Ensure that all peripheral<br />
devices are connected<br />
properly.<br />
2, Connect the accessory power<br />
cord.<br />
3, Remove the lens cover.<br />
#<br />
RGB<br />
VIDEO<br />
$<br />
&<br />
Power cord<br />
)<br />
*<br />
Power indicator<br />
#<br />
$<br />
%<br />
Lens cover<br />
Press the MAIN POWER switch to turn on the power.<br />
BThe power indicator on the projector will illuminate red.<br />
Press the POWER button.<br />
BThe power indicator on the projector will flash green. After a short<br />
period, the indicator will illuminate green, and a picture will be<br />
projected.<br />
Turn on the power of all connected devices.<br />
BStart the play function of a device such as a DVD player.<br />
NOTE:<br />
B A tinkling sound may be heard when the lamp unit is turned on, but this<br />
is not a sign of a malfunction.<br />
B The projector cannot be turned on and off from the remote control unit<br />
if the “CONTROLLER ID” does not match the projector ID number.<br />
(pages 23 and 49)<br />
24-ENGLISH<br />
A<br />
(<br />
'<br />
*<br />
'
&<br />
Press the input select button to select the<br />
input signal.<br />
Input select<br />
buttons<br />
Changing<br />
signals<br />
VIDEO<br />
Follow the procedure below when you set the projector up first, and when<br />
you change the setup place.<br />
Adjusting the angle<br />
' BWhile pressing the adjuster buttons,<br />
adjust the forward/back angle of tilt<br />
of the projector. Adjust so that the<br />
projector is as vertical to the screen<br />
as possible.<br />
Press the AUTO SETUP button to initiate<br />
(<br />
automatic positioning.<br />
BThe position of the projected image<br />
will be corrected automatically in<br />
accordance with the input signal. AUTO SETUP<br />
(Refer to page 28 for details.)<br />
BIf the projected image contains<br />
keystone distortion, adjust<br />
VIDEO<br />
<br />
<br />
<br />
<br />
“KEYSTONE” in the “POSITION” menu (refer to page 43 for details).<br />
RGB<br />
RGB<br />
<br />
<br />
BA picture will be projected in accordance with the selected input<br />
signal.<br />
BWhen an YPBPR signal is being input, “YPBPR” will be displayed<br />
(when “RGB/YPBPR” in the “O<strong>PT</strong>ION” menu is set to “YPBPR”.<br />
Refer to page 47 for details).<br />
Adjusting the size<br />
) BPress the ZOOM +/- buttons to adjust the size of the projected image.<br />
*<br />
Adjusting the focus<br />
BPress the FOCUS +/- buttons to adjust the focus of the projected image.<br />
The focus of the projected image can also be adjusted by turning the<br />
focus ring. To make fine adjustments, use the FOCUS +/- buttons.<br />
ENGLISH-25<br />
Basic Operation
Turning off the power<br />
#<br />
RGB<br />
VIDEO<br />
Power indicator<br />
$<br />
RGB INPUT indicator<br />
#<br />
$<br />
Press the POWER button.<br />
B“Power OFF” is displayed on the<br />
screen.<br />
Press the I or H button to select “OK”, and<br />
then press the ENTER button.<br />
BThe lamp unit will switch off and the picture will stop being projected.<br />
(The power indicator on the projector will illuminate orange while the<br />
cooling fan is still operating.)<br />
Press the MAIN POWER switch to turn off the<br />
%<br />
power after the power indicator on the<br />
projector illuminates red.<br />
26-ENGLISH<br />
%<br />
Power OFF<br />
OK<br />
CANCEL<br />
Direct power off function<br />
You can turn off the MAIN POWER switch and move the projector<br />
immediately after use. The cooling fan will operate by the internal power<br />
supply to cool down the lamp.<br />
B When this function is used, it may take more time for the lamp to turn<br />
back on again <strong>com</strong>pared to when the lamp cools down while the MAIN<br />
POWER switch is ON.<br />
B Do not put the projector in a bag while the cooling fan is operating.
NOTE:<br />
B You can also turn off the power by pressing the POWER button twice or<br />
by holding it down for at least 0.5 seconds.<br />
B When the projector is in standby mode (the power indicator on the<br />
projector is illuminated red), the projector continues to draw approximately<br />
11 W of power even when the cooling fan has stopped.<br />
B When the projector is in “WEB STANDBY” mode, the cooling fan operates<br />
and the power indicator on the projector flashes slowly in red and the<br />
projector continues to draw approximately 40 W of power. (page 50)<br />
Power indicator<br />
Power indicator status<br />
Projector status<br />
The projector is in standby mode and image projection<br />
Illuminated<br />
is possible by pressing the POWER button.<br />
Red<br />
The projector is in “WEB STANDBY” mode, and can be<br />
Flashing<br />
controlled with personal <strong>com</strong>puters via a wired LAN.<br />
slowly (The cooling fan is operating.)<br />
The projector is preparing for projection after the<br />
power is turned on while the power indicator is<br />
Flashing<br />
Green<br />
illuminated red. (After a short period, a picture will be<br />
projected.)<br />
Illuminated A picture is being projected.<br />
The lamp is cooling down after the power is turned<br />
Illuminated<br />
off. (The cooling fan is operating.)<br />
The projector is preparing for projection after the<br />
Orange<br />
power is turned on while the power indicator is<br />
Flashing<br />
illuminated orange. (After a short period, a picture<br />
will be projected.)<br />
Basic Operation<br />
RGB INPUT indicator<br />
RGB INPUT indicator status<br />
Illuminated during<br />
standby mode<br />
Illuminated during<br />
projection<br />
Projector status<br />
A signal is being input to one of the RGB1 IN, RGB2<br />
IN or RGB3 IN connectors.<br />
A signal is being input to the connector selected<br />
using the input select buttons.<br />
ENGLISH-27
Correcting the image position<br />
automatically (AUTO SETUP)<br />
The position of the projected image can be corrected automatically in<br />
accordance with the input signal.<br />
Press the AUTO SETUP button.<br />
(When the edges of the projected image are not visible)<br />
A<br />
ALL<br />
SET<br />
B Automatic positioning<br />
will be carried out.<br />
[<br />
Projector control panel<br />
INPUT<br />
AUTO SETUP VIDEO RGB<br />
SHUTTER<br />
NOTE:<br />
B “AUTO SETUP” does not function when DVI signals are being input.<br />
B When RGB signals are being input, “DOT CLOCK”, and “CLOCK<br />
PHASE” will be adjusted automatically in addition to the position of the<br />
image being corrected (except when the dot clock frequency is 108 MHz<br />
or higher). Refer to page 43 for details.<br />
B If the edges of the projected image are indistinct, or if a dark picture is<br />
being projected, the automatic setup processing may stop automatically<br />
before it is <strong>com</strong>plete. If this happens, project a different picture and then<br />
press the AUTO SETUP button again.<br />
28-ENGLISH
Turning off the picture and sound<br />
momentarily (SHUTTER)<br />
The “SHUTTER” function can be used to momentarily turn off the picture and<br />
sound from the projector when the projector is not being used for short<br />
periods of time, such as during breaks in meetings or when carrying out<br />
preparation. The projector uses less power in “SHUTTER” mode than it does<br />
in normal projection mode.<br />
A<br />
Press the SHUTTER button.<br />
B The picture and sound will be turned off.<br />
B Press any button on either the projector or<br />
remote control unit to return to normal operating<br />
mode.<br />
ALL<br />
SET<br />
Projector control panel<br />
INPUT<br />
AUTO SETUP VIDEO RGB SHUTTER<br />
Useful functions<br />
Pausing a picture (FREEZE)<br />
Press the FREEZE button.<br />
Still picture<br />
A<br />
ALL<br />
SET<br />
B The picture being projected will be paused.<br />
B Press the FREEZE button again to cancel the<br />
still picture.<br />
ENGLISH-29
Enlarging the picture (D.ZOOM)<br />
Press the D.ZOOM +/- button.<br />
RGB<br />
VIDEO<br />
B The picture will then<br />
be enlarged to 1.5<br />
times the normal size.<br />
[<br />
A<br />
The remote control unit functions during D.ZOOM (digital zoom)<br />
Press the F,G,IandHbuttons to move the enlarged area which you want to project.<br />
Press the D.ZOOM +/- buttons to change the enlargement ratio.<br />
Press the MENU button to return to the normal screen.<br />
NOTE:<br />
B The enlargement ratio can be changed within the range of x1 to x4, in<br />
steps of 0.1.<br />
B If the type of signal being input changes while the digital zoom function<br />
is being used, the digital zoom function will be cancelled.<br />
Adjusting the volume (VOLUME)<br />
ALL<br />
A<br />
SET<br />
Press the VOLUME +/- button.<br />
B Press the + button to raise the volume.<br />
B Press the - button to lower the volume.<br />
NOTE:<br />
B You can also select “VOLUME” from the<br />
“AUDIO” menu to adjust the volume. (page 46)<br />
30-ENGLISH
Adjusting the zoom and focus (LENS)<br />
RGB<br />
VIDEO<br />
Press the LENS button.<br />
<br />
<br />
B Press the I or H button to adjust the size of<br />
the projected image.<br />
B Press the F or G button to adjust the focus of<br />
the projected image.<br />
ALL<br />
A<br />
SET<br />
NOTE:<br />
B “ZOOM/FOCUS” in the “LENS” menu is the<br />
same function.<br />
Useful functions<br />
ENGLISH-31
Useful functions of the remote control unit<br />
Laser beam pointer<br />
The laser beam emitted from the remote control can be used as a pointer by<br />
pointing forward to the screen.<br />
While the LASER button is being pressed, the laser beam is being emitted<br />
and the operating indicator illuminates.<br />
Do not look into the laser emitter of the remote control unit or point the laser<br />
beam towards other people, otherwise damage to eyes may occur.<br />
Laser transmitter window<br />
Warning<br />
B DO NOT STARE INTO THE LASER<br />
BEAM OR AIM IT AT ANY PERSON'S<br />
EYE. LASER RADIATION CAN CAUSE<br />
SERIOUS INJURY TO THE HUMAN EYE.<br />
RGB<br />
VIDEO<br />
A<br />
ALL<br />
SET<br />
Caution<br />
B Use of controls or adjustments or performance of procedures<br />
other than those specified herein may result in hazardous<br />
radiation exposure.<br />
B This remote control unit cannot be repaired.<br />
32-ENGLISH
Wireless mouse<br />
By connecting the wireless mouse receiver (ET-RMRC2, sold separately) to<br />
a personal <strong>com</strong>puter, you can use the remote control unit as a personal<br />
<strong>com</strong>puter mouse.<br />
RGB<br />
ALL<br />
VIDEO<br />
A<br />
SET<br />
Click button<br />
PAGE UP button<br />
ENTER button<br />
Right click button<br />
PAGE DOWN button<br />
Click button<br />
Mode switch<br />
(Computer/Projector)<br />
Mode switch (Computer/Projector)<br />
Move the mode switch to the<br />
“Computer” position.<br />
B PAGE UP button<br />
Functions as the Page Up<br />
button on a personal <strong>com</strong>puter<br />
keyboard.<br />
B PAGE DOWN button<br />
Functions as the Page Down<br />
button on a personal <strong>com</strong>puter<br />
keyboard.<br />
B ENTER button<br />
Pressing the upper, lower, left<br />
and right edges of this button<br />
can move the cursor up, down,<br />
left and right.<br />
B Right click button<br />
This button functions as the right<br />
button on a personal <strong>com</strong>puter<br />
mouse.<br />
B Click button<br />
This button functions as the left<br />
button on a personal <strong>com</strong>puter<br />
mouse.<br />
Useful functions<br />
ENGLISH-33
On-screen menus<br />
Menu screens<br />
The various settings and adjustments for this projector can be carried out by<br />
selecting the operations from on-screen menus.<br />
The general arrangement of these menus is shown below.<br />
PICTURE menu (page 39)<br />
When an RGB/DVI signal is being<br />
input<br />
When a YPBPR signal is being input<br />
PICTURE<br />
PICTURE MODE<br />
CONTRAST<br />
BRIGHT<br />
SHARPNESS<br />
COLOR TEMP.<br />
WHITE BALANCE R<br />
WHITE BALANCE G<br />
WHITE BALANCE B<br />
STANDARD<br />
STANDARD<br />
32<br />
32<br />
6<br />
STANDARD<br />
32<br />
32<br />
32<br />
PICTURE<br />
PICTURE MODE<br />
CONTRAST<br />
BRIGHT<br />
COLOR<br />
TINT<br />
SHARPNESS<br />
COLOR TEMP.<br />
NR<br />
STANDARD<br />
STANDARD<br />
32<br />
32<br />
32<br />
32<br />
6<br />
STANDARD<br />
1<br />
SELECT:[^][@]<br />
ADJUST:[{][}]<br />
ENTER:[ENTER]<br />
ESC:[MENU]<br />
SELECT:[^][@]<br />
ADJUST:[{][}]<br />
ENTER:[ENTER]<br />
ESC:[MENU]<br />
When an S-VIDEO/VIDEO signal is<br />
being input<br />
PICTURE<br />
PICTURE MODE<br />
CONTRAST<br />
BRIGHT<br />
COLOR<br />
TINT<br />
SHARPNESS<br />
COLOR TEMP.<br />
NR<br />
TV-SYSTEM<br />
STANDARD<br />
STANDARD<br />
32<br />
32<br />
32<br />
32<br />
6<br />
STANDARD<br />
1<br />
AUTO<br />
SELECT:[^][@]<br />
ADJUST:[{][}]<br />
ENTER:[ENTER]<br />
ESC:[MENU]<br />
NOTE:<br />
B Keystone distortion of the on-screen display will not be corrected.<br />
B This projector has unadjustable items and unusable functions<br />
depending on the signal being input.<br />
When an item cannot be adjusted or a function cannot be used, the<br />
corresponding on-screen menu display does not appear, and the item<br />
or function will not work even if the ENTER button is pressed.<br />
34-ENGLISH
POSITION menu (page 42)<br />
When an RGB/DVI signal is being<br />
input<br />
When a YPBPR signal is being input<br />
POSITION<br />
POSITION<br />
DOT CLOCK<br />
CLOCK PHASE<br />
KEYSTONE<br />
OSD POSITION<br />
RESIZING<br />
AUTO SETUP<br />
FRAME LOCK<br />
STANDARD<br />
H: 128 V: 32<br />
32<br />
16<br />
H: 0 V: 0<br />
TOP LEFT<br />
OFF<br />
OFF<br />
ON<br />
ON<br />
POSITION<br />
POSITION<br />
CLOCK PHASE<br />
KEYSTONE<br />
OSD POSITION<br />
ASPECT<br />
RESIZING<br />
AUTO SETUP<br />
STANDARD<br />
H: 64 V: 16<br />
16<br />
H: 0 V: 0<br />
TOP LEFT<br />
4:3<br />
OFF ON<br />
SELECT:[^][@]<br />
ADJUST:[{][}]<br />
ENTER:[ENTER]<br />
ESC:[MENU]<br />
“POSITION”, “DOT CLOCK” and<br />
“CLOCK PHASE” are not displayed<br />
when a DVI signal is being input.<br />
SELECT:[^][@]<br />
ADJUST:[{][}]<br />
ENTER:[ENTER]<br />
ESC:[MENU]<br />
When an S-VIDEO/VIDEO signal is<br />
being input<br />
POSITION<br />
POSITION<br />
KEYSTONE<br />
OSD POSITION<br />
ASPECT<br />
RESIZING<br />
AUTO SETUP<br />
STANDARD<br />
SELECT:[^][@]<br />
ADJUST:[{][}]<br />
H: 32 V: 16<br />
H: 0 V: 0<br />
TOP LEFT<br />
4:3<br />
OFF ON<br />
ENTER:[ENTER]<br />
ESC:[MENU]<br />
AUDIO menu (page 46)<br />
LANGUAGE menu (page 46)<br />
Adjustments and settings<br />
AUDIO<br />
VOLUME<br />
MUTE<br />
20<br />
OFF ON<br />
LANGUAGE<br />
ENGLISH<br />
DEUTSCH<br />
FRANÇAIS<br />
ESPAÑOL<br />
ITALIANO<br />
SELECT:[^][@]<br />
ADJUST:[{][}]<br />
ENTER:[ENTER]<br />
ESC:[MENU]<br />
SELECT:[^][@][{][}]<br />
SELECT:[{][}]<br />
ESC:[MENU]<br />
ENTER:[ENTER]<br />
ENGLISH-35
O<strong>PT</strong>ION menu (page 47)<br />
O<strong>PT</strong>ION<br />
OSD<br />
AUTO SEARCH<br />
AUTO SIGNAL<br />
RGB2 SELECT<br />
RGB/YPBPR<br />
VGA60/480p<br />
BACK COLOR<br />
CINEMA REALITY<br />
NEXT PAGE @<br />
OFF<br />
OFF<br />
OFF<br />
INPUT<br />
RGB<br />
VGA60<br />
BLUE<br />
OFF<br />
ON<br />
ON<br />
ON<br />
OUTPUT<br />
YPBPR<br />
480p<br />
BLACK<br />
ON<br />
O<strong>PT</strong>ION<br />
PREVIOUS PAGE ^<br />
FRONT/REAR<br />
DESK/CEILING<br />
FAN CONTROL<br />
LAMP POWER<br />
LAMP RUN TIME<br />
FUNC1<br />
CONTROL KEY<br />
SET ID<br />
AUTO POWER OFF<br />
FRONT<br />
DESK<br />
STANDARD<br />
LOW<br />
MUTE<br />
OFF<br />
REAR<br />
CEILING<br />
HIGH<br />
HIGH<br />
10 H<br />
KEYSTONE<br />
ON<br />
ALL<br />
DISABLE<br />
SELECT:[^][@]<br />
ADJUST:[{][}]<br />
ESC:[MENU]<br />
“RGB/YPBPR” is displayed when<br />
an RGB/YPBPR signal is being<br />
input.<br />
SELECT:[^][@]<br />
ADJUST:[{][}]<br />
ENTER:[ENTER]<br />
ESC:[MENU]<br />
LENS menu (page 50)<br />
NETWORK menu (page 50)<br />
LENS<br />
ZOOM/FOCUS<br />
LENS SELECT<br />
STANDARD<br />
NETWORK<br />
NETWORK<br />
HOSTNAME<br />
WEB CONTROL<br />
WEB STANDBY<br />
WEB PASSWORD<br />
MAC ADDRESS<br />
OFF<br />
OFF<br />
LAN1<br />
PROJECTOR<br />
ON<br />
ON<br />
00:0B:97:41:00:00<br />
SELECT:[^][@]<br />
ENTER:[ENTER]<br />
ESC:[MENU]<br />
SELECT:[^][@]<br />
ENTER:[ENTER]<br />
ESC:[MENU]<br />
SECURITY menu (page 51)<br />
SECURITY<br />
PASSWORD SETTING<br />
CHANGE PASSWORD<br />
TEXT DISPLAY<br />
CHANGE TEXT<br />
LOGO DISPLAY<br />
LOGO CLEAR<br />
LOGO CA<strong>PT</strong>URE<br />
INVALID<br />
OFF<br />
OFF<br />
VALID<br />
ON<br />
ON<br />
SELECT:[^][@][{][}]<br />
ADJUST:[{][}]<br />
ENTER:[ENTER]<br />
ESC:[MENU]<br />
36-ENGLISH
Menu operation guide<br />
# Press the MENU button.<br />
The menu screen will be displayed.<br />
RGB<br />
VIDEO<br />
PICTURE<br />
PICTURE MODE<br />
CONTRAST<br />
BRIGHT<br />
SHARPNESS<br />
COLOR TEMP.<br />
WHITE BALANCE R<br />
WHITE BALANCE G<br />
WHITE BALANCE B<br />
STANDARD<br />
STANDARD<br />
32<br />
32<br />
6<br />
STANDARD<br />
32<br />
32<br />
32<br />
SELECT:[^][@]<br />
SELECT:[{][}]<br />
ENTER:[ENTER]<br />
ESC:[MENU]<br />
A<br />
$ Press the I or H button to select a menu.<br />
The selected menu screen will then be displayed.<br />
(Example: “POSITION” menu)<br />
ALL<br />
Projector control panel<br />
MENU<br />
SET<br />
ENTER<br />
POSITION<br />
POSITION<br />
DOT CLOCK<br />
CLOCK PHASE<br />
KEYSTONE<br />
OSD POSITION<br />
RESIZING<br />
AUTO SETUP<br />
FRAME LOCK<br />
STANDARD<br />
SELECT:[^][@]<br />
SELECT:[{][}]<br />
H: 128 V: 32<br />
32<br />
16<br />
H: 0 V: 0<br />
TOP LEFT<br />
OFF ON<br />
% Press the G button to accept the selection.<br />
You can select an item here. The selected item is<br />
shown in yellow.<br />
OFF<br />
ESC:[MENU]<br />
ON<br />
Adjustments and settings<br />
NOTE:<br />
B Press the MENU<br />
button to return to<br />
the previous<br />
screen.<br />
POSITION<br />
POSITION<br />
DOT CLOCK<br />
CLOCK PHASE<br />
KEYSTONE<br />
OSD POSITION<br />
RESIZING<br />
AUTO SETUP<br />
FRAME LOCK<br />
STANDARD<br />
SELECT:[^][@]<br />
ADJUST:[{][}]<br />
H: 128 V: 32<br />
32<br />
16<br />
H: 0 V: 0<br />
TOP LEFT<br />
OFF ON<br />
OFF<br />
ON<br />
ENTER:[ENTER]<br />
ESC:[MENU]<br />
ENGLISH-37
& Press the F or G button to<br />
select an item.<br />
B<br />
A<br />
POSITION<br />
POSITION<br />
DOT CLOCK<br />
CLOCK PHASE<br />
KEYSTONE<br />
OSD POSITION<br />
RESIZING<br />
AUTO SETUP<br />
FRAME LOCK<br />
STANDARD<br />
SELECT:[^][@]<br />
ADJUST:[{][}]<br />
H: 128 V: 32<br />
32<br />
16<br />
H: 0 V: 0<br />
TOP LEFT<br />
OFF ON<br />
OFF<br />
A <strong>For</strong> the value adjusting items<br />
Press the ENTER button to<br />
display an individual adjustment<br />
screen.<br />
POSITION<br />
H:<br />
V: 128<br />
32<br />
DOT CLOCK 32<br />
Press the I or H button to<br />
adjust the setting.<br />
Some items can be adjusted by<br />
pressing the F or G button.<br />
You can also adjust the bar-scale<br />
items pressing the I or H button<br />
in the menu screen.<br />
B <strong>For</strong> the selective items<br />
RESIZING OFF ON<br />
Press the I or H button to select<br />
the setting.<br />
C <strong>For</strong> the fixed items<br />
Press the ENTER button, and the<br />
function will work.<br />
ON<br />
ENTER:[ENTER]<br />
ESC:[MENU]<br />
C<br />
Returning a setting to<br />
the factory default<br />
If you press the STD (standard)<br />
button on the remote control unit,<br />
you can return settings to the<br />
factory default settings. However,<br />
the operation of this function varies<br />
depending on which screen is being<br />
displayed.<br />
B When a menu screen is being<br />
displayed<br />
POSITION<br />
POSITION<br />
DOT CLOCK<br />
CLOCK PHASE<br />
KEYSTONE<br />
OSD POSITION<br />
RESIZING<br />
AUTO SETUP<br />
FRAME LOCK<br />
STANDARD<br />
SELECT:[^][@]<br />
ADJUST:[{][}]<br />
H: 128 V: 32<br />
32<br />
16<br />
H: 0 V: 0<br />
TOP LEFT<br />
OFF ON<br />
OFF<br />
All items displayed will be returned<br />
to their factory default settings.<br />
B When an individual adjustment<br />
screen is being displayed<br />
Only the item displayed will be<br />
returned to the factory default<br />
setting.<br />
ON<br />
ENTER:[ENTER]<br />
ESC:[MENU]<br />
NOTE:<br />
B You can also select<br />
“STANDARD” from the menu<br />
screen and then press the<br />
ENTER button.<br />
DOT CLOCK 32<br />
38-ENGLISH
Adjusting the picture<br />
Press the F or G button on the<br />
projector or remote control unit to<br />
select an item, and then press the<br />
I or H button to change the<br />
setting.<br />
<strong>For</strong> the value adjusting items, press<br />
the ENTER button to display the<br />
adjustment screen, and then press<br />
the I or H button to make the<br />
adjustment.<br />
When an S-VIDEO/VIDEO signal is<br />
being input<br />
PICTURE<br />
PICTURE MODE<br />
CONTRAST<br />
BRIGHT<br />
COLOR<br />
TINT<br />
SHARPNESS<br />
COLOR TEMP.<br />
NR<br />
TV-SYSTEM<br />
STANDARD<br />
STANDARD<br />
32<br />
32<br />
32<br />
32<br />
6<br />
STANDARD<br />
1<br />
AUTO<br />
When an RGB/DVI signal is being<br />
input<br />
SELECT:[^][@]<br />
ADJUST:[{][}]<br />
ENTER:[ENTER]<br />
ESC:[MENU]<br />
PICTURE<br />
PICTURE MODE<br />
CONTRAST<br />
BRIGHT<br />
SHARPNESS<br />
COLOR TEMP.<br />
WHITE BALANCE R<br />
WHITE BALANCE G<br />
WHITE BALANCE B<br />
STANDARD<br />
SELECT:[^][@]<br />
ADJUST:[{][}]<br />
PICTURE<br />
PICTURE MODE<br />
CONTRAST<br />
BRIGHT<br />
COLOR<br />
TINT<br />
SHARPNESS<br />
COLOR TEMP.<br />
NR<br />
STANDARD<br />
STANDARD<br />
32<br />
32<br />
6<br />
STANDARD<br />
32<br />
32<br />
32<br />
ENTER:[ENTER]<br />
ESC:[MENU]<br />
When a YPBPR signal is being input<br />
STANDARD<br />
32<br />
32<br />
32<br />
32<br />
6<br />
STANDARD<br />
1<br />
PICTURE MODE<br />
NATURAL<br />
STANDARD<br />
DYNAMIC<br />
Select the picture mode that best<br />
matches the image source and<br />
room conditions.<br />
The mode best used in dark rooms<br />
is “NATURAL”. <strong>For</strong> rooms having<br />
regular lighting conditions in use,<br />
select “STANDARD”. <strong>For</strong><br />
exceptionally bright rooms, use<br />
“DYNAMIC”.<br />
Adjustments and settings<br />
SELECT:[^][@]<br />
ADJUST:[{][}]<br />
ENTER:[ENTER]<br />
ESC:[MENU]<br />
ENGLISH-39
CONTRAST<br />
This adjusts the contrast of the<br />
picture. (Adjust the “BRIGHT”<br />
setting first if required before<br />
adjusting the “CONTRAST” setting.)<br />
The picture is bright: I button<br />
The picture is dark: H button<br />
BRIGHT<br />
This adjusts the darker areas (black<br />
areas) in the picture.<br />
Black areas are too light: I button<br />
Dark areas are too solid: H button<br />
COLOR<br />
(S-VIDEO/VIDEO/YPBPR only)<br />
The color is too deep: I button<br />
The color is too pale: H button<br />
TINT<br />
(NTSC/NTSC 4.43/YPBPR only)<br />
This adjusts the flesh tones in the<br />
picture.<br />
The flesh tones are greenish:<br />
I button<br />
The flesh tones are reddish:<br />
H button<br />
SHARPNESS<br />
To soften the picture details:<br />
I button<br />
To sharpen the picture details:<br />
H button<br />
COLOR TEMP.<br />
STANDARD<br />
HIGH<br />
LOW<br />
Noise Reduction (NR)<br />
(S-VIDEO/VIDEO/480i and 576i<br />
YPBPR only)<br />
If the signal is of such poor quality<br />
that picture interference appears,<br />
you can suppress this interference<br />
by adjusting the “NR” (Noise<br />
Reduction).<br />
To turn off the “NR” feature (set the<br />
value to “0”):<br />
I button<br />
To strengthen the effect:<br />
H button<br />
WHITE BALANCE R/G/B<br />
(RGB only)<br />
This is used to adjust the white<br />
areas of the picture if they appear<br />
colorised.<br />
To make the selected color lighter:<br />
I button<br />
To make the selected color stronger:<br />
H button<br />
This is used to adjust the white<br />
areas of the picture if they appear<br />
bluish or reddish.<br />
40-ENGLISH
TV-SYSTEM<br />
(S-VIDEO/VIDEO only)<br />
AUTO<br />
NTSC<br />
NTSC4.43<br />
PAL<br />
PAL-M<br />
PAL-N<br />
SECAM<br />
This should normally be set to<br />
“AUTO”. If the signal is of such poor<br />
quality that the correct format<br />
cannot be automatically<br />
distinguished, change the setting<br />
manually to the required TV system.<br />
NOTE:<br />
B When set to “AUTO”, the<br />
projector automatically<br />
distinguishes between<br />
NTSC/NTSC 4.43/PAL/PAL60/<br />
PAL-M/PAL-N/SECAM signals.<br />
Projecting sRGB<strong>com</strong>patible<br />
pictures<br />
sRGB is an international color<br />
reproduction standard (IEC61966-2-<br />
1) established by the International<br />
Electrotechnical Commission (IEC).<br />
If you would like the colors in sRGB<strong>com</strong>patible<br />
pictures to be<br />
reproduced more faithfully, make<br />
the following settings.<br />
# Press the F or G button to<br />
select “PICTURE MODE”, and<br />
then press the I or H button<br />
to select “NATURAL”.<br />
$ Press the F or G button to<br />
select “COLOR TEMP.”, and<br />
then press the I or H button<br />
to select “STANDARD”.<br />
% Press the STD (standard)<br />
button on the remote control<br />
unit.<br />
& Press the F or G button to<br />
select “LAMP POWER” in the<br />
“O<strong>PT</strong>ION” menu, and then<br />
press the I or H button to<br />
select “HIGH”.<br />
NOTE:<br />
B sRGB is only enabled when<br />
RGB signals are being input.<br />
Adjustments and settings<br />
ENGLISH-41
Adjusting the position<br />
When an RGB signal is being<br />
input, press the AUTO SETUP<br />
button first to initiate automatic<br />
positioning. If the optimum setting<br />
is not obtained when “AUTO<br />
SETUP” is carried out, adjust by<br />
the following procedure.<br />
Press the F or G button on the<br />
projector or remote control unit to<br />
select an item, and then press the I<br />
or H button to change the setting.<br />
<strong>For</strong> the value adjusting items, press the<br />
ENTER button to display the<br />
adjustment screen, and then press the<br />
I or H button to make the adjustment.<br />
Some items can be adjusted<br />
pressing the F or G button.<br />
When an RGB/DVI signal is being input<br />
POSITION<br />
POSITION<br />
DOT CLOCK<br />
CLOCK PHASE<br />
KEYSTONE<br />
OSD POSITION<br />
RESIZING<br />
AUTO SETUP<br />
FRAME LOCK<br />
STANDARD<br />
SELECT:[^][@]<br />
ADJUST:[{][}]<br />
H: 128 V: 32<br />
32<br />
16<br />
H: 0 V: 0<br />
TOP LEFT<br />
OFF ON<br />
OFF<br />
ON<br />
ENTER:[ENTER]<br />
ESC:[MENU]<br />
“POSITION”, “DOT CLOCK” and<br />
“CLOCK PHASE” are not displayed<br />
when a DVI signal is being input.<br />
When a YPBPR signal is being input<br />
POSITION<br />
POSITION<br />
CLOCK PHASE<br />
KEYSTONE<br />
OSD POSITION<br />
ASPECT<br />
RESIZING<br />
AUTO SETUP<br />
STANDARD<br />
SELECT:[^][@]<br />
ADJUST:[{][}]<br />
When an S-VIDEO/VIDEO signal is<br />
being input<br />
POSITION<br />
POSITION<br />
KEYSTONE<br />
OSD POSITION<br />
ASPECT<br />
RESIZING<br />
AUTO SETUP<br />
STANDARD<br />
SELECT:[^][@]<br />
ADJUST:[{][}]<br />
POSITION<br />
Moves the picture position.<br />
Press the I or H button to move the<br />
picture horizontally.<br />
Press the F or G button to move the<br />
picture vertically.<br />
POSITION<br />
H:<br />
V: 128<br />
32<br />
H: 64 V: 16<br />
16<br />
H: 0 V: 0<br />
TOP LEFT<br />
4:3<br />
OFF ON<br />
ENTER:[ENTER]<br />
ESC:[MENU]<br />
H: 32 V: 16<br />
H: 0 V: 0<br />
TOP LEFT<br />
4:3<br />
OFF ON<br />
ENTER:[ENTER]<br />
ESC:[MENU]<br />
42-ENGLISH
DOT CLOCK<br />
(RGB only)<br />
Periodic striped pattern interference<br />
(noise) may occur when a striped<br />
pattern such as the one below is<br />
projected. If this happens, press the<br />
I or H button to adjust so that any<br />
such noise is minimised.<br />
Picture<br />
condition<br />
Operation<br />
Press the F<br />
button.<br />
Press the G<br />
button.<br />
Press the I<br />
button.<br />
CLOCK PHASE<br />
(RGB/YPBPR only)<br />
Adjust the “DOT CLOCK” setting<br />
first before carrying out this<br />
adjustment. Press the I or H<br />
button to adjust so that the noise<br />
level is least noticeable.<br />
NOTE:<br />
B If signals with a dot clock<br />
frequency of 108 MHz or<br />
higher are being input,<br />
interference may not be<br />
<strong>com</strong>pletely eliminated when<br />
the “DOT CLOCK” and<br />
“CLOCK PHASE” adjustments<br />
are carried out.<br />
KEYSTONE<br />
If the projected image contains<br />
keystone distortion, follow the<br />
procedures in the table to correct<br />
any keystone distortion.<br />
KEYSTONE H:<br />
V:<br />
0<br />
0<br />
Press the H<br />
button.<br />
NOTE:<br />
B The greater the correction of<br />
keystone distortion amount, the<br />
more the picture quality will<br />
deteriorate, and the harder it will<br />
be<strong>com</strong>e to achieve a good level of<br />
focus. To obtain the best picture<br />
quality, set up the projector and<br />
screen in such a way that the<br />
amount of keystone correction<br />
required is as minimal as possible.<br />
B The picture size will also change<br />
when correction of keystone<br />
distortion is carried out.<br />
B The range of keystone correction<br />
varies depending on the type of<br />
signal being input (including when<br />
no signal is being input). If you<br />
make an adjustment that is outside<br />
the allowable range, the setting will<br />
not be changed. In addition, if the<br />
input signal is changed after<br />
keystone correction has been<br />
carried out, the correction setting<br />
may be cancelled. This indicates<br />
ENGLISH-43<br />
Adjustments and settings
that the current correction setting<br />
exceeds the allowable range for<br />
the new input signal.<br />
B If you correct both vertical and<br />
horizontal keystone distortion at<br />
the same time, the allowable range<br />
of keystone correction be<strong>com</strong>es<br />
smaller. If you make an adjustment<br />
that is outside the allowable range,<br />
the setting will not be changed.<br />
B The ratio of length and width of an<br />
image may be<strong>com</strong>e incorrect<br />
depending on the amount of the<br />
keystone correction.<br />
16:9<br />
The picture is <strong>com</strong>pressed to a ratio<br />
of 16:9 and projected.<br />
When a<br />
horizontally<br />
squeezed<br />
signal is being<br />
input.<br />
[<br />
OSD POSITION<br />
Press the I or H button to move<br />
the OSD position.<br />
ASPECT<br />
(S-VIDEO/VIDEO/480i, 576i, 480p<br />
and 576p YPBPR only)<br />
S4:3<br />
The size of the input signal is<br />
<strong>com</strong>pressed to 75% and projected.<br />
(This is useful for projecting a<br />
picture with a 4:3 aspect ratio onto a<br />
16:9 screen.)<br />
AUTO<br />
4:3<br />
16:9<br />
S4:3<br />
AUTO<br />
(S-VIDEO only)<br />
When an S1 video signal is being<br />
input, the aspect ratio is changed<br />
automatically to project a 16:9<br />
picture.<br />
4:3<br />
The input signal is projected without<br />
change.<br />
When a 4:3<br />
signal is being<br />
input.<br />
[<br />
When using the 16:9 screen<br />
44-ENGLISH
S1 video signals<br />
B S1 video signals are a type of<br />
video signal with an aspect ratio<br />
of 16:9 which include a detector<br />
signal. This detector signal is<br />
output by some sources such as<br />
wide-vision video decks.<br />
B When “ASPECT” is set to “AUTO”,<br />
the projector recognizes the<br />
detector signal and automatically<br />
switches the aspect ratio to 16:9.<br />
NOTE:<br />
B If a selected mode does not<br />
match the aspect ratio of the<br />
input signal, it may affect the<br />
quality of viewing of the original<br />
picture. Keep this in mind when<br />
selecting the aspect ratio.<br />
B If using this projector in places<br />
such as cafes or hotels to<br />
display programs for a<br />
<strong>com</strong>mercial purpose or for public<br />
presentation, note that if the<br />
aspect ratio (16:9) selection<br />
function is used to change the<br />
aspect ratio of the screen<br />
picture, you may be infringing<br />
the rights of the original copyright<br />
owner for that program under<br />
copyright protection laws.<br />
B If a normal (4:3) picture which<br />
was not originally intended for<br />
wide-screen viewing is<br />
projected onto a wide screen,<br />
distortion may occur around<br />
the edges of the picture, or<br />
part of the picture may not be<br />
visible. Such programs should<br />
be viewed in 4:3 mode to give<br />
proper consideration to the<br />
aims and intentions of the<br />
original programme’s creator.<br />
RESIZING<br />
This should normally be set to “ON”.<br />
(This setting is only for signals<br />
which have lower resolutions than<br />
the LCD panels. Refer to page 70<br />
for details.)<br />
ON<br />
The pixel resolution of the input<br />
signal is converted to the same<br />
resolution as the LCD panels before<br />
being projected. <strong>For</strong> signals with<br />
lower resolutions, gaps in the pixels<br />
are automatically interpolated into<br />
the picture before it is projected.<br />
This may sometimes cause<br />
problems with the quality of the<br />
picture.<br />
OFF<br />
The input signal is projected at its<br />
original resolution, with no pixel<br />
conversion. The projected picture<br />
will be smaller than normal, so<br />
adjust the zoom setting or move the<br />
projector forwards or backwards to<br />
adjust the picture size if necessary.<br />
If set to “OFF”, some features, such<br />
as “D.ZOOM” (digital zoom) or<br />
“KEYSTONE” will not function.<br />
AUTO SETUP<br />
This item functions in the same way<br />
as the AUTO SETUP button on the<br />
remote control unit and the projector<br />
control panel. (page 28)<br />
FRAME LOCK<br />
If the picture’s condition is bad while<br />
a RGB moving picture is projected,<br />
set “FRAME LOCK” to “ON”. Refer<br />
to page 70 for <strong>com</strong>patible RGB<br />
signals.<br />
Adjustments and settings<br />
ENGLISH-45
Audio adjustment<br />
Press the F or G button on the<br />
projector or remote control unit to<br />
select an item.<br />
AUDIO<br />
VOLUME<br />
MUTE<br />
20<br />
OFF ON<br />
VOLUME<br />
Press the I or H button to adjust<br />
the volume of the sound output.<br />
MUTE<br />
Set to “ON” pressing the I or H<br />
button to turn off the volume of the<br />
sound output. To cancel muting, set<br />
to “OFF”.<br />
SELECT:[^][@]<br />
ADJUST:[{][}]<br />
ENTER:[ENTER]<br />
ESC:[MENU]<br />
Changing the display language<br />
Press the F, G, I and H buttons<br />
on the projector or remote control<br />
unit to select a language, then press<br />
the ENTER button to accept the<br />
setting.<br />
LANGUAGE<br />
ENGLISH<br />
DEUTSCH<br />
FRANÇAIS<br />
ESPAÑOL<br />
ITALIANO<br />
SELECT:[^][@][{][}]<br />
SELECT:[{][}]<br />
ESC:[MENU]<br />
ENTER:[ENTER]<br />
46-ENGLISH
Option settings<br />
Press the F or G button on the<br />
projector or remote control unit to<br />
select an item, then press the I or<br />
H button to change the setting.<br />
O<strong>PT</strong>ION<br />
OSD<br />
AUTO SEARCH<br />
AUTO SIGNAL<br />
RGB2 SELECT<br />
RGB/YPBPR<br />
VGA60/480p<br />
BACK COLOR<br />
CINEMA REALITY<br />
NEXT PAGE @<br />
SELECT:[^][@]<br />
ADJUST:[{][}]<br />
O<strong>PT</strong>ION<br />
PREVIOUS PAGE ^<br />
FRONT/REAR<br />
DESK/CEILING<br />
FAN CONTROL<br />
LAMP POWER<br />
LAMP RUN TIME<br />
FUNC1<br />
CONTROL KEY<br />
SET ID<br />
AUTO POWER OFF<br />
SELECT:[^][@]<br />
ADJUST:[{][}]<br />
OFF<br />
OFF<br />
OFF<br />
INPUT<br />
RGB<br />
VGA60<br />
BLUE<br />
OFF<br />
ESC:[MENU]<br />
FRONT<br />
DESK<br />
STANDARD<br />
LOW<br />
MUTE<br />
OFF<br />
ON<br />
ON<br />
ON<br />
OUTPUT<br />
YPBPR<br />
480p<br />
BLACK<br />
ON<br />
REAR<br />
CEILING<br />
HIGH<br />
HIGH<br />
10 H<br />
KEYSTONE<br />
ON<br />
ALL<br />
DISABLE<br />
ENTER:[ENTER]<br />
ESC:[MENU]<br />
OSD<br />
ON<br />
The signal name is displayed in the<br />
top-right corner of the screen when<br />
the input signal is changed.<br />
OFF<br />
Use this setting when you do not<br />
want the signal name to be<br />
displayed.<br />
NOTE:<br />
B The setting for “TV-SYSTEM”<br />
will also be displayed when an<br />
S-VIDEO/VIDEO signal is being<br />
input.<br />
AUTO SEARCH<br />
ON<br />
The input signal will be detected and<br />
selected automatically when the input<br />
select (RGB, VIDEO) buttons are<br />
pressed for a few seconds. (page 14)<br />
OFF<br />
“AUTO SEARCH” is disabled.<br />
NOTE:<br />
B “AUTO SEARCH” will not<br />
function when the input signal is<br />
being projected.<br />
AUTO SIGNAL<br />
This should normally be set to “ON”.<br />
ON<br />
“AUTO SETUP” will be carried out<br />
automatically when the input signal<br />
is changed.<br />
OFF<br />
“AUTO SETUP” will not function<br />
when the input signal is changed.<br />
RGB2 SELECT<br />
This setting is used to select the<br />
function of the RGB2 IN/RGB OUT<br />
connector.<br />
When set to “OUTPUT”, the<br />
selected input signal (RGB1 or<br />
RGB3) will be output.<br />
RGB/YPBPR<br />
This setting is valid when 480i, 576i,<br />
480p, 576p, 1 080/60i, 1 080/50i<br />
and 720/60p signals are being input.<br />
Select the setting in accordance<br />
with the input signal.<br />
“RGB/YPBPR” is displayed when the<br />
RGB1 IN, RGB2 IN or RGB3 IN<br />
connector has a signal being input.<br />
ENGLISH-47<br />
Adjustments and settings
VGA60/480p<br />
Set to “VGA60” when 59.9Hz<br />
VGA480 signals are being input<br />
(refer to page 70 for details). Set to<br />
“480p” when 480p RGB signals are<br />
being input.<br />
BACK COLOR<br />
This sets the color which is<br />
projected onto the screen when no<br />
signal is being input to the projector.<br />
CINEMA REALITY<br />
(S-VIDEO/VIDEO/480i and 576i<br />
YPBPR only)<br />
ON<br />
Set to “ON” when you would like 24<br />
frames per second pictures (such as<br />
movies) to project the source<br />
faithfully.<br />
OFF<br />
Set to “OFF” when the projected<br />
pictures have problems with<br />
captions or subtitles when the<br />
setting is “ON”.<br />
FRONT/REAR<br />
This setting should be changed in<br />
accordance with the projector<br />
setting-up method.<br />
(Refer to page 18.)<br />
FRONT<br />
When the projector is placed in front<br />
of a screen.<br />
REAR<br />
When using a translucent screen.<br />
DESK/CEILING<br />
This setting should be changed in<br />
accordance with the projector<br />
setting-up method.<br />
(Refer to page 18.)<br />
DESK<br />
When the projector is placed on a<br />
desk or similar.<br />
CEILING<br />
When the projector is suspended<br />
from a ceiling using the ceiling<br />
bracket (sold separately).<br />
FAN CONTROL<br />
Set “FAN CONTROL” to “HIGH”,<br />
when using this projector at high<br />
elevations (above 1 400 m) only.<br />
LAMP POWER<br />
This setting changes the lamp<br />
brightness. When set to “LOW”, the<br />
luminance of the lamp is reduced,<br />
but the projector uses less power,<br />
and the operating noise is also<br />
reduced. This can help to extend<br />
the lamp’s operating life. If using the<br />
projector in small rooms where high<br />
luminance is not required, it is<br />
re<strong>com</strong>mended that you set the<br />
“LAMP POWER” to “LOW”.<br />
LAMP RUN TIME<br />
This setting displays the usage time<br />
for the lamp unit which is currently<br />
being used. When replacing the<br />
lamp unit, follow the instructions on<br />
page 58, and reset “LAMP RUN<br />
TIME” to “0”.<br />
NOTE:<br />
B The lamp’s operating life varies<br />
depending on the usage<br />
conditions (such as the “LAMP<br />
POWER” setting and the<br />
number of times the power is<br />
turned on and off).<br />
48-ENGLISH
FUNC 1<br />
This assigns a function to the FUNC1<br />
button of the remote control unit .<br />
MUTE<br />
Functions in the same way as the<br />
“MUTE” function. (page 46)<br />
KEYSTONE<br />
Functions in the same way as when<br />
“KEYSTONE” is selected from the<br />
“POSITION” menu screen. (page<br />
43)<br />
CONTROL KEY<br />
To disable the buttons on the<br />
projector, set “CONTROL KEY” to<br />
“OFF”. A confirmation screen will<br />
then be displayed. Select “OK” by<br />
pressing the I or H button. To use<br />
the buttons on the projector, set to<br />
“ON” by using the remote control<br />
unit.<br />
AUTO POWER OFF<br />
If no signal is input to the projector<br />
for the duration of the period you<br />
set, the projector will return to<br />
standby mode. The period can be<br />
set from 15 minutes to 60 minutes in<br />
5 minute intervals. If you don’t use<br />
this feature, set it to “DISABLE”.<br />
This feature will not function when<br />
using the “FREEZE” function.<br />
NOTE:<br />
B When the projector is<br />
connected to a personal<br />
<strong>com</strong>puter via a wired LAN, the<br />
projector will go into “WEB<br />
STANDBY” mode. (page 50)<br />
SET ID<br />
This item is used to set the projector<br />
ID number to control two or more<br />
projectors either simultaneously or<br />
separately.<br />
ALL<br />
1<br />
64<br />
ALL<br />
The projectors can be controlled from<br />
any remote control unit regardless of<br />
their ID numbers.<br />
1-64<br />
The projector can be controlled from<br />
the remote control unit with the<br />
same ID number.<br />
NOTE:<br />
B “SET ID” is set to “ALL” by<br />
default. Hence ID number<br />
need not be set when only one<br />
projector is used.<br />
B If the projectors are given ID<br />
numbers, their remote control<br />
units must be assigned the<br />
same ID numbers, respectively.<br />
B When several projectors are set<br />
up together and “SET ID” is set<br />
to “ALL”, none of the projectors<br />
can be operated separately<br />
from other projectors, even if<br />
they have been set with<br />
different ID numbers.<br />
B The projector cannot be turned on<br />
and off from the remote control<br />
unit if the “CONTROLLER ID”<br />
does not match the projector ID<br />
number. <strong>For</strong> details on setting the<br />
projector ID number in the remote<br />
control unit, refer to page 23.<br />
Adjustments and settings<br />
ENGLISH-49
Adjusting the lens<br />
Press the F or G button on the projector<br />
or remote control unit to select an item.<br />
When adjusting “ZOOM/FOCUS”, press<br />
the ENTER button to display the<br />
adjustment screen.<br />
Press the LENS button.<br />
LENS<br />
ZOOM/FOCUS<br />
LENS SELECT<br />
SELECT:[^][@]<br />
Network setup<br />
You need adjust some items when<br />
controlling the projector with a<br />
personal <strong>com</strong>puter via a wired LAN.<br />
Refer to the “Network Function Edition”<br />
operating instructions for details.<br />
NETWORK<br />
NETWORK<br />
HOSTNAME<br />
WEB CONTROL<br />
WEB STANDBY<br />
WEB PASSWORD<br />
MAC ADDRESS<br />
SELECT:[^][@]<br />
50-ENGLISH<br />
OFF<br />
OFF<br />
STANDARD<br />
ENTER:[ENTER]<br />
ESC:[MENU]<br />
LAN1<br />
PROJECTOR<br />
ON<br />
ON<br />
00:0B:97:41:00:00<br />
ENTER:[ENTER]<br />
ESC:[MENU]<br />
NETWORK<br />
Network settings can be selected<br />
and you can then make further<br />
settings.<br />
HOSTNAME<br />
The host name for this projector can<br />
be set.<br />
ZOOM/FOCUS<br />
Refer to page 31 for details.<br />
LENS SELECT<br />
Change the setting in accordance<br />
with the type of projection lens (sold<br />
separately) by pressing the I or H<br />
button.<br />
STANDARD<br />
<strong>For</strong> standard projection<br />
LONG FOCUS<br />
<strong>For</strong> ET-LE30<br />
MIDDLE FOCUS<br />
<strong>For</strong> ET-LE20<br />
SHORT FOCUS<br />
<strong>For</strong> ET-LE10<br />
WEB CONTROL<br />
To control the projector with a<br />
personal <strong>com</strong>puter via a wired LAN,<br />
set “WEB CONTROL” to “ON”. To<br />
prevent it, set to “OFF”.<br />
WEB STANDBY<br />
To turn on the power with a personal<br />
<strong>com</strong>puter via a wired LAN, set the “WEB<br />
STANDBY” to “ON”. When the projector is<br />
in “WEB STANDBY” mode (the projector<br />
is in standby mode and connected to a<br />
<strong>com</strong>puter via a wired LAN), the cooling fan<br />
operates and the power indicator on the<br />
projector flashes slowly in red.<br />
WEB PASSWORD<br />
You can set the password for<br />
controlling the projector with a<br />
personal <strong>com</strong>puter via a wired LAN.<br />
MAC ADDRESS<br />
Displays the MAC address (Media<br />
Access Control Address), which is unique<br />
to the network device. This function may<br />
be needed when using the DHCP server.
Setting up the security function<br />
This projector is equipped with a security function. A password input screen<br />
can be displayed, or a <strong>com</strong>pany URL can be set up and displayed at the<br />
bottom of the projected image. A logo also can be displayed before projection.<br />
Press the I or H button on the<br />
projector or remote control unit to<br />
select “SECURITY”, then press the<br />
G button.<br />
SECURITY<br />
PASSWORD SETTING<br />
CHANGE PASSWORD<br />
TEXT DISPLAY<br />
CHANGE TEXT<br />
LOGO DISPLAY<br />
LOGO CLEAR<br />
LOGO CA<strong>PT</strong>URE<br />
PASSWORD<br />
OK:[ENTER]<br />
INVALID<br />
OFF<br />
OFF<br />
VALID<br />
(When you use the “SECURITY”<br />
function for the first time)<br />
Press the F, H, G, I, F, H, G<br />
and I buttons in order, then press<br />
the ENTER button.<br />
(When a password change has<br />
been made before)<br />
Type in the changed password, then<br />
press the ENTER button.<br />
SECURITY<br />
PASSWORD SETTING<br />
CHANGE PASSWORD<br />
TEXT DISPLAY<br />
CHANGE TEXT<br />
LOGO DISPLAY<br />
LOGO CLEAR<br />
LOGO CA<strong>PT</strong>URE<br />
CANCEL:[MENU]<br />
INVALID<br />
OFF<br />
OFF<br />
ON<br />
ON<br />
VALID<br />
ON<br />
ON<br />
PASSWORD SETTING<br />
The password input screen can be<br />
displayed when the power is turned<br />
on. All of the controls other than the<br />
POWER button are disabled unless<br />
the password is entered correctly.<br />
VALID<br />
“PASSWORD SETTING” is<br />
enabled.<br />
INVALID<br />
“PASSWORD SETTING” is<br />
disabled. The password input<br />
screen will not be displayed when<br />
the power is turned on.<br />
CHANGE PASSWORD<br />
Passwords can be changed. Press<br />
the ENTER button to display the<br />
“CHANGE PASSWORD” screen.<br />
NEW<br />
CONFIRM<br />
FINISH:[ENTER]<br />
CANCEL:[MENU]<br />
# Set a password by pressing the<br />
F,G,I, and H buttons. (A<br />
maximum of 8 buttons can be<br />
set.)<br />
$ Press the ENTER button.<br />
% Enter the password again for<br />
confirmation.<br />
& Press the ENTER button.<br />
Password change will be<br />
<strong>com</strong>pleted.<br />
Adjustments and settings<br />
SELECT:[^][@][{][}]<br />
ADJUST:[{][}]<br />
ENTER:[ENTER]<br />
ESC:[MENU]<br />
ENGLISH-51
NOTE:<br />
B The entered password will<br />
appear as . It will not be<br />
displayed on the screen.<br />
B If you enter the wrong<br />
password, the letters<br />
“PASSWORD” and “NEW” will<br />
be<strong>com</strong>e red. Enter the correct<br />
password again.<br />
TEXT DISPLAY<br />
You can set text to be displayed at<br />
the bottom of the projected image at<br />
all times.<br />
ON<br />
“TEXT DISPLAY” is enabled.<br />
OFF<br />
“TEXT DISPLAY” is disabled.<br />
CHANGE TEXT<br />
The text which is displayed when<br />
“TEXT DISPLAY” is set to “ON” can<br />
be changed.<br />
Press the ENTER button to display<br />
the “CHANGE TEXT” screen.<br />
Above: Setting before change<br />
Below: Setting after change<br />
Cursor<br />
<br />
<br />
'<br />
<br />
<br />
<br />
<br />
<br />
<br />
<br />
52-ENGLISH<br />
Editing items<br />
# Press the F, G, I and H<br />
buttons to select the letters, then<br />
press the ENTER button.<br />
(You can enter 20 letters<br />
continuously.)<br />
<br />
←<br />
Moves cursor to left.<br />
→<br />
Moves cursor to right.<br />
DELETE<br />
Deletes a letter on the cursor.<br />
ALL DELETE<br />
Deletes all the letters.<br />
$ Press the F, G, I and H<br />
buttons to select “OK”, then press<br />
the ENTER button.<br />
C Select “CANCEL” to cancel the<br />
change.
NOTE:<br />
B The letters which cannot be<br />
input will be displayed in gray,<br />
and cannot be selected in<br />
“CHANGE TEXT”.<br />
LOGO CA<strong>PT</strong>URE<br />
A logo can be captured from the<br />
picture being projected. Press the<br />
ENTER button to display the<br />
capture adjustment screen.<br />
LOGO DISPLAY<br />
A logo can be displayed before<br />
projection.<br />
ON<br />
“LOGO DISPLAY” is enabled.<br />
OFF<br />
“LOGO DISPLAY” is disabled.<br />
LOGO CLEAR<br />
Captured logo data can be cleared.<br />
Press the ENTER button to display<br />
the confirmation screen, and then<br />
select “OK”.<br />
POSITION:[{ } ^ @]<br />
CA<strong>PT</strong>URE:[ENTER]<br />
CANCEL:[MENU]<br />
Capturing frame<br />
# Press the FGIand H buttons<br />
to move the capturing frame to<br />
the area you want to capture.<br />
$ Press the ENTER button.<br />
C The letters “CA<strong>PT</strong>URE ...” and<br />
the progress status will be<br />
displayed while logo capture is<br />
being carried out.<br />
NOTE:<br />
B The size of the capturing frame<br />
varies depending on the<br />
signals being input.<br />
B Fine images such as landscapes<br />
may be unable to be captured.<br />
B Only RGB signals can be<br />
captured. (Except 480i, 576i,<br />
480p, 576p, 1 080/60i,<br />
1 080/50i and 720/60p. Refer<br />
to page 70 for details.)<br />
B Images with 512 x 384 pixels<br />
can be captured.<br />
B It is re<strong>com</strong>mended that you input<br />
XGA signals, and set<br />
“KEYSTONE” to “0” when<br />
carrying out “LOGO CA<strong>PT</strong>URE”.<br />
Adjustments and settings<br />
ENGLISH-53
When the TEMP indicator and the<br />
LAMP indicator are illuminated<br />
There are two indicators on the control panel of the projector which give<br />
information about the operating condition of the projector. These indicators<br />
illuminate or flash to warn you about problems that have occurred inside the<br />
projector, so if you notice that one of the indicators is on, turn off the power<br />
and check the table below for the cause of the problem.<br />
LAMP indicator<br />
TEMP indicator<br />
RGB INPUT<br />
LAMP<br />
TEMP<br />
INPUT<br />
AUTO SETUP VIDEO RGB<br />
SHUTTER<br />
Indicator<br />
display<br />
Problem<br />
Possible<br />
cause<br />
Remedy<br />
TEMP indicator<br />
Illuminated (red)<br />
(Lamp unit on)<br />
The surrounding temperature or<br />
the temperature inside the<br />
projector has be<strong>com</strong>e unusually<br />
high.<br />
Flashing (red)<br />
(Lamp unit off)<br />
The surrounding temperature or<br />
the temperature inside the<br />
projector has be<strong>com</strong>e<br />
dangerously high, causing the<br />
lamp unit to automatically shut<br />
off.<br />
B The ventilation holes may be covered.<br />
B The ambient temperature in the place of use may be too high.<br />
B The air filter may be blocked.<br />
B Uncover the ventilation holes.<br />
B Set up the projector in a place where the temperature is<br />
between 0 °C (32 °F) and 40 °C (104 °F) and the humidity is<br />
between 20% and 80% (with no condensation). [If you set the<br />
“FAN CONTROL” to “HIGH” (page 48), set up the projector in a<br />
place where the temperature is between 0 °C (32 °F) and 35 °C<br />
(95 °F) and the humidity is between 20% and 80% (with no<br />
condensation).]<br />
B Turn off the MAIN POWER switch by following the procedure<br />
on page 26, and then clean the air filter (refer to page 56).<br />
54-ENGLISH
LAMP indicator<br />
Indicator<br />
Illuminated (red)<br />
display<br />
It is nearly time to<br />
Problem replace the lamp<br />
unit.<br />
Flashing (red)<br />
An abnormality has been detected in the lamp<br />
circuit.<br />
Possible<br />
cause<br />
B Does “REPLACE<br />
LAMP” appear on<br />
the screen after<br />
the projector is<br />
turned on?<br />
B The power may<br />
have been turned<br />
on straight away<br />
after it was turned<br />
off.<br />
B There may be an<br />
abnormality in the<br />
lamp circuit.<br />
Remedy<br />
B This occurs when<br />
the operation time<br />
for the lamp unit is<br />
nearing 1 350<br />
hours (when<br />
“LAMP POWER”<br />
has been set to<br />
“HIGH”). Ask your<br />
dealer or an<br />
Authorized<br />
Service Center to<br />
replace the lamp<br />
unit.<br />
B Wait for a while<br />
until the lamp unit<br />
cools down before<br />
turning the power<br />
back on again.<br />
B Turn off the MAIN<br />
POWER switch by<br />
following the<br />
procedure given<br />
on page 26, and<br />
then contact an<br />
Authorized<br />
Service Center.<br />
NOTE:<br />
B Be sure to turn off the MAIN POWER switch by following the procedure<br />
given in “Turning off the power” on page 26 before carrying out any of<br />
the procedures in the “Remedy” column.<br />
B If the power turns off after the TEMP indicator has illuminated, it means<br />
an abnormality has occurred. Please contact an Authorized Service<br />
Center so that the necessary repairs can be made.<br />
Care and maintenance<br />
ENGLISH-55
Cleaning and replacing the air filter<br />
If the air filter be<strong>com</strong>es clogged with dust, the internal temperature of the<br />
projector will rise, the TEMP indicator will illuminate and the projector’s<br />
power will turn off (the TEMP indicator will flash after the power is turned off).<br />
The air filter should be cleaned every 100 hours of use.<br />
# Turn off the MAIN POWER<br />
switch and disconnect the<br />
power cord plug from the wall<br />
outlet.<br />
Turn off the MAIN POWER switch<br />
according to the procedure given<br />
in “Turning off the power” on page<br />
26 before disconnecting the power<br />
cord plug from the wall outlet.<br />
$ Gently turn the projector<br />
upside down.<br />
& Clean the air filter.<br />
Soak the air filter in water and<br />
wash out dirt by hand.<br />
NOTE:<br />
B Do not use detergent.<br />
B Be careful not to separate the<br />
air filter cover from the frame<br />
when washing the air filter.<br />
NOTE:<br />
B Place the projector on top of a<br />
soft cloth so that it will not<br />
be<strong>com</strong>e scratched.<br />
% Remove the air filter.<br />
Put your fingernails under the air<br />
filter and pull the air filter out of<br />
the projector.<br />
Air filter<br />
' Dry the air filter and install it to<br />
the projecter.<br />
NOTE:<br />
B Be sure to install the air filter<br />
before using the projector. If<br />
the projector is used without<br />
the air filter installed, dust and<br />
other foreign particles will be<br />
drawn into the projector, and<br />
malfunctions will result.<br />
B If the dust cannot be removed<br />
by cleaning, it is time to<br />
replace the air filter. Please<br />
consult your dealer.<br />
Furthermore, if the lamp unit is<br />
being replaced, replace the air<br />
filter at this time also.<br />
56-ENGLISH
Replacing the lamp unit<br />
Warning<br />
The lamp unit should only be<br />
replaced by a qualified<br />
technician.<br />
When replacing the lamp, allow it<br />
to cool for at least one hour<br />
before handling it.<br />
B The lamp cover gets very hot,<br />
and contact with it can cause<br />
burns.<br />
Notes on replacing the lamp<br />
unit<br />
B The light generating lamp is<br />
made of glass, so dropping it or<br />
allowing it to hit hard objects may<br />
cause it to burst. Be careful when<br />
handling the lamp.<br />
B Dispose of the removed old lamp<br />
with the same care that would be<br />
taken with a fluorescent light.<br />
B A Phillips screwdriver is<br />
necessary for removing the lamp<br />
unit.<br />
Lamp unit replacement<br />
period<br />
The lamp is a consumable product.<br />
Even when the full life of the bulb<br />
has not been exhausted, the<br />
brightness of the light will gradually<br />
decline. Therefore periodic<br />
replacement of the lamp is<br />
necessary.<br />
The intended lamp replacement<br />
interval is 1 500 hours, but it is<br />
possible that the lamp may need to<br />
be replaced earlier due to variables<br />
such as a particular lamp’s<br />
characteristics, usage conditions<br />
and the installation environment.<br />
Early preparation for lamp<br />
replacement is encouraged.<br />
The lamp will automatically shut off<br />
after approximately 10 minutes<br />
when 1 500 hours of use have been<br />
reached because of a much greater<br />
chance of it exploding after this<br />
time.<br />
NOTE:<br />
B The projector is not supplied<br />
with a replacement lamp unit.<br />
Please ask your dealer for<br />
details. Lamp unit product<br />
no.: ET-LA785<br />
CAUTION:<br />
B Do not use any lamp unit other<br />
than the one with the product<br />
number indicated above.<br />
NOTE:<br />
B The usage hours explained<br />
above are for when “LAMP<br />
POWER” in the “O<strong>PT</strong>ION”<br />
menu has been set to “HIGH”.<br />
If “LAMP POWER” is set to<br />
“LOW”, the brightness of the<br />
lamp will be less and life of the<br />
lamp can be extended.<br />
B While 1 500 hours is the<br />
intended replacement interval,<br />
it is not a period of time<br />
covered by warranty.<br />
Care and maintenance<br />
ENGLISH-57
On-screen display<br />
LAMP indicator<br />
More than 1 350 hours<br />
More than 1 500 hours<br />
Displayed for 30<br />
seconds. Pressing any<br />
button will clear the<br />
display.<br />
Remains displayed until<br />
any button is pressed.<br />
Illuminates red during<br />
image projection and<br />
standby mode.<br />
Lamp unit replacement procedure<br />
NOTE:<br />
B If the lamp usage time has passed 1 500 hours (when “LAMP POWER”<br />
has been set to “HIGH”), the projector will switch to standby mode after<br />
approximately 10 minutes of operation. The steps ) to . on the next<br />
page should thus be <strong>com</strong>pleted within 10 minutes.<br />
# Turn off the MAIN POWER<br />
switch according to the<br />
procedure given in “Turning off<br />
the power” on page 26, and<br />
then disconnect the power<br />
cord plug from the wall outlet<br />
and check that the area around<br />
the lamp unit has cooled down.<br />
$ Use a Phillips screwdriver to<br />
turn the air outlet port fixing<br />
screws at the back of the<br />
projector, and then open the air<br />
outlet port.<br />
Air outlet port<br />
Air outlet port fixing screws<br />
% Use a Phillips screwdriver to<br />
loosen the two lamp unit fixing<br />
screws until the screws turn<br />
freely. Then hold the handle of<br />
the lamp unit and gently pull it<br />
out from the projector.<br />
Lamp unit fixing screws<br />
Handle<br />
& Insert the new lamp unit while<br />
making sure that the direction<br />
of insertion is correct, and then<br />
use a Phillips screwdriver to<br />
securely tighten the lamp unit<br />
fixing screws.<br />
58-ENGLISH
' Close the air outlet port, and<br />
then use a Phillips screwdriver<br />
to securely tighten the air<br />
outlet port fixing screws.<br />
NOTE:<br />
B Be sure to install the lamp unit<br />
and the air outlet port securely.<br />
If they are not securely<br />
installed, it may cause the<br />
protection circuit to operate so<br />
that the power cannot be<br />
turned on.<br />
( Insert the power cord plug into<br />
the wall outlet and then press<br />
the MAIN POWER switch.<br />
NOTE:<br />
B If the power indicator on the<br />
projector does not illuminate red<br />
when the MAIN POWER switch<br />
is turned on, turn the MAIN<br />
POWER switch off again and<br />
check that the lamp unit and the<br />
air outlet port are securely<br />
installed. Then turn the MAIN<br />
POWER switch back on.<br />
) Press the POWER button so<br />
that a picture is projected onto<br />
the screen.<br />
* Press the MENU button to<br />
display the menu screen, and<br />
select “O<strong>PT</strong>ION” by pressing<br />
the I or H button.<br />
O<strong>PT</strong>ION<br />
OSD<br />
AUTO SEARCH<br />
AUTO SIGNAL<br />
RGB2 SELECT<br />
RGB/YPBPR<br />
VGA60/480p<br />
BACK COLOR<br />
CINEMA REALITY<br />
OFF<br />
OFF<br />
OFF<br />
INPUT<br />
RGB<br />
VGA60<br />
BLUE<br />
OFF<br />
ON<br />
ON<br />
ON<br />
OUTPUT<br />
YPBPR<br />
480p<br />
BLACK<br />
ON<br />
+ Press the G button and select<br />
the “LAMP RUN TIME” by<br />
pressing the F or G button.<br />
O<strong>PT</strong>ION<br />
PREVIOUS PAGE ^<br />
FRONT/REAR<br />
DESK/CEILING<br />
FAN CONTROL<br />
LAMP POWER<br />
LAMP RUN TIME<br />
FUNC1<br />
CONTROL KEY<br />
SET ID<br />
AUTO POWER OFF<br />
SELECT:[^][@]<br />
ADJUST:[{][}]<br />
FRONT<br />
DESK<br />
STANDARD<br />
LOW<br />
MUTE<br />
OFF<br />
REAR<br />
CEILING<br />
HIGH<br />
HIGH<br />
10 H<br />
KEYSTONE<br />
ON<br />
ALL<br />
DISABLE<br />
ENTER:[ENTER]<br />
ESC:[MENU]<br />
, Press and hold the ENTER<br />
button for approximately 3<br />
seconds.<br />
LAMP TIME RESET<br />
Power OFF<br />
OK<br />
CANCEL<br />
The “LAMP TIME RESET” will be<br />
displayed.<br />
- Select “OK” by pressing the<br />
I or H button and press the<br />
ENTER button.<br />
This will reset the cumulative<br />
usage time for the lamp unit to<br />
zero. The lamp unit will<br />
automatically shut off, and the<br />
projector will go in the standby<br />
mode.<br />
NOTE:<br />
B If “CANCEL” is selected in step<br />
-, the operation for resetting<br />
the lamp time will be cancelled.<br />
Care and maintenance<br />
NEXT PAGE @<br />
SELECT:[^][@]<br />
ADJUST:[{][}]<br />
ESC:[MENU]<br />
ENGLISH-59
Before calling for service<br />
Before calling for service, check the following points.<br />
Problem Possible cause Page<br />
Power does not B The power cord may not be connected.<br />
–<br />
turn on. B The MAIN POWER switch is turned off.<br />
–<br />
B The main power supply is not being supplied to the –<br />
wall outlet.<br />
B TEMP indicator is illuminated or flashing.<br />
54<br />
B LAMP indicator is illuminated or flashing.<br />
55<br />
B The air outlet port has not been securely installed. 59<br />
No picture<br />
appears.<br />
The picture is<br />
fuzzy.<br />
The color is<br />
pale or grayish.<br />
No sound can<br />
be heard.<br />
The remote<br />
control unit<br />
does not<br />
operate.<br />
B The video signal input source may not be<br />
connected properly.<br />
B The input selection setting may not be correct.<br />
B The “BRIGHT” adjustment setting may be at the<br />
minimum possible setting.<br />
B The “SHUTTER” function may be in use.<br />
B The lens cover may still be attached to the lens.<br />
B The lens focus may not have been set correctly.<br />
B The projector may not be at the correct distance<br />
from the screen.<br />
B The lens may be dirty.<br />
B The projector may be tilted too much.<br />
B “COLOR” or “TINT” adjustment may be incorrect.<br />
B The input source which is connected to the<br />
projector may not be adjusted correctly.<br />
B The audio signal source may not be connected<br />
properly.<br />
B The volume adjustment may be at the lowest<br />
possible setting.<br />
B A cable may be connected to the AUDIO OUT<br />
connector.<br />
B The MUTE function may be active.<br />
B The batteries may be weak.<br />
B The batteries may not be inserted correctly.<br />
B The remote control signal receptor on the projector<br />
may be obstructed.<br />
B The remote control unit may be out of the<br />
operation range.<br />
–<br />
25<br />
40<br />
29<br />
–<br />
25,<br />
31<br />
19<br />
–<br />
19<br />
40<br />
–<br />
–<br />
30,<br />
46<br />
20,<br />
21<br />
46<br />
–<br />
22<br />
22<br />
22<br />
60-ENGLISH
Problem<br />
The buttons on<br />
the projector do<br />
not function.<br />
The picture does<br />
not display<br />
correctly.<br />
Picture from<br />
<strong>com</strong>puter does<br />
not appear.<br />
Possible cause<br />
B The “CONTROL KEY” may be set to “OFF”.<br />
In order to set the “CONTROL KEY” to “ON”<br />
without using the remote control unit, keep holding<br />
down the ENTER button on the projector and press<br />
the MENU button for more than 2 seconds.<br />
B The signal format (“TV-SYSTEM”) may not be set<br />
correctly.<br />
B There may be a problem with the video tape or<br />
other signal source.<br />
B A signal which is not <strong>com</strong>patible with the projector<br />
may be being input.<br />
B The cable may be too long.<br />
B The external video output for the laptop <strong>com</strong>puter<br />
may not be set correctly.<br />
(You may be able to change the external output<br />
settings by pressing the [Fn]+[F3] or [Fn]+[F10]<br />
keys simultaneously. The actual method varies<br />
depending on the type of <strong>com</strong>puter, so refer to the<br />
documentation provided with your <strong>com</strong>puter for<br />
further details.)<br />
B If an RGB INPUT indicator is turned off, the video<br />
signals may not be output from the <strong>com</strong>puter.<br />
B “RGB2 SELECT” in the “O<strong>PT</strong>ION” menu is set to<br />
“OUTPUT” when the signals are input to RGB2 IN /<br />
RGB OUT connector.<br />
Cleaning and maintenance<br />
Before carrying out cleaning and maintenance, be<br />
sure to disconnect the power cord plug from the<br />
wall outlet.<br />
Wipe the cabinet with a soft, dry cloth.<br />
If the cabinet is particularly dirty, soak the cloth in water with a small amount of<br />
neutral detergent in it, squeeze the cloth very well, and then wipe the cabinet.<br />
After cleaning, wipe the cabinet dry with a dry cloth. If using a chemically-treated<br />
cloth, read the instructions supplied with the cloth before use.<br />
Do not wipe the lens with a cloth that is dusty or which produces lint.<br />
If any dust or lint gets onto the lens, such dust or lint will be magnified and<br />
projected onto the screen. Use a blower to clean any dust and lint from the<br />
lens surface, or use a soft cloth to wipe off any dust or lint.<br />
Page<br />
49<br />
41<br />
–<br />
70<br />
–<br />
–<br />
14,<br />
27<br />
47<br />
ENGLISH-61<br />
Care and maintenance
Using the cable cover<br />
Putting the power cord and remote control unit away<br />
Installing the cable cover<br />
#<br />
Hook1<br />
Remote control unit<br />
(Infrared emitter)<br />
Hook2<br />
#Put the remote control unit<br />
into the cable cover with the<br />
buttons facing downward to<br />
prevent them from being<br />
pressed.<br />
$<br />
$Put the power cord and other<br />
cables into the cable cover.<br />
%<br />
Velcro<br />
%Put the Velcro through the<br />
hole, and tape it to prevent<br />
the cables from dropping out.<br />
˛'<br />
˛'<br />
˛(<br />
˛&<br />
Removing the cable cover<br />
˛$<br />
˛$<br />
# %<br />
&Insert the hook 1 of the cable<br />
cover into the mounting holes<br />
in the projector.<br />
'Push in the hook 2 until it<br />
locks into place.<br />
(Tighten the screw by turning it<br />
clockwise.<br />
#Loosen the screw by turning it<br />
anticlockwise.<br />
$Release the two hooks at the<br />
top of the cable cover.<br />
%Pull the cable cover to the<br />
rear to remove it from the<br />
projector.<br />
NOTE:<br />
Do not lift up the projector by holding the cable cover, otherwise the cable<br />
cover might <strong>com</strong>e off.<br />
62-ENGLISH
Covering the connector panel<br />
When installing the projector to the ceiling, the accessory cable cover can be<br />
used to cover the connectors after removing the cut-away parts.<br />
#Use pliers or similar to break the<br />
perforated sections of the cutaway<br />
parts.<br />
Perforated sections<br />
&Push in the hook 2 until it locks<br />
into place.<br />
Cut-away part S<br />
Cut-away<br />
part L<br />
$Work the cut-away parts back and<br />
forth several times to break the<br />
fixing tabs. Smooth off any jagged<br />
edges if necessary.<br />
Hook2<br />
Hook1<br />
'Tighten the screw by turning it<br />
clockwise.<br />
Screw<br />
Fixing tabs Fixing tabs<br />
%Pass the mains lead through cutaway<br />
part S, pass the other<br />
cables through cut-away part L,<br />
and then insert the hook1 of the<br />
cable cover into the mounting<br />
holes in the projector.<br />
Refer to page 62 for details on<br />
removing the cable cover.<br />
NOTE:<br />
B Do not cover the air inlet ports<br />
when using the cable cover as<br />
stated above.<br />
B Do not place any heavy objects<br />
on the cable cover to prevent it<br />
from falling.<br />
B Do not bend the cables greatly,<br />
otherwise it will be difficult to<br />
attach the cable cover.<br />
B Remove the cable cover when<br />
cleaning or replacing the air filter.<br />
Others<br />
ENGLISH-63
Replacing the projection lens<br />
By replacing the projection lens with a lens that is sold separately, you can<br />
change the projection distance.<br />
Removing the lens<br />
#Turn the projection lens<br />
anticlockwise until it stops.<br />
$While pressing the lens<br />
release button, turn the<br />
projection lens anticlockwise<br />
again.<br />
%Remove the projection lens.<br />
Installing the lens<br />
Signal connection<br />
Projection<br />
Groove<br />
#Insert the other projection<br />
lens (sold separately) as far<br />
as it will go, while matching<br />
the projection to the groove.<br />
$Turn the projection lens<br />
clockwise until a click is<br />
heard.<br />
NOTE:<br />
B Be sure to turn off the power before replacing the projection lens.<br />
B Do not touch the signal connection. If any dust or lint gets onto the<br />
signal connection, the electrical contact may be<strong>com</strong>e poor.<br />
B Do not touch the surface of the lens with your bare hands.<br />
B Store the replaced projection lens away carefully to avoid subjecting it<br />
to excessive vibration or shock.<br />
B Be sure to adjust “LENS SELECT” in the “LENS” menu when replacing<br />
the projection lens. (page 50)<br />
64-ENGLISH
Projection distance for each projection lens<br />
(sold separately)<br />
Projector position<br />
SH<br />
Top edge of screen<br />
Screen<br />
L<br />
Bottom edge of screen<br />
L: Projection distance<br />
SH: Image height<br />
SW:Image width<br />
SW<br />
Screen<br />
L<br />
25 mm<br />
(-31/32˝)<br />
ET-LE10 (for short-distance projection)<br />
Screen size (4:3)<br />
Projection distance (L)<br />
Diagonal<br />
length<br />
Height (SH)<br />
Width<br />
(SW)<br />
Wide<br />
(LW)<br />
Telephoto<br />
(LT)<br />
1.01 m(40˝) 0.61 m(2´) 0.81 m(2´8˝) 1.1 m(3´7˝) 1.3 m(4´3˝)<br />
1.27 m(50˝) 0.76 m(2´6˝) 1.02 m(3´4˝) 1.3 m(4´3˝) 1.7 m(5´6˝)<br />
1.52 m(60˝) 0.91 m(3´) 1.22 m(4´) 1.6 m(5´2˝) 2.0 m(6´6˝)<br />
1.77 m(70˝) 1.07 m(3´6˝) 1.42 m(4´8˝) 1.9 m(6´2˝) 2.4 m(7´10˝)<br />
2.03 m(80˝) 1.22 m(4´) 1.63 m(5´4˝) 2.2 m(7´2˝) 2.7 m(8´10˝)<br />
2.28 m(90˝) 1.37 m(4´6˝) 1.83 m(6´) 2.4 m(7´10˝) 3.1 m(10´2˝)<br />
2.54 m(100˝) 1.52 m(5´) 2.03 m(6´8˝) 2.7 m(8´10˝) 3.5 m(11´5˝)<br />
3.81 m(150˝) 2.29 m(7´6˝) 3.05 m(10´) 4.0 m(13´1˝) 5.3 m(17´4˝)<br />
5.08 m(200˝) 3.05 m(10´) 4.06 m(13´4˝) 5.4 m(17´8˝) 7.0 m(22´11˝)<br />
6.35 m(250˝) 3.81 m(12´6˝) 5.08 m(16´8˝) 6.7 m(21´11˝) 8.8 m(28´10˝)<br />
7.62 m(300˝) 4.57 m(15´) 6.10 m(20´) 8.1 m(26´6˝) 10.6 m(34´9˝)<br />
Others<br />
ENGLISH-65
ET-LE20 (for medium-distance projection)<br />
Screen size (4:3)<br />
Projection distance (L)<br />
Diagonal<br />
length<br />
Height (SH)<br />
Width<br />
(SW)<br />
Wide<br />
(LW)<br />
Telephoto<br />
(LT)<br />
1.01 m(40˝) 0.61 m(2´) 0.81 m(2´8˝) 2.1 m(6´10˝) 3.3 m(10´9˝)<br />
1.27 m(50˝) 0.76 m(2´6˝) 1.02 m(3´4˝) 2.7 m(8´10˝) 4.2 m(13´9˝)<br />
1.52 m(60˝) 0.91 m(3´) 1.22 m(4´) 3.2 m(10´5˝) 5.0 m(16´4˝)<br />
1.77 m(70˝) 1.07 m(3´6˝) 1.42 m(4´8˝) 3.8 m(12´5˝) 5.9 m(19´4˝)<br />
2.03 m(80˝) 1.22 m(4´) 1.63 m(5´4˝) 4.3 m(14´1˝) 6.8 m(22´3˝)<br />
2.28 m(90˝) 1.37 m(4´6˝) 1.83 m(6´) 4.9 m(16´) 7.7 m(25´3˝)<br />
2.54 m(100˝) 1.52 m(5´) 2.03 m(6´8˝) 5.4 m(17´8˝) 8.5 m(27´10˝)<br />
3.81 m(150˝) 2.29 m(7´6˝) 3.05 m(10´) 8.2 m(26´10˝) 12.9 m(42´3˝)<br />
5.08 m(200˝) 3.05 m(10´) 4.06 m(13´4˝) 11.0 m(36´10˝) 17.2 m(56´5˝)<br />
6.35 m(250˝) 3.81 m(12´6˝) 5.08 m(16´8˝) 13.8 m(45´3˝) 21.6 m(70´10˝)<br />
7.62 m(300˝) 4.57 m(15´) 6.10 m(20´) 16.5 m(54´1˝) 26.0 m(85´3˝)<br />
ET-LE30 (for long-distance projection)<br />
Screen size (4:3)<br />
Projection distance (L)<br />
Diagonal<br />
length<br />
Height (SH)<br />
Width<br />
(SW)<br />
Wide<br />
(LW)<br />
Telephoto<br />
(LT)<br />
1.01 m(40˝) 0.61 m(2´) 0.81 m(2´8˝) 3.4 m(11´1˝) 4.6 m(15´1˝)<br />
1.27 m(50˝) 0.76 m(2´6˝) 1.02 m(3´4˝) 4.2 m(13´9˝) 5.8 m(19´)<br />
1.52 m(60˝) 0.91 m(3´) 1.22 m(4´) 5.0 m(16´4˝) 6.9 m(22´7˝)<br />
1.77 m(70˝) 1.07 m(3´6˝) 1.42 m(4´8˝) 5.8 m(19´) 8.1 m(26´6˝)<br />
2.03 m(80˝) 1.22 m(4´) 1.63 m(5´4˝) 6.6 m(21´7˝) 9.2 m(30´2˝)<br />
2.28 m(90˝) 1.37 m(4´6˝) 1.83 m(6´) 7.4 m(24´3˝) 10.4 m(34´1˝)<br />
2.54 m(100˝) 1.52 m(5´) 2.03 m(6´8˝) 8.2 m(26´10˝) 11.5 m(37´8˝)<br />
3.81 m(150˝) 2.29 m(7´6˝) 3.05 m(10´) 12.2 m(40´) 17.3 m(56´9˝)<br />
5.08 m(200˝) 3.05 m(10´) 4.06 m(13´4˝) 16.3 m(53´5˝) 23.0 m(75´5˝)<br />
6.35 m(250˝) 3.81 m(12´6˝) 5.08 m(16´8˝) 20.4 m(66´11˝) 28.7 m(94´1˝)<br />
7.62 m(300˝) 4.57 m(15´) 6.10 m(20´) 24.4 m(80´) 34.5 m(113´2˝)<br />
66-ENGLISH
Setting-up dimensions which are not given in the table can be calculated<br />
using the formulas below.<br />
SD (m): Screen size (diagonal)<br />
LW: Projection distance for the wide lens position<br />
LT: Projection distance for the telephoto lens position<br />
Model No. of projection lens Aspect ratio Methods of calculation of Projection distance (L) Unit: mm<br />
Zoom lens<br />
ET-LE10<br />
(1.3-1.7:1)<br />
ET-LE20<br />
(2.6-4.2:1)<br />
ET-LE30<br />
(4.0-5.6:1)<br />
4:3<br />
16:9<br />
4:3<br />
16:9<br />
4:3<br />
16:9<br />
LW = 0.027xSD/0.0254-0.0523<br />
LT = 0.0355xSD/0.0254-0.0509<br />
LW = 0.0294xSD/0.254-0.0523<br />
LT = 0.0387xSD/0.0254-0.0509<br />
LW = 0.0554xSD/0.0254-0.134<br />
LT = 0.0871xSD/0.0254-0.136<br />
LW = 0.0604xSD/0.254-0.134<br />
LT = 0.0949xSD/0.254-0.136<br />
LW = 0.0809xSD/0.0254+0.104<br />
LT = 0.1147xSD/0.0254+0.096<br />
Others<br />
LW = 0.0881xSD/0.0254+0.104<br />
LT = 0.1250xSD/0.0254+0.096<br />
ENGLISH-67
Specifications<br />
Power supply:<br />
100 V - 240 V ~, 50 Hz/60 Hz<br />
Power consumption:<br />
380 W [During standby (when fan is<br />
stopped): approx. 11 W, during “WEB<br />
STANDBY” mode: approx. 40W]<br />
Amps:<br />
4.5 A - 2.0 A<br />
LCD panel:<br />
Panel size (diagonal): 1.0 type (25.4 mm)<br />
Aspect ratio: 4:3<br />
Micro lens array:<br />
Available<br />
Display method:<br />
3 transparent LCD panels (RGB)<br />
Drive method:<br />
Active matrix method<br />
Pixels:<br />
786 432 (1 024 x 768) x 3 panels<br />
Lens:<br />
Electronic zoom (1 - 1.2) / focus<br />
F 1.7 - 2.1 f 40.7 mm - 52.8 mm<br />
Lamp: UHM lamp (270 W)<br />
Luminosity:<br />
3 200 lm<br />
Scanning frequency (for RGB signals):<br />
Horizontal scanning frequency: 15 kHz - 91 kHz<br />
Vertical scanning frequency: 50 Hz - 87 Hz<br />
Dot clock frequency:<br />
Less than 108 MHz<br />
YPBPR signals:<br />
480i, 576i, 480p, 576p, 1 080/60i,<br />
1 080/50i, 720/60p<br />
Color system:<br />
7 (NTSC/NTSC 4.43/PAL/PAL-M/PAL-N/<br />
PAL60/SECAM)<br />
Projection size: 1 016 mm - 7 620 mm (40˝ - 300˝)<br />
Throw distance:<br />
1.6 m - 16.0 m (5´2˝ - 52´5˝)<br />
Optical axis shift:<br />
10:0 (fixed)<br />
Screen aspect ratio: 4:3<br />
Installation:<br />
Front/Rear/Ceiling/Desk (menu selection)<br />
Speaker: 4 cm x 3 cm oval x 2<br />
Max. useable volume output: 2 W (stereo)<br />
Connectors<br />
DVI-D IN:<br />
Single-line, DVI-D 24 pin<br />
RGB IN/OUT:<br />
Dual-line, D-sub HD 15-pin (female)<br />
[One line is available for input and output,<br />
selectable using an on-screen menu]<br />
Single-line, BNCx5<br />
During YPBPR input/output:<br />
Y: 1.0 V [p-p] (Including sync), 75 Ω<br />
PB, PR :<br />
0.7 V [p-p], 75 Ω<br />
During RGB input/output:<br />
R.G.B.:<br />
0.7 V [p-p], 75 Ω<br />
G.SYNC:<br />
1.0 V [p-p], 75 Ω<br />
68-ENGLISH
HD/SYNC:<br />
TTL, automatic positive/negative polarity<br />
<strong>com</strong>patible<br />
VD:<br />
TTL, automatic positive/negative polarity<br />
<strong>com</strong>patible<br />
RGB AUDIO IN:<br />
Single-line, 0.5 V [rms] M3 jack (Stereo MINI)<br />
VIDEO IN:<br />
Single-line, RCA pin jack<br />
1.0 V [p-p], 75 Ω<br />
S-VIDEO IN:<br />
Single-line, Mini DIN 4-pin<br />
Y 1.0 V [p-p], C 0.286 V [p-p], 75 Ω<br />
AUDIO IN (for S-VIDEO/VIDEO): Single-line, 0.5 V [rms] RCA pin jack x 2 (L-R)<br />
AUDIO OUT:<br />
Single-line, 0.5 V [rms] M3 jack (Stereo MINI)<br />
(Monitor output/stereo <strong>com</strong>patible)<br />
0 V [rms] - 1.0 V [rms] (variable)<br />
SERIAL:<br />
D-sub 9-pin for external control (RS-232C)<br />
REMOTE:<br />
D-sub 9-pin for external control<br />
Wired LAN:<br />
RJ-45 x 1, 10Base-T/100Base-TX for<br />
network connection<br />
Cabinet:<br />
Moulded plastic (PC/ABS)<br />
Dimensions:<br />
Width:<br />
290 mm (11-13/32˝)<br />
Height:<br />
137 mm (5-3/8˝)<br />
Length:<br />
406 mm (15-31/32˝) (without lens cover)<br />
Weight:<br />
5.8 kg (12.8 lbs.)<br />
Operating environment:<br />
Temperature:<br />
0 °C - 40 °C (32 °F - 104 °F)<br />
[When the “FAN CONTROL” is set to<br />
“HIGH” (page 48): 0 °C - 35 °C (32 °F - 95 °F)]<br />
Humidity:<br />
Certifications:<br />
20% - 80% (no condensation)<br />
UL60950, C-UL<br />
FCC Class B<br />
<br />
Power supply: 3 V DC (AAA battery x2)<br />
Operating range:<br />
Approx. 7 m (23´) (when operated directly<br />
in front of signal receptor)<br />
Weight:<br />
95 g (3.4 ozs.) (including batteries)<br />
Dimensions:<br />
Width:<br />
45 mm (1-3/4˝)<br />
Length:<br />
145 mm (5-11/16˝)<br />
Height:<br />
23 mm (-7/8˝)<br />
<br />
Ceiling mount bracket ET-PK780<br />
Ceiling mount bracket<br />
(for low ceilings)<br />
ET-PK780S<br />
Wireless mouse receiver ET-RMRC2<br />
Projection lens<br />
ET-LE10 (for a short-distance projection)<br />
ET-LE20 (for a medium-distance projection)<br />
ET-LE30 (for a long-distance projection)<br />
ENGLISH-69<br />
Others
Appendix<br />
List of <strong>com</strong>patible signals<br />
Mode<br />
NTSC/NTSC4.43/<br />
PAL-M/PAL60<br />
PAL/PAL-N/SECAM<br />
480i<br />
576i<br />
480p<br />
576p<br />
1 080/60i<br />
1 080/50i<br />
720/60p<br />
VGA400<br />
VGA480<br />
SVGA<br />
MAC16<br />
XGA<br />
MXGA<br />
MAC21<br />
MSXGA<br />
SXGA<br />
UXGA<br />
*1 The “i” appearing after the resolution indicates an interlaced signal.<br />
*2 The following symbols are used to indicate picture quality.<br />
AA Maximum picture quality can be obtained.<br />
A Signals are converted by the image processing circuit before picture<br />
is projected.<br />
B Some loss of data occurs to make projection easier.<br />
*3 Signals with “OK” in the “Resizing” column can be set using the<br />
“RESIZING” <strong>com</strong>mand in the “POSITION” menu. (page 45)<br />
*4 Signals that are <strong>com</strong>patible with the “FRAME LOCK” function. (page 45)<br />
70-ENGLISH<br />
* 4<br />
* 4<br />
* 4<br />
* 4<br />
* 4<br />
* 4<br />
* 4<br />
Scanning<br />
Display<br />
Dot clock<br />
frequency<br />
Picture<br />
resolution<br />
frequency<br />
H V<br />
quality*<br />
(dots)* 1<br />
(MHz)<br />
2 Resizing*3 <strong>For</strong>mat<br />
(kHz) (Hz)<br />
720 x 480i 15.7 59.9 A OK Video/S-Video<br />
720 x 576i 15.6 50.0 A OK Video/S-Video<br />
720 x 480i 15.7 59.9 13.5 A OK YPBPR/RGB<br />
720 x 576i 15.6 50.0 13.5 A OK YPBPR/RGB<br />
720 x 483 31.5 59.9 27.0 A OK YPBPR/RGB<br />
720 x 576 31.3 50.0 27.0 A OK YPBPR/RGB<br />
1 920 x 1 080i 33.8 60.0 74.3 A YPBPR/RGB<br />
1 920 x 1 080i 28.1 50.0 74.3 A YPBPR/RGB<br />
1 280 x 720 45.0 60.0 74.3 A YPBPR/RGB<br />
640 x 400 31.5 70.1 25.2 A OK RGB<br />
640 x 400 37.9 85.1 31.5 A OK RGB<br />
640 x 480 31.5 59.9 25.2 A OK RGB/DVI<br />
640 x 480 35.0 66.7 30.2 A OK RGB<br />
640 x 480 37.9 72.8 31.5 A OK RGB<br />
640 x 480 37.5 75.0 31.5 A OK RGB<br />
640 x 480 43.3 85.0 36.0 A OK RGB<br />
800 x 600 35.2 56.3 36.0 A OK RGB<br />
800 x 600 37.9 60.3 40.0 A OK RGB/DVI<br />
800 x 600 48.1 72.2 50.0 A OK RGB<br />
800 x 600 46.9 75.0 49.5 A OK RGB<br />
800 x 600 53.7 85.1 56.3 A OK RGB<br />
832 x 624 49.7 74.6 57.3 A OK RGB<br />
1 024 x 768 48.4 60.0 65.0 AA RGB/DVI<br />
1 024 x 768 56.5 70.1 75.0 AA RGB<br />
1 024 x 768 60.0 75.0 78.8 AA RGB<br />
1 024 x 768 68.7 85.0 94.5 AA RGB<br />
1 024 x 768i 35.5 87.0 44.9 AA RGB<br />
1 152 x 864 64.0 71.2 94.2 A RGB<br />
1 152 x 864 67.5 74.9 108.0 A RGB<br />
1 152 x 864 76.7 85.0 121.5 B RGB<br />
1 152 x 870 68.7 75.1 100.0 A RGB<br />
1 280 x 960 60.0 60.0 108.0 A RGB/DVI<br />
1 280 x 1 024 64.0 60.0 108.0 A RGB/DVI<br />
1 280 x 1 024 80.0 75.0 135.0 B RGB<br />
1 280 x 1 024 91.1 85.0 157.5 B RGB<br />
1 400 x 1 050 64.0 60.0 108.0 A RGB<br />
1 600 x 1 200 75.0 60.0 162.0 B RGB
Using the REMOTE connector<br />
Using the REMOTE connector which is on the connector panel of the<br />
projector, it is possible to operate the projector from an external location from<br />
where infrared remote control signals cannot be received, by using a remote<br />
control panel.<br />
Pin assignments and signal names<br />
6 9<br />
1 5<br />
D-sub 9-pin<br />
Appearance<br />
Pin No.<br />
#<br />
$<br />
%<br />
&<br />
'<br />
(<br />
)<br />
*<br />
+<br />
Signal Name<br />
GND<br />
POWER<br />
INPUT SEL3<br />
INPUT SEL1<br />
INPUT SEL2<br />
ENABLE<br />
Contents<br />
Ground<br />
Power ON<br />
Input signal select3<br />
NC<br />
Input signal select1<br />
Input signal select2<br />
NC<br />
NC<br />
Enables remote terminal control<br />
Short pin # and pin + when controlling.<br />
Power ON/OFF<br />
Pin No.<br />
$-# Short<br />
Lamp ON<br />
Setting<br />
Open<br />
OFF (standby)<br />
Switching the input mode<br />
Pin No.<br />
%-#<br />
'-#<br />
(-#<br />
Input Signal<br />
Setting<br />
Open Open Short Short Short Open<br />
Open Short Open Open Short Open<br />
Open Open Short Open Open Short<br />
RGB1 RGB2 RGB3 VIDEO S-VIDEO DVI<br />
NOTE:<br />
B The POWER, RGB and VIDEO buttons on the remote control unit and<br />
projector will not operate when pins # and + are shorted. RS-232C<br />
<strong>com</strong>mands will also be ignored.<br />
B Do not short pins #, $, %, ', or ( when pin + is open. If this is<br />
done, the projector will ignore signals from the remote control unit.<br />
Others<br />
ENGLISH-71
Using the SERIAL connector<br />
The serial connector which is on the connector panel of the projector<br />
conforms to the RS-232C interface specification, so that the projector can be<br />
controlled by a personal <strong>com</strong>puter which is connected to this connector.<br />
Connection<br />
SERIAL(female)<br />
D-sub 9-pin (male)<br />
Communication cable<br />
NOTE:<br />
B Use a proper <strong>com</strong>munication<br />
cable which is suitable for the<br />
personal <strong>com</strong>puter to connect<br />
the serial connector and the<br />
personal <strong>com</strong>puter.<br />
Pin assignments and signal<br />
names<br />
Pin<br />
No.<br />
Signal<br />
name<br />
6 9<br />
1 5<br />
D-sub 9-pin<br />
Appearance<br />
Computer<br />
Contents<br />
# NC<br />
$ TXD Transmitted data<br />
% RXD Received data<br />
& NC<br />
' GND Ground<br />
( DSR<br />
) CTS Connected internally<br />
*<br />
+<br />
RTS<br />
NC<br />
Communications settings<br />
Signal level<br />
Sync. method<br />
Baud rate<br />
Parity<br />
Character length<br />
Stop bit<br />
X parameter<br />
S parameter<br />
RS-232C<br />
Asynchronous<br />
9 600 bps<br />
None<br />
8 bits<br />
1 bit<br />
None<br />
None<br />
Basic format<br />
The data sent from the <strong>com</strong>puter to<br />
the projector is transmitted in the<br />
format shown below.<br />
STX Command : Parameter ETX<br />
Start byte 1 byte End byte<br />
(02h) 3 bytes 1 byte-5 bytes (03h)<br />
NOTE:<br />
B The projector can not receive<br />
the <strong>com</strong>mand for 10 seconds<br />
after the lamp is switched on.<br />
Wait 10 seconds before sending<br />
the <strong>com</strong>mand.<br />
B If sending multiple <strong>com</strong>mands,<br />
check that a response has been<br />
received from the projector for<br />
one <strong>com</strong>mand before sending<br />
the next <strong>com</strong>mand.<br />
B When a <strong>com</strong>mand which does<br />
not require parameters is sent,<br />
the colon (:) is not required.<br />
B If an incorrect <strong>com</strong>mand is sent<br />
from the personal <strong>com</strong>puter, the<br />
“ER401” <strong>com</strong>mand will be sent<br />
from the projector to the<br />
personal <strong>com</strong>puter.<br />
72-ENGLISH
Control <strong>com</strong>mands<br />
The <strong>com</strong>mands which the personal <strong>com</strong>puter can use to control the projector<br />
are shown in the following table.<br />
Command<br />
PON<br />
POF<br />
AVL<br />
IIS<br />
Q$S<br />
OSH<br />
Control<br />
Contents<br />
Power ON<br />
Power OFF<br />
Volume<br />
Input signal<br />
selection<br />
Lamp ON<br />
condition query<br />
Shutter function<br />
Remarks<br />
In standby mode, all <strong>com</strong>mands other than<br />
the PON <strong>com</strong>mand are ignored.<br />
B The PON <strong>com</strong>mand is ignored during<br />
lamp ON control.<br />
B If a PON <strong>com</strong>mand is received while the cooling<br />
fan is operating after the lamp has switched off,<br />
the lamp is not turned back on again straight<br />
away, in order to protect the lamp.<br />
Parameter<br />
000-063 (Adjustment value 0-63)<br />
Parameter<br />
VID=VIDEO SVD=S-VIDEO<br />
RG1=RGB1 RG2=RGB2<br />
RG3=RGB3 DVI=DVI<br />
Callback<br />
0 = Standby<br />
1 = Lamp ON control active<br />
2 = Lamp ON<br />
3 = Lamp OFF control active<br />
Operation will be switched between ON and<br />
OFF each time the <strong>com</strong>mand is sent. Do<br />
not switch operation ON and OFF after only<br />
short periods of time.<br />
Cable specifications<br />
(When connected to a personal <strong>com</strong>puter)<br />
At the projector<br />
At the <strong>com</strong>puter<br />
(DTE specifications)<br />
1<br />
NC<br />
NC<br />
1<br />
2<br />
2<br />
3<br />
4<br />
5<br />
6<br />
NC<br />
NC<br />
NC<br />
NC<br />
3<br />
4<br />
5<br />
6<br />
Others<br />
7<br />
7<br />
8<br />
8<br />
9<br />
NC<br />
NC<br />
9<br />
ENGLISH-73
Pin assignments<br />
# $<br />
%<br />
&<br />
S-VIDEO IN<br />
Appearance<br />
(<br />
- 1<br />
,<br />
# '<br />
RGB1 IN,<br />
RGB2 IN/RGB OUT<br />
Appearance<br />
Pin No.<br />
Signal<br />
# Earth (Luminance signal)<br />
$ Earth (Color signal)<br />
% Luminance signal<br />
& Color signal<br />
Pin No.<br />
Signal<br />
# R/PR<br />
$ G/G·SYNC/Y<br />
% B/PB<br />
. SDA<br />
/ HD/SYNC<br />
0 VD<br />
1 SCL<br />
Pin + is spare. Pins &-*, , and - are for earth.<br />
Pins . and 1 functions are only valid when supported by the <strong>com</strong>puter.<br />
:<br />
3<br />
*Interface with TMDS connector on a personal <strong>com</strong>puter<br />
74-ENGLISH<br />
2 +<br />
*<br />
DVI-D IN*<br />
Appearance<br />
Pin No. Signal Pin No. Signal<br />
# T.M.D.S data 2- / T.M.D.S data 3+<br />
$ T.M.D.S data 2+ 0 +5 V<br />
% T.M.D.S data 2/4 shield 1 Earth<br />
& T.M.D.S data 4- 2 Hot plug sense<br />
' T.M.D.S data 4+ 3 T.M.D.S data 0-<br />
( DDC clock 4 T.M.D.S data 0+<br />
) DDC data<br />
5 T.M.D.S data 0/5 shield<br />
* - 6 T.M.D.S data 5-<br />
+ T.M.D.S data 1- 7 T.M.D.S data 5+<br />
, T.M.D.S data 1+ 8 T.M.D.S clock shield<br />
- T.M.D.S data1/3 shield 9 T.M.D.S clock+<br />
. T.M.D.S data 3- : T.M.D.S clock-<br />
#
Projection dimensions calculation methods<br />
If the screen size (diagonal) is SD (m), then the following formula is used to<br />
calculate the projection distance for the wide lens position (LW) and the<br />
projection distance for the telephoto lens position (LT).<br />
4:3<br />
SD<br />
SW<br />
LW=0.0407xSD/0.0254-0.080<br />
LT=0.0538xSD/0.0254-0.0774<br />
<strong>For</strong> 16:9 aspect ratios, the following formula can be used to calculate the<br />
projection distance.<br />
*The values obtained from the formulas above are approximate.<br />
Others<br />
SH<br />
LW/LT<br />
Minimum Projection Distance<br />
Maximum Projection Distance<br />
Minimum Projection Distance<br />
Maximum Projection Distance<br />
LW=0.0443xSD/0.0254-0.080<br />
LT=0.0586xSD/0.0254-0.0774<br />
ENGLISH-75
Dimensions<br />
<br />
55<br />
(2-5/32˝)<br />
406(15-31/32˝)<br />
25(-31/32˝)<br />
290(11-13/32˝)<br />
8(-5/16˝)<br />
137(5-3/8˝)<br />
Trademark acknowledgements<br />
B VGA and XGA are trademarks of International Business Machines<br />
Corporation.<br />
BMacintosh is a registered trademark of Apple Computer, Inc.<br />
B S-VGA is a registered trademark of the Video Electronics Standards<br />
Association.<br />
All other trademarks are the property of the various trademark owners.<br />
76-ENGLISH<br />
These Operating Instructions are printed on recycled paper.
NOTES IMPORTANTES<br />
CONCERNANT LA SECURITE<br />
AVERTISSEMENT: POUR REDUIRE LES RISQUES DE FEU OU DE CHOC<br />
ÉLECTRIQUE, NE PAS EXPOSER CE PRODUIT À L’EAU<br />
OU À L’HUMIDITÉ<br />
Alimentation: Ce projecteur LCD est conçu pour fonctionner sur secteur<br />
de 100 V - 240 V, 50 Hz/60 Hz seulement.<br />
ATTENTION: Le cordon d’alimentation secteur fourni avec le projecteur<br />
peut être utilisé uniquement pour une alimentation électrique<br />
de 125 V, 7 A maximum. Si on veut l’utiliser avec une<br />
tension ou un courant plus forts, on doit se procurer un autre<br />
cordon d’alimentation de 250 V. Si on utilise le cordon fourni<br />
sous ces conditions, risque de provoquer un incendie.<br />
Le symbole de la flèche en forme d’éclair, dans un triangle,<br />
avertit l’usager de la présence de “tensions dangereuses” à<br />
l’intérieur du produit qui peuvent être de force suffisante pour<br />
constituer un risque de choc électrique aux personnes.<br />
Le point d’exclamation dans un triangle avertit l’usager de la<br />
présence d’instructions importantes concernant l’utilisation et<br />
l’entretien (réparation) dans la littérature ac<strong>com</strong>pagnant le<br />
produit.<br />
ATTENTION: Cet appareil est équipé d’une fiche<br />
de courant à trois broches avec<br />
mise à la terre. Ne pas retirer la<br />
broche de mise à la masse de la<br />
fiche.<br />
Ne pas retirer<br />
Cette fiche ne pourra être utilisée que dans une prise avec<br />
mise à la terre. Ceci est une précaution sécuritaire. S’il est<br />
impossible d’insérer la fiche dans la prise, s’adresser à un<br />
électricien. Ne pas annuler la protection de la fiche à mise à<br />
la terre.<br />
Others<br />
FRANÇAIS-77
AVERTISSEMENT:<br />
B Ne peut être utilisé dans une salle d’ordinateurs telle que définie dans la<br />
norme ANSI/NFPA 75 Standard for Protection of Electronic<br />
Computer/Data Processing Equipment.<br />
Précautions de sécurité<br />
AVERTISSEMENT<br />
Si l’on remarque une émission de fumée, d’odeurs suspectes ou de<br />
bruits provenant du projecteur, débrancher la fiche du cordon<br />
d’alimentation de la prise de courant.<br />
B Ne pas continuer d’utiliser le projecteur dans ces cas, autrement cela peut<br />
entraîner un incendie ou des chocs électriques.<br />
B Après s’être assuré que de la fumée ne se dégage plus, s’adresser à un centre<br />
technique agréé et demander que les réparations nécessaires soient faites.<br />
B Le fait de réparer le projecteur soi-même est très dangereux, et ne doit<br />
jamais être fait.<br />
Ne pas installer ce projecteur dans un endroit qui n’est pas assez<br />
résistant pour supporter le poids du projecteur.<br />
B Si l’emplacement d’installation n’est pas assez résistant, le projecteur<br />
risque de tomber et causer de graves blessures et (ou) des dommages.<br />
Demander à un technicien qualifié d’installer le projecteur par exemple<br />
s’il est installé au plafond.<br />
B Si l’installation n’est pas faite correctement, cela peut entraîner des<br />
blessures ou des chocs électriques.<br />
Si de l’eau ou des objets étrangers entrent dans le projecteur, si le<br />
projecteur tombe, ou si le boîtier est endommagé, éteindre l’appareil et<br />
débrancher immédiatement la fiche du cordon d’alimentation de la prise<br />
de courant.<br />
B Si l’on continue d’utiliser le projecteur dans cette condition, cela peut<br />
entraîner un incendie ou des chocs électriques.<br />
B S’adresser à un centre technique agréé pour que les réparations<br />
nécessaires puissent être faites.<br />
Ne pas surcharger la prise de courant.<br />
B Si l’alimentation est surchargée (par exemple, par l’utilisation de trop<br />
d’adaptateurs), cela risque de faire surchauffer le projecteur et peut<br />
entraîner un incendie.<br />
Ne pas retirer le capot ou le modifier.<br />
B Des hautes tensions qui peuvent causer de graves blessures sont<br />
présentes à l’intérieur du projecteur.<br />
B Pour toute inspection, réglage ou réparation, s’adresser à un centre<br />
technique agréé.<br />
78-FRANÇAIS
Nettoyer la fiche du cordon d’alimentation régulièrement afin d’éviter<br />
toute accumulation de poussière.<br />
B Si de la poussière s’accumule sur la fiche du cordon d’alimentation, l’humidité<br />
peut endommager l’isolant et entraîner un incendie. Débrancher la fiche du<br />
cordon d’alimentation de la prise de courant et l’essuyer avec un tissu sec.<br />
B Si le projecteur n’est pas utilisé pendant une période prolongée,<br />
débrancher la fiche du cordon d’alimentation de la prise de courant.<br />
Faire attention à ne pas endommager le cordon d’alimentation.<br />
B Ne pas endommager le cordon d’alimentation, ne pas le modifier, ne pas<br />
le placer sous des objets lourds, ne pas le chauffer, ne pas le placer près<br />
d’objets chauffants, ne pas le tordre, ne pas le plier ou le tirer<br />
excessivement et ne pas le rouler en boule.<br />
B Si le cordon d’alimentation est endommagé, cela peut entraîner un<br />
incendie et des chocs électriques.<br />
B Si le cordon d’alimentation est endommagé, le faire réparer par un centre<br />
technique agréé.<br />
Ne pas manipuler le cordon d’alimentation avec les mains mouillées.<br />
B Cela peut entraîner des chocs électriques.<br />
Brancher la fiche du cordon d’alimentation fermement dans la prise de<br />
courant.<br />
B Si la fiche n’est pas <strong>com</strong>plètement insérée, cela peut entraîner des chocs<br />
électriques ou la faire surchauffer.<br />
B Si la fiche est endommagée ou la plaque de la prise est desserrée, elles<br />
ne devraient pas être utilisées.<br />
Ne pas placer le projecteur sur des surfaces instables.<br />
B Si le projecteur est placé sur une surface qui est inclinée ou instable, il<br />
risque de tomber ou de se renverser et cela peut causer des blessures ou<br />
des dommages.<br />
Ne pas placer le projecteur dans l’eau ou ne pas le laisser se mouiller.<br />
B Sinon cela peut causer un incendie ou des chocs électriques.<br />
Ne pas placer des récipients de liquide sur le projecteur.<br />
B Si de l’eau se renverse sur le projecteur ou pénètre dans celui-ci, il y aura<br />
risque d’incendie ou d’électrocution.<br />
B Si de l’eau entre à l’intérieur du projecteur, entrer en contact avec un<br />
centre technique agréé.<br />
Ne pas mettre d’objets étrangers dans le projecteur.<br />
B Ne pas insérer d’objets métalliques ou inflammables dans les orifices de<br />
ventilation ou les faire tomber sur le projecteur, car cela peut causer un<br />
incendie ou des chocs électriques.<br />
Garder les piles hors de portée des enfants.<br />
B Si les piles sont ingérées, il y aura risque de décès par étouffement. En<br />
cas d’ingestion des piles, consulter immédiatement un médecin.<br />
Others<br />
FRANÇAIS-79
Veiller à ce que les bornes + et - des piles n’entrent pas en contact<br />
avec des objets métalliques tels que colliers ou épingles à cheveux.<br />
B Sinon, les piles risquent de fuir, de surchauffer, d’exploser ou de prendre feu.<br />
B Ranger les piles dans un sac en plastique, et ne pas les ranger à<br />
proximité d’objets métalliques.<br />
Pendant un orage, ne pas toucher le projecteur ou le câble.<br />
B Il y a risque d’électrocution.<br />
Ne pas utiliser l’appareil dans un bain ou une douche.<br />
BIl y a risque d’incendie ou d’électrocution.<br />
Ne pas regarder directement dans l’objectif pendant que le projecteur<br />
fonctionne.<br />
B Une lumière intense est émise par l’objectif du projecteur. Si l’on regarde<br />
directement dans cette lumière, elle risque de causer des blessures et de<br />
graves lésions aux yeux.<br />
B Veiller particulièrement à ce que les enfants ne regardent pas dans l’objectif.<br />
En outre, éteindre le projecteur si on le laisse sans surveillance.<br />
Garder la télé<strong>com</strong>mande hors de portée des enfants, et ne pas regarder<br />
directement dans le rayon laser; ne pas pointer le rayon vers d’autres<br />
personnes.<br />
B Si l’on pointe directement vers les yeux le rayon laser émis par la<br />
télé<strong>com</strong>mande, ceci risque d’endommager les yeux.<br />
Ne pas placer les mains ou autres objets près de l’orifice de sortie d’air.<br />
B De l’air chaud sort par l’orifice de sortie d’air. Ne pas placer les mains, le<br />
visage, ou d’autres objets qui ne peuvent résister à la chaleur près de cette<br />
sortie d’air, sinon des brûlures ou des dommages risqueraient de s’ensuivre.<br />
Le remplacement de l’unité de lampe ne devrait être effectué que par un<br />
technicien qualifié.<br />
B Le bloc de lampe a une haute pression interne. S’il est mal manipulé, une<br />
explosion peut s’ensuivre<br />
B Le bloc de lampe peut être facilement endommagé s’il est cogné contre<br />
des objets durs ou si on le laisse tomber, pouvant entraîner des blessures<br />
ou des mauvais fonctionnements.<br />
Lors du remplacement de la lampe, la laisser refroidir pendant au<br />
moins une heure avant de la manipuler.<br />
B Le couvercle de la lampe devient très chaud, et on risque de se brûler si<br />
on le touche.<br />
Avant de remplacer la lampe, veiller à débrancher la fiche du cordon<br />
d’alimentation de la prise de courant.<br />
B Il y a risque d’électrocution ou d’explosion.<br />
Attention<br />
Ne pas obstruer les orifices d’entrée et de sortie d’air.<br />
B Cela risque de faire surchauffer le projecteur, et causer un incendie ou<br />
endommager le projecteur.<br />
80-FRANÇAIS
B Ne pas installer le projecteur dans des endroits étroits, mal ventilés tels<br />
que des placards ou des étagères.<br />
Ne pas installer le projecteur dans des endroits humides ou<br />
poussiéreux ou dans des endroits où le projecteur peut entrer en<br />
contact avec de la fumée ou la vapeur.<br />
B L’utilisation du projecteur dans de telles conditions peut causer un<br />
incendie ou des chocs électriques.<br />
Pour débrancher le cordon d’alimentation, tenir la fiche et non pas le<br />
cordon.<br />
B Si le cordon d’alimentation est tiré, le cordon sera endommagé et cela peut<br />
causer un incendie, des courts-circuits ou des chocs électriques sérieux.<br />
Débrancher toujours tous les câbles avant de déplacer le projecteur.<br />
B Le fait de déplacer le projecteur avec des câbles branchés peut endommager<br />
les câbles, ce qui pourrait causer un incendie ou des chocs électriques.<br />
Ne pas placer d’objets lourds sur le projecteur.<br />
B Cela peut déséquilibrer le projecteur et le faire tomber, ce qui peut<br />
entraîner des dommages ou des blessures.<br />
Ne pas court-circuiter, chauffer ou démonter les piles, et ne pas les<br />
mettre dans l’eau ou dans le feu.<br />
B Sinon, les piles risqueront de surchauffer, de fuir, d’exploser ou de<br />
prendre feu, et donc de causer des brûlures ou d’autres blessures.<br />
Lorsqu’on insère les piles, veiller à ce que les polarités (+ et -) soient<br />
bien respectées.<br />
B Si l’on insère les piles incorrectement, elles risqueront d’exploser ou de<br />
fuir, ce qui peut causer un incendie, des blessures ou une contamination<br />
du logement des piles et de la zone environnante.<br />
Utiliser uniquement les piles spécifiées.<br />
B Si l’on utilise des piles incorrectes, elles risqueront d’exploser ou de fuir,<br />
ce qui peut causer un incendie, des blessures ou une contamination du<br />
logement des piles et de la zone environnante.<br />
Ne pas mélanger des piles usées et des piles neuves.<br />
B Si l’on insère les piles incorrectement, elles risqueront d’exploser ou de<br />
fuir, ce qui peut causer un incendie, des blessures ou une contamination<br />
du logement des piles et de la zone environnante.<br />
Isoler la pile à l’aide d’adhésif ou autre avant de la mettre au rebut.<br />
B Si la pile entre en contact avec des objets métalliques ou d’autres piles,<br />
elle peut prendre feu ou éclater.<br />
Ne pas peser de tout son poids sur ce projecteur.<br />
B On risque de tomber ou de casser l’appareil, ce qui peut causer des blessures.<br />
B Veiller tout particulièrement à ce que les enfants ne se tiennent pas<br />
debout ou ne s’asseyent pas sur le projecteur.<br />
Ne pas soulever le projecteur en le tenant par le couvercle du câble.<br />
BSinon, le couvercle du câble risquera de se détacher et le projecteur<br />
risquera de tomber et de causer des blessures.<br />
FRANÇAIS-81<br />
Others
Débrancher la fiche du cordon d’alimentation de la prise de courant<br />
<strong>com</strong>me mesure de sécurité avant d’effectuer tout nettoyage.<br />
B Sinon cela peut causer des chocs électriques.<br />
Demander à un centre technique agréé de nettoyer l’intérieur du<br />
projecteur au moins une fois par an.<br />
B S’il n’est pas nettoyé et que de la poussière s’accumule à l’intérieur du<br />
projecteur, cela peut causer un incendie ou des problèmes de fonctionnement.<br />
B Il est re<strong>com</strong>mandé de nettoyer l’intérieur du projecteur avant l’arrive de la<br />
saison humide. Demander au centre technique agréé le plus proche de<br />
nettoyer le projecteur lorsque cela est requis. Se renseigner auprès du<br />
centre technique agréé pour le coût du nettoyage.<br />
Nous faisons tous les efforts possibles afin de préserver<br />
l’environnement. Prière de rapporter l’appareil, s’il n’est pas réparable,<br />
à votre revendeur ou à un centre de recyclage.<br />
Avant l’utilisation<br />
Précaution à prendre lors du déplacement du<br />
projecteur<br />
Veiller à bien mettre le capuchon d’objectif en place avant de déplacer<br />
le projecteur.<br />
La lentille de projection est extrêmement sensible aux vibrations et aux chocs.<br />
Veiller à ne pas la soumettre à des vibrations ou à des chocs excessifs lors du<br />
déplacement du projecteur.<br />
Avertissements concernant l’installation<br />
Éviter de l’installer dans les endroits sujets à des vibrations ou à des<br />
chocs.<br />
Les pièces internes peuvent être endommagées, ce qui peut causer des<br />
pannes ou des accidents.<br />
Ne pas installer le projecteur près de lignes d’alimentation électrique à<br />
haute tension ou de moteurs.<br />
Le projecteur peut être soumis à des interférences électromagnétiques.<br />
Si le projecteur est installé au plafond, demander à un technicien<br />
qualifié de faire tous les travaux d’installation.<br />
Il faut acheter le kit d’installation séparé (numéro de modèle: ET-PK780).<br />
En outre, tous les travaux d’installation doivent être exécutés uniquement par<br />
un technicien qualifié.<br />
82-FRANÇAIS
Si l’on utilise ce projecteur à un endroit élevé (au-dessus de 1 400 m),<br />
régler le “VENTILATEUR” sur “HAUTE” (se référer à la page 48).<br />
Sinon, des anomalies pourront se produire.<br />
Notes sur l’utilisation<br />
Afin d’obtenir la meilleure qualité d’image<br />
Fermer les rideaux ou les volets de toutes les fenêtres et éteindre les lampes<br />
fluorescentes situées à proximité de l’écran afin que la lumière extérieure ou<br />
la lumière des lampes intérieures n’éclaire pas l’écran.<br />
Ne pas toucher aux surfaces de l’objectif avec les mains nues.<br />
Si la surface de l’objectif est salie par des empreintes digitales ou autre, ceci<br />
sera agrandi et projeté sur l’écran. Par ailleurs, lorsque le projecteur n’est<br />
pas utilisé, rétracter l’objectif, puis la couvrir à l’aide du capuchon d’objectif.<br />
Écran<br />
N’appliquer aucun produit volatil qui risque de décolorer l’écran, et veiller à<br />
ce que l’écran ne soit pas sale ou endommagé.<br />
Lampe<br />
Il est possible qu’il faille remplacer la lampe plus tôt en raison de facteurs<br />
variables <strong>com</strong>me les caractéristiques de la lampe, des conditions d’utilisation<br />
et un environnement d’installation particuliers, notamment si elle est utilisée<br />
de façon continue pendant plus de 10 heures ou si l’alimentation est<br />
fréquemment mise en et hors circuit.<br />
Affichage à cristaux liquides<br />
L’affichage à cristaux liquides du projecteur a été fabriqué en utilisant une<br />
technologie de haute précision afin d’offrir une image très détaillée. Il est<br />
possible que parfois quelques pixels non actifs apparaissent sur l’écran sous<br />
forme de points fixes bleus, verts ou rouges. Bien noter que ceci n’affecte<br />
pas le bon fonctionnement de votre LCD.<br />
Others<br />
FRANÇAIS-83
Remplacement du bloc de lampe<br />
AVERTISSEMENT<br />
Le bloc de lampe ne devrait être<br />
remplacé que par un technicien<br />
qualifié.<br />
Lors du remplacement de la<br />
lampe, la laisser refroidir pendant<br />
au moins une heure avant de la<br />
manipuler.<br />
B Le couvercle de la lampe devient<br />
très chaud, et on risque de se<br />
brûler si on le touche.<br />
Notes sur le remplacement<br />
du bloc de lampe<br />
B La lampe produisant la lumière<br />
est en verre; il ne faut donc pas la<br />
laisser tomber ou la cogner<br />
contre des objets rigides, car elle<br />
risquerait d’éclater. Faire bien<br />
attention lorsqu’on manipule la<br />
lampe.<br />
B Jeter la lampe usagée de la<br />
même manière qu’une lampe<br />
fluorescente.<br />
B Il faut utiliser un tournevis Phillips<br />
pour déposer le bloc de lampe.<br />
REMARQUE:<br />
B Le projecteur n’est pas fourni<br />
avec un bloc de lampe de<br />
rechange. Demander les<br />
détails au revendeur. Numéro<br />
de produit du bloc de lampe:<br />
ET-LA785<br />
ATTENTION:<br />
B Ne pas utiliser un bloc de<br />
lampe avec un numéro de<br />
pièce autre que celui indiqué<br />
ci-dessus.<br />
Période de remplacement du<br />
bloc de lampe<br />
La lampe est un produit qui doit être<br />
remplacé. Même si la durée de vie<br />
<strong>com</strong>plète de l’ampoule n’est pas encore<br />
épuisée, la luminosité de la lampe<br />
diminuera progressivement. Il faut donc<br />
remplacer périodiquement la lampe.<br />
L’intervalle de remplacement de la<br />
lampe prévu est de 1 500 heures; il<br />
est toutefois possible qu’il faille<br />
remplacer la lampe avant ce délai en<br />
raison d’éléments variables <strong>com</strong>me<br />
les caractéristiques particulières de la<br />
lampe, les conditions d’utilisation et<br />
l’environnement d’installation. Il est<br />
re<strong>com</strong>mandé de toujours avoir un bloc<br />
de lampe de rechange prêt à l’emploi.<br />
La lampe s’éteindra automatiquement<br />
après environ 10 minutes lorsque la<br />
limite de 1 500 heures d’utilisation est<br />
atteinte, car le risque d’explosion de la<br />
lampe devient beaucoup plus grand<br />
passé cette limite.<br />
REMARQUE:<br />
B Les heures d’utilisation<br />
expliquées ci-dessus concernent<br />
l’utilisation lorsque<br />
“PUIS.LAMPE” dans le menu<br />
“O<strong>PT</strong>ION” a été réglée sur<br />
“HAUTE”. Si “PUIS.LAMPE” est<br />
réglée sur “FROIDE”, la durée de<br />
vie de la lampe peut être<br />
allongée.<br />
B Bien que le délai de 1 500<br />
heures soit l’intervalle de<br />
remplacement prévu,<br />
l’obtention de cette durée n’est<br />
pas couverte par la garantie.<br />
84-FRANÇAIS
Affichage à l’écran<br />
Indicateur LAMP<br />
Plus de 1 350 heures<br />
Plus de 1 500 heures<br />
Affiché pendant 30<br />
secondes. L’affichage<br />
disparaît si l’on appuie sur<br />
n’importe quelle touche.<br />
Reste affiché jusqu’à ce<br />
qu’une touche<br />
quelconque soit pressée.<br />
S’allume en rouge<br />
pendant que l’image est<br />
projetée et en mode<br />
d’attente.<br />
Méthode de remplacement du bloc de lampe<br />
REMARQUE:<br />
B Si le temps d’utilisation de la lampe a dépassé 1 500 heures (lorsque<br />
“PUIS LAMPE” a été mis sur “HAUTE”), le projecteur passe en mode<br />
d’attente après environ dix minutes de fonctionnement. Dès lors, faire les<br />
étapes ) à . à la page suivante dans les 10 minutes.<br />
# Mettre hors circuit<br />
l’interrupteur MAIN POWER<br />
(alimentation principale)<br />
suivant la méthode donnée<br />
dans “Mise hors circuit de<br />
l’alimentation” à la page 26,<br />
puis débrancher la fiche du<br />
cordon d’alimentation de la<br />
prise de courant et vérifier que<br />
les pièces autour du bloc de<br />
lampe se sont refroidies.<br />
$ Utiliser un tournevis Phillips<br />
pour faire tourner les vis de<br />
fixation de la sortie d’air à<br />
l’arrière du projecteur et ouvrir<br />
la sortie d’air.<br />
Sortie d’air<br />
Vis de fixation de la sortie d’air<br />
% Utiliser un tournevis Phillips<br />
pour desserrer les deux vis de<br />
fixation du bloc de lampe jusqu’à<br />
ce que les vis tournent librement.<br />
Tenir la poignée du bloc de<br />
lampe et tirer doucement pour le<br />
sortir du projecteur.<br />
Vis de fixation du bloc de lampe<br />
Poignée<br />
& Insérer le nouveau bloc de<br />
lampe tout en s’assurant que la<br />
direction de l’insertion est<br />
correcte, puis utiliser un<br />
tournevis Phillips pour<br />
resserrer fermement les vis de<br />
fixation du bloc de lampe.<br />
FRANÇAIS-85<br />
Others
' Refermer la sortie d’air, puis<br />
utiliser un tournevis Phillips<br />
pour bien resserrer les vis de<br />
fixation de la sortie d’air.<br />
REMARQUE:<br />
B Veiller à bien installer le bloc de<br />
lampe et la sortie d’air. S’ils ne<br />
sont pas bien installés, ils peuvent<br />
déclencher le circuit de protection,<br />
empêchant la mise en circuit de<br />
l’alimentation.<br />
( Insérer la fiche du cordon<br />
d’alimentation dans la prise de<br />
courant, puis appuyer sur<br />
l’interrupteur MAIN POWER<br />
(alimentation principale).<br />
REMARQUE:<br />
B Si l’indicateur POWER ne s’allume<br />
pas en rouge sur le projecteur<br />
lorsque l’interrupteur MAIN<br />
POWER est mis en circuit,<br />
remettre l’interrupteur MAIN<br />
POWER hors circuit et s’assurer<br />
que le bloc de lampe et la sortie<br />
d’air sont bien installés, puis<br />
remettre l’interrupteur MAIN<br />
POWER en circuit.<br />
) Appuyer sur la touche POWER<br />
pour projeter une image sur<br />
l’écran.<br />
* Appuyer sur la touche MENU<br />
pour faire apparaître l’écran de<br />
menu, et sélectionner “O<strong>PT</strong>ION”<br />
en appuyant sur la touche I ou<br />
H.<br />
O<strong>PT</strong>ION<br />
INFO ÉCRAN<br />
RECHERCHE AUTO<br />
SIGNAL AUTO<br />
SELECTION RGB2<br />
RGB/YPBPR<br />
VGA60/480p<br />
COULEUR FOND<br />
CINEMA REALITY<br />
NON<br />
NON<br />
NON<br />
ENTRÉE<br />
RGB<br />
VGA60<br />
BLEU<br />
NON<br />
OUI<br />
OUI<br />
OUI<br />
SORTIE<br />
YPBPR<br />
480p<br />
NOIR<br />
OUI<br />
+ Appuyer sur la touche G et<br />
sélectionner “DURÉE LAMPE” en<br />
appuyant sur la touche I ou H.<br />
O<strong>PT</strong>ION<br />
PAGE PRÉCÉDENTE ^<br />
INSTALLATION<br />
SOL/PLAFOND<br />
VENTILATEUR<br />
PUIS.LAMPE<br />
DURÉE LAMPE<br />
FONCTION 1<br />
TOUCHE CTRL<br />
AFFECTER N<br />
POUVOIR AUTO FERM<br />
SÉL.:[^][@]<br />
AJT:[{][}]<br />
FAÇADE<br />
SOL<br />
STANDARD<br />
FROIDE<br />
MUET<br />
NON<br />
ARRIÈRE<br />
PLAFOND<br />
HAUTE<br />
HAUTE<br />
10 H<br />
COR TRAP<br />
OUI<br />
TOUT<br />
IMMOBILISER<br />
VALID:[ENTER]<br />
ESC:[MENU]<br />
, Maintenir la touche ENTER<br />
enfoncée pendant environ 3<br />
secondes.<br />
REINIT. TEMPS LAMPE<br />
Coupe l,alimentation<br />
OUI<br />
NON<br />
“REINIT. TEMPS LAMPE”<br />
s’affiche.<br />
- Sélectionner “OUI” en<br />
appuyant sur la touche I ou H<br />
et appuyer sur la touche<br />
ENTER.<br />
Le temps d’utilisation total du bloc<br />
de lampe est alors remis à zéro.<br />
Le bloc de lampe est éteint<br />
automatiquement, et le projecteur<br />
passe en mode d’attente.<br />
REMARQUE:<br />
B Si “NON” est sélectionné à<br />
l’étape -, l’opération pour<br />
remettre le temps de la lampe<br />
à zéro sera annulée.<br />
PAGE SUIVANTE @<br />
SÉL.:[^][@]<br />
AJT:[{][}]<br />
ESC:[MENU]<br />
86-FRANÇAIS
FRANÇAIS-87<br />
Others
R<br />
Professional/Industrial Video<br />
<strong>Panasonic</strong> Broadcast & Television Systems Company<br />
Division of Matsushita Electric Corporation of America<br />
One <strong>Panasonic</strong> Way 4E-7 Secaucus, NJ 07094 (201) 392-4443<br />
3330 Cahuenga Blvd West Los Angels, CA 90068 (323) 436-3500<br />
Technical Support:<br />
(800) 524-1448<br />
(800) 526-6610<br />
FAX: (201) 392-6514<br />
E-Mail: pbtssupport@panasonic.<strong>com</strong><br />
Printed in Japan<br />
S0604-0A<br />
C 2004 Matsushita Electric Industrial Co., Ltd. All Rights Reserved.