
Create successful ePaper yourself
Turn your PDF publications into a flip-book with our unique Google optimized e-Paper software.
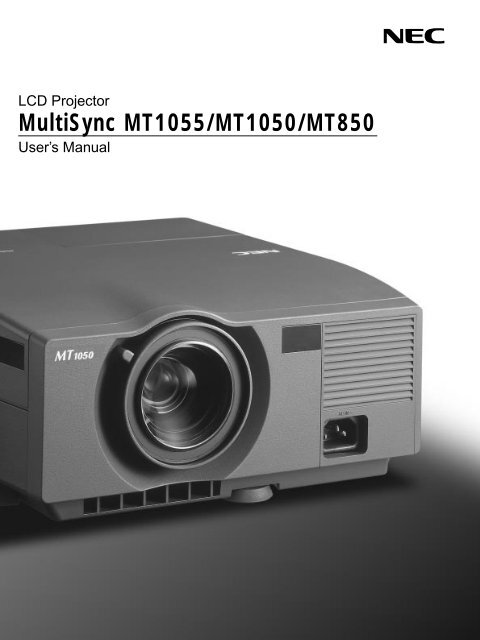
LCD Projector<br />
MultiSync MT1055/<strong>MT1050</strong>/MT850<br />
User’s Manual
LIMITED WARRANTY (USA and Canada only)<br />
<strong>NEC</strong> SOLUTIONS’ PROJECTOR PRODUCTS<br />
<strong>NEC</strong> Solutions (America), Inc. (hereafter <strong>NEC</strong> Solutions) warrants<br />
this product to be free from defects in material and workmanship<br />
under the following terms.<br />
HOW LONG IS THE WARRANTY<br />
<strong>NEC</strong> Solutions’ MT1055, <strong>MT1050</strong> and MT850 projectors are<br />
covered by a two (2) year limited parts and labor warranty from<br />
the date of the first customer purchase. The lamp when used<br />
under normal operating conditions is warranted for 1000 hours<br />
or six months, whichever comes first.<br />
WHO IS PROTECTED<br />
This warranty may be enforced only by the first purchaser, and is<br />
not transferable.<br />
WHAT IS COVERED AND WHAT IS NOT COVERED<br />
Except as specified below, this warranty covers all defects in<br />
material or workmanship in this product.<br />
<strong>NEC</strong> SOLUTIONS’ LIABILITY FOR ANY DEFECTIVE PRODUCT IS<br />
LIMITED TO THE REPAIR OR REPLACEMENT OF THE PRODUCT<br />
AT <strong>NEC</strong> SOLUTIONS’ OPTION. REPLACEMENT PRODUCTS MAY<br />
BE NEW OR ‘LIKE NEW’. The following are not covered by the<br />
limited warranty and <strong>NEC</strong> Solutions shall not be liable for:<br />
1. Any product which is not distributed in the U.S.A. or Canada<br />
by <strong>NEC</strong> Solutions or which is not purchased, installed, and<br />
operated in the U.S.A or Canada.<br />
2. Any product on which the serial number has been defaced,<br />
modified or removed.<br />
3. Normal decrease in lamp light output over time.<br />
4. Damage, deterioration or malfunction resulting from:<br />
a. Accident, misuse, abuse, neglect, improper ventilation, fire,<br />
dust, smoke, water, lightning or other acts of nature, unauthorized<br />
product modification, or failure to follow instructions<br />
supplied with the product.<br />
b. Repair or attempted repair by anyone other than a <strong>NEC</strong><br />
Solutions authorized service center.<br />
c. Any shipment of the product (claims must be presented to<br />
the carrier).<br />
d. Removal or installation of the product.<br />
e. Any other cause which does not relate to a product defect.<br />
f. Use of the product beyond normal operating conditions.<br />
Normal operating conditions are defined as product use<br />
not in excess of 5 hours per day and 260 days per year.<br />
5. Cartons, carrying cases, shipping cases, batteries, external<br />
cabinets, magnetic tapes, or any accessories used in connection<br />
with the product.<br />
6. Service required as a result of third party components.<br />
WHAT <strong>NEC</strong> SOLUTIONS WILL PAY FOR<br />
<strong>NEC</strong> Solutions will pay labor and material expenses for covered<br />
items, but <strong>NEC</strong> Solutions will not pay for the following:<br />
1. Removal or installation charges.<br />
2. Costs of technical adjustments, set-up, maintenance, or adjustment<br />
of user controls.<br />
3. Payment of shipping and related charges incurred in returning<br />
the product for warranty repair.<br />
HOW YOU CAN GET WARRANTY SERVICE<br />
1. To obtain service on your product, consult the dealer from whom<br />
you purchased the product.<br />
2. Whenever warranty service is required, the original dated invoice<br />
(or a copy) must be presented as proof of warranty coverage. In<br />
order to obtain warranty service, you may be required to describe<br />
and demonstrate the problem to your dealer or to <strong>NEC</strong> Solutions.<br />
3. All products returned to <strong>NEC</strong> Solutions for service MUST have<br />
prior approval. To receive approval or for the name of the<br />
nearest <strong>NEC</strong> Solutions authorized service center, call <strong>NEC</strong><br />
Solutions at 800-836-0655.<br />
4. It shall be your obligation and expense to ship the product,<br />
freight prepaid, or to deliver it to a <strong>NEC</strong> Solutions authorized<br />
service center, in either the original package or a similar package<br />
affording an equal degree of protection.<br />
5. In the event a product is returned to <strong>NEC</strong> Solutions for warranty<br />
service, and it is determined that there is no product defect or that<br />
the product condition is not covered by this limited warranty, a<br />
diagnostic service fee may be charged to the customer.<br />
LIMITATION OF IMPLIED WARRANTIES<br />
EXCEPT AS EXPRESSLY SET FORTH IN THIS LIMITED WARRANTY,<br />
<strong>NEC</strong> SOLUTIONS MAKES NO OTHER WARRANTIES, EXPRESS<br />
OR IMPLIED, INCLUDING BUT NOT LIMITED TO ANY IMPLIED<br />
WARRANTIES OR CONDITIONS OF MERCHANTABILITY AND<br />
FITNESS FOR A PARTICULAR PURPOSE. ANY IMPLIED WARRAN-<br />
TIES THAT MAY BE IMPOSED BY LAW ARE LIMITED TO THE TERMS<br />
AND DURATION OF THIS LIMITED WARRANTY.<br />
EXCLUSION OF DAMAGES<br />
<strong>NEC</strong> SOLUTIONS’ LIABILITY FOR ANY DEFECTIVE PRODUCT IS<br />
LIMITED TO THE REPAIR OR REPLACEMENT OF THE PRODUCT<br />
AT <strong>NEC</strong> SOLUTIONS’ OPTION. <strong>NEC</strong> SOLUTIONS SHALL NOT<br />
BE LIABLE FOR:<br />
1. DAMAGE TO OTHER PROPERTY CAUSED BY ANY DEFECTS<br />
IN THIS PRODUCT, DAMAGES BASED UPON INCONVE-<br />
NIENCE, LOSS OF USE OF THE PRODUCT, LOSS OF TIME,<br />
COMMERCIAL LOSS; OR<br />
2. ANY OTHER DAMAGES, WHETHER INCIDENTAL, CONSE-<br />
QUENTIAL OR OTHERWISE.<br />
HOW STATE LAW RELATES TO THE WARRANTY<br />
SOME STATES DO NOT ALLOW LIMITATIONS ON HOW LONG<br />
AN IMPLIED WARRANTY LASTS AND/OR DO NOT ALLOW THE<br />
EXCLUSION OR LIMITATION OF INCIDENTAL OR CONSEQUEN-<br />
TIAL DAMAGES, SO THE ABOVE LIMITATIONS AND EXCLU-<br />
SIONS MAY NOT APPLY TO YOU. THIS LIMITED WARRANTY<br />
GIVES YOU SPECIFIC LEGAL RIGHTS, AND YOU MAY HAVE<br />
OTHER RIGHTS WHICH VARY FROM STATE TO STATE.<br />
FOR MORE INFORMATION, CONTACT:<br />
<strong>NEC</strong> SOLUTIONS (AMERICA), INC.<br />
1250 N. Arlington Heights Road, Suite 500<br />
Itasca, Illinois 60143-1248<br />
TELEPHONE 800-836-0655<br />
www.necvisualsystems.com<br />
Customers are cautioned that product performance is affected by<br />
system configuration, software, the application, customer data,<br />
and operator control, among other factors. While <strong>NEC</strong> Solutions’<br />
products are considered to be compatible with many systems, the<br />
specific functional implementation by the customers of the product<br />
may vary. Therefore, the suitability of a product for a specific<br />
purpose or application must be determined by the customer and<br />
is not warranted by <strong>NEC</strong> Solutions.<br />
Printed in Japan<br />
'
DECLARATION OF CONFORMITY<br />
This device complies with Part 15 of FCC Rules. Operation is subject to the following two conditions. (1) This device may<br />
not cause harmful interference, and (2) this device must accept any interference received, including interference that may<br />
cause undesired operation.<br />
U.S. Responsible Party:<br />
Address:<br />
Tel. No.:<br />
<strong>NEC</strong> Technologies, Inc.<br />
1250 N. Arlington Heights Road<br />
Itasca, Illinois 60143<br />
(630) 467-5000<br />
Type of Product:<br />
Equipment Classification:<br />
LCD Projector<br />
Class B Peripheral<br />
Models:<br />
MT1055, <strong>MT1050</strong> and MT850<br />
We hereby declare that the equipment specified above<br />
conforms to the technical standards as specified in the FCC Rules.
OUT<br />
REMO<br />
CONTR<br />
INPU<br />
STATUS<br />
POWER<br />
ENTER<br />
AUDIO<br />
S-VIDEO<br />
RGB MONITOR<br />
OUTPUT<br />
VIDEO<br />
MultiSync MT1055/<strong>MT1050</strong>/MT850<br />
LCD Projector<br />
User’s Manual<br />
English<br />
ON/STAND BY<br />
CA N C E L<br />
SELECT<br />
SOURCE AUTO ADJUST<br />
MENU<br />
USB PC-CARD<br />
C CONTROL MOUSE<br />
AUDIO RGB INPUT 1<br />
AC IN<br />
AUDIO RGB INPUT 2<br />
L/MONO R<br />
E – 1
IMPORTANT INFORMATION<br />
Precautions<br />
Please read this manual carefully before using your <strong>NEC</strong> MultiSync<br />
MT1055/<strong>MT1050</strong>/MT850 Projector and keep the manual handy for future<br />
reference.<br />
Your serial number is located under the name plate label on the left<br />
side of your MultiSync MT1055/<strong>MT1050</strong>/MT850. Record it here:<br />
CAUTION<br />
To turn off main power, be sure to remove the plug from<br />
power outlet.<br />
The power outlet socket should be installed as near to<br />
the equipment as possible, and should be easily accessible.<br />
CAUTION<br />
TO PREVENT SHOCK, DO NOT OPEN THE CABINET.<br />
NO USER-SERVICEABLE PARTS INSIDE.<br />
REFER SERVICING TO QUALIFIED <strong>NEC</strong> SERVICE<br />
PERSONNEL.<br />
This symbol warns the user that uninsulated voltage<br />
within the unit may be sufficient to cause electrical shock.<br />
Therefore, it is dangerous to make any kind of contact<br />
with any part inside of the unit.<br />
This symbol alerts the user that important information<br />
concerning the operation and maintenance of this unit<br />
has been provided. The information should be read carefully<br />
to avoid problems.<br />
WARNING<br />
TO PREVENT FIRE OR SHOCK, DO NOT EXPOSE THIS UNIT TO<br />
RAIN OR MOISTURE.<br />
DO NOT USE THIS UNIT’S GROUNDED PLUG WITH AN EXTEN-<br />
SION CORD OR IN AN OUTLET UNLESS ALL THREE PRONGS CAN<br />
BE FULLY INSERTED.<br />
DO NOT OPEN THE CABINET. THERE ARE HIGH-VOLTAGE COM-<br />
PONENTS INSIDE. ALL SERVICING MUST BE DONE BY QUALI-<br />
FIED <strong>NEC</strong> SERVICE PERSONNEL.<br />
DOC Compliance Notice<br />
This Class B digital apparatus meets all requirements of the Canadian<br />
Interference-Causing Equipment Regulations.<br />
CAUTION<br />
LASER RADIATION-<br />
DO NOT STATE INTO BEAM<br />
WAVE LENGTH: 650nm<br />
MAX. OUTPUT: 1mW<br />
CLASS 2 LASER PRODUCT<br />
RADIACION LASER<br />
NO MIRE AL RAYO<br />
PRODUCTO LASER CLASSE2<br />
LASER-STRAHLUNG<br />
NICHT IN DEN STRAHL<br />
BLICKEN ! LASER KLASSE2<br />
RAYONNEMENT LASER NE PAS<br />
REGARDER DANS LE FAISCEAU<br />
APPAREIL A LASER DE CLASSE2<br />
EN60825-1 : 1994 + A11 : 1996<br />
This label is located on the back of the remote control.<br />
REMOTE<br />
CONTROL<br />
MODEL:<br />
RD-367E<br />
7N900011<br />
MADE IN CHINA<br />
RF Interference<br />
WARNING<br />
The Federal Communications Commission does not allow any<br />
modifications or changes to the unit EXCEPT those specified by<br />
<strong>NEC</strong> Technologies in this manual. Failure to comply with this government<br />
regulation could void your right to operate this equipment.<br />
This equipment has been tested and found to comply with the<br />
limits for a Class B digital device, pursuant to Part 15 of the FCC<br />
Rules. These limits are designed to provide reasonable protection<br />
against harmful interference in a residential installation. This equipment<br />
generates, uses, and can radiate radio frequency energy<br />
and, if not installed and used in accordance with the instructions,<br />
may cause harmful interference to radio communications. However,<br />
there is no guarantee that interference will not occur in a<br />
particular installation. If this equipment does cause harmful interference<br />
to radio or television reception, which can be determined<br />
by turning the equipment off and on, the user is encouraged to try<br />
to correct the interference by one or more of the following measures:<br />
• Reorient or relocate the receiving antenna.<br />
• Increase the separation between the equipment and receiver.<br />
• Connect the equipment into an outlet on a circuit different from that to<br />
which the receiver is connected.<br />
• Consult the dealer or an experienced radio / TV technician for help.<br />
In UK, a BS approved power cable with moulded plug has a Black (five<br />
Amps) fuse installed for use with this equipment. If a power cable is not<br />
supplied with this equipment please contact your supplier.<br />
3. GSGV Acoustic Noise Information Ordinance:<br />
The sound pressure level is less than 70 dB (A) according to ISO 3744<br />
or ISO 7779.<br />
• IBM is a registered trademark of International Business Machines<br />
Corporation.<br />
• Macintosh and PowerBook are registered trademarks of Apple Computer,<br />
Inc.<br />
• Other product and company names mentioned in this user's manual<br />
may be the trademarks of their respective holders.<br />
E – 2
Important Safeguards<br />
These safety instructions are to ensure the long life of your projector<br />
and to prevent fire and shock. Please read them carefully and heed all<br />
warnings.<br />
Installation<br />
1. For best results, use your projector in a darkened room.<br />
2. Place the projector on a flat, level surface in a dry area away from<br />
dust and moisture.<br />
3. Do not place your projector in direct sunlight, near heaters or heat<br />
radiating appliances.<br />
4. Exposure to direct sunlight, smoke or steam can harm internal components.<br />
5. Handle your projector carefully. Dropping or jarring can damage internal<br />
components.<br />
6. Do not place heavy objects on top of the projector.<br />
7. If you wish to have the projector installed on the ceiling:<br />
a. Do not attempt to install the projector yourself.<br />
b. The projector must be installed by qualified technicians in order to ensure<br />
proper operation and reduce the risk of bodily injury.<br />
c. In addition, the ceiling must be strong enough to support the projector<br />
and the installation must be in accordance with any local building codes.<br />
d. Please consult your dealer for more information.<br />
Power Supply<br />
1. The projector is designed to operate on a power supply of 100-120<br />
or 200-240 V 50/60 Hz AC. Ensure that your power supply fits this<br />
requirement before attempting to use your projector.<br />
2. Handle the power cable carefully and avoid excessive bending. A<br />
damaged cord can cause electric shock or fire.<br />
3. If the projector is not to be used for an extended period of time,<br />
disconnect the plug from the power outlet.<br />
Cleaning<br />
1. Unplug the projector before cleaning.<br />
2. Clean the cabinet periodically with a damp cloth. If heavily soiled,<br />
use a mild detergent. Never use strong detergents or solvents such<br />
as alcohol or thinner.<br />
3. Use a blower or lens paper to clean the lens, and be careful not to<br />
scratch or mar the lens.<br />
Lamp Replacement<br />
• To replace the lamp, follow all instructions provided on page E-47.<br />
• Be sure to replace the lamp when the message "The Lamp has<br />
reached the end of its usable life. Please replace the lamp."<br />
appears. If you continue to use the lamp after the lamp has reached<br />
the end of its usable life, the lamp bulb may shatter, and pieces of<br />
glass may be scattered in the lamp case. Do not touch them as the<br />
pieces of glass may cause injury. If this happens, contact your <strong>NEC</strong><br />
dealer for lamp replacement.<br />
• Allow a minimum of ONE minute to elapse after turning off the projector.<br />
Then disconnect the power cable and allow 60 minutes to<br />
cool the projector before replacing the lamp.<br />
Fire and Shock Precautions<br />
1. Ensure that there is sufficient ventilation and that vents are unobstructed<br />
to prevent the build-up of heat inside your projector. Allow<br />
at least 3 inches (10 cm) of space between your projector and a<br />
wall.<br />
2. Prevent foreign objects such as paper clips and bits of paper from<br />
falling into your projector. Do not attempt to retrieve any objects that<br />
might fall into your projector. Do not insert any metal objects such as<br />
a wire or screwdriver into your projector. If something should fall into<br />
your projector, disconnect it immediately and have the object removed<br />
by a qualified <strong>NEC</strong> service personnel.<br />
3. Do not place any liquids on top of your projector.<br />
• Do not look into the lens while the projector is on. Serious damage<br />
to your eyes could result.<br />
• Keep any items such as magnifying glass out of the light path of the<br />
projector. The light being projected from the lens is extensive, therefore<br />
any kind of abnormal objects that can redirect light coming out<br />
of the lens, can cause unpredictable outcome such as fire or injury<br />
to the eyes.<br />
• Do not cover the lens with the supplied lens cap or equivalent while<br />
the projector is on. Doing so can lead to melting of the cap and<br />
possibly burning your hands due to the heat emitted from the light<br />
output.<br />
• Do not look into the laser pointer while it is on and do not point the<br />
laser beam at another person. Serious injury could result.<br />
CAUTION<br />
Do not unplug the power cable from the wall outlet under any one<br />
of the following circumstances. Doing so can cause damage to<br />
the projector:<br />
• While the Hour Glass icon appears.<br />
• While the message "Please wait a little." appears. This message will be<br />
displayed after the projector is turned off.<br />
• Immediately after the power cable is plugged into the wall outlet (the<br />
POWER indicator has not changed to a steady amber glow).<br />
• Immediately after the cooling fan stops working (The cooling fan continues<br />
to work for ONE minute after the projector is turned off with the<br />
POWER button).<br />
• While the POWER and the STATUS indicators are alternately flashing.<br />
CAUTION<br />
Do not put the projector on its side when the lamp is turned on.<br />
Doing so may cause damage to the projector.<br />
E – 3
TABLE OF CONTENTS<br />
1. INTRODUCTION<br />
Introduction to the MultiSync MT1055/<strong>MT1050</strong>/MT850 Projector .......... E-5<br />
Getting Started ............................................................................. E-5<br />
What's in the Box ......................................................................... E-6<br />
Getting to Know Your MultiSync MT1055/<strong>MT1050</strong>/MT850 Projector ...... E-7<br />
Front / Side Features ............................................................. E-7<br />
Rear / Side Features .............................................................. E-7<br />
Top Features .......................................................................... E-8<br />
Terminal Panel Features ........................................................ E-9<br />
Remote Control Features .................................................... E-10<br />
Remote Control Battery Installation .............................. E-12<br />
Operating Range ........................................................... E-12<br />
Remote Control Precautions ......................................... E-12<br />
Switching Operation mode between mouse and projector ..... E-13<br />
2. INSTALLATION<br />
Setting Up Your Projector ........................................................... E-14<br />
Selecting a Location ................................................................... E-14<br />
Using a Tabletop or Cart ............................................................ E-14<br />
Adjusting the Tilt Foot ................................................................. E-15<br />
Distance Chart ........................................................................... E-16<br />
Ceiling Installation ...................................................................... E-16<br />
Reflecting the Image .................................................................. E-16<br />
Wiring Diagram .......................................................................... E-18<br />
Connecting Your PC ............................................................. E-19<br />
Connecting Your Macintosh Computer................................. E-20<br />
Connecting Your Computer to the Mouse Output Port ......... E-21<br />
Connecting an External Monitor .......................................... E-21<br />
Connecting Your DVD Player ............................................... E-22<br />
Connecting Your VCR or Laser Disc Player ......................... E-23<br />
About Startup screen (Menu Language Select screen) ............. E-24<br />
3. OPERATION<br />
General Controls ........................................................................ E-25<br />
Using the Menus .................................................................. E-25<br />
Using a USB Mouse ............................................................ E-25<br />
Basic Operation ................................................................... E-26<br />
Adjust the Image Using Auto Adjust .................................... E-26<br />
Using Pointer ....................................................................... E-27<br />
Enlarging and Moving a Picture ........................................... E-27<br />
Correcting Keystone Distortion ............................................ E-28<br />
Freezing a Picture ................................................................ E-28<br />
Customizing Basic/Custom Menu ........................................ E-28<br />
Menu Tree .................................................................................. E-30<br />
Menu Elements .......................................................................... E-31<br />
Menu Descriptions & Functions ................................................. E-32<br />
Source Select ............................................................................. E-32<br />
RGB1&2/Video/S-Video/PC Card Viewer<br />
Picture ........................................................................................ E-32<br />
Brightness/Contrast/Color/Hue/Sharpness<br />
Volume ....................................................................................... E-32<br />
Image Options ............................................................................ E-33<br />
Keystone .............................................................................. E-33<br />
Color Temperature ............................................................... E-33<br />
Lamp Mode .......................................................................... E-33<br />
Gamma Correction .............................................................. E-33<br />
Aspect Ratio ........................................................................ E-33<br />
Noise Reduction .................................................................. E-34<br />
Color Matrix ......................................................................... E-34<br />
White Balance ..................................................................... E-34<br />
Position/Clock ...................................................................... E-34<br />
Resolution ............................................................................ E-34<br />
Factory Default .................................................................... E-35<br />
Projector Options ....................................................................... E-35<br />
Menu .................................................................................... E-35<br />
Menu Mode ................................................................... E-35<br />
Advanced Menu, Basic/Custom Menu ...................... E-35<br />
Language ...................................................................... E-35<br />
Projector Pointer ............................................................ E-35<br />
Source Display .............................................................. E-35<br />
Direct Button (Volume Bar and Keystone Bar) .............. E-35<br />
Menu Display Time ........................................................ E-35<br />
Setup ................................................................................... E-36<br />
Orientation ..................................................................... E-36<br />
Background ................................................................... E-36<br />
Mouse Settings ............................................................. E-36<br />
Button/Sensitivity ....................................................... E-36<br />
PC Card Viewer Options ............................................... E-36<br />
Capture Options ............................................................ E-36<br />
Signal Select ................................................................. E-36<br />
Auto Adjust (RGB only) ................................................. E-37<br />
Auto Start ...................................................................... E-37<br />
Power Management ...................................................... E-37<br />
Power Off Confirmation ................................................. E-37<br />
Keystone Save .............................................................. E-37<br />
Fan High Speed Mode .................................................. E-37<br />
Auto Mute for Built-in Speaker ....................................... E-37<br />
Clear Lamp Hour Meter ................................................. E-37<br />
Remote Sensor ............................................................. E-37<br />
S-Video Mode Select .................................................... E-37<br />
RGBOUT Terminal ........................................................ E-37<br />
Communication Speed .................................................. E-38<br />
Default Source Select .................................................... E-38<br />
Tools ........................................................................................... E-38<br />
Capture ................................................................................ E-38<br />
PC Card Files ...................................................................... E-38<br />
Changing Background Logo .......................................... E-39<br />
Chalk Board ......................................................................... E-39<br />
Help ............................................................................................ E-39<br />
Contents .............................................................................. E-39<br />
Information ........................................................................... E-39<br />
Using the PC Card Viewer Function ........................................... E-40<br />
Features ............................................................................... E-40<br />
Inserting and Ejecting a PC Card ........................................ E-40<br />
Installing the PC Card Viewer Software ............................... E-41<br />
Starting Up the PC Card Viewer Software on your PC<br />
(PC Card Viewer Utility 10) ........ E-41<br />
Operating the PC Card Viewer Function from the Projector<br />
(playback) .................................. E-42<br />
Capturing Images Displayed on the Projector ..................... E-44<br />
Viewing Digital Images ........................................................ E-44<br />
Uninstalling the PC Card Viewer Software .......................... E-45<br />
Terminology ......................................................................... E-46<br />
4. MAINTENANCE<br />
Replacing the Lamp ................................................................... E-47<br />
Cleaning or Replacing the Filters ............................................... E-48<br />
5. TROUBLESHOOTING<br />
Power / Status Light Messages .................................................. E-49<br />
Common Problems & Solutions ................................................. E-49<br />
6. SPECIFICATIONS<br />
Optical/Electrical/Mechanical ..................................................... E-51<br />
Cabinet Dimensions ................................................................... E-52<br />
D-Sub Pin Assignments ............................................................. E-54<br />
Timing Chart .............................................................................. E-55<br />
PC Control Codes ...................................................................... E-56<br />
Cable Connection ....................................................................... E-56<br />
E – 4
1. INTRODUCTION<br />
Introduction to the MultiSync MT1055/<strong>MT1050</strong>/<br />
MT850 Projector<br />
This section introduces you to your new MultiSync MT1055 and <strong>MT1050</strong><br />
(XGA)/ MT850 (SVGA) Projector and describes the features and controls.<br />
Congratulations on Your Purchase of The<br />
MultiSync MT1055/<strong>MT1050</strong>/MT850 Projector<br />
The MultiSync MT1055/<strong>MT1050</strong>/MT850 is one of the very best projectors<br />
available today. The MultiSync MT1055/<strong>MT1050</strong>/MT850 enables<br />
you to project precise images up to 300 inches across (measured diagonally)<br />
from your PC or Macintosh computer (desktop or notebook),<br />
VCR, DVD player, document camera, a laser disc player or PC Card<br />
Viewer.<br />
You can use the projector on a tabletop or cart, you can use the projector<br />
to project images from behind the screen, and the projector can be<br />
permanently mounted on a ceiling* 1 . The remote control can be used<br />
wirelessly.<br />
Features you’ll enjoy:<br />
• Simple set up and operation.<br />
• Hot air blown from the vents does not bother the audience during<br />
your presentation since the vents are located on the side.<br />
• A high-performance 200 watt NSH lamp.<br />
• The supplied wireless remote control that operates the projector from<br />
any angle.<br />
• The image can be projected between 30 and 300 inches (measured<br />
diagonally).<br />
• Keystone correction allows you to correct trapezoidal distortion so<br />
that the image is square.<br />
• You can choose between video modes depending on your source:<br />
"normal" for a typical picture, "natural" for true color reproduction.<br />
• The built-in PC Card Viewer allows you to start your presentation<br />
even when a PC is not available at the site.<br />
• The "Capture" enables you to capture the current projected image.<br />
• An image can be projected from in front or behind a screen, and the<br />
projector can even be installed on the ceiling.<br />
• <strong>NEC</strong> Technologies’ exclusive Advanced AccuBlend intelligent pixel<br />
blending technology - an extremely accurate image compression<br />
technology - offers a crisp image with UXGA (16001200) resolution*<br />
3 .<br />
• Supports most IBM VGA, SVGA, XGA* 2 , SXGA/UXGA(with Advanced<br />
AccuBlend)* 3 , Macintosh, component signal (YCbCr / YPbPr)<br />
or any other RGB signals within a horizontal frequency range of 15<br />
to 100 kHz and a vertical frequency range of 50 to 120 Hz. This<br />
includes NTSC, PAL, PAL60, SECAM and NTSC4.43 standard video<br />
signals.<br />
NOTE: Composite video standards are as follows:<br />
NTSC: U.S. TV standard for video in U.S. and Canada.<br />
PAL: TV standard used in Western Europe.<br />
PAL60: TV standard used for NTSC playback on PAL TVs.<br />
SECAM: TV standard used in France and Eastern Europe.<br />
NTSC4.43: TV standard used in Middle East countries.<br />
* 1 Do not attempt to mount the projector on a ceiling yourself. The projector<br />
must be installed by qualified technicians in order to ensure<br />
proper operation and reduce the risk of bodily injury. In addition, the<br />
ceiling must be strong enough to support the projector and the installation<br />
must be in accordance with any local building codes. Please<br />
consult your dealer for more information.<br />
* 2 An XGA image (1024768) is converted into an 800600 crisp<br />
image with <strong>NEC</strong> technology’s Advanced AccuBlend on MT850.<br />
* 3 A UXGA (16001200) and SXGA image (12801024) is converted<br />
into a 16001200 and 1024768 crisp image respectivery with<br />
<strong>NEC</strong> technology’s Advanced AccuBlend on MT1055/<strong>MT1050</strong>.<br />
* 4 The PC Control Utility 1.0 is required. This program is included on<br />
the supplied CD-ROM.<br />
* 5 The USB terminal meets the USB1.1 specification and accepts a<br />
USB mouse only.<br />
Getting Started<br />
The fastest way to get started is to take your time and do everything<br />
right the first time. Take a few minutes now to review the user’s manual.<br />
This may save you time later on. At the beginning of each section of<br />
the manual you’ll find an overview. If the section doesn’t apply, you can<br />
skip it.<br />
• The supplied remote control can be used without a cable, and you<br />
can even use the remote control and mouse adapter to operate your<br />
PC or Macintosh mouse wirelessly from across the room with the<br />
built-in remote mouse receiver.<br />
• You can control the projector with a PC using the PC Control port* 4 .<br />
• USB terminal allows USB mouse operation * 5 .<br />
• The contemporary cabinet design is light, compact, easy to carry,<br />
and complements any office, boardroom or auditorium.<br />
• Eight pointers are available for your presentation.<br />
E – 5
AUDIO<br />
S-VIDEO<br />
RGB MONITOR<br />
OUTPUT<br />
VIDEO<br />
FREEZE<br />
PIC-MUTE<br />
LIST<br />
KEYSTONE<br />
VOL.<br />
SLIDE<br />
MAGNIFY<br />
FOLDER<br />
SLIDE<br />
OFF<br />
What's in the Box?<br />
Make sure your box contains everything listed. If any pieces are missing, contact your dealer.<br />
Please save the original box and packing materials if you ever need to ship your MultiSync MT1055/<strong>MT1050</strong>/MT850 Projector.<br />
ON/STAND BY<br />
ENTER<br />
CA N C E L<br />
STATUS<br />
POWER<br />
Lens cap<br />
SELECT<br />
SOURCE AUTO ADJUST<br />
MENU<br />
USB PC-CARD<br />
C CONTROL MOUSE<br />
OUT<br />
REMO<br />
CONTR<br />
INPU<br />
String and rivet<br />
AUDIO RGB INPUT 1<br />
AC IN<br />
AUDIO RGB INPUT 2<br />
L/MONO R<br />
Batteries (AA2)<br />
<strong>NEC</strong> MultiSync MT1055, <strong>MT1050</strong> or MT850 projector<br />
Power cable Serial cable RGB signal cable<br />
(15-Pin Mini D-Sub To 15-Pin Mini D-Sub connector)<br />
Mouse adapter<br />
(For IBM PS/2)<br />
Mouse adapter<br />
(For Macintosh)<br />
Mouse adapter<br />
(USB)<br />
Remote cable<br />
Quick<br />
Connect<br />
Guide<br />
-<br />
RGB 1<br />
VIDEO S-VIDEO AUTO ADJ.<br />
RGB 2 PJ<br />
MENU LASER<br />
ON<br />
R-CLICK /CANCEL<br />
HELP POINTER PC CARD<br />
+<br />
CD-ROM<br />
User's<br />
Manual<br />
Remote control<br />
E – 6
OUT<br />
REMO<br />
CONTR<br />
INPU<br />
ENTER<br />
Getting to Know Your MultiSync MT1055/<strong>MT1050</strong>/MT850 Projector<br />
Front/Side Features<br />
Controls<br />
Remote Sensor<br />
Zoom<br />
USB (Mouse)<br />
Terminal<br />
STATUS<br />
POWER<br />
Focus<br />
Remote Sensor<br />
Air-Filter<br />
ON/STAND BY<br />
CA N C E L<br />
SELECT<br />
SOURCE AUTO ADJUST<br />
MENU<br />
USB PC-CARD<br />
C CONTROL MOUSE<br />
PC Card Slot<br />
AUDIO<br />
RGB MONITOR<br />
OUTPUT<br />
AC IN<br />
Lenscap<br />
AUDIO RGB INPUT 1<br />
Slot for Kensington<br />
Micro saver Security<br />
System<br />
AUDIO RGB INPUT 2<br />
S-VIDEO<br />
L/MONO R VIDEO<br />
Air Filter<br />
Terminal Panel<br />
AC Input<br />
Connect the supplied power cable’s threepin<br />
plug here.<br />
Adjustable Tilt Foot<br />
Carrying Handle<br />
Lens<br />
Ventilation (outlet)<br />
Rear/Side Features<br />
Remote Sensor<br />
Built-In Stereo Speaker (1W)<br />
MENU<br />
SOURCE AUTO ADJUST<br />
SELECT<br />
ENTER<br />
CA N C E L<br />
ON/STAND BY<br />
STATUS<br />
POWER<br />
One-touch Tilt Button<br />
Remote Sensor<br />
Rear Foot<br />
Lamp Cover<br />
Built-In Stereo Speaker (1W)<br />
Lamp Cover Screw<br />
Rear Foot<br />
E – 7
Top Features<br />
1<br />
2<br />
SOURCE<br />
AUTO ADJUST<br />
MENU<br />
3<br />
4<br />
5<br />
SELECT<br />
6<br />
7<br />
ENTER<br />
CANCEL<br />
9<br />
8<br />
STATUS<br />
POWER<br />
ON/STAND BY<br />
1. Source Button<br />
Use this button to select a video source such as a PC, VCR, DVD<br />
player or PC Card Viewer (PC card).<br />
Each time this button is pressed, the input source will change as follows:<br />
→ RGB1 → RGB2 → Video → S-Video → PC Card Viewer ⎯<br />
If no input signal is present, the input will be skipped.<br />
2. Auto Adjust Button (RGB only)<br />
Use this button to adjust Position-H/V and Pixel Clock/Phase for an<br />
optimal picture. Some signals may not be displayed correctly or take<br />
time to switch between sources.<br />
3. Menu Button<br />
Displays the menu.<br />
4. Select ▲▼ / Volume (+) (-) Buttons<br />
▲▼: Use these buttons to select the menu of the item you wish to<br />
adjust.<br />
When no menus appear, these buttons work as a volume control.<br />
: Use these buttons to change the level of a selected menu item.<br />
A press of the button executes the selection.<br />
When the menus or the Viewer tool bar is not displayed, these<br />
buttons can be used to select a slide, or to move the cursor in<br />
Folder List or Slide List.<br />
When the pointer is displayed, these ▲▼ buttons move<br />
the pointer.<br />
6. Cancel Button<br />
Press this button to exit "Menus". Press this button to return the adjustments<br />
to the last condition while you are in the adjustment or setting<br />
menu.<br />
7. Status Indicator<br />
When this is lit red (orange in Eco mode) continually, it's warning you<br />
that the projection lamp has exceeded 1500 hours (2500 hours in Eco<br />
mode) of service. After this light appears, it is advisable to replace the<br />
projection lamp as soon as possible. (See page E-47). In addition the<br />
message "The lamp has reached the end of its usable life. Please replace<br />
the lamp." appears continually until the lamp is replaced.<br />
If this light blinks red rapidly, it indicates that the lamp cover is not<br />
attached properly or the projector is overheated.<br />
See the Power / Status Light Messages on page E-49 for more details.<br />
8. Power Indicator ( )<br />
When this indicator is green, the projector is on; when the indicator is<br />
orange, it is in standby mode.<br />
9. Power Button (ON / STAND BY)<br />
Use this button to turn the power on and off when the power is supplied<br />
and the projector is in standby mode.<br />
NOTE: To turn off the projector, press and hold this button for a minimum of<br />
two seconds.<br />
5. Enter Button<br />
Executes your menu selection and activates items selected from the<br />
menu.<br />
E – 8
Terminal Panel Features<br />
1 2 3<br />
AUDIO<br />
RGB MONITOR<br />
OUTPUT<br />
8<br />
AUDIO RGB INPUT 1<br />
USB<br />
4<br />
9<br />
AUDIO RGB INPUT 2<br />
5<br />
PC CONTROL<br />
MOUSE<br />
OUTPUT<br />
REMOTE<br />
CONTROL<br />
INPUT<br />
6<br />
10<br />
S-VIDEO<br />
L/MONO<br />
R<br />
VIDEO<br />
7<br />
1. USB Terminal<br />
Connect a commercially available mouse that supports USB. You can<br />
operate the menu or PC Card Viewer with the USB mouse via this<br />
terminal.<br />
Note that this terminal is not used with a computer and that there may<br />
be some brands of USB mouse that the projector does not support.<br />
11 12 13<br />
USB<br />
RCE AUTO ADJUST<br />
MENU<br />
2 PC Card Slot<br />
Insert a PC card here.<br />
C CONTROL MOUSE<br />
OUTPUT<br />
PC-CARD<br />
3. PC Card Access Indicator<br />
Lights while accessing a PC card.<br />
REMO<br />
CONTR<br />
INPU<br />
4. PC Card Eject Button<br />
Press to eject a PC card.<br />
Slot for Kensington<br />
MicroSaver Security System 14<br />
5. PC Control Port (Mini DIN 8 Pin)<br />
Use this port to connect your PC to control your projector via a serial<br />
cable. This enables you to use your PC and serial communication protocol<br />
to control the projector. The <strong>NEC</strong> optional serial cable is required<br />
to use this port. Also PC Control Utility 1.0 included in the supplied CD-<br />
ROM must be installed on your PC.<br />
If you are writing your own program, typical PC control codes are on<br />
page E-56.<br />
A cap is put on the port at the factory. Remove the cap when using the<br />
port.<br />
6. Mouse Output Port (Mini DIN 8 Pin)<br />
Use this port to operate your computer's mouse functions from the<br />
remote control.<br />
7. Remote Control Input Jack<br />
Connect your remote control cable here for wired operation.<br />
8. Audio Monitor Output Mini Jack<br />
Connect additional external speakers here to listen to audio coming<br />
from your computer, Video or S- Video input.<br />
RGB Monitor Output Connector (Mini D-Sub 15 pin)<br />
You can use this connector to loop your computer image to an external<br />
monitor from the RGB input source.<br />
9. RGB Audio Input 1 Connector<br />
This is where you connect RGB audio output from a computer or another<br />
RGB source.<br />
RGB Input 1 Connector (Mini D-Sub 15 pin)<br />
Connect your PC or other RGB equipment. Use the signal cable that's<br />
supplied to connect to a PC.<br />
10. RGB Audio Input 2 Connector<br />
This is where you connect RGB audio output from a computer or another<br />
RGB source.<br />
RGB Input 2 Connector (Mini D-Sub 15 pin)<br />
Connect your PC or other RGB equipment. Use the signal cable that's<br />
supplied to connect to a PC.<br />
11. S-Video Input Port<br />
Here is where you connect the S-Video input from an external source<br />
like a VCR.<br />
12. Left Channel/Mono Audio Input Jack (RCA)<br />
This is the left channel audio input for stereo sound coming from video<br />
equipment or audio system. This also serves as your monaural audio<br />
input. (Video and S-video only)<br />
Right Channel Audio Input Jack (RCA)<br />
This is the right channel audio input for stereo sound. (Video and S-<br />
video only)<br />
NOTE: When using two Video sources simultaneously, the Left Channel Audio<br />
Input jack is available for the S-Video source only and the Right Channel Audio<br />
Input jack is available for the composite video source only.<br />
13. Video Input<br />
Connect a VCR, DVD player, laser disc player, or document camera<br />
here to project video.<br />
14. Built-in Security Slot ( )<br />
This security slot supports the MicroSaver ® Security System.<br />
MicroSaver ® is a registered trademark of Kensington Microware<br />
Inc. The logo is trademarked and owned by Kensington Microware Inc.<br />
E – 9
Remote Control Features<br />
NOTE: If you are using a Macintosh computer, you can click either the rightclick<br />
or left-click button to activate the mouse.<br />
NOTE: If any one of the buttons is pressed and held for 60 seconds or more,<br />
the button operations will cease to operate. This is not a malfunction, rather it<br />
is a feature used to prolong battery power. To cancel this feature, press any one<br />
of the buttons other than the Mouse button.<br />
1. Infrared Transmitter<br />
Direct the remote control toward the remote sensor on the projector<br />
cabinet.<br />
2. Laser Pointer<br />
Beams a laser light when "Laser" button is pressed.<br />
1<br />
3. LED<br />
Flashes when any button is pressed.<br />
4. Power On Button<br />
If the main power is applied, you can use this button to turn your projector<br />
on.<br />
5. Power Off Button<br />
If the main power is applied, you can use this button to turn your projector<br />
off.<br />
NOTE: To turn off the projector, press and hold the POWER OFF button for a<br />
minimum of two seconds.<br />
6. Video Button<br />
Press this button to select an NTSC, PAL, SECAM or NTSC4.43 compatible<br />
video source from a VCR, DVD player, laser disc player or document<br />
camera.<br />
7. S-Video Button<br />
Press this button to select an S-Video source from a VCR.<br />
8. RGB 1 Button<br />
Press this button to select a video source from computer or component<br />
equipment connected to your RGB 1 port.<br />
3<br />
2<br />
MENU<br />
OFF<br />
5 4<br />
6<br />
8<br />
7<br />
13*<br />
14<br />
VIDEO S-VIDEO AUTO ADJ.<br />
RGB 1<br />
RGB 2<br />
ON<br />
PJ<br />
LASER<br />
10<br />
11*<br />
9<br />
12<br />
9. RGB 2 Button<br />
Press this button to select a video source from computer or component<br />
equipment connected to your RGB 2 port.<br />
10. Auto Adjust Button (RGB only)<br />
Press this button to automatically adjust the vertical/horizontal position,<br />
clock frequency/phase and resolution if the projected picture is<br />
not centered, if there are vertical stripes on the picture or if the picture<br />
is flickering.<br />
11. PJ Button<br />
Press this button to switch the Mouse, Cancel/Right Click, and Enter/<br />
Left Click buttons between the Projector mode (lit red) and the Computer<br />
mode. Press this button or any one of the Menu, Help, Pointer,<br />
PC Card, Folder List or Slide List buttons to switch to the Projector<br />
mode and the PJ button lights red. To switch back to the Computer<br />
mode, press the PJ button again.<br />
12. Laser Button<br />
Press and hold this button to activate the laser pointer. When lit, you<br />
can use the laser to draw your audience's attention to a red dot that<br />
you can place on any object.<br />
13. Menu Button<br />
Displays the menu for various settings and adjustments.<br />
R-CLICK /CANCEL<br />
HELP POINTER PC CARD<br />
KEYSTONE MAGNIFY SLIDE<br />
FREEZE<br />
PIC-MUTE<br />
VOL. FOLDER<br />
SLIDE<br />
14. Mouse (▲▼ ) / (+) (–) Button<br />
When you are in the Computer mode, these buttons work as a computer<br />
mouse.<br />
When you are in the Projector mode, which is indicated by lighting the<br />
PJ button:<br />
▲▼: Use these buttons to select the menu of the item you wish to<br />
adjust.<br />
: Use these buttons to change the level of a selected menu item.<br />
A press of the button executes the selection.<br />
When the pointer is displayed, these ▲▼ buttons move the<br />
pointer.<br />
LIST<br />
E – 10
15. Enter / Left Click Button<br />
When you are in the Computer mode, this button works as the mouse<br />
left button.<br />
When you are in the Projector mode, which is indicated by lighting the<br />
PJ button:<br />
Use this button to enter your menu selection. It works the same way as<br />
the "Enter" button on the cabinet.<br />
16. Cancel/ Right Click Button<br />
When you are in the Computer mode, this button works as the mouse<br />
right button.<br />
When you are in the Projector mode, which is indicated by lighting the<br />
PJ button:<br />
Press this button to exit "Menus". It works the same way as the “Cancel”<br />
button on the cabinet.<br />
17. Pointer Button<br />
Press this button to display one of the eight pointers; press again to<br />
hide the pointer. You can move your pointer icon to the area you want<br />
on the screen using the Mouse button.<br />
15<br />
OFF<br />
ON<br />
VIDEO S-VIDEO AUTO ADJ.<br />
RGB 1 RGB 2 PJ<br />
18. Help Button<br />
Provides information about operation and adjustment procedures or<br />
the set information for the current menu or adjustment during menu<br />
operation.<br />
19. Keystone (+) (–) Button<br />
Press the (+) or (–) button to correct the keystone (trapezoidal) distortion,<br />
and make the image square.<br />
20. Magnify (+) (–) Button<br />
Use this button to adjust the image size up to 400%.<br />
When the pointer is displayed, the image is magnified about the center<br />
of the pointer. When the pointer is not displayed, the image is magnified<br />
about the center of the screen.<br />
When the image is magnified, the pointer is changed to the magnifying<br />
icon.<br />
MENU<br />
LASER<br />
21. Freeze Button<br />
This button will freeze a picture. Press again to resume motion.<br />
22. Picture Mute Button<br />
This button turns off the image and sound for a short period of time.<br />
Press again to restore the image and sound.<br />
NOTE: When the menu is displayed, a press of this button mutes an<br />
image and sound without turning off the menu.<br />
17*<br />
18*<br />
19<br />
20<br />
21<br />
22<br />
23<br />
R-CLICK /CANCEL<br />
HELP POINTER PC CARD<br />
KEYSTONE MAGNIFY SLIDE<br />
FREEZE<br />
PIC-MUTE<br />
VOL. FOLDER<br />
SLIDE<br />
LIST<br />
16<br />
24*<br />
25<br />
26*<br />
27*<br />
23. Volume (+) (–) Button<br />
Press (+) to increase the volume and (–) to decrease it.<br />
24. PC Card Button<br />
Press this button to select the PC Card Viewer source.<br />
25. Slide (+) (–) Button<br />
Press (+) to select the next folder or slide and (–) to select the previous<br />
folder or slide.<br />
26. Folder List Button<br />
Press this button to select PC Card Viewer source to display a list of<br />
folders included in a PC card.<br />
27. Slide List Button<br />
Press this button to select PC Card Viewer source to display a list of<br />
slides included in a PC card.<br />
28. Remote Jack<br />
Connect your remote control cable here for wired operation.<br />
PIC-MUTE<br />
FREEZE VOL.<br />
SLIDE<br />
LIST<br />
FOLDER<br />
MAGNIFY<br />
SLIDE<br />
EL<br />
PC CARD<br />
*NOTE: The default is the Computer mode, which allows you to use the Mouse,<br />
R-Click/Cancel, and L-Click/Enter buttons as your computer mouse. When the<br />
MENU, HELP, POINTER, PC CARD, FOLDER LIST, or SLIDE LIST button is<br />
pressed, the PJ button lights red to indicate that you are in the Projector mode.<br />
If no buttons are pressed within 10 seconds, the light goes out and the Projector<br />
mode is canceled.<br />
28<br />
E – 11
Remote Control Battery Installation<br />
Operating Range<br />
1. Press firmly and slide the battery cover off.<br />
7m<br />
2. Remove both old batteries and install new ones (AA). Ensure that<br />
you have the batteries' polarity (+/–) aligned correctly.<br />
3. Slip the cover back over the batteries until it snaps into place.<br />
Remote Control Precautions<br />
• Handle the remote control carefully.<br />
• If the remote control gets wet, wipe it dry immediately.<br />
• Avoid excessive heat and humidity.<br />
• If you will not be using the remote control for a long time, remove the<br />
batteries.<br />
• Do not place the batteries upside down.<br />
• Do not look into the laser pointer while it is on.<br />
• Do not point the laser beam at a person.<br />
Do not mix different types of batteries or new and old batteries.<br />
E – 12
Switching operation mode between mouse and projector<br />
The three shaded buttons shown on the drawing work as a computer mouse in the Computer mode.<br />
In the Computer mode the PJ button is not lit.<br />
• When the MENU button is pressed, the PJ button lights red to indicate that you are in the Projector mode, which allows the projector menu<br />
operation using the three buttons.<br />
• When the POINTER button is pressed, the PJ button lights red to indicate that you are in the Projector mode and that the MOUSE ▲▼ button<br />
works as a moving button for the POINTER or magnified image.<br />
• If no buttons are pressed within 10 seconds, the PJ button's light goes out to indicate that you are in the Computer mode. To enable the projector<br />
menu operation again, press the PJ button to light red. To move the pointer or a magnified image again, turn off the pointer and then turn on the<br />
pointer (press the POINTER button two times).<br />
• When the PJ button is lit, if you want to use the mouse function immediately, press the PJ button to return to the Computer mode (not lit).<br />
OFF<br />
ON<br />
OFF<br />
ON<br />
VIDEO S-VIDEO AUTO ADJ.<br />
VIDEO S-VIDEO AUTO ADJ.<br />
RGB 1<br />
RGB 2<br />
PJ<br />
RGB 1<br />
RGB 2<br />
PJ<br />
Not lit<br />
Lit red<br />
MENU<br />
LASER<br />
Works as a mouse for your computer.<br />
MENU<br />
LASER<br />
Works as the Select button<br />
on the projector.<br />
Works as a right-click button<br />
for your computer.<br />
Works as the Cancel<br />
button on the projector.<br />
R-CLICK /CANCEL<br />
HELP POINTER PC CARD<br />
KEYSTONE MAGNIFY SLIDE<br />
Works as a left-click button<br />
for your computer.<br />
R-CLICK /CANCEL<br />
HELP POINTER PC CARD<br />
KEYSTONE MAGNIFY SLIDE<br />
Works as the Enter<br />
button on the projector.<br />
FREEZE<br />
VOL.<br />
FOLDER<br />
FREEZE<br />
VOL.<br />
FOLDER<br />
PIC-MUTE<br />
SLIDE<br />
PIC-MUTE<br />
SLIDE<br />
LIST<br />
LIST<br />
L-CLICK/ENTER<br />
L-CLICK/ENTER<br />
E – 13
AC IN<br />
CA N CE L<br />
2. INSTALLATION<br />
This section describes how to set up your MultiSync MT1055/<strong>MT1050</strong>/<br />
MT850 projector and how to connect video and audio sources.<br />
Setting up Your Projector<br />
Your MultiSync MT1055/<strong>MT1050</strong>/MT850 Projector is simple to set up<br />
and use. But before you get started, you must first:<br />
1. Determine the image size.<br />
2. Set up a screen or select a non-glossy white wall onto which you<br />
can project your image.<br />
Carrying the Projector: Always carry your projector by the handle.<br />
Ensure that the power cable and any other cables connecting to video<br />
sources are disconnected before moving the projector.<br />
When moving the projector or when it is not in use, cover the lens with<br />
the lens cap.<br />
Carrying handle<br />
MENU<br />
SELECT<br />
ENTER<br />
STATUS<br />
POWER<br />
SOURCE AUTO ADJUST<br />
USB<br />
ON/OFF<br />
Selecting a Location<br />
The further your projector is from the screen or wall, the larger the<br />
image. The minimum size the image can be is approximately 30" (0.76<br />
m) measured diagonally when the projector is roughly 4 feet (1.3 m)<br />
from the wall or screen. The largest the image can be is 300" (7.6 m)<br />
when the projector is about 36.8 feet (11.2 m) from the wall or screen.<br />
Using a Tabletop or Cart<br />
1. Place your projector on a flat level surface at the optimal distance<br />
from the screen or wall so you realize the size image you<br />
want. (Avoid having bright room lighting or sun light directly on the screen<br />
or wall where you’ll be projecting the image.)<br />
2. Connect the power cable, remove the lens cap and turn the projector<br />
on. (If no input signal is available, the projector will display a<br />
background image.)<br />
3. Ensure that the projector is square to the screen.<br />
Top view<br />
Screen<br />
AC IN<br />
4. Move the projector left or right to center the image horizontally<br />
on the screen.<br />
Attaching the lens cap to the lens hood<br />
with the supplied string and rivet.<br />
Lens cap<br />
5. To center the image vertically, lift the front edge of the projector<br />
and press the One-Touch Tilt button on the front-left side of the<br />
projector to release the Front Adjustable foot.<br />
Side view<br />
Screen<br />
String<br />
Rivet<br />
(There is approximately 5 degrees of up and down adjustment for the front<br />
of the projector.)<br />
6. If the projected image does not appear square to the screen then<br />
use keystone correction for proper adjustment.<br />
7. Adjust the size of the image using the Zoom ring on the lens.<br />
E – 14
AC IN<br />
AC IN<br />
MENU<br />
MENU<br />
CANCEL<br />
SELECT<br />
CANCEL<br />
ENTER<br />
POWER<br />
STATUS<br />
ON/OFF<br />
ENTER<br />
POWER<br />
STATUS<br />
ON/OFF<br />
SELECT<br />
Adjusting the Tilt Foot<br />
Press and hold the Tilt button on the left side of the projector.<br />
SOURCE AUTO ADJUST<br />
Lift the front edge of the projector to the height you want, and release<br />
the button to lock the Adjustable Tilt Foot.<br />
SOURCE AUTO ADJUST<br />
To fine-tune the image’s position vertically on the screen, rotate the<br />
foot. Each of the rear feet height can be changed up to 0.6” (4mm).<br />
E – 15
Distance Chart<br />
Screen top<br />
Throwing Distance (C)<br />
B<br />
Screen center<br />
Lens Center<br />
Throwing Angle (α)<br />
D<br />
2.9” (79.5mm)<br />
Projector Foot<br />
Screen Bottom<br />
B=Vertical distance between lens center and screen center<br />
C=Throw distance<br />
D=Vertical distance between lens center and screen bottom (screen top for ceiling installation)<br />
Ceiling Installation<br />
Screen top<br />
D<br />
B<br />
2.9” (79.5mm)<br />
Lens Center<br />
Screen center<br />
Throwing Angle (α)<br />
Projector Foot<br />
Screen Bottom<br />
WARNING<br />
• Installing your projector on the ceiling must be done by a qualified<br />
technician. Contact your <strong>NEC</strong> dealer for more information.<br />
* Do not attempt to install the projector yourself.<br />
• Only use your projector on a solid, level surface. If the projector<br />
falls to the ground, you can be injured and the projector severely<br />
damaged.<br />
• Do not use the projector where temperatures vary greatly. The<br />
projector must be used at temperatures between 32˚F (0˚C)<br />
and 104˚F (40˚C).<br />
• Do not expose the projector to moisture, dust, or smoke. This<br />
will harm the screen image.<br />
• Ensure that you have adequate ventilation around your projector<br />
so heat can dissipate. Do not cover the vents on the side or<br />
the front of the projector.<br />
Throwing Distance (C)<br />
If your projector is mounted on the ceiling and your image is upside<br />
down, use the “Menu” and “Select” buttons on your projector cabinet or<br />
▲▼ button on your remote control to correct the orientation. (See page<br />
E-36.)<br />
Reflecting the Image<br />
Using a mirror to reflect your projector’s image enables you to enjoy a<br />
much larger image. Contact your <strong>NEC</strong> dealer if you need a mirror. If<br />
you’re using a mirror and your image is inverted, use the “Menu” and<br />
“Select” buttons on your projector cabinet or ▲▼ buttons on your remote<br />
control to correct the orientation. (See page E-36.)<br />
E – 16
E – 17<br />
10.3<br />
10.1<br />
10.1<br />
10.0<br />
10.0<br />
10.0<br />
10.0<br />
9.9<br />
9.9<br />
9.9<br />
9.8<br />
9.8<br />
9.8<br />
9.8<br />
Diagonal Width Height wide telephoto wide telephoto<br />
B<br />
C<br />
Screen Size D α<br />
40<br />
1016<br />
60<br />
1524<br />
67<br />
1701.8<br />
72<br />
1828.8<br />
84<br />
2133.6<br />
90<br />
2286<br />
100<br />
2540<br />
120<br />
3048<br />
150<br />
3810<br />
180<br />
4572<br />
210<br />
5334<br />
240<br />
6096<br />
270<br />
6858<br />
300<br />
7620<br />
inch<br />
mm<br />
inch<br />
mm<br />
inch<br />
mm<br />
inch<br />
mm<br />
inch<br />
mm<br />
inch<br />
mm<br />
inch<br />
mm<br />
inch<br />
mm<br />
inch<br />
mm<br />
inch<br />
mm<br />
inch<br />
mm<br />
inch<br />
mm<br />
inch<br />
mm<br />
inch<br />
mm<br />
32<br />
812.8<br />
48<br />
1219.2<br />
53.6<br />
1361.44<br />
57.6<br />
1463.04<br />
67.2<br />
1706.88<br />
72<br />
1828.8<br />
80<br />
2032<br />
96<br />
2438.4<br />
120<br />
3048<br />
144<br />
3657.6<br />
168<br />
4267.2<br />
192<br />
4876.8<br />
216<br />
5486.4<br />
240<br />
6096<br />
24<br />
609.6<br />
36<br />
914.4<br />
40.2<br />
1021.08<br />
43.2<br />
1097.28<br />
50.4<br />
1280.16<br />
54<br />
1371.6<br />
60<br />
1524<br />
72<br />
1828.8<br />
90<br />
2286<br />
108<br />
2743.2<br />
126<br />
3200.4<br />
144<br />
3657.6<br />
162<br />
4114.8<br />
180<br />
4572<br />
inch<br />
mm<br />
inch<br />
mm<br />
inch<br />
mm<br />
inch<br />
mm<br />
inch<br />
mm<br />
inch<br />
mm<br />
inch<br />
mm<br />
inch<br />
mm<br />
inch<br />
mm<br />
inch<br />
mm<br />
inch<br />
mm<br />
inch<br />
mm<br />
inch<br />
mm<br />
inch<br />
mm<br />
inch<br />
mm<br />
inch<br />
mm<br />
inch<br />
mm<br />
inch<br />
mm<br />
inch<br />
mm<br />
inch<br />
mm<br />
inch<br />
mm<br />
inch<br />
mm<br />
inch<br />
mm<br />
inch<br />
mm<br />
inch<br />
mm<br />
inch<br />
mm<br />
inch<br />
mm<br />
inch<br />
mm<br />
10.2<br />
259.5<br />
15.3<br />
389.2<br />
17.1<br />
434.7<br />
18.4<br />
467.1<br />
21.5<br />
544.9<br />
23.0<br />
583.9<br />
25.5<br />
648.7<br />
30.6<br />
778.5<br />
38.3<br />
973.1<br />
46.0<br />
1167.7<br />
53.6<br />
1362.3<br />
61.3<br />
1557.0<br />
69.0<br />
1751.6<br />
76.6<br />
1946.2<br />
inch<br />
mm<br />
inch<br />
mm<br />
inch<br />
mm<br />
inch<br />
mm<br />
inch<br />
mm<br />
inch<br />
mm<br />
inch<br />
mm<br />
inch<br />
mm<br />
inch<br />
mm<br />
inch<br />
mm<br />
inch<br />
mm<br />
inch<br />
mm<br />
inch<br />
mm<br />
inch<br />
mm<br />
56.3<br />
1430.3<br />
86.1<br />
2185.8<br />
96.5<br />
2450.2<br />
103.9<br />
2639.0<br />
121.7<br />
3092.3<br />
130.7<br />
3318.9<br />
145.5<br />
3696.6<br />
175.3<br />
4452.1<br />
219.9<br />
5585.2<br />
264.5<br />
6718.4<br />
309.1<br />
7851.5<br />
353.7<br />
8984.7<br />
398.3<br />
10117.8<br />
443.0<br />
11251.0<br />
inch<br />
mm<br />
inch<br />
mm<br />
inch<br />
mm<br />
inch<br />
mm<br />
inch<br />
mm<br />
inch<br />
mm<br />
inch<br />
mm<br />
inch<br />
mm<br />
inch<br />
mm<br />
inch<br />
mm<br />
inch<br />
mm<br />
inch<br />
mm<br />
inch<br />
mm<br />
inch<br />
mm<br />
68.6<br />
1743.7<br />
104.3<br />
2649.9<br />
116.8<br />
2967.1<br />
125.7<br />
3193.7<br />
147.1<br />
3737.4<br />
157.8<br />
4009.3<br />
175.7<br />
4462.4<br />
211.4<br />
5368.7<br />
264.9<br />
6728.0<br />
318.4<br />
8087.4<br />
371.9<br />
9446.8<br />
425.4<br />
10806.2<br />
479.0<br />
12165.5<br />
532.5<br />
13524.9<br />
inch<br />
mm<br />
inch<br />
mm<br />
inch<br />
mm<br />
inch<br />
mm<br />
inch<br />
mm<br />
inch<br />
mm<br />
inch<br />
mm<br />
inch<br />
mm<br />
inch<br />
mm<br />
inch<br />
mm<br />
inch<br />
mm<br />
inch<br />
mm<br />
inch<br />
mm<br />
inch<br />
mm<br />
1.8<br />
45.3<br />
2.7<br />
68.0<br />
3.0<br />
75.9<br />
3.2<br />
81.5<br />
3.7<br />
95.1<br />
4.0<br />
101.9<br />
4.5<br />
113.3<br />
5.4<br />
135.9<br />
6.7<br />
169.9<br />
8.0<br />
203.9<br />
9.4<br />
237.9<br />
10.7<br />
271.8<br />
12.0<br />
305.8<br />
13.4<br />
339.8<br />
inch<br />
mm<br />
inch<br />
mm<br />
inch<br />
mm<br />
inch<br />
mm<br />
inch<br />
mm<br />
inch<br />
mm<br />
inch<br />
mm<br />
inch<br />
mm<br />
inch<br />
mm<br />
inch<br />
mm<br />
inch<br />
mm<br />
inch<br />
mm<br />
inch<br />
mm<br />
inch<br />
mm<br />
degree<br />
degree<br />
degree<br />
degree<br />
degree<br />
degree<br />
degree<br />
degree<br />
degree<br />
degree<br />
degree<br />
degree<br />
degree<br />
degree<br />
–<br />
–<br />
–<br />
–<br />
–<br />
–<br />
–<br />
–<br />
–<br />
–<br />
–<br />
–<br />
–<br />
–<br />
8.5<br />
8.4<br />
8.3<br />
8.3<br />
8.3<br />
8.3<br />
8.3<br />
8.3<br />
8.2<br />
8.2<br />
8.2<br />
8.2<br />
8.2<br />
8.2<br />
degree<br />
degree<br />
degree<br />
degree<br />
degree<br />
degree<br />
degree<br />
degree<br />
degree<br />
degree<br />
degree<br />
degree<br />
degree<br />
degree<br />
–<br />
–<br />
–<br />
–<br />
–<br />
–<br />
–<br />
–<br />
–<br />
–<br />
–<br />
–<br />
–<br />
–<br />
40<br />
1016<br />
60<br />
1524<br />
67<br />
1701.8<br />
72<br />
1828.8<br />
84<br />
2133.6<br />
90<br />
2286<br />
100<br />
2540<br />
120<br />
3048<br />
150<br />
3810<br />
180<br />
4572<br />
210<br />
5334<br />
240<br />
6096<br />
270<br />
6858<br />
300<br />
7620<br />
inch<br />
mm<br />
inch<br />
mm<br />
inch<br />
mm<br />
inch<br />
mm<br />
inch<br />
mm<br />
inch<br />
mm<br />
inch<br />
mm<br />
inch<br />
mm<br />
inch<br />
mm<br />
inch<br />
mm<br />
inch<br />
mm<br />
inch<br />
mm<br />
inch<br />
mm<br />
inch<br />
mm<br />
32<br />
812.8<br />
48<br />
1219.2<br />
53.6<br />
1361.44<br />
57.6<br />
1463.04<br />
67.2<br />
1706.88<br />
72<br />
1828.8<br />
80<br />
2032<br />
96<br />
2438.4<br />
120<br />
3048<br />
144<br />
3657.6<br />
168<br />
4267.2<br />
192<br />
4876.8<br />
216<br />
5486.4<br />
240<br />
6096<br />
24<br />
609.6<br />
36<br />
914.4<br />
40.2<br />
1021.08<br />
43.2<br />
1097.28<br />
50.4<br />
1280.16<br />
54<br />
1371.6<br />
60<br />
1524<br />
72<br />
1828.8<br />
90<br />
2286<br />
108<br />
2743.2<br />
126<br />
3200.4<br />
144<br />
3657.6<br />
162<br />
4114.8<br />
180<br />
4572<br />
inch<br />
mm<br />
inch<br />
mm<br />
inch<br />
mm<br />
inch<br />
mm<br />
inch<br />
mm<br />
inch<br />
mm<br />
inch<br />
mm<br />
inch<br />
mm<br />
inch<br />
mm<br />
inch<br />
mm<br />
inch<br />
mm<br />
inch<br />
mm<br />
inch<br />
mm<br />
inch<br />
mm<br />
inch<br />
mm<br />
inch<br />
mm<br />
inch<br />
mm<br />
inch<br />
mm<br />
inch<br />
mm<br />
inch<br />
mm<br />
inch<br />
mm<br />
inch<br />
mm<br />
inch<br />
mm<br />
inch<br />
mm<br />
inch<br />
mm<br />
inch<br />
mm<br />
inch<br />
mm<br />
inch<br />
mm<br />
10.2<br />
259.5<br />
15.3<br />
389.2<br />
17.1<br />
434.7<br />
18.4<br />
467.1<br />
21.5<br />
544.9<br />
23.0<br />
583.9<br />
25.5<br />
648.7<br />
30.6<br />
778.5<br />
38.3<br />
973.1<br />
46.0<br />
1167.7<br />
53.6<br />
1362.3<br />
61.3<br />
1557.0<br />
69.0<br />
1751.6<br />
76.6<br />
1946.2<br />
inch<br />
mm<br />
inch<br />
mm<br />
inch<br />
mm<br />
inch<br />
mm<br />
inch<br />
mm<br />
inch<br />
mm<br />
inch<br />
mm<br />
inch<br />
mm<br />
inch<br />
mm<br />
inch<br />
mm<br />
inch<br />
mm<br />
inch<br />
mm<br />
inch<br />
mm<br />
inch<br />
mm<br />
56.5<br />
1434.7<br />
85.8<br />
2179.8<br />
96.1<br />
2440.5<br />
103.4<br />
2626.8<br />
121.0<br />
3073.8<br />
129.8<br />
3297.3<br />
144.5<br />
3669.8<br />
173.8<br />
4414.9<br />
217.8<br />
5532.4<br />
261.8<br />
6650.0<br />
305.8<br />
7767.6<br />
349.8<br />
8885.1<br />
393.8<br />
10002.7<br />
437.8<br />
11120.3<br />
inch<br />
mm<br />
inch<br />
mm<br />
inch<br />
mm<br />
inch<br />
mm<br />
inch<br />
mm<br />
inch<br />
mm<br />
inch<br />
mm<br />
inch<br />
mm<br />
inch<br />
mm<br />
inch<br />
mm<br />
inch<br />
mm<br />
inch<br />
mm<br />
inch<br />
mm<br />
inch<br />
mm<br />
68.2<br />
1732.7<br />
103.4<br />
2626.7<br />
115.7<br />
2939.7<br />
124.5<br />
3163.2<br />
145.7<br />
3699.6<br />
156.2<br />
3967.8<br />
173.8<br />
4414.8<br />
209.0<br />
5308.9<br />
261.8<br />
6649.9<br />
314.6<br />
7991.0<br />
367.4<br />
9332.0<br />
420.2<br />
10673.1<br />
473.0<br />
12014.1<br />
525.8<br />
13355.2<br />
inch<br />
mm<br />
inch<br />
mm<br />
inch<br />
mm<br />
inch<br />
mm<br />
inch<br />
mm<br />
inch<br />
mm<br />
inch<br />
mm<br />
inch<br />
mm<br />
inch<br />
mm<br />
inch<br />
mm<br />
inch<br />
mm<br />
inch<br />
mm<br />
inch<br />
mm<br />
inch<br />
mm<br />
1.8<br />
45.3<br />
2.7<br />
68.0<br />
3.0<br />
75.9<br />
3.2<br />
81.5<br />
3.7<br />
95.1<br />
4.0<br />
101.9<br />
4.5<br />
113.3<br />
5.4<br />
135.9<br />
6.7<br />
169.9<br />
8.0<br />
203.9<br />
9.4<br />
237.9<br />
10.7<br />
271.8<br />
12.0<br />
305.8<br />
13.4<br />
339.8<br />
inch<br />
mm<br />
inch<br />
mm<br />
inch<br />
mm<br />
inch<br />
mm<br />
inch<br />
mm<br />
inch<br />
mm<br />
inch<br />
mm<br />
inch<br />
mm<br />
inch<br />
mm<br />
inch<br />
mm<br />
inch<br />
mm<br />
inch<br />
mm<br />
inch<br />
mm<br />
inch<br />
mm<br />
10.3<br />
10.1<br />
10.1<br />
10.1<br />
10.1<br />
10.0<br />
10.0<br />
10.0<br />
10.0<br />
10.0<br />
9.9<br />
9.9<br />
9.9<br />
9.9<br />
degree<br />
degree<br />
degree<br />
degree<br />
degree<br />
degree<br />
degree<br />
degree<br />
degree<br />
degree<br />
degree<br />
degree<br />
degree<br />
degree<br />
–<br />
–<br />
–<br />
–<br />
–<br />
–<br />
–<br />
–<br />
–<br />
–<br />
–<br />
–<br />
–<br />
–<br />
8.5<br />
8.4<br />
8.4<br />
8.4<br />
8.4<br />
8.4<br />
8.4<br />
8.3<br />
8.3<br />
8.3<br />
8.3<br />
8.3<br />
8.3<br />
8.3<br />
degree<br />
degree<br />
degree<br />
degree<br />
degree<br />
degree<br />
degree<br />
degree<br />
degree<br />
degree<br />
degree<br />
degree<br />
degree<br />
degree<br />
–<br />
–<br />
–<br />
–<br />
–<br />
–<br />
–<br />
–<br />
–<br />
–<br />
–<br />
–<br />
–<br />
–<br />
Diagonal Width Height wide telephoto wide telephoto<br />
B<br />
C<br />
Screen Size D α<br />
40<br />
1016<br />
60<br />
1524<br />
67<br />
1701.8<br />
72<br />
1828.8<br />
84<br />
2133.6<br />
90<br />
2286<br />
100<br />
2540<br />
120<br />
3048<br />
150<br />
3810<br />
180<br />
4572<br />
210<br />
5334<br />
240<br />
6096<br />
270<br />
6858<br />
300<br />
7620<br />
inch<br />
mm<br />
inch<br />
mm<br />
inch<br />
mm<br />
inch<br />
mm<br />
inch<br />
mm<br />
inch<br />
mm<br />
inch<br />
mm<br />
inch<br />
mm<br />
inch<br />
mm<br />
inch<br />
mm<br />
inch<br />
mm<br />
inch<br />
mm<br />
inch<br />
mm<br />
inch<br />
mm<br />
32<br />
812.8<br />
48<br />
1219.2<br />
53.6<br />
1361.44<br />
57.6<br />
1463.04<br />
67.2<br />
1706.88<br />
72<br />
1828.8<br />
80<br />
2032<br />
96<br />
2438.4<br />
120<br />
3048<br />
144<br />
3657.6<br />
168<br />
4267.2<br />
192<br />
4876.8<br />
216<br />
5486.4<br />
240<br />
6096<br />
24<br />
609.6<br />
36<br />
914.4<br />
40.2<br />
1021.08<br />
43.2<br />
1097.28<br />
50.4<br />
1280.16<br />
54<br />
1371.6<br />
60<br />
1524<br />
72<br />
1828.8<br />
90<br />
2286<br />
108<br />
2743.2<br />
126<br />
3200.4<br />
144<br />
3657.6<br />
162<br />
4114.8<br />
180<br />
4572<br />
inch<br />
mm<br />
inch<br />
mm<br />
inch<br />
mm<br />
inch<br />
mm<br />
inch<br />
mm<br />
inch<br />
mm<br />
inch<br />
mm<br />
inch<br />
mm<br />
inch<br />
mm<br />
inch<br />
mm<br />
inch<br />
mm<br />
inch<br />
mm<br />
inch<br />
mm<br />
inch<br />
mm<br />
inch<br />
mm<br />
inch<br />
mm<br />
inch<br />
mm<br />
inch<br />
mm<br />
inch<br />
mm<br />
inch<br />
mm<br />
inch<br />
mm<br />
inch<br />
mm<br />
inch<br />
mm<br />
inch<br />
mm<br />
inch<br />
mm<br />
inch<br />
mm<br />
inch<br />
mm<br />
inch<br />
mm<br />
10.3<br />
261.6<br />
15.4<br />
392.3<br />
17.2<br />
438.1<br />
18.5<br />
470.8<br />
21.6<br />
549.3<br />
23.2<br />
588.5<br />
25.7<br />
653.9<br />
30.9<br />
784.7<br />
38.6<br />
980.8<br />
46.3<br />
1177.0<br />
54.1<br />
1373.2<br />
61.8<br />
1569.3<br />
69.5<br />
1765.5<br />
77.2<br />
1961.7<br />
inch<br />
mm<br />
inch<br />
mm<br />
inch<br />
mm<br />
inch<br />
mm<br />
inch<br />
mm<br />
inch<br />
mm<br />
inch<br />
mm<br />
inch<br />
mm<br />
inch<br />
mm<br />
inch<br />
mm<br />
inch<br />
mm<br />
inch<br />
mm<br />
inch<br />
mm<br />
inch<br />
mm<br />
57.0<br />
1446.5<br />
86.5<br />
2197.5<br />
96.9<br />
2460.3<br />
104.3<br />
2648.1<br />
122.0<br />
3098.6<br />
130.9<br />
3323.9<br />
145.6<br />
3699.4<br />
175.2<br />
4450.4<br />
219.6<br />
5576.8<br />
263.9<br />
6703.2<br />
308.3<br />
7829.6<br />
352.6<br />
8956.1<br />
396.9<br />
10082.5<br />
441.3<br />
11208.9<br />
inch<br />
mm<br />
inch<br />
mm<br />
inch<br />
mm<br />
inch<br />
mm<br />
inch<br />
mm<br />
inch<br />
mm<br />
inch<br />
mm<br />
inch<br />
mm<br />
inch<br />
mm<br />
inch<br />
mm<br />
inch<br />
mm<br />
inch<br />
mm<br />
inch<br />
mm<br />
inch<br />
mm<br />
68.8<br />
1746.9<br />
104.3<br />
2648.0<br />
116.7<br />
2963.4<br />
125.5<br />
3188.7<br />
146.8<br />
3729.4<br />
157.5<br />
3999.7<br />
175.2<br />
4450.3<br />
210.7<br />
5351.4<br />
263.9<br />
6703.1<br />
317.1<br />
8054.8<br />
370.3<br />
9406.5<br />
423.6<br />
10758.2<br />
476.8<br />
12109.9<br />
530.0<br />
13461.6<br />
inch<br />
mm<br />
inch<br />
mm<br />
inch<br />
mm<br />
inch<br />
mm<br />
inch<br />
mm<br />
inch<br />
mm<br />
inch<br />
mm<br />
inch<br />
mm<br />
inch<br />
mm<br />
inch<br />
mm<br />
inch<br />
mm<br />
inch<br />
mm<br />
inch<br />
mm<br />
inch<br />
mm<br />
1.7<br />
43.2<br />
2.6<br />
64.9<br />
2.9<br />
72.4<br />
3.1<br />
77.8<br />
3.6<br />
90.8<br />
3.8<br />
97.3<br />
4.3<br />
108.1<br />
5.1<br />
129.7<br />
6.4<br />
162.2<br />
7.7<br />
194.6<br />
8.9<br />
227.0<br />
10.2<br />
259.5<br />
11.5<br />
291.9<br />
12.8<br />
324.3<br />
inch<br />
mm<br />
inch<br />
mm<br />
inch<br />
mm<br />
inch<br />
mm<br />
inch<br />
mm<br />
inch<br />
mm<br />
inch<br />
mm<br />
inch<br />
mm<br />
inch<br />
mm<br />
inch<br />
mm<br />
inch<br />
mm<br />
inch<br />
mm<br />
inch<br />
mm<br />
inch<br />
mm<br />
10.2<br />
10.1<br />
10.1<br />
10.1<br />
10.1<br />
10.0<br />
10.0<br />
10.0<br />
10.0<br />
10.0<br />
9.9<br />
9.9<br />
9.9<br />
9.9<br />
degree<br />
degree<br />
degree<br />
degree<br />
degree<br />
degree<br />
degree<br />
degree<br />
degree<br />
degree<br />
degree<br />
degree<br />
degree<br />
degree<br />
–<br />
–<br />
–<br />
–<br />
–<br />
–<br />
–<br />
–<br />
–<br />
–<br />
–<br />
–<br />
–<br />
–<br />
8.5<br />
8.4<br />
8.4<br />
8.4<br />
8.4<br />
8.4<br />
8.4<br />
8.3<br />
8.3<br />
8.3<br />
8.3<br />
8.3<br />
8.3<br />
8.3<br />
degree<br />
degree<br />
degree<br />
degree<br />
degree<br />
degree<br />
degree<br />
degree<br />
degree<br />
degree<br />
degree<br />
degree<br />
degree<br />
degree<br />
–<br />
–<br />
–<br />
–<br />
–<br />
–<br />
–<br />
–<br />
–<br />
–<br />
–<br />
–<br />
–<br />
–<br />
Diagonal Width Height wide telephoto wide telephoto<br />
B<br />
C<br />
Screen Size D α<br />
MT850<br />
<strong>MT1050</strong><br />
MT1055<br />
NOTE: Distances may vary +/–5%.
Wiring Diagram<br />
Monitor<br />
Supplied serial cable<br />
Supplied mouse adapter<br />
(For Macintosh or USB)<br />
Macintosh or Compatibles<br />
(Desktop type or notebook type)<br />
PC CONTROL<br />
MOUSE<br />
OUTPUT<br />
REMOTE<br />
CONTROL<br />
INPUT<br />
AUDIO<br />
RGB MONITOR<br />
OUTPUT<br />
Supplied mouse adapter<br />
(For IBM PS/2 or USB)<br />
IBM VGA or Compatibles<br />
(Desktop type or notebook type)<br />
AUDIO RGB INPUT 1<br />
AUDIO RGB INPUT 2<br />
S-VIDEO<br />
L/MONO R<br />
VIDEO<br />
Signal cable (supplied)<br />
To mini D-Sub 15-pin connector on the<br />
projector. It is recommended that you<br />
use a commercially available distribution<br />
amplifier if connecting a signal<br />
cable longer than the supplied one.<br />
Optional Component V cable<br />
DVD Player (with component output)<br />
To video, S-video, and audio<br />
inputs on the projector.<br />
Document Camera<br />
VCR, DVD Player or LaserDisc Player<br />
NOTE: When using with a notebook PC, be sure to connect between the projector<br />
and the notebook PC before turning on the power to the notebook PC. In<br />
most cases signal cannot be output from RGB output unless the notebook PC<br />
is turned on after connecting with the projector.<br />
NOTE: If using video, S-video, or audio cables, the cables should be 3 m (9.8<br />
feet) or shorter.<br />
Remote Control Guideline for the Remote Control<br />
1. Plug the supplied serial cable with the mouse output port of the projector<br />
into your computer’s mouse port and restart your computer to<br />
gain remote mouse control.<br />
2. When using the remote control’s built-in infrared mouse on a laptop<br />
computer, the laptop’s mouse, trackball or trackpad will be disabled.<br />
Disconnect the serial cable from the mouse output port and restart<br />
your computer to regain trackball or trackpad mouse control.<br />
3. If the screen goes blank while using your remote control, it may be<br />
the result of the computer’s screen-saver or power management<br />
software.<br />
4. If you accidentally hit the OFF button on the remote control, wait one<br />
full minute and then press the ON button to resume.<br />
E – 18<br />
Connecting Your PC or Macintosh Computer<br />
Connecting your PC or Macintosh computer to your MultiSync MT1055<br />
and <strong>MT1050</strong> (XGA) / MT850 (SVGA) projector will enable you to project<br />
your computer’s screen image for an impressive presentation.<br />
To connect to a PC or Macintosh, simply:<br />
1. Turn off the power to your projector and computer.<br />
2. Use the signal cable that’s supplied to connect your PC or Macintosh<br />
computer to the projector.<br />
NOTE:The new Macintosh computer such as G3 will have the 15 pin HD<br />
connector. The MT1055/<strong>MT1050</strong>/MT850's "Plug and Play" data will be downloaded<br />
to the Macintosh. Therefore, the Mac adapter will not be necessary.<br />
3. Turn on the projector and the computer.<br />
4. If the projector goes blank after a period of inactivity, it may be caused<br />
by a screen saver installed on the computer you’ve connected to the<br />
projector.
OUT<br />
INPU<br />
ENTER<br />
S-VIDEO<br />
RGB MONITOR<br />
OUTPUT<br />
L/MONO R<br />
VIDEO<br />
RGB MONITOR<br />
OUTPUT<br />
Connecting Your PC<br />
IBM VGA or Compatibles (Notebook type)<br />
RGB signal cable (supplied)<br />
To mini D-Sub 15-pin connector on the<br />
projector. It is recommended that you<br />
use a commercially available distribution<br />
amplifier if connecting a signal<br />
cable longer than the supplied one.<br />
ON/STAND BY<br />
CA N CEL<br />
STATUS<br />
POWER<br />
USB PC-CARD<br />
CONTROL MOUSE<br />
REMOT<br />
CONTR<br />
SELECT<br />
SOURCE AUTO ADJUST<br />
MENU<br />
AUDIO<br />
AUDIO<br />
AC IN<br />
AUDIO RGB INPUT 1<br />
AUDIO RGB INPUT 2<br />
AUDIO<br />
AUDIO RGB INPUT 1<br />
RGB INPUT<br />
AUDIO RGB INPUT 2<br />
Audio cable (not supplied)<br />
S-VIDEO<br />
L/MONO R<br />
IBM VGA or Compatibles (Desktop type)<br />
VIDEO<br />
Connecting your PC to your MultiSync MT1055 and <strong>MT1050</strong> (XGA)/<br />
MT850 (SVGA) projector will enable you to project your computer’s<br />
screen image for an impressive presentation.<br />
To connect to a PC, simply:<br />
1. Turn off the power to your projector and computer.<br />
2. Use the supplied signal cable to connect your PC to the projector.<br />
3. Turn on the projector and the computer.<br />
4. If the projector goes blank after a period of inactivity, it may be caused<br />
by a screen saver installed on the computer you’ve connected to the<br />
projector.<br />
E – 19
1<br />
OUT<br />
REMOT<br />
CONTR<br />
INPU<br />
ENTER<br />
SELECT<br />
STATUS<br />
POWER<br />
AUDIO<br />
RGB MONITOR<br />
OUTPUT<br />
S-VIDEO<br />
Connecting Your Macintosh Computer<br />
Macintosh (Notebook type)<br />
ON/STAND BY<br />
CA N CEL<br />
SOURCE AUTO ADJUST<br />
MENU<br />
USB PC-CARD<br />
CONTROL MOUSE<br />
AUDIO<br />
AC IN<br />
AUDIO RGB INPUT 1<br />
AUDIO RGB INPUT 2<br />
RGB Signal cable (supplied)<br />
S-VIDEO<br />
L/MONO R<br />
VIDEO<br />
RGB MONITOR<br />
OUTPUT<br />
AUDIO<br />
AUDIO RGB INPUT 1<br />
RGB INPUT<br />
AUDIO RGB INPUT 2<br />
L/MONO R<br />
Audio cable (not supplied)<br />
VIDEO<br />
Macintosh (Desktop type)<br />
The new Macintosh computer such as<br />
G3 will have the 15 pin HD connector.<br />
The MT1055/<strong>MT1050</strong>/MT850's<br />
"Plug and Play" data will be downloaded<br />
to the Macintosh. Therefore,<br />
a Mac adapter will not be necessary.<br />
ON DIP<br />
2 3 4 5 6<br />
Pin adapter for Macintosh<br />
(not supplied)<br />
For older Macintosh, use a commercially<br />
available pin adapter to connect to your<br />
Mac's video port.<br />
To connect to a Macintosh, simply:<br />
1. Turn off the power to your projector and your Macintosh computer.<br />
2. Use the supplied signal cable to connect your Macintosh computer<br />
to the projector.<br />
3. Turn on the projector and the Macintosh computer.<br />
E – 20
OUT<br />
INPU<br />
ENTER<br />
SELECT<br />
STATUS<br />
POWER<br />
AUDIO IN<br />
S-VIDEO<br />
AUDIO<br />
S-VIDEO<br />
RGB MONITOR<br />
OUTPUT<br />
L/MONO R<br />
VIDEO<br />
Connecting Your Computer to the Mouse Output Port<br />
PC CONTROL<br />
MOUSE<br />
OUT<br />
REMOTE<br />
CONTROL<br />
INPUT<br />
Serial cable (suppried)<br />
Macintosh<br />
IBM PS2<br />
The built-in remote mouse receiver enables you to operate your<br />
computer's mouse functions from the remote control. It is a great convenience<br />
for clicking through your computer-generated presentations.<br />
To connect the mouse output port:<br />
1. Turn off your computer.<br />
2. For PCs: Remove your current mouse and connect the supplied<br />
serial cable from the mouse output to your PC's mouse port. (Use<br />
the 6-pin adapter for connecting to a PS/2 computer or the supplied<br />
USB adapter.)<br />
For Macintosh: Remove your current mouse from your computer,<br />
attach the Macintosh adapter or the supplied USB adapter to the<br />
mouse output port's serial cable, and connect the projector to your<br />
mouse port.<br />
3. When the built-in remote mouse receiver is available, it will disable<br />
your regular mouse, disconnect the serial cable and restart your<br />
computer.<br />
NOTE: The mouse adapter for USB is not compatible with the USB terminal on<br />
the projector.<br />
Connecting an External Monitor<br />
ON/STAND BY<br />
CA N CEL<br />
SOURCE AUTO ADJUST<br />
MENU<br />
USB PC-CARD<br />
External monitor<br />
CONTROL MOUSE<br />
REMOT<br />
CONTR<br />
AUDIO OUT<br />
AUDIO<br />
AC IN<br />
AUDIO RGB INPUT 1<br />
AUDIO RGB INPUT 2<br />
RGB MONITOR<br />
OUTPUT<br />
RGB OUTPUT<br />
AUDIO RGB INPUT 1<br />
AUDIO RGB INPUT 2<br />
RGB INPUT<br />
L/MONO R<br />
VIDEO<br />
RGB Signal cable (suppried)<br />
You can connect a separate, external monitor to your MT1055/<strong>MT1050</strong>/MT850 to simultaneously view on a monitor the image you're projecting. To<br />
do so:<br />
1. Turn off the power to your projector, monitor and computer.<br />
2. Use a 15-pin cable to connect your monitor to the RGB Monitor Output (Mini D-Sub 15 pin) connector on your projector.<br />
3. Turn on the projector, monitor and the computer.<br />
E – 21
OUT<br />
REMOT<br />
CONTR<br />
INPU<br />
STATUS<br />
POWER<br />
ENTER<br />
AUDIO<br />
S-VIDEO<br />
RGB MONITOR<br />
OUTPUT<br />
L/MONO R<br />
VIDEO<br />
Connecting Your DVD Player<br />
DVD player<br />
ON/STAND BY<br />
USB PC-CARD<br />
CA N CEL<br />
SELECT<br />
SOURCE AUTO ADJUST<br />
MENU<br />
CONTROL MOUSE<br />
AUDIO<br />
AC IN<br />
AUDIO RGB INPUT 1<br />
AUDIO RGB INPUT 2<br />
R L<br />
Y Cb Cr<br />
Y<br />
Cb<br />
Cr<br />
AUDIO RGB INPUT 1<br />
AUDIO RGB INPUT 2<br />
S-VIDEO<br />
RGB MONITOR<br />
OUTPUT<br />
RGB INPUT<br />
White<br />
Red<br />
L/MONO R<br />
VIDEO<br />
Optional 15-pin-to-RCA3 cable (optional)<br />
(Component V )<br />
Audio Equipment<br />
R L<br />
Audio cable (not supplied)<br />
White<br />
Red<br />
You can connect your projector to a DVD player with component outputs<br />
or Video output. To do so, simply:<br />
1. Turn off the power to your projector and DVD player.<br />
2. If your DVD player has the component video (Y,Cb,Cr) output, use<br />
the optional 15-pin-to-RCA3 cable to connect your DVD player to<br />
the RGB INPUT connector on the projector.<br />
For a DVD player without component video (Y,Cb,Cr) outputs, use<br />
common RCA cables (not provided) to connect a composite VIDEO<br />
output of the DVD player to the Video Input of the projector.<br />
3. Turn on the projector and DVD player.<br />
NOTE: Refer to your DVD player’s owner’s manual for more information about<br />
your DVD player’s video output requirements,<br />
E – 22
OUT<br />
INPU<br />
ENTER<br />
SELECT<br />
STATUS<br />
POWER<br />
AUDIO<br />
S-VIDEO<br />
RGB MONITOR<br />
OUTPUT<br />
L/MONO R<br />
VIDEO<br />
S-VIDEO<br />
RGB MONITOR<br />
OUTPUT<br />
Connecting Your VCR or Laser Disc Player<br />
ON/STAND BY<br />
CA N CEL<br />
VCR/ Laser disc player<br />
USB PC-CARD<br />
CONTROL MOUSE<br />
REMOT<br />
CONTR<br />
SOURCE AUTO ADJUST<br />
MENU<br />
AUDIO<br />
AUDIO RGB INPUT 1<br />
AC IN<br />
AUDIO RGB INPUT 2<br />
AUDIO RGB INPUT 1<br />
AUDIO RGB INPUT 2<br />
R L<br />
S-video cable (not supplied)<br />
S-VIDEO<br />
L/MONO R<br />
VIDEO<br />
VIDEO<br />
Audio cable (not supplied)<br />
Audio equipment<br />
Video cable (not supplied)<br />
R L<br />
VIDEO<br />
Document camera<br />
Use common RCA cables (not provided) to connect your VCR, laser disc player or document camera to your projector.<br />
To make these connections, simply:<br />
1. Turn off the power to the projector and VCR, laser disc player or document camera.<br />
2. Connect one end of your RCA cable to the video output connector on the back of your VCR or laser disc player, connect the other end to the Video<br />
input on your projector. Use an audio cable (not supplied) to connect the audio from your VCR or laser disc player to your audio equipment (if your<br />
VCR or laser disc player has this capability). Be careful to keep your right and left channel connections correct for stereo sound.<br />
3. Turn on the projector and the VCR or laser disc player.<br />
NOTE: Refer to your VCR or laser disc player owner’s manual for more information about your equipment’s video output requirements.<br />
E – 23
About Startup screen<br />
(Menu Language Select screen)<br />
When you first turn on the projector, you will get the Startup screen.<br />
This screen gives you the opportunity to select one of the seven menu<br />
languages: English, German, French, Itilan, Spanish,Swedish and Japanese.<br />
To select a menu language, follow these steps:<br />
1. Use the Select ▲ or ▼ button to select one of the seven languages<br />
for the menu.<br />
2. Press the Enter button to execute the selection.<br />
3. The Basic/Custom menu will be displayed in the language you<br />
have selected.<br />
To close the menu, press the Cancel button.<br />
After this has been done, you can proceed to the advanced menu operation.<br />
If you want, you can select the menu language later. See “Language”<br />
on page E-35.<br />
E – 24
3. OPERATION<br />
This section describes how to select a computer or video source, how<br />
to adjust the picture, and how to customize the menu or projector settings.<br />
General Controls<br />
Before you turn on your projector, ensure that the computer or video<br />
source is turned on and that your lens cap is removed.<br />
1. Turn on the Projector<br />
Plug the supplied power cable in the wall outlet. The projector<br />
will go into its standby mode and the power indicator will glow<br />
orange.<br />
Only after you press the “On” button on the remote control (“ON/<br />
STAND BY” button on the projector cabinet) will the power indicator<br />
turn to green and the projector become ready to use.<br />
NOTE: To turn the projector on by plugging in the power cable, use the<br />
menu and enable the “Auto Start” feature. (See page E-37.)<br />
2. Select the Computer, Video Source or PC Card Viewer<br />
Press a source button on the remote control or the projector cabinet<br />
to select “Video” (VCR, document camera, or laser disc<br />
player), S-Video”, “RGB 1 or 2” (computer or DVD with component<br />
output) or “PC Card Viewer” to display the image.<br />
Or press the “Menu” button on the remote control or the cabinet<br />
and use the menu to select your video source: “Video”, “S-Video”,<br />
“RGB1 or 2”, or “PC Card Viewer”.<br />
3. Adjust the Image Size and the Focus<br />
Use the Zoom ring to adjust the image size, then use the Focus<br />
ring to obtain the best focus.<br />
Use the “Magnify” button (+) or (-) on the remote control to make<br />
the image larger up to 400%.<br />
4. Turning off the Projector<br />
First press the “off” button on the remote control (“ON/STAND<br />
BY” button on the projector cabinet) for a minimum of two seconds.<br />
The power indicator will glow orange. Then, unplug the<br />
power cable. The power indicator will go out.<br />
IMPORTANT:<br />
• The projector should be unplugged if it will not to be used for an<br />
extended period.<br />
• To turn off the image and sound briefly (five minutes or less), use<br />
the “Picture Mute” button instead of turning the projector off and on.<br />
• The projector will display a black, blue image or logo if no input signal<br />
is present.<br />
• Do not turn the projector off and then immediately back on. The<br />
projector needs to cool for a minute before it can be restarted.<br />
After the projector turns off, the cooling fans keep operating for a full<br />
minute.<br />
Do not disconnect the power cable during this time.<br />
Using the Menus<br />
NOTE: The on-screen menu may not be displayed correctly while interlaced<br />
motion video image is projected.<br />
3. Press the button or the “Enter” button on the projector cabinet<br />
or the “Left Click” button on the remote control to select a submenu<br />
or item.<br />
4. Adjust the level or turn the selected item on or off by using “Select”<br />
or buttons on the cabinet, or the “Mouse button” on the<br />
remote control. The on-screen slide bar will show you the amount<br />
of increase or decrease.<br />
5. Changes are stored until you adjust it again.<br />
ENTER ......... Stores the setting or adjustments.<br />
CANCEL .......... Return to the previous screen without storing settings or adjustments.<br />
NOTE: You can close the main and sub menus simultaneously by pressing<br />
the PJ button to cancel the Projector mode.<br />
6. Repeat steps 2-5 to adjust an additional item, or press “Cancel”<br />
on the projector cabinet or the remote control to quit the menu<br />
display.<br />
Using a USB Mouse<br />
Using a USB mouse gives you a smooth operation. A commercially<br />
available USB mouse is required.<br />
NOTE: There may be some brands of USB mouse that the projector does not<br />
support.<br />
Operate the Menus using the USB mouse:<br />
Mouse Cursor:<br />
When connecting a USB mouse to the projector, you get a mouse<br />
cursor on the screen.<br />
Unless you use your USB mouse within 10 seconds, the mouse<br />
cursor disappears.<br />
Menu Display:<br />
Clicking with a mouse button displays the main menu.<br />
Clicking displays the pull-down menu.<br />
To close the menu, click anywhere in the background.<br />
Adjusting and Setting Display:<br />
You can select a menu item and click with a mouse button to make<br />
adjustments and setting.<br />
Examples:<br />
Click (or press and hold) the mouse button or to adjust the<br />
brightness.<br />
Or click and drag the mouse button on the slide bar horizontally to<br />
adjust it.<br />
To save the adjustments, click . The display is closed.<br />
If you click anywhere in the background while displaying adjustment<br />
and setting menu or dialog box, you will get the main menu at<br />
the clicking point.<br />
NOTE: The MOUSE OUTPUT port on the projector is not compatible with the<br />
USB mouse.<br />
1. Press the “Menu” button on the remote control or projector cabinet<br />
to display the Main Menu.<br />
NOTE: When using a USB mouse, click the mouse button to display the<br />
main menu. For other operations, do the same way as you use your PC<br />
mouse.<br />
2. Press the ▲▼ buttons on the remote control or the projector cabinet<br />
to highlight the menu for the item you want to adjust or set.<br />
E – 25
Basic Operation<br />
Selecting the computer or video source:<br />
SOURCE<br />
AUTO ADJUST<br />
Adjust the Image Using Auto Adjust<br />
The Auto Adjust function automatically optimizes the image in RGB<br />
mode.<br />
OFF<br />
ON<br />
Each time the Source button is pressed, the input source will change<br />
as follows:<br />
→ RGB1 → RGB2 → Video → S-Video → PC Card Viewer ⎯<br />
VIDEO S-VIDEO AUTO ADJ.<br />
RGB 1 RGB 2 PJ<br />
AUTO ADJUST<br />
If no input signal is present, the input will be skipped.<br />
VIDEO S-VIDEO AUTO ADJ.<br />
MENU<br />
LASER<br />
RGB 1 RGB 2 PJ<br />
HELP POINTER PC CARD<br />
[Poor picture]<br />
Source display<br />
[Normal picture]<br />
Press the Auto Adjust button to fine-tune the computer image or to<br />
remove any vertical banding that might appear and to reduce video<br />
noise, dot interference or cross talk (this is evident when part of your<br />
image appears to be shimmering). This function adjusts the clock frequencies<br />
that eliminate the horizontal banding in the image. This function<br />
also adjusts the clock phase to reduce video noise, dot interference<br />
or cross talk. (This is evident when part of your image appears to<br />
be shimmering.)<br />
This adjustment may be necessary when you connect your computer<br />
for the first time.<br />
NOTE: The Auto Adjust function does not work for component signal.<br />
E – 26
Volume control:<br />
Sound level from the speaker on the projector can be adjusted.<br />
Using Pointer<br />
You can use one of eight pointers to draw your audience's attention to<br />
the portion of a projected image you want.<br />
VOL.<br />
increase volume<br />
POINTER<br />
Volume bar<br />
Press the Pointer button to<br />
display the pointer.<br />
decrease volume<br />
Turning off picture and sound:<br />
Press the Picture Mute button to turn off the image and sound for a<br />
short period of time. Press again to restore the image and sound.<br />
PIC-MUTE<br />
Getting Help about how to operate the projector:<br />
You get the contents about Help.<br />
MENU<br />
LASER<br />
Use the Select button to<br />
move the pointer.<br />
Enlarging and Moving a Picture<br />
You can enlarge the area you want up to 400 percent.<br />
To do so:<br />
1. Press the Pointer button to display the pointer.<br />
HELP<br />
POINTER<br />
Display Help<br />
R-CLICK /CANCEL<br />
Exit Help<br />
2. Move the pointer to the area you want to enlarge.<br />
3. Enlarge the selected area.<br />
When the Magnify (+) button is pressed, the pointer is changed to<br />
a magnifying glass. To move the magnifying glass, use the Mouse<br />
button.<br />
MAGNIFY<br />
E – 27
4. Return the image to the original size.<br />
MAGNIFY<br />
Customizing Basic/Custom Menu<br />
The Basic/Custom menu can be customized to meet your requirements.<br />
Selecting a menu item from the “Basic/Custom Menu Edit” list, allows<br />
you to custom tailor the menu items to your needs.<br />
1. Select “Basic/Custom Menu Edit” to display the “Basic/Custom<br />
Menu Edit” screen.<br />
Correcting Keystone distortion<br />
Press (+) or (-) to correct keystone (trapezoidal) distortion to make the<br />
top or bottom of the screen longer or shorter so that the projected<br />
image is rectangular.<br />
KEYSTONE<br />
Keystone distortion<br />
Normal<br />
2. Use the ▲ or ▼ button to highlight your selection and press the<br />
Enter button to place a check mark next to an option. This action<br />
enables that feature.<br />
Press the Enter button again to clear the check box.<br />
NOTE: The maximum keystone angle that can be corrected is 40 degrees upward<br />
and 20 degrees downward with the projector placed horizontally on the<br />
ground plane.<br />
Depending on the type of graphics being used, the picture may get blurred or<br />
keystone correction may not be possible when excessive keystone correction<br />
is used.<br />
The idea is, the closer you are to native resolution, the better image you will<br />
see.<br />
Freezing a picture<br />
Press the Freeze button to freeze a picture. Press again to resume<br />
motion.<br />
FREEZE<br />
If you select an item with a solid triangle and press the Enter<br />
button on the remote control or the projector cabinet, you can<br />
enable all the items within that submenu.<br />
Also you can turn on an item within the submenu without placing<br />
a check mark on the main menu item.<br />
NOTE: Up to 12 main menu items (within Basic/Custom Menu Edit, not<br />
including submenu items) can be selected.<br />
E – 28
3. In order for the changes to take effect, use the or button on<br />
the remote control or the projector cabinet to highlight “OK”,<br />
then press the Enter button. To cancel the changes, use the ▲ or<br />
▼ buttons to highlight “Cancel” and press the “Enter” button.<br />
To return to the factory default, select “Reset” then press the “Enter”<br />
button.<br />
The default Basic/Custom Menu items are:<br />
Source Select (RGB1/2, Video, S-Video and PC Card Viewer), Picture,<br />
Volume, Image Options (Keystone, Color Temperature and<br />
Lamp Mode), Projector Options (Menu and Setup), Tools (Capture,<br />
PC Card Files and ChalkBoard) and Help (Contents and Information)<br />
NOTE: Once you have selected OK on the Basic/Custom Menu Edit screen, you<br />
cannot cancel the changes on the Menu screen. However, you can re-edit the<br />
menu items over again as described in the steps above.<br />
NOTE: If the “Advanced Menu” item has been selected on the Menu mode, you<br />
get the “Confirmation Change Menu” upon completion of “Basic/Custom Menu”<br />
editing. In this case, selecting “Yes” then “Enter” will close all the menus and<br />
apply the changes from the Advanced menu to the Basic/Custom Menu. If you<br />
select “No” then “Enter” functions, then all menu items will return to the Advanced<br />
menu, but your changes will still be available within the “Basic/Custom<br />
Menu” selection. To display the previously tailored Basic/Custom Menu, select<br />
“Basic/Custom Menu” from the “Menu Mode”.<br />
An item “To Advanced Menu” will be added to the bottom of the Basic/<br />
Custom Menu.<br />
Selecting this item and pressing the “Enter” button will display the “Advanced<br />
Menu” features.<br />
E – 29
Menu Tree<br />
Advanced Menu<br />
RGB1<br />
Source Select<br />
RGB2<br />
Picture<br />
Video<br />
Volume S-Video Brightness/Contrast/Color/Hue/Sharpness<br />
Image Options<br />
PC Card Viewer<br />
Projector Options<br />
Volume<br />
Tools<br />
High-Bright/Eco<br />
Help<br />
Keystone<br />
Normal/Natural 1/Natural 2<br />
Color Temperature<br />
Lamp Mode<br />
Aspect Ratio<br />
Normal/Zoom/Wide Zoom/Cinema<br />
Gamma Correction<br />
Noise Reduction<br />
Off/Low/Medium/High<br />
Advanced Options<br />
Factory Default<br />
Color Matrix<br />
Select Color Matrix HDTV/SDTV<br />
Select Color Matrix Type B-Y/R-Y,Cb/Cr,Pb/Pr<br />
White Balance<br />
Brightness R/G/B, Contrast R/G/B<br />
Position/Clock<br />
Horizontal/Vertical/Clock/Phase<br />
Resolution<br />
Auto/Native<br />
All Data/Current Signal<br />
Menu<br />
Capture<br />
PC Card Files<br />
ChalkBoard<br />
Menu Mode (Advanced Menu, Basic/Custom Menu)<br />
Basic/Custom Menu Edit<br />
Language (English/German/French/Italian/Spanish/Swedish/Japanese)<br />
Projector Pointer (Pointer 1-8)<br />
Source Display (On/Off)<br />
Direct Button Volume Bar (On/Off)<br />
Keystone Bar (On/Off)<br />
Menu Display Time (Manual/Auto 5 sec/Auto 10 sec/Auto 30 sec)<br />
Page 1 Orientation (Desktop Front/Ceiling Rear/Desktop Rear/Ceiling Front)<br />
Background (Blue/Black/Logo)<br />
Mouse Button(Right Hand/Left Hand)<br />
Sensitivity(Fast/Medium/Slow)<br />
Page 2 PC Card Viewer Options Show Folder List (On/Off)<br />
(Auto Play/Manual Play)<br />
Interval (5-300 sec)<br />
Capture Options (High Quality/Normal/High Compression)<br />
Page 3 Signal Select RGB1 (Auto/RGB/Component)<br />
RGB2 (Auto/RGB/Component)<br />
Video (Auto/NTSC3.58/NTSC4.43/PAL/PAL60/SECAM)<br />
S-Video (Auto/NTSC3.58/NTSC4.43/PAL/PAL60/SECAM)<br />
Page 4 Auto Adjust (RGB Only) (On/Off)<br />
Auto Start (On/Off)<br />
Power Management (On/Off)<br />
Power Off Confirmation (On/Off)<br />
Keystone Save (On/Off)<br />
Fan High Speed Mode (On/Off)<br />
Auto Mute for Built-in Speaker (On/Off)<br />
Clear Lamp Hour Meter<br />
Page 5 Remote Sensor (Front/ Back/ Left/ Right)<br />
S-Video Mode Select (Off/S2)<br />
RGBOUT Terminal (Disable/ RGB1/ RGB2)<br />
Page 6 Communication Speed(4800/9600/19200/38400)<br />
Default Source Select (Last/Auto/Select)<br />
(RGB1/RGB2/Video/S-Video/PC Card Viewer)<br />
Contents<br />
Contents<br />
Information Page1 Source Name/Input Terminal/Horizontal Frequency/Vertical Frequency/Sync Polarity<br />
Page2 Signal Type/Video Type/Sync Type/Interlace/Resolution<br />
Page3 Aspect Ratio/Gamma Correction/Noise Reduction/Color Matrix/Matrix Type<br />
Page4 Lamp Remaining Time/Lamp Hour Meter/Projector Usage<br />
E – 30
Menu Elements<br />
Title bar<br />
Highlight<br />
Tab<br />
Help Button<br />
Close Button<br />
OK Button<br />
Cancel Button<br />
Solid triangle<br />
Radio button<br />
Check box<br />
Drag<br />
Tool bar<br />
Slide bar<br />
Menu windows or dialog boxes typically have the following elements:<br />
Title bar: Indicates the menu title.<br />
Highlight: Indicates the selected menu or item.<br />
Solid triangle: Indicates further choices are available. A highlighted triangle indicates the item is active.<br />
Tab:<br />
Indicates a group of features in a dialog box. Selecting on any tab brings its page to the front.<br />
Radio button: Use this round button to select an option in a dialog box.<br />
Check box: Place a checkmark in the square box to turn the option On.<br />
Slide bar: Indicates settings or the direction of adjustment.<br />
OK button: Press to confirm your setting. You will return to the previous menu.<br />
Cancel button: Press to cancel your setting. You will return to the previous menu.<br />
Close button: Click to close the window with saving changes. (USB mouse only)<br />
Help button: Indicates that help about that feature is available (USB mouse only). Press the Help button on the remote control to display help.<br />
Toolbar: Contains several icons for specific tasks. It is also referred to as "launcher".<br />
Drag: Point the mouse here, and click and drag to move a toolbar.<br />
E – 31
Menu Descriptions & Functions<br />
Source Select<br />
Enables you to select a video source such as a VCR, DVD player, laser<br />
disc player, computer or document camera depending on what is connected<br />
to your inputs.<br />
Press the "Select" button on the projector cabinet or ▲▼ buttons on<br />
your remote control to highlight the menu for the item you want to adjust.<br />
The launcher is a tool bar including the following buttons:<br />
Drag ............. Drags to move the tool bar. (for USB mouse operation only)<br />
Prev ............. Returns to the previous slide or folder.<br />
Next ............. Advances to the next slide or folder.<br />
Play .............. Plays back automatically or manually depending on the setting<br />
on PC Card Viewer Options of the menu. This allows you<br />
to move on to the next slide when "Manual Play" is selected.<br />
Stop ............. Stops Auto Play while you are playing back and to resume<br />
playing from the selected slide or folder when "Auto Play" is<br />
selected.<br />
Jump ........... Displays a list of slides while you are playing back.<br />
Select ........... Displays a list of folders while you are playing back.<br />
Setup ........... Displays the PC Card Viewer Options dialog box on Page 2 of<br />
the Setup dialog box.<br />
Delete ........... Deletes a captured slide(s) or all the captured slides in the<br />
selected folder.<br />
View ............. Hides the tool bar while you are playing back. Clicking with<br />
the right button of a mouse shows it again.<br />
Picture (not available for PC Card Viewer)<br />
RGB1 / RGB2<br />
Selects the computer connected to your RGB or component signal.<br />
NOTE: An optional component cable (Component V cable) is needed for a component<br />
signal. Select "Component" from the Input Signal submenu to display<br />
the component signal.<br />
Video<br />
Selects what is connected to your Video input-VCR, laser disc player,<br />
DVD player or document camera.<br />
S-Video<br />
Selects what is connected to your S-Video input-VCR, DVD player, or<br />
laser disc player.<br />
NOTE: A frame may freeze for a brief period of time when a video is played back<br />
in fast-forward or fast-rewind with a Video or S-Video source.<br />
PC Card Viewer<br />
This feature enables you to make presentations using a PC card that contains<br />
captured images and slides created with the exclusive PC Card Viewer Utility<br />
contained in the CD-ROM. See page E-41 for installing the PC Card Viewer<br />
Utility. The starting screen for the PC Card Viewer varies depending on the<br />
settings of the Setup's Page 2. See Setup on page E-36.<br />
NOTE: Even if you switch the current PC Card Viewer source to another source,<br />
the current slide is retained. When you return back to the PC Card Viewer, you<br />
will get the slide that has been retained. A launcher will appear when you press<br />
the MENU button.<br />
Provides access to controls for your image. Use ▲▼ buttons on the<br />
projector cabinet or the remote control to highlight the menu for the<br />
item you want to adjust.<br />
Brightness ... Adjusts the brightness level or the back raster intensity.<br />
Contrast ....... Adjusts the intensity of the image according to the incoming<br />
signal.<br />
Color ............ Increases or decreases the color saturation level (not valid<br />
for RGB).<br />
Hue .............. Varies the color level from +/- green to +/-blue. The red level<br />
is used as reference. This adjustment is only valid for Video<br />
and Component inputs (not valid for RGB).<br />
Sharpness .... Controls the detail of the image for Video (Not valid for RGB<br />
and Component).<br />
Volume (not available for PC Card Viewer)<br />
Adjusts the sound level of the projector.<br />
NOTE: You can also display the volume bar without opening the menu. See<br />
"Volume Bar (Direct Button)"on page E-35 for more details.<br />
Prev Play Jump Setup View<br />
Drag<br />
Next Stop Select Delete<br />
A press of the MENU button displays the toolbar; a press of the MENU<br />
button again displays the Menu and hereafter each press of the MENU<br />
button switches displaying between the Menu and the toolbar.<br />
E – 32
Image Options<br />
Gamma Correction<br />
Use the or button to choose "Normal" when in a lighted room and<br />
"Natural 1&2" when in a darkened room. "Natural 1" for better flesh<br />
tone; "Natural 2" for true reproduction of middle tones.<br />
Each mode is recommended for :<br />
Keystone<br />
Normal ......... For the regular picture<br />
Natural 1 ...... For true color reproduction of natural tones<br />
Natural 2 ...... For dark portions of a picture<br />
Aspect Ratio (not available for RGB and PC Card Viewer)<br />
This feature corrects the keystone (trapezoidal) distortion to make<br />
the top of the screen longer or shorter to be the same as the bottom.<br />
Use the or buttons on the slide bar to correct the keystone<br />
(trapezoidal) distortion.<br />
Keystone distortion<br />
Normal<br />
NOTE: The maximum keystone angle that can be corrected is 40 degrees upward<br />
and 20 degrees downward with the projector placed horizontally on the<br />
ground plane.<br />
Depending on the type of graphics being used, the picture may get<br />
blurred or keystone correction may not be possible when excessive<br />
keystone correction is used.<br />
The idea is, the closer you are to native resolution, the better image<br />
you will see.<br />
Color Temperature<br />
Aspect Ratio allows you to select the best Aspect mode to display your<br />
source image.<br />
When 4:3 is selected from the source (i.e. DVD player), the following<br />
selections will display:<br />
Normal Zoom Wide Zoom Cinema<br />
This feature adjusts the color temperature using the slide bar.<br />
Move the slide bar to the right to increase the color temperature for a<br />
bluish image; to the left to decrease it for a reddish image.<br />
Lamp Mode<br />
Standard<br />
4:3 Aspect<br />
All 4 sides<br />
stretched<br />
Left & Right<br />
stretched<br />
Left and right<br />
stretched<br />
When 16:9 is selected from the source (i.e. DVD player), the following<br />
selections will display:<br />
Normal Zoom Wide Zoom Cinema<br />
This feature enables you to select two brightness mode of the lamp:<br />
High-Bright and Eco modes. The lamp life can be extended up to 2500<br />
hours by using the Eco mode.<br />
High-Bright Mode ....... This is the default setting.<br />
Eco Mode .................... Select this mode to increase the lamp life.<br />
16:9 image<br />
displayed<br />
in 4:3 mode<br />
All 4 sides<br />
stretched<br />
Left & right<br />
stretched<br />
Left and right<br />
stretched to<br />
display the true<br />
aspect<br />
NOTE: If you have selected the Eco mode, the lamp lights in High-Bright mode<br />
for 3 minutes after the projector is turned on. After 3 minutes the lamp will<br />
change to Eco mode.<br />
E – 33
Noise Reduction (not available for RGB and PC Card Viewer)<br />
Position/ Clock (when Auto Adjust is off)<br />
You can select three levels video noise reduction.<br />
NOTE: The lower the Noise Reduction level, the better the image quality by way<br />
of higher video bandwidth.<br />
Color Matrix (available for component video signal only)<br />
This allows you to manually adjust the image horizontally and vertically,<br />
and adjust Clock and Phase.<br />
First select an appropriate color matrix to fit your component signal for<br />
HDTV or SDTV. Then select an appropriate matrix type from B-Y/R-Y,<br />
Cb/Cr or Pb/Pr.<br />
White Balance<br />
Horizontal/Vertical Position<br />
.................... Adjusts the image location horizontally and vertically using<br />
the and buttons.<br />
This adjustment is made automatically when the Auto Adjust<br />
is turned on.<br />
Clock ............ Use this item to fine tune the computer image or to remove<br />
any vertical banding that might appear. This function adjusts<br />
the clock frequencies that eliminate the horizontal banding in<br />
the image.<br />
Press the and buttons until the banding disappears.<br />
This adjustment may be necessary when you connect your<br />
computer for the first time. This adjustment is made automatically<br />
when the Auto Adjust is turned on.<br />
Phase ........... Use this item to adjust the clock phase or to reduce video<br />
noise, dot interference or cross talk. (This is evident when<br />
part of your image appears to be shimmering.) Use the <br />
and buttons to adjust the image.<br />
See "Auto Adjust (RGB Only) on page E-37 for turning on or off the<br />
Auto Adjust feature.<br />
Use "Phase" only after the "Clock" is complete.<br />
This adjustment is made automatically when the Auto Adjust is turned<br />
on.<br />
Resolution (when Auto Adjust is off)<br />
This allows you to adjust the white balance. Brightness for each color<br />
(RGB)is used to adjust the black level of the screen;<br />
Contrast for each color (RGB)to adjust the white level of the screen.<br />
First use the ▲ or ▼ buttons to select R, G, or B for the brightness and<br />
the contrast. Next use the or buttons to adjust the level.<br />
This allows you to activate or deactivate the Advanced AccuBlend feature.<br />
Auto ............. Turns on the Advanced AccuBlend feature. The projector automatically<br />
reduces or enlarges the current image to fit the<br />
full screen.<br />
Native ........... Turns off the Advanced AccuBlend feature. The projector displays<br />
the current image in its true resolution.<br />
See "Auto Adjust (RGB Only) on page E-37 for turning on or off the<br />
Auto Adjust feature.<br />
NOTE: While you are displaying an image with higher resolution than the<br />
projector's native resolution, even when you are in the Native mode, the image<br />
is displayed full screen using the Advanced AccuBlend feature.<br />
E – 34
Factory Default<br />
Changes all adjustments and setting to the factory preset for each<br />
source individually except Lamp Hour Meter, Projector Usage, Language<br />
and Communication Speed. (To reset the lamp usage time, see<br />
"Clear Lamp Hour Meter" on page E-37.)<br />
All Data ............... Reset all the adjustments and settings for all the signals<br />
to the factory preset.<br />
Current Signal ..... Resets the adjustments for the current signal to the factory<br />
preset levels.<br />
The items that can be reset for the currently projected image are:<br />
Picture (Brightness, Contrast, Color, Hue and Sharpness) and Image<br />
Options (Color Temperature, Gamma Correction, Advanced Options<br />
[Aspect Ratio, Noise Reduction, Color Matrix, White Balance, Position/Clock<br />
and Resolution] ).<br />
NOTE: The Volume, Keystone, Lamp Mode and all the items in the Projector<br />
Options can be reset only when "All Data" is selected.<br />
Projector Options<br />
Advanced Menu .......... This is the menu that contains all the available menus<br />
and commands.<br />
Basic/Custom Menu .... This is the menu that you can customize using the<br />
Basic/Custom Menu Edit to fit your needs.<br />
The factory default Basic/Custom menu includes:<br />
Source Select (RGB1/2, Video, S-Video and PC Card Viewer), Picture,<br />
Volume, Image Options (Keystone, Color Temperatureand and Lamp Mode),<br />
Projector Options (Menu and Setup), Tools (Capture, PC Card Files and<br />
ChalkBoad) and Help (Contents and Information). See page E-28 for instructions<br />
about how to customize the Basic/Custom Menu.<br />
Language:<br />
You can choose one of seven languages for on-screen instructions.<br />
The options are: English, German, French, Italian, Spanish, Swedish<br />
and Japanese.<br />
Projector Pointer:<br />
This enables you to select from eight different Pointer icons for the<br />
"Pointer" button on your remote control.<br />
After moving your Pointer icon to the area you want on the screen,<br />
press the Magnify button on the remote control to enlarge the selected<br />
area on the screen. See page E-27 for more details.<br />
NOTE: There may be cases where the Pointer function is not available (ex. a<br />
non-interlace signal at 15kHz such as video game.)<br />
Source Display:<br />
You can turn on and off the information for input name such as<br />
VIDEO and RGB.<br />
When this option is on, the current input will be displayed each time<br />
you switch sources or turn on the projector.<br />
Direct Button:<br />
Volume Bar: This option turns on or off the volume bar when you adjust<br />
the sound volume using VOL+/– button on the remote control.<br />
Menu<br />
On ................ You can increase or decrease the sound volume with the volume<br />
bar on screen.<br />
Off ................ You can increase or decrease the sound volume without having<br />
to use the volume bar.<br />
Allows you to set preferences for the on-screen menu.<br />
Press “OK” to save your changes for all the features.<br />
Menu Mode:<br />
This feature allows you to select two menu modes: Advanced Menu<br />
and Basic/Custom Menu.<br />
E – 35<br />
Keystone Bar: This option turns on or off the keystone bar when you adjust<br />
the keystone using KEYSTONE +/– button on the remote control.<br />
On ................ You can increase or decrease the level with the keystone bar<br />
on screen.<br />
Off ................ You can increase or decrease the level without having to use<br />
the keystone bar.<br />
Menu Display Time :<br />
This option allows you to select how long the projector waits after<br />
the last touch of a button to turn off the menu.<br />
The preset choices are "Manual", "Auto 5 sec", "Auto 10 sec", and<br />
"Auto 30 sec". The "Auto 10 sec" is the factory preset.<br />
Manual ......... The menu can be turned off manually.<br />
Auto 5 sec .... The menu will automatically be turned off in 5 seconds if no<br />
buttons are pressed within 5 seconds.<br />
Auto 10 sec .. The menu will automatically be turned off in 10 seconds if no<br />
buttons are pressed within 10 seconds.<br />
Auto 30 sec .. The menu will automatically be turned off in 30 seconds if no<br />
buttons are pressed within 30 seconds.<br />
NOTE: If no buttons on the remote control are pressed within 10 seconds, the<br />
PJ button’s light goes out to indicate that you are in the Computer mode. To<br />
enable the projector menu operation again, press the PJ button again to light<br />
red.
Setup<br />
Enables you to set operating options.<br />
Press "OK" to save your changes for all the features of Page1, Page2,<br />
Page3, Page 4, Page5 and Page6.<br />
[Page1]<br />
Auto Play Interval:<br />
You can specify interval time between 5 and 300 seconds.<br />
NOTE: The Auto Play Interval time set on the PC Card Viewer Utility overrides<br />
the one set here.<br />
Manual Play:<br />
Views a slide manually when PC Card Viewer input is selected.<br />
NOTE: The Auto Play and Manual Play options determine the behavior of<br />
the Play/Stop [ / ] icon on the Viewer toolbar.<br />
NOTE: If you check "Auto Play" and select "PC Card Viewer" on the projector,<br />
the slides will automatically start to play back from any given slide.<br />
Capture Options: (available for JPEG only)<br />
These options are used for the Capture function that you can select<br />
from Tools. You have three options for JPEG compression quality:<br />
High quality, Normal and High Compression.<br />
High Quality . Gives quality of JPEG a priority.<br />
Normal ......... Gives normal JPEG quality.<br />
High Compression Gives compression a priority.<br />
Orientation:<br />
This reorients your image for your type of projection.<br />
The options are: desktop front projection, ceiling rear projection,<br />
desktop rear projection, and ceiling front projection.<br />
[Page3] Signal Select<br />
Background:<br />
Use this feature to display a blue/ black screen or logo when no<br />
signal is available. The default background is blue. You can change<br />
the logo screen using the PC Card Files feature. See page E-39.<br />
Mouse Settings:<br />
This option lets you to change your USB mouse settings. The mouse<br />
settings feature is available for USB mouse only. Choose the settings<br />
you want:<br />
Mouse Button ............."Right Hand" or "Left Hand"<br />
Mouse Sensitivity ......."Fast", "Medium" or "Slow"<br />
[Page2] PC Card Viewer Options<br />
RGB1/2:<br />
Allows you to choose "RGB" for an RGB source such as a computer,<br />
or "Component" for a component video source such as a<br />
DVD player. Normally select "Auto" and the projector automatically<br />
detects a component signal. However there may be some component<br />
signals that the projector is unable to detect. If this is the case,<br />
select "Component".<br />
VIDEO and S-VIDEO:<br />
This feature enables you to select composite video standards manually.<br />
Normally select "Auto".<br />
Select the video standard from the pull-down menu.<br />
This must be done for Video and S-Video separately.<br />
Show Folder List:<br />
If this option is checked, when PC Card Viewer input is selected on<br />
the projector, the folder lists will be displayed and allows you to<br />
select the presentation from a PC card.<br />
Auto Play:<br />
If this option is checked, any given slide will start to play automatically.<br />
E – 36
[Page4]<br />
Clear Lamp Hour Meter:<br />
Resets the lamp clock back to zero. Pressing this button appears a<br />
confirmation dialog box. To reset the lamp usage hour, press "OK".<br />
NOTE: The projector will turn off and go into standby mode after 1600 hours<br />
(up to 2600 hours in Eco mode) of service. If this happens, press the "Help"<br />
button on the remote control for ten seconds to reset the lamp clock back<br />
to zero. Do this only after replacing the lamp.<br />
[Page5]<br />
Auto Adjust (RGB Only):<br />
When "Auto Adjust" is set to "On", the projector automatically determines<br />
the best resolution for the current RGB input signal to<br />
project an image using <strong>NEC</strong>'s Advanced AccuBlend Intelligent Pixel<br />
Blending Technology.<br />
The image can be automatically adjusted for position and stability;<br />
"Horizontal Position", "Vertical Position", "Clock", "Phase", and<br />
"Resolution."<br />
On ................ Automatically adjusts image "Horizontal Position", "Vertical<br />
Position", "Clock", "Phase" and "Resolution".<br />
Off ................ User can adjust the image display functions ("Horizontal Position",<br />
"Vertical Position", "Clock", "Phase" and "Resolution")<br />
manually.<br />
Auto Start:<br />
Turns the projector on automatically when the power cable is inserted<br />
into an active power outlet. This eliminates the need to always<br />
use the "Power" button on the remote control or projector cabinet.<br />
Power Management:<br />
When this option is on and there is no RGB input for five minutes or<br />
more, the projector will automatically turn itself off.<br />
Power Off Confirmation:<br />
This option determines whether a confirmation dialog for turning off<br />
the projector will appear or not.<br />
NOTE: When the confirmation message is displayed, you must be in the<br />
Projector mode to operate your projector using the remote control. If not,<br />
press the PJ button on the remote control to change your projector to the<br />
Projector mode. The button lights to indicate that you are in the Projector<br />
mode.<br />
Keystone Save:<br />
This option enables you to save your current keystone settings.<br />
Saving your change once affects all sources. The changes are saved<br />
when you turn off the projector.<br />
Remote Sensor:<br />
This option determines which remote sensors on the projector are<br />
enabled in wireless mode.<br />
The options are: front, rear, right, or left. All checked boxes indicate<br />
that they can accept the infrared signal from the supplied remote<br />
control.<br />
S-Video Mode Select:<br />
This feature is used to select the S-Video signal detection mode.<br />
This allows identifying of the S-Video signals with different aspect<br />
ratio (Zoom signal 16:9, Wide Zoom signal 4:3).<br />
S2 ............... Identifies Zoom or Wide Zoom signal.<br />
OFF ............. Does not identify any S-video signal.<br />
RGBOUT Terminal:<br />
This option allows you to determine which RGB source is output<br />
from the RGBOUT terminal when the Video, S-Video or Viewer<br />
source is selected.<br />
Disable ......... Neither RGB 1 nor RGB 2 is output from the RGBOUT terminal.<br />
RGB 1 .......... The signal from RGB 1 is output from the RGBOUT terminal.<br />
RGB 2 .......... The signal from RGB 2 is output from the RGBOUT terminal.<br />
NOTE: The AUDIO OUT mini jack outputs sound for the source that the<br />
projector currently selects independently of setting "RGB OUT Terminal".<br />
Fan High Speed Mode:<br />
This option allows you to select two modes for fan speed: highspeed<br />
mode and normal speed mode.<br />
When you wish to cool down the temperature inside the projector<br />
quickly, check this box. This is convenient especially when the projector<br />
is installed on the ceiling.<br />
Auto Mute for Built-in Speaker:<br />
This option allows you to mute the built-in speakers automatically<br />
when you connect an audio cable to the AUDIO OUT terminal.<br />
E – 37
[Page6]<br />
The tool bar includes the following buttons:<br />
Drag ............. Drags to move the tool bar. (for USB mouse operation only)<br />
Capture ........ Captures an image and save it as a JPEG file in a PC card.<br />
Freeze .......... Freezes and unfreezes images.<br />
Exit ............... Exits the Capture function.<br />
Unless a PC card is inserted into the PC Card slot of the projector,<br />
the Capture feature is not available.<br />
The "Card Error" display means that the free space of the PC card<br />
is insufficient for saving images. Make more space available on the<br />
card by erasing unwanted images with your PC. The number of<br />
images that can be captured depends on the size of the PC card.<br />
NOTE: Be sure not to turn off the power or remove the PC card while capturing<br />
an image. Doing so could cause a loss of the data in the PC card or<br />
damage to the card itself.<br />
Communication Speed:<br />
This feature sets the baud rate of the PC Control port (Mini DIN 8<br />
Pin).<br />
It supports data rates from 4800 to 38400 bps.<br />
The default is 38400 bps. Select the appropriate baud rate for your<br />
equipment to be connected.<br />
Default Source Select:<br />
You can set the projector to default to any one of its inputs each<br />
time the projector is turned on.<br />
Last .............. Sets the projector to default to the previous or last active<br />
input each time the projector is turned on.<br />
Auto ............. Searches for an active source in order of RGB1 → RGB2 →<br />
Video → S-Video → PC Card Viewer → RGB1 and displays<br />
the first found source.<br />
Select ........... Displays the selected source input every time the projector is<br />
started up. Select an input from the pull-down menu.<br />
NOTE: Captured images with higher resolution than the projector's native<br />
resolution cannot be displayed correctly.<br />
PC Card Files:<br />
Displays a list of all the files stored in the PC card so that you can<br />
select a file you want to display. You can also sort files by file name<br />
or date, or display the file.<br />
Although a list of all the files in the PC card is displayed, you can<br />
view files in idx, text, HTML, JPEG and BMP format only.<br />
Selecting BMP and JPEG files automatically switches to the PC<br />
Card Viewer source.<br />
NOTE: When an image with a resolution of XGA (1024768) or higher is<br />
projected, the PC Card Files screen may not be correctly displayed.<br />
Tools<br />
Selecting "Execute" displays the file you selected.<br />
When you select a JPEG or BMP file and press the Enter button on<br />
the remote or the cabinet, or “Execute” on the above, you will get a<br />
toolbar. This toolbar is used to return to the PC Card Files screen.<br />
Provides tools for capturing images, displaying files in a PC Card and<br />
drawing.<br />
NOTE: The "Capture" and "PC Card Files" features are required for a PC card.<br />
Capture:<br />
Allows you to capture an image from a source that is currently being<br />
displayed. The image is saved as JPEG in the PC card.<br />
When you select Capture from the menu, you will get a tool bar. You<br />
can capture an image directly using the tool bar when the menu is<br />
not displayed.<br />
Freeze<br />
Drag<br />
Return<br />
Close<br />
Drag ............. Drags to move the tool bar. (for USB mouse operation only)<br />
Return .......... Returns to the PC Card Files screen.<br />
Close ............ Close the toolbar.<br />
Drag<br />
Exit<br />
Capture<br />
E – 38
Changing Background Logo:<br />
The Logo button allows you to select a background logo from graphic<br />
files on a PC card and change to it as the background logo.<br />
NOTE: File size must be 64KB or less. Other file formats than JPEG and<br />
BMP are not available.<br />
1. Use the ▲ or ▼ button to select a JPEG or BMP file for your background<br />
logo.<br />
NOTE:<br />
* The ChalkBoard feature is available only when a USB mouse is used. Freehand<br />
drawings cannot be saved or captured.<br />
* The menu is not available while you display the ChalkBoard screen.<br />
* The Capture function is not available on ChalkBoard screen.<br />
* Switching slides clears a drawing completely.<br />
Help<br />
2. Use the and then ▼ button to select “Logo”.<br />
3. Press the Enter on the remote control or the cabinet. You will get the<br />
confirmation dialog box.<br />
Contents:<br />
Provides an online help about how to use the menus. An underlined<br />
link means that you can move to an adjustment item directly.<br />
Selecting the underlined link and pressing ENTER moves to the<br />
corresponding adjustment item.<br />
NOTE: The Help Menu may not be displayed correctly when a UXGA signal<br />
is displayed.<br />
Information:<br />
Displays the status of the current signal, and the lamp and the projector<br />
usage hours.<br />
This dialog box has four pages.<br />
4. Select “OK” and press the Enter button. This completes changing a<br />
logo for the background.<br />
* Once you have changed the background from the <strong>NEC</strong> logo to another,<br />
you cannot return the logo to background even by using Factory Default.<br />
To do so, repeat the above steps. The <strong>NEC</strong> logo file is included<br />
on the supplied CD-ROM (/logo/nec_b_x.jpg).<br />
ChalkBoard: (available only when using with USB mouse)<br />
Provides the tool bar for producing freehand drawings.<br />
Drag<br />
Pen Eraser View<br />
Color<br />
Clear<br />
Exit<br />
The information included are as follows:<br />
[Page 1]<br />
Source Name<br />
Input Terminal<br />
Horizontal Frequency<br />
Vertical Frequency<br />
Sync Polarity<br />
[Page 3]<br />
Aspect Ratio<br />
Gamma Correction<br />
Noise Reduction<br />
Color Matrix<br />
Matrix Type<br />
[Page 2]<br />
Signal Type<br />
Video Type<br />
Sync Type<br />
Interlace<br />
Resolution<br />
[Page 4]<br />
Lamp Remaining Time (%)<br />
Lamp Hour Meter (H)<br />
Projector Usage (H)<br />
NOTE: The progress indicator shows the percentage of remaining bulb life. The<br />
value informs you of the amount of lamp and projector usage respectively.<br />
Drag ............. Drags to move the tool bar. (for USB mouse operation only)<br />
Pen .............. Left-click and drag to draw. Left-click [▲] or right-click the<br />
pen icon to display the pen palette containing four lines of<br />
different thickness from which you can select a line you prefer<br />
by left-clicking.<br />
Color ............ Selects a color. Left-click to display the color palette from<br />
which you can select a color you prefer by left-clicking.<br />
Eraser .......... Left-click and drag to erase part of a drawing. Left-click [▲]<br />
or right-click the eraser icon to display the eraser palette containing<br />
four eraser of different thickness from which you can<br />
select an eraser you prefer by left-clicking.<br />
Clear ............ Left-click to clear the drawing completely from the ChalkBoard<br />
screen.<br />
View ............. Hides the tool bar by left-clicking. Right-clicking anywhere<br />
on the screen displays the ChalkBoard tool bar again.<br />
Exit ............... Clears the complete drawing and exits the ChalkBoard.<br />
E – 39
Using the PC Card Viewer function<br />
NOTE: When using the supplied software (CD-ROM)<br />
The software is designed to use with a personal computer only. Do not play the<br />
software on CD player. Doing so could cause damage to speakers.<br />
Features<br />
The Viewer feature allows slides stored on a PC memory card (referred<br />
to as PC card in this manual) to be displayed on the projector.<br />
Even if no computer is available, presentations can be conducted simply<br />
with the projector. This feature is convenient for holding presentations<br />
at meetings and in offices, as well as for playing images taken on<br />
digital cameras.<br />
Easy to use<br />
• Presentations can be started immediately simply by inserting a PC<br />
card (not supplied)<br />
• Easy slide switching<br />
• Remote control operation<br />
• Jumping to list of slides or any specific slide<br />
High quality images<br />
• High resolution up to 1024768 dots(MT850: up to 800600 dots)<br />
• 24-bit full color playback<br />
• Viewing of digital camera images<br />
Ejecting the PC Card<br />
Press the eject button. The PC card pops out a little. Grasp the edges<br />
of the PC card and pull it out. Do not eject the PC card while its data is<br />
being accessed.<br />
Eject button<br />
Direction for Inserting the PC Card<br />
The PC card has a top and bottom and must be inserted into the<br />
PC card slot in a specific direction. It cannot be inserted backwards<br />
or upside-down. Attempting to force it into the slot in the wrong<br />
direction may break the internal pin and damage the card slot.<br />
Refer to the PC card's operating instructions for the proper direction<br />
of insertion.<br />
PC Card Type<br />
The PC Card slot accepts PCMCIA Type II only.<br />
Simple utility software (for computer)<br />
• PC Card Viewer Utility operable on Windows 95/98/NT4.0/2000<br />
• Slides can be created by capturing the currently displayed image<br />
• Control screen for displaying lists of slides and editing<br />
• PC Card Viewer PPT Converter 1.0 [Add-In Version] converts files<br />
created with Microsoft PowerPoint 95/97/2000 (hereafter referred to<br />
as PowerPoint) into indexes playable with PC Card Viewer<br />
* Microsoft, Windows and PowerPoint are registered trademarks of<br />
Microsoft Corporation.<br />
Inserting and Ejecting a PC Card<br />
A PC card is used to view presentation data prepared on the computer<br />
and to capture and play images projected with the projector.<br />
Inserting the PC Card<br />
• Hold the PC card horizontally and insert it slowly into the card slot<br />
with its top facing up.<br />
• The eject button pops out once the PC card is fully inserted.<br />
Check that the PC card is fully inserted.<br />
NOTE: Do not try to force the PC card into the slot.<br />
PC Card<br />
E – 40
Installing the PC Card Viewer Software<br />
Before Installing<br />
Perform the following before installing the PC Card Viewer software:<br />
• If Windows is already started, exit all applications. Installation may<br />
not be performed properly if any applications are running.<br />
Installation<br />
Install the viewer software as described below.<br />
To quit installation before it is completed, press the "Cancel" button<br />
then follow the instructions in the dialog box.<br />
Starting Up the PC Card Viewer Software<br />
on your PC<br />
(PC Card Viewer Utility 1.0)<br />
Use the PC Card Viewer Utility 1.0 for creating viewer slides.<br />
To start the PC Card Viewer software:<br />
* Select [Start]-[Programs]-[<strong>NEC</strong> Projector Tools]-[PC Card Viewer<br />
Utility 1.0].<br />
1. Start up Windows.<br />
2. Insert the CD-ROM into the CD-ROM drive.<br />
The auto CD play function automatically starts the CD-ROM's<br />
program and the contents screen appears.<br />
Refer to online help for instructions on using the PC Card Viewer software.<br />
* The auto CD play function operates if the "Auto insert notification" box in<br />
the computer's CD-ROM control panel is checked. (The box is checked<br />
by default.)<br />
3. Click [Installing the PC Card Viewer Utility 1.0]<br />
The setup dialog appears.<br />
Contents of the English version PC Card Viewer software<br />
(PC Card Viewer Utility 1.0)<br />
This is the software used for creating PC Card Viewer slides. In this<br />
manual it is referred to as the "PC Card Viewer software".<br />
* Follow the instructions in the setup dialog to complete the installation.<br />
For instructions on uninstalling the PC Card Viewer software, see page<br />
E-45.<br />
PC Card Viewer PPT Converter 1.0<br />
This is an application that converts files created with Microsoft<br />
PowerPoint 95/97/2000 into indexes so that they can be played directly<br />
with the PC Card Viewer Utility 1.0.<br />
PC Card Viewer PPT Converter is installed automatically when you<br />
install the PC Card Viewer Utility.<br />
To start PC Card Viewer PPT Converter:<br />
* Select PC Card Viewer PPT Converter from <strong>NEC</strong> Projector Tools.<br />
Basic Operation of the PC Card Viewer Software<br />
PC Card Viewer Utility is an application for editing documents, converting<br />
them into slides and storing them on PC cards as playback<br />
data (indexes) for presentations using projectors.<br />
E – 41
Operating the PC Card Viewer Function<br />
from the Projector (playback)<br />
This section describes the operation for showing slides of presentation<br />
documents created using the PC Card Viewer function with the projector.<br />
It is also possible to make slides directly from the images projected<br />
with the projector.<br />
Projecting slides<br />
1. Insert a PC card into the card slot.<br />
Insert the PC card with the side with the insertion direction arrow<br />
on the top.<br />
* Press the eject button to eject the card.<br />
2. Select the “PC Card Viewer” from the Source Select menu.<br />
Delete ........ Deletes a captured slide(s) or all the captured slides in the<br />
Capture – specific folder.<br />
View .......... Hides the tool bar while you are playing back. Pressing the<br />
MENU button or clicking with the right button of a mouse<br />
shows it again.<br />
NOTE: If no PC card is inserted in the PC CARD slot, there is no signal, and a<br />
black, blue or logo background is displayed, depending on the setting.<br />
Playback is stopped when SLIDE +/– on the remote control or / <br />
button on the cabinet is pressed in Auto Play mode.<br />
NOTE: Up to 12 indexes can be displayed on the list of folders. The folder in the<br />
right bottom is always a folder exclusively for captured images, but is only<br />
displayed when images have been captured. To display the list of folders when<br />
there are 13 or more indexes stored on the PC card, select "Edit index" from the<br />
PC Card Viewer software's "File" menu and move the index you want to display<br />
to within 12 indexes from the top of the folder index. For details on indexes,<br />
refer to the PC Card Viewer software's help folder.<br />
3. Project slides.<br />
Checking “Show Folder List”, means that selecting PC Card Viewer<br />
input displays a list of the folders in the PC card and if “Auto Play” is<br />
checked the projector automatically starts to play slides at the first<br />
slide of the folder you have selected.<br />
A tool bar will appear when you press the MENU button on the remote<br />
control or the projector cabinet or clicking with the right button of a<br />
mouse.<br />
Drag<br />
Prev Play Jump Setup View<br />
Next Stop Select Delete<br />
The tool bar includes the following buttons:<br />
Drag .......... Drags to move the tool bar (for USB mouse operation only).<br />
Prev .......... Returns to the previous slide or folder. Or this lets you play<br />
slides back in reverse.<br />
Next .......... Advances to the next slide or folder. Or this lets you play<br />
slides back.<br />
Play ........... Plays back automatically or manually depending on the setting<br />
on PC Card Viewer Options of the menu. This allows you<br />
to move on to the next slide when “Manual Play” is selected.<br />
Stop .......... This allows you to stop Auto Play while you are playing back<br />
and to resume playing from the selected slide or folder when<br />
“Auto Play” is selected.<br />
Jump ......... Displays a list of slides while you are playing back.<br />
Select ........ Displays a list of folders while you are playing back.<br />
Setup ........ Displays the PC Card Viewer Options dialog box on Page 2 of<br />
the Setup dialog box.<br />
E – 42
When the tool bar is not displayed:<br />
Press the FOLDER LIST button on the remote control to display folders<br />
from a PC card in the projector’s PC Card slot.<br />
Multi cursor (blue marks)<br />
SLIDE<br />
Folder Folder Folder Folder<br />
Folder<br />
Auto Play Mode<br />
• If the “Auto Play” option is selected in “PC Card Viewer Options” of<br />
the menu, any given slide will start to play automatically. You can<br />
also specify Auto Play Interval between 5 and 300 seconds.<br />
Switching to Slides Directly from Other Input<br />
Modes<br />
With this function it is possible to switch directly to a slide when the<br />
picture of a VCR or computer is being projected.<br />
Use the SLIDE +/- button to<br />
advance to the next folder or<br />
return to the previous folder.<br />
Folder<br />
Example:<br />
When conducting presentations using a combination of slides and<br />
moving pictures from a VCR, etc., it is possible to switch from a PC<br />
Card Viewer slide to the video picture then back to the PC Card Viewer<br />
slide simply by using a source button and PC CARD button.<br />
NOTE: Even if you switch the current PC Card Viewer source to another source,<br />
the current slide is retained. When you return back to the PC Card Viewer, you<br />
will get the slide that has been retained.<br />
Slide(Table) cursor (green marks)<br />
Slide Slide Slide Slide<br />
OFF<br />
ON<br />
VIDEO S-VIDEO AUTO ADJ.<br />
Slide Slide Slide Slide<br />
RGB 1<br />
RGB 2<br />
PJ<br />
MENU<br />
LASER<br />
Use the SLIDE +/- button to<br />
advance to the next slide or return<br />
to the previous slide.<br />
Slide<br />
R-CLICK /CANCEL<br />
HELP POINTER PC CARD<br />
KEYSTONE MAGNIFY<br />
SLIDE<br />
NOTE: You can also use the and button on the remote control to select<br />
folders or slides.<br />
If you use the and button on the remote control for PC Card Viewer operation,<br />
press the PJ button to switch to the Projector mode and the PJ button<br />
lights red.<br />
FREEZE<br />
PIC-MUTE<br />
VOL.<br />
FOLDER<br />
SLIDE<br />
LIST<br />
RGB 1<br />
RGB 2<br />
PJ<br />
Lit red<br />
MENU<br />
LASER<br />
Works as the Select button<br />
on the projector.<br />
NOTE: The PC card editing operation cannot be performed from the projector.<br />
Do so using the PC Card Viewer software.<br />
E – 43
Capturing Images Displayed on the Projector<br />
Storing images displayed on the projector on the PC card<br />
Preparations:<br />
Insert the PC card into the card slot.<br />
Insert the PC card with the side with the insertion direction arrow on<br />
the top.<br />
* Press the eject button to eject the card.<br />
1. Project the image you wish to store on the projector.<br />
2. Select the “Capture” from the Tools menu.<br />
Deleting Captured Images<br />
Drag<br />
Prev Play Jump Setup View<br />
Next Stop Select Delete<br />
Using the Delete button on the tool bar for PC Card Viewer can delete<br />
captured images.<br />
To delete captured images:<br />
1. Select PC Card Viewer.<br />
2. Use button to select the Capture folder in the right bottom of<br />
the screen.<br />
Freeze<br />
3. Press the MENU button to display the tool bar.<br />
Drag<br />
3. A tool bar will appear.<br />
Capture<br />
Exit<br />
The tool bar includes the following buttons:<br />
Drag ............. Drags to move the tool bar (for USB mouse operation only).<br />
Capture ........ Captures an image and save it as a JPEG file in a PC card.<br />
Freeze .......... Freezes and unfreezes images.<br />
Exit ............... Exits the Capture function. Another option to exit the Capture<br />
function is to press MENU or CANCEL button on the remote<br />
control or projector cabinet.<br />
4. Use the or button to select the Delete icon and press the<br />
ENTER button or click with a mouse button.<br />
Viewing Digital Images<br />
Digital images can be played with the PC Card Viewer if the following<br />
conditions are met:<br />
• If the image can be stored on an MS-DOS format PC card<br />
• If the image can be stored in a format supported by the PC Card<br />
Viewer.<br />
With the PC Card Viewer, images on the card are searched for in<br />
directories and images in JPEG or BMP format are recognized as<br />
slides.<br />
Searchable directories are directories within two steps from the root<br />
directory, and searchable images are images within the first 12 files<br />
in the directory. Only file and slide switching are possible.<br />
NOTE: The maximum number of images recognized as slides within one directory<br />
is 128.<br />
NOTE: You can compress a captured file (JPEG) using the Capture Options in<br />
the Setup dialog. See page E-36.<br />
NOTE: Captured images with higher resolution than the projector's native resolution<br />
cannot be displayed correctly.<br />
NOTE:<br />
• File size of the captured image varies depending on the resolution of an<br />
input signal.<br />
• Since an image data is compressed with the JPEG format, the image is slightly<br />
degraded.<br />
NOTE: An hourglass indicating that an image is being captured appears on the<br />
projector's display. Do not eject the PC card or turn off the projector's power<br />
while this icon is displayed. Doing so will damage the PC card data. If the PC<br />
card data is damaged, use a computer to repair the data.<br />
NOTE: The folder in the right bottom is always a folder exclusively for captured<br />
images. To display the list of folders when there are 13 or more indexes stored<br />
on the PC card, select "Edit index" from the PC Card Viewer software's "File"<br />
menu and move the index you want to display to within 12 indexes from the top<br />
of the folder index. For details on indexes, refer to the PC Card Viewer software's<br />
help file.<br />
E – 44
Uninstalling the PC Card Viewer Software<br />
Even if you do now know the PC Card Viewer software's file names or<br />
where they are stored, the PC Card Viewer software files can be easily<br />
removed from the system using the "Install/Uninstall Applications" control<br />
panel in Windows. (Normally there is no need to perform this operation.)<br />
3. In the "Add/Remove Programs Properties" dialog box, click the<br />
"Setup/Remove" tab, then select "PC Card Viewer Utility 1.0" from<br />
the list of applications and click on "Add/Remove".<br />
Uninstalling the software<br />
Use the procedure described below to uninstall the PC Card Viewer<br />
software files.<br />
1. From the "Start" menu, select "Settings" then "Control Panels".<br />
4. In the "Confirm File Deletion" dialog box, click "Yes".<br />
2. In the "Control Panels" dialog box, double-click on "Add/Remove<br />
Programs".<br />
5. Once the application is uninstalled, click on "OK" in the "Remove<br />
Program From Your Computer" dialog box.<br />
E – 45
Terminology<br />
PC card<br />
ATA card<br />
CompactFlash<br />
TYPE (I, II and III)<br />
BMP<br />
JPEG<br />
This is the name of a card currently being standardized by the Japan Electronic Industry Association (JEIDA) and PCMCIA<br />
(Personal Computer Memory Card Interface Association) of the United States.<br />
A type of PC card. ATA was originally a type of interface between computers and fixed disk devices. The ATA card is a standard<br />
card-type recording medium.<br />
CompactFlash card is a small removable card conforming to ATA specifications. It is one-fourth the volume of a PCMCIA card.<br />
PCMCIA 2.1 PC cards are divided into three types according to their thickness: Type I (3.3 mm), Type II (5.0 mm) and Type III<br />
(10.5 mm).<br />
A type of image format. The standard Windows Bit Map format used for MS-DOS/Windows-compatible computers.<br />
A type of image format. "JPEG" is the abbreviation of Joint Photographic Experts Group. JPEG compression offers efficient<br />
data storage. The data not required for displaying the image is identified and deleted. Since the data is deleted, JPEG<br />
algorithms are said to be irreversible. This means that once the image is compressed, the decompressed image it is not the<br />
same as the original image.<br />
E – 46
S<br />
SE<br />
4. MAINTENANCE<br />
This section describes the simple maintenance procedures you should<br />
follow to replace the lamp and clean the filter.<br />
Replacing the Lamp<br />
After your lamp has been operating for 1500 hours (2500 hours : Eco<br />
mode) or longer, the “Status” light in the cabinet will go on and the<br />
message will appear. Even though the lamp may still be working, replace<br />
it at 1500 (2500 hours : Eco mode) hours to maintain optimal<br />
projector performance.<br />
3. Insert a new lamp housing until the lamp housing is plugged into<br />
the socket.<br />
CAUTION: Do not use a lamp other than the <strong>NEC</strong> replacement lamp<br />
(MT50LP). Order this from your <strong>NEC</strong> dealer.<br />
Secure it in place with the two screws.<br />
Be sure to tighten the screws.<br />
CAUTION<br />
• DO NOT TOUCH THE LAMP immediately after it has been used. It will<br />
be extremely hot. Turn the projector off, wait a full minute, and then<br />
disconnect the power cable. Allow at least one hour for the lamp to<br />
cool before handling.<br />
• DO NOT REMOVE ANY SCREWS except the lamp cover screw and three<br />
lamp case screws. You could receive an electric shock.<br />
• The projector will turn off and go into stand by mode after 1600 (2600<br />
hours : Eco mode) hours of service. If this happens, be sure to replace<br />
the lamp. If you continue to use the lamp after 1500 hours (2500 hours<br />
: Eco mode) of use, the lamp bulb may shatter, and pieces of glass may<br />
be scattered in the lamp case. Do not touch them as the pieces of glass<br />
may cause injury. If this happens, contact your <strong>NEC</strong> dealer for lamp<br />
replacement.<br />
MENU<br />
SOURCE AUTO ADJUST<br />
SELECT<br />
ENTER<br />
STATUS<br />
POWER<br />
CA N C E L<br />
ON/OFF<br />
MENU<br />
SOURCE AUTO ADJUST<br />
SELECT<br />
ENTER<br />
STATUS<br />
POWER<br />
CA N C E L<br />
To replace the lamp:<br />
1. Loosen the lamp cover screw until the screwdriver goes into a<br />
freewheeling condition and remove the lamp cover. The lamp cover<br />
screw is not removable.<br />
SELECT<br />
ENTER<br />
STATUS<br />
POWER<br />
CA N C E L<br />
ON/STAND BY<br />
MENU<br />
SOURCE AUTO<br />
4. Reattach the lamp cover.<br />
Tighten the lamp cover screw.<br />
Be sure to tighten the screw.<br />
ENTER<br />
CA N C<br />
ON/STAND BY<br />
STATUS<br />
POWER<br />
2. Loosen the two screws securing the lamp housing until the screwdriver<br />
goes into a freewheeling condition. The three screws are<br />
not removable.<br />
Remove the lamp housing by pulling out the handle.<br />
NOTE: There is an interlock on this case to prevent the risk of electrical<br />
shock. Do not attempt to circumvent this interlock.<br />
MENU<br />
SOURCE AUTO ADJUST<br />
SELECT<br />
ENTER<br />
STATUS<br />
POWER<br />
CA N C E L<br />
ON/STAND BY<br />
MENU<br />
SOURCE AUTO ADJUST<br />
SELECT<br />
5. After you install a new lamp, select [Menu] → [Projector Options]<br />
→ [Setup]→[Page 4]→[Clear Lamp Hour Meter] to reset<br />
the lamp usage hours.<br />
NOTE: When the lamp exceeds 1600 hours (2600 hours : Eco mode) of service,<br />
the projector cannot turn on and the message is not displayed. If this<br />
happens, press the OFF or Help button on the remote control for a minimum of<br />
10 seconds while in standby mode. When the lamp time clock is reset to zero,<br />
the STATUS indicator goes out.<br />
ENTER<br />
STATUS<br />
POW<br />
E – 47
STATUS<br />
POWER<br />
ON/OFF<br />
E L<br />
LECT<br />
ENTER<br />
Cleaning or Replacing the Filters<br />
The air-filter sponge keeps the inside of the MultiSync MT1055/<strong>MT1050</strong>/<br />
MT850 Projector free from dust or dirt and should be cleaned after<br />
every 100 hours of operation (more often in dusty conditions). If the<br />
filter is dirty or clogged, your projector may overheat.<br />
CAUTION<br />
• Turn off the power and unplug the projector before replacing the filter.<br />
• Only clean the outside of the filter cover with a vacuum cleaner.<br />
• Do not attempt to operate the projector without a filter cover.<br />
• Your projector will not operate unless the filter cover is installed correctly.<br />
To clean the air-filter:<br />
Vacuum the filter-through the filter cover.<br />
CA N CE L<br />
SELECT<br />
USB<br />
SOURCE AUTO ADJUST<br />
MENU<br />
AC IN<br />
To replace the air-filter:<br />
1. Remove the filter cover by pushing up on the catch of the cover<br />
until you feel it detach.<br />
2<br />
AC IN<br />
1<br />
USB<br />
SOURCE AUTO ADJUST<br />
MENU<br />
AC IN<br />
2<br />
1<br />
2. Reinstall the new filter cover.<br />
NOTE: Do not detach the sponge from the filter cover. Do not wash the filter<br />
cover with soap and water. Soap and water will damage the the filter membrane.<br />
Before replacing the filter cover, remove dust and dirt from the projector<br />
cabinet. Keep out dust and during filter replacement.<br />
E – 48
5. TROUBLESHOOTING<br />
This section helps you resolve problems you may encounter while setting up or using the projector.<br />
Power/ Status Light Messages<br />
Condition<br />
Standby<br />
Cooling down<br />
Lamp in High-Bright mode<br />
Lamp in Eco mode<br />
3 minutes after lamp is turned on in<br />
Eco mode<br />
Lamp has reached its end of life<br />
(1500 hours or over)<br />
Lamp life has reached its end of life<br />
(1600 hours or over)<br />
Lamp or filter cover error (3 locations)<br />
Temperature error<br />
Fan error<br />
Lamp error<br />
Power Indicator Status Indicator<br />
Steady orange –<br />
Blinking green –<br />
Steady green –<br />
Steady green Steady green<br />
Steady green Blinking green<br />
Steady green<br />
Steady orange<br />
Steady orange<br />
Steady orange<br />
Steady orange<br />
Steady orange<br />
Steady red (High-Bright mode)/<br />
Steady orange (Eco mode)<br />
Steady red<br />
Blinking red (1 sec interval)<br />
Blinking red (4 sec interval)<br />
Blinking red (8 sec interval)<br />
Blinking red (12 sec interval)<br />
Note<br />
–<br />
Blinks green for 60 seconds<br />
–<br />
–<br />
Fixed at High-Bright mode. Lamp mode<br />
can be changed on the menu<br />
Message appears on screen during 1500-<br />
1600 hours of lamp usage. The projector<br />
reaches its end of life. Please replace the<br />
lamp as soon as possible.<br />
The projector is in standby mode and cannot<br />
be turned on.<br />
The projector is in standby mode and cannot<br />
be turned on.<br />
The projector is in standby mode and cannot<br />
be turned on.<br />
The projector is in standby mode and cannot<br />
be turned on.<br />
The projector is in standby mode and cannot<br />
be turned on.<br />
Common Problems & Solutions<br />
Problem<br />
Does not turn on<br />
Check These Items<br />
• Check that the power cable is plugged in and that the power button on the projector cabinet or the remote<br />
control is on.<br />
• Ensure that the lamp cover is installed correctly. See page E-47.<br />
• Check to see if the projector has overheated or the lamp usage exceeds 1600 hours (2600 hours in Eco<br />
mode). If there is insufficient ventilation around the projector or if the room where you’re presenting is particularly<br />
warm, move the projector to a cooler location.<br />
No picture<br />
Image isn’t square to the<br />
screen<br />
Picture is blurred<br />
Image is scrolling vertically,<br />
horizontally or both<br />
Remote control does not<br />
work<br />
Status indicator is lit or blinking<br />
Cross color in RGB mode<br />
• Use the menu to select your source (Video, S-Video, RGB1, RGB2 or PC Card Viewer). See page E-32.<br />
• Ensure your cables are connected properly.<br />
• Use menus to adjust the brightness and contrast. See page E-32.<br />
• Remove the lens cap.<br />
• Reset the settings or adjustments to factory preset levels using the Factory Default on the Image Options<br />
Menu in Advanced menu. See page E-35.<br />
• Reposition the projector to improve its angle to the screen. See page E-14.<br />
• Use the Keystone to correct the trapezoid distortion. See page E-28 or 33.<br />
• Adjust the focus. See page E-25.<br />
• Reposition the projector to improve its angle to the screen. See page E-14.<br />
• Ensure that the distance between the projector and screen is within the adjustment range of the lens. See<br />
page E-17.<br />
• Use menus or a source button on the remote control or the cabinet to select the source you want to input.<br />
• Install new batteries. See page E-12.<br />
• Make sure there are no obstacles between you and the projector.<br />
• Stand within 22 feet (7 m) of the projector. See page E-12.<br />
• Make sure that you are in the Projector mode or the PJ button lights in red. If not, press the PJ button.<br />
• See the Power/ Status Light messages above.<br />
• If Auto Adjust is off, turn it on. If Auto Adjust is on, turn it off and balance the image with the Position and Clock<br />
Adjust on the Advanced Options Menu. See page E-34.<br />
E – 49
When using the PC Card Viewer function<br />
Condition<br />
No picture<br />
Part of a slide is not displayed<br />
Contents of PC Card are<br />
damaged<br />
Status<br />
• Is “PC Card Viewer” selected from the Source menu?<br />
• Is the PC card seated in the PC CARD slot completely?<br />
• Are slide data stored in the PC card?<br />
• Have the contents of the PC card been destroyed?<br />
• While an image with over 1024768 dots (MT850: 800600 dots) is projected, several lines of information<br />
will be lost. Use the supplied software change the image to 1024768 dots in size.<br />
• Use a computer, etc., to repair the data.<br />
For more information contact your dealer.<br />
E – 50
6. SPECIFICATIONS<br />
This section provides technical information about the MultiSync MT1055/<strong>MT1050</strong>/MT850 Projector’s performance.<br />
Model Number<br />
MT1055/<strong>MT1050</strong>/MT850<br />
Optical<br />
LCD Panel 1.3” p-Si TFT active-matrix, 800600 dots (MT850) / 1024768 dots (MT1055/<strong>MT1050</strong>)<br />
1.3” p-Si TFT active-matrix with Micro Lens Array (MT1055)<br />
Lens<br />
Manual zoom, manual focus<br />
<strong>MT1050</strong>/MT850 : F2.3 – 2.7 f=48.6 – 58.4 mm<br />
MT1055 : F1.8 – 2.2 f=49.3 – 59.3 mm<br />
Lamp<br />
200W NSH lamp (160W in Eco mode)<br />
The lamp, under normal operating conditions, is warranted for 1500 hours of operation time within 6 months.<br />
Image Size<br />
30 – 300 inches (762 – 7620 mm) diagonal<br />
Projection Distance <strong>MT1050</strong>/MT850 : 4.3 – 36.7 ft (1.3 - 11.2 m)<br />
MT1055 : 4.3 – 37.1 ft (1.3 - 11.3 m)<br />
Electrical<br />
Inputs<br />
Video Bandwidth<br />
Color<br />
Horizontal Resolution<br />
Power Requirement<br />
Input Current<br />
Video (NTSC / PAL / PAL60 / SECAM / NTSC4.43)<br />
Horizontal Frequency : 15 – 100 kHz (RGB : 24 kHz or over)<br />
Vertical Frequency : 50 – 120 Hz<br />
RGB: 80 MHz<br />
Reproduction Full color, 16.7 million colors simultaneously.<br />
550 TV lines : NTSC / PAL / NTSC4.43 / YCbCr<br />
350 TV lines : SECAM<br />
RGB MT850 : 800 dots horizontal, 600 dots vertical<br />
MT1055/<strong>MT1050</strong> : 1024 dots horizontal, 768 dots vertical<br />
100 – 120 / 200 – 240 VAC, 50 / 60 Hz<br />
3.5 A (100 – 120 VAC) / 1.7A (200 – 240 VAC)<br />
Mechanical<br />
Dimensions<br />
<strong>MT1050</strong>/MT850 : 11.1" (W)4.8" (H)14.3" (D) / 281mm (W)121mm (H)364mm (D) (not including lens and feet)<br />
MT1055 : 11.1" (W)4.8" (H)14.9" (D) / 281mm (W)121mm (H)376mm (D) (not including lens and feet)<br />
Net Weight<br />
<strong>MT1050</strong>/MT850 : 13.0 lbs / 5.9 kg<br />
MT1055 : 13.3 lbs / 6.0 kg<br />
Environmental Considerations Operational Temperatures: 32˚ – 104˚F (0˚ to 40˚C), 20 – 80% humidity<br />
Storage Temperatures: 14˚ – 122˚F (-10˚ to 50˚C), 20 – 80% humidity<br />
Regulations UL Approved (UL 1950, CSA 950)<br />
Meets DOC Canada Class B requirements<br />
Meets FCC Class B requirements<br />
Meets AS/NZS3548 Class B<br />
Meets EMC Directive (EN55022, EN55024, EN61000-3-2, EN61000-3-3)<br />
Meets Low Voltage Directive (EN60950, TUV GS Approved)<br />
LCD panels are inherently susceptible to bad pixels.<br />
The LCD panel may have pixel failures at the rate of 0.01% or less.<br />
We provide information about our projectors through the World Wide Web at http://www.nec-pj.com/<br />
The specifications are subject to change without notice.<br />
E – 51
Cabinet Dimensions<br />
MT1055<br />
281(11.06")<br />
1.5(0.06")<br />
USB<br />
PC CONTROL MOUSE<br />
OUTPUT<br />
CANCEL<br />
ENTER<br />
SELECT<br />
STATUS<br />
POWER<br />
ON/STAND BY<br />
REMOTE<br />
CONTROL<br />
INPUT<br />
MENU<br />
PC-CARD AUDIO<br />
RGB MONITOR<br />
OUTPUT<br />
AUDIO RGB INPUT 1<br />
AUDIO RGB INPUT 2<br />
S-VIDEO<br />
L /MONO R<br />
SOURCE AUTO ADJUST<br />
VIDEO<br />
7.5 (0.3")<br />
121 (4.76")<br />
73.5<br />
(2.89")<br />
AC IN<br />
4<br />
(0.16")<br />
376 (14.9")<br />
Lens center<br />
39.5<br />
(1.56")<br />
Lens center<br />
Unit = mm (inch)<br />
E – 52
<strong>MT1050</strong>/MT850<br />
281 (11.06")<br />
1.5 (0.06")<br />
USB<br />
PC CONTROL MOUSE<br />
OUTPUT<br />
CANCEL<br />
ENTER<br />
SELECT<br />
STATUS<br />
POWER<br />
MENU<br />
SOURCE AUTO ADJUST<br />
ON/STAND BY<br />
REMOTE<br />
CONTROL<br />
INPUT<br />
364 (14.33")<br />
AUDIO<br />
RGB MONITOR<br />
OUTPUT<br />
AUDIO RGB INPUT 1<br />
AUDIO RGB INPUT 2<br />
S-VIDEO<br />
L /MONO R<br />
VIDEO<br />
Lens center<br />
4 121 (4.76")<br />
(0.16") 6.6<br />
73.5 (2.89")<br />
(0.26")<br />
Lens center<br />
39.5<br />
(1.56")<br />
AC IN<br />
Unit = mm (inch)<br />
E – 53
D-Sub Pin Assignments<br />
Mini D-Sub 15 Pin Connector<br />
5 4 3 2 1<br />
10 9 8 7 6<br />
15 14 13 12 11<br />
Signal Level<br />
Video signal : 0.7Vp-p (Analog)<br />
Sync signal : TTL level<br />
* RGB Input 1 only<br />
Pin No. RGB Signal (Analog) YCbCr Signal<br />
1 Red Cr<br />
2 Green or Sync on Green Y<br />
3 Blue Cb<br />
4 Ground<br />
5 Ground<br />
6 Red Ground Cr Ground<br />
7 Green Ground Y Ground<br />
8 Blue Ground Cb Ground<br />
9 No Connection<br />
10 Sync Signal Ground<br />
11 Ground<br />
12 Bi-directional DATA (SDA)*<br />
13 Horizontal Sync or Composite Sync<br />
14 Vertical Sync<br />
15 Data Clock*<br />
E – 54
Timing Chart<br />
Y / N Signal Resolution Frequency H. Refresh Rate Dot Clock<br />
( Dots ) ( kHz ) ( Hz ) ( MHz )<br />
Y NTSC 640 480 15.734 60 -<br />
Y PAL 768 576 15.625 50 -<br />
Y SECAM 768 576 15.625 50 -<br />
Y VESA 640 480 31.47 59.94 25.175<br />
Y IBM 640 480 31.47 60 25.175<br />
Y MAC 640 480 31.47 60 25.175<br />
Y MAC 640 480 34.97 66.67 31.334<br />
Y MAC 640 480 35 66.67 30.24<br />
Y VESA 640 480 37.86 72.81 31.5<br />
Y VESA 640 480 37.5 75 31.5<br />
Y IBM 640 480 39.375 75 31.49<br />
Y VESA 640 480 43.269 85.01 36<br />
Y IBM 720 350 31.469 70.09 28.322<br />
Y VESA 720 400 37.927 85.04 35.5<br />
Y IBM 720 350 39.44 87.85 35.5<br />
Y IBM 720 400 39.375 87.7 35.5<br />
Y VESA 800 600 35.16 56.25 36<br />
Y VESA 800 600 37.879 60.32 40<br />
Y VESA 800 600 48.077 72.19 50<br />
Y VESA 800 600 46.88 75 49.5<br />
Y VESA 800 600 53.674 85.06 56.25<br />
#Y MAC 832 624 49.725 74.55 57.283<br />
#Y VESA 1024 768 35.5 43 Interlaced 44.9<br />
#Y VESA 1024 768 48.363 60 65<br />
#Y VESA 1024 768 57.476 70.07 75<br />
#Y IBM 1024 768 58.131 72.03 79<br />
#Y MAC 1024 768 60.241 74.93 80<br />
#Y VESA 1024 768 60.023 75.03 78.75<br />
#Y VESA 1024 768 68.677 85 94.5<br />
##Y VESA 1152 864 67.5 75 108<br />
##Y MAC 1152 870 68.681 75.06 100<br />
##Y SUN 1152 900 61.796 65.95 92.94<br />
##Y SGI 1152 900 71.736 76.05 105.6<br />
##Y VESA 1280 960 60 60 108<br />
##Y SGI 1280 1024 63.9 60 107.35<br />
##Y VESA 1280 1024 63.981 60.02 108<br />
##Y MAC 1280 1024 64.31 60.38 107<br />
##Y MAC 1280 1024 69.9 65.2 118.5<br />
##Y HP 1280 1024 78.125 72.01 135<br />
##Y SUN 1280 1024 81.13 76.11 135<br />
##Y VESA 1280 1024 79.976 75.03 135<br />
##Y VESA 1280 1024 91.146 85.02 157.5<br />
##Y HDTV (1080i)(1125i) 1920 1080 33.75 60 Interlace 74.25<br />
##Y HDTV (720p)(750p) 1280 720 45 60 Progressive 74.25<br />
##Y SDTV (480p)(525p) 720 483 31.47 59.94 Progressive 27<br />
##Y SDTV (480i)(525i) 720 480 15.73 59.9 Interlace –<br />
##Y VESA 1600 1200 75.0 60 162<br />
##Y VESA 1600 1200 81.3 65 175.5<br />
##Y VESA 1600 1200 87.5 70 189<br />
##Y VESA 1600 1200 93.75 75 202.5<br />
#Y: Images in above flagged with # and Y are compressed with Advanced AccuBlend on MT850 only.<br />
##Y: Images in above flagged with ## and Y are compressed with Advanced AccuBlend on MT1055/<strong>MT1050</strong> and MT850.<br />
NOTE1: Some composite sync signals may not be displayed correctly.<br />
NOTE2: Signals other than those specified in the table above may not be displayed correctly. If this should happen, change the refresh rate or resolution on your PC.<br />
Refer to Display Properties help section of your PC for procedures.<br />
NOTE3: UXGA can be supported for separate sync signal only.<br />
E – 55
PC Control Codes<br />
Function<br />
Code Data<br />
POWER ON 02H 00H 00H 00H 00H 02H<br />
POWER OFF 02H 01H 00H 00H 00H 03H<br />
INPUT SELECT RGB 1 02H 03H 00H 00H 02H 01H 01H 09H<br />
INPUT SELECT RGB 2 02H 03H 00H 00H 02H 01H 02H 0AH<br />
INPUT SELECT VIDEO 02H 03H 00H 00H 02H 01H 06H 0EH<br />
INPUT SELECT S-VIDEO 02H 03H 00H 00H 02H 01H 0BH 13H<br />
INPUT SELECT PC CARD VIEWER 02H 03H 00H 00H 02H 01H 1FH 27H<br />
PICTURE MUTE ON 02H 10H 00H 00H 00H 12H<br />
PICTURE MUTE OFF 02H 11H 00H 00H 00H 13H<br />
SOUND MUTE ON 02H 12H 00H 00H 00H 14H<br />
SOUND MUTE OFF 02H 13H 00H 00H 00H 15H<br />
ON SCREEN MUTE ON 02H 14H 00H 00H 00H 16H<br />
ON SCREEN MUTE OFF 02H 15H 00H 00H 00H 17H<br />
Cable Connection<br />
Communication Protocol<br />
Baud rate: 38400 bps<br />
Data length: 8 bits<br />
Parity:<br />
No parity<br />
Stop bit:<br />
One bit<br />
X on/off:<br />
None<br />
Communications Full duplex<br />
procedure:<br />
PC Control Connector (DIN-8P)<br />
8<br />
7<br />
6<br />
5 4 3<br />
To RxD of PC<br />
NOTE: Contact your local dealer for a full list of the PC Control Codes if needed.<br />
2<br />
1<br />
To GND of PC<br />
To TxD of PC<br />
NOTE: Pins 2, 3, 5, 6 and 8 are used inside the projector.<br />
E – 56
Printed in Japan<br />
7N8P0161