Create successful ePaper yourself
Turn your PDF publications into a flip-book with our unique Google optimized e-Paper software.
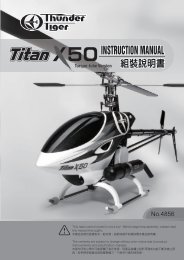
Almost Ready To Fly<br />
1.4M Electric Powered R/C Sailplane<br />
No.4312 E-HAWK 1400<br />
Wing Span: 55" (1400mm) Length: 31” (787mm) Wing Area: 300 sq.in.(19.4dm 2 ) Weight: 21oz.(600g)<br />
Wing Loading: 10oz./sq.ft.(31g/dm 2 ) Motor: 380PH Motor included Prop: 6 x 3 Folding Prop included<br />
Warranty:This kit is guaranteed to be free from defects in material and workmanship at the date of<br />
purchase. It does not cover any damage caused by use or modification. The warranty does not extend<br />
beyond the product itself and is limited only to the original cost of the kit. By the act of building this userassembled<br />
kit, the user accepts all resulting liability for damage caused by the final product. If the buyer<br />
is not prepared to accept this liability, it can be returned new and unused to the place of purchase for a<br />
refund.<br />
Notice: Adult Supervision Required:This is not a toy. Assembly and flying of this<br />
product requires adult supervision. Read through this book completely and become familiar with the<br />
assembly and flight of this airplane. Inspect all parts for completeness and damage. Customers in North<br />
America please call 1-949-833-7498 for help if you encounter any problems.
?<br />
?<br />
?<br />
?<br />
?<br />
?<br />
?<br />
?<br />
?<br />
?<br />
?<br />
?<br />
?<br />
?<br />
?<br />
?<br />
?<br />
?<br />
?<br />
?<br />
?<br />
?<br />
?<br />
?<br />
?<br />
?<br />
?<br />
?<br />
?<br />
?<br />
?<br />
?<br />
ASSEMBLY INSTRUCTION<br />
Table of Contents<br />
Introduction<br />
Pre-Assembly Notes...............................1<br />
Other Items Required .............................1<br />
Tools and Supplies Needed ...................1<br />
Parts Drawing ........................................2<br />
Assembly<br />
Wing........................................................3<br />
Tail..........................................................4<br />
Motor.......................................................5<br />
Servo......................................................6<br />
Canopy ...............................................8<br />
Control Throws....................................8<br />
Balancing Your E-Hawk......................8<br />
First Flights<br />
Checks You Should Make.....................9<br />
Flying Your E-Hawk..............................9<br />
Safety Precautions................................9<br />
Lauching & Landing............................10<br />
INTRODUCTION<br />
All of us at Thunder Tiger want to thank you for choosing the E-Hawk.This Kit has been engineered to go together<br />
quickly and easily while still providing you with great looks and exceptional flying performance. The world of electric<br />
powered sailplanes can be an extremely challenging and rewarding experience. Your skill along with the design<br />
capabilities of your model will combine to defy the laws of gravity and produce flights of unbelievable distance or<br />
duration. Under proper conditions your E-Hawk can stay aloft for hours from a single battery charge! As you gain<br />
experience with your model you will be able to<br />
greatly extend your flight times.<br />
?<br />
W.eW.hg?<br />
?W.Y?W.Yhg?<br />
?7U??7U?hg?<br />
?@1??@1?hg?<br />
?@@??@@?hg?<br />
?<br />
?<br />
?<br />
?<br />
?<br />
?<br />
?<br />
?<br />
?<br />
?<br />
?<br />
?<br />
?<br />
?<br />
?<br />
?<br />
feel<br />
?<br />
@@e@@hg?<br />
3@e3@hg?<br />
S5eS5hg?<br />
?W.Y?W.Yhg?<br />
?.Y??.Y?hg?<br />
?<br />
?<br />
?<br />
?<br />
?<br />
?<br />
?<br />
?<br />
?<br />
?<br />
?<br />
?<br />
?<br />
?<br />
?<br />
?<br />
the wing and lift conditions that affect it enabling you to<br />
The E-Hawk is an electric powered 1.4-meter sailplane which is intended for use in light wind and lift conditions.<br />
Its airfoil, motor package and design planform are intended to maximize performance under those flying conditions<br />
and will provide great results for pilots of all skill levels.<br />
We suggest that before beginning to assemble this kit you thoroughly read this assembly instruction manual to<br />
familiarize yourself with the complete assembly procedure. This will insure that your assembly process will be as<br />
smooth and uneventful as possible.<br />
We are confident that you will enjoy flying your E-Hawk and that it will provide many hours of challenging and<br />
rewarding flight.
?<br />
?<br />
?<br />
?<br />
?<br />
?<br />
?<br />
?<br />
?<br />
?<br />
?<br />
?<br />
?<br />
?<br />
?<br />
?<br />
?<br />
?<br />
?<br />
?<br />
?<br />
?<br />
?<br />
?<br />
?<br />
?<br />
?<br />
?<br />
?<br />
?<br />
?<br />
?<br />
?<br />
?<br />
ASSEMBLY INSTRUCTION<br />
PRE-ASSEMBLY NOTES<br />
1. If you are not an experienced R/C pilot plan to have a fully<br />
competent pilot help you to learn to fly your E-Hawk. This<br />
will help you to be successful much faster and also avoid<br />
potential damage to your model.<br />
2. Please assemble your model exactly according to these<br />
instructions. Do not attempt to modify or change the E-Hawk<br />
in any way as doing so may adversely change its flying<br />
characteristics.<br />
3. Before you begin please check the entire contents of this<br />
kit against the parts list and part drawings to be sure that no<br />
parts are missing or damaged. This will also help you to<br />
become familiar with each component of your E-Hawk. If you<br />
find that any of the parts are either missing or damaged<br />
please contact your dealer immediately for replacement.<br />
Note: Your dealer cannot accept kits for return if construction<br />
has begun.<br />
For customers in the US and Canada please call or write to<br />
ACE Hobby Distributors, Inc for replacement of missing or<br />
damaged parts.<br />
ACE Hobby Distributors, Inc.<br />
2055 Main Street, Irvine, CA 92614<br />
Tel: 949.833.0088<br />
Fax: 949.833.0003<br />
E-Mail: service@acehobby.com<br />
Remember. We have worked very hard to make this model<br />
as easy to assemble as possible while still maintaining our<br />
high standards of quality. Your assembly of this model is very<br />
important and will determine the final flight capabilities of<br />
your E-Hawk, so use extra care and follow the assembly<br />
procedure exactly.<br />
OTHER ITEMS REQUIRED<br />
Radio: You will need at least a<br />
2~3 channel radio control system<br />
on an aircraft frequency for use in<br />
your E-Hawk. Recommend ACE<br />
Commander 3ch single stick raido<br />
(P/N ACE 8304) which comes with<br />
2 Micro Servos and Mini Receiver.<br />
However, if you are really looking<br />
for every bit of extra performance<br />
then you should consider using<br />
one of the miniature radio systems<br />
available which would lower the<br />
weight and increase the<br />
performance of your E-Hawk.<br />
ACE 8304<br />
ACE 8012 ACE 8007<br />
Electronic motor controller: We recommend the ACE8007<br />
Auto Cut-Off Device (work with 2CH radio) or ACE8012<br />
ESC-30 with BEC (work with 3CH radio) for controlling the<br />
power of your E-Hawk as well as eliminating the need for a<br />
separate radio battery. The BEC (Battery Eliminator<br />
Circuitry) in this controller will automatically turn off the<br />
power to the motor when the battery reaches a factory<br />
present discharge level leaving about 20-25 minutes of flight<br />
time for the radio system. Note: Some radio manufacturers<br />
offer a lightweight radio system with a built-in motor<br />
controller with BEC especially for this type of model.<br />
Flight Battery: We recommend the use of ACE 2922 7 cell<br />
8.4V 1000 mAh NiMH battery pack for maximum<br />
performance.<br />
Charger: You will need a battery charger to charge your<br />
power battery. We recommend our ACE2604 8.4V DC Time<br />
Charger for 7-cell bettery pack. Note: When charging your<br />
flight battery be sure to very carefully follow the instructions<br />
provided with the charger.<br />
ACE 2922<br />
Extension Wire: 2 servo extensions in 6” long are required.<br />
TOOLS AND SUPPLIES NEEDED<br />
1. 12 Minute Epoxy<br />
2. Thin CA Glue<br />
3. Mixing Stick for Epoxy<br />
4. Medium Grit Sandpaper<br />
5. Rubbing Alcohol<br />
6. Paper Towels<br />
7. Hobby Knife<br />
8. 3/16 Drill<br />
9. 1/16” Drill<br />
10. Ruler<br />
?<br />
?<br />
?<br />
?<br />
?W2@6T2@@? @@@?@@@?<br />
?7@X;@@X ?@5??@5? ?<br />
?<br />
?<br />
?<br />
?@@1?@@1 ?W&(YW&(Y?<br />
?@@@?@@@ ?&0Y?&0Y ?<br />
?<br />
?<br />
?<br />
?<br />
?<br />
?<br />
?<br />
?<br />
?<br />
?<br />
?<br />
?<br />
?<br />
?<br />
?<br />
?<br />
?<br />
?<br />
?<br />
?<br />
?<br />
11. Z?<br />
Bend Pliers<br />
?<br />
?<br />
?<br />
?<br />
?<br />
?<br />
?<br />
12. Pen, Pencil or Marker<br />
13. Small Screw Drivers<br />
14. Curved scissors<br />
ACE 2604
PARTS DRAWING<br />
Open the box and check that you have all the parts as shown below.<br />
If anything is missing please contact your dealer<br />
AS6239 Main Wing (T. Magenta)<br />
AS6239L Main Wing (T. Blue)<br />
AS6239Y Main Wing (T. Yellow)<br />
Aileron Servo Tray(1)<br />
Wing Protector(1)<br />
3x12mm Wood Screw(2)<br />
Wing Join Wire(1)<br />
CA Hinge(6)<br />
Left Wing(1)<br />
Right Wing(1)<br />
AS6240 Tail Feathers (T. Magenta)<br />
AS6240L Tail Feathers (T. Blue)<br />
AS6240Y Tail Feathers (T. Yellow)<br />
Left V Tail(1)<br />
Right V Tail(1)<br />
AS6238 FRP Fuselage<br />
Fuselage(1)<br />
Motor Mount(1)<br />
Servo Tray(1)<br />
Wing Mount(2)<br />
AS6026 6x3 Folding Prop<br />
Spinner(1) Back Plate(1) Pin(2)<br />
AS6244 Decal (T. Magenta)<br />
AS6244L Decal (T. Blue)<br />
AS6244Y Decal (T. Yellow)<br />
AS6241 Canopy<br />
Canopy(1)<br />
Blade(2)<br />
2x8mm Screw(1)<br />
3x3mm Set Screw(2)<br />
Decal(1)<br />
2x5mm<br />
Wood Screw(3)<br />
PE0009 Hardware Set<br />
AS6242 Motor<br />
AS6243 Control Horn<br />
Hex Wrench(1)<br />
Capacitor(2)<br />
Backplate(2)<br />
Control Horn Base(2)<br />
EZ Connector(2)<br />
M2 Nut(2)<br />
2x22mm Screw(2)<br />
3x3mm Set Screw(2)<br />
M2 Washer(2)<br />
380 Motor(1)<br />
2.5x5mm Screw(2)<br />
Nylon Horn(2)<br />
AS6245 Pushrods<br />
Aileron Pushrod(2)<br />
Elevator Pushrod(1)<br />
Clevis(4)
ASSEMBLY / WING<br />
Wing Assembly<br />
1. Locate CA Hinges and use pins to center the<br />
hinges in place.<br />
4. Trial fit two wing halves with Wing Join Wire. When<br />
satisfied, apply epoxy to two center wing ribs then<br />
accurately aligned and firmly press with each other<br />
until it cured.<br />
2. Install the aileron and remove all pins then apply<br />
thin CA to all hinge areas.<br />
5. Cut plywood Wing Mount into two pieces with<br />
hobby knife. Trail fit the wing mounts in fuselage.<br />
Sand the glue area in fuselage to enhance<br />
adhesion. Upside down the fuselage then glue<br />
wing mounts in place with epoxy.<br />
3. Remove the portion of center wing rib to allow<br />
clearance for aileron servo. Repeat the same<br />
process on the other wing .
ASSEMBLY / TAIL<br />
6. Mark a centerline and wing mounting holes on<br />
Wing Protector as shown.<br />
9. CA the wing protector. Trial fit the main wing onto<br />
the fuselage, then drill 3/64"(2mm) holes at the<br />
marks you drew before. Secure the main wing<br />
with furnished wing mounting wood screws.<br />
Tail Installation<br />
110˚<br />
7. Place wing protector on the main wing and make<br />
sure it is centered and level with trailing edge. Use<br />
fine tip marker to make mark along the wing<br />
protector.<br />
10.Trail fit two tails to the fuselage, sand it if<br />
necessary. Epoxy the tails as shown, use<br />
furnished template to make sure the two tails is<br />
angled 110-degree.<br />
8. Use hobby knife to cut away the covering inside the<br />
line about 1/8"(3mm). Be carefully do not hurt the<br />
wood structure.
ASSEMBLY / TAIL / MOTOR<br />
11. Locate Elevator Control Horn (Back Plate, Control<br />
Horn Base, 2 x 25mm Screw, Nylon Horn).<br />
Position Back Plate on elevator then drill 3/64"<br />
(2mm) holes.<br />
Motor / Prop Installation<br />
12. Secure and install the control horns as shown.<br />
15. Locate Motor, Motor Mount, Folding Prop and<br />
Screws as shown.<br />
13. Locate the Y Pushrod then bend the wire as<br />
required in the photo.<br />
16. Apply very very little CA glue to keep motor mount<br />
on motor. Be careful do not apply any glue at<br />
mounting holes and motor shaft. Trail fit motor in<br />
fuselage, sand the contact area if necessary.<br />
When satisfied, apply very thin epoxy on motor<br />
mount then secure motor in fuselage with two 2.5<br />
x 5mm Sink Screws.<br />
14. Insert Y Pushrod through fuselage and exit two<br />
ends at two pushrod exit holes. Thread Clevises<br />
on two threaded pushrod ends then connect to the<br />
elevator control horns. Slice two pieces of<br />
furnished tube then apply on clevises to prevent<br />
clevis snapping off when in flight.
ASSEMBLY / SERVO<br />
19. Install the nylon horn to aileron torque rod.<br />
Thread clevis to pushrod then connect the clevis<br />
to nylon horn. Z-bend the pushrod at the proper<br />
position then connect to the servo horn. You will<br />
have to remove the servo horn from the servo to<br />
do this step.<br />
17. Install the Folding Propeller. Make sure there is<br />
1/16"(1.5mm) clearance between back plate and<br />
fuselage.<br />
Enlarge the servo horn holes for pushrod to go in<br />
might be necessary.<br />
Adjust the clevises when servo in neutral position,<br />
apply tube to hold clevis in place when satisfied.<br />
Servo Installation<br />
18. Locate Aileron Servo Tray, cut away the covering<br />
then glue the servo tray and install the aileron<br />
servo.<br />
20. Secure the elevator servo on the servo tray as<br />
shown.<br />
21. Glue the servo tray in fuselage with CA as<br />
required position.
NARROW BAND<br />
BATT<br />
CH.1<br />
CH.2<br />
CH.3<br />
CH.4<br />
CONTINOUS CURRENT :30A(MAX)<br />
INPUT VOLTAGE:7.2-8.4V<br />
NARROW BAND<br />
BATT<br />
CH.1<br />
CH.2<br />
ASSEMBLY / SERVO<br />
22. Install EZ Connector on servo horn.<br />
25. Refer to manufacturer's Receiver and ESC manual<br />
then connect all connectors properly. The ESC<br />
and RX are located between battery and motor.<br />
You might need two servo extensions at this step.<br />
Install the switch on fuselage as shown. Thread<br />
the antenna though fuselage and explode at least<br />
5"(10cm) in length out of of fuselage.<br />
23. Insert the pushrod through the EZ connector,<br />
make sure elevator is level with the tail then secure<br />
the servo horn and set screw when servo is in<br />
neutral position.<br />
ACE R/C<br />
TR-402A<br />
4CH AM RECEIVER<br />
27 MHZ<br />
Batt Rx Sw<br />
ACE<br />
ESC-30<br />
0N<br />
Motor<br />
OFF<br />
7.2-8.4V Battery<br />
ACE R/C<br />
TR-202A<br />
4CH AM RECEIVER<br />
27 MHZ<br />
M+<br />
B+<br />
START<br />
M-<br />
Auto Cutoff<br />
SW<br />
BEC<br />
B-<br />
OFF<br />
ON<br />
7.2-8.4V Battery<br />
24. Locate Vecro and cut it into two pieces. Attach the<br />
vecro to battery pack and attach the other halves<br />
of vecro to the fuselage as shown.<br />
26. The attached two pictures are the examples for<br />
using ESC-30 and auto cut-off.
CANOPY / CONTROL THROWS & BALANCING<br />
Canopy Installation<br />
Control Throws<br />
These control throws are merely a starting point for<br />
your radio setup and can be tailored to fit your flying<br />
style.<br />
Aileron-Low Rate<br />
1/4" (6mm)<br />
1/4" (6mm)<br />
27. Trim the Canopy alone with the molded line. Cut a<br />
hole at front top canopy so air could go in to cool<br />
motor and battery when in the air.<br />
Aileron-High Rate<br />
Elevator-Low Rate<br />
1/2" (12mm)<br />
1/2" (12mm)<br />
1/4" (6mm)<br />
1/4" (6mm)<br />
Elevator-High Rate<br />
3/8" (9mm)<br />
3/8" (9mm)<br />
Balance<br />
28.Position the canopy in place. Drill three 1/16" (<br />
1.5mm) holes then secure the canopy with<br />
furnished 2 x 5mm Black Wood Screws.<br />
29.Balancing your model is very important and must<br />
not be overlooked. The center of gravity (CG) is<br />
2-3/8" behind the leading edge of the wing near<br />
the wing root. You can adjust the battery pack<br />
forward or backward to reach the right CG.<br />
2 3/8" (<br />
60mm<br />
2-3/8" (6cm)
FIRST FLIGHTS<br />
FIRST FLIGHTS<br />
Checks You Should Make<br />
Before you attempt to fly your model you should<br />
perform some final checks:<br />
1. Fully charge your radio and flight batteries following<br />
the manufacturers instructions.<br />
2.Check the direction of travel of your control surfaces<br />
and the operation of the motor controller per the<br />
manufacturers instructions.<br />
3.Range check your radio system per the<br />
manufacturers instructions.<br />
4. Double check that you have installed the screws in<br />
the servo control arms and that the clevis are<br />
snapped tightly on the control horns.<br />
We strongly recommend that you get help from an<br />
experienced R/C pilot to learn to fly if you are just<br />
beginning. You should be able to find help at your<br />
local dealer or club field.<br />
Flying Your E-Hawk<br />
First of all, if you are flying with other flyers, check to<br />
make sure they are not operating on the same<br />
frequency as you. If they are, do not turn on your<br />
radio until they have safely landed and have turned<br />
their radios off.<br />
Secondly, even though the E-Hawk is very easy to fly,<br />
if you are a novice modeler/pilot, we highly<br />
recommend that you seek the help of an experienced<br />
modeler for your first few flights. He can save you a<br />
lot time and possible disappointment by helping you<br />
get your model in the air safely and getting it trimmed<br />
out for you.<br />
Important: The radio control system is set up to<br />
operate the control surfaces just like a real airplanes<br />
as if the pilot (you) are sitting in cockpit controlling the<br />
airplane. When you want the plane to dive, you push<br />
the elevator stick forward (up), to climb you pull the<br />
stick back (down), to turn right, you move the aileron<br />
stick to right with elevator up and visa versa. When<br />
you want to turn the motor on you push the throttle<br />
stick forward and when you want to turn the motor off<br />
you pull the stick back. It is the turning that causes<br />
the most problems with novice pilots because when<br />
the plane is flying towards you a right turn command<br />
on the transmitter cause the plane to turn to your left<br />
(which is the planes right). Get the picture?<br />
Fortunately the up and down commands do not<br />
change. The easiest way to conquer this problem is to<br />
try and always face your body near the direction the<br />
planes is flying. This means that you will have to look<br />
over your shoulder at times, but many modelers find<br />
this an easy way to learn.<br />
THE FIRST FLIGHTS<br />
You should always use the first few flights to get<br />
accustomed to your new airplane and its flying<br />
characteristics. Keep the model upwind and climb to a<br />
good comfortable altitude to cut off the motor and trim<br />
your E-Hawk for a glide. At altitude cut the motor and<br />
start your glide. Have an experienced modeler adjust<br />
the trims of the transmitter for you until the plane will<br />
glide straight and level without any other control input.<br />
Once the trims are set practice making smooth turns<br />
in both directions while losing as little altitude as<br />
possible. When the E-Hawk starts to get too low for<br />
comfort turn the motor back on and climb back up to<br />
altitude. Practice this climbing and gliding until you<br />
are comfortable with the airplane.<br />
Depending on the battery you use the E-Hawk will<br />
make 2 to 3 good climbs up to a nice thermal<br />
searching altitude from single battery charge. Once<br />
the Auto Cut-off Device or ESC shuts off the power to<br />
the motor you will need to set up for your landing.<br />
Continue to make smooth gently turns while lining up<br />
the E-Hawk with your landing strip. Once you are set<br />
up to land keep the wings level and let the model<br />
settle in for an nice gentle landing while adding up<br />
elevator to keep the nose up slightly as the plane<br />
slows down. Make several flights like this to really<br />
familiarize yourself with the characteristics of your<br />
model and to learn the glide and distance covering<br />
abilities of the E-Hawk. Once you have mastered a<br />
good “comfort level” you are ready to start searching<br />
for thermals which will really increase your flight times.<br />
Safety Precautions<br />
You as the pilot of this radio controlled model are<br />
responsible for any accidents that may occur during its<br />
use. We recommend that you fly your model at a<br />
model club field which is specially set up for model<br />
flying. But always be sure that you operate the model<br />
in a safe and careful manner and observe the
LAUNCHING & LANDING<br />
Following Suggestions:<br />
1. Do not fly your model close to buildings, power<br />
lines, roads, or other obstacles.<br />
2. Do not fly in congested areas . Select wide, flat<br />
and open area to fly with no obstructions and<br />
plenty of room for learning to fly.<br />
3. Do not fly without help from an experienced model<br />
pilot until you have learned how to fly. Your local<br />
model club or hobby shop can recommend an<br />
instructor if you do not already know one.<br />
4. Always check for other modelers in the area and be<br />
sure that your frequency is not in use by someone<br />
else which might cause you model to crash.<br />
Always observe frequency control systems at<br />
flying fields and wait your turn to fly.<br />
5. Never fly your model directly toward spectators,<br />
autos, other modelers or their models.<br />
6. Always abide by the rules for model flying provided<br />
by your club and the governing agency for model<br />
aircraft in your country.<br />
Congratulations<br />
Now that you have completed the assembly of your E-<br />
Hawk model we feel that have a very capable and<br />
good looking 1.4-meter electric sailplane. We hope<br />
that you will enjoy this model and get many hours of<br />
flying pleasure from its use. Thank you for purchasing<br />
this E-Hawk from Thunder Tiger and we look forward<br />
to providing you with other great R/C products in the<br />
future.<br />
Launching & Landing<br />
Incorrect<br />
Launch firmly into wind straight and level.<br />
Do not throw upwards or the plane will<br />
stall and crash!<br />
Wind Direction<br />
Correct<br />
Straight<br />
and level with ground<br />
Wind<br />
Landing<br />
Wind Direction<br />
3ft.