Porkka MR MF manual 112009A
Porkka MR MF manual 112009A
Porkka MR MF manual 112009A

You also want an ePaper? Increase the reach of your titles
YUMPU automatically turns print PDFs into web optimized ePapers that Google loves.
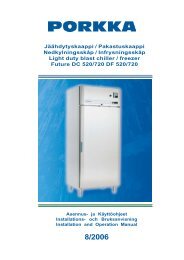
<strong>MR</strong>, <strong>MF</strong>, <strong>MR</strong>F 2/2 MARINE<br />
ASENNUS- JA KÄYTTÖOHJEET<br />
INSTALLATIONS- OCH BRUKSANVISNING<br />
INSTALLATION AND OPERATION MANUAL<br />
11/2009A
ENGLISH<br />
THESE INSTRUCTIONS ARE FOR MARINE CABINETS <strong>MR</strong>,<br />
<strong>MF</strong> AND <strong>MR</strong>F 2/2.<br />
IT IS VERY IMPORTANT TO READ THESE INSTALLATION<br />
AND OPERATING INSTRUCTIONS CAREFULLY BEFORE<br />
YOU START USING THE EQUIPMENT FOR THE FIRST<br />
TIME.<br />
ALSO, PLEASE KEEP THESE INSTRUCTIONS IN A SAFE<br />
PLACE FOR FUTURE REFERENCE OR USE BY ANOTHER<br />
OPERATOR.<br />
BY FOLLOWING THESE INSTRUCTIONS YOU CAN<br />
IMPROVE THE PRODUCT’S PERFORMANCE AND REDUCE<br />
UNNECESSARY REPAIR COSTS. PLEASE NOTE! IT IS<br />
IMPORTANT TO HAVE YOUR EQUIPMENT REGULARLY<br />
MAINTAINED BY A PROFESSIONAL ENGINEER.<br />
YOU WILL FIND THE TERMS OF GUARANTEE ON PAGE 6.<br />
TABLE OF CONTENTS<br />
RECEIPT 2<br />
INSTALLATION AND INTRODUCTION 2<br />
USE: COMBINED CONTROLLER AND DIGITAL<br />
TEMPERATURE DISPLAY 3<br />
-keyboard 3<br />
-to lock and unlock the keyboard 3<br />
-display lights 3<br />
-main switch 4<br />
-defrosting 4<br />
-<strong>manual</strong> defrosting 4<br />
-to check the lowest temperature 4<br />
-to check the highest temperature 4<br />
-to delete the lowest and highest temperatures<br />
registered 4<br />
-to modify the temperature set points 4<br />
ALARM SIGNALS 5<br />
CLEANING TO BE UNDERTAKEN BY<br />
THE OPERATOR 6<br />
IF THE CABINET DOES NOT FUNCTION<br />
CORRECTLY 6<br />
DISPOSAL OF THE EQUIPMENT 6<br />
GUARANTEE 6<br />
SERVICE DURING GUARANTEE PERIOD 6<br />
RECEIPT<br />
Check the product as soon as you receive it. If you notice that<br />
it has suffered from damages during transportation, you must<br />
indicate this in the delivery documents and tell about the matter<br />
to the carrier off the retailer.<br />
The manufacturer’s guarantee does not cover damages<br />
caused by transportation!<br />
INSTALLATION AND INTRODUCTION<br />
Unpack the cabinet as close to the installation place as<br />
possible.<br />
Remove the protective fi lms on exterior surfaces of the cabinet.<br />
Sort packing material and dispose off according to local<br />
legislation requirements.<br />
Avoid placing the cabinet in direct sunlight or close to any<br />
equipment radiating heat, such as cookers and radiators.<br />
The ambient temperature<br />
must be +5°C…+32°C.<br />
Ensure the cabinet is<br />
horizontal (if necessary use<br />
spirit level). The legs are<br />
adjustable. All legs must<br />
touch the fl oor with even<br />
weight loading per leg.<br />
Fasten the cabinet on the fl oor through Ø9 mm bolt holes of the<br />
foot fl ange. You can alsoweld the fl ange on the fl oor. The height<br />
of the legs can be adjusted after the cabinet has been fastened<br />
on the place.<br />
Ensure the air circulation below and above the cabinet is free.<br />
Leave 10 cm empty space above the cabinet.<br />
Clean the unit carefully with a mild<br />
detergent prior to use,<br />
for instance dish washing liquid. Do<br />
not use scrubbing products, abrasive<br />
materials or chlorine based<br />
products i.e. bleach when cleaning!<br />
Unpack the shelve packages and put<br />
the shelves in place.<br />
If the unit has been outside and is<br />
then brought inside for any period<br />
there will be condensate water on the<br />
units surface. Do not connect the<br />
machine to an electric inlet before the surfaces are dry and<br />
the surface has reached room temperature!<br />
Connect the unit to an earthed electrical socket of 230 V /<br />
50 Hz this being protected by an independent fuse of a 16<br />
amp rating.<br />
Let the cabinet stand at least 2 hours on the installation place<br />
before switching it on so that the compressor lubricating oil gets<br />
down into the oil pocket.<br />
Marine cabinets are designed for storing of already cool or<br />
frozen products. Do not fill the cabinet before the necessary<br />
operating temperature inside the cabinet has been reached.<br />
It is extremely important to keep foods with high acidity<br />
such as pickles and salad dressings in air tight containers.<br />
Highly acid foods will corrode the evaporator resulting in<br />
expensive repair work which will not be covered by<br />
warranty!<br />
The product must not be used outdoors.<br />
2
USE: COMBINED CONTROLLER AND DIGITAL<br />
TEMPERATURE DISPLAY<br />
Keyboard<br />
The key to display and adjust the set point. By using<br />
the ”SET” button you can modify the set point with<br />
arrow buttons (within the limits programmed in the<br />
thermostat). In the programming mode the adjusting<br />
function is quitted by this key.<br />
Locking and unlocking the keys<br />
+<br />
Display lights<br />
The key-lock prevents unintended use of<br />
the keys. The lock is switched on and off by<br />
holding the keys down at the same time for<br />
3 seconds. The display momentarily shows<br />
letters “PoF”. With key-lock on you can still<br />
check the lowest and highest temperature<br />
registered. The light switch function can still be<br />
used when keypad is locked. Pon” means that<br />
the keys are not locked.<br />
ENGLISH<br />
The key shows the highest thermostat value<br />
registered. In the programming mode you navigate<br />
inside the program or it is used to raise the selected<br />
value.<br />
Symbol<br />
Mode<br />
Function<br />
The key shows the lowest thermostat value registered.<br />
In the programming mode you navigate inside the<br />
program or it is used to lower the selected value.<br />
The <strong>manual</strong> defrosting starts when you push the key<br />
for 3 seconds.<br />
Light switch<br />
Power switch (Note! The power operation light remains<br />
illuminated even when power is switched off)<br />
FLASHING<br />
ON<br />
FLASHING<br />
ON<br />
ON<br />
Set temperature is displayed and can be<br />
changed.<br />
Compressor is running.<br />
Time delay to protect compressor after<br />
start-up<br />
The fan of the evaporator is on.<br />
Defrosting of the evaporator is on.<br />
FLASHING<br />
Drying of the evaporator is on.<br />
-<br />
NOT IN USE<br />
ON<br />
ALARM, see alarms on page 5.<br />
ON<br />
Light is on. (Note! only in cabinets<br />
equipped with light).<br />
3
ENGLISH<br />
Main switch<br />
The cabinet is switched on and off by using the main switch<br />
. When you move to the standby mode the code “OFF” is<br />
displayed. In the standby mode all the control functions are off.<br />
If the product is connected to the monitoring system it does not<br />
receive control or alarm data from the monitoring unit. The light<br />
switch functions when the instrument is on standby.<br />
Defrosting<br />
The evaporator is defrosted automatically. During the defrosting<br />
period the defrostings LED is displayed. After that the<br />
display returns to the normal mode.<br />
Note!<br />
The <strong>manual</strong> defrosting resets the defrosting time counter so that<br />
by means of the <strong>manual</strong> defrosting period the regular defrosting<br />
periods can be scheduled to take place e.g. outside the peak<br />
periods.<br />
Manual defrosting<br />
Push key for 3 seconds when the <strong>manual</strong> defrosting will<br />
start. After <strong>manual</strong> defrost the cabinet will continue to defrost at<br />
regular intervals. Manual defrosting is recommended if there is<br />
a lot of ice on the evaporator, i.e. if the door has been left open<br />
for a long time or if warm uncovered food has been placed in<br />
the cabinet.<br />
To check the lowest temperature<br />
Push key. Code “Lo” is displayed after which the lowest<br />
registered temperature is displayed. The display returns to the<br />
normal mode automatically after 5 seconds.<br />
To check the highest temperature<br />
Push key. Code “Hi” is displayed after which the highest<br />
registered temperature is displayed. The display returns to the<br />
normal mode automatically after 5 seconds.<br />
Note!<br />
After the first start reset the lowest and highest temperatures<br />
stored.<br />
Note!<br />
The temperature of the <strong>MR</strong> cabinet can be changed from<br />
+3°...+15°C and the temperature of the <strong>MF</strong> cabinet can be changed<br />
from -15°...-25°C.<br />
To delete the lowest and highest temperatures registered<br />
The registered lowest and highest temperatures are deleted<br />
separately. Get the lowest and highest temperature registered<br />
on the display by pushing the arrow key or . Push<br />
immediately the key for 3 seconds until the code “rST”<br />
(reset) starts to fl ash on the display. Release the key and the<br />
temperatures have been deleted and the display returns to the<br />
normal mode.<br />
To modify the temperature set points<br />
Push key and the temperature set point appears and symbol<br />
fl ash on the display. Modify the value by pushing or<br />
key within 15 seconds. Save the new value by pushing key<br />
again or wait for 15 seconds after which the display returns to<br />
the normal mode.<br />
4
ALARM SIGNALS<br />
CODE<br />
REASON<br />
ENGLISH<br />
”HA”<br />
High temperature alarm<br />
The temperature inside the cabinet has exceeded the<br />
set alarm temperature. The alarm can be instigated<br />
by sudden icing of the evaporator. Initiate <strong>manual</strong> defrosting<br />
(see instructions on page 4). Ensure the cabinet<br />
has not been loaded with warm products. Check<br />
that a door has not been left open.Check if product is<br />
blocking air circulation within the cabinet.<br />
”LA”<br />
Low temperature alarm<br />
The temperature inside the cabinet has fallen below<br />
the set value. Ensure that the products put into the<br />
cabinet are not too cold.<br />
Reset the alarm signal by pushing<br />
key.<br />
The temperature alarm is reset automatically<br />
after the interior of the cabinet returns to set<br />
temperature range. If this does not happen, move<br />
the products to another cabinet and contact your<br />
service provider.<br />
”HA2”<br />
Condenser high temperature alarm<br />
The condenser / filter needs to be cleaned. Switch<br />
the cabinet to standby mode, remove cover and<br />
clean the fi lter by washing and / or using a soft brush<br />
and vacuum cleaner. Remove dirt and debris from<br />
the condenser face. Check also that air circulation<br />
to the condenser is not blocked or that the ambient<br />
temperature is not too high. If the alarm still does not<br />
stop, remove products to another cabinet and contact<br />
you service provider.<br />
”LA2”<br />
Condenser low temperature alarm<br />
”P1”<br />
Thermostat probe failure*<br />
”P2”<br />
Evaporator probe failure*<br />
”P3”<br />
Condenser probe failure*<br />
*Note! The cabinet operates on its standby<br />
system and will hold normal temperature, but<br />
reset the alarm signal and immediately contact<br />
your service provider.<br />
5
ENGLISH<br />
CLEANING TO BE UNDERTAKEN BY THE OPERATOR<br />
Switch the power off.<br />
Do not use running water to wash the cabinet.<br />
Clean the stainless steel surfaces using a mild water<br />
soluble detergent, for example washing up liquid. Do not<br />
use scrubbing products, abrasive materials or<br />
chlorine based products i.e. bleach when cleaning!<br />
Clean the door sealing using a mild water-soluble detergent, for<br />
instance dish washing liquid or other suitable detergent. Do not<br />
use solvents or sharp tools!<br />
Use silicone to make the sealings fl exible and dirt-repellent.<br />
Clean the condenser fi lter twice a month. Remove the fi lter and<br />
rinse under running water.<br />
Neglect of operators / user’s obligations may lead to lowering of<br />
the cooling unit capacity, it’s running costs and eventually<br />
damage to the equipment it’s self which may not be covered<br />
under warranty.<br />
Condenser fi lter<br />
IF THE CABINET DOES NOT FUNCTION CORRECTLY<br />
The machine does not start<br />
Check that the main switch has been turned to ON and that<br />
the indicator light of the switch is on (page 4).<br />
Check that the electric cable has been connected to a socket.<br />
Check that the fuse of the socket is undamaged.<br />
The cabinet does not become cool or does not reach the<br />
wanted temperature<br />
Check that the main switch has been turned to ON and that<br />
the indicator light of the switch is on (page 4).<br />
Check that the electric cable has been connected to a socket.<br />
Check that the fuse of the socket is undamaged.<br />
Check that the thermostat has been correctly adjusted<br />
(page 4, to modify the temperature set points).<br />
Check that the ambient temperature is not too high.<br />
Check that the fi lter of the condenser is not blocked (page 6).<br />
Ensure the air circulation under and above the cabinet is free.<br />
Check the alarm signals of the display which are detailed on<br />
page 5.<br />
DISPOSAL OF THE EQUIPMENT<br />
Once the equipment becomes redundant it may not be<br />
disposed of with normal waste because the equipment is<br />
governed by the WEEE directive. It has to be disposed of<br />
following the WEEE act which became effective on August 13th<br />
2005.<br />
GUARANTEE<br />
12 months parts only guarantee. In addition a 12 months parts<br />
and labour guarantee and maintenance contract can be<br />
provided by your authorised dealer.<br />
The guarantee does not cover faults caused by<br />
-transportation<br />
-overloading or user’s negligence<br />
-negligence due to not reading <strong>manual</strong>s, proper care and<br />
maintenance<br />
-modifi cations or repairs performed by an unauthorised service<br />
agent or dealer<br />
-use of parts not supplied or approved by the manufacturer<br />
The guarantee also does not cover<br />
-scratches / marks or dents or other minor faults caused when<br />
unpacking or during installation that do not effect the operation<br />
or performance of the equipment<br />
The manufacturer or his distributor or dealer or selling<br />
agent do not accept under any circumstances liability for<br />
any food loss or consequential loss how so ever it occurs.<br />
All goods are supplied under out terms and conditions of sale,<br />
a copy of which will be supplied on request.<br />
SERVICE DURING GUARANTEE PERIOD<br />
When claiming guarantee work, please provide the<br />
manufacturers model number which can be found on the name<br />
plate attached to the inner frame of the unit towards the upper<br />
left-hand side behind the door.<br />
6
<strong>Porkka</strong> Finland Oy<br />
Soisalmentie 3<br />
FIN-15860 HOLLOLA<br />
Finland<br />
Tel. +358 (0)20 5555 12<br />
Fax +358 (0)20 5555 497<br />
e-mail porkka@huurre.com<br />
www.porkka.com<br />
Oikeus muutoksiin pidätetään<br />
All rights reserved