Peterbilt ComfortClass Operator's Manual - Peterbilt Motors Company
Peterbilt ComfortClass Operator's Manual - Peterbilt Motors Company
Peterbilt ComfortClass Operator's Manual - Peterbilt Motors Company

You also want an ePaper? Increase the reach of your titles
YUMPU automatically turns print PDFs into web optimized ePapers that Google loves.
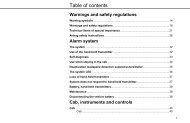
Quick Table of Contents<br />
Introduction ..................................................................................................... 1<br />
Electric Power System.................................................................................... 7<br />
Heating and Air Conditioning System......................................................... 25<br />
Troubleshooting............................................................................................ 41
PART 1: INTRODUCTION<br />
Safety Signals<br />
Figure -1<br />
PART 1: INTRODUCTION<br />
Safety Signals<br />
WARNING:<br />
A number of alerting messages are in this manual. Please<br />
read and follow them. They are there for your protection<br />
and information. These messages can help you avoid<br />
injury to yourself and your passengers, and help prevent<br />
costly damage to the vehicle.<br />
Key symbols and “signal words” are used to indicate what<br />
kind of message is going to follow. Pay special attention to<br />
instructions prefaced by symbols and signal words<br />
“WARNING,” “CAUTION,” or “NOTE.” Please do not ignore<br />
any of these alerts.<br />
Figure -2<br />
When you see this symbol and word, the message that follows<br />
is especially vital. This signals something that can<br />
cause injury or even death. This message will tell you what<br />
the hazard is, what can happen if you don’t heed the warning,<br />
and how to avoid it. For example:<br />
Figure -3<br />
Figure -4<br />
WARNING! Do not carry additional fuel containers<br />
in your vehicle. Fuel containers, either<br />
full or empty, may leak, explode, and cause or<br />
feed a fire. Do not carry extra fuel containers.<br />
Even empty ones are dangerous.<br />
Figure -5<br />
CAUTION:<br />
Figure -6<br />
This symbol and word signals something that could damage<br />
your vehicle. For example:<br />
Figure -7<br />
Figure -8<br />
CAUTION: Continuing to operate your vehicle<br />
with insufficient oil pressure will cause serious<br />
engine damage.<br />
R(09/07) Y53-6017 – 1 –
Safety Signals<br />
PART 1: INTRODUCTION<br />
NOTE:<br />
Figure -9<br />
i<br />
Gives you information we feel you would like to<br />
have. It could have to do with care of your vehicle<br />
or with driving more efficiently. For example:<br />
Figure -10<br />
i<br />
NOTE: Pumping the accelerator will not assist in<br />
starting the engine.<br />
Figure -11<br />
Please take the time to read these messages when<br />
you see them, and remember:<br />
WARNING!<br />
Something that could cause an injury or even death.<br />
CAUTION:<br />
Something that could cause damage to your vehicle.<br />
NOTE:<br />
Useful information.<br />
– 2 – Y53-6017 R(09/07)
PART 1: INTRODUCTION<br />
The <strong>Peterbilt</strong> <strong>ComfortClass</strong> System<br />
This system utilizes a sleeper air conditioning system and<br />
diesel fuel-powered sleeper heater that are compliant with<br />
anti-idling requirements. The sleeper air conditioning system<br />
provides up to 10 hours of engine-off cooling in typical<br />
conditions * . The air conditioning system recharges as the<br />
vehicle is driven or by shore power and requires approximately<br />
4-6 hours of recharging depending upon outside<br />
conditions. The cold air for the air conditioning system<br />
comes from a Storage Cooler that is located behind the<br />
sleeper. It stores the system’s cooling capacity by freezing<br />
water. As the system is used, the ice melts back into water<br />
and needs to be recharged (frozen) again by the Air Conditioning<br />
Charge Unit.<br />
The system is powered by an energy-efficient Comfort-<br />
Class System Battery Box that includes four deep-cycle<br />
AGM batteries and is outfitted with 2000 watt, 12 VDC/120<br />
VAC inverter. The system includes a 20 amp shore power<br />
capability with a 25-foot shore power cable and includes<br />
<strong>ComfortClass</strong> System battery charging capability while on<br />
shore power.<br />
The system has an enhanced charge/start capability that<br />
includes two 1000 CCA dedicated Starter Batteries in the<br />
The <strong>Peterbilt</strong> <strong>ComfortClass</strong> System<br />
starter battery box, a starter battery charger and a 185A<br />
alternator with remote voltage regulator located in the<br />
<strong>ComfortClass</strong> System Battery Box. The voltage regulator is<br />
optimized and pre-programmed with a specific charge profile<br />
for optimal charging of the deep-cycle batteries that<br />
increases the deep-cycle battery life.<br />
An enhanced insulation package includes upgraded<br />
sleeper in-wall insulation. Interior features include the following:<br />
• Floor insulation,<br />
• A cab dash-mounted A/C charge enable switch,<br />
• Two 120 VAC, GFCI (ground fault circuit interruption)<br />
duplex outlets in passenger side closet and under<br />
driver side bunk,<br />
• A dedicated sleeper control panel with diagnostic feedback,<br />
via “blink” codes (status of HVAC modes,<br />
inverter modes, alerts, etc.),<br />
• Sleeper fresh or recirculated air intake, and<br />
• A premium-grade dust and pollen filter readily accessible<br />
under sleeper bunk.<br />
* Overall performance may vary depending on conditions described on page 33.<br />
R(09/07) Y53-6017 – 3 –
The <strong>Peterbilt</strong> <strong>ComfortClass</strong> System<br />
PART 1: INTRODUCTION<br />
System features include:<br />
• Engine-off sleeper heating, cooling, and 120-Volt AC<br />
power.<br />
• No engine noise or vibration.<br />
• Decrease in overall fuel consumption.<br />
Figure -12<br />
i<br />
NOTE: This system is NOT designed to cool a<br />
hot sleeper. Use the vehicle’s air conditioner to<br />
pre-cool the sleeper to at least 75°F prior to turning<br />
on the <strong>ComfortClass</strong> System air conditioner.<br />
The system can then be used to maintain that<br />
temperature.<br />
Figure -13<br />
i<br />
NOTE: The system is designed to maintain the<br />
interior sleeper temperature around 75°F for a<br />
period of up to 10 hours * , based on maximum<br />
outside temperature of 95°F, a relative humidity<br />
of 50%, and with the sleeper not in direct sunlight.<br />
The sleeper environment must be<br />
pre-cooled to 75°F by the air conditioner prior to<br />
use of the system. The system is NOT designed<br />
to maintain sleeper temperatures under<br />
extremes of heat or direct sunlight. You may<br />
need to supplement the <strong>ComfortClass</strong> System by<br />
operating the vehicle’s air conditioner if the <strong>ComfortClass</strong><br />
System is unable to maintain the<br />
desired temperature level.<br />
* Overall performance may vary depending on conditions<br />
described on page 33.<br />
This Operator’s <strong>Manual</strong> contains useful information for the<br />
safe and efficient operation of your <strong>ComfortClass</strong> System.<br />
All information contained in this manual is based on the latest<br />
production information available at the time of publication.<br />
<strong>Peterbilt</strong> <strong>Motors</strong> reserves the right to make changes at<br />
any time without notice.<br />
– 4 – Y53-6017 R(09/07)
PART 1: INTRODUCTION<br />
The <strong>Peterbilt</strong> <strong>ComfortClass</strong> System<br />
Location of Components<br />
Figure 1<br />
Fuel-Fired Heater<br />
(in passenger’s side<br />
toolbox)<br />
Air Handler<br />
(Under Lower Bunk)<br />
Enhanced Insulation<br />
High Output Alternator<br />
Starter Batteries<br />
Disconnect Switch<br />
Air Conditioning<br />
Charge Unit<br />
<strong>ComfortClass</strong> System<br />
Battery Disconnect Switch<br />
Shore Power Connector<br />
<strong>ComfortClass</strong> System<br />
Battery Box<br />
Starter Batteries<br />
Circuit Breaker Box<br />
(located in driver’s side toolbox)<br />
Storage Cooler<br />
(Behind Sleeper)<br />
<strong>ComfortClass</strong> System Batteries<br />
PB00001<br />
Figure 2<br />
R(09/07) Y53-6017 – 5 –
The <strong>Peterbilt</strong> <strong>ComfortClass</strong> System<br />
PART 1: INTRODUCTION<br />
Location of Components<br />
Figure 3<br />
Sleeper Control Panel<br />
(located in Sleeper)<br />
Fan Control Dial<br />
(Page 26)<br />
Temperature Control Dial<br />
(Pages 29 & 32)<br />
CHARGE<br />
Air Conditioner Pump<br />
ON Lamp (Green)<br />
(Page 26)<br />
Inverter/Charger Lamp<br />
(Page 19)<br />
Shore Power Lamp<br />
(120-Volt AC)<br />
(Page 19)<br />
Air Conditioning/Heating<br />
Switch<br />
(Pages 29 & 32)<br />
OFF<br />
NORMAL<br />
OFF/RESET<br />
Charge/Enable Switch<br />
(located on cab dash)<br />
(Page 37)<br />
Inverter/Charger Switch<br />
(Page 18)<br />
Sleeper Fresh/Recirculation Air<br />
Switch<br />
(Page 27)<br />
PB00002<br />
Figure -14<br />
– 6 – Y53-6017 R(09/07)
PART 2: ELECTRIC POWER SYSTEM<br />
Charging/Jump-Starting Instructions<br />
Figure -15<br />
PART 2: ELECTRIC POWER SYSTEM<br />
Charging/Jump-Starting Instructions<br />
Figure -19<br />
Figure -16<br />
Figure -17<br />
Figure -18<br />
i<br />
WARNING! The electrical charging system<br />
used for the <strong>ComfortClass</strong> System is different<br />
from normal charging systems. Failure to<br />
adhere to the proper charging or jump-starting<br />
procedures could lead to death or serious<br />
injury, damage to the Inverter/Charger or vehicle<br />
damage. Follow the Charging/Jump-Starting<br />
Instructions on page 10.<br />
NOTE: The charging/jump-starting instructions<br />
can also be found on the top of the <strong>ComfortClass</strong><br />
System Battery Box cover.<br />
Figure -20<br />
Starter Batteries<br />
<strong>ComfortClass</strong> System<br />
Batteries<br />
PB00006A<br />
Vehicles equipped with the <strong>ComfortClass</strong> System have<br />
battery configurations that are different from traditional<br />
vehicles. These vehicles have a dedicated set of batteries<br />
in addition to the Starter Batteries. These batteries are<br />
referred to as the “<strong>ComfortClass</strong> System Batteries.” These<br />
batteries provide power to the vehicles’ electrical demands<br />
including on-board computers and the starting batteries.<br />
The starter is the only electrical device that does not<br />
depend on the <strong>ComfortClass</strong> System Batteries. The schematic<br />
on page 9 is provided to help illustrate the system.<br />
R(09/07) Y53-6017 – 7 –
Charging/Jump-Starting Instructions<br />
PART 2: ELECTRIC POWER SYSTEM<br />
Figure -21<br />
i<br />
NOTE: Do not attempt to jump-start the vehicle<br />
without first reading the instructions on top of the<br />
<strong>ComfortClass</strong> System Battery Box cover. If you<br />
have a battery problem, it is best to contact an<br />
authorized repair facility or a reputable towing<br />
service. When you do, inform them of the charging<br />
instructions on page 10 and the wiring schematic<br />
on page 9. These instructions can also be<br />
found on the top of the <strong>ComfortClass</strong> System<br />
Battery Box cover.<br />
– 8 – Y53-6017 R(09/07)
PART 2: ELECTRIC POWER SYSTEM<br />
Charging/Jump-Starting Instructions<br />
Figure 4<br />
Wiring Schematic<br />
Figure 5<br />
R(09/07) Y53-6017 – 9 –
Charging/Jump-Starting Instructions<br />
The <strong>ComfortClass</strong> System Batteries are located in the<br />
<strong>ComfortClass</strong> System Battery Box behind the sleeper, on<br />
the driver’s side. They power all electrical systems on the<br />
vehicle EXCEPT the starter motor.<br />
Figure -22<br />
i<br />
Figure -23<br />
i<br />
Figure -24<br />
i<br />
NOTE: Because the <strong>ComfortClass</strong> System Batteries<br />
power the engine controls and starter<br />
relay, you may experience a no-crank condition if<br />
the <strong>ComfortClass</strong> System Battery voltage is<br />
below 9.5-Volt, even though the Starter Batteries<br />
are fully charged.<br />
NOTE: A DC/DC charger, also located below<br />
the cab on the driver’s side, serves to isolate the<br />
starting batteries from the <strong>ComfortClass</strong> System<br />
Batteries and provides charge to the starting batteries<br />
to maintain them at a minimum of 12-Volt.<br />
NOTE: The DC/DC charger will only be activated<br />
when either the truck is running or the<br />
truck is attached to a shore power electrical supply<br />
and the key is in the IGN or ON position.<br />
PART 2: ELECTRIC POWER SYSTEM<br />
Charging/Jump-Starting Instructions<br />
There may be occasions where the vehicle will crank but it<br />
will not start, even after charging the starting batteries<br />
and/or attempting to jump-start the vehicle using normal<br />
procedures found in the Operator’s <strong>Manual</strong>. You may also<br />
notice that the voltage meter on your dash is below 11<br />
volts, interior lights are dimmed or not on, and the DC outlets<br />
have no power.<br />
Figure -25<br />
i<br />
NOTE: The voltmeter only monitors the Comfort-<br />
Class System Batteries, not the Starter Batteries.<br />
In such situations, the <strong>ComfortClass</strong> System System Battery<br />
voltage has dropped below 9.5 volts. It is necessary to<br />
charge the <strong>ComfortClass</strong> System System Batteries to<br />
above 11 volts (and ensure that the Starter Batteries are at<br />
12 volts) in order to start the vehicle.<br />
– 10 – Y53-6017 R(09/07)
PART 2: ELECTRIC POWER SYSTEM<br />
Charging/Jump-Starting Instructions<br />
Figure -26<br />
Charging Terminals<br />
Shore Power<br />
Connector<br />
PB00032<br />
Refer to “Battery Charging” and “Jump-Starting Vehicles”<br />
in the <strong>Peterbilt</strong> Operator’s <strong>Manual</strong> for additional battery<br />
charging and jump-starting procedures. Also, refer to<br />
the Troubleshooting Section on page 41 for more<br />
details.<br />
Figure -28<br />
Figure -29<br />
CAUTION: Do not connect any accessories<br />
directly to the starting batteries. This could<br />
drain the batteries to a point where they can no<br />
longer start the engine.<br />
Figure -27<br />
The <strong>ComfortClass</strong> System Batteries are located in the<br />
driver’s side frame-mounted box located behind the<br />
sleeper. The batteries can be accessed by removing the<br />
cover plate and connecting a charger to the charging terminals.<br />
Turn the battery disconnect switch, on the side of the<br />
<strong>ComfortClass</strong> System Battery Box, to the “ON” position if<br />
you want to charge the batteries using the charging terminals.<br />
Charging these batteries can also be performed by<br />
using the shore power connection on the side of this box.<br />
Please have your <strong>ComfortClass</strong> System inspected by an<br />
authorized dealer if your <strong>ComfortClass</strong> System Batteries<br />
continue to drop below 11 volts or if you are unable to start<br />
the vehicle after charging both the starter and the Comfort-<br />
Class System Batteries.<br />
R(09/07) Y53-6017 – 11 –
Charging/Jump-Starting Instructions<br />
PART 2: ELECTRIC POWER SYSTEM<br />
Disconnect Instructions<br />
Figure -30<br />
<strong>ComfortClass</strong> System<br />
Batteries Disconnect<br />
Switch (shown in the<br />
off position)<br />
4. Turn <strong>ComfortClass</strong> System Battery disconnect<br />
located on <strong>ComfortClass</strong> System Battery Box<br />
(located on driver’s side, rear of sleeper) to OFF<br />
position.<br />
Charging <strong>ComfortClass</strong> System Batteries using Shore<br />
Power<br />
Shore Power<br />
Connector<br />
Figure -32<br />
<strong>ComfortClass</strong> System<br />
Batteries Disconnect<br />
Switch<br />
<strong>ComfortClass</strong> System<br />
Battery Box<br />
Shore Power<br />
Connector<br />
PB00004<br />
Figure -31<br />
Prior to servicing the vehicle, disconnect the electrical system<br />
as follows:<br />
1. Turn air heater off and wait three minutes prior to<br />
turning the disconnect switches to the OFF position<br />
(steps 3 and 4 below). This gives three minutes for<br />
the heater to purge any fuel still in the heater and<br />
allows the unit to cool off.<br />
2. Unplug shore power connection.<br />
3. Turn Starter Battery disconnect to OFF position.<br />
Figure -33<br />
Figure -34<br />
Figure -35<br />
PB00005<br />
WARNING! Electric Shock Hazard. 120-Volt AC<br />
power present. This can cause electrical shock<br />
or fire resulting in death, personal injury or<br />
property damage. Only a trained technician<br />
should work on the shore power system. Turn<br />
all battery disconnect switches to the OFF<br />
position and unplug the shore power electrical<br />
supply before servicing any part of the vehicle’s<br />
electrical system.<br />
– 12 – Y53-6017 R(09/07)
PART 2: ELECTRIC POWER SYSTEM<br />
Charging/Jump-Starting Instructions<br />
Figure -36<br />
Figure -37<br />
Figure -38<br />
Figure -39<br />
WARNING! Electric Shock Hazard. 120-Volt AC<br />
power present. An improperly maintained<br />
shore power electrical system can cause fires<br />
and electrical shocks that may lead to death,<br />
personal injury or property damage. Regularly<br />
inspect the shore power truck wiring, AC shore<br />
power cord, plugs and connectors for damaged<br />
or frayed wiring. Do not use the shore<br />
power system if there are any signs of problems.<br />
WARNING! Do not use an undersized AC<br />
extension cord or a cord that is too long as<br />
there is an Electric Shock Hazard due to the<br />
120-Volt AC power present. An undersized AC<br />
extension cord can cause fires and electrical<br />
shocks that may lead to death, personal injury<br />
or property damage. Always use a properly<br />
grounded 20 Amp UL rated AC extension cord<br />
that is no longer than 25 ft. and a 20 Amp AC<br />
protected power source with a grounding conductor<br />
when connecting to a shore power electrical<br />
supply.<br />
1. Attach the shore power cord to a 20 Amp protected<br />
circuit and the shore power connector until system<br />
voltage is restored (9.5 Volts minimum at Comfort-<br />
Class System Batteries and 12 Volts minimum at<br />
Starter Batteries). The shore power connector is<br />
located on the rear of the <strong>ComfortClass</strong> System Battery<br />
Box.<br />
2. Make sure the Inverter/Charger Switch (shown on<br />
page 20) is in the ON position and that the circuit<br />
breaker on the Protection Unit box has not been<br />
tripped. The Shore Power Lamp on the Sleeper Control<br />
Panel will illuminate green and the<br />
Inverter/Charger Lamp will illuminate orange.<br />
Normal system voltage is 13.5 to 14.6 Volts with the<br />
engine running. Typically the <strong>ComfortClass</strong> System Batteries<br />
must reach at least a 9.5-Volt charge to power the<br />
engine controls necessary to start the engine.<br />
R(09/07) Y53-6017 – 13 –
12-Volt DC System<br />
12-Volt DC System<br />
<strong>ComfortClass</strong> System Batteries<br />
PART 2: ELECTRIC POWER SYSTEM<br />
Figure -42<br />
Figure -40<br />
Starter Batteries<br />
<strong>ComfortClass</strong> System<br />
Batteries<br />
PB00006A<br />
Figure -41<br />
The 12-Volt Direct Current (DC) System consists of <strong>ComfortClass</strong><br />
System Batteries, Starter Batteries, a Low Voltage<br />
Disconnect system and gauges for Electrical<br />
Monitoring. Vehicles equipped with the <strong>Peterbilt</strong> Comfort-<br />
Class System have a unique 12-Volt electrical system. The<br />
system uses a high output alternator and two sets of batteries:<br />
the <strong>ComfortClass</strong> System Batteries and the Starter<br />
Batteries.<br />
Figure -43<br />
Figure -44<br />
Figure -45<br />
<strong>ComfortClass</strong> System Batteries<br />
Deep-Cycle AGM (Gel Cell)<br />
PB00007<br />
WARNING! Do not cover the batteries with<br />
additional insulation or covers or store any<br />
items around the batteries. Additional insulation<br />
or items around the batteries will lead to<br />
poor venting which could result in a fire and/or<br />
explosion that may lead to death, personal<br />
injury or equipment damage.<br />
– 14 – Y53-6017 R(09/07)
PART 2: ELECTRIC POWER SYSTEM<br />
12-Volt DC System<br />
The <strong>ComfortClass</strong> System Batteries are located in the<br />
<strong>ComfortClass</strong> System Battery Box on the driver’s side of<br />
the vehicle behind the sleeper compartment. The four<br />
Deep Cycle AGM (Gel Cell) batteries power all electrical<br />
system components on the vehicle EXCEPT the starter<br />
motor.<br />
Starter Batteries<br />
Figure -49<br />
Figure -46<br />
Figure -47<br />
CAUTION: Do not replace the Deep Cycle AGM<br />
(Gel Cell) batteries with common lead acid batteries.<br />
The <strong>ComfortClass</strong> System is designed<br />
to draw to very low voltages which will significantly<br />
reduce the life of a lead acid battery. Use<br />
only PACCAR recommended <strong>ComfortClass</strong><br />
System Batteries. See your <strong>Peterbilt</strong> dealer for<br />
additional information.<br />
Figure -50<br />
Figure -51<br />
i<br />
PB00008<br />
NOTE: The charging instructions can also be<br />
found on the top of the <strong>ComfortClass</strong> System<br />
Battery Box cover.<br />
Figure -48<br />
i<br />
NOTE: Because the <strong>ComfortClass</strong> System Batteries<br />
power the engine controls and starter<br />
relay, you may experience a no-crank condition if<br />
the <strong>ComfortClass</strong> System Battery voltage is<br />
below 9.5-Volt, even though the Starter Batteries<br />
are fully charged.<br />
The Starter Batteries (two 1000 Cold Cranking Amp<br />
12-Volt batteries) are located below the cab on the driver’s<br />
side of the vehicle. These batteries are used only to power<br />
the starter motor.<br />
A DC/DC charger serves to isolate the starting batteries<br />
from the <strong>ComfortClass</strong> System Batteries and provides<br />
charge to the Starter Batteries to maintain them at a minimum<br />
of 12 Volts.<br />
R(09/07) Y53-6017 – 15 –
12-Volt DC System<br />
PART 2: ELECTRIC POWER SYSTEM<br />
Figure -52<br />
i<br />
Low-Voltage Disconnect<br />
Figure -53<br />
i<br />
NOTE: The DC/DC charger will only be activated<br />
when either the truck is running or the<br />
truck is attached to a shore power electrical supply<br />
and the key is in the IGN or ON position.<br />
NOTE: The electrical system is equipped with a<br />
low-voltage disconnect feature that will shut<br />
down all non-essential electrical components if<br />
<strong>ComfortClass</strong> System Battery voltage drops<br />
below 11 Volts.<br />
Electrical System Monitoring<br />
Normal system voltage on vehicles equipped with the<br />
<strong>Peterbilt</strong> <strong>ComfortClass</strong> System is between 13.5 and 14.6<br />
Volts with the engine running. This is slightly higher than<br />
vehicles without the <strong>Peterbilt</strong> <strong>ComfortClass</strong> System.<br />
All vehicles come equipped with a dash-mounted voltmeter.<br />
Some vehicles may be equipped with an optional<br />
ammeter as well.<br />
Figure -54<br />
i<br />
NOTE: These gauges monitor the <strong>ComfortClass</strong><br />
System Batteries, not the Starter Batteries.<br />
The system is designed to disconnect when <strong>ComfortClass</strong><br />
System Battery voltage drops below 11 Volts. Three minutes<br />
prior to system disconnect, an audible warning in the<br />
Sleeper Control Panel will sound to give the operator time<br />
to switch to an alternative power source or reduce loads.<br />
To reset the system the <strong>ComfortClass</strong> System Batteries<br />
must be charged until a system voltage of 13.2 Volts or<br />
greater is reached. This can be accomplished by attaching<br />
to shore power or starting the engine. Turning the ignition<br />
key to the ON position will not disable the Low-Voltage Disconnect.<br />
An indicator lamp on the face of the voltmeter will illuminate<br />
if system voltage reaches 15 Volts. This is considered<br />
an over voltage condition. If this occurs, contact the nearest<br />
authorized repair facility.<br />
– 16 – Y53-6017 R(09/07)
PART 2: ELECTRIC POWER SYSTEM<br />
Shore Power<br />
Figure -55<br />
Shore Power<br />
The shore power system is located in the <strong>ComfortClass</strong><br />
System Battery Box and consists of a 120-Volt AC Electrical<br />
System connection, Inverter/Charger, Circuit Breaker<br />
Box, and 120-Volt AC outlets in the sleeper.<br />
Shore Power and Inverter<br />
Figure -59<br />
Shore Power<br />
Connector<br />
<strong>ComfortClass</strong> System<br />
Battery Box<br />
PB00010<br />
Figure -56<br />
Figure -57<br />
Figure -58<br />
WARNING! Electric Shock Hazard. 120-Volt AC<br />
power present. This can cause electrical shock<br />
or fire resulting in death, personal injury and/or<br />
property damage. Only a trained technician<br />
should work on the shore power system. Turn<br />
all battery disconnect switches to the OFF<br />
position and unplug the shore power electrical<br />
supply before servicing any part of the vehicle’s<br />
electrical system.<br />
Figure -60<br />
Shore Power Hook Up<br />
PB00006B<br />
R(09/07) Y53-6017 – 17 –
Shore Power<br />
PART 2: ELECTRIC POWER SYSTEM<br />
Figure -61<br />
Figure -62<br />
WARNING! Electric Shock Hazard. 120-Volt AC<br />
power present. An improperly maintained<br />
Shore Power electrical system can cause fires<br />
and electrical shocks that may lead to death,<br />
personal injury or property damage. Regularly<br />
inspect the shore power truck wiring, AC shore<br />
power cord, plugs and connectors for damaged<br />
or frayed wiring. Do not use the shore<br />
power system if there are any signs of problems.<br />
Always use a properly grounded 20 Amp<br />
UL rated AC extension cord that is no longer<br />
than 25 ft. and a 20 Amp AC protected power<br />
source with a grounding conductor when connecting<br />
to a shore power electrical supply.<br />
The <strong>Peterbilt</strong> <strong>ComfortClass</strong> System enables you to access<br />
120-Volt AC power from two different sources. A shore<br />
power connection allows access to an outside power<br />
source and an electrical inverter system can produce<br />
120-Volt AC from the <strong>ComfortClass</strong> System Batteries.<br />
Inverter/Charger Switch<br />
Figure -63<br />
Figure -64<br />
PB00011<br />
The 120-Volt AC system function is controlled by the<br />
Inverter/Charger Switch located on the Sleeper Control<br />
Panel.<br />
When the top of the switch is pressed (NORMAL position),<br />
the Inverter/Charger is on and the green electrical outlet<br />
symbol on the switch will turn on. This is the normal operating<br />
position for the Inverter/Charger.<br />
When the bottom of the switch is pressed (OFF/RESET<br />
position), the Inverter/Charger will be off and the green<br />
electrical outlet symbol on the switch will turn off. Refer to<br />
the Inverter/Charger Indicator Chart on page 20 for<br />
Reset information.<br />
– 18 – Y53-6017 R(09/07)
PART 2: ELECTRIC POWER SYSTEM<br />
Shore Power<br />
Inverter/Charger & Shore Power Lamps<br />
Figure -65<br />
Inverter/Charger Lamp<br />
Shore Power Lamp<br />
PB00011A<br />
Figure -66<br />
The Inverter/Charger and Shore Power Lamps located in<br />
the center of the Sleeper Control Panel will illuminate in an<br />
array of colors and configurations to designate system status.<br />
Refer to the Inverter/Charger Indicator chart on the<br />
next page for more information.<br />
R(09/07) Y53-6017 – 19 –
Shore Power<br />
PART 2: ELECTRIC POWER SYSTEM<br />
Inverter/Charger Indicator Chart<br />
Figure 6<br />
Inverter/Charger & Shore Power Lamps Status<br />
System Status<br />
Inverter/Charger Lamp<br />
Shore Power Lamp<br />
Inverter/Charge<br />
Switch<br />
Shore<br />
Power Inverter Charger<br />
Solid Green OFF ON OFF ON OFF<br />
Blinking Green<br />
(0.5 sec ON, 0.5 sec OFF)<br />
OFF ON OFF Input Low Voltage OFF<br />
Blinking Green<br />
3x (0.2 sec ON/OFF) 4.5 sec OFF<br />
Blinking Green<br />
(0.5 sec ON, 0.5 sec OFF)<br />
OFF ON OFF Input Low Voltage Warning OFF<br />
OFF ON OFF Input Over Voltage Protection OFF<br />
Solid Red OFF ON OFF<br />
Overload; Short Circuit<br />
Protection; Output Over Voltage<br />
Protection<br />
OFF OFF ON OFF Over Temp OFF<br />
Solid Orange Solid Green ON ON OFF ON<br />
Solid Orange Solid Green ON ON OFF Thermally Derated Charge<br />
Solid Orange Solid Green ON ON OFF Overload;<br />
Short Circuit Protection<br />
Blinking Orange/Red<br />
(4 sec Orange, 1 sec Red)<br />
Solid Green ON ON OFF Low Voltage Timed Charge<br />
Blinking Orange/Red<br />
(0.5 sec Orange, 0.5 sec Red)<br />
Solid Green ON ON OFF Low Voltage Auto-Stop<br />
OFF OFF ON Battery Disconnect<br />
OFF OFF OFF OFF<br />
OFF<br />
Figure 7<br />
– 20 – Y53-6017 R(09/07)
PART 2: ELECTRIC POWER SYSTEM<br />
Shore Power<br />
Figure 8<br />
Inverter/Charger & Shore Power Lamps Status<br />
Inverter/Charger Lamp Shore Power Lamp Remedy<br />
Solid Green OFF Normal inverter/charger operation, no action required.<br />
Blinking Green<br />
(0.5 sec ON, 4.5 sec OFF)<br />
Blinking Green<br />
OFF<br />
- Inverter/charger will auto-restart if voltage reaches an acceptable level.<br />
- Cycle inverter/charger on/off switch to off/reset and then back on to reset inverter. 1<br />
- Inverter/charger will auto-restart if voltage reaches an acceptable level.<br />
3x (0.2 sec ON/OFF) 4.5 sec OFF<br />
OFF<br />
- Cycle inverter/charger on/off switch to off/reset and then back on to reset inverter. 1<br />
Blinking Green<br />
(0.5 sec ON, 0.5 sec OFF)<br />
Solid Red<br />
OFF<br />
OFF<br />
- Inverter/charger will auto-restart if voltage reaches an acceptable level.<br />
- Cycle inverter/charger on/off switch to off/reset and then back on to reset inverter. 1<br />
- Cycle inverter/charger on/off switch to off/reset and then back on to reset inverter. 1<br />
OFF<br />
OFF<br />
- Inverter/charger will auto-restart if temperature reaches an acceptable level.<br />
- Cycle inverter/charger on/off switch to off/reset and then back on to reset inverter. 1<br />
Solid Orange Solid Green Normal inverter/charger operation, no action required.<br />
Solid Orange Solid Green Charging will derate at high temperatures, no action required.<br />
Solid Orange<br />
Blinking Orange/Red<br />
(4 sec Orange, 1 sec Red)<br />
Blinking Orange/Red<br />
(0.5 sec Orange, 0.5 sec Red)<br />
Solid Green<br />
Solid Green<br />
Solid Green<br />
- Inverter/charger will auto-restart if conditions reach an acceptable level.<br />
- Cycle inverter/charger on/off switch to off/reset and then back on to reset inverter. 1<br />
Low voltage charging operation, allows for charging of batteries as low as 5V, no action<br />
required.<br />
If batteries at a low voltage are not successfully accepting a charge, inverter/charger will turn<br />
off. Cycle inverter/charger on/off switch to off/reset and then back on to reset<br />
inverter/charger. 1,2<br />
Turn inverter/charger on/off switch to off/reset. Reconnect batteries to inverter/charger. Turn<br />
OFF<br />
OFF<br />
inverter/charger on/off switch to on.<br />
OFF OFF For inverter/charger function, turn inverter/charger on/off switch to on.<br />
1 If after restarting the inverter/charger the blink code persists, please see your local <strong>Peterbilt</strong> service dealer.<br />
2 Continuous charging of low voltage batteries is not recommended. If low voltage charging is unsuccessful after restarting inverter/charger, replace main batteries.<br />
Figure 9<br />
R(09/07) Y53-6017 – 21 –
Shore Power<br />
PART 2: ELECTRIC POWER SYSTEM<br />
Circuit Breaker Box<br />
Figure -67<br />
Circuit Breaker Box<br />
20 Amp<br />
Circuit Breaker<br />
Circuit Breaker Box<br />
(GFCI)<br />
Figure -69<br />
Figure -70<br />
WARNING! Electrical shock hazard. Use of a<br />
ground fault circuit interrupter other than that<br />
supplied with the Circuit Breaker Box may fail<br />
to operate properly and may lead to death, personal<br />
injury or equipment damage. Use only<br />
the ground fault circuit interrupter that is supplied<br />
with the Circuit Breaker Box (Hubbell Part<br />
Number GFBF20GYL GFCI).<br />
The Circuit Breaker Box houses a 20 Amp circuit breaker<br />
and a Ground Fault Circuit Interrupter (GFCI) that provides<br />
circuit protection for the 120-Volt AC system. (The Circuit<br />
Breaker Box is located in the tool box on the driver’s side<br />
of the sleeper.)<br />
The circuit breaker is located on the right side of the Circuit<br />
Breaker Box. If the breaker is tripped (circuit open) it can<br />
be reset by pressing the top of the rocker switch to the ON<br />
position.<br />
The GFCI is located on the left side of the Circuit Breaker<br />
Box. The GFCI will open (disconnecting the power) if a<br />
ground fault is detected on the circuit. The unit can be<br />
reset by pressing the RESET button on the top of the<br />
GFCI.<br />
PB00012<br />
Figure -68<br />
– 22 – Y53-6017 R(09/07)
PART 2: ELECTRIC POWER SYSTEM<br />
Shore Power<br />
Figure -71<br />
i<br />
NOTE: Replace GFCI if light on GFCI flashes. If<br />
this is not done, outlets will not be powered.<br />
Replace with a new Hubbell GFBF20GYL GFCI.<br />
120-Volt AC Outlets<br />
Figure -74<br />
i<br />
NOTE: The Inverter has its own low-voltage disconnect<br />
system that will shut off power to the two<br />
duplex outlets when the <strong>ComfortClass</strong> System<br />
Battery voltage gets below 11 Volts.<br />
Figure -72<br />
120-Volt AC Outlets<br />
PB00013B<br />
Figure -73<br />
Two 120-Volt AC duplex style outlets are located in the<br />
sleeper compartment, one under the driver’s side lower<br />
bunk, the second in the passenger side closet. They are<br />
powered by either a shore power electrical supply or by the<br />
<strong>ComfortClass</strong> System Batteries through the Inverter.<br />
R(09/07) Y53-6017 – 23 –
Shore Power<br />
PART 2: ELECTRIC POWER SYSTEM<br />
NOTES<br />
– 24 – Y53-6017 R(09/07)
PART 3: HEATING AND AIR CONDITIONING SYSTEM<br />
Controls and Switches<br />
Figure -75<br />
PART 3: HEATING AND AIR CONDITIONING SYSTEM<br />
Controls and Switches<br />
Figure -76<br />
Air Conditioning<br />
ON Position<br />
Figure -78<br />
Air Conditioning Mode<br />
Blue Bands<br />
Heating Mode<br />
Red Bands<br />
OFF<br />
Heat ON Position<br />
Air Conditioning<br />
Pump ON<br />
Lamp (Green)<br />
PB00014<br />
PB00015<br />
Figure -77<br />
The Air Conditioning/Heating Switch is the leftmost switch<br />
in the Sleeper Control Panel. The middle is the OFF position<br />
of the switch. Pressing on the top of the switch will turn<br />
the sleeper air conditioning system on. Pressing on the<br />
bottom of the switch will turn the sleeper fuel fired heater<br />
on.<br />
Figure -79<br />
The Temperature Control Dial is located on the left side of<br />
the Sleeper Control Panel. Turning the dial clockwise from<br />
the 12 o’clock position to the red bands controls the<br />
sleeper heater. Turning the dial counterclockwise from the<br />
12 o’clock position to the blue bands controls the sleeper<br />
air conditioning.<br />
R(09/07) Y53-6017 – 25 –
Controls and Switches<br />
PART 3: HEATING AND AIR CONDITIONING SYSTEM<br />
Figure -80<br />
Figure -82<br />
Fan Control Dial<br />
Air Conditioning<br />
Pump ON<br />
Lamp (Green)<br />
OFF<br />
Figure -81<br />
Air Conditioning Pump ON Lamp<br />
PB00022<br />
The Air Conditioning Pump ON Lamp is located on the left<br />
side of the Temperature Control Dial between the blue<br />
band and the white snowflake. The lamp will illuminate<br />
green when the Temperature Control Dial is turned to a<br />
temperature range which requires the air conditioning<br />
pump to turn on (i.e., colder temperature). The pump will<br />
cycle on and off automatically to maintain a desired temperature.<br />
Figure -83<br />
Figure -84<br />
i<br />
Fan Control Dial<br />
PB00021<br />
NOTE: The more the pump is on, the more the<br />
ice in the Storage Cooler melts. When all of the<br />
ice has melted, you will lose the ability for the<br />
system to provide cold air until the Storage<br />
Cooler has been recharged. See Storage<br />
Cooler on page 35.<br />
– 26 – Y53-6017 R(09/07)
PART 3: HEATING AND AIR CONDITIONING SYSTEM<br />
Controls and Switches<br />
Fresh/Recirculation Air Switch<br />
Figure -85<br />
Figure -87<br />
i<br />
NOTE: The Fresh/Recirculation Switch is only<br />
operational when the Fan Control Dial is in the<br />
ON position. When the Fan Control Dial is in the<br />
OFF position, the Fresh/Recirculation door and<br />
control will be deactivated. The Fresh/Recirculation<br />
door will remain in the position (open or<br />
closed) selected prior to turning the fan off.<br />
PB00023<br />
Figure -86<br />
The Fresh/Recirculation Air Switch is the rightmost switch<br />
on the Sleeper Control Panel. The two-position switch controls<br />
the source of the incoming air to the air conditioning<br />
and ventilation system. With the switch in the FRESH position<br />
(top position pressed), outside air is introduced to the<br />
air conditioning or ventilation system. In the RECIRCULA-<br />
TION position (bottom position pressed), sleeper air is<br />
recirculated through the system.<br />
The system can be operated in a ventilation only mode by<br />
placing the Air Conditioning/Heating Switch in the OFF<br />
position and moving the Fan Control Dial from the OFF<br />
position. With the Fresh/Recirculation Switch in the<br />
FRESH position, outside air is vented to the sleeper compartment.<br />
R(09/07) Y53-6017 – 27 –
Using the Heater<br />
PART 3: HEATING AND AIR CONDITIONING SYSTEM<br />
Using the Heater<br />
Figure -88<br />
Figure -89<br />
Figure -90<br />
Figure -91<br />
WARNING! Do not operate the sleeper heating<br />
system or ventilating system around hazardous<br />
fumes or exhaust gases. Hazardous fumes<br />
and exhaust fumes may be vented into the<br />
sleeper compartment causing serious illness<br />
that may lead to death. Do not park your vehicle<br />
near other vehicles that are idling or where<br />
other hazardous fumes may be present.<br />
WARNING! Do not operate the heater portion of<br />
the <strong>ComfortClass</strong> System when vehicle is in an<br />
enclosed, unventilated area. Exhaust fumes<br />
from the air heater contain carbon monoxide, a<br />
colorless and odorless gas which, if inhaled,<br />
can cause serious illness that may lead to<br />
death. Never park in an enclosed area when<br />
operating the heater.<br />
Figure -92<br />
Figure -93<br />
i<br />
Figure -94<br />
WARNING! Exhaust fumes from the heating<br />
unit contain carbon monoxide, a colorless and<br />
odorless gas. Do not breathe the heater<br />
exhaust gas. A poorly maintained, damaged, or<br />
corroded exhaust system can allow carbon<br />
monoxide to enter the cab or sleeper. Entry of<br />
carbon monoxide into the cab or sleeper is<br />
also possible from other vehicles nearby. Failure<br />
to properly maintain your vehicle could<br />
cause carbon monoxide to enter the<br />
cab/sleeper and cause serious illness that may<br />
lead to death.<br />
NOTE: When filling fuel tanks with low-temperature<br />
fuel, run the air heater for 15 minutes in<br />
warmer climates to circulate the low-temperature<br />
fuel into the heater system to prevent the fuel from<br />
gelling in colder climates.<br />
– 28 – Y53-6017 R(09/07)
PART 3: HEATING AND AIR CONDITIONING SYSTEM<br />
Using the Heater<br />
Follow the steps to properly start and operate the heater.<br />
Figure -95<br />
Figure -98<br />
Heating Mode<br />
Red Bands<br />
Heat ON Position<br />
Air Conditioning/Heating Switch<br />
PB00016<br />
Temperature Control Dial<br />
PB00017<br />
Figure -96<br />
Step 1: Turn the Air Conditioning/Heating Switch to the<br />
Heater ON position.<br />
Figure -97<br />
i<br />
NOTE: A flashing RED lamp indicates a system<br />
fault. Contact the nearest authorized repair facility.<br />
Figure -99<br />
Step 2: Turn the Temperature Control Dial clockwise to the<br />
Heating Mode. Turning the dial in a clockwise direction<br />
(red band on dial) increases both the temperature and the<br />
Fuel-Fired Heater fan speed simultaneously. Turn the knob<br />
clockwise to increase the temperature or counterclockwise<br />
to decrease the temperature. Once the desired temperature<br />
is reached, the system will maintain it automatically.<br />
The dial is not calibrated to specific temperatures.<br />
R(09/07) Y53-6017 – 29 –
Using the Heater<br />
Step 3: If you want more air from the vents, you can set<br />
the Fresh/Recirculation Air Switch to the RECIRCULA-<br />
TION position and increase the air from the vents via the<br />
Fan Control Dial.<br />
PART 3: HEATING AND AIR CONDITIONING SYSTEM<br />
Fuel-Fired Heater<br />
Figure -100<br />
Fuel-Fired Heater<br />
PB00018<br />
Figure -101<br />
The Fuel-Fired Heater is a stand-alone unit that is controlled<br />
only by the Sleeper Control Panel. It is located in<br />
front of the toolbox on the side of the vehicle. Its design<br />
and function are similar to units used on other vehicles.<br />
The heater uses diesel fuel drawn from the vehicle’s fuel<br />
tank(s) to create heat.<br />
– 30 – Y53-6017 R(09/07)
PART 3: HEATING AND AIR CONDITIONING SYSTEM<br />
Using the Air Conditioner<br />
Figure -102<br />
Figure -103<br />
Figure -104<br />
Figure -105<br />
i<br />
Figure -106<br />
WARNING! Do not operate the sleeper air conditioning<br />
system or ventilating system around<br />
hazardous fumes or exhaust gases. Hazardous<br />
fumes and exhaust fumes may be vented into<br />
the sleeper compartment causing serious illness<br />
that may lead to death. Do not park your<br />
vehicle near other vehicles that are idling or<br />
where other hazardous fumes may be present.<br />
WARNING! Do not breathe the engine exhaust<br />
gas. Exhaust fumes from the engine contain<br />
carbon monoxide, a colorless and odorless<br />
gas. A poorly maintained, damaged, or corroded<br />
exhaust system can allow carbon monoxide<br />
to enter the cab or sleeper and cause<br />
serious illness that may lead to death. Inspect<br />
the exhaust system for leaks monthly or every<br />
7,500 miles (12,000 km).<br />
NOTE: This system is NOT designed to cool a hot<br />
sleeper. Use the vehicle’s air conditioner to<br />
pre-cool the sleeper to at least 75°F prior to turning<br />
on the <strong>ComfortClass</strong> System air conditioner. The<br />
system can then be used to maintain that temperature.<br />
i<br />
Figure -107<br />
Using the Air Conditioner<br />
NOTE: The system is designed to maintain the<br />
interior sleeper temperature around 75°F for a<br />
period of up to 10 hours * , based on maximum outside<br />
temperature of 95°F, a relative humidity of<br />
50%, and with the sleeper not in direct sunlight.<br />
The sleeper environment must be pre-cooled to<br />
75°F by the air conditioner prior to use of the system.<br />
The system is NOT designed to maintain<br />
sleeper temperatures under extremes of heat or<br />
direct sunlight. You may need to supplement the<br />
<strong>ComfortClass</strong> System by operating the vehicle’s air<br />
conditioner if the <strong>ComfortClass</strong> System is unable<br />
to maintain the desired temperature level.<br />
* Overall performance may vary depending on conditions<br />
described on page 33.<br />
R(09/07) Y53-6017 – 31 –
Using the Air Conditioner<br />
PART 3: HEATING AND AIR CONDITIONING SYSTEM<br />
Figure -108<br />
Air Conditioning<br />
ON Position<br />
Figure -110<br />
Green Band − Up to<br />
10 Hours Cooling<br />
Blue Band − Air Conditioning Mode<br />
Yellow Band − Reduce<br />
Overall Cooling Time<br />
Air Conditioning/Heating Switch<br />
PB00019<br />
Temperature Control Dial<br />
PB00020<br />
Figure -109<br />
Follow the steps to properly start and operate the air conditioner.<br />
Figure -111<br />
Step 1: Turn the Air Conditioning/Heating Switch to the air<br />
conditioning ON position.<br />
– 32 – Y53-6017 R(09/07)
PART 3: HEATING AND AIR CONDITIONING SYSTEM<br />
Using the Air Conditioner<br />
Step 2: Turn the Fan Control Dial clockwise to start the<br />
fan. Continuing to turn the dial clockwise will gradually<br />
increase fan speed. In the full counterclockwise position<br />
the dial is in the OFF position. In the OFF position, the air<br />
conditioning system will be deactivated. The dial controls<br />
fan speed for the air conditioning system only and not for<br />
the heater.<br />
Step 3: Turn the Temperature Control Dial counterclockwise<br />
to the Air Conditioning Mode. Continuing to turn the<br />
dial in a counterclockwise direction (blue band on dial) will<br />
lower (colder) the air conditioning output temperature.<br />
Once the desired temperature is reached, the system will<br />
maintain it automatically. Setting the dial within the green<br />
band should give up to 10 hours of cooling (depending<br />
upon the outside heat conditions). Adjusting the dial further<br />
to the left (yellow band on dial) will lower the output temperature.<br />
The dial is not calibrated to specific temperatures,<br />
so where you position the dial to achieve the same<br />
temperature will vary depending on the current outside<br />
temperature conditions.<br />
Figure -112<br />
i<br />
NOTE: Setting the dial in the yellow band will<br />
lower the output temperature produced by the<br />
system. Leaving the dial in this position for<br />
extended periods will cause the ice in the Storage<br />
Cooler to melt more quickly, thus reducing<br />
the amount of cooling time available for your use.<br />
When all of the ice has melted, you will lose the<br />
ability for the system to provide cold air until the<br />
Storage Cooler has been recharged. See Storage<br />
Cooler on page 35.<br />
Cooling Efficiency<br />
In order to maximize engine-off cooling many factors must<br />
be considered. The following factors all affect the system’s<br />
cooling ability:<br />
• Direct Sunlight<br />
• Vehicle Color<br />
• Ambient Temperature<br />
• Initial Compartment Temperature<br />
• Intake Air Mix<br />
• Sleeper Curtain Position<br />
• Window Coverings<br />
R(09/07) Y53-6017 – 33 –
Using the Air Conditioner<br />
PART 3: HEATING AND AIR CONDITIONING SYSTEM<br />
Figure -113<br />
i<br />
Figure -114<br />
i<br />
NOTE: This system is NOT designed to cool a<br />
hot sleeper. Use the vehicle’s air conditioner to<br />
pre-cool the sleeper to at least 75°F prior to<br />
turning on the <strong>ComfortClass</strong> System air<br />
conditioner. The system can then be used to<br />
maintain that temperature.<br />
NOTE: The system is designed to maintain the<br />
interior sleeper temperature around 75°F for a<br />
period of up to 10 hours * , based on maximum<br />
outside temperature of 95°F, a relative humidity<br />
of 50%, and with the sleeper not in direct<br />
sunlight. The sleeper environment must be<br />
pre-cooled to 75°F by the air conditioner prior to<br />
use of the system. The system is NOT designed<br />
to maintain sleeper temperatures under<br />
extremes of heat or direct sunlight. You may<br />
need to supplement the <strong>ComfortClass</strong> System by<br />
operating the vehicle’s air conditioner if the<br />
<strong>ComfortClass</strong> System is unable to maintain the<br />
desired temperature level.<br />
* Overall performance may vary depending on conditions<br />
described on page 33.<br />
For maximum cooling ability:<br />
• The sleeper compartment should already be at a maximum<br />
75°F temperature using the cab A/C system.<br />
• The window covers and sleeper curtain should be in<br />
place and closed.<br />
• The Fresh/Recirculation Air Switch should be in the<br />
RECIRCULATION position.<br />
• The Temperature Control Dial of the sleeper should be<br />
in the green band.<br />
• The dust and pollen filter must be clean and clear of<br />
dust and pollen.<br />
• The truck must be parked in shade out of direct sunlight.<br />
– 34 – Y53-6017 R(09/07)
PART 3: HEATING AND AIR CONDITIONING SYSTEM<br />
Cooling System Components<br />
Cooling System Components<br />
Cooling Vents<br />
Storage Cooler<br />
Figure -117<br />
Figure -115<br />
Storage Cooler<br />
Output Vent<br />
PB00024<br />
Coolant Reservoir<br />
Storage Cooler<br />
Figure -116<br />
The <strong>ComfortClass</strong> System has one dedicated air vent. This<br />
vent is separate from the vents used for the vehicle’s<br />
HVAC system.<br />
PB00026<br />
Figure -118<br />
R(09/07) Y53-6017 – 35 –
Cooling System Components<br />
PART 3: HEATING AND AIR CONDITIONING SYSTEM<br />
Figure -119<br />
Figure -120<br />
CAUTION: The coolant reservoir on the Storage<br />
Cooler does not require maintenance. If<br />
coolant is added, use only a 50/50 mix of water<br />
and antifreeze to prevent coolant from freezing<br />
in the Storage Cooler.<br />
Air Conditioning Charge Unit<br />
Figure -122<br />
Air Conditioning Charge Unit<br />
The Storage Cooler is located behind the sleeper. It stores<br />
the system’s cooling capacity by freezing water. As the<br />
system is used, the ice melts back into water and needs to<br />
be recharged (frozen) again by the Air Conditioning<br />
Charge Unit in order to cool the sleeper. A fully charged<br />
(frozen) Storage Cooler can cool the sleeper up to 10<br />
hours (depending on the outside heat conditions). The<br />
approximate time required to fully charge the Storage<br />
Cooler, without the <strong>ComfortClass</strong> air handler and pump on,<br />
is 4 to 6 hours.<br />
Figure -121<br />
i<br />
NOTE: The sleeper cooling system can be used<br />
while the Storage Cooler is being charged by the<br />
Air Conditioning Charge Unit; however, this will<br />
increase the time required to fully charge the<br />
Storage Cooler.<br />
PB000028<br />
Figure -123<br />
– 36 – Y53-6017 R(09/07)
PART 3: HEATING AND AIR CONDITIONING SYSTEM<br />
Cooling System Components<br />
The Air Conditioning Charge Unit is an electric refrigeration<br />
unit that operates automatically to cool the Storage Cooler,<br />
and is located on the passenger’s side of the vehicle,<br />
behind the sleeper compartment. The dash-mounted<br />
Charge/Enable Switch must be in the CHARGE position to<br />
enable the Charge Unit to operate. The unit will operate<br />
when the engine is running or connected to a shore power<br />
electrical supply. It will not operate using only battery<br />
power as this will deplete the batteries too quickly.<br />
Figure -124<br />
Figure -125<br />
WARNING! Electrical Shock Hazard. 120 Volts<br />
AC are present inside the charging unit. This<br />
can cause electrical shock or fire resulting in<br />
death, personal injury and/or property damage.<br />
Disconnect shore power source to inverter<br />
before servicing equipment.<br />
Charge/Enable Switch<br />
Figure -128<br />
REAR<br />
AC<br />
O<br />
AUX<br />
O<br />
SPARE<br />
SPARE<br />
SPARE<br />
Charge Enable Switch<br />
CHARGE<br />
Figure -126<br />
Figure -127<br />
WARNING! Immediately get away from vehicle<br />
if you hear sounds or arcing (sizzling, sputtering<br />
or popping) inside the charging unit. Hot<br />
gas may vent from compressor terminals causing<br />
death, personal injury and/or property damage.<br />
Improper servicing can lead to fire,<br />
electrocution or explosion which can result in<br />
death, personal injury and/or property damage.<br />
Never service, repair or troubleshoot a system<br />
unless you are a trained service person.<br />
Figure -129<br />
PB00033<br />
R(09/07) Y53-6017 – 37 –
Cooling System Components<br />
PART 3: HEATING AND AIR CONDITIONING SYSTEM<br />
The Charge/Enable Switch is located on the cab dash and<br />
enables the Air Conditioning Charge Unit to refreeze/<br />
replenish the Storage Cooler. The switch should normally<br />
be left in the CHARGE position (top of switch is pressed).<br />
Switching to the OFF position (bottom of switch is pressed)<br />
will disable the Air Conditioning Charge Unit. When the Air<br />
Conditioning Charge Unit is on, a green lamp will be displayed<br />
on the Charge/Enable Switch. When the green<br />
lamp turns off, the charging cycle is complete.<br />
Figure -130<br />
i<br />
NOTE: Upon initial start-up of the truck engine,<br />
the <strong>ComfortClass</strong> System Batteries must go<br />
through a charge cycle before the Air Conditioning<br />
Charge Unit will begin charging the Storage<br />
Cooler. This <strong>ComfortClass</strong> System Battery<br />
charge cycle can take up to 60 minutes. The air<br />
conditioning compressor will not turn on until this<br />
<strong>ComfortClass</strong> System Battery charge cycle is<br />
completed. Leave the Charge/Enable Switch in<br />
the CHARGE position during the battery charge<br />
cycle.<br />
Figure -132<br />
i<br />
NOTE: The Charge/Enable Switch does not turn<br />
on the Sleeper Air Conditioning System. It only<br />
enables the Air Conditioning Charge Unit to<br />
refreeze/replenish the Storage Cooler.<br />
Figure -131<br />
i<br />
NOTE: The green lamp can cycle on and off as<br />
the system maintains the cooling capacity.<br />
– 38 – Y53-6017 R(09/07)
PART 3: HEATING AND AIR CONDITIONING SYSTEM<br />
Preventative Maintenance<br />
Preventative Maintenance<br />
Figure -133<br />
The following section identifies serviceable parts for the<br />
<strong>ComfortClass</strong> System. You may avoid expensive and<br />
time-consuming repairs by replacing serviceable parts at<br />
the recommended intervals. Your system will operate better,<br />
will operate safer and will last longer. Neglect of recommended<br />
maintenance may void your vehicle’s warranty.<br />
Dust and Pollen Filter<br />
Dust and Pollen Filter<br />
The <strong>ComfortClass</strong> System air handler has a dust and pollen<br />
filter. To access the air handler, raise the lower bunk<br />
from inside the sleeper.<br />
Air Handler<br />
PB00030<br />
Figure -134<br />
Check and replace dirty dust and pollen filter once every<br />
12 months, or earlier if operating in highly dusty environments.<br />
Fuel Filter<br />
The <strong>ComfortClass</strong> System utilizes a fuel-fired heater. Subsequently,<br />
the heater has a dedicated fuel filter and is a<br />
serviceable part.<br />
R(09/07) Y53-6017 – 39 –
Preventative Maintenance<br />
PART 3: HEATING AND AIR CONDITIONING SYSTEM<br />
Figure -135<br />
Fuel Filter<br />
Driver Side<br />
Fuel Tank<br />
PB00031<br />
Figure -136<br />
The fuel filter is located along the frame above the driver<br />
side fuel tank. The fuel filter should be inspected every 12<br />
months. Check the filter for debris, sediment or water.<br />
Replace if any is found.<br />
Figure -137<br />
i<br />
NOTE: Do not substitute the Webasto supplied<br />
fuel filter with a non-Webasto replacement filter.<br />
Irregular heater operation may result if a<br />
non-Webasto filter is used.<br />
– 40 – Y53-6017 R(09/07)
PART 4: TROUBLESHOOTING<br />
Figure -138<br />
PART 4: TROUBLESHOOTING<br />
Figure -139<br />
Concern Possible Cause Remedy<br />
Parked truck will not get<br />
cool.<br />
Parked truck will not stay<br />
cool for up to 10 hours.<br />
Parked truck will not get<br />
warm.<br />
Storage Cooler not<br />
charged.<br />
Lack of cool air out of<br />
vents.<br />
Storage Cooler is<br />
depleting too quickly.<br />
Lack of hot air out of lower<br />
heater vent.<br />
1. Make sure Charge/Enable dash switch is in the ON position.<br />
2. Make sure the Inverter/Charger Switch is in the ON position.<br />
3. Make sure the circuit breaker in the Circuit Breaker Box is not tripped. Reset if necessary.<br />
4. Air conditioning component service/refrigerant level check.<br />
(Please note, if outside temperature is below 55°F, compressor will not turn on.)<br />
1. Make sure blower is in the ON position.<br />
2. Make sure air conditioning mode is selected.<br />
3. Make sure temperature control is set in the blue zone.<br />
4. Service fresh air/recirculation filter.<br />
5. Check coolant level.<br />
6. Component service.<br />
7. Cab was not pre-cooled.<br />
1. Make sure temperature control is set in the green zone.<br />
2. Make sure sleeper pass-through curtain is closed and all window coverings are installed.<br />
1. Make sure heating mode is selected.<br />
2. Make sure temperature control is set in the red zone.<br />
3. Check for heater diagnostic blink codes at the heater mode selection LED.<br />
4. Make sure heater inlet in tool compartment is not blocked.<br />
5. Make sure fuel and exhaust lines are not blocked.<br />
6. Component service.<br />
R(09/07) Y53-6017 – 41 –
PART 4: TROUBLESHOOTING<br />
Concern Possible Cause Remedy<br />
Sleeper AC electrical<br />
outlets not working.<br />
Cannot run cab/sleeper<br />
DC loads.<br />
Cannot start truck.<br />
No power to sleeper AC<br />
electrical outlets.<br />
Not enough power<br />
available for cab/<br />
sleeper DC loads.<br />
Voltage at <strong>ComfortClass</strong><br />
System Batteries is too<br />
low (below 9.5 Volts).<br />
Not enough cranking<br />
power from starting<br />
batteries.<br />
1. Make sure battery disconnect switch on <strong>ComfortClass</strong> System Battery Box is in the ON<br />
position.<br />
2. Make sure Inverter/Charger Switch is in the ON position.<br />
3. Make sure the circuit breaker in the Circuit Breaker Box is not tripped. Reset if necessary.<br />
4. Make sure GFCI in the Circuit Breaker Box is not tripped. Reset if necessary.<br />
5. Component service.<br />
1. Make sure battery disconnects are in the ON position.<br />
2. Make sure LVD is not tripped. (To reset, <strong>ComfortClass</strong> System Battery voltage must be<br />
brought up to 13.2 Volts by starting the truck or using Shore Power electrical supply).<br />
3. Check <strong>ComfortClass</strong> System Battery voltage. If voltage is below 11 Volts, charge the<br />
<strong>ComfortClass</strong> System Batteries.<br />
1. Make sure both battery disconnects are in the ON position.<br />
2. Hook up to Shore Power electrical supply to charge <strong>ComfortClass</strong> System Batteries or<br />
attach battery charger to charging terminals.<br />
1. Make sure both battery disconnects are in the ON position.<br />
2. Check starting battery voltage. If voltage is below 12 Volts (check at starter using voltmeter),<br />
charge starting batteries with external battery charger.<br />
3. If starting battery voltage continues to discharge, replace starting batteries and/or have an<br />
authorized repair facility service the vehicle.<br />
– 42 – Y53-6017 R(09/07)