Instruction - Pentron Clinical
Instruction - Pentron Clinical
Instruction - Pentron Clinical

Create successful ePaper yourself
Turn your PDF publications into a flip-book with our unique Google optimized e-Paper software.
F I B E R R E I N F O R C E D C O M P O S I T E S ( F R C )<br />
3 - U N I T I N L A Y B R I D G E T E C H N I Q U E<br />
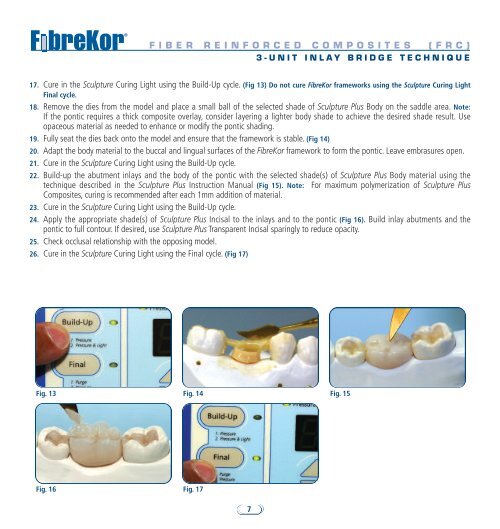
17. Cure in the Sculpture Curing Light using the Build-Up cycle. (Fig 13) Do not cure FibreKor frameworks using the Sculpture Curing Light<br />
Final cycle.<br />
18. Remove the dies from the model and place a small ball of the selected shade of Sculpture Plus Body on the saddle area. Note:<br />
If the pontic requires a thick composite overlay, consider layering a lighter body shade to achieve the desired shade result. Use<br />
opaceous material as needed to enhance or modify the pontic shading.<br />
19. Fully seat the dies back onto the model and ensure that the framework is stable. (Fig 14)<br />
20. Adapt the body material to the buccal and lingual surfaces of the FibreKor framework to form the pontic. Leave embrasures open.<br />
21. Cure in the Sculpture Curing Light using the Build-Up cycle.<br />
22. Build-up the abutment inlays and the body of the pontic with the selected shade(s) of Sculpture Plus Body material using the<br />
technique described in the Sculpture Plus <strong>Instruction</strong> Manual (Fig 15). Note: For maximum polymerization of Sculpture Plus<br />
Composites, curing is recommended after each 1mm addition of material.<br />
23. Cure in the Sculpture Curing Light using the Build-Up cycle.<br />
24. Apply the appropriate shade(s) of Sculpture Plus Incisal to the inlays and to the pontic (Fig 16). Build inlay abutments and the<br />
pontic to full contour. If desired, use Sculpture Plus Transparent Incisal sparingly to reduce opacity.<br />
25. Check occlusal relationship with the opposing model.<br />
26. Cure in the Sculpture Curing Light using the Final cycle. (Fig 17)<br />
Fig. 13<br />
Fig. 14 Fig. 15<br />
Fig. 16<br />
Fig. 17<br />
7