Instruction - Pentron Clinical
Instruction - Pentron Clinical
Instruction - Pentron Clinical

Create successful ePaper yourself
Turn your PDF publications into a flip-book with our unique Google optimized e-Paper software.
F I B E R R E I N F O R C E D C O M P O S I T E S ( F R C )<br />
I N D E X I N G T E C H N I Q U E - A N A LT E R N A T E F R A M E W O R K T E C H N I Q U E<br />
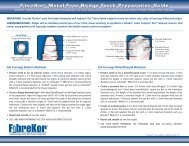
Please provide the FibreKor Preparation Guide to your dentist and review prior to operative procedures.<br />
Ensure that a posterior proximal box or anterior step is provided on all abutment preparations.<br />
Avoid fiber exposure in the oral environment. FibreKor frameworks should be completely covered in Sculpture Plus composite.<br />
The indexing technique allows the build-up of the base of the bridge framework within an impression or "matrix" rather than free hand<br />
on a model. This technique substitutes for only a portion of the standard framework build-up as it includes only the span of the box<br />
preparations and the pontic form. The framework still requires finishing with standard technique that includes, at minimum, an application<br />
of FibreKor material over the occlusal surface of the abutment preparations. This technique may not be suitable for all FibreKor<br />
framework build-ups.<br />
1. Prepare die/model as described on Page 4. Ensure that the model is removable from the articulator.<br />
2. Build a wax up of the bridge framework on the model, including only the span of the box preps and the pontic form (Fig 1).<br />
Ensure that the pontic wax up allows for a minimum of 1-2mm of Sculpture Plus composite overlay to full contour.<br />
3. Prepare Correct Plus ® impression material (Item Code Q34H).<br />
a. Dispense equal amounts of catalyst and base. (Fig 2)<br />
b. Mix or knead material until a uniform color is reached. (Fig 3)<br />
4. Create a matrix for the framework by placing the wax framework into the impression material gingival side first. (Fig 4) Allow to set<br />
for approximately 5 minutes.<br />
5. Remove the wax up from the matrix to expose the framework shape. (Fig 5)<br />
6. Apply FibreFlo resin to the surface impression in the matrix. (Fig 6)<br />
Fig. 1<br />
Fig. 2 Fig. 3<br />
Fig. 4<br />
Fig. 5 Fig. 6<br />
20