Instruction - Pentron Clinical
Instruction - Pentron Clinical
Instruction - Pentron Clinical

You also want an ePaper? Increase the reach of your titles
YUMPU automatically turns print PDFs into web optimized ePapers that Google loves.
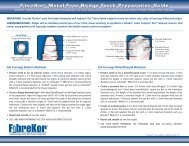
F I B E R R E I N F O R C E D C O M P O S I T E S ( F R C )<br />
M A R Y L A N D B R I D G E T E C H N I Q U E<br />
9. Place the assembled strip across the length of the preparation and lingual to the established bar as shown. (Fig 7)<br />
10. Apply additional strips of FibreKor material as space allows. Note: A larger FibreKor framework will provide stronger support.<br />
Maximize the size of the FibreKor framework without compromising the esthetics of the final restoration. The amount and size of<br />
FibreKor material used for Maryland bridges may vary greatly depending on the constraints of the individual case.<br />
11. Carefully spread the FibreKor fibers. Work to adapt and distribute fibers evenly across the lingual surface of the abutment wings. (Fig 8)<br />
12. Gently press and form the FibreKor strips across the inter-proximal span to ensure contact between all layers of FibreKor<br />
material.<br />
13. Use the opposing cast to shape proper curvature of the inter-proximal bar and ensure proper contour of the pontic.<br />
14. Apply a strip of 16K FibreKor material to the gingival surface of the bar to create the pontic form (Fig 9). A FibreKor strip may be placed<br />
on the incisal surface of the bar if space permits. Be sure to leave room to cover the framework with 1-2mm of Sculpture<br />
Plus Composite.<br />
15. Apply a thin layer of FibreFlo resin to the lingual surface of the pontic area. (Fig10)<br />
16. Apply strips of the selected shade of FibreKor 2K or 4K material across the lingual and/or labial surfaces in the incisal/gingival<br />
direction as space permits (Fig 11). Adapt the strip to the incisal surface to reinforce the pontic framework.<br />
17. Cure in the Sculpture Curing Light using the Build-up cycle. (Fig 12). Do not cure FibreKor frameworks in the Sculpture Curing Light<br />
Final cycle.<br />
Fig. 7<br />
Fig. 8 Fig. 9<br />
Fig. 10<br />
Fig. 11 Fig. 12<br />
16