Instruction - Pentron Clinical
Instruction - Pentron Clinical
Instruction - Pentron Clinical

Create successful ePaper yourself
Turn your PDF publications into a flip-book with our unique Google optimized e-Paper software.
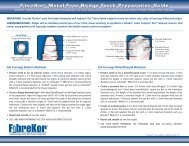
F I B E R R E I N F O R C E D C O M P O S I T E S ( F R C )<br />
Indications<br />
❘❙❚ Metal-free anterior bridges<br />
❘❙❚ Metal-free posterior bridges<br />
❘❙❚ Bonded retainers i.e. Maryland bridges<br />
❘❙❚ Intracoronal splinting<br />
* FibreKor ® materials are also used for metal-free implants. For FibreKor ® Posts, please contact <strong>Pentron</strong> ® <strong>Clinical</strong> at 1-800-551-0283.<br />
Contraindications<br />
❘❙❚ Metal-free bridges with an individual proximal span of over 15 mm<br />
❘❙❚ Patients with known sensitivity to ingredients in FibreKor ® and/or Sculpture ® Plus materials<br />
❘❙❚ Young patients with large pulp chambers<br />
❘❙❚ Patients who consume excessive amounts of alcohol<br />
❘❙❚ Bruxism<br />
Physical Properties<br />
Property Unit Test Method/ Results<br />
Standard 2K/4K 16K<br />
Bond Strength to MPa Shear Bond Test 20 ± 1 23 ± 1<br />
Sculpture Plus Composite<br />
Flexural Strength MPa ISO 10477 659 ± 29 957 ± 55<br />
(2mm x 2mm cross section)<br />
Flexural Strength MPa ISO 10477 938 ± 126 1413 ± 44<br />
(1mm x 2mm cross section)<br />
Flexural Modulus GPa ISO 10477 22 ± 2 27 ± 1<br />
(2mm x 2mm cross section)<br />
Flexural Modulus GPa ISO 10477 31 ± 3 31 ± 2<br />
(1mm x 2mm cross section)<br />
Water Sorption µg/mm 3 ANSI/ADA 27
F I B E R R E I N F O R C E D C O M P O S I T E S ( F R C )<br />
Table of Contents<br />
Indications/Contraindications................................................................................ (Inside cover)<br />
Physical Properties Chart ...................................................................................... (Inside cover)<br />
Introduction to FibreKor ® Fiber Reinforced Composites ............................................................2<br />
FibreKor ® Storage & Basic Handling Technique ......................................…………………….3<br />
Basic Die/Model Preparation ....................................……………………………………....4<br />
FibreKor ® Framework Build-Up Techniques<br />
3-unit Inlay Bridge .............................................................................................................5<br />
3-unit Full-coverage Bridge ................................................................................................9<br />
Maryland Bridge ..............................................................................................................15<br />
Alternate Pontic Wrap Technique......................................................................................19<br />
Alternate Indexing Technique............................................................................................20<br />
1717 West Collins Ave., • Orange, CA 92867<br />
800.243.3100 • 203.303.2010 • www.pentron.com<br />
CEpartner4U, Esdoornlaan 13, 3951DB Maarn. • The Netherlands. • tel: +31 (0)6.516.536.26
F I B E R R E I N F O R C E D C O M P O S I T E S ( F R C )<br />
FIBREKOR ® FRC IS A UNIQUE COMPOSITION of fine, unidirectional glass fibers combined with resin for the fabrication<br />
of fiber-reinforced, metal-free bridges. Each FibreKor bundle contains thousands of fibers with an average diameter of<br />
8µ to produce a bridge substructure that is strong, translucent and bonds seamlessly with the composite build-up. Metal-free<br />
bridge substructures offer a lightweight and esthetic alternative to metal bridge frameworks without the hyper-sensitivity<br />
issues that accompany metal alloys.<br />
THE RESIN FORMULATION FOR FIBREKOR ® FRC is similar to the resin formulation for Sculpture Plus Composites, the<br />
overlay material indicated for FibreKor frameworks. As Sculpture Plus composite is added to the FibreKor framework and<br />
cured, the resins in both products cure together. The end result is a finished bridge that fully integrates the fiber framework<br />
with the composite build up, virtually eliminating the possibility of the build up de-bonding from the framework.<br />
FIBREKOR ® FRC IS AVAILABLE IN 2K, 4K AND 16K BUNDLE SIZES to provide versatility, ease of handling and maximum<br />
strength for metal-free bridge restorations. The 2K bundle contains 2,000 individual glass fibers and the 4K bundle contains<br />
4,000 glass fibers; both bundle sizes are available in A, B, C, D and Clear shades. The 16K bundle contains 16,000 individual<br />
glass fibers with a filled resin for increased strength and overall quality. The 16K bundle is used to form a strong initial base<br />
for the bridge framework and is available in a single universal shade.<br />
2
F I B E R R E I N F O R C E D C O M P O S I T E S ( F R C )<br />
S T O R A G E A N D B A S I C H A N D L I N G T E C H N I Q U E<br />
General Handling and Storage<br />
❘❙❚ Store FibreKor material at or below 2°– 8°C. Refrigeration is required.<br />
❘❙❚ For best handling, bring material to room temperature. Remove from refrigerator 15–20 minutes prior to use.<br />
❘❙❚ Cover FibreKor material with the light blocking cover when not in use to prevent premature polymerization from ambient light.<br />
Basic Handling Technique<br />
❘❙❚ FibreKor 2K and 4K bundles are tightly packaged between two polyester strips to protect the material. Remove the clear strip<br />
from the top of the material. Using tweezers or another sharp instrument, peel up one end of the FibreKor material from the<br />
polyester backing ensuring that all fibers are lifted up from the backing and remain intact. Secure the end of the bundle with tweezers,<br />
lift the bundle from the backing and place on a glass slab. (Fig 1)<br />
FibreKor 16K bundles are loosely packaged between two polyester strips to protect their shape. Carefully remove 16K bundles from<br />
the packaging and transfer to a glass slab. Avoid over-handling or flattening the material unintentionally.<br />
❘❙❚ FibreKor materials are measured and cut to size for application to models. Determine proper length, then measure (Fig 2) and mark<br />
the FibreKor strip using the FibreKor ruler. (Fig 3)<br />
❘❙❚ Cut FibreKor bundles to length using FibreKor ceramic scissors (Fig 4). Use extra care when cutting the FibreKor 16K bundle to avoid<br />
crushing or flattening the bundle. Replace ceramic scissors as necessary.<br />
❘❙❚ 2K and 4K FibreKor bundles are often stacked together for application to a model. Neatly stack two strips of equal length together<br />
(Fig 5). Gently flatten the two strips together to form a single bar. (Fig 6)<br />
Fig. 1<br />
Fig. 2 Fig. 3<br />
Fig. 4<br />
Fig. 5 Fig. 6<br />
3
F I B E R R E I N F O R C E D C O M P O S I T E S ( F R C )<br />
B A S I C D I E / M O D E L P R E P A R A T I O N<br />
1. Using diestone material, pour the impression and prepare the model/die in the usual manner. Prepare this model so it is removable from<br />
the articulator. This will allow the model to fit into the Sculpture ® Curing Light.<br />
2. Optional Step – Re-pour impression using diestone material without pins for a "solid model technique."<br />
3. Inspect die and blockout any undercut. Note: All die blockout should be accomplished with high temperature inlay-wax, polymer<br />
blockout material or gypsum material prior to sealing the die.<br />
4. Mark and define the margins of the abutment dies with a permanent marking pencil. (Fig 1)<br />
5. Protect and seal the margins by applying a thin coat of Zip Sep * Sealer (Fig 2). Apply a second coat within 15 seconds. Allow to dry<br />
for 2 minutes.<br />
6. Paint a thin coat of Sculpture Plus Die Spacer all over the die, including margins (Fig 3). Allow to dry for 5 minutes. For a more<br />
passive fit, a second or third coat should be applied. Keep any additional coats 1mm away from the margin. Sculpture Plus Die Spacer<br />
also acts as a separator.<br />
7. Use Zip Sep* Sealer to seal contact areas, opposing models and saddle areas (Fig 4). Note: Use Zip Sep* Sealer and Zip Sep*<br />
Universal Separator when adding to short, incomplete margins on the die.<br />
* Zip Sep is a trademark of Dental Ventures of America, Inc.<br />
Fig. 1<br />
Fig. 2 Fig. 3<br />
Fig. 4<br />
4
F I B E R R E I N F O R C E D C O M P O S I T E S ( F R C )<br />
3 - U N I T I N L A Y B R I D G E T E C H N I Q U E<br />
Please provide the FibreKor Preparation Guide to your dentist and review prior to operative procedures.<br />
Ensure that a posterior proximal box or anterior step is provided on all abutment preparations.<br />
Avoid fiber exposure in the oral environment. FibreKor frameworks should be completely covered in Sculpture Plus composite.<br />
1. Prepare die/model as described on Page 4. Ensure that the model can be removed from the articulator.<br />
2. Apply a thin layer of Sculpture Plus Body material to the floor and margins of the inter-proximal area. (Fig 1) Note: For additional<br />
details on preparing and using Sculpture Plus Composites refer to the Sculpture Plus <strong>Instruction</strong> Manual.<br />
3. Measure the distance of the inter-proximal span including the mesial and distal box preps. (Fig 2)<br />
4. Measure and cut the FibreKor 16K material to the same length. (Fig 3)<br />
5. Position this strip of FibreKor 16K material in the inter-proximal boxes as shown and press gently into place. Do not cure. (Fig 4)<br />
6. Measure the distance between abutments including the mesio-distal width of the occlusal tables. (Fig 5)<br />
7. Measure, mark and cut 2 strips of the desired shade of FibreKor 4K material to the same length. A single strip of 16K material may<br />
be used here in place of the two 4K strips if space permits.<br />
8. Neatly stack the two strips of 4K material and flatten together into a single bar. (Fig 6)<br />
Fig. 1<br />
Fig. 2 Fig. 3<br />
Fig. 4<br />
Fig. 5 Fig. 6<br />
5
F I B E R R E I N F O R C E D C O M P O S I T E S ( F R C )<br />
3 - U N I T I N L A Y B R I D G E T E C H N I Q U E<br />
9. Place the assembled strip across the length of the preparation and on top of the 16K bundle. (Fig 7)<br />
10. Gently press and form the FibreKor strips across the bar that has been formed to ensure contact between all layers of FibreKor and<br />
Sculpture Plus material.<br />
11. Carefully shape and adapt the FibreKor material across the pontic span using tweezers as shown (Fig 8). Work the material as<br />
needed to remove any voids between layers. Do not cure.<br />
12. Ensure that the height of the bar in the proximal span is not higher than the occlusal table of either abutment.<br />
13. Bend the formed bar across the pontic span to attain the proper occlusal plane (Fig 9). Ensure that the framework is not touching<br />
any area of soft tissue. Do not cure.<br />
14. Create the pontic form by placing a short strip of FibreKor 16K on the lingual and on the buccal of the formed bar as shown<br />
(Fig 10). Adapt to the formed bar. Note: FibreKor material forms only the framework for the restoration. Be sure to leave room to<br />
cover the framework with 1–2mm of Sculpture Plus Composite.<br />
15. Apply a small amount of FibreFlo resin to the occlusal area of the pontic. (Fig 11)<br />
16. Position and apply short strips of FibreKor 2K or 4K material perpendicular to the buccal and lingual strips of the pontic to form<br />
the pontic occlusal table (Fig 12). Note: The formation of the pontic occlusal table is essential to support the build-up of the<br />
pontic with Sculpture Plus composite. If the pontic will be subject to high stress, consider using the alternate wrap technique<br />
described on Page 19 to create the occlusal table.<br />
Fig. 7<br />
Fig. 8 Fig. 9<br />
Fig. 10<br />
Fig. 11 Fig. 12<br />
6
F I B E R R E I N F O R C E D C O M P O S I T E S ( F R C )<br />
3 - U N I T I N L A Y B R I D G E T E C H N I Q U E<br />
17. Cure in the Sculpture Curing Light using the Build-Up cycle. (Fig 13) Do not cure FibreKor frameworks using the Sculpture Curing Light<br />
Final cycle.<br />
18. Remove the dies from the model and place a small ball of the selected shade of Sculpture Plus Body on the saddle area. Note:<br />
If the pontic requires a thick composite overlay, consider layering a lighter body shade to achieve the desired shade result. Use<br />
opaceous material as needed to enhance or modify the pontic shading.<br />
19. Fully seat the dies back onto the model and ensure that the framework is stable. (Fig 14)<br />
20. Adapt the body material to the buccal and lingual surfaces of the FibreKor framework to form the pontic. Leave embrasures open.<br />
21. Cure in the Sculpture Curing Light using the Build-Up cycle.<br />
22. Build-up the abutment inlays and the body of the pontic with the selected shade(s) of Sculpture Plus Body material using the<br />
technique described in the Sculpture Plus <strong>Instruction</strong> Manual (Fig 15). Note: For maximum polymerization of Sculpture Plus<br />
Composites, curing is recommended after each 1mm addition of material.<br />
23. Cure in the Sculpture Curing Light using the Build-Up cycle.<br />
24. Apply the appropriate shade(s) of Sculpture Plus Incisal to the inlays and to the pontic (Fig 16). Build inlay abutments and the<br />
pontic to full contour. If desired, use Sculpture Plus Transparent Incisal sparingly to reduce opacity.<br />
25. Check occlusal relationship with the opposing model.<br />
26. Cure in the Sculpture Curing Light using the Final cycle. (Fig 17)<br />
Fig. 13<br />
Fig. 14 Fig. 15<br />
Fig. 16<br />
Fig. 17<br />
7
F I B E R R E I N F O R C E D C O M P O S I T E S ( F R C )<br />
3 - U N I T I N L A Y B R I D G E T E C H N I Q U E<br />
26. Contour then polish using a combination of Upofix * wheels, cotton buff wheels and Sculpture Glo ® polishing compound. (Fig 18)<br />
Refer to the Sculpture Plus <strong>Instruction</strong> Manual for additional detail on polishing Sculpture Plus composites.<br />
27. Submerge the finished restoration in distilled water to clean. Do not submerge restoration in alcohol at any time.<br />
28. FibreKor/Sculpture Plus bridge is ready for delivery. (Fig 19)<br />
* Upofix is a trademark of Austenal, Inc.<br />
Fig. 18 Fig. 19<br />
8
F I B E R R E I N F O R C E D C O M P O S I T E S ( F R C )<br />
3 - U N I T F U L L C O V E R A G E B R I D G E T E C H N I Q U E<br />
Please provide the FibreKor Preparation Guide to your dentist and review prior to operative procedures.<br />
Ensure that a posterior proximal box or anterior step is provided on all abutment preparations.<br />
Avoid fiber exposure in the oral environment. FibreKor frameworks should be completely covered in Sculpture Plus composite.<br />
1. Prepare die/model as described on Page 4. Ensure that the model is removable from the articulator.<br />
2. Apply a thin layer of Sculpture Plus Body material to the prepared abutment dies (Fig 1). Note: For additional details on preparing and<br />
using Sculpture Plus Composites refer to the Sculpture Plus <strong>Instruction</strong> Manual. If the abutment requires a thick composite<br />
overlay, consider layering a lighter body shade to achieve the desired shade result. Use opaceous material as needed to enhance or<br />
modify final shading.<br />
3. Adapt by burnishing the material from the center to the periphery.<br />
4. Remove any excess material from the margin.<br />
5. Optional Step: Apply a small amount of Sculpture Plus Neck Paste and/or Opaceous Body to the cervical area, if desired, to achieve<br />
a more natural look. (Fig 2)<br />
6. Measure the longest distance of the inter-proximal span including the mesial and distal box preparations. (Fig 3)<br />
7. Measure and cut the FibreKor 16K material to the same length. (Fig 4)<br />
8. Position this strip of FibreKor 16K material in the inter-proximal boxes as shown and press gently into place (Fig 5). Do not cure.<br />
9. Measure the distance between abutments including the mesio-distal width of the occlusal tables. (Fig 6) Note: If an occlusal isthmus<br />
groove is included with a preparation, be sure to include it in this measurement.<br />
Fig. 1<br />
Fig. 2 Fig. 3<br />
Fig. 4<br />
Fig. 5 Fig. 6<br />
9
F I B E R R E I N F O R C E D C O M P O S I T E S ( F R C )<br />
3 - U N I T F U L L C O V E R A G E B R I D G E T E C H N I Q U E<br />
10. Measure, mark and cut 2 strips of the desired shade of FibreKor 4K material to the same length (Fig 7). A single strip of 16K<br />
material may be used here in place of the two 4K strips if space permits.<br />
11. Neatly stack the two strips of 4K material and flatten together.<br />
12. Place the assembled strip across the length of the preparation and on top of the 16K bundle as shown. (Fig 8)<br />
13. Gently press and form the FibreKor strips across the bar that has been formed to ensure contact between all layers of FibreKor and<br />
Sculpture Plus material.<br />
14. Carefully shape and adapt the FibreKor material across the pontic span using tweezers as shown (Fig 9). Work the material as<br />
needed to remove any voids between layers. Do not cure.<br />
15. Ensure that the height of the bar in the proximal span is not higher than the occlusal table of either abutment.<br />
16. Bend the formed bar across the pontic span to attain the proper occlusal plane using the opposing cast as necessary (Fig 10). Ensure<br />
that the framework is not touching any area of soft tissue. Do not cure.<br />
17. Add small amounts of Sculpture Plus Body or Incisal material to the corners of the occlusal table on both abutments. This will help<br />
to keep the FibreKor material in place as it is positioned around the abutments. (Fig 11)<br />
18. Cure in the Sculpture Curing Light using the Build-Up cycle. (Fig 12). Do not cure FibreKor frameworks using the Sculpture Curing Light<br />
Final cycle.<br />
Fig. 7<br />
Fig. 8 Fig. 9<br />
Fig. 10<br />
Fig. 11 Fig. 12<br />
10
F I B E R R E I N F O R C E D C O M P O S I T E S ( F R C )<br />
3 - U N I T F U L L C O V E R A G E B R I D G E T E C H N I Q U E<br />
19. Measure the inter-proximal span including only the mesial distal width of only one abutment as shown. (Fig 13)<br />
20. Double this measurement and add 5mm to determine the proper length of 4K FibreKor material for a circumferential wrap.<br />
Circumferential Formula = Measurement (pontic span + 1 abutment) x 2 + 5mm. Example: For a measurement of 22mm: FibreKor<br />
length = (22 x 2) + 5 = 49mm. FibreKor 2K material may be used if space is limited.<br />
21. Measure, mark and cut the selected shade of FibreKor 4K material to this calculated length. (Fig 14)<br />
22. Apply a thin layer of FibreFlo resin to the buccal side of the formed bar in the pontic area as shown. (Fig 15)<br />
24. Carefully position the prepared strip of FibreKor 4K material on the buccal side of the bar as shown. (Fig 16)<br />
25. Adapt the 4K strip along the buccal surface of the inter-proximal span. (Fig 17)<br />
26. Light cure the area of the inter-proximal span only with the Spectra-Lite ® cure light, or equivalent, for 10 seconds (Fig 18).<br />
Avoid curing the unpositioned portion of the FibreKor material.<br />
Fig. 13<br />
Fig. 14 Fig. 15<br />
Fig. 16<br />
Fig. 17 Fig. 18<br />
11
F I B E R R E I N F O R C E D C O M P O S I T E S ( F R C )<br />
3 - U N I T F U L L C O V E R A G E B R I D G E T E C H N I Q U E<br />
27. Apply a small amount of FibreFlo resin onto the axial walls and in the lingual and buccal corners of the abutment as shown. (Fig 19)<br />
29. Using tweezers, gently form the remaining length of FibreKor 4K material around the axial walls of the abutment. (Fig 20)<br />
30. Carefully adapt the material to the corner of the abutment and to the lingual surface of the bar. (Fig 21)<br />
31. Ensure that the loop of 4K material is thoroughly adapted to the framework with no voids between layers.<br />
32. Light cure with the Spectra-Lite ® cure light, or equivalent, for 30 seconds. (Fig 22)<br />
33. Repeat steps 19 to 32 for the remaining abutment.<br />
34. Create the pontic form by placing a short strip of FibreKor 16K material on the lingual and on the buccal of the formed bar as<br />
shown (Fig 23). Adapt to the formed bar. Note: FibreKor material forms only the framework for the restoration. Be sure to leave<br />
room to cover the framework with 1-2 mm of Sculpture Plus Composite.<br />
35. Apply a small amount of FibreFlo resin to the occlusal area of the pontic. (Fig 24)<br />
Fig. 19<br />
Fig. 20 Fig. 21<br />
Fig. 22<br />
Fig. 23 Fig. 24<br />
12
F I B E R R E I N F O R C E D C O M P O S I T E S ( F R C )<br />
3 - U N I T F U L L C O V E R A G E B R I D G E T E C H N I Q U E<br />
36. Position and apply short strips of FibreKor 2K or 4K material perpendicular to the buccal and lingual strips of the pontic form to<br />
form the pontic occlusal table (Fig 25). Note: The formation of the pontic occlusal table is essential to support the build-up of the<br />
pontic with Sculpture Plus composite. If the pontic will be subject to high stress, consider using the alternate wrap technique<br />
described on Page 19 to create the occlusal table.<br />
37. Fill in any voids between FibreKor layers with FibreFlo resin.<br />
38. Cure in the Sculpture Curing Light using the Build-Up cycle. (Fig 26). Do not cure FibreKor frameworks in the Sculpture Curing Light<br />
Final cycle.<br />
39. Remove the dies from the model and place a small ball of the selected shade of Sculpture Plus Body on the saddle area. Note:<br />
If the pontic requires a thick composite overlay, consider layering a lighter body shade to achieve the desired shade result. Use<br />
opaceous material as needed to enhance or modify final shading.<br />
40. Fully seat the dies back onto the model and ensure that the framework is stable. (Fig 27)<br />
41. Adapt the Sculpture Plus Body material to the buccal and lingual surfaces of the FibreKor framework to form the pontic. Leave<br />
embrasures open.<br />
42. Cure in the Sculpture Curing Light using the Build-Up cycle.<br />
43. Build-up the bodies of the abutment crowns and the pontic with the selected shade(s) of Sculpture Plus Body using the technique<br />
described in the Sculpture Plus <strong>Instruction</strong> Manual. (Fig 28) Note: For maximum polymerization of Sculpture Plus Composites,<br />
curing is recommended after each 1mm addition of material.<br />
44. Cure in the Sculpture Curing Light using the Build-Up cycle.<br />
45. Apply the appropriate shade(s) of Sculpture Plus Incisal to the abutment crowns and pontic (Fig 29). Build to full contour.<br />
If desired, use Sculpture Plus Transparent Incisal sparingly to reduce opacity.<br />
Fig. 25<br />
Fig. 26 Fig. 27<br />
Fig. 28<br />
Fig. 29<br />
13
F I B E R R E I N F O R C E D C O M P O S I T E S ( F R C )<br />
3 - U N I T F U L L C O V E R A G E B R I D G E T E C H N I Q U E<br />
46. Check occlusal relationship with the opposing model.<br />
47. Cure in the Sculpture Curing Light using the Final cycle.<br />
48. Contour then polish using a combination of Upofix * wheels, cotton buff wheels and Sculpture Glo ® (Fig 30). Refer to the Sculpture<br />
Plus <strong>Instruction</strong> Manual for additional detail on polishing and optional glazing of Sculpture Plus composites.<br />
49. Submerge the finished restoration in distilled water to clean. Do not submerge restoration in alcohol at any time.<br />
50. FibreKor/Sculpture Plus bridge is ready for delivery. (Fig 31)<br />
* Upofix is a trademark of Austenal, Inc.<br />
Fig. 30 Fig. 31<br />
14
F I B E R R E I N F O R C E D C O M P O S I T E S ( F R C )<br />
M A R Y L A N D B R I D G E T E C H N I Q U E<br />
Please provide the FibreKor Preparation Guide to your dentist and review prior to operative procedures.<br />
Ensure that a posterior proximal box or anterior step is provided on all abutment preparations.<br />
Avoid fiber exposure in the oral environment. FibreKor frameworks should be completely covered in Sculpture Plus composite.<br />
1. Prepare die/model as described on Page 4. Ensure that the model is removable from the articulator.<br />
2. Apply a thin layer of Sculpture Plus Body material to the lingual wings of the prepared abutment dies (Fig 1). Do not cure.<br />
Note: For additional details on Sculpture Plus composite build-up technique refer to the Sculpture Plus <strong>Instruction</strong> Manual.<br />
3. Measure the longest distance of the inter-proximal span including the mesial and distal box preps. (Fig 2)<br />
4. Measure and cut a strip of 16K FibreKor material to the same length. (Fig 3)<br />
5. Position the 16K strip in the inter-proximal boxes as shown and press gently into place (Fig 4). Use additional strips of FibreKor<br />
material as space permits. FibreKor strips should fill the box preparation area completely. Do not cure.<br />
6. Measure the longest total distance of the preparation from distal to distal, as shown. (Fig 5)<br />
7. Measure, mark and cut 2 or more strips of the desired shade of 2K or 4K FibreKor material to the same length. (Fig 6)<br />
8. Neatly stack the strips of 2K or 4K material and flatten together.<br />
Fig. 1<br />
Fig. 2 Fig. 3<br />
Fig. 4<br />
Fig. 5 Fig. 6<br />
15
F I B E R R E I N F O R C E D C O M P O S I T E S ( F R C )<br />
M A R Y L A N D B R I D G E T E C H N I Q U E<br />
9. Place the assembled strip across the length of the preparation and lingual to the established bar as shown. (Fig 7)<br />
10. Apply additional strips of FibreKor material as space allows. Note: A larger FibreKor framework will provide stronger support.<br />
Maximize the size of the FibreKor framework without compromising the esthetics of the final restoration. The amount and size of<br />
FibreKor material used for Maryland bridges may vary greatly depending on the constraints of the individual case.<br />
11. Carefully spread the FibreKor fibers. Work to adapt and distribute fibers evenly across the lingual surface of the abutment wings. (Fig 8)<br />
12. Gently press and form the FibreKor strips across the inter-proximal span to ensure contact between all layers of FibreKor<br />
material.<br />
13. Use the opposing cast to shape proper curvature of the inter-proximal bar and ensure proper contour of the pontic.<br />
14. Apply a strip of 16K FibreKor material to the gingival surface of the bar to create the pontic form (Fig 9). A FibreKor strip may be placed<br />
on the incisal surface of the bar if space permits. Be sure to leave room to cover the framework with 1-2mm of Sculpture<br />
Plus Composite.<br />
15. Apply a thin layer of FibreFlo resin to the lingual surface of the pontic area. (Fig10)<br />
16. Apply strips of the selected shade of FibreKor 2K or 4K material across the lingual and/or labial surfaces in the incisal/gingival<br />
direction as space permits (Fig 11). Adapt the strip to the incisal surface to reinforce the pontic framework.<br />
17. Cure in the Sculpture Curing Light using the Build-up cycle. (Fig 12). Do not cure FibreKor frameworks in the Sculpture Curing Light<br />
Final cycle.<br />
Fig. 7<br />
Fig. 8 Fig. 9<br />
Fig. 10<br />
Fig. 11 Fig. 12<br />
16
F I B E R R E I N F O R C E D C O M P O S I T E S ( F R C )<br />
M A R Y L A N D B R I D G E T E C H N I Q U E<br />
19. Apply Sculpture Plus Body to the saddle area and adapt to the buccal and lingual surface of the FibreKor framework to form the<br />
pontic. (Fig 13) Note: If the pontic requires a thick composite overlay, consider layering a lighter body shade to achieve the desired<br />
shade result. Use opaceous material as needed to enhance or modify the pontic shading.<br />
20. Cure in the Sculpture Curing Light using the Build-Up cycle. (Fig 14)<br />
21. Build-up the body of the pontic and the lingual wings using the selected shades of Sculpture Plus Body (Fig 15). Add and adapt<br />
Sculpture Plus Neck Paste or Opaceous Body to the cervical area of the pontic, if desired. Note: For maximum polymerization of<br />
Sculpture Plus Composites, curing is recommended after each 1mm addition of material.<br />
22. Cure in the Sculpture Curing Light using the Build-Up cycle.<br />
23. Apply the selected shade of Sculpture Plus Incisal and build the pontic to full contour. (Fig 16) If desired, use Sculpture Plus<br />
Transparent Incisal sparingly to reduce opacity.<br />
24. Cure in the Sculpture Curing Light using the Final cycle. (Fig 17)<br />
Fig. 13<br />
Fig. 14 Fig. 15<br />
Fig. 16<br />
Fig. 17<br />
17
F I B E R R E I N F O R C E D C O M P O S I T E S ( F R C )<br />
M A R Y L A N D B R I D G E T E C H N I Q U E<br />
25. Contour then polish using a combination of Upofix * wheels, cotton buff wheels and Sculpture Glo ® polishing compound (Fig 18).<br />
Refer to the Sculpture Plus <strong>Instruction</strong> Manual for additional details on polishing Sculpture Plus composites.<br />
26. Submerge the finished restoration in distilled water to clean. Do not submerge restoration in alcohol at any time.<br />
27. FibreKor/Sculpture Plus bridge is ready for delivery. (Fig 19)<br />
* Upofix is a trademark of Austenal, Inc.<br />
Fig. 18 Fig. 19<br />
18
F I B E R R E I N F O R C E D C O M P O S I T E S ( F R C )<br />
A L T E R N A T E P O N T I C W R A P T E C H N I Q U E<br />
If a pontic will be subject to high stresses, this wrap technique can provide added strength to the pontic framework.<br />
Follow standard technique to build up the FibreKor framework span, then use the technique described below to<br />
create the pontic framework.<br />
1. Place a short strip of FibreKor 16K to the buccal and to the lingual surfaces of the framework to start the pontic form as in<br />
standard technique.<br />
2. Adapt the end of a single strip of FibreKor 2K or 4K material to the occlusal surface of the pontic form. (Fig 1)<br />
3. Carefully wrap the FibreKor strip tightly around the pontic form (Fig 2). Continue to wrap the material until a single layer covers<br />
the occlusal surface with minimum overlap.<br />
4. Trim any remaining length of the strip and carefully adapt the wrapped material to the pontic form.<br />
5. Fill in any voids between FibreKor layers with FibreFlo resin.<br />
6. Light cure in the Sculpture Curing Light using the Build-up cycle. (Fig 3)<br />
7. Framework is complete. Continue with Sculpture Plus overlay as in standard technique.<br />
Fig. 1 Fig. 2 Fig. 3<br />
19
F I B E R R E I N F O R C E D C O M P O S I T E S ( F R C )<br />
I N D E X I N G T E C H N I Q U E - A N A LT E R N A T E F R A M E W O R K T E C H N I Q U E<br />
Please provide the FibreKor Preparation Guide to your dentist and review prior to operative procedures.<br />
Ensure that a posterior proximal box or anterior step is provided on all abutment preparations.<br />
Avoid fiber exposure in the oral environment. FibreKor frameworks should be completely covered in Sculpture Plus composite.<br />
The indexing technique allows the build-up of the base of the bridge framework within an impression or "matrix" rather than free hand<br />
on a model. This technique substitutes for only a portion of the standard framework build-up as it includes only the span of the box<br />
preparations and the pontic form. The framework still requires finishing with standard technique that includes, at minimum, an application<br />
of FibreKor material over the occlusal surface of the abutment preparations. This technique may not be suitable for all FibreKor<br />
framework build-ups.<br />
1. Prepare die/model as described on Page 4. Ensure that the model is removable from the articulator.<br />
2. Build a wax up of the bridge framework on the model, including only the span of the box preps and the pontic form (Fig 1).<br />
Ensure that the pontic wax up allows for a minimum of 1-2mm of Sculpture Plus composite overlay to full contour.<br />
3. Prepare Correct Plus ® impression material (Item Code Q34H).<br />
a. Dispense equal amounts of catalyst and base. (Fig 2)<br />
b. Mix or knead material until a uniform color is reached. (Fig 3)<br />
4. Create a matrix for the framework by placing the wax framework into the impression material gingival side first. (Fig 4) Allow to set<br />
for approximately 5 minutes.<br />
5. Remove the wax up from the matrix to expose the framework shape. (Fig 5)<br />
6. Apply FibreFlo resin to the surface impression in the matrix. (Fig 6)<br />
Fig. 1<br />
Fig. 2 Fig. 3<br />
Fig. 4<br />
Fig. 5 Fig. 6<br />
20
F I B E R R E I N F O R C E D C O M P O S I T E S ( F R C )<br />
I N D E X I N G T E C H N I Q U E - A N A LT E R N A T E F R A M E W O R K T E C H N I Q U E<br />
7. Measure the pontic length in the matrix as shown. (Fig 7)<br />
8. Measure and cut the FibreKor 16K material to the same length. (Fig 8)<br />
9. Lay the 16K strip in the floor of the pontic form in the matrix as shown. (Fig 9)<br />
10. Measure the framework span in the matrix as shown. (Fig 10)<br />
11. Measure and cut the FibreKor 16K material to the same length.<br />
12. Lay the 16K FibreKor strip across the span of the matrix as shown and press gently into place (Fig 11). Do not cure.<br />
13. Add additional strips of FibreKor material as needed to build the bar up to the top of the matrix.<br />
14. Work the material as needed with tweezers to adapt the layers together and to remove any voids.<br />
15. Measure the length of the pontic form in the matrix. (Fig 12)<br />
Fig. 7<br />
Fig. 8 Fig. 9<br />
Fig. 10<br />
Fig. 11 Fig. 12<br />
21
F I B E R R E I N F O R C E D C O M P O S I T E S ( F R C )<br />
I N D E X I N G T E C H N I Q U E - A N A LT E R N A T E F R A M E W O R K T E C H N I Q U E<br />
16. Cut short strips of FibreKor 16K material to the measured length.<br />
17. Apply FibreFlo resin to the buccal and lingual surfaces of the bar as needed.<br />
18. Lay a short 16K FibreKor strip on the buccal and on the lingual side of the bar in the matrix to start the pontic form. (Fig 14)<br />
19. Measure the width of the pontic form in the matrix (Fig 15). This measurement may be taken on an angle if fibers will be laid at an<br />
angle to the bar.<br />
20. Measure and cut the FibreKor 16K material to the same length.<br />
21. Lay the 16K FibreKor strip across the bar to form the occlusal table (Fig 16). Add additional strips as space permits to fill the form of<br />
the framework in the matrix.<br />
22. Gently press and adapt the FibreKor material within the matrix to fill the impression completely. Use FibreFlo resin to fill in voids as<br />
needed.<br />
23. Cure in the Sculpture Curing Light using the Build-Up cycle. (Fig 17). Do not cure FibreKor frameworks in the Sculpture Curing Light<br />
Final cycle.<br />
24. Remove the FibreKor framework from the matrix. (Fig 18)<br />
25. Apply a thin layer of Sculpture Plus Body material to the abutment preparation.<br />
Fig. 13<br />
Fig. 14 Fig. 15<br />
Fig. 16<br />
Fig. 17 Fig. 18<br />
22
F I B E R R E I N F O R C E D C O M P O S I T E S ( F R C )<br />
I N D E X I N G T E C H N I Q U E - A N A LT E R N A T E F R A M E W O R K T E C H N I Q U E<br />
26. Lay the framework between the box preparations on the model and press into place. (Fig 19)<br />
27. Measure the distance between abutments including the mesio-distal width of the occlusal tables.<br />
28. Measure, cut and stack two strips of 4K FibreKor material to the same length. A single strip of 16K FibreKor material may be used if<br />
space permits.<br />
29. Place the strip of 4K material across the length of the preparation and on top of the cured framework. (Fig 20)<br />
30. Cure in the Sculpture Curing Light using the Build-Up cycle. [Fig 21]<br />
31. Continue with any additional framework build up using standard technique.<br />
32. Complete the Sculpture Plus overlay for the abutments and the pontic using standard technique.<br />
Fig. 19 Fig. 20 Fig. 21<br />
23
F I B E R R E I N F O R C E D C O M P O S I T E S ( F R C )<br />
NOTES:<br />
24
REF Z23N / 05J178_Rev02<br />
1717 West Collins Ave., Orange, CA 92867 • Tel: 800.243.3100 / 203.303.2010 • www.pentron.com<br />
CEpartner4U, Esdoornlaan 13, 3951DB Maarn. NL. tel: +31 (0)6.516.536.26