

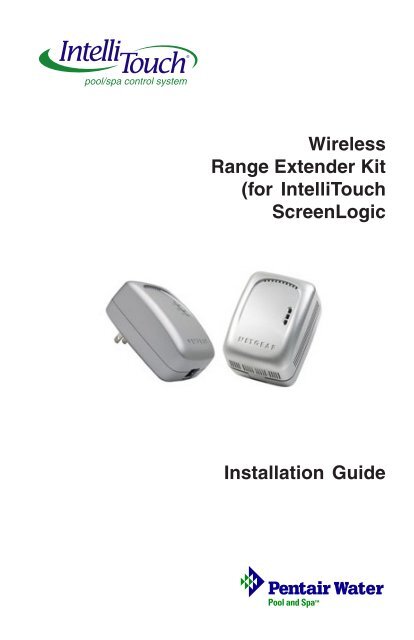
IntelliTouch Wireless Range Extender Kit Installation Guide - Pentair
IntelliTouch Wireless Range Extender Kit Installation Guide - Pentair
IntelliTouch Wireless Range Extender Kit Installation Guide - Pentair

Create successful ePaper yourself
Turn your PDF publications into a flip-book with our unique Google optimized e-Paper software.
pool/spa control system<br />
<strong>Wireless</strong><br />
<strong>Range</strong> <strong>Extender</strong> <strong>Kit</strong><br />
(for <strong>IntelliTouch</strong><br />
ScreenLogic<br />
<strong>Installation</strong> <strong>Guide</strong><br />
<strong>IntelliTouch</strong> <strong>Range</strong> <strong>Extender</strong> <strong>Installation</strong> <strong>Guide</strong>
Technical Support<br />
Contact Technical Support at:<br />
Sanford, North Carolina (8 A.M. to 5 P.M.)<br />
Phone: (800) 831-7133<br />
Fax: (919) 566-8920<br />
Moorpark, California (8 A.M. to 5 P.M.)<br />
Phone: (800) 831-7133 (Ext. 6312)<br />
Fax: (805) 553-5515<br />
Web site: visit www.pentairpool.com<br />
Related <strong>IntelliTouch</strong> Manuals<br />
<strong>IntelliTouch</strong> ScreenLogic User’s <strong>Guide</strong> (P/N 520493)<br />
© 2005 <strong>Pentair</strong> Water Pool and Spa, Inc. All rights reserved.<br />
1620 Hawkins Ave., Sanford, NC 27330 • (919) 566-8000<br />
10951 West Los Angeles Ave., Moorpark, CA 93021 • (805) 523-2400<br />
This document is subject to change without notice.<br />
Trademarks and Disclaimers. The trademark <strong>IntelliTouch</strong>, is a registered trademark of<br />
<strong>Pentair</strong> Water Pool and Spa Inc. Other trademarks and trade names may be used in this<br />
document to refer to either the entities claiming the marks and names or their products. <strong>Pentair</strong><br />
Water Pool and Spa Inc. disclaims proprietary interest in marks and names of others.<br />
P/N 520582 Rev A August 2005<br />
<strong>IntelliTouch</strong> <strong>Range</strong> <strong>Extender</strong> <strong>Installation</strong> <strong>Guide</strong>
Contents<br />
i<br />
Introduction ........................................................................................... 1<br />
Try to avoid using AC power strip and surge protectors ......................... 1<br />
Adding the <strong>Range</strong> <strong>Extender</strong> <strong>Kit</strong> for Large Home and Properties ............ 1<br />
Where do I locate the <strong>Range</strong> <strong>Extender</strong> .................................................. 3<br />
Step 1: Installing the <strong>Range</strong> <strong>Extender</strong> <strong>Kit</strong> .............................................. 4<br />
Troubleshooting ..................................................................................... 4<br />
Step 2: Connecting to the <strong>Range</strong> <strong>Extender</strong>s .......................................... 6<br />
To manually establish a connection from your Screen Tablet ................. 6<br />
To manually establish a connection from your PDA ............................... 8<br />
<strong>IntelliTouch</strong> <strong>Range</strong> <strong>Extender</strong> <strong>Installation</strong> <strong>Guide</strong>
ii<br />
Blank Page<br />
<strong>IntelliTouch</strong> <strong>Range</strong> <strong>Extender</strong> <strong>Installation</strong> <strong>Guide</strong>
Introduction<br />
The <strong>Range</strong> <strong>Extender</strong> kit is based on the HomePlug standard, an<br />
industry consortium ensuring the interoperability of power line devices<br />
from multiple manufacturers. The <strong>Range</strong> <strong>Extender</strong> kit uses a home’s<br />
existing electrical wiring to provide a communications network for your<br />
ScreenLogic wireless Tablet and/or PDA. If your wiring is modern and<br />
up to code, there is no need to rewire outlets or to install special filters.<br />
The <strong>Range</strong> <strong>Extender</strong> kit works with 110 VAC two-prong or three-prong<br />
electrical outlets.<br />
The <strong>Range</strong> <strong>Extender</strong> kit reliably provides coverage for considerable<br />
distances in a home as large as 5,000 square feet. Depending on the<br />
quality of your home’s AC wiring, wireless coverage can be reduced<br />
due to noise in your home’s electrical system. Since noise is not directly<br />
distance-dependant, you may get considerably less (or, in many cases,<br />
considerably more) coverage. In many cases, the technology works<br />
across multiple phases and circuit breakers.<br />
Try to avoid using AC power strip and surge protectors<br />
Where possible, plug the devices directly into the AC electrical outlet.<br />
While inexpensive power strips and surge protectors may have little<br />
effect, more expensive and effective models may block the <strong>Range</strong><br />
<strong>Extender</strong>’s signal.<br />
Adding the <strong>Range</strong> <strong>Extender</strong> <strong>Kit</strong> for Large Home and Properties<br />
For larger homes and properties it may be necessary to install the<br />
wireless <strong>Range</strong> <strong>Extender</strong> kit (P/N 520561). The wireless <strong>Range</strong><br />
<strong>Extender</strong> kit transfers the wireless signal for better coverage where<br />
you primarily use your Tablet and/or PDA. The wireless <strong>Range</strong><br />
<strong>Extender</strong> kit consists of two wall-plugs that plug into your home’s<br />
AC power wall outlets. The first wireless <strong>Range</strong> <strong>Extender</strong> wall-plug<br />
connects to the ScreenLogic wireless router via an Ethernet cable<br />
(RJ45/CAT5). The second wall-plug does not require connection wires.<br />
This wireless <strong>Range</strong> <strong>Extender</strong> wall-plug picks up and broadcasts the<br />
ScreenLogic wireless router signal for better coverage in the area of<br />
the home where the wireless Tablet and/or PDA are primarily used<br />
(see diagram on page 2 for recommended location for <strong>Range</strong> <strong>Extender</strong>s<br />
location).<br />
Advantages when using <strong>Range</strong> <strong>Extender</strong>s:<br />
• Better wireless coverage in the area where the Tablet and/or<br />
PDA will be primarily used. Use your home’s electrical wiring<br />
instead of running an Ethernet cable.<br />
1<br />
<strong>IntelliTouch</strong> <strong>Range</strong> <strong>Extender</strong> <strong>Installation</strong> <strong>Guide</strong>
2<br />
Second wireless range<br />
extender wall-plug<br />
Pool<br />
Spa<br />
FAMILY ROOM<br />
KITCHEN<br />
LIVING ROOM<br />
STUDY<br />
Existing wired<br />
or wireless<br />
router<br />
Recommended location for <strong>Range</strong> <strong>Extender</strong>s<br />
ScreenLogic wireless<br />
router, and first<br />
wireless range<br />
extender wall-plug<br />
(via Ethernet cable)<br />
<strong>IntelliTouch</strong> Protocol Adapter<br />
connected to Load Center<br />
(4-wire Serial cable)<br />
Existing DSL or<br />
Cable modem<br />
<strong>IntelliTouch</strong> <strong>Range</strong> <strong>Extender</strong> <strong>Installation</strong> <strong>Guide</strong>
Where do I locate the <strong>Range</strong> <strong>Extender</strong><br />
If it is not practical to place the ScreenLogic wireless router close to<br />
the primary operating location of your wireless Tablet or PDA, you can<br />
purchase a <strong>Range</strong> <strong>Extender</strong> kit. This kit includes two wall plugs; the<br />
Ethernet Bridge and the wireless Access Point that plug into you<br />
home’s AC wall outlets. With the <strong>Range</strong> <strong>Extender</strong> kit, the wireless<br />
network can originate at any point of your choosing within your home.<br />
There are no visible wires and no desk or floor space consumed<br />
allowing it to blend into your home decor.<br />
For example, if your wireless Tablet and/or PDA do not reliably<br />
connect to the ScreenLogic wireless router because your ScreenLogic<br />
wireless router is located in your study (upstairs in the front of your<br />
home) and you primarily use your Tablet and/or PDA in the family<br />
room (downstairs in the back of your home), the <strong>Range</strong> <strong>Extender</strong> kit<br />
will resolve your wireless connection issues. Simply plug the <strong>Range</strong><br />
<strong>Extender</strong> with the Ethernet RJ45 connector into an electrical wall outlet<br />
near your ScreenLogic wireless router in your study and run an<br />
Ethernet cable from this <strong>Range</strong> <strong>Extender</strong> to Port 1-4 on your<br />
ScreenLogic wireless router. Then plug the other range extender into<br />
an electrical outlet in or near your family room.<br />
3<br />
<strong>Range</strong> <strong>Extender</strong><br />
Cable DSL/<br />
ScreenLogic<br />
wireless<br />
router<br />
Through electrical<br />
outlets<br />
PDA<br />
<strong>IntelliTouch</strong> <strong>Range</strong> <strong>Extender</strong> <strong>Installation</strong> <strong>Guide</strong>
4<br />
Step 1: Installing the <strong>Range</strong> <strong>Extender</strong> <strong>Kit</strong><br />
For larger homes and properties, you may need to use the wireless<br />
<strong>Range</strong> <strong>Extender</strong> kit (P/N 520561) to transfer the wireless signal to the<br />
room near where the wireless Tablet and/or PDA will be primarily<br />
used. The setup diagram on page 8 shows the wireless <strong>Range</strong> <strong>Extender</strong><br />
connection.<br />
To install the wireless <strong>Range</strong> <strong>Extender</strong> wall-plugs:<br />
1. Connect the Ethernet cable (RJ45/CAT5) from the <strong>Range</strong><br />
<strong>Extender</strong> that has the Ethernet jack, to LAN port 1-4 on the<br />
ScreenLogic wireless router.<br />
2. Plug this <strong>Range</strong> <strong>Extender</strong> wall-plug into an AC power wall outlet<br />
near the ScreenLogic wireless router.<br />
3. Plug the other <strong>Range</strong> <strong>Extender</strong> wall-plug into an AC power wall<br />
outlet located in a room where the wireless Tablet and/or the<br />
PDA will primarily be used. When all three LEDs on the <strong>Range</strong><br />
<strong>Extender</strong> are lit, the installation is complete.<br />
Troubleshooting<br />
If the middle green LED is not lit, this indicates that the <strong>Range</strong><br />
<strong>Extender</strong>s are not communicating with each other. Check the above<br />
installation steps again and verify the following:<br />
• Unplug both <strong>Range</strong> <strong>Extender</strong>s then plug them back in.<br />
• Ensure that both <strong>Range</strong> <strong>Extender</strong>s are directly plugged into a<br />
working AC power wall outlet. Power strips can filter the signal.<br />
While inexpensive power strips and surge protectors may have<br />
little effect, more expensive and effective models may block the<br />
<strong>Range</strong> <strong>Extender</strong>’s signal.<br />
• If neither of the above steps resolve the problem, try moving the<br />
<strong>Range</strong> <strong>Extender</strong> closer to the <strong>Range</strong> <strong>Extender</strong> that is plugged into<br />
the ScreenLogic wireless router.<br />
<strong>IntelliTouch</strong> <strong>Range</strong> <strong>Extender</strong> <strong>Installation</strong> <strong>Guide</strong>
5<br />
RJ11 for DSL<br />
Coax for Cable<br />
INTERNET<br />
Existing wired or wireless<br />
router (mandatory)<br />
ScreenLogic<br />
<strong>Wireless</strong> router<br />
<strong>Range</strong> <strong>Extender</strong> (Ethernet Bridge)<br />
wall-plug (Plugs into AC power wall<br />
outlet - Connect to LAN Port 1-4 via<br />
Ethernet cable)<br />
In-wall Touch<br />
Screen<br />
WAN<br />
1 234<br />
DSL or<br />
Cable Modem<br />
RJ11 RJ45<br />
(RJ45)<br />
Ethernet cable<br />
(RJ45 - CAT 5)<br />
- LAN -<br />
1 234 WAN<br />
Four-wire<br />
(22 gauge)<br />
(Connects to the<br />
Personality board)<br />
Ethernet cable (RJ45 - CAT 5)<br />
Protocol<br />
Adapter<br />
Existing PC<br />
Cable Distant Limits:<br />
• Ethernet cable distance limit = 300 feet<br />
• Four-wire cable distance limit = 1500 feet<br />
Indoor Control<br />
Panel (*)<br />
Note: (*) Optional wiring for existing<br />
Indoor Control Panel. Tap into the Indoor<br />
Control Panel connector or pig tail off<br />
the four-wire cable connected to the<br />
Personality board.<br />
<strong>Wireless</strong> Digital Tablet<br />
<strong>Wireless</strong> PDA<br />
<strong>Wireless</strong> <strong>Extender</strong> wall-plug<br />
(Plugs in to AC power wall<br />
outlet Located in a room where<br />
the Tablet and/or PDA will be<br />
primarily used)<br />
Load Center<br />
(Located outside at<br />
equipment pad)<br />
<strong>IntelliTouch</strong> <strong>Range</strong> <strong>Extender</strong> <strong>Installation</strong> <strong>Guide</strong>
6<br />
Step 2: Connecting to the <strong>Range</strong> <strong>Extender</strong>s<br />
After installing the <strong>Range</strong> <strong>Extender</strong>s you need to setup a wireless<br />
connection from your ScreenLogic Tablet and/or PDA to the <strong>Range</strong><br />
<strong>Extender</strong>s.<br />
Your Tablet and/or PDA should already be configured to automatically connect<br />
to the ScreenLogic wireless router.<br />
Note: A red X displays on top of the Internet connection icon in the system<br />
task tray indicates no wireless connection to the wireless router.<br />
To manually establish a connection from your Screen Tablet<br />
1. Double-tap the wireless icon with the stylus. A window pop<br />
up.<br />
2. Tap the “<strong>Wireless</strong> Information” tab. On this screen you should<br />
see the ScreenLogic wireless router SSID “PENTAIRx” (where x=1<br />
through 9) and “PENTAIR EXTENDER” the SSID for the <strong>Range</strong><br />
<strong>Extender</strong>.<br />
3. Select PENTAIR EXTENDER and tap the Connect button. The<br />
“<strong>Wireless</strong> Network Properties” dialog is displayed.<br />
<strong>IntelliTouch</strong> <strong>Range</strong> <strong>Extender</strong> <strong>Installation</strong> <strong>Guide</strong>
7<br />
4. Tap the “The key is provided automatically” to clear the<br />
check box.<br />
5. From the screen keyboard, enter 5555599999 (10 digits<br />
total) in the “Network Key” field. For security, the PDA<br />
uses WEP encrypted and Open authentication.<br />
6. Tap OK to save the settings and exit the dialog.<br />
7. The Tablet should connect automatically to the <strong>Range</strong><br />
<strong>Extender</strong>s.<br />
8. Save the correct settings in the registry. Tap Start ><br />
Control Panel > Save Registry. Tap OK twice to save<br />
and exit.<br />
<strong>IntelliTouch</strong> <strong>Range</strong> <strong>Extender</strong> <strong>Installation</strong> <strong>Guide</strong>
8<br />
To manually establish a connection from your PDA<br />
1. Tap the wireless icon (vertical bars) in the lower right<br />
corner of the screen.<br />
2. Tap “Edit <strong>Wireless</strong> Profiles” at the bottom of the screen.<br />
3. Tap PENTAIR EXTENDER in the available wireless<br />
network list.<br />
<strong>IntelliTouch</strong> <strong>Range</strong> <strong>Extender</strong> <strong>Installation</strong> <strong>Guide</strong>
9<br />
4. Tap the “Network Key” tab.<br />
5. Tap the “The key is provided automatically” to clear the<br />
check box.<br />
6. From the screen keyboard, enter 5555599999 (10 digits<br />
total) in the “Network Key” field. For security, the PDA<br />
uses WEP encrypted and Open authentication.<br />
7. Tap OK to save the setting.<br />
<strong>IntelliTouch</strong> <strong>Range</strong> <strong>Extender</strong> <strong>Installation</strong> <strong>Guide</strong>
10<br />
8. Tap and hold PENTAIR EXTENDER in the available<br />
wireless network list. Select Connect from the pop up<br />
selection.<br />
9. Tap OK twice to exit. Your PDA should be connected to<br />
the <strong>Range</strong> <strong>Extender</strong>s.<br />
<strong>IntelliTouch</strong> <strong>Range</strong> <strong>Extender</strong> <strong>Installation</strong> <strong>Guide</strong>
Notes<br />
11<br />
<strong>IntelliTouch</strong> <strong>Range</strong> <strong>Extender</strong> <strong>Installation</strong> <strong>Guide</strong>
P/N 520582 - Revision A<br />
<strong>IntelliTouch</strong> <strong>Range</strong> <strong>Extender</strong> <strong>Installation</strong> <strong>Guide</strong>


