Gladiator 04 manual2_10(print ver). - MacDev
Gladiator 04 manual2_10(print ver). - MacDev
Gladiator 04 manual2_10(print ver). - MacDev

You also want an ePaper? Increase the reach of your titles
YUMPU automatically turns print PDFs into web optimized ePapers that Google loves.
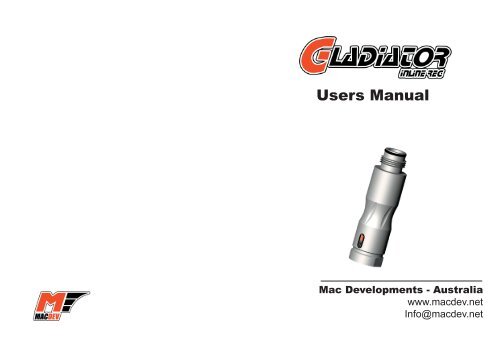
Users Manual<br />
Mac Developments - Australia<br />
www.macdev.net<br />
Info@macdev.net
<strong>Gladiator</strong> Version <strong>04</strong><br />
Users Manual Version 2.<strong>10</strong><br />
Copyright Mac Developments Pty. Ltd. 20<strong>04</strong><br />
All rights reserved<br />
No part of this document may be copied or reproduced in any form<br />
or by any means without the prior written consent of Mac Developments<br />
Pty. Ltd.<br />
Notice is hereby given that this manual is part of the article owned<br />
in whole by Mac Developments Pt. Ltd., known as indicated in<br />
this manual and drawings. All rights of manufacture and reproduction<br />
of such articles or any part thereof are reserved by Mac<br />
Developments Pty Ltd. Neither said article nor any part thereof<br />
may be manufactured or reproduced without the written authorization<br />
from Mac Developments Pty. Ltd. All proprietary rights and<br />
information are the sole property of Mac Developments Pty. Ltd.<br />
<strong>MacDev</strong> 20<strong>04</strong>/5<br />
Find us on the web at:<br />
www.macdev.net<br />
Email us at:<br />
info@macdev.net<br />
Australian Offi ce:<br />
Mac Developments<br />
PO Box 584<br />
Gymea, NSW<br />
Australia 2227<br />
ph: INT+612 9531 5055<br />
fax: INT+6129531 5188<br />
Statement of Liability<br />
Mac Developments Pty. Ltd. Makes no warranties with respect to<br />
this documentation and disclaims any implied warranties of merchantability<br />
or fi tness for a particular purpose. The information in<br />
this document is subject to change without notice. Mac Developments<br />
Pty. Ltd. assumes no responsibility for its resale or safe<br />
handling. Mac Developments Pty. Ltd. assumes no responsibility for<br />
physical injury or property damage resulting from its use.<br />
US distributor:<br />
Gramps and Grizzly’s Outpost<br />
7203 Arlington Ave, Unit F<br />
Ri<strong>ver</strong>side, CA 92503<br />
ph: (909) 359-4859
Accessories<br />
Use genuine macdev accessories for best results.<br />
Rebuild Kit<br />
The <strong>Gladiator</strong> rebuild kit contains all the parts that may<br />
commonly need replacing. This kit is a must for any serious<br />
toolkit.<br />
Sonic ASA<br />
The Sonic ASA is specifically designed to fit the <strong>Gladiator</strong><br />
to popular paintball markers - designs currently available<br />
include:<br />
- Angel LCD<br />
- B2K/B2K2/DEFIANT<br />
- Tribal<br />
- AutoCocker<br />
MacLine Kit<br />
Introduction<br />
The <strong>04</strong> Conquest is a fully balanced, enhanced flow 4th<br />
generation paintball regulator. The <strong>Gladiator</strong> is built from<br />
precision machined components manufactured on some of<br />
the most sophisticated computer controlled machinery in the<br />
world today.<br />
Features<br />
- Dual pressure, balanced regulation<br />
- Optimised high flow seals<br />
- High memory elastomer, abrasion resistant seal<br />
material<br />
- Bottom adjustment with bottom inlet<br />
- Harmonised motion piston system, with low main<br />
tenance features<br />
- Easy rebuild design - fully user rebuildable<br />
- Strengthened adjustment with stainless steel screw<br />
The Macline kit includes 3 fittings (1 straight, 1 fixed elbow<br />
and 1 swivel elbow) to ensure easy plumbing to any popular<br />
air/nitro system.
Installation<br />
Air Fitting Installation:<br />
Your <strong>Gladiator</strong> inline reg comes ready to have an air fitting<br />
installed. To correctly install your air fitting follow these<br />
steps. NOTE: failure to follow these instructions may result<br />
in damage to your <strong>Gladiator</strong> – this is not co<strong>ver</strong>ed under warranty!<br />
Step 1: Unscrew the two halves of your <strong>Gladiator</strong> (by hand).<br />
NOTE: There is a white grease on the threads inside your<br />
<strong>Gladiator</strong> – do not wipe this off.<br />
Step 2: Use a wrench to hold the <strong>Gladiator</strong> bottom works<br />
in place as you tighten the air fitting into place (as shown in<br />
figure 3). Do not o<strong>ver</strong> tighten the air fitting, and use a snug<br />
wrench on the <strong>Gladiator</strong> bottom works to prevent scratching.<br />
Now re-assemble your <strong>Gladiator</strong> and it is ready for use.<br />
7. Slide the piston etc back into the gladiator topworks and<br />
screw the bottom and topworks back together.<br />
NOTE: Keeping your piston clean and<br />
lubricated at all times is essential<br />
to keeping your <strong>Gladiator</strong> inline<br />
reg consistent o<strong>ver</strong> the Chronograph.<br />
Seat<br />
If your <strong>Gladiator</strong> seat is dirty or damaged, you will find<br />
problems such as creeping or inconsistency. If you experience<br />
this, you can degas the system and inspect the seat.<br />
If debris is found on the seat, you may clean it off using a<br />
clean q-tip. Then try the gladiator for perfomance to ensure<br />
that no lasting damage has been done. Howe<strong>ver</strong>, if you still<br />
experience inconsistency, you can remove the seat and use<br />
the underside instead.
Maintaining your <strong>Gladiator</strong><br />
The <strong>04</strong> <strong>Gladiator</strong> is designed to require less maintenance<br />
than any previous <strong>Gladiator</strong> <strong>ver</strong>sion. Howe<strong>ver</strong>, for optimal<br />
recharge and consistancy, you should lubricate certain<br />
moving parts e<strong>ver</strong>y 8,000 shots or so. These are detailed<br />
below.<br />
Piston<br />
The piston is continually sliding up and down inside the<br />
piston bore. This will eventually push the lubricant away from<br />
the o-ring. To remove the piston for lubrication:<br />
1. Degas system of all pressurised gas and unscrew the bottomworks.<br />
2. Place a rag on the tabletop and tap the gladiator topworks<br />
until the piston falls out. If it cannot be removed this way, you<br />
can push it out from the top. Separate the piston from the<br />
o-ring retainers and spring washers.<br />
Connecting the <strong>Gladiator</strong> to your marker<br />
The <strong>Gladiator</strong> will be accepted into all standard ASA adaptor<br />
threads. (for example: Cocker, LCD Angel, B2K, BKO,<br />
Cyborg)<br />
Step 1:Lubricate o-ring and ASA threads with good quality<br />
silicon grease. DO NOT USE OIL.<br />
Step 2:Screw <strong>Gladiator</strong> into ASA thread. Connect your air<br />
system to the fitting in the bottom of your <strong>Gladiator</strong>.<br />
Step 4:Turn on air to the <strong>Gladiator</strong> reg. Wind the adjustment<br />
screw counter-clockwise to increase velocity and clockwise<br />
to decrease velocity. NOTE: always chronograph your<br />
marker after adjusting your regulator. Ne<strong>ver</strong> chrono o<strong>ver</strong><br />
300fps.<br />
Step 5:Put on your goggles, scream out “WHO’S YOUR<br />
DADDY?” and run onto the field.<br />
3. Clean the piston, o-rings and o-ring retainers of old grease<br />
using a clean rag, do not leave any lint or cotton strands on<br />
or between the o-rings. Re-apply Dow 33 th the o-rings.<br />
4. Clean the piston bore using a Q-tip to remove all old<br />
grease.<br />
5. Using a clean Q-tip, apply silicon grease to the piston<br />
bore. Do not o<strong>ver</strong> apply grease - all you need is a thin film.<br />
6.slide the spring washers back onto the piston and lubricate<br />
the shaft with Dow 33. Now slide the o-ring retainers and o-<br />
rings back onto the shaft.