Modeling Cracks with ANSYS Maximizing the ROI on your ... - PADT
Modeling Cracks with ANSYS Maximizing the ROI on your ... - PADT
Modeling Cracks with ANSYS Maximizing the ROI on your ... - PADT

You also want an ePaper? Increase the reach of your titles
YUMPU automatically turns print PDFs into web optimized ePapers that Google loves.
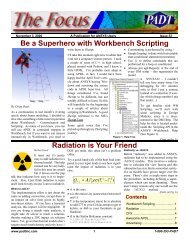
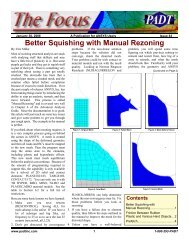
June 18, 2010 The Focus Issue 74<br />
(Thin Sweep, C<strong>on</strong>t...)<br />
which <str<strong>on</strong>g>the</str<strong>on</strong>g> mesh is swept) and a single target face as<br />
in Figure 1 (<str<strong>on</strong>g>the</str<strong>on</strong>g> face to which <str<strong>on</strong>g>the</str<strong>on</strong>g> mesh is swept).<br />
But wait! What if I told you that, in Workbench<br />
Mechanical, you can sweep mesh an extrudable volume<br />
having multiple source and target faces (Figure 2)?<br />
The trick to this, my friends, lies under <str<strong>on</strong>g>the</str<strong>on</strong>g> Src/Trg Selecti<strong>on</strong> opti<strong>on</strong>s <str<strong>on</strong>g>with</str<strong>on</strong>g>in <str<strong>on</strong>g>the</str<strong>on</strong>g><br />
Sweep Method mesh object.<br />
The first thing you want to do is insert a Method object under <str<strong>on</strong>g>the</str<strong>on</strong>g> Mesh branch<br />
(Figure 3).<br />
Select <str<strong>on</strong>g>the</str<strong>on</strong>g> geometry to be meshed and set "Method" to "Sweep" in <str<strong>on</strong>g>the</str<strong>on</strong>g> Details<br />
window (Figure 4). Now for <str<strong>on</strong>g>the</str<strong>on</strong>g> magic. From <str<strong>on</strong>g>the</str<strong>on</strong>g> "Src/Trg Selecti<strong>on</strong>" pull-down<br />
menu, select ei<str<strong>on</strong>g>the</str<strong>on</strong>g>r "Automatic Thin" or "Manual Thin." If you select <str<strong>on</strong>g>the</str<strong>on</strong>g><br />
"Manual Thin" opti<strong>on</strong>, you'll also have to select <str<strong>on</strong>g>the</str<strong>on</strong>g> source faces. The<br />
"Automatic Thin" opti<strong>on</strong> allows <str<strong>on</strong>g>the</str<strong>on</strong>g> Workbench mesher to figure it out <strong>on</strong> its own<br />
(Figure 5).<br />
It's also a good idea to specify <str<strong>on</strong>g>the</str<strong>on</strong>g> number of element divisi<strong>on</strong>s through <str<strong>on</strong>g>the</str<strong>on</strong>g><br />
sweep mesh. My experience has been that, even <str<strong>on</strong>g>with</str<strong>on</strong>g> <str<strong>on</strong>g>the</str<strong>on</strong>g> number of divisi<strong>on</strong>s<br />
set to "Default," I still get just a single element through <str<strong>on</strong>g>the</str<strong>on</strong>g> sweep unless I set it<br />
manually, regardless of global element size (Figure 6).<br />
Once you specify <str<strong>on</strong>g>the</str<strong>on</strong>g>se settings and generate <str<strong>on</strong>g>the</str<strong>on</strong>g> mesh, you end up <str<strong>on</strong>g>with</str<strong>on</strong>g> a<br />
beautiful sweep mesh as shown previously in Figure 2 (assuming, of course,<br />
you've applied <str<strong>on</strong>g>the</str<strong>on</strong>g>se specificati<strong>on</strong>s to an extrudable volume).<br />
Now, you may be asking me telepathically from <strong>your</strong> desk, what element type<br />
do you get <str<strong>on</strong>g>with</str<strong>on</strong>g> this "thin sweep" opti<strong>on</strong>, at least <str<strong>on</strong>g>with</str<strong>on</strong>g> a structural analysis? Are<br />
<str<strong>on</strong>g>the</str<strong>on</strong>g>y SOLID186s? SOLSH190s? Writing out an <str<strong>on</strong>g>ANSYS</str<strong>on</strong>g> input file, bringing it<br />
into Mechanical APDL, and listing <str<strong>on</strong>g>the</str<strong>on</strong>g> element types give us our answer (Figure<br />
7).<br />
Figure 7 They're SOLID186s: Your Typical Workbench Structural Brick Elements<br />
For a <str<strong>on</strong>g>the</str<strong>on</strong>g>rmal analysis, thin sweep meshing produces SOLID90s which, again is<br />
c<strong>on</strong>sistent <str<strong>on</strong>g>with</str<strong>on</strong>g> a standard <str<strong>on</strong>g>the</str<strong>on</strong>g>rmal brick mesh.<br />
Interested in learning about o<str<strong>on</strong>g>the</str<strong>on</strong>g>r Workbench tricks? C<strong>on</strong>sider taking our Introducti<strong>on</strong><br />
to Workbench Mechanical course, prepared by <str<strong>on</strong>g>ANSYS</str<strong>on</strong>g> users (i.e. <strong>your</strong> friendly<br />
neighborhood <strong>PADT</strong> engineers) for <str<strong>on</strong>g>ANSYS</str<strong>on</strong>g> users.<br />
Figure 3 Right-Click Mesh Object > Insert > Method<br />
Figure 4: Sweep Method Specificati<strong>on</strong><br />
Figure 5: Thin Opti<strong>on</strong> for Source/Target Selecti<strong>on</strong><br />
Figure 6: Setting <str<strong>on</strong>g>the</str<strong>on</strong>g> Number of Sweep Divisi<strong>on</strong>s<br />
Figure 7: They’re SOLID186’s - Your Typical Workbench Structural Brick Elements<br />
www.padtinc.com 6 1-800-293-<strong>PADT</strong>