

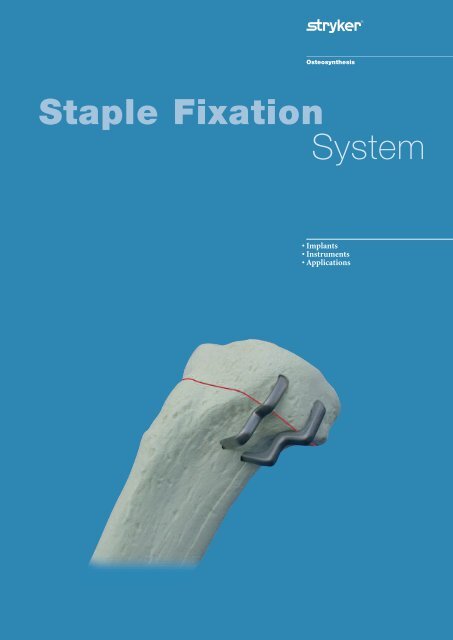
Staple Fixation System - Stryker
Staple Fixation System - Stryker
Staple Fixation System - Stryker

You also want an ePaper? Increase the reach of your titles
YUMPU automatically turns print PDFs into web optimized ePapers that Google loves.
<strong>Staple</strong> <strong>Fixation</strong><br />
<strong>System</strong><br />
• Implants<br />
• Instruments<br />
• Applications
Contents<br />
Introduction 3<br />
Instrument Use - Universal Inserter 4<br />
Instrument Use - Universal Rod 5<br />
Ordering Information - Implants 6<br />
Ordering Information - Instruments 7<br />
2
Introduction<br />
When the stapling of bones, ligaments,<br />
tendons or soft tissue is part of an<br />
operative procedure, then the new<br />
advanced <strong>Staple</strong> Instrumentation<br />
<strong>System</strong> combined with a complete<br />
family of <strong>Fixation</strong> <strong>Staple</strong>s offers<br />
clear-cut advantages.<br />
Implants<br />
Instruments<br />
The <strong>Stryker</strong> <strong>Staple</strong> <strong>System</strong> consists of<br />
eight different <strong>Staple</strong> designs. They<br />
differ in their function and indication.<br />
The Ellison Arched Bridge <strong>Staple</strong>s are<br />
designed to reduce the risk of the<br />
staple backing out of the bone and to<br />
reattaching tubular soft tissue to bone.<br />
The Ellison Flat <strong>Staple</strong>s are used to<br />
attach bone to bone.<br />
The Ellison removable Soft Tissue<br />
Retainer can be used with the flat<br />
<strong>Staple</strong> for soft tissue reattachment.<br />
All Ellison <strong>Staple</strong>s are barbed on all<br />
four sides of the legs for enhanced<br />
fixation and protection against back<br />
out.<br />
Depalma <strong>Staple</strong> – same indication as<br />
the Ellison Arched Bridge <strong>Staple</strong> but<br />
without barbed legs.<br />
The Blount Epiphyseal <strong>Staple</strong>s are<br />
applicable for epiphyseal applications<br />
in children and adolescents. The<br />
reinforced corners reduce unwanted<br />
staple bending and allow accurate<br />
staple driving.<br />
Stepped <strong>Staple</strong>s provide the most<br />
comprehensive approach to bone<br />
fixation following high tibial<br />
osteotomies. These staples are available<br />
in three offset steps (5, 10 and 15mm)<br />
The Kremser <strong>Staple</strong> for HTO can be<br />
locked with a standard 4.5mm self<br />
tapping cortical screw through a<br />
special locking hole in the distal leg.<br />
Fracture <strong>Staple</strong>s have slightly tapered<br />
legs. This feature creates compression<br />
when the staples are driven in bone.<br />
Wire <strong>Staple</strong>s are indicated for fragment<br />
fixation, particularly in small<br />
fragments and where inter-fragmental<br />
screw fixation is not possible.<br />
All staples are manufactured from<br />
Vitallium alloy, fully conforming to the<br />
requirements set by ASTM F799/ISO<br />
5832 standards.<br />
The upgraded instrumentation system<br />
features a unique universal staple<br />
inserter for accurate staple impaction<br />
into bone. The special<br />
holding/tightening mechanism enables<br />
secure gripping of the staples and<br />
allows easy exchange of the three<br />
different clamping jaws.<br />
The system also includes a universal<br />
rod to connect the final impactor,<br />
extraction spoon and a extraction hook<br />
together with a slotted hammer. A<br />
swivel drill guide for pre-drilling<br />
cortical bone is available as an optional<br />
item. All instruments are stored in a<br />
plastic sterilization case together with a<br />
tray for staples. The tray with preformed<br />
inserts holds a variety of<br />
<strong>Staple</strong>s for easy intra-operative<br />
selection.<br />
3
Instrument Use<br />
Universal Inserter<br />
Assembling the Inserter<br />
Three different clamping jaws are<br />
available for insertion of the staple<br />
range. If the jaws need changing the<br />
following procedure must be followed:<br />
Turn the knob anti-clockwise until it<br />
disengages from the threaded shaft.<br />
Remove the spring and push the shaft<br />
forward through the instrument<br />
casing.<br />
Select the appropriate clamping jaws<br />
and place the two parts on the distal<br />
end of the shaft using the transverse<br />
pegs. Firmly press the jaws on the shaft<br />
and re-insert the shaft through the<br />
casing.<br />
Ensure that the two pegs engage in the<br />
longitudinal slots in the casing. Keep<br />
the clamping jaws pressed against the<br />
conical end of the casing. Slide the<br />
spring over the threaded end of the<br />
shaft and reattach the knob to the<br />
thread.<br />
Turn the knob clockwise and advance<br />
until a gap of approx. 5mm to the<br />
proximal end of the casing has been<br />
reached.<br />
Using the inserter<br />
Spread the clamping jaws by pushing<br />
the knob against the casing and insert<br />
the selected staple correctly in the<br />
chosen clamping jaws.<br />
Release the pressure on the knob so<br />
that the spring-loaded mechanism<br />
keeps the staple fixed in the jaws.<br />
Tighten the knob until firm resistance<br />
can be felt, confirming secure fixation<br />
of the staple in the clamping jaws.<br />
After impaction of the staple into the<br />
bone, turn the knob anti-clockwise<br />
several turns and release the<br />
instrument by pushing the knob<br />
against the casing.<br />
4
Instrument Use<br />
Universal Rod<br />
The Universal Rod has been designed<br />
for the use with the Final Impactor, the<br />
Extraction Spoon and the Extraction<br />
Hook.<br />
Select the correct instrument and<br />
attach it to the rod using the threaded<br />
end.<br />
Check secure fixation with the 8mm<br />
open wrench on the flat parts of the<br />
instruments.<br />
Final impaction of staples can be<br />
carried out using the rod with the<br />
attached Impactor and the Hammer.<br />
The Extraction Spoon is used to lift the<br />
staple off the bone until final<br />
extraction can be carried out using the<br />
Extraction Hook and the slot of the<br />
Hammer over the Universal Rod.<br />
5
Ordering Information - Implants<br />
ELLISON Arched Bridge <strong>Fixation</strong> <strong>Staple</strong>s<br />
WIRE <strong>Staple</strong>s<br />
Vitallium Step <strong>Staple</strong> <strong>Staple</strong><br />
Alloy Size Width Length<br />
REF mm mm mm<br />
6982-1-009 N/A 9 23<br />
6982-1-012 N/A 12 23<br />
6982-1-015 N/A 15 23<br />
Vitallium Step <strong>Staple</strong> <strong>Staple</strong><br />
Alloy Size Width Length<br />
REF mm mm mm<br />
6586-1-005 N/A 10 16<br />
6586-2-005 N/A 16 16<br />
6586-3-005 N/A 22 16<br />
ELLISON Flat Bridge <strong>Fixation</strong> <strong>Staple</strong>s<br />
Vitallium Step <strong>Staple</strong> <strong>Staple</strong><br />
Alloy Size Width Length<br />
REF mm mm mm<br />
6982-2-008 N/A 8 23<br />
6982-2-011 N/A 11 23<br />
6982-2-014 N/A 14 23<br />
FRACTURE <strong>Staple</strong>s Straight<br />
Vitallium Step <strong>Staple</strong> <strong>Staple</strong><br />
Alloy Size Width Length<br />
REF mm mm mm<br />
6986-0-005 N/A 16 22<br />
6986-0-007 N/A 22 22<br />
ELLISON Optional Soft Tissue Retainers<br />
Vitallium Step <strong>Staple</strong> <strong>Staple</strong><br />
Alloy Size Width Length<br />
REF mm mm mm<br />
6982-3-008 N/A 8 N/A<br />
6982-3-011 N/A 11 N/A<br />
6982-3-014 N/A 14 N/A<br />
DEPALMA Soft Tissue <strong>Staple</strong>s<br />
Vitallium Step <strong>Staple</strong> <strong>Staple</strong><br />
Alloy Size Width Length<br />
REF mm mm mm<br />
6985-3-003 N/A 10 19<br />
6985-3-006 N/A 19 19<br />
BLOUNT <strong>Staple</strong>s Epiphyseal (with reinforced corners)<br />
Vitallium Step <strong>Staple</strong> <strong>Staple</strong><br />
Alloy Size Width Length<br />
REF mm mm mm<br />
6985-0-003 N/A 10 22<br />
6985-0-005 N/A 16 22<br />
6985-0-007 N/A 22 22<br />
6985-0-011 N/A 27 22<br />
KREMSER* High Tibial Osteotomy <strong>Staple</strong><br />
Vitallium Step <strong>Staple</strong> <strong>Staple</strong><br />
Alloy Size Width Length<br />
REF mm mm mm<br />
6987-7-035 14 35 38<br />
Note: *ISO 4.5mm Cortical Screw recommended<br />
STEPPED High Tibial Osteotomy <strong>Staple</strong>s<br />
Vitallium Step <strong>Staple</strong> <strong>Staple</strong><br />
Alloy Size Width Length<br />
REF mm mm mm<br />
6987-1-005 5 28 33<br />
6987-3-010 10 28 38<br />
6987-5-015 15 28 43<br />
6
Ordering Information - Instruments<br />
REF<br />
Description<br />
6983-1000 Universal Inserter<br />
6983-1010 Clamping Jaws, blue (for Blount, Stepped, Fracture and Kremser <strong>Staple</strong>s)<br />
6983-1020 Clamping Jaws, yellow (for Ellison <strong>Staple</strong>s)<br />
6983-1030 Clamping Jaws, green (for Depalma and Wire <strong>Staple</strong>s)<br />
1806-0113 Universal Rod<br />
6983-3000 Final Impactor<br />
6983-4000 Extraction Spoon<br />
6983-4050 Extraction Hook<br />
1806-0130 Open Wrench 8/10<br />
6983-5000 Slotted Hammer, small<br />
6983-9000 Storage Case with Tray Insert, Implants<br />
6983-9100 Tray Insert, Implants<br />
Optional<br />
6983-2000 Swivel Drill Guide for 2.5mm Drill<br />
Spare Parts<br />
E6983101<br />
E6983102<br />
E6983103<br />
Knob for Universal Inserter<br />
Spring for Universal Inserter<br />
Shaft for Universal Inserter<br />
7
Trauma, Extremities & Deformities<br />
Trauma, Extremities & Deformities<br />
Biologics<br />
Biologics<br />
Surgical Products<br />
Surgical Products<br />
Neuro & ENT<br />
Neuro & ENT<br />
<strong>Stryker</strong> Trauma GmbH<br />
Prof.-Küntscher-Strasse 1-5<br />
D-24232 Schönkirchen<br />
Germany<br />
www.osteosynthesis.stryker.com<br />
The information presented in this brochure is intended to demonstrate a <strong>Stryker</strong> product. Always refer to the package<br />
insert, product label and/or user instructions before using any <strong>Stryker</strong> product. Surgeons must always rely on their own<br />
clinical judgment when deciding which products and techniques to use with their patients. Products may not be available<br />
in all markets. Product availability is subject to the regulatory or medical practices that govern individual markets. Please<br />
contact your <strong>Stryker</strong> representative if you have questions about the availability of <strong>Stryker</strong> products in your area.<br />
<strong>Stryker</strong> Corporation or its subsidiary owns the registered trademark: <strong>Stryker</strong><br />
Literature Number: B1000053<br />
LOT B1007<br />
Copyright © 2007 <strong>Stryker</strong><br />
Printed in Germany


