

T2 Tibial Nailing System Operative Technique - Stryker
T2 Tibial Nailing System Operative Technique - Stryker
T2 Tibial Nailing System Operative Technique - Stryker

You also want an ePaper? Increase the reach of your titles
YUMPU automatically turns print PDFs into web optimized ePapers that Google loves.
<strong>Operative</strong> <strong>Technique</strong><br />
Nail Removal<br />
Nail removal is an elective procedure.<br />
If needed, the End Cap and Advanced<br />
Compression Screw are removed<br />
with the Screwdriver Shaft and<br />
Tear drop Handle. If the Advanced<br />
Locking Mode was utilized, first<br />
remove the End Cap, then the most<br />
proximal screw, then the Advanced<br />
Compression Screw can be removed<br />
(Fig. 43).<br />
Note:<br />
As an alternative to removing the<br />
Advanced Compression Screw (if<br />
used), it can be just disengaged<br />
from the Partially Threaded<br />
Locking Screw (Shaft Screw)<br />
by turning the Compression<br />
Screwdriver one full turn in a<br />
counter-clockwise direction.<br />
There is no need to remove it from<br />
the nail.<br />
Fig. 43<br />
Caution:<br />
DO NOT remove the last proximal<br />
Locking Screw prior to<br />
attaching the Universal Rod to<br />
the proximal end of the nail.<br />
Doing so may result in the nail<br />
moving posteriorly, making it difficult<br />
to attach the Universal Rod<br />
to the nail.<br />
The Universal Rod is inserted into<br />
the driving end of the nail. All<br />
Locking Screws are removed with the<br />
Long Screwdriver Shaft and Teardrop<br />
Handle (Fig. 44).<br />
Fig. 44<br />
Alternatively, the 3.5mm Hex Self-<br />
Holding Screwdriver Long (1806-0233)<br />
or Extra Short (1806-0203) can be<br />
used for the screw removal.<br />
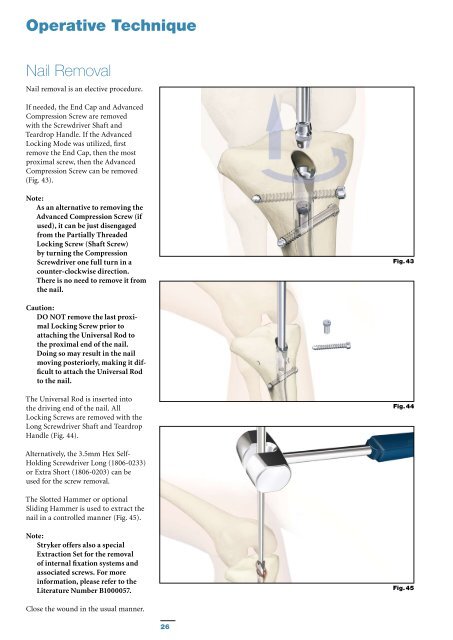
The Slotted Hammer or optional<br />
Sliding Hammer is used to extract the<br />
nail in a controlled manner (Fig. 45).<br />
Note:<br />
<strong>Stryker</strong> offers also a special<br />
Extraction Set for the removal<br />
of internal fixation systems and<br />
associated screws. For more<br />
information, please refer to the<br />
Literature Number B1000057.<br />
Fig. 45<br />
Close the wound in the usual manner.<br />
26


