HydroSet Brochure - Stryker
HydroSet Brochure - Stryker HydroSet Brochure - Stryker
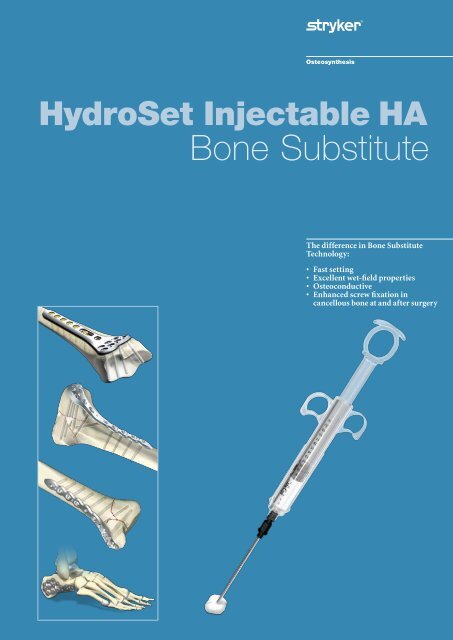
HydroSet Injectable HA Bone Substitute The difference in Bone Substitute Technology: • Fast setting • Excellent wet-field properties • Osteoconductive • Enhanced screw fixation in cancellous bone at and after surgery
- Page 2 and 3: Introduction Table of Contents Pack
- Page 4 and 5: Rationale, Features & Benefits Hydr
- Page 6 and 7: Rationale, Features & Benefits Bone
- Page 8 and 9: Technical Details Steps to Implanta
- Page 10 and 11: Technical Details Distal Radius Voi
- Page 12 and 13: Technical Details Tibial Plateau Vo
- Page 14 and 15: Technical Details Bone Augmentation
- Page 16: Trauma, Extremities & Deformities T
<strong>HydroSet</strong> Injectable HA<br />
Bone Substitute<br />
The difference in Bone Substitute<br />
Technology:<br />
• Fast setting<br />
• Excellent wet-field properties<br />
• Osteoconductive<br />
• Enhanced screw fixation in<br />
cancellous bone at and after surgery
Introduction<br />
Table of Contents<br />
Packaging and Sterility 3<br />
Sterile Needles 3<br />
Storage Information 3<br />
Handling Characteristics 3<br />
Indications 4<br />
Contraindications 4<br />
Advantages 5<br />
Application Properties 5<br />
Histological Properties 5<br />
Bone Augmentation Rationale 6<br />
Steps to Implantation 8<br />
Distal Radius Void Filling 10<br />
Tibial Plateau Void Filling 12<br />
Tibial Pilon Void Filling 13<br />
Bone Augmentation 14<br />
Ordering Information 15<br />
Special acknowledgement<br />
is made to:<br />
• Dr. Peter Catalano, M.D.,<br />
Otolaryngology, Lahey Clinic,<br />
Burlington, MA, USA, for his<br />
valuable contribution in the<br />
development of the product<br />
and premarket testing<br />
• Prof. Sune Larsson, M.D.,<br />
Department of Orthopaedic<br />
and Trauma Surgery at Uppsala<br />
University Hospital in Sweden<br />
for his valuable contribution<br />
in the development of the<br />
product and premarket testing<br />
• Dr. Walt Virkus, M.D.,<br />
Assistant Professor of the<br />
Department of Orthopaedic<br />
Surgery at Rush University<br />
Medical Center in Chicago,<br />
Illinois, for sharing his<br />
technical know-how and<br />
surgical expertise and providing<br />
assistance in the preparation<br />
of this Operative Technique.<br />
2
Product Overview<br />
Packaging and<br />
Sterility<br />
<strong>HydroSet</strong> is packaged sterile in<br />
exact, pre-measured ingredients.<br />
Sizes offered: 3cc, 5cc, 10cc, 15cc<br />
INJECTION or MANUAL IMPLANTATION<br />
Mixing<br />
(45 seconds)<br />
Cement Conditioning/<br />
Syringe Loading Time<br />
(1 minute 45 seconds)<br />
Injection or Manual<br />
Implantation & Sculping<br />
Time (2 minutes)<br />
Setting Time<br />
(4 minutes)<br />
There are two separate sterile<br />
packs. (Syringe and cannula are for<br />
single use only. Do not resterilize).<br />
1. Foil Pouch:<br />
The powder is packaged in<br />
a plastic bowl. The bowl is<br />
placed in a Tyvek® container.<br />
Underneath the bowl containing<br />
the powder is a desiccant to<br />
control moisture. This should<br />
never be implanted or mixed<br />
with the powder.<br />
The Tyvek® container is placed<br />
in a foil pouch and it is sterilized<br />
via gamma irradiation.<br />
Caution:<br />
The product should be used<br />
within 60 minutes of opening the<br />
outer powder packaging.<br />
2. Liquid Blister Kit:<br />
The packaging which contains<br />
the sterile, liquid filled syringe<br />
also includes the cement delivery<br />
syringe with a preattached<br />
funnel, plunger rod, 8ga cannula<br />
and mixing spatula which are<br />
sterilized via Ethylene oxide.<br />
Sterile Needles<br />
0:00 0:45 2:30 4:30 8:30 8:30<br />
Elapsed Time<br />
Storage Information<br />
Room temperature between 15 and 25°C (approx. 59-77°F).<br />
Temperature (°C)<br />
25<br />
20<br />
15<br />
10<br />
5<br />
0<br />
-5<br />
0:00 0:14 0:28 0:34 0:57 1:12<br />
Time (Hour : Min)<br />
<strong>HydroSet</strong> Temperature Equilibrium<br />
(Liquid Syringe) - From Frozen State<br />
Temperature (°C)<br />
45<br />
40<br />
35<br />
30<br />
25<br />
20<br />
0:00 0:14 0:28 0:34 0:57 1:12 1:26 1:40<br />
Time (Hours : Min)<br />
<strong>HydroSet</strong> Temperature Equilibrium<br />
(Liquid Syringe) - From Heated State<br />
Note:<br />
Sculping and material manipulation must<br />
cease after 4 minutes and 30 seconds.<br />
Handling Characteristics<br />
Room Temp = 20°C<br />
Room Temp = 22°C<br />
Room Temp = 22°C<br />
The <strong>HydroSet</strong> package contains an 8ga<br />
cannula. 10ga and 12ga cannulas are<br />
available as single use, sterile packaged<br />
to meet a variety of surgeons needs.<br />
- 8ga cannula OD = 4.2mm<br />
- 10ga cannula OD = 3.4mm<br />
- 12ga cannula OD = 2.8mm<br />
Note:<br />
Always refer to the IFU as well before<br />
using <strong>HydroSet</strong>.<br />
<strong>HydroSet</strong> is quick-setting and<br />
easy to mix and deliver via hand<br />
application or syringe injection.<br />
Mixing Time: 45 seconds<br />
Transfer Time:<br />
1 minute 45 seconds<br />
Injection and Sculpting Time:<br />
2 minutes<br />
Setting Time: 4 minutes at 32°C<br />
defect site temperature<br />
Caution:<br />
<strong>HydroSet</strong> is temperature<br />
sensitive, therefore, handling<br />
times are approximate based on<br />
product and OR temperatures<br />
of 18 to 22°C (approx. 64−72°F).<br />
A higher temperature can lead<br />
to a shorter setting time and a<br />
lower temperature to a longer<br />
setting time.<br />
Tyvek® is a DuPont registered trademark.<br />
3
Rationale, Features & Benefits<br />
<strong>HydroSet</strong> is an injectable, sculptable<br />
and fast-setting bone substitute.<br />
<strong>HydroSet</strong> is a calcium phosphate<br />
cement that converts to<br />
hydroxyapatite, the principle<br />
mineral component of bone. The<br />
crystalline structure and porosity<br />
of <strong>HydroSet</strong> makes it an effective<br />
osteoconductive material, with<br />
excellent biocompatibility and<br />
mechanical properties 1 . <strong>HydroSet</strong><br />
is specifically formulated to set in a<br />
wet field environment and exhibits<br />
outstanding wet-field characteristics 2 .<br />
The chemical reaction that occurs<br />
as <strong>HydroSet</strong> hardens does not<br />
release heat that could be potentially<br />
damaging to the surrounding tissue.<br />
After implantation, the <strong>HydroSet</strong><br />
is remodelled over time at a rate<br />
that is dependent on the size of<br />
the defect and the average age and<br />
general health of the patient.<br />
Indications<br />
1. <strong>HydroSet</strong> is indicated to fill bone<br />
voids or gaps of the skeletal system<br />
(i.e., extremities, craniofacial, spine<br />
and pelvis). These defects may<br />
be surgically created or osseous<br />
defects created from traumatic<br />
injury to the bone. <strong>HydroSet</strong> is<br />
indicated only for bone voids or<br />
gaps that are not intrinsic to the<br />
stability of the bone structure.<br />
<strong>HydroSet</strong> cured in situ provides<br />
an open void/gap filler that can<br />
augment provisional hardware<br />
(e.g., K-wires, plates, screws) to<br />
help support bone fragments<br />
during the surgical procedure.<br />
The cured cement acts only as a<br />
temporary support media and is<br />
not intended to provide structural<br />
support during the healing process.<br />
2. The cured cement is intended to<br />
enhance screw fixation in cancellous<br />
bone at and after the time of<br />
surgery*. Injecting <strong>HydroSet</strong> into<br />
cancellous bone creates a composite<br />
of bone and cement; this is referred<br />
to as Bone Augmentation, and<br />
results in better fixation of screws.<br />
<strong>HydroSet</strong> is not intended for use<br />
in areas where the surrounding<br />
bone is osteoporotic, avascular or<br />
otherwise not capable of supporting<br />
or anchoring the implant.<br />
Contraindications<br />
• Use in defects as a sole anchorage<br />
material for fixation of implants.<br />
• Use in currently infected field or<br />
surgical site near an infection<br />
• Use in patients with acute traumatic<br />
injuries with open wounds near<br />
the defect that are likely to become<br />
infected<br />
• Use for open fractures<br />
• Use for bone voids that link joint<br />
spaces and/articulating surfaces<br />
• Use for load bearing applications<br />
• Use in areas where surrounding<br />
bone is avascular or is incapable of<br />
supporting or anchoring the implant<br />
• Use in patients who have not reached<br />
an age at which skeletal system<br />
growth is essentially complete.<br />
• Use in patients with the following<br />
conditions: abnormal calcium<br />
metabolism, metabolic bone<br />
disease, a recent untreated infection,<br />
immunologic abnormalities and<br />
systemic disorders which result in<br />
poor wound healing or will result in<br />
tissue deterioration over the implant<br />
site.<br />
• Use for augmenting pedicle screws.<br />
• Use in Vertebroplasty or Kyphoplasty<br />
Warning:<br />
• <strong>HydroSet</strong> should not be used in<br />
areas where the surrounding bone is<br />
osteoporotic, avascular or otherwise<br />
not capable of supporting or<br />
anchoring the implant.<br />
• Care should be taken to avoid<br />
overpressurizing the device because<br />
this may lead to extrusion of the<br />
device beyond the site of its intended<br />
application and damage to the<br />
surrounding tissues<br />
• Care should be taken to avoid<br />
overpressurizing the device because<br />
this may lead to fat embolization or<br />
embolization of the device material<br />
into the bloodstream.<br />
Note:<br />
Always refer to the IFU as well before<br />
using <strong>HydroSet</strong>.<br />
References<br />
1.<br />
Chow, L, Takagi, L. A Natural Bone Cement – A Laboratory Novelty Led to the<br />
Development of Revolutionary New Biomaterials. J. Res. Natl. Stand. Technolo.<br />
106, 1029-1033 (2001).<br />
2.<br />
TR-1808. E703. Wet field set penetration (Data on file at <strong>Stryker</strong>)<br />
Scanning Electron Microscope<br />
image of <strong>HydroSet</strong> material<br />
crystalline microstructure<br />
at 15000× magnification<br />
*This indication is not cleared for use in the U.S.<br />
4
Rationale, Features & Benefits<br />
Advantages<br />
Application Properties<br />
• Injectable or manual implantation<br />
• Fast Setting<br />
• Isothermic<br />
• Excellent wet-field Characteristics<br />
• Osteoconductive<br />
• Augmentation of provisional<br />
hardware<br />
• Radiopaque to allow convenient<br />
visualization of healing during<br />
follow- up<br />
• Enhanced Screw fixation in<br />
cancellous bone at and after surgery*<br />
Self-curing calcium phosphate<br />
cements (CaP) are used clinically<br />
to replace, repair and augment<br />
non load bearing defects in<br />
cancellous bone voids 1 . Next to<br />
understanding and advancing<br />
the mechanical properties of<br />
these materials as well as the<br />
biological integration with the<br />
surrounding bony structure; the<br />
clinical ease of application and<br />
handling of CaP materials cannot<br />
be overlooked. OR and defect<br />
temperature, wet field properties<br />
and defect size play a key role.<br />
1.TR-1808 A701 Animal Study conducted at the<br />
Ballina, Ireland Animals Testing facilities by<br />
Peter Catalano, M.D., Lahey Clinic, on canine<br />
sinus defect model in a wet environment<br />
(27°C).<br />
• Alpha-BSM® is a registered trademark of<br />
Depuy a Johnson & Johnson Company.<br />
• Norian® is a registered trademark of Synthes®.<br />
• MIIG® X3 is a registered trademark of Wright.<br />
Wet Field Setting 1<br />
<strong>HydroSet</strong> demonstrated superior<br />
cement washout resistance and<br />
setting properties when subjected<br />
to blood and/or saline during<br />
application compared to other<br />
evaluated commercially available<br />
cements.<br />
In a wet field environment<br />
<strong>HydroSet</strong> sets significantly faster<br />
than Norian®, SRS, MIIG® and<br />
Alpha-BSM®.<br />
Histological Properties<br />
Biological Rabbit Model 1<br />
• Histology proved <strong>HydroSet</strong><br />
to be biocompatible &<br />
osteoconductive as an effective<br />
bone void filler<br />
• Histology results indicated<br />
good cement integration into<br />
the bony defect site for all three<br />
bone substitutes over the 1 year<br />
study window.<br />
• All three CaP’s tested<br />
(Norian, BoneSource and<br />
<strong>HydroSet</strong>) were resorbed by<br />
an osteoclastic mechanism.<br />
All cements were found to be<br />
variable with none of the CaP’s<br />
fully remodelled in the one<br />
year study time period.<br />
Canine sinus cavity defect, wet field<br />
with blood and saline<br />
Setting Time (minutes)<br />
25<br />
20<br />
15<br />
10<br />
5<br />
0<br />
patella<br />
patella<br />
ligament<br />
bone cement<br />
<strong>HydroSet</strong> Norlan® SRS MIIG® X3 Alpha BSM®<br />
Adult New Zealand Rabbit<br />
medial view<br />
frontal view<br />
site of implantation<br />
medial collateral ligament<br />
plastic plug<br />
A CaP in defect after 6 weeks<br />
surrounded by newly formed<br />
vital bone (mag 12.5×).<br />
B Detail of tight contact between<br />
new bone and cement surface after<br />
52 weeks (mag 25×)<br />
A TRAP-positive cells<br />
resorbing cement after<br />
26 weeks<br />
B HE stained section<br />
showing new bone formation<br />
on <strong>HydroSet</strong> after 26 weeks<br />
C Non-decalcified section<br />
after 52 weeks (mag 100×)<br />
*This indication is not cleared for use in the U.S.<br />
5
Rationale, Features & Benefits<br />
Bone Augmentation Rationale*<br />
Calcium Phosphate based (CaP)<br />
cements resorb slowly (over years)<br />
so it can be expected that bone<br />
augmentation effects obtained<br />
at the time of surgery should<br />
be maintained for an extended<br />
period of time. This effect has<br />
been demonstrated, to a limited<br />
degree, in a study 2 in which screw<br />
(3.5mm dia.) pullout strength<br />
was shown to be improved at 1<br />
week (W1), 3 months (M3) and<br />
6 months (M6) in goat bone that<br />
was augmented with CaP cement<br />
(Fig.1).<br />
In summary CaP cements have<br />
the following characteristics when<br />
used for bone augmentation 2 :<br />
• in low density materials (bone<br />
models/animal & human<br />
cadaver bone) there is increased<br />
pullout strength when screws<br />
are augmented with calcium<br />
phosphates<br />
• this effect is greatest in the least<br />
dense cancellous bone<br />
• the augmentation effect is seen<br />
in diameters of orthopaedic<br />
screws 1.5mm to 8.0mm<br />
Screw fixation failure in cancellous<br />
bone represents a surgical challenge.<br />
In these cases, augmentation of screw<br />
purchase with injectable biomaterials<br />
has been proposed to increase the<br />
strength of the fixation. An in-vitro<br />
study investigated the biomechanical<br />
conditions that improve fixation<br />
strength in an in-vitro model of<br />
cancellous bone with and without<br />
augmentation with <strong>HydroSet</strong> as well as<br />
to explore the effect of a cortical shell.<br />
It was suggested that the presence of a<br />
cortical shell is a significant factor in<br />
pullout strength of a screw 3 .<br />
For this in-vitro study of screw fixation<br />
in <strong>HydroSet</strong> augmented cancellous<br />
bone models, an open pore foam model<br />
(Sawbones material 1521-59) was<br />
utilised to simulate cancellous bone.<br />
Cancellous bone screws (<strong>Stryker</strong><br />
325460S A5 mm × 60mm, thread<br />
length 20 mm, pitch 2 mm), were<br />
inserted in the cancellous bone blocks<br />
to model 4 different clinical scenarios:<br />
a) screw purchase through cancellous<br />
bone only;<br />
b) screw purchase in cancellous bone<br />
traversing a cortical layer;<br />
c) screw purchase through augmented<br />
cancellous bone and, finally,<br />
d) screw purchase through augmented<br />
cancellous bone and traversing<br />
cortical layer (Fig. 2).<br />
In each experiment the cancellous<br />
screw was inserted into the<br />
simulated bone block using the<br />
appropriate surgical tooling. The<br />
insertion depth for each screw was<br />
standardised to 20 mm through a<br />
pre drilled 3.5 mm pilot hole.<br />
The cortical layer was simulated by<br />
application of a Perspex layer 2 mm<br />
thick to the uppermost side of each<br />
block.<br />
The mean pullout strength and<br />
standard deviations for each of the<br />
test configurations are shown in<br />
(Fig 3).<br />
The experimental results showed<br />
the benefits of augmentation with<br />
a four-fold increase in pullout<br />
strength in the augmented foam<br />
without a cortical layer and nearly<br />
fourteen-fold increase with the<br />
augmentation in the presence<br />
of a cortical layer. A statistically<br />
significant increase in pull-out<br />
strength in open pore foam was<br />
achieved with the augmented<br />
specimens compared to the nonaugmented<br />
ones.<br />
a) pure<br />
cancellous<br />
b) pure cancellous<br />
+ cortex<br />
*This indication is not cleared for use in the U.S.<br />
2.5<br />
Fig. 2<br />
c) augmented<br />
cancellous<br />
d) augmented<br />
cancellous + cortex<br />
2.0<br />
Screw Pullout Work Done (J)<br />
1.5<br />
1.0<br />
0.5<br />
0.0<br />
W1 M3 M6<br />
Pull-out Force (N)<br />
300<br />
250<br />
200<br />
150<br />
100<br />
50<br />
0<br />
a) pure cancellous b) pure cancellous<br />
+ cortex<br />
c) augmented<br />
cancellous<br />
d) augmented<br />
cancellous + cortex<br />
Fig. 1<br />
Difference in Pullout Work Done<br />
Control = screw alone<br />
Expt = screw + BoneSource<br />
6<br />
Fig. 3<br />
Pull-out force for each test configuration
Rationale, Features & Benefits<br />
Another in-vitro 4 test was<br />
performed at the University of<br />
Bath, UK to measure the screw<br />
pull-out forces for 5mm, 4mm<br />
and 2mm cancelleous bone screws<br />
in an open pore polyurethane<br />
foam, with and without <strong>HydroSet</strong>.<br />
Statistical analysis of the data<br />
clearly indicated that there was<br />
no significant difference between<br />
any augmented test groups.<br />
There was a significant difference<br />
between all the test groups and<br />
the non-augmented screws within<br />
the open pore material (Fig. 4)<br />
If <strong>HydroSet</strong> is used for bone augmentation, please mind the following<br />
information:<br />
Warning:<br />
• <strong>HydroSet</strong> should not be used in areas where the surrounding bone is steoporotic,<br />
avascular or otherwise not capable of supporting or anchoring the implant.<br />
• Care should be taken to avoid overpressurizing the device because this may lead<br />
to extrusion of the device beyond the site of its intended application and damage<br />
to the surrounding tissues<br />
• Care should be taken to avoid overpressurizing the device because this<br />
may lead to fat embolization or embolization of the device material into the<br />
bloodstream.<br />
Caution:<br />
• Insertion of screws in hardened cement must be done in a controlled manner<br />
(slowly drilling at
Technical Details<br />
Steps to Implantation<br />
Mixing<br />
Each kit contains one liquid-filled<br />
glass syringe and one bowl of<br />
powder.<br />
Peel off the lid on the Liquid Blister<br />
Kit and place the inner Tyvec tray<br />
on the sterile field. Place the cement<br />
delivery syringe barrel at an angled<br />
position using the fixture aid in<br />
the blister tray to hold the syringe<br />
securely.<br />
Note:<br />
Approach the fixture aid holding the<br />
syringe at a 45 degree angle and then<br />
push the syringe onto the fixture aid<br />
to achieve a stable footing. Peel back<br />
the lid on the bowl and empty the<br />
liquid contents of the syringe into the<br />
bowl with powder (Fig. 1).<br />
Take caution when injecting the<br />
liquid into the powder. Loss of liquid<br />
may cause a dry mixture that is<br />
difficult to inject.<br />
Fig. 1<br />
Fig. 2<br />
Caution:<br />
Ideal operating room temperatures<br />
should be between 18° and 22° C<br />
(64.4°−71.6° F).<br />
Mix the liquid and powder<br />
thoroughly in a circular motion<br />
for 45 seconds, ensuring that all<br />
the solution has been distributed<br />
throughout the powder (Fig. 2).<br />
Compress the material against<br />
the sides of the bowl until a<br />
homogeneous, consistent paste is<br />
achieved.<br />
Fig. 3<br />
Caution:<br />
The cement paste may look<br />
uniformly mixed after 10−15 seconds<br />
of mixing; however, continue to mix<br />
for 45 seconds to ensure the powder<br />
is thoroughly mixed into solution.<br />
If manual implantation is desired,<br />
it is recommended to wait until 2<br />
minutes and 30 seconds have elapsed<br />
(from the start of mixing) prior to<br />
implantation.<br />
Transfer the paste from the mixing<br />
bowl to the delivery syringe using the<br />
supplied spatula (Fig. 3).<br />
Fig. 4<br />
8
Technical Details<br />
This will allow the paste to run slowly<br />
down the syringe barrel keeping an<br />
open air pathway through the syringe<br />
assembly at all times.<br />
The funnel comes pre-attached to the<br />
syringe barrel. Once cement transfer<br />
is complete, remove the funnel<br />
(counterclockwise direction) (Fig. 4)<br />
and attach the supplied cannula<br />
(clockwise direction) (Fig. 5).<br />
Caution:<br />
If the placement of provisional<br />
hardware is required, wait until twelve<br />
minutes from the start of mixing until<br />
implantation of K-wires, plates or<br />
screws (ensuring hardware fixation is<br />
to bone).<br />
Fig. 5<br />
Attach the plunger rod into the piston<br />
at the syringe barrel entrance by<br />
threading into place while keeping<br />
the syringe system vertical with the<br />
cannula pointing up (Fig. 6).<br />
Fully load the plunger rod into the<br />
syringe barrel to remove trapped<br />
air in the syringe assembly and to<br />
accumulate the paste to the base<br />
of the syringe (Fig. 7). Removing<br />
trapped air is necessary. Trapped<br />
air will compromise injectability.<br />
The loading process should be<br />
complete by 2 minutes and 30<br />
seconds from the start of mixing.<br />
Implantation & Sculpting<br />
Once the syringe is fully loaded and<br />
ready to inject, there will be 2 minutes<br />
of injection time before the material<br />
begins to harden and it may become<br />
too difficult to inject.<br />
Fig. 6<br />
Caution:<br />
Contact and heat transfer between<br />
the palm of hands and syringe barrel<br />
may decrease this injectability time<br />
window. Deliver the material to the<br />
defect site. Use the spatula to contour<br />
as desired.<br />
Sculpting and material manipulation<br />
must cease after 4 minutes 30 seconds<br />
from the start of mixing.<br />
Set time<br />
Allow the material to set completely<br />
before closing. Set time is 4 minutes 30<br />
seconds to 8 minutes 30 seconds from<br />
the start of mixing (potentially longer<br />
if the defect effective temperature is<br />
less than32° C).<br />
Leave the material undisturbed until<br />
it is completely set.<br />
Fig.7<br />
9
Technical Details<br />
Distal Radius Void Filling<br />
Plate Technique<br />
1. Perform a volar approach to the<br />
distal radius. Additional dorsal<br />
approach may be necessary if direct<br />
visualization of the articular surface<br />
is required.<br />
1 2<br />
2. Obtain preliminary reduction<br />
of the articular surface. Temporary<br />
fixation with K-wires is helpful in<br />
stabilizing the elevated articular<br />
fragments until the <strong>HydroSet</strong> Bone<br />
Substitute or definitive hardware<br />
are placed.<br />
In preparation for use, thoroughly<br />
mix the liquid and <strong>HydroSet</strong><br />
powder for 45 seconds.<br />
3 4<br />
Note:<br />
Perform either Step 3 or Step 4.<br />
3. Inject the <strong>HydroSet</strong> Bone<br />
Substitute using the provided<br />
syringe and cannula directly into<br />
the residual defect. After the cement<br />
has set, follow with placement of<br />
definitive hardware. Additional<br />
fragment specific plates may be<br />
placed as necessary.<br />
OR<br />
4. Place the volar plate and inject<br />
the <strong>HydroSet</strong> Bone Substitute using<br />
the provided syringe and Cannula<br />
under fluoroscopic guidance. The<br />
cannula may be inserted through an<br />
exposed fracture line. The <strong>HydroSet</strong><br />
is then injected under fluoroscopic<br />
control to minimize extrusion<br />
outside of the defect.<br />
Note:<br />
Screw fixation must be provided<br />
by bone.<br />
Note:<br />
Bone augmentation with<br />
<strong>HydroSet</strong> can be applied before<br />
insertion of the fixation/locking<br />
screws in cancellous bone. Please<br />
refer to page 14 for the instruction<br />
for use of the <strong>HydroSet</strong> for bone<br />
augmentation.<br />
Caution:<br />
For VariAx Distal Radius plates*,<br />
a 12 gauge cannula (OD 2.8mm)<br />
or smaller to pass through the hole<br />
in the plate may be required as the<br />
standard 8 gauge cannula (OD<br />
4.2mm) provided might be too wide<br />
for this indication.<br />
* For more information about the Variax Distal Radius Locking Plate System,<br />
please refer to the Literature Number: 90-07800 or 90-70801<br />
10
Technical Details<br />
Distal Radius Void Filling<br />
External Fixator Technique<br />
1 2<br />
1. Place an external fixator*<br />
in accordance with the<br />
manufacturer’s technique.<br />
2. Apply distraction across the<br />
wrist with the external fixator.<br />
3. Place K-wires into any<br />
unreduced fragments and<br />
manipulate to adjust the<br />
reduction and maintain<br />
preliminary fixation. Additional<br />
wires are placed as needed<br />
to achieve adequate fracture<br />
stability.<br />
3 4<br />
In preparation for use,<br />
thoroughly mix the liquid and<br />
<strong>HydroSet</strong> powder for 45 seconds.<br />
4. Place the <strong>HydroSet</strong> cannula<br />
into the fracture defect through<br />
an exposed fracture line or<br />
through a cortical drill hole. The<br />
<strong>HydroSet</strong> Bone Substitute can<br />
be injected under fluoroscopic<br />
control to minimize extrusion<br />
into the soft tissues.<br />
Note:<br />
Hardware fixation must be<br />
provided by bone.<br />
*For more information about <strong>Stryker</strong> External Fixation<br />
Systems please refer to following Literature Numbers:<br />
5075-1-500 Hoffmann II Compact <strong>Brochure</strong><br />
5075-1-600 Hoffmann II Compact MRI <strong>Brochure</strong><br />
11
Technical Details<br />
Tibial Plateau Void Filling<br />
Plate Technique<br />
1. Obtain anterolateral exposure.<br />
Submeniscal arthrotomy may be<br />
useful for direct joint visualization of<br />
the articular surface (optional).<br />
2. Reduce the articular surface by:<br />
Option 1 - Direct elevation of<br />
depressed articular fragments.<br />
Option 2 - Indirect elevation of<br />
depressed articular fragments<br />
through cortical window (medial or<br />
lateral).<br />
Temporary fixation with K-wires may<br />
be helpful in stabilizing the elevated<br />
articular fragments until <strong>HydroSet</strong><br />
Bone Substitute or definitive<br />
hardware is placed.<br />
1 2<br />
3 4<br />
In preparation for use, thoroughly<br />
mix the liquid and <strong>HydroSet</strong> powder<br />
for 45 seconds.<br />
Note:<br />
Perform either Step 3 or Step 4.<br />
3. Inject the <strong>HydroSet</strong> Bone<br />
Substitute using the provided syringe<br />
and cannula directly into the residual<br />
defect. After the cement has set, place<br />
the definitive hardware.<br />
Note:<br />
Bone augmentation with <strong>HydroSet</strong><br />
can be applied before insertion<br />
of the fixation/locking screws in<br />
cancellous bone. Please refer to page<br />
14 for the instruction for use of the<br />
<strong>HydroSet</strong> for bone augmentation.<br />
OR<br />
4. Place the definitive hardware<br />
and inject the <strong>HydroSet</strong> Bone<br />
Substitute using the provided syringe<br />
and cannula under fluoroscopic<br />
guidance. The 8ga cannula may<br />
be inserted through an exposed<br />
fracture line or a 4.2mm drill hole.<br />
The <strong>HydroSet</strong> is then injected under<br />
fluoroscopic control to minimize<br />
extrusion outside of the defect.<br />
Caution:<br />
For AxSOS Proximal Tibia* plates,<br />
a 10 gauge cannula (OD 3.4mm)<br />
or smaller to pass through the hole<br />
in the plate may be required as the<br />
standard 8 gauge cannula (OD<br />
4.2mm) provided might be too wide<br />
for this indication.<br />
Note:<br />
Screw fixation must be<br />
provided by bone.<br />
*For more information about the AxSOS Proximal Tibia Locking Plate System<br />
please refer to the Literature Number: 982278<br />
12
Technical Details<br />
Tibial Pilon Void Filling<br />
Plate Technique<br />
1. Obtain exposure of distal tibia.<br />
Anterolateral or anteromedial<br />
exposures are standard.<br />
1 2<br />
2. Obtain preliminary reduction<br />
of the articular surface. K-wires<br />
are useful to temporarily maintain<br />
articular reduction. Reduction can<br />
be obtained by direct manipulation<br />
of the depressed fragments or<br />
indirectly by the use of tamps and<br />
elevators placed through cortical<br />
windows.<br />
In preparation for use, thoroughly<br />
mix the liquid and <strong>HydroSet</strong><br />
powder for 45 seconds.<br />
3 4<br />
Note:<br />
Perform either Step 3 or Step 4.<br />
3. Inject the <strong>HydroSet</strong> Bone<br />
Substitute using the provided<br />
syringe and cannula directly into the<br />
residual defect. After the <strong>HydroSet</strong><br />
has set, follow with placement of<br />
definitive hardware.<br />
Note:<br />
Bone augmentation with <strong>HydroSet</strong><br />
can be applied before insertion<br />
of the fixation/locking screws in<br />
cancellous bone. Please refer to page<br />
14 for the instruction for use of the<br />
<strong>HydroSet</strong> for bone augmentation.<br />
OR<br />
4. Place the definitive hardware and<br />
inject the <strong>HydroSet</strong> Bone Substitute<br />
using the provided syringe and<br />
cannula under fluoroscopic<br />
guidance. The 8ga cannula may<br />
be inserted through an exposed<br />
fracture line or a 4.2mm drill hole.<br />
<strong>HydroSet</strong> can be injected under<br />
fluoroscopic control to minimize<br />
extrusion outside of the defect.<br />
Caution:<br />
For AxSOS Distal Tibia* plates, a<br />
10 gauge cannula (OD 3.4mm) or<br />
smaller to pass through the hole<br />
in the plate may be required as the<br />
standard 8 gauge cannula (OD<br />
4.2mm) provided might be too wide<br />
for this indication.<br />
Note:<br />
Screw fixation must be<br />
provided by bone.<br />
*For more information about the AxSOS Distal Tibia Locking Plate System please<br />
refer to the Literature Number: 982279<br />
13
Technical Details<br />
Bone Augmentation*<br />
Plate Technique<br />
With “locking screw-plate systems”<br />
results have improved compared with<br />
conventional plates and screws when<br />
dealing with weak bone.<br />
However, bone augmentation with<br />
calcium phosphate cement can<br />
potentially further improve the<br />
screw fixation of the “angle stable<br />
construction” in an osteoporotic bone.<br />
The cement may potentially provide a<br />
more stable surrounding around the<br />
metal that can result in a more stable<br />
construction than without augmentation.<br />
When using <strong>HydroSet</strong> for bone<br />
augmentation with a plate and screw<br />
fixation system, the following surgical<br />
steps are recommended:<br />
1. Obtain preliminary reduction of the<br />
articular surface. K-wires are useful<br />
to temporarily maintain articular<br />
reduction.<br />
Reduction can be obtained by direct<br />
manipulation of the depressed<br />
fragments or indirectly by the use of<br />
tamps and elevators placed through<br />
cortical windows.<br />
2. Locate the plate on bone to stabilize<br />
the fracture (use K-wire for initial<br />
stability)<br />
3. Drill the holes for screws according<br />
to the respective implant technical<br />
requirements.<br />
Warning:<br />
Use of <strong>HydroSet</strong> in defects as a sole<br />
anchorage site for fixation implants is<br />
a contraindication. Screw should rely<br />
on the surrounding cancellous bone<br />
for definative fixation and <strong>HydroSet</strong> is<br />
used to augment the cancellous bone<br />
to enhance the screw fixation strength.<br />
Inspect and remove extra <strong>HydroSet</strong><br />
cement debris from the defect after<br />
injection and/or drilling and tapping<br />
for screw placement to eliminate<br />
potential for defect soreness, redness,<br />
or skin irritation.<br />
4. Insert one or two screws to keep the<br />
plate stable.<br />
5. Prepare <strong>HydroSet</strong> and inject the<br />
cement into the drilled holes under<br />
fluoroscopic guidance.<br />
• Use the back-fill technique (filling<br />
the screw hole in retrograde fashion)<br />
if the OD of the cannula is smaller<br />
than the drill used (Fig. 1a and 1b)<br />
or<br />
• Use a “pressurized” technique<br />
(filling the screw hole in antegrade<br />
fashion, with the tip of the cannula<br />
at the screw hole entrance) if the OD<br />
of the cannula is larger than the drill<br />
used (Fig. 2a and 2b).<br />
6. Insert the screws into the hole<br />
while the cement is still soft<br />
(approx. 2 min after injection).<br />
Caution:<br />
Do not use <strong>HydroSet</strong> for bone<br />
augmentation of lag screws.<br />
When using locking plates, always<br />
lag before you lock.<br />
Note:<br />
For VariAx Distal Radius plates, a<br />
12 gauge cannula (OD 2.8mm) or<br />
smaller to pass through the hole<br />
in the plate may be required as<br />
the standard 8 gauge cannula (OD<br />
4.2mm) provided might be too wide<br />
for this indication.<br />
For AxSOS Proximal Humerus,<br />
Proximal and Distal Tibia plates,<br />
a 10 gauge cannula (OD 3.4mm) or<br />
smaller to pass through the hole<br />
of the plate may be required as the<br />
standard 8 gauge cannula (OD<br />
4.2mm) provided might be too wide<br />
for this indication.<br />
The amount of <strong>HydroSet</strong> needed is<br />
estimated to be 3−5cc of cement for<br />
augmenting 6−10 screws. (depending<br />
on screw diameter and length)<br />
Fig. 1a<br />
Fig. 1b<br />
Fig. 1c<br />
Fig. 2a<br />
Fig. 2b<br />
Fig. 2c<br />
*This indication is not cleared for use in the U.S.<br />
14
Ordering Information<br />
REF Description<br />
397003 3cc <strong>HydroSet</strong> Bone Substitute<br />
397005 5cc <strong>HydroSet</strong> Bone Substitute<br />
397010 10cc <strong>HydroSet</strong> Bone Substitute<br />
397015 15cc <strong>HydroSet</strong> Bone Substitute<br />
707010 8ga x 10cm cannula (1 carton box with 10 units )<br />
397022 10ga x 10cm cannula (1 carton box with 10 units )<br />
397024 12ga x 7.5cm cannula (1 carton box with 10 units )<br />
15
Trauma, Extremities & Deformities<br />
Trauma, Extremities & Deformities<br />
Biologics<br />
Biologics<br />
Surgical Products<br />
Surgical Products<br />
Neuro & ENT<br />
Neuro & ENT<br />
<strong>Stryker</strong> Leibinger GmbH & Co.KG<br />
Bötzinger Straße 41<br />
D-79111 Freiburg<br />
Germany<br />
www.osteosynthesis.stryker.com<br />
1275<br />
The information presented in this brochure is intended to demonstrate a <strong>Stryker</strong> product. Always refer to the package<br />
insert, product label and/or user instructions before using any <strong>Stryker</strong> product. Surgeons must always rely on their own<br />
clinical judgment when deciding which products and techniques to use with their patients. Products may not be available<br />
in all markets. Product availability is subject to the regulatory or medical practices that govern individual markets.<br />
Please contact your <strong>Stryker</strong> representative if you have questions about the availability of <strong>Stryker</strong> products in your area.<br />
<strong>Stryker</strong> Corporation or its subsidiary uses or has applied for the trademarks: <strong>Stryker</strong>, <strong>HydroSet</strong>, VariAx, AxSOS,<br />
Hoffmann<br />
Literature Number : 90-07900<br />
LOT B1008<br />
Copyright © 2008 <strong>Stryker</strong>


