Models SRJ-7 and HRJ-7 Juno Survey Meters
Models SRJ-7 and HRJ-7 Juno Survey Meters
Models SRJ-7 and HRJ-7 Juno Survey Meters
Create successful ePaper yourself
Turn your PDF publications into a flip-book with our unique Google optimized e-Paper software.
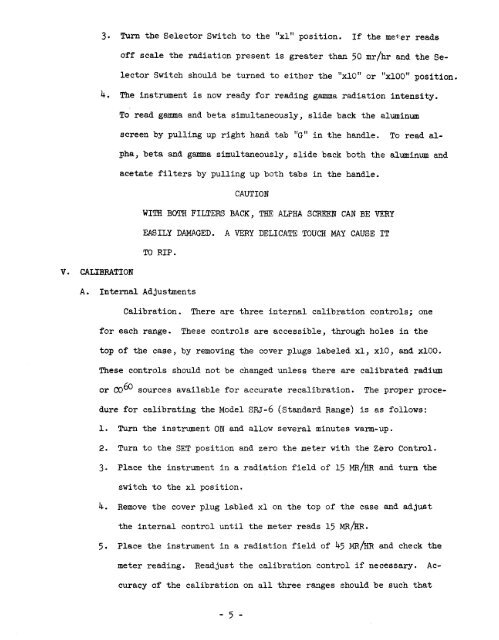
3. Turn the Selector Switch to the "x1" position.<br />
If the mefer reads<br />
off scale the radiation present is greater than 50 m/hr <strong>and</strong> the Se-<br />
lector Switch should be turned to either the "x10" or "~100" position.<br />
4.<br />
The instrument is now ready for reading gamma radiation intensity.<br />
To read gamma <strong>and</strong> beta simultaneously, slide back the aluminum<br />
screen by pulling up right h<strong>and</strong> tab "G" in the h<strong>and</strong>le.<br />
To read al-<br />
pha, beta <strong>and</strong> gamma simultaneously, slide back both the aluminum <strong>and</strong><br />
acetate filters by pulling up both tabs in the h<strong>and</strong>le.<br />
CAUTION<br />
WITH BOTH FILTERS BACK, TRE ALPHA SCREEN CAN BE VERY<br />
EASILY DAMAGED. A VERY DELICATE TOUCH MAY CAUSE IT<br />
TO RIP.<br />
V. CALIBRATION<br />
A. Internal Adjustments<br />
Calibration.<br />
for each range.<br />
There are three internal calibration controls; one<br />
These controls are accessible, through holes in the<br />
top of the case, by removing the cover plugs labeled xl, x10, <strong>and</strong> xl00.<br />
These controls should not be changed unless there are calibrated radium<br />
or C060 sources available for accurate recalibration.<br />
The proper proce-<br />
dure for calibrating the Model <strong>SRJ</strong>-6 (St<strong>and</strong>ard Range) is as follows:<br />
1.<br />
2.<br />
Turn the instrument ON <strong>and</strong> allow several minutes warm-up.<br />
Turn to the SET position <strong>and</strong> zero the meter with the Zero Control.<br />
3.<br />
Place the instrument in a radiation field of 15 MR/HR<br />
switch to the xl position.<br />
<strong>and</strong> turn the<br />
4.<br />
Remove the cover plug labled xl on the top of the case <strong>and</strong> adjust<br />
5.<br />
the internal control until the meter reads 15 MR/HR.<br />
Place the instrument in a radiation field of 45 MR/HR<br />
<strong>and</strong> check the<br />
meter reading. Readjust the calibration control if necessary. Ac-<br />
curacy of the calibration on all three ranges should be such that<br />
- 5 -


