UM EN FLX ASI SYS PRO INST - Onlinecomponents.com
UM EN FLX ASI SYS PRO INST - Onlinecomponents.com
UM EN FLX ASI SYS PRO INST - Onlinecomponents.com

You also want an ePaper? Increase the reach of your titles
YUMPU automatically turns print PDFs into web optimized ePapers that Google loves.
<strong>UM</strong> <strong>EN</strong> <strong>FLX</strong> <strong>ASI</strong> <strong>SYS</strong> <strong>PRO</strong> <strong>INST</strong><br />
4.3.11 Setting the Sensor Power Supply<br />
You can specify whether the sensor is to be supplied from the AS-i circuit or from an external<br />
power supply.<br />
For the <strong>ASI</strong> IO ME DI 4 AB and <strong>ASI</strong> IO ME DIO 4/3 modules, proceed as follows:<br />
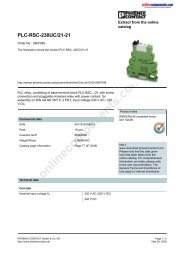
• To release the upper part, press on both tabs (1) one after the other using a screwdriver.<br />
• Pull the upper part towards you until you can feel some resistance.<br />
Opening the module<br />
<strong>ASI</strong> IO ME DI 4 AB<br />
<strong>ASI</strong> IO ME DIO 4/3 AB<br />
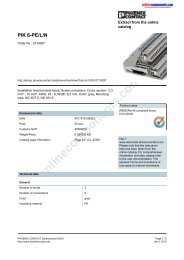
Setting the switch<br />
<strong>ASI</strong> IO ME DI 4 AB<br />
<strong>ASI</strong> IO ME DIO 4/3 AB<br />
Figure 4-35<br />
<br />
% # ! ) #<br />
Opening the module<br />
• If you are using an external sensor power supply (U EXT = 12 V DC to 30 V DC) set the<br />
switch to the "EXT" position.<br />
• If you want to supply the sensor from the AS-i circuit set the switch to the "INT"<br />
position. The green "INT" LED lights up.<br />
CAUTION: Use a PELV power supply<br />
The auxiliary voltage for the output supply must be taken from an isolated power supply<br />
(PELV according to IEC 60364-4-41).<br />
online<strong>com</strong>ponents.<strong>com</strong><br />
1 6<br />
- : 6<br />
% # ! ) "<br />
Figure 4-36<br />
Setting the switch<br />
4-32 PHO<strong>EN</strong>IX CONTACT 7513_en_01